So I wasn't going to get into the 60-piece ball but you can form solids (to make a starting blank for the ball) out of lower numbers of equilateral triangles including 4, 8, 20 etc. You can also mix 'n match with other shapes like squares and pentagons but with triangles there is only one shape to fabricate, which makes construction a bit more straightforward. The 8-sided form was a point that gave a decent number of vertices and faces but wasn't too involved to make. It also let me make a reasonably-sized 2"-diameter ball out of a single layer of 3/4" plywood which helped keep things simple.
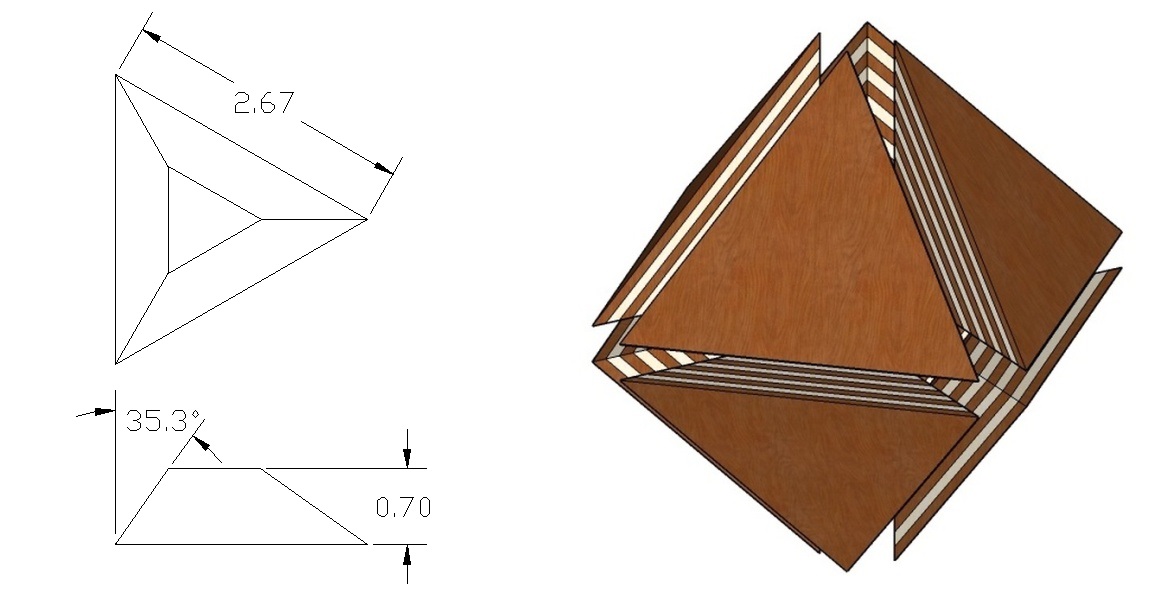
Plans for the individual piece and exploded ball blank
Shapes
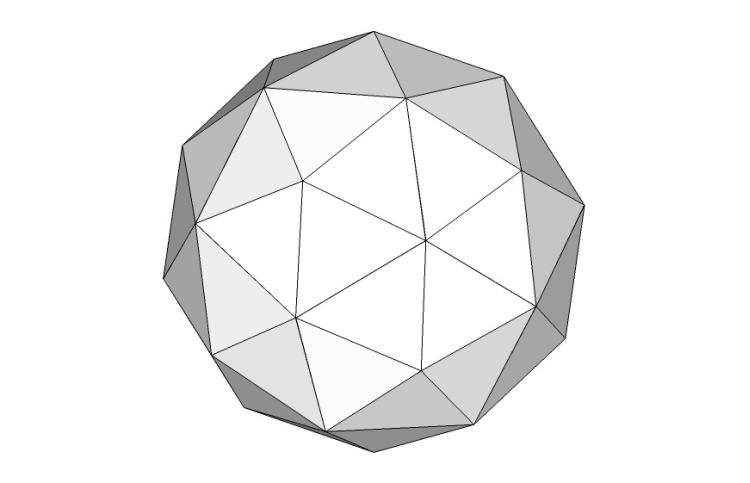
60-sided solid
This is the 60-sided solid made up of equilateral triangles that inspired these simpler spheres. For those of a technical bent, it seems to be called a deltoidal hexecontahedron or perhaps a pentakis dodecahedron. Feel free to slip either term into casual conversation to sound really smart.
Anyway, the main problem with making a shape with this many pieces is that you need to cut out all 60 just to see if you had the angles right. And you never get the angle right on the first try.
Anyway, the main problem with making a shape with this many pieces is that you need to cut out all 60 just to see if you had the angles right. And you never get the angle right on the first try.
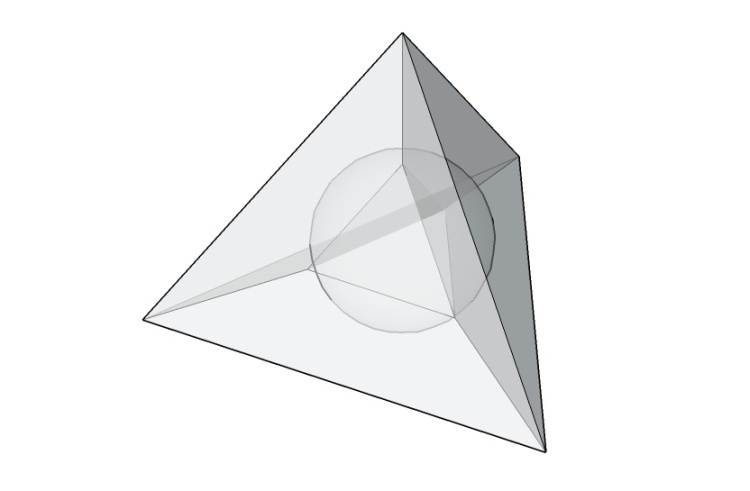
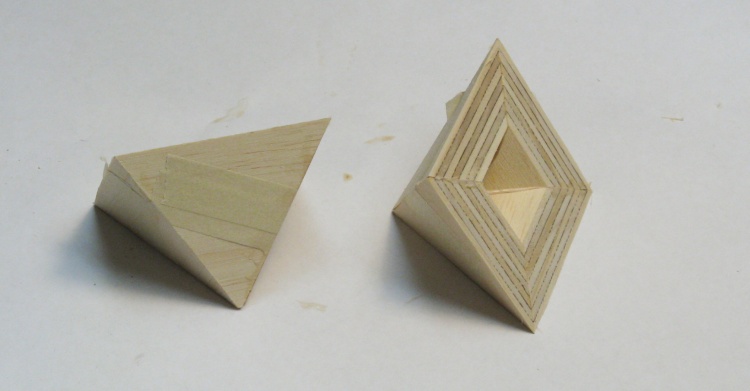
X-ray view of the minimalist quadrahedron
So I wanted something simpler. I also wanted to stick with equilateral triangles and the simplest solid uses four of them to form an octohedron as shown here.
The problem with this one is that with an 0.7"-thick piece of plywood for the sides, a 2" sphere that fits inside the outer walls gets pierced by the inner void (which you can see at the left side of the sphere). You'd need thicker walls to be able to turn a sphere without holes.
The problem with this one is that with an 0.7"-thick piece of plywood for the sides, a 2" sphere that fits inside the outer walls gets pierced by the inner void (which you can see at the left side of the sphere). You'd need thicker walls to be able to turn a sphere without holes.
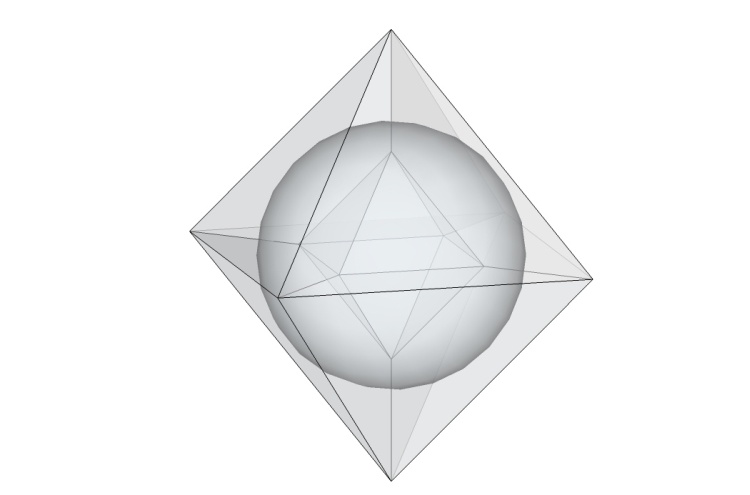
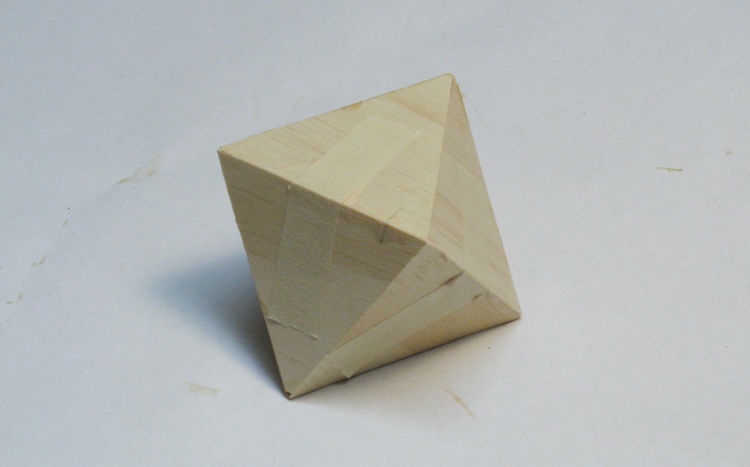
X-ray view of the target octahedron
The next shape up the triangular-sided solids list was an octahedron which of course has 8 sides. It does have the distinct advantage that you can cut a 2" un-ventilated sphere out of it, as this 3D X-ray rendering shows.
This seemed like a decent compromise between complexity and having an interesting surface so this was my choice of shape.
This seemed like a decent compromise between complexity and having an interesting surface so this was my choice of shape.
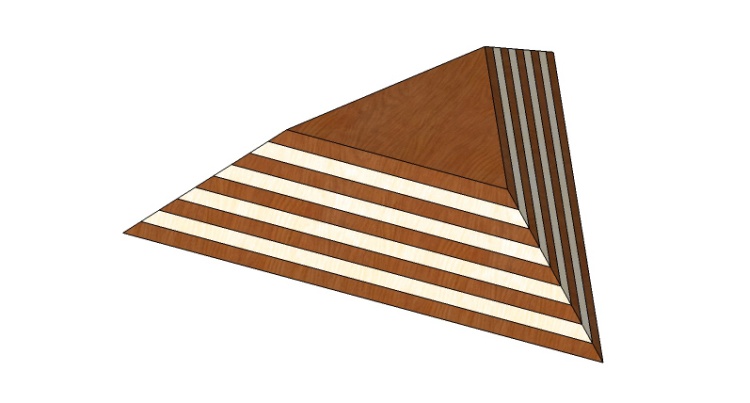
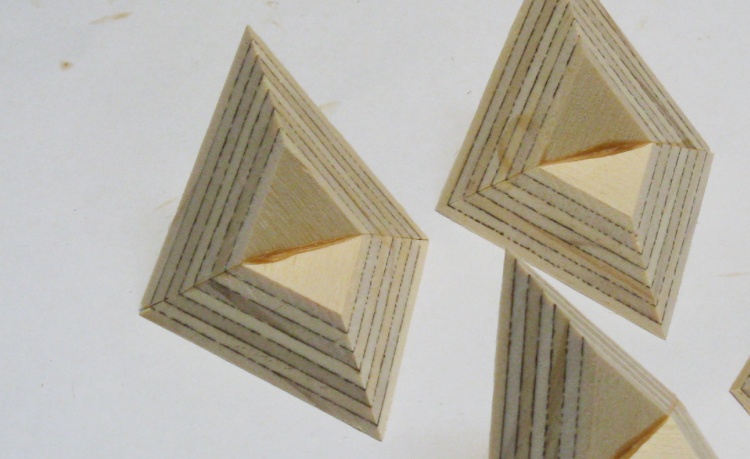
Octahedron piece
Here's the model of the individual piece from a 9-layer plywood with a nice buff-and-brown color scheme. I'll need eight of these pieces for a ball blank.
Construction
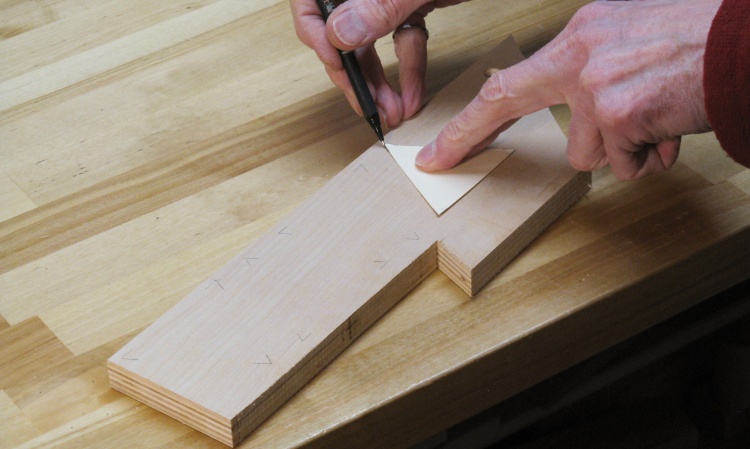
Marking plywood
I made a number of balls using different types of plywood and this section actually mixes photos from most of them to get a more-complete description. So when the plywood type suddenly changes between subsequent photos, that will be why.
I started by marking the shape on the selected plywood to guide the cutting-up of individual triangle blanks.
I started by marking the shape on the selected plywood to guide the cutting-up of individual triangle blanks.
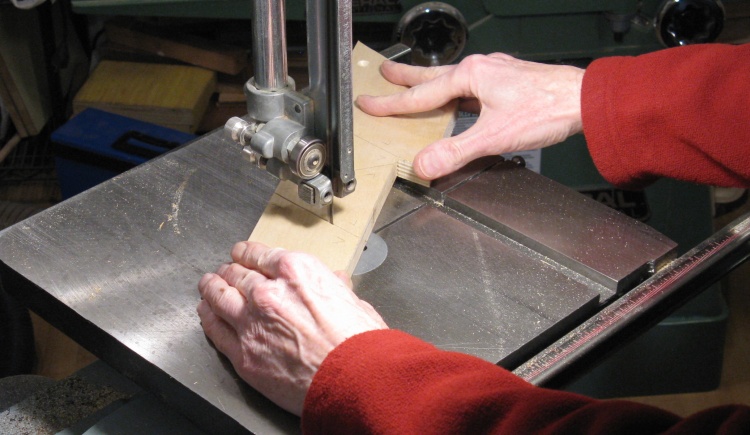
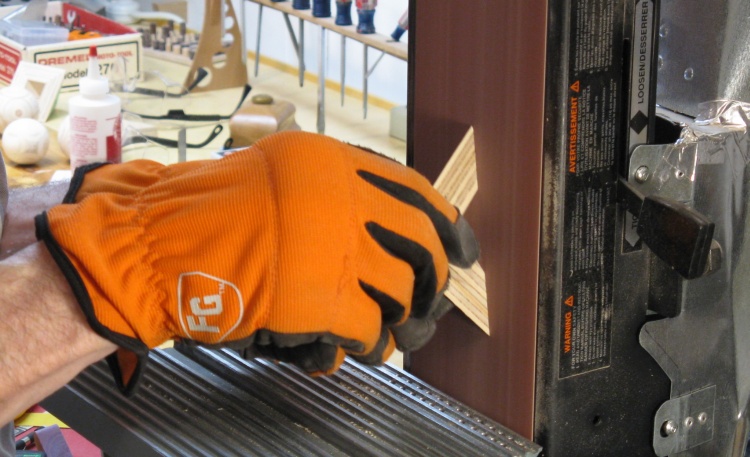
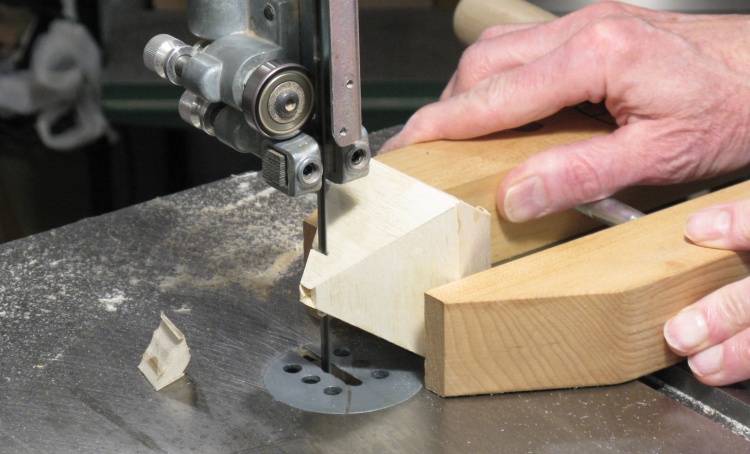
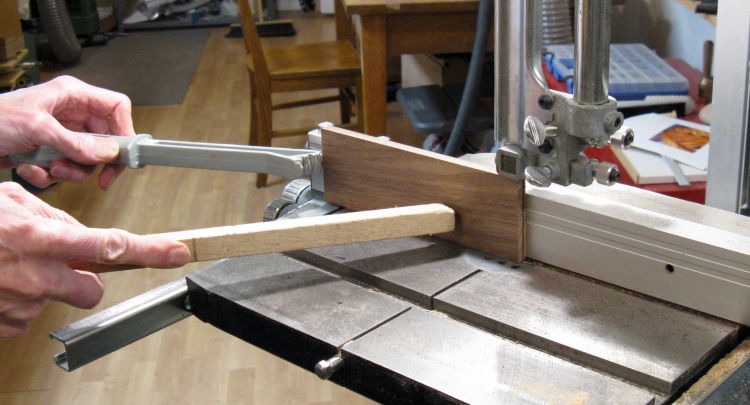
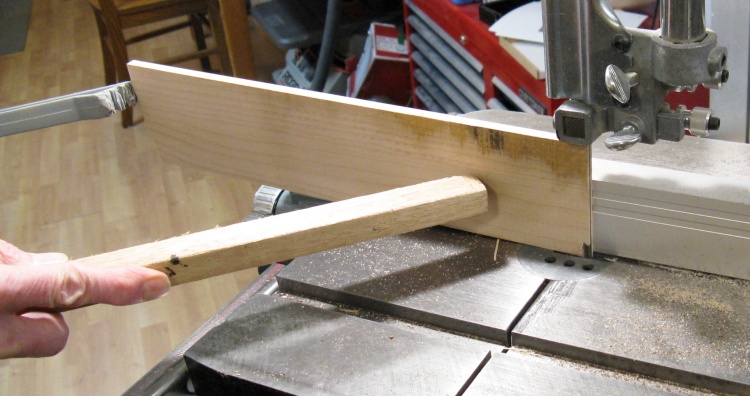
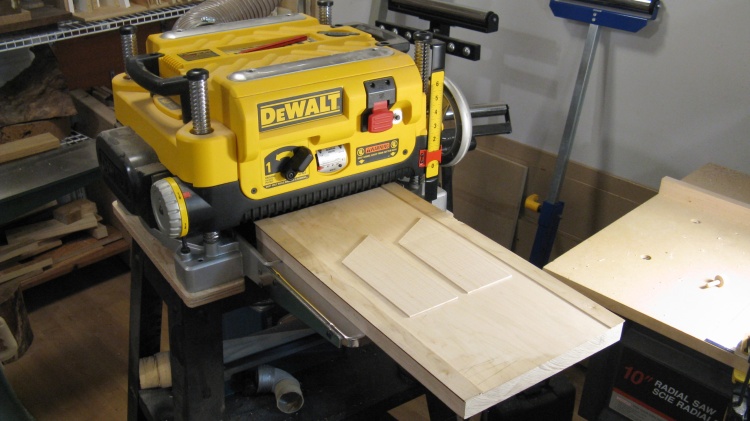
Chopping plywood into rough pieces
Then side blanks were cut out on the bandsaw, usually 1/8" - 1/4" wider on each side than the finished size.
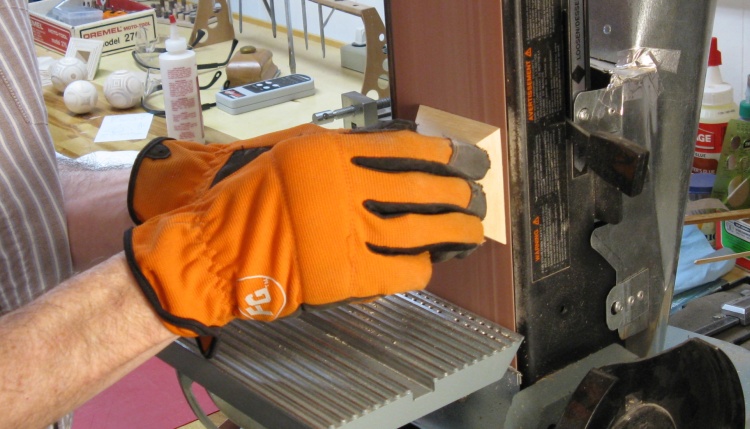
The basement gets pretty cold in winter (around 18°) and I must have been feeling it this day since I have on a fleece.
The basement gets pretty cold in winter (around 18°) and I must have been feeling it this day since I have on a fleece.
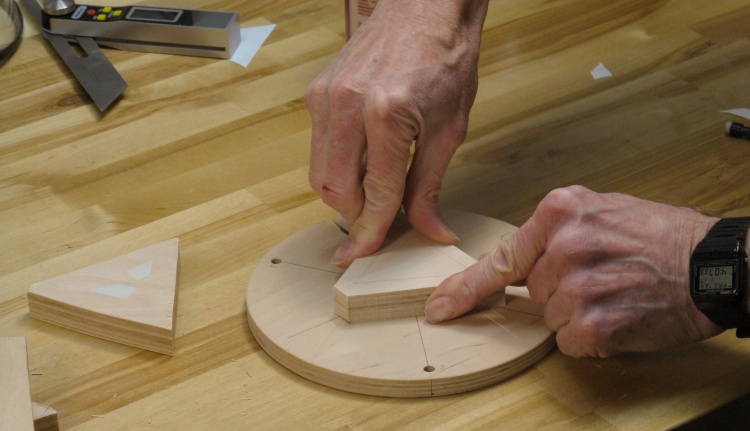
Taping down a piece to the turntable
Using double-sided tape, each piece in turn was taped down to the center of a turntable that was part of a cutting jig.
Cutting jig in place
The turntable was mounted on a short vertical axle on the fixed part of the cutting jig, which let the turntable rotate about its center.
The jig also had a removable wooden pin fitting into one of three index holes that let me rotate the turntable on its axle in exactly 1/3 of a turn increments and lock it in place so each of the three sides of the blank could be positioned under the blade.
The jig also had a removable wooden pin fitting into one of three index holes that let me rotate the turntable on its axle in exactly 1/3 of a turn increments and lock it in place so each of the three sides of the blank could be positioned under the blade.
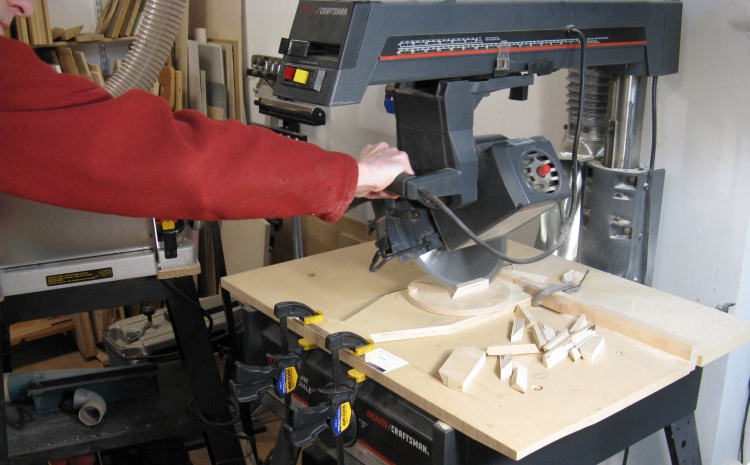
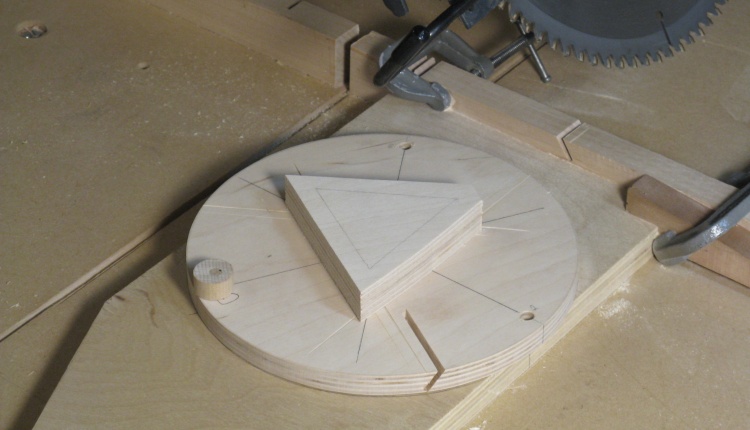
Making angled cut with radial arm saw
The angle of the radial arm saw was set to cut the 35.3° slope on the side of the piece, and the height was set to just barely cut through.
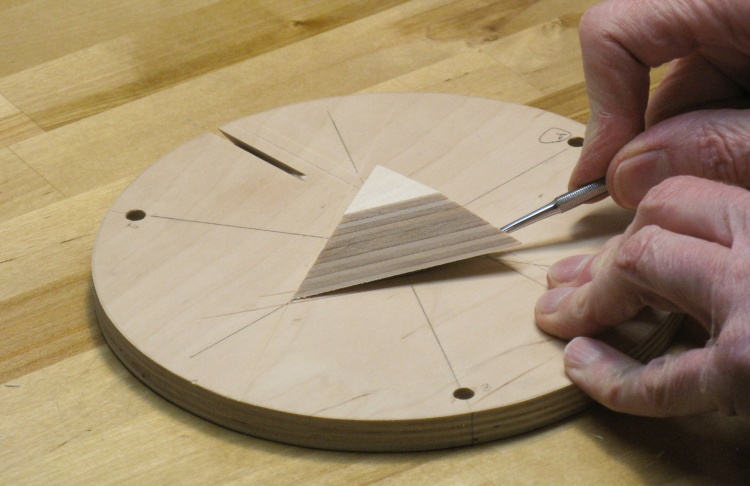
Prying off the cut piece
I did a Cut/Rotate/Cut/Rotate/Cut sequence to form the three sides and then removed the turntable and pried off the completed piece.
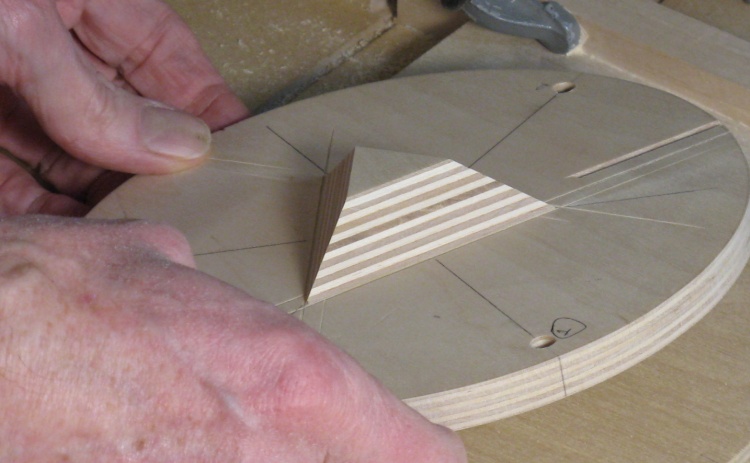
Imperfect first try at cutting angle
So the comment above about never getting the angle right the first try? Well, this is the first try. And we got gaps.
So I tweaked the saw angle by around 0.6° and fortunately that nailed it on try #2. I used that setting for the remainder of the work.
So I tweaked the saw angle by around 0.6° and fortunately that nailed it on try #2. I used that setting for the remainder of the work.

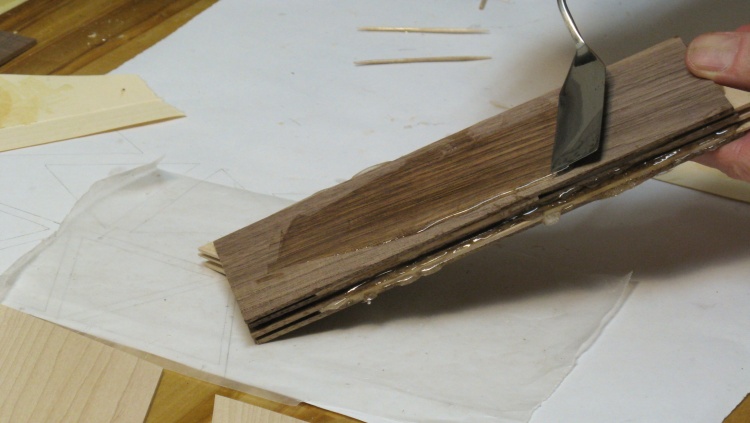
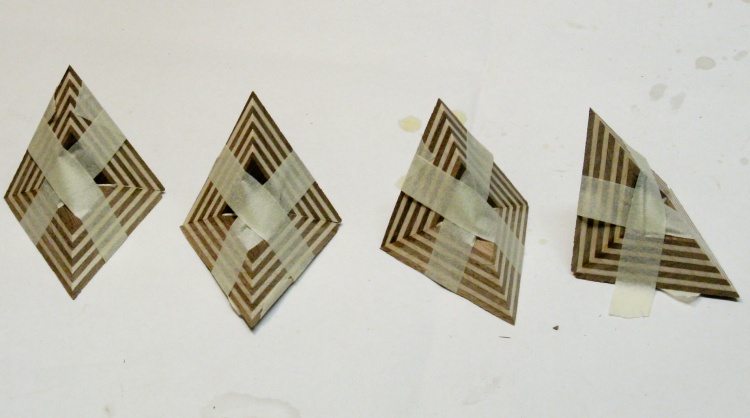
Pairs of sides glued together
Despite getting the angle right, there were still minor errors that prevented perfect alignment of all eight pieces. So instead of just gluing them together all at once, I started by making four pairs like those shown here.
Making sure pair side is flat
The pairs should have a flat side where they mate with the adjacent pair, so I used the belt sander to to ensure they were in fact flat.
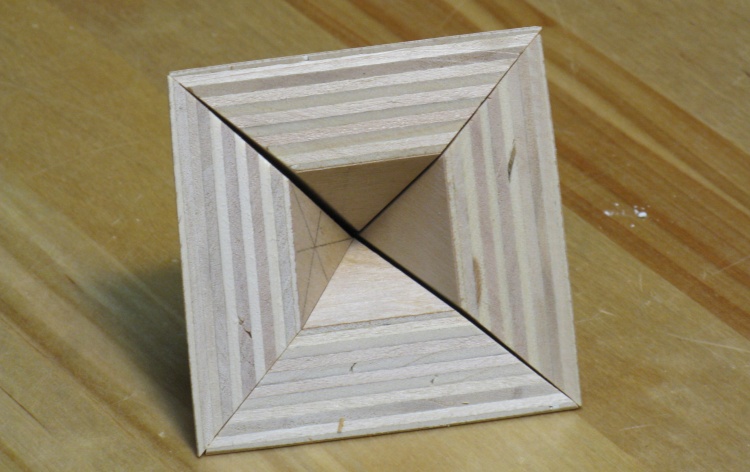
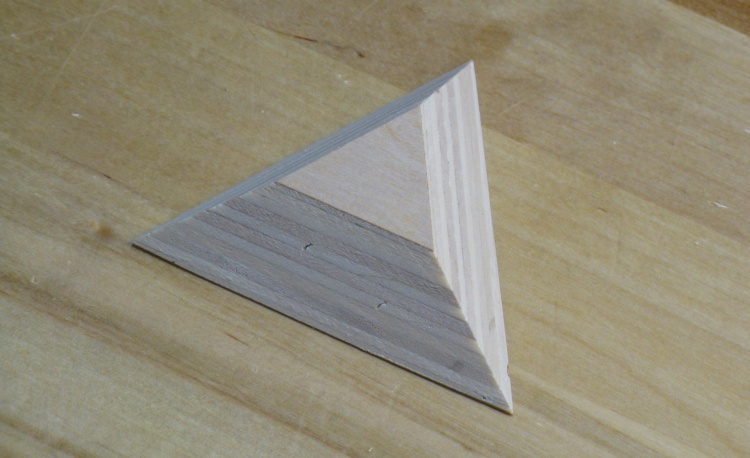
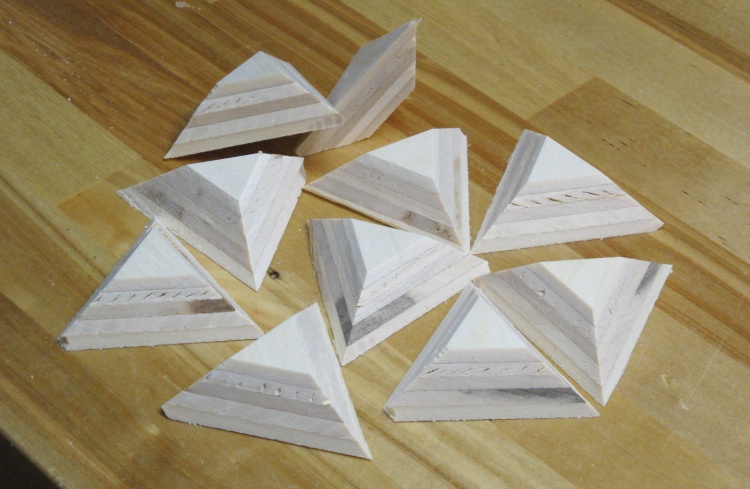
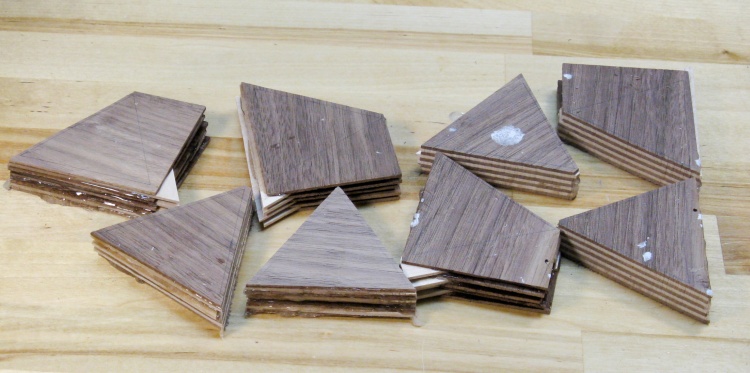
Then pairs glued into pyramids
The flattened sides of the pairs then fit nicely together and two pairs were glued together to form these two pyramids.
Then making sure pyramid face is flat
The bottoms of the pyramids should also be flat so they got "belted" into shape as well.
And finally gluing pyramid together
And finally the two pyramids were glued together.
In all cases of gluing, I just used tensioned masking tape to keep the parts in position while the glue dried.
In all cases of gluing, I just used tensioned masking tape to keep the parts in position while the glue dried.
Trimming ends for lathe mounting
The next stage was to put the octohedron on the lathe but to make it more practical to hold, I cut off opposite corners to form flat areas.
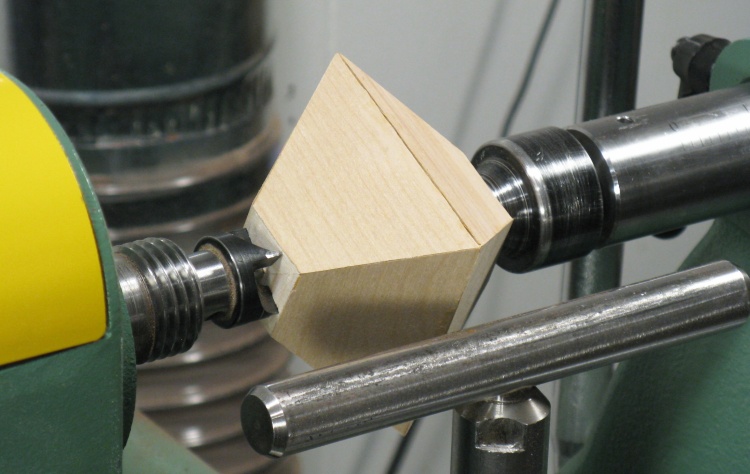
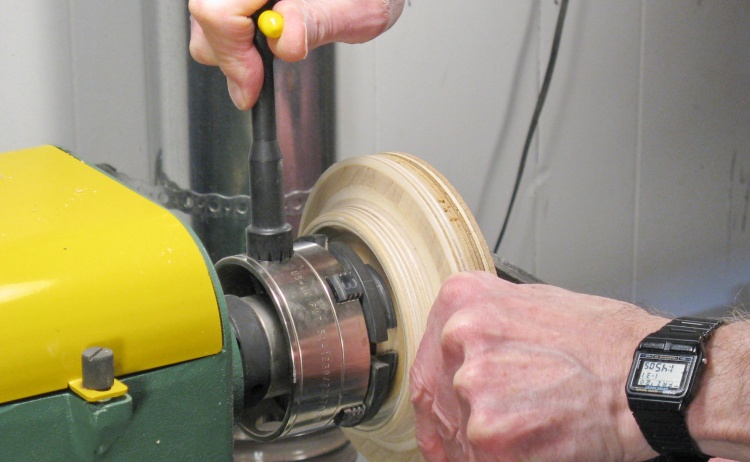
Mounted on lathe
I carefully marked the center of each cut-off end and then the ball blank was mounted to the lathe between centers.
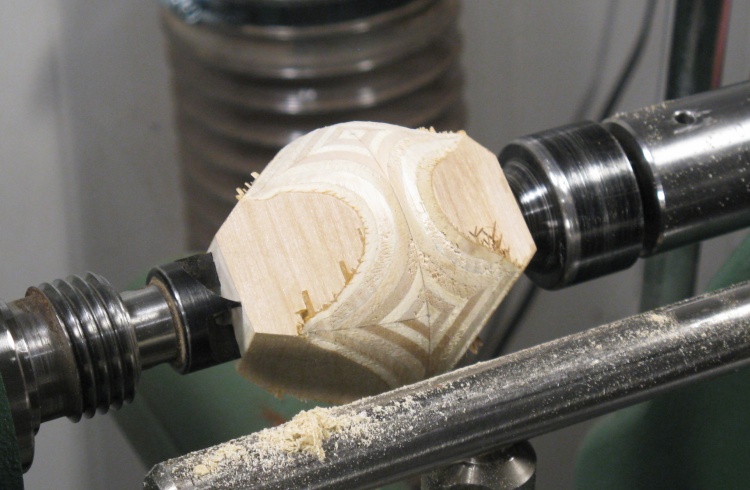
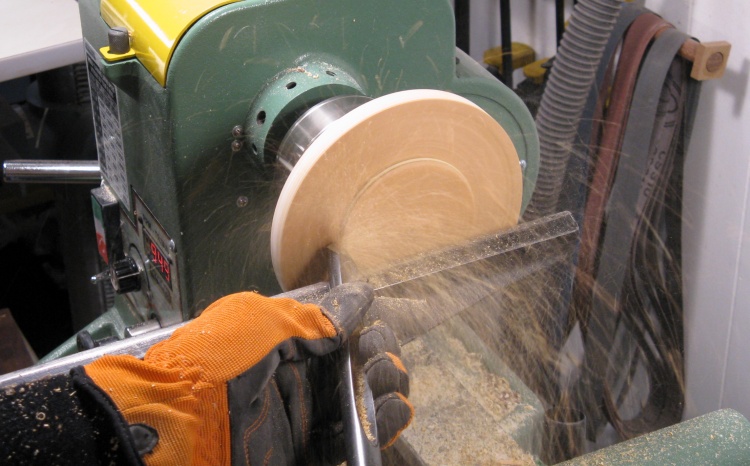
First orientation rounded
The first step in the rounding process was to remove the square corners to get the center to a round profile. Ideally one would cut it perfectly round side-to-side as well but Russ ≠ Perfect. So it was just more-gently curved toward the ends.
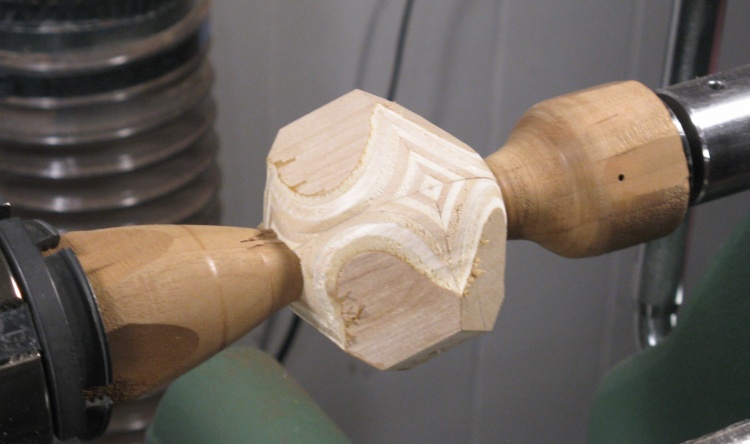
New orientation, and held with cup chucks
Then it was time to break out the cup chucks. These are just wooden forms with a concave circular face that cradles the curved section of the piece. The ball blank is rotated 90° and squeezed between the chucks.
The chucks hold best when the surface they are holding is spherical which is why one endeavours to have a roughly equal curvature in both directions in the first cut.
The chucks hold best when the surface they are holding is spherical which is why one endeavours to have a roughly equal curvature in both directions in the first cut.

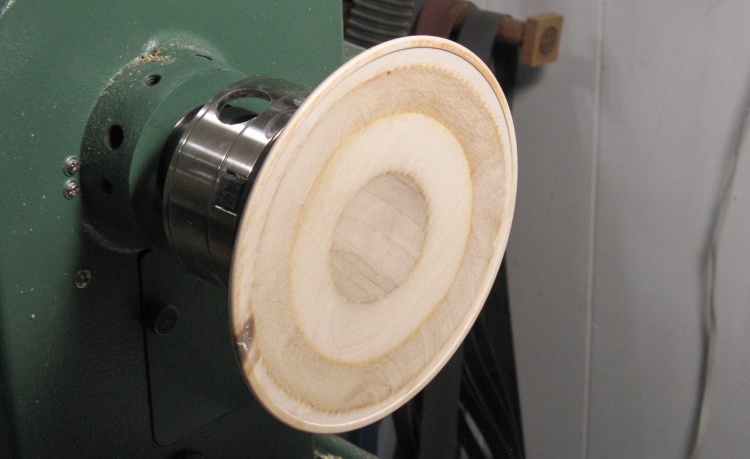
Rounded in second orientation
The barrel shape of the previous photo was spun up and the profile was once again cut to round. This was a bit easier than the first stage since you can see a ghostly outline at the edge where the profile is uneven. I just cut until that ghost was minimized.
Here the original diameter was not cut quite small enough since there are still some flat sections in the "corners". So this one was cut a bit smaller, rotated 90° again and rounded.
Here the original diameter was not cut quite small enough since there are still some flat sections in the "corners". So this one was cut a bit smaller, rotated 90° again and rounded.
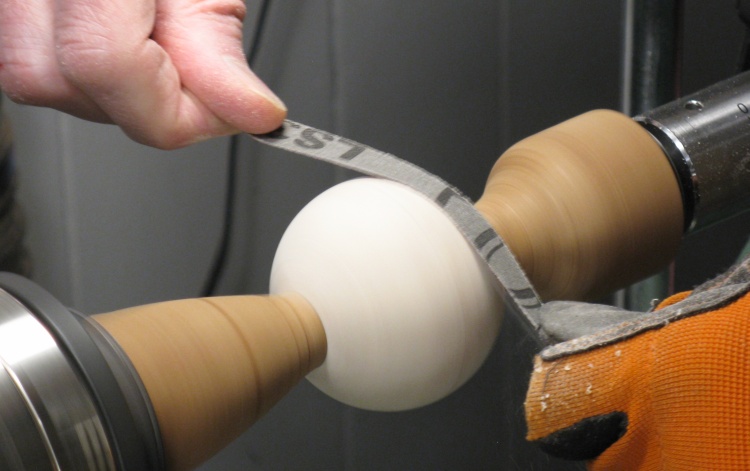
Sanding on the lathe
Once the ball is mostly round, the sandpaper comes out. The sanding process is similar to the original shaping; the exposed section of the ball is sanded, the ball is rotated 90° in the cup chucks and sanding continues.
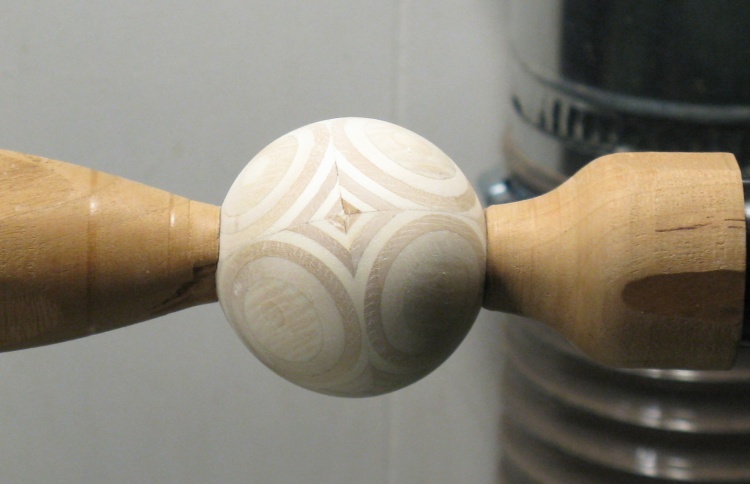
Finished ball
I usually started with 80 grit sandpaper and here I've gone through a sequence of 80-120-220 and then 320 grit.
Plywoods
11-ply birch-veneered plywood
Most of the work I do is with hardwoods but I seem to have accumulated a variety of plywoods as well. I have different types of plywood in different thicknesses, but I just chose some of the 3/4"-thick sheets for these balls.
This first one is an 11-ply birch plywood. It has a very thin birch veneer on the outsides, and was left over from construction of a garage cabinet.
This first one is an 11-ply birch plywood. It has a very thin birch veneer on the outsides, and was left over from construction of a garage cabinet.
13-ply Baltic birch plywood
This one is a 13-ply Baltic birch plywood that was left over from making some plywood vessels a few years back. It has thin plys of decent quality (few voids or knots) so is often used where plys are to be exposed.
Some cheesy 6-ply aspen plywood
This sorry group is from a 5-ply aspen plywood left over from my work bench top. It isn't very good quality - glue missing, internal voids, etc. and the wood itself is very splintery (note the broken corners).
In fact the ball made from this one is smaller than the others since pieces kept cracking off while I turned it. I completed that ball, but it didn't make the cut onto the main page.
In fact the ball made from this one is smaller than the others since pieces kept cracking off while I turned it. I completed that ball, but it didn't make the cut onto the main page.
Run-of-the-mill 7-ply softwood plywood
While all the above are hardwood, most plywoods are actually softwood. This one is a standard 7-ply softwood plywood, albeit with nicely-contrasting black glue.
Maple-Walnut Plywood
The above four woods were convenient since I had pieces of them in my shop (I also had other 3/4" plywoods but they were plainer or poorer quality). So to get a bit more contrast, I thought I'd make a decent version of plywood, which might give a more-striking looking ball. I went with the classic maple and walnut combination since they provided a nice contrast and were pretty easy to work with.

Flattening face of walnut piece on jointer
Plywood is of course made by gluing together thin sheets of wood with alternating grain direction for better strength. Out in the real world the sheets are cut directly from a log or large piece of wood with a large sharp blade. That's not too practical at the basement-shop level so us basement dwellers are forced to use things like the bandsaw.
However, the bandsaw leaves a rough surface which would produce a jagged edge when the plys were exposed at an angle (like say, in a sphere...) so the faces needed to be smooth. This photo shows the first step which is cleaning up the face of a piece of walnut by running it through the jointer.
However, the bandsaw leaves a rough surface which would produce a jagged edge when the plys were exposed at an angle (like say, in a sphere...) so the faces needed to be smooth. This photo shows the first step which is cleaning up the face of a piece of walnut by running it through the jointer.
Cutting a slice of walnut veneer
Then with the smooth face next to the fence, a thin piece was cut off the block using the bandsaw. Then the block needs to be re-smoothed on the jointer before the next slice while the newly cut-off ply has one smooth side and one unsmooth side. This would be dealt with two photos later.
Cutting a slice of maple veneer
Same deal for the maple.
Smoothing the second side of a couple veneer pieces
So then the unsmooth sides of the plys must be addressed. The thickness must also be consistent so that means that sanding isn't a good choice.
Instead they go through the planer. Since the pieces are too thin (and too short) to go through by themselves, they were taped to my maple planer sled as shown here and passed through a few times with light cuts until they were smooth and the correct thickness (which was about 0.09").
Instead they go through the planer. Since the pieces are too thin (and too short) to go through by themselves, they were taped to my maple planer sled as shown here and passed through a few times with light cuts until they were smooth and the correct thickness (which was about 0.09").
Building up plywood with epoxy between plys
With the plys complete, the actual plywood could be made. I used epoxy as the adhesive between the layers, and here I'm spreading on a layer before adding the next ply. I made two pieces this size.
I actually did this in about three steps with 3 or 4 plies per step to build up the 9 plies total.
I actually did this in about three steps with 3 or 4 plies per step to build up the 9 plies total.

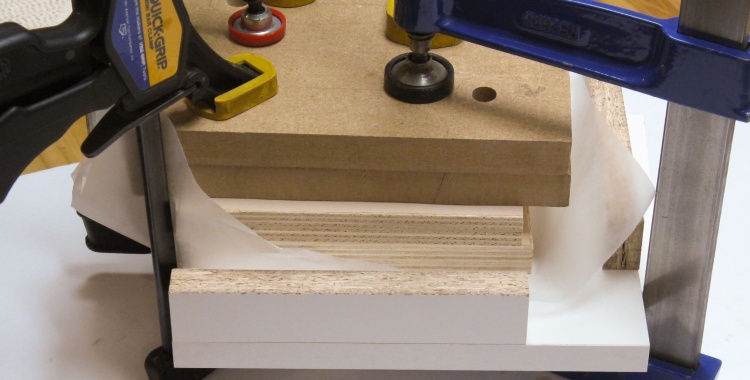
Clamping plywood
After each gluing the plywood was clamped to squeeze out excess glue and to keep things flat.
Plywood chopped up
As before the plywood was chopped up into little blanks large enough for a single triangular side. I made only exactly enough plywood to do the 8 sides for one ball so fortunately I didn't have any problems that required a spare.
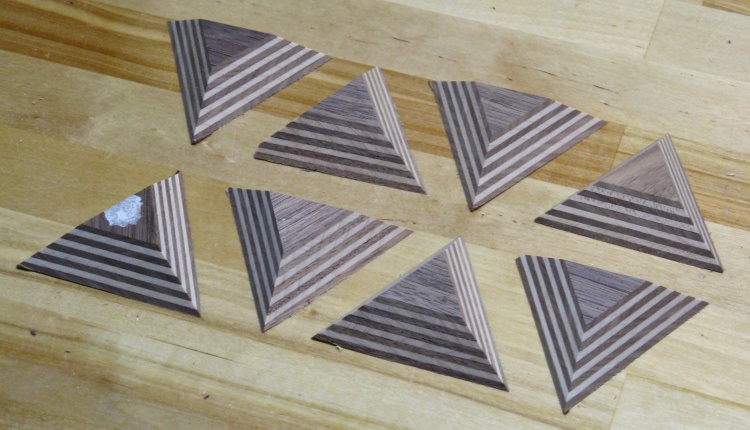
The eight pieces of maple-walnut plywood
The pieces look nice and regular after being cut to size.
As before - pairs first
I went back to using regular wood glue and as before, started by gluing together pairs.

...then pyramids
After sanding the pairs were assembled into pyramids and then they in turn were sanded and assembled into the octahedron shape.
This little time-lapse video (at about 25X speed) shows the maple-walnut ball being turned and sanded.
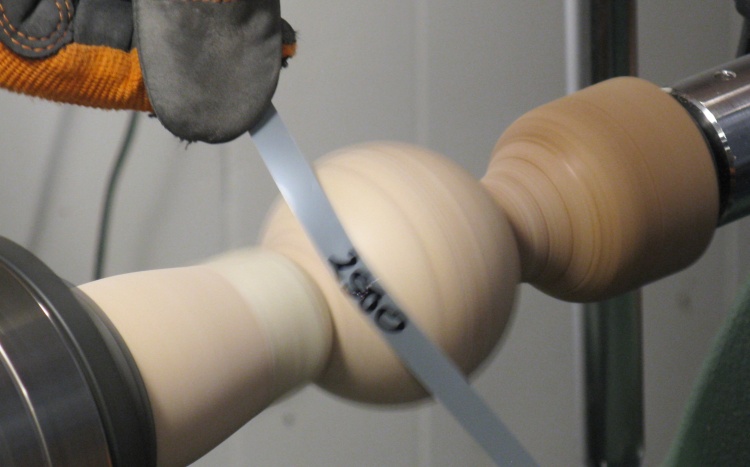
Re-sanding the balls with finer grits
I had originally sanded the balls to 320 grit but thought I'd try one at a finer grit. It made for a nice glossy surface which I kind of liked so I redid all the remaining balls up to an equivalent of 5000 grit. Here's one of them getting sanded with the second-finest grit of 2500.
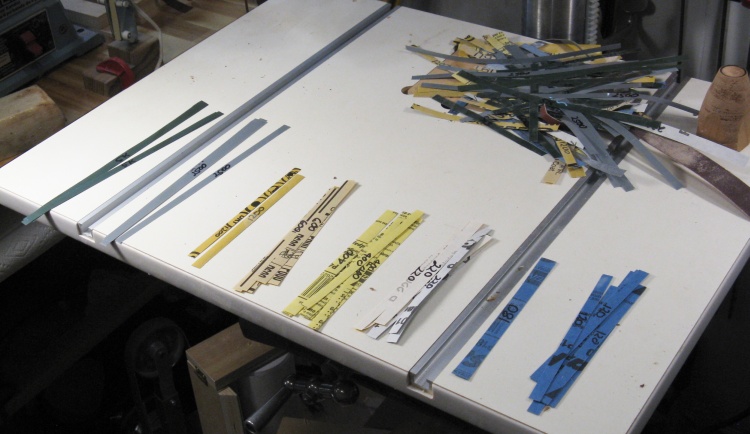
The sequence of sandpaper grits
This shows the drill press table with the sandpaper progression. There's an 80 grit in the discard pile at the back and fresh strips at the front of 120, 180, 220, 320, 400, 600, 1200, 2500 and 5000 grits.

Applying wax
Instead of using varnish for a finish, I applied a couple coats of wax.
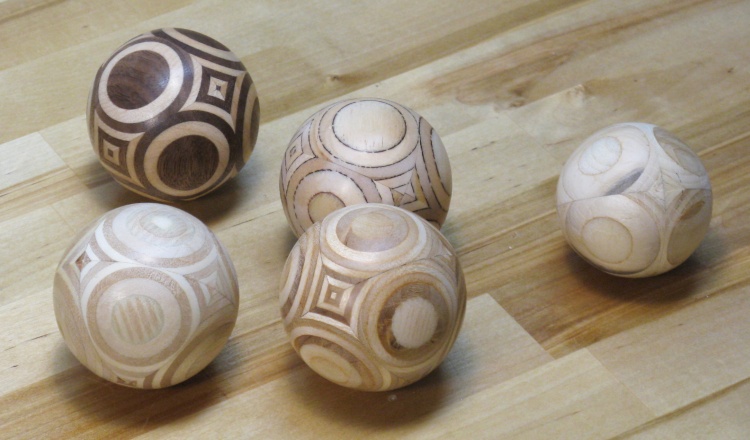
The five completed balls
This is the "super-set" of balls - the four good ones and the smaller reject off to the right.
Are the 4 "good" balls the same size? Not quite; I didn't specifically try to make them an exact size but the largest is only about 3% larger than the smallest (2.3" average diameter). And are they round? Well, closeish. The worst one is +/- 0.027", which is around 1%.
Are the 4 "good" balls the same size? Not quite; I didn't specifically try to make them an exact size but the largest is only about 3% larger than the smallest (2.3" average diameter). And are they round? Well, closeish. The worst one is +/- 0.027", which is around 1%.
Holder
Laminating plywood for the holder
And then where do you put a set of spherical objects? To avoid the whole rolling-away situation, I thought I should make a suitable holder for them.
My previous set of wooden balls sits in a shallow bowl and I thought I'd do the same here. I stuck with the plywood theme and made the holder out of plywood as well, specifically the Baltic birch variety.
I needed a double thickness so in this photo two pieces of plywood are being glued together to make the turning blank.
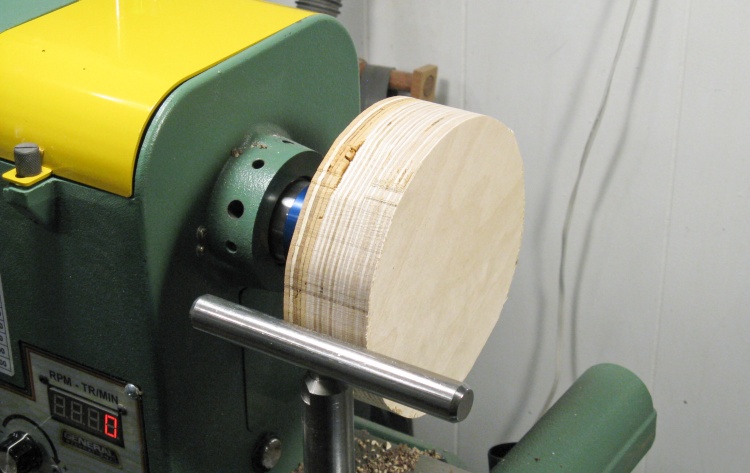
Holder blank mounted to lathe
There wasn't quite enough thickness to acommodate the faceplate screws so I glued yet another piece of plywood on before adding the faceplate.
This shot shows the blank after it had been cut in a rough circle and then mounted to the lathe so it was ready to be turned.
This shot shows the blank after it had been cut in a rough circle and then mounted to the lathe so it was ready to be turned.

Shaping the bottom side
I started by turning the bottom, with this photo showing the bowl gouge making some significant sawdust.
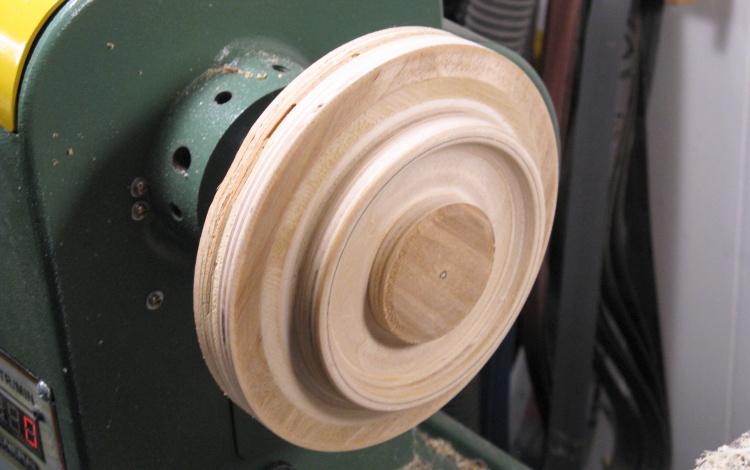
Bottom finished for this first stage
This is the completed bottom (for this stage anyway). The center stub is needed to hold the wood when it gets flipped around to do the top and eventually feet will be formed out of the circular ridge.
Re-clamping to shape the top side
Then the blank was flipped around so the top side could be shaped. I used a 4-jaw chuck to clamp to the center stub that was cut on the bottom.
Shaping the top
And then the extra plywood was removed and the top was shaped.
Top shaping done
This shows the completed top. It looks flat in this photo but it is actually a shallow bowl shape (about 3 plys deep, in fact) with a small ridge at the edge.

Flipped again to remove central stub on bottom
The final turning task was to remove (most of) the central stub from the bottom.
The bowl was flipped again and squeezed between a large dowel and the tailstock, then the stub was reduced down to the little central cone visible here.
The bowl was flipped again and squeezed between a large dowel and the tailstock, then the stub was reduced down to the little central cone visible here.
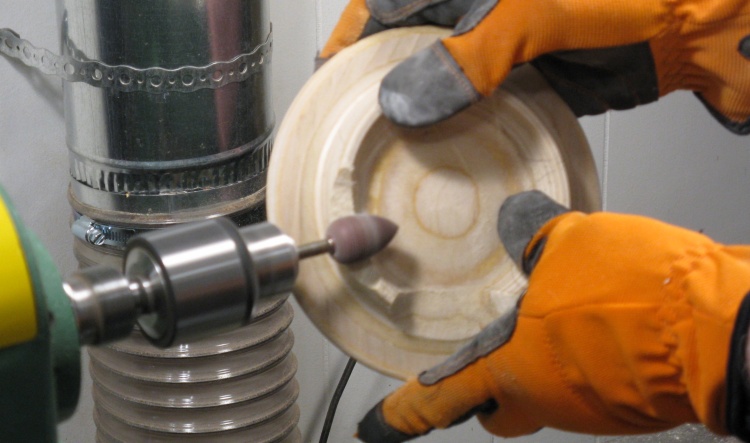
Shaping the feet using a grinder in the lathe
That central cone from above was cut off and the center smoothed with sanding.
Then the feet had to be formed out of the bottom-side ridge. I used a grinding bit in the lathe and ground out sections to form five evenly-spaced feet.
Then the feet had to be formed out of the bottom-side ridge. I used a grinding bit in the lathe and ground out sections to form five evenly-spaced feet.
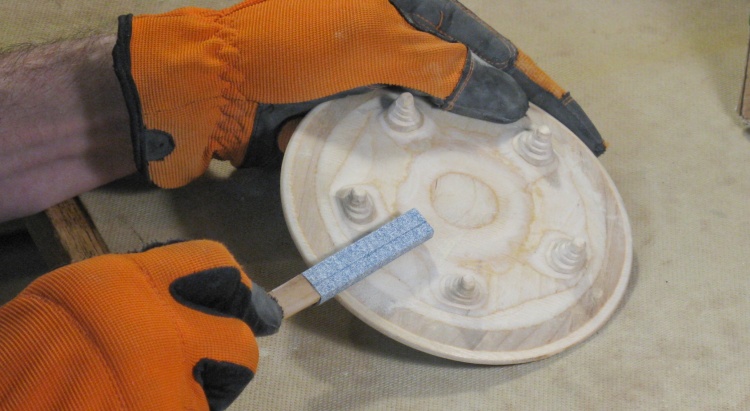
Sanding the bottom even
I ground out as much as I dared on the lathe and then using manual sanding, shaped the feet and smoothed the sections between the feet. In this shot I'm almost done the sanding.
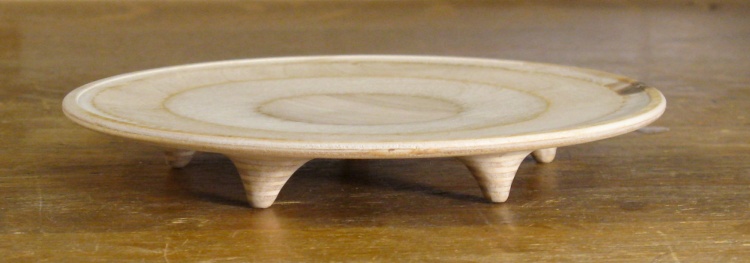
The completed holder
This shows a side view of the holder before finishing.
But then after it was done I wasn't really satisfied with the holder. It was too flat to show off the wood plys and the balls didn't even sit in the middle.
It was pretty simple to make so I figured I'd redo it, giving the holder a bit more curvature. Cue the rev 2 version...
But then after it was done I wasn't really satisfied with the holder. It was too flat to show off the wood plys and the balls didn't even sit in the middle.
It was pretty simple to make so I figured I'd redo it, giving the holder a bit more curvature. Cue the rev 2 version...
Holder, Rev 2
And we'll just eliminate the scroll-forever thing and use this big composite photo to show the stages. Fabrication was pretty much identical to the first holder, except for more curvature to the bowl section and a gratuitous hole in the center for even more wood ply exposure.
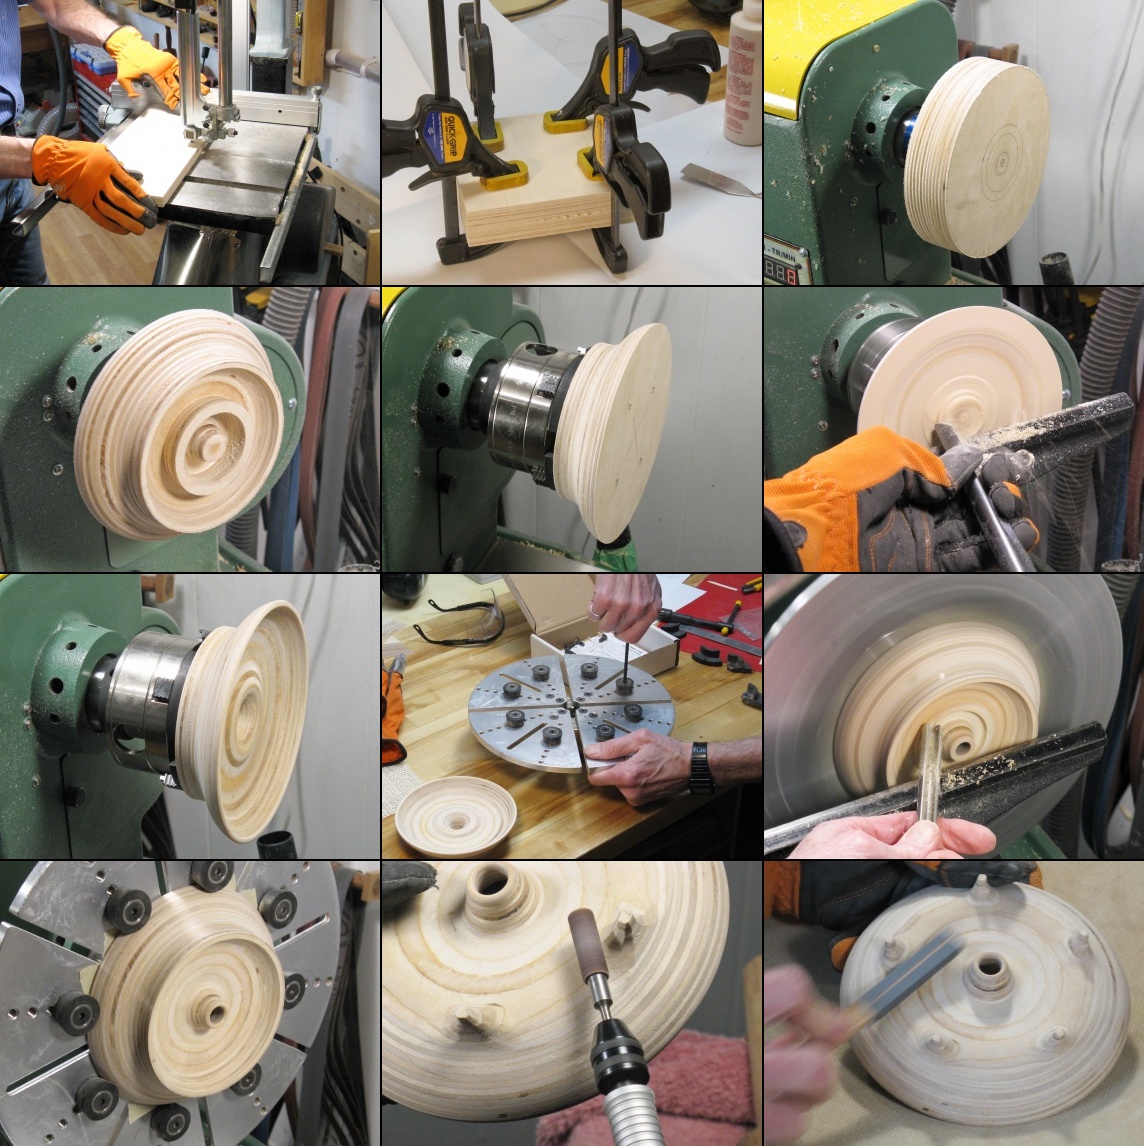
Same as the first time, but more curvey
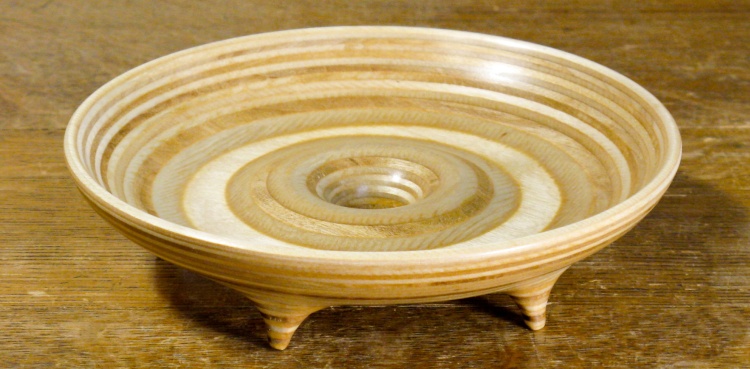
Rev 2 ball holder complete
Here is the finished Rev 2 holder. It's a bit smaller diameter than the first version but has lots of exposed plys.
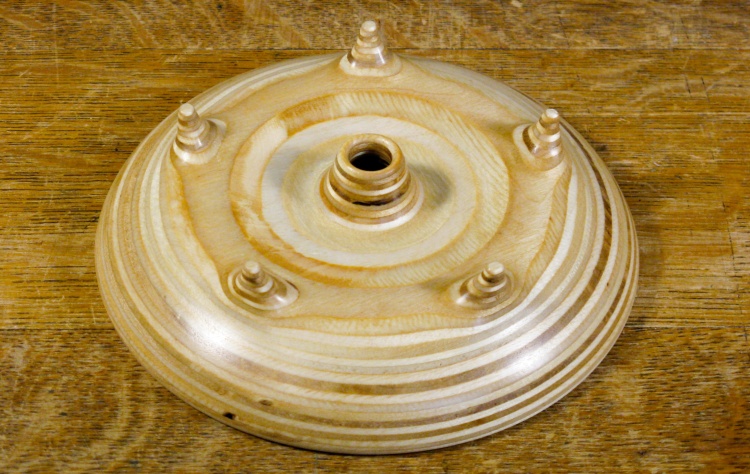
Holder bottom
The bottom side.
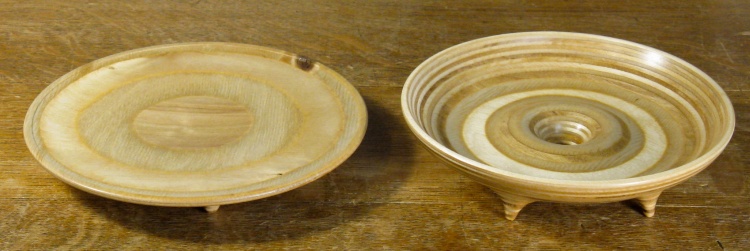
Rev 1 and the Way Better Rev 2
Doesn't even really look like they're made from the same wood.
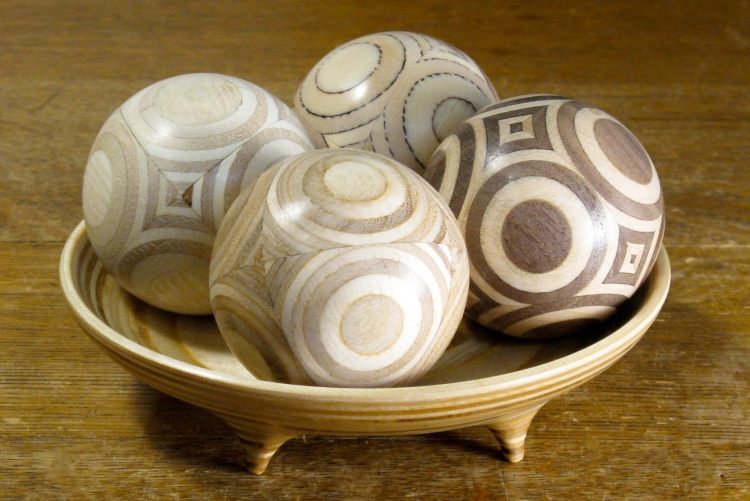
The holder in action
No room for the balls to wander in this version of the holder.
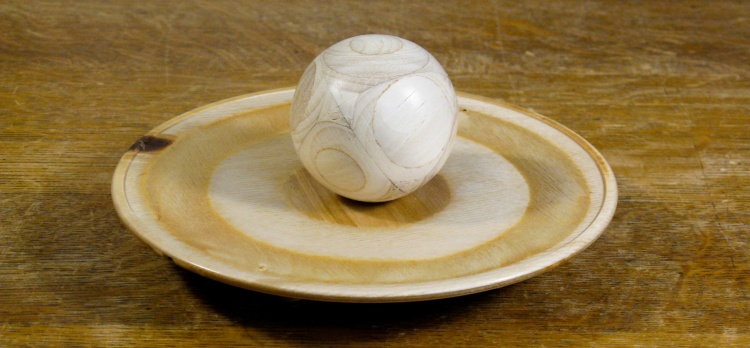
The rejects
Now I've gotta figure out what to do with the rejects...

Ball details


