The trick to making a ball is mostly in the use of cup chucks to hold it in the lathe. Unlike most mounting techniques, this one allows the piece to be removed and rotated to any angle. The cup chucks are just round cup-shaped faces that hold the piece through friction. They don't need to pierce the wood at all. The photo below shows a pair of home-made wooden cup chucks. The left one is the driven chuck mounted to the headstock, and on the right the chuck slides over a live center on the tailstock so it can spin freely. The piece is mounted between the chucks and the tailstock is tightened to squeeze the piece and produce the necessary amount of friction.
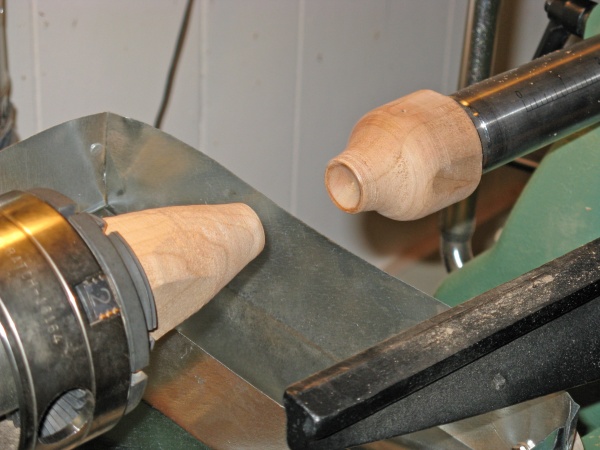
Cup chucks mounted to lathe
The following photos show the making of a red oak ball.
A little chunk of oak to start with
Blank
I start with a suitable blank (blank: [blaNGk] n; a roughly cut metal or wooden block intended for further shaping or finishing). A nice rectangular piece like this one is good since then it is simpler to find the center to maximize the size of ball it produces. This one was just cut out from a larger plank. I like to have at least 1/2" extra wood on both ends, but 1" is even better.
I doesn't matter what the orientation of the wood grain is in the blank, although it might be a bit easier to start the turning if the grain runs the long dimension. With the grain running the short way like this one, the chisel often takes off big, trauma-inducing chunks until the piece is closer to round.
Here I have marked the center of each side with pencil and a dimple to make it simpler to align for the first setup on the lathe.
Mounted between centers on the lathe
1. Mount between centers
Here the blank is mounted "between centers". The points on the headstock drive center and the tailstock live center are aligned with the marked center of the blank. I usually knock the blank onto the drive center with a mallet until it engages with the spurs. Then the tailstock center is aligned and the tailstock tightened to hold things in place.
For some very hard woods, I sometimes need to drill a pilot hole for the center prong to make sure it is fully inserted so the spurs will contact the wood.

Rounding started
2. Start shaping
This shot shows the blank partly shaped. This is usually done with a large roughing chisel.
This shot shows the blank partly shaped. This is usually done with a large roughing chisel.
All rounded
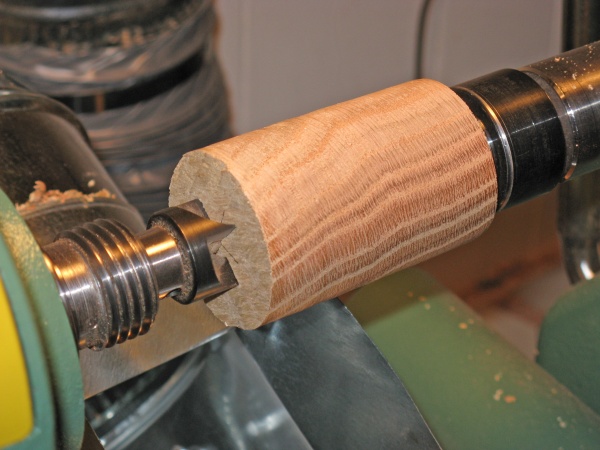
3. Complete cylinder
The blank is turned until it is cylindrical. It's not important to have perfectly straight sides since they will all be removed later anyway.
The blank is turned until it is cylindrical. It's not important to have perfectly straight sides since they will all be removed later anyway.
Marked for ends
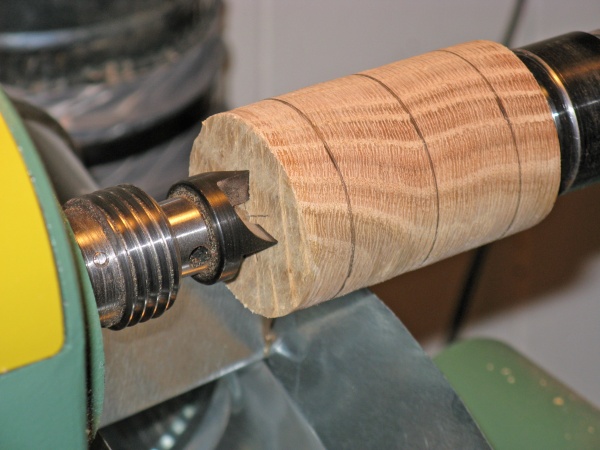
4. Mark the size
The next step is to measure the diameter of the cylinder. That distance is then marked on the circumference as shown, along with a center line. The centering doesn't need to be particularly accurate.
The lines show where the ends of the ball will be.
The next step is to measure the diameter of the cylinder. That distance is then marked on the circumference as shown, along with a center line. The centering doesn't need to be particularly accurate.
The lines show where the ends of the ball will be.
Ends removed
5. Remove the ends
The cylinder ends are then removed. This leaves a cylinder with equal length and diameter. Like in this shot, it usually looks like the cylinder is longer than it is wide, but that's an optical illusion.
I usually use a beading tool for this operation. Ideally, the sections of wood left would have a diameter less than 1/3 of the ball diameter, but that's not always practical. With only 1/2" of wood at the ends, the centers still need some support so on this one I have cut a bit deeper, leaving a wider flange of wood for the spurs on the drive center. With more wood at the ends, this wouldn't be necessary.

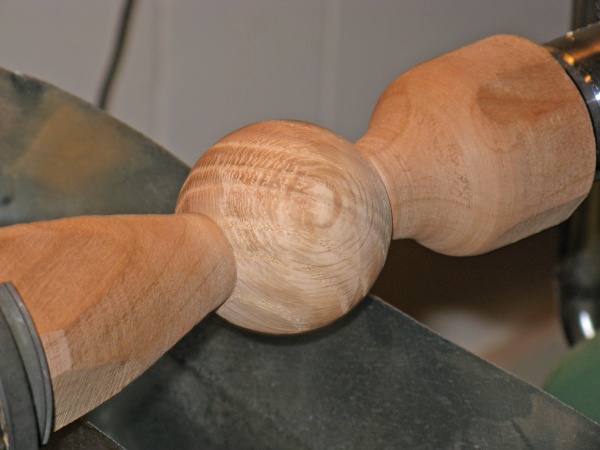
Sides rounded a bit
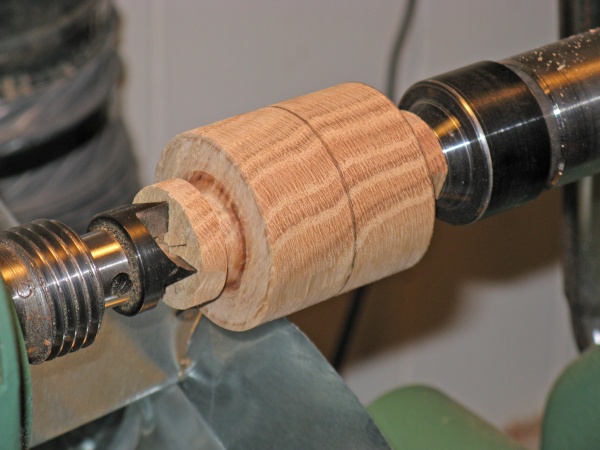
5. Turn to round(ish)
Now the cylinder is turned to as close to a sphere as possible. My particular attempt here was pretty pathetic, but the main thing is to try not to have any part too small. Too large is OK since it will be removed later. So egg and barrel shapes are preferable to UFO shapes.
The closer the center section is to spherical, the better the cup chucks will hold the part.
Ends cut off
6. Cut off ends
Next, the piece is removed from the lathe, and the ends cut off.
Next, the piece is removed from the lathe, and the ends cut off.
Finally - the cup chucks
7. Cup chucks
So finally we get to the cup chucks. At this point, the lathe is switched over to use them.
I started with chucks that were around 1.5" outside diameter (for making balls around 2" diameter), but they were a bit too large. I found these at 0.8" to be better, although they would not hold quite as securely.

Oblong piece mounted between chucks
8. Mount piece in chucks
The barrel-shaped piece is mounted between the chucks. It is centered as closely as possible in two dimensions, and then the tailstock is tightened to hold it in place.
If the wood is not centered, it usually results in a smaller ball, since you end up cutting away some good surface on the too-close side before getting to the surface on the too-far side.
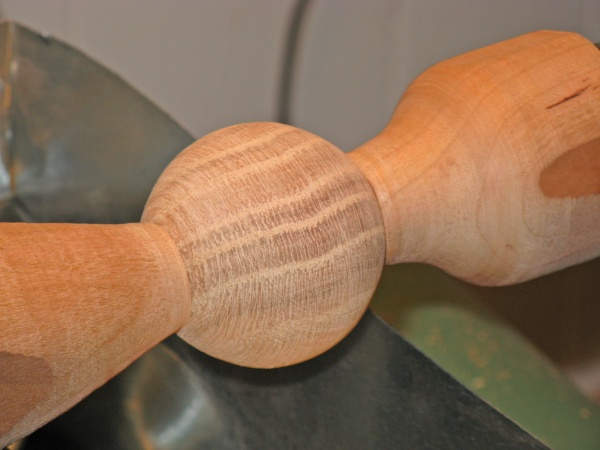
The other dimension rounded
9. Turn second dimension
Now with the wood mounted at a right angle to the original orientation, it can be cut so that it is round in this direction too. I generally cut down until the center is round, and then round the ends to as close to a sphere as practical.
Now with the wood mounted at a right angle to the original orientation, it can be cut so that it is round in this direction too. I generally cut down until the center is round, and then round the ends to as close to a sphere as practical.
10. Repeat as necessary
If this is not close enough to spherical, the wood can be taken out and reoriented again to present to most out-of round sections for further cutting. This can be done as many times as necessary, although I have found little improvement after 2 or three tries.
It is sometimes difficult to center things exactly in the chucks (especially using small ones like these), so changing the orientation runs the risk of having it off-center and having to cut more wood off to bring it back to round in the new positioning. After making a number of balls, I started relying less on cutting to perfection and more on the Awesome Power of Sandpaper.
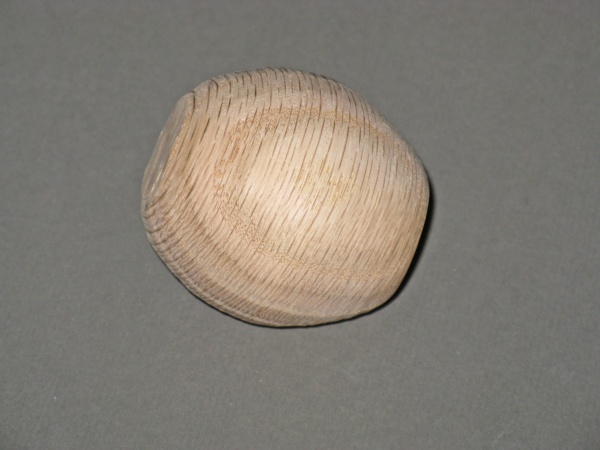
Starting sanding
11. Start sanding
Once the wood looks fairly spherical, then it can be sanded. I do that on the lathe as well, since it is pretty quick. If the sphere is still pretty rough, I might start with 50 grit sandpaper. I have to be a bit careful, since it can cut away wood pretty quickly. If it is not so bad, I usually start with 80 grit. The sequence is usually 80 - 120 - 240 - 400 - 600 grit. Some woods are particularly easy to sand in that they don't easily show the sand marks. In that case, I can sometimes skip grits and use 80 - 120 - 320 - 600.
The wood needs to be sanded in a number of different directions. I usually use a 1" strip of sandpaper and do the "top" and as much of the "sides" as I can reach down to the chucks. The ball is then reoriented in the chucks and I redo the sanding with the same grit. It usually takes at least three and typically 4 or 5 reorientations to make sure all parts have been evenly sanded. Then all that is repeated with the next grit, and so forth.
Like in any sanding, sometimes after using a finer grit, scratches from a coarser one become visible and you need to back off a grit or two to remove them. That is especially a problem when making balls since some of the sanding is necessarily across the grain, where scratches are most visible.

Sanding done
11. Complete sanding
As mentioned above, the ball is sanded in several orientations with each successively finer grit of sandpaper.
When you sand a wood surface with the grain, often you can stop at 220 grit for a nice finish. But that is almost never possible with a ball due to the necessity of sanding end grain and against the grain. The balls almost always have visible sanding scratches below around 600 grit.
I need to make sure the headstock is tightened enough so the piece doesn't slip in the cup chucks, since that can mark the wood and require more sanding. On the other hand, soft woods can be marked by the chucks, so on them it is often necessary to reduce pressure and have a lighter touch on the sanding.
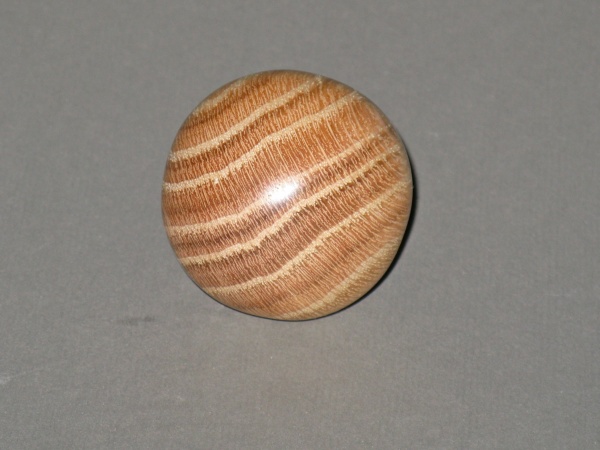
Waxed and shiny
12. Finish
I've really only used wax on the balls I have made. It brings out the grain nicely, and provides a small amount of protection.
It's also be possible to use another type of finish like a varnish, but having it dry without some sort of contact marks or coating-overlap marks would be a bit of a challenge.
This is the finished oak ball after waxing. It actually looks a bit out of round in this photo, although that's partially an effect of the shadows. However, it turns out that this ball is one of the least round I have made. It's diameter varies from 1.792" to 1.830" - a variation of 0.045". Most balls I have made vary around 0.025" from minimum to maximum diameter. That's not exactly ball-bearing material, but at least it's round to the eye and touch.


