Since the 1996-vintage rack actually worked perfectly well, there wasn't much reason to deviate from its basic design. So the 2022 version will be the same in that it will include hooks for belts with ring-shaped buckles ("frame buckles") and slots for belts with solid buckles ("box" or "plate" buckles).
The current rack had rather more capacity than needed, especially for my now-reduced number of belts so the new one is a bit shorter and has around 30% less capacity. It probably still has more capacity than I need but I wanted to keep the same mounting hole locations which put the kibosh on further length reductions.
The current rack had rather more capacity than needed, especially for my now-reduced number of belts so the new one is a bit shorter and has around 30% less capacity. It probably still has more capacity than I need but I wanted to keep the same mounting hole locations which put the kibosh on further length reductions.
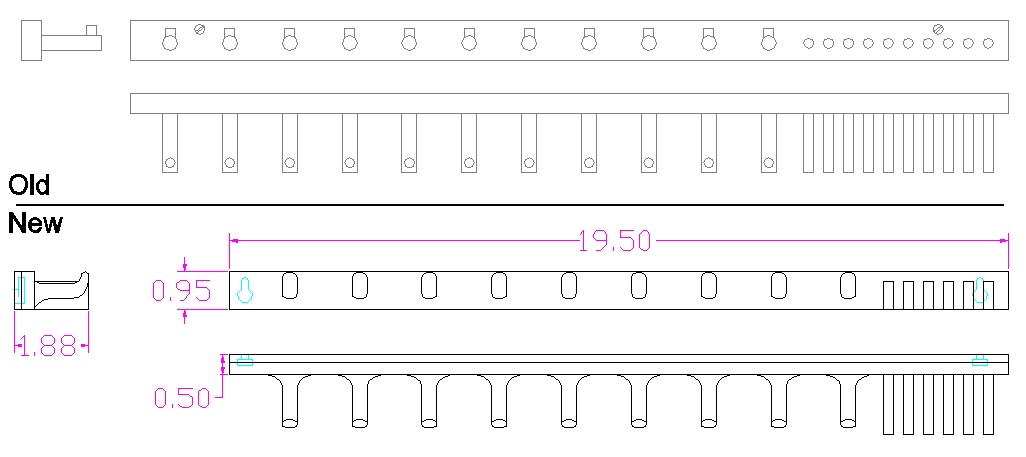
The plan
Prototype Hook
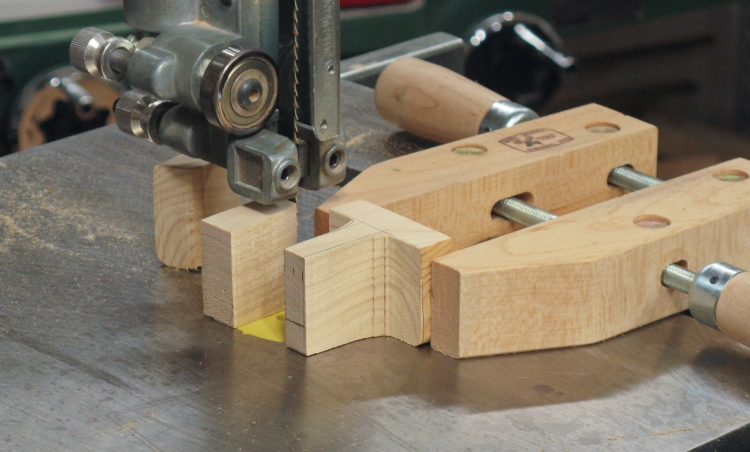
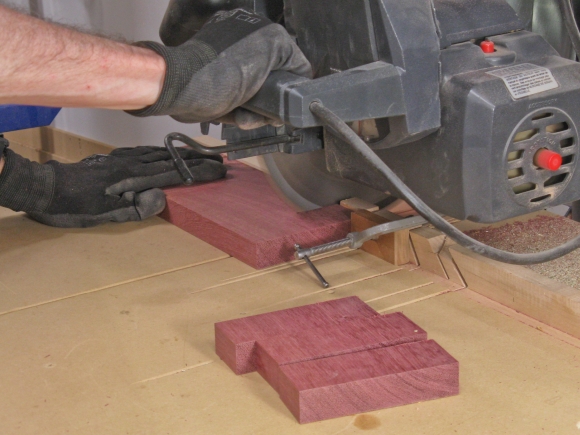
Cutting out a test piece
I wanted to verify the hook shape before diving directly into the purpleheart pool so I began with a toe-dipping prototype.
I started with a little block cut out of a construction 2x4 which gave a nice soft piece to work with. In this shot that block has had the hook profile cut into it on the bandsaw.
I started with a little block cut out of a construction 2x4 which gave a nice soft piece to work with. In this shot that block has had the hook profile cut into it on the bandsaw.
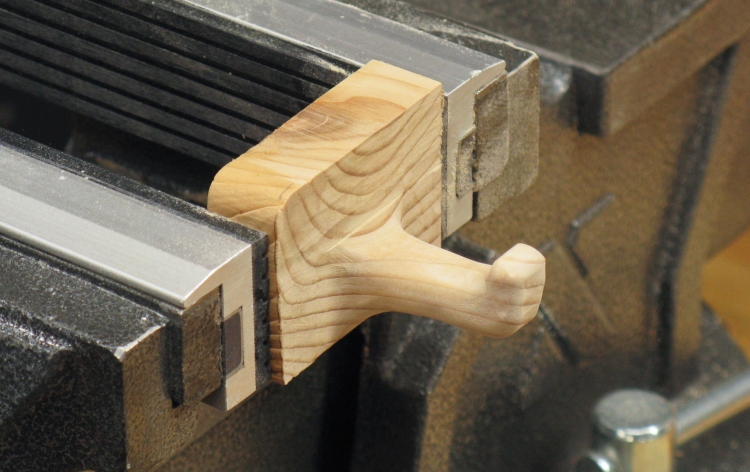
Test piece shaping done
A bit more cutting, some shaping and a touch of sanding resulted in the hook shown here. This looked fine for size and shape so I forged ahead with the real thing.
Making the Blank
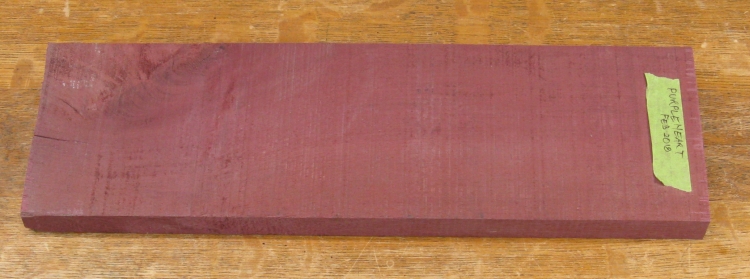
A suitable piece of purpleheart
I didn't have a lot of purpleheart lying around but this one plank (around 5.5" x 20" x 1") looked like it would be more than enough for the rack.
Based on the 2018 date I'm guessing this piece was probably left over from my first tissue box cover.
Based on the 2018 date I'm guessing this piece was probably left over from my first tissue box cover.
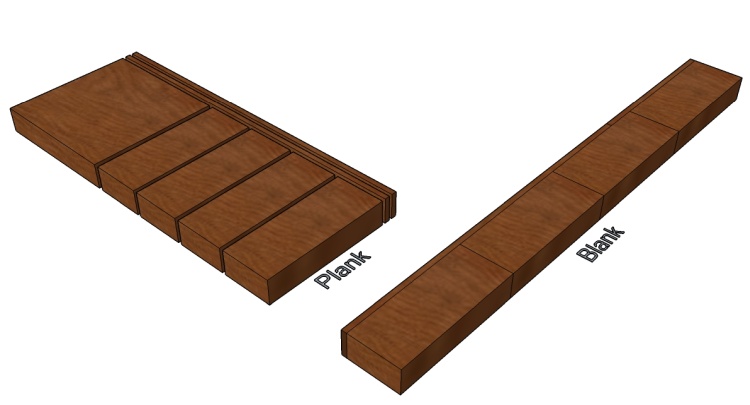
The plank-to-blank plan
To get enough strength in the hooks, the wood grain needed to run along their length. That meant that the piece I started with was cut from the end of a plank.
The belt rack was to be a "hewed from of a single block" kind of design but of course I didn't have any 20"-wide pieces of purpleheart on which to start hewing, so I had to make up a 20" blank from the narrower piece I had.
This drawing shows the six pieces cut out of the plank to make up the blank. The thin strip on the back of the blank adds extra strength by having the grain go the long direction of the rack.
I started by planing the plank smooth and then cut a couple strips off one side for the back stiffener.
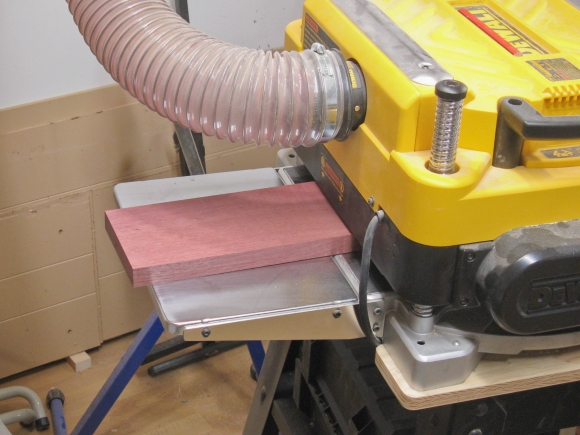
Planing smooth
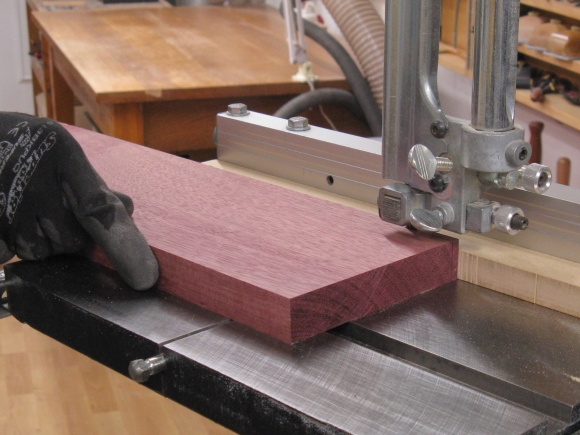
Slicing off the back pieces
The back pieces were planed to a consistent thickness (of about 3/16") and then the four pieces for the main body of the blank were cut free on the radial arm saw.
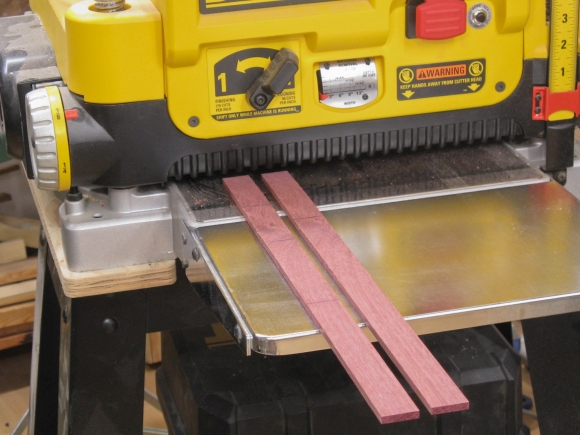
Planing back pieces
Slicing off body pieces
I had cut two strips for the back since a single one wasn't going to be long enough by itself. To provide strength in the area that would connect them, I cut a simple finger-joint (as in, 1 finger) so there would be about an inch of overlap of the two pieces. The joint ends were cut on the bandsaw and then trimmed by hand for a closer fit.
Cutting a one-finger joint
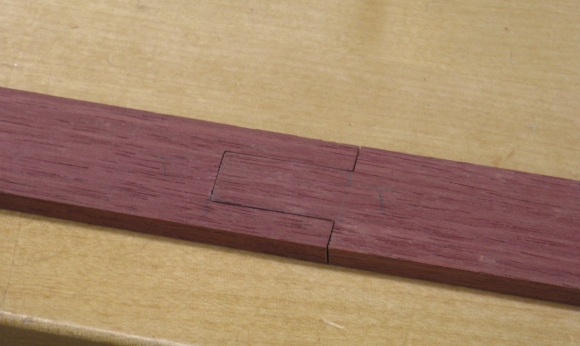
The joint in the back pieces

Everything glued together
That was everything needed for the blank so the two back pieces and the four body pieces were glued together and clamped as shown here.
Generally having end grain glued to side grain in a non-symmetrical configuration as was done with this blank is a recipe for warpage as humidity levels change seasonally; we'll see how much of a problem that turns out to be.
Generally having end grain glued to side grain in a non-symmetrical configuration as was done with this blank is a recipe for warpage as humidity levels change seasonally; we'll see how much of a problem that turns out to be.
The completed blank
This shows the completed blank. It received a bit of attention from the belt sander, planer and jointer to ensure flat and flush sides.
Rough Shaping
Starting to form the hook shape
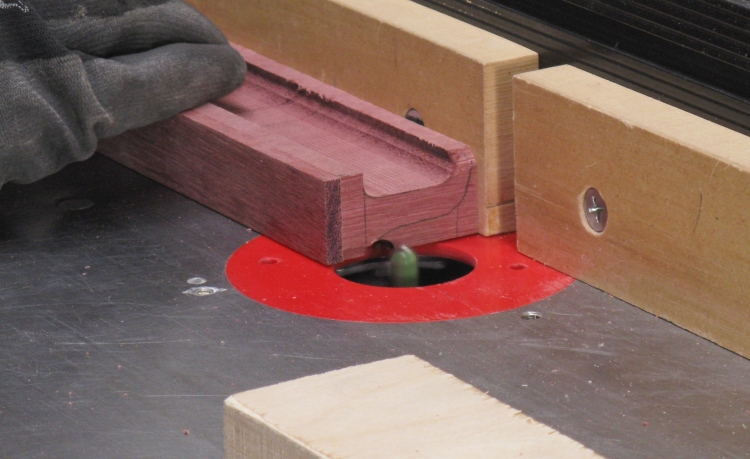
The profile of the hooks was produced by routing away the surrounding material. This shot shows the first cut which starts shaping the top side of the hooks.
The near end of the blank shown here is actually where the slots are located but the first few routings were needed to shorten them anyway. After that only the hook section of the rack was routed.
The near end of the blank shown here is actually where the slots are located but the first few routings were needed to shorten them anyway. After that only the hook section of the rack was routed.
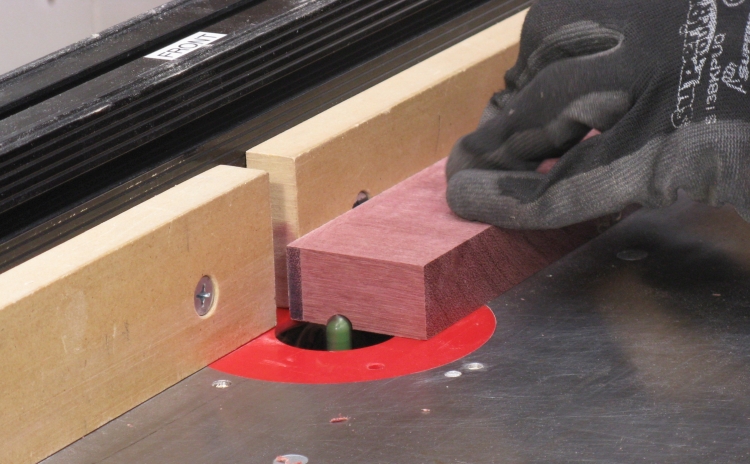
Working on the bottom of the hook shape
When the top side was done, I flipped the blank over and began routing to the bottom side profile.
I started with the 3/8" bull-nose bit seen here and then switched to a roundover bit for the end, followed by a flat-topped bit to clean up corner.
I started with the 3/8" bull-nose bit seen here and then switched to a roundover bit for the end, followed by a flat-topped bit to clean up corner.
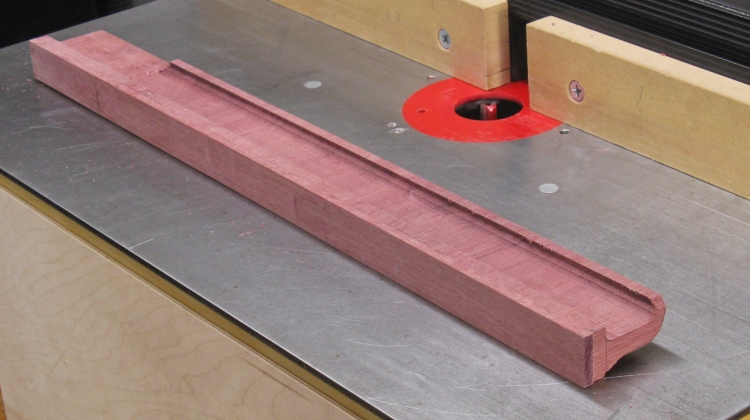
Hook profiles routed in
This shot shows the blank with the routing complete. The hook profiles are on the near end while the slots will be cut into the far end.
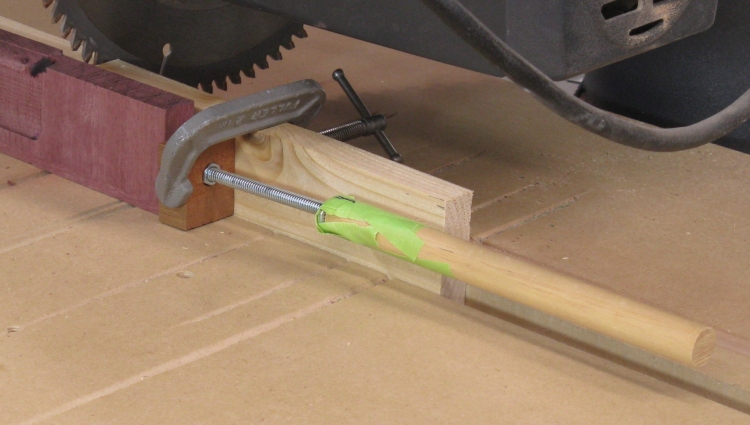
Quickie jig to help cut slots
Next up was cutting the slots for which I used the radial arm saw since it would result in straight and smooth sides.
To make the cutting more accurate, I made a little quickie indexing jig consisting of a long 1/4-20 nut hammered into a slightly undersized hole in a small block of wood*. I threaded in a longish bolt with a wood dowel taped on for a handle.
*for those woodspotters out there, that's a mahogany block.
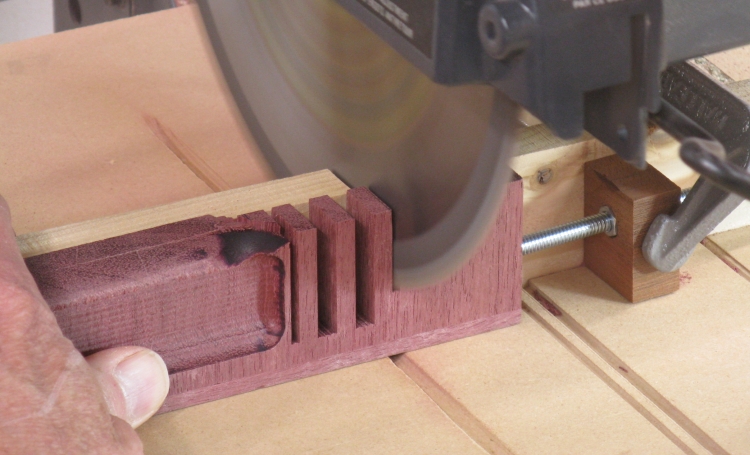
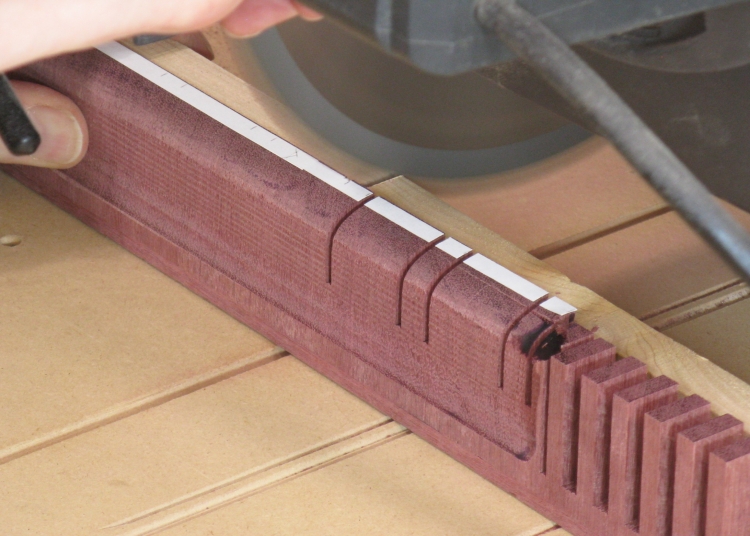
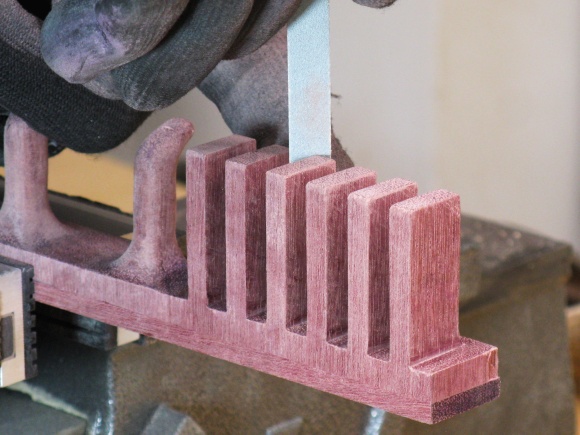
Slot cutting in progress
The procedure was to cut a slot and then turn the bolt a specific number of turns to cut the next.
The blade cut a slot exactly 0.1" wide and the slots were 0.25" wide and 0.25" apart. So I;
1. Made a cut
2. Rotated the screw 1.5 turns for an 0.075" shift
3. Took a second cut to remove the middle of the slot
4. Rotated the screw another 1.5 turns for another 0.075" shift
5. Took a final cut to finish the slot.
6. The screw was then rotated 7 turns (0.35") to start the next slot and steps 1 through 5 were repeated.
Next is cutting hook sides
The sides of the hooks were cut with the RAS as well. The cut depth was less than an inch since the hook sides widen at the base.
The position of these cuts was less critical so I just marked the locations (using some white tape for better contrast) and positioned the wood manually for each cut.
The position of these cuts was less critical so I just marked the locations (using some white tape for better contrast) and positioned the wood manually for each cut.
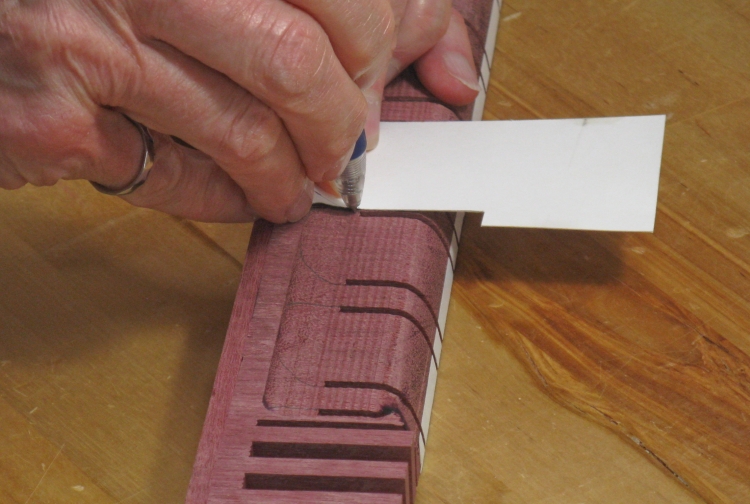
Marking the curves at the bases of the hooks
To establish the shape of the hook bases, I cut a pattern from a business card and traced on a curve for each cut.
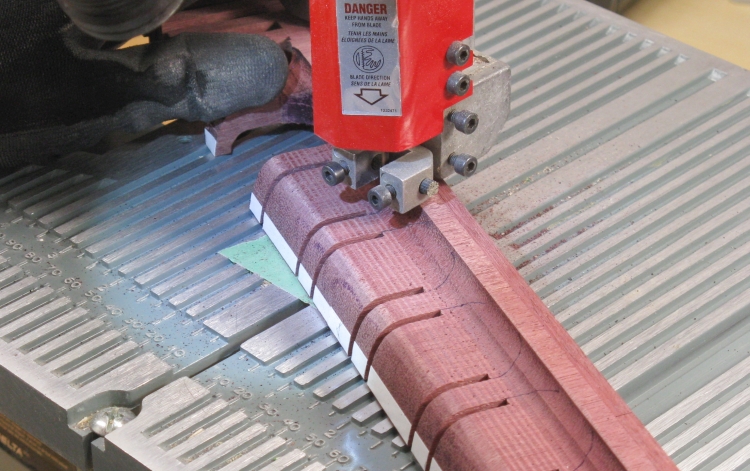
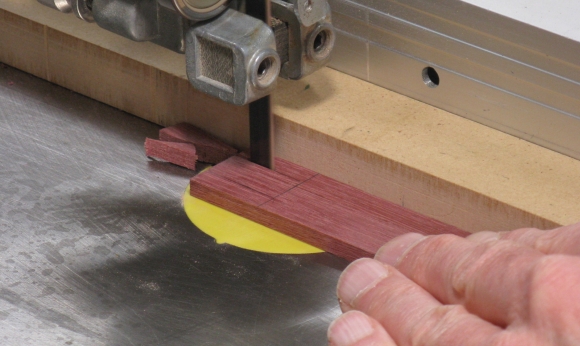
Cutting out between the hooks
Then out came the small bandsaw (equipped with a narrow blade capable of tight curves) to cut out the sections between the hooks.
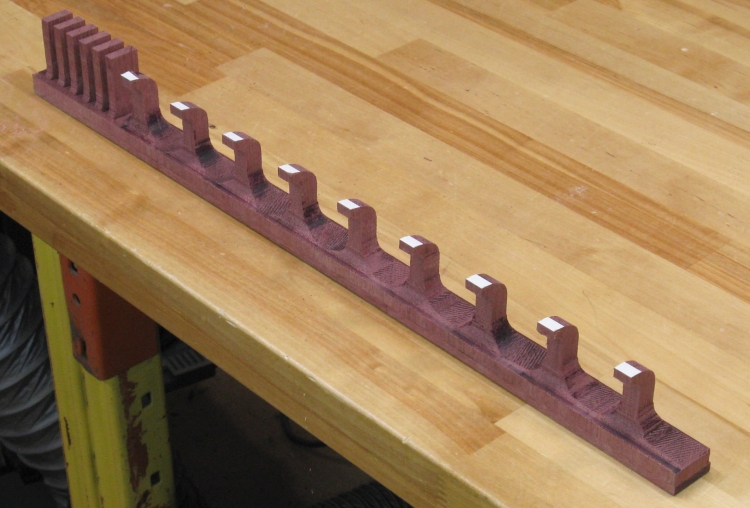
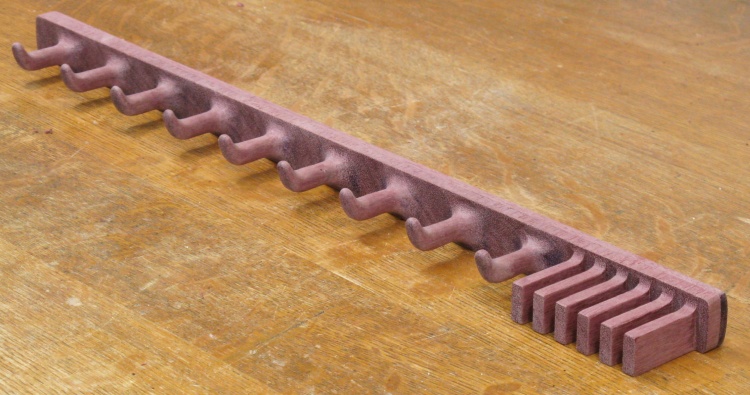
Basic shape done - now for some sanding
That gave the rough-cut blank seen in this shot.
The next step was of course to smooth off all the square corners and the routing and saw marks.
The next step was of course to smooth off all the square corners and the routing and saw marks.
Smoothing
Smoothing the hook corners
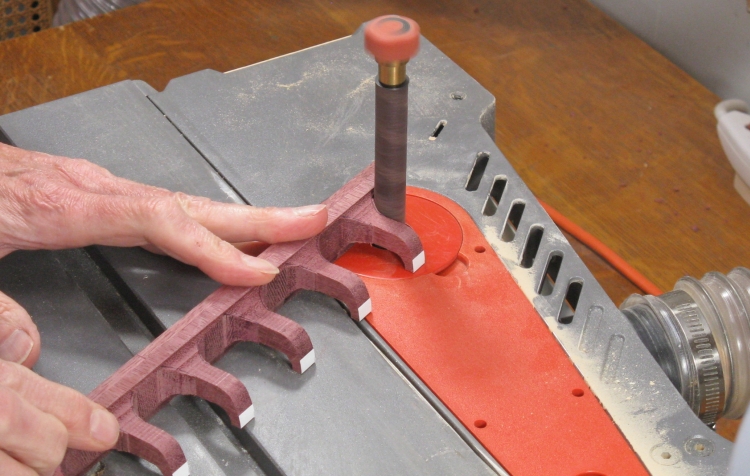
Smoothing was commenced with the rounding of the hook sides using the spindle sander.
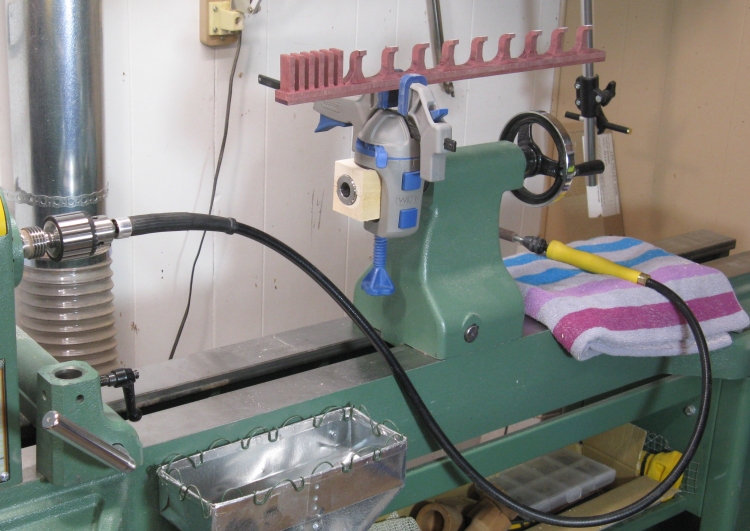
The lathe-based sanding setup
I was going to need to do some rounding at odd angles on the rack so I set up a vise mounted to the lathe.
I also attached a rotary shaft (the yellow-handled bit) that was driven by the lathe to use for the rounding.
I also attached a rotary shaft (the yellow-handled bit) that was driven by the lathe to use for the rounding.

Another quickie jig - this time for lathe mounting of a vise
I needed another little jig to attach a vise to the lathe. The simplest way was to drill an appropriately-sized hole in two stacked blocks so the vise mount would squeeze them against the shaft.
That put the position of the rack up high enough that I wouldn't need to bend over to work on it.
That put the position of the rack up high enough that I wouldn't need to bend over to work on it.
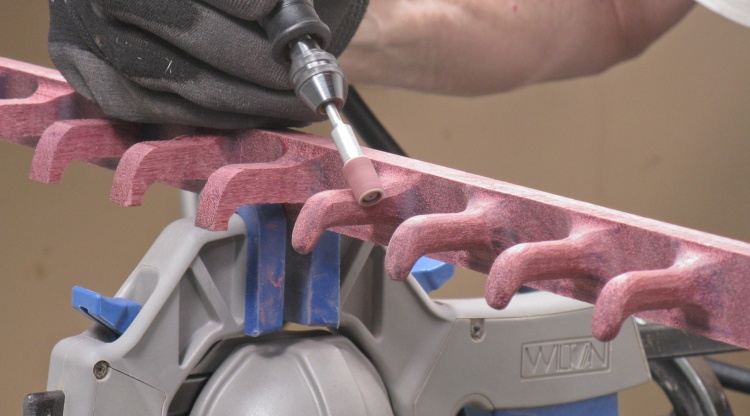
Rounding off the hooks
So ultimately I didn't need the large flex-shaft driven by the lathe. Instead I ended up using a Dremel with a flex shaft which was a bit smoother-operating.
I used a couple different sizes of sanding drums to round off inside and outside corners of the hooks with the smaller one seen in this shot.
I used a couple different sizes of sanding drums to round off inside and outside corners of the hooks with the smaller one seen in this shot.
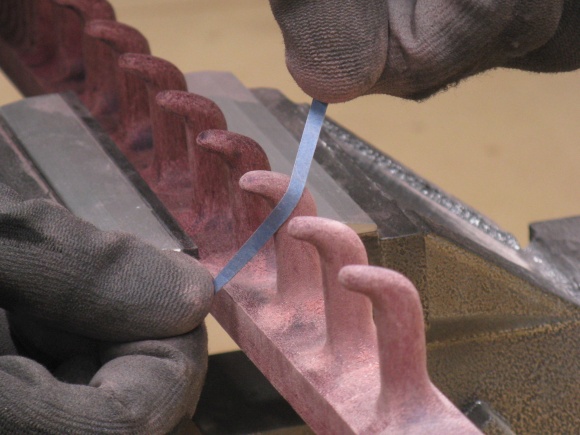
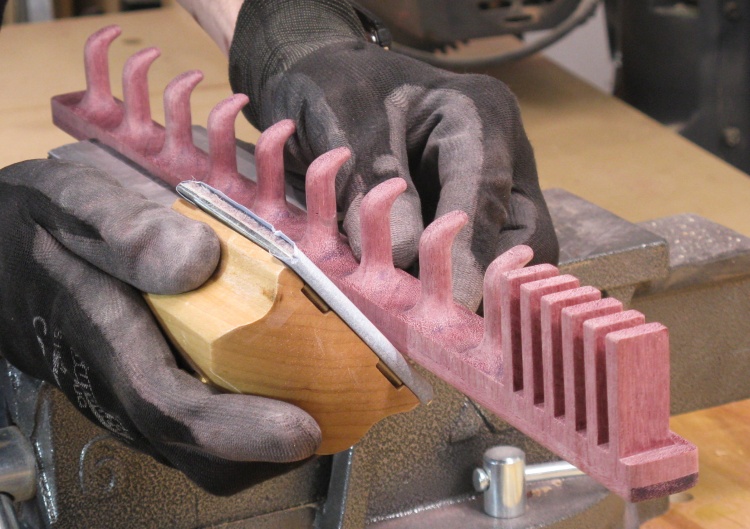
Once the basic shaping was done, the next step was to smooth things off a bit more with hand sanding. These shots show a variety of the operations performed.
Purpleheart is quite a hard wood and the end grain (which comprises the face of the rack) is especially hard. To make matters worse, it seems to burn fairly easily with powered tools meaning that many of the previously-sanded inside corners were dark and needed to be sanded clear. Probably 90% of the sanding time was this operation.
Purpleheart is quite a hard wood and the end grain (which comprises the face of the rack) is especially hard. To make matters worse, it seems to burn fairly easily with powered tools meaning that many of the previously-sanded inside corners were dark and needed to be sanded clear. Probably 90% of the sanding time was this operation.

Base sanding
Hook sanding

Slot sanding
Corner sanding
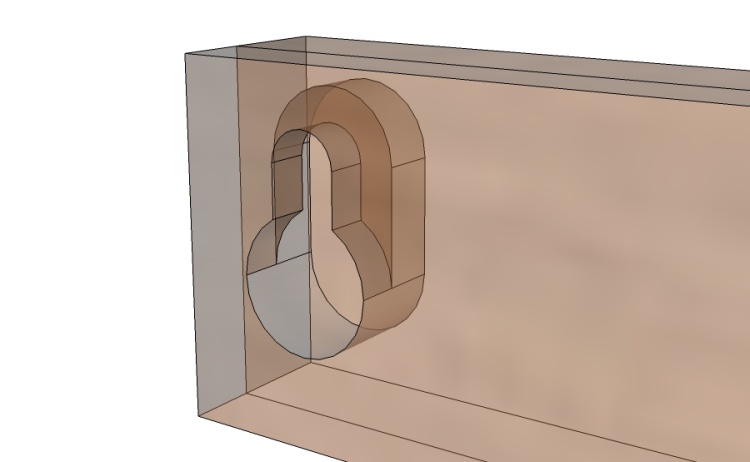
An X-ray view of the keyhole for mounting
The current belt rack had screws through the base holding it to the wall but I didn't have enough room for them in this design. I had earlier considered adding a strip to make the base taller or wood nubs sticking up for the screws but decided that it would be neater to use the same keyhole-based mounting I had used for the scarf rack.
This X-ray 3D sketch gives an idea what the keyhole will look like.
This X-ray 3D sketch gives an idea what the keyhole will look like.
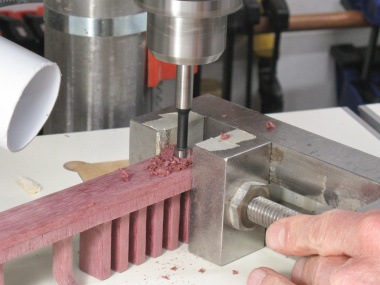
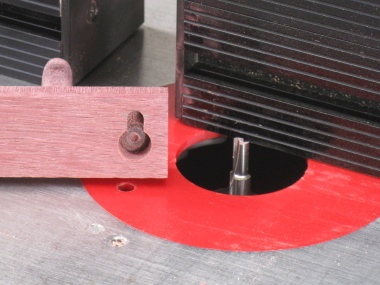
I didn't have a specialized keyhole bit so I used a three-stage procedure to cut the holes; First was a 3/8" diameter blind hole drilled with a forstner bit (to 0.27" depth). Next was to mill out the slot which was accomplished with the help of a 3/16" router bit. And the last step was the undercut, accomplished with the mini-circular-saw cutter which was inserted into the main hole and moved into the slot to undercut it. The cutter was only 0.05" thick so the slotting operation was done a few times at different depths to get the required slot depth of 0.15".
1. Drill hole
2. Cut slot
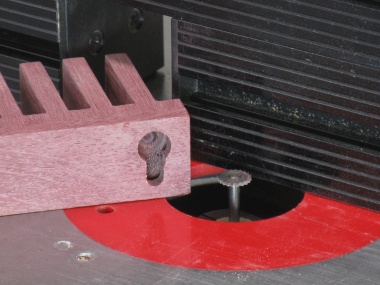
3. Undercut slot
Some final hand sanding
And lastly there was a bit of edge and surface clean-up with 220 grit sandpaper.
Woodworking done
That's it for the woodworking.
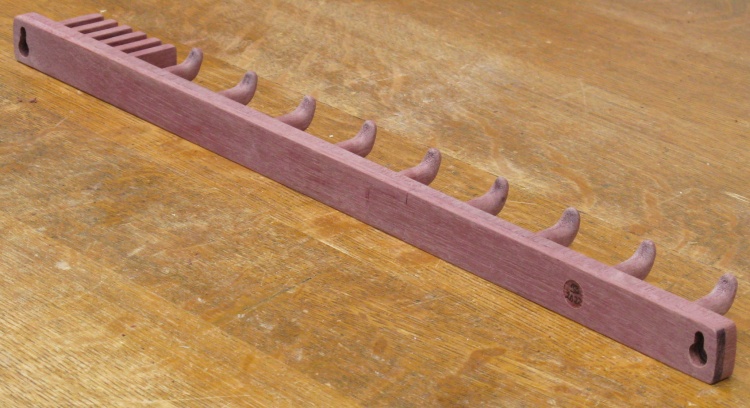
The back side
Rear view showing mounting holes.
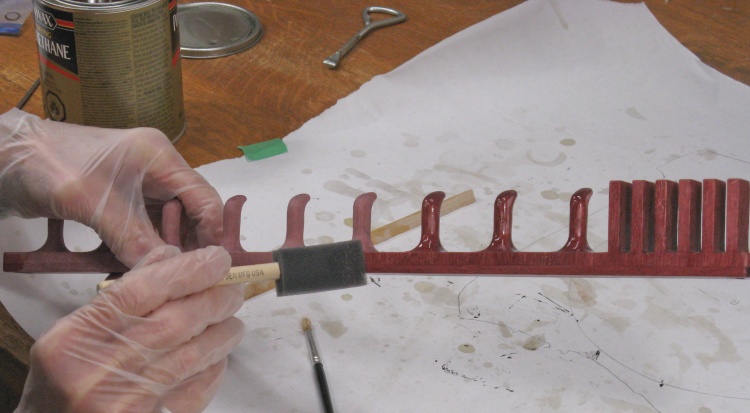
Applying the first coat of varnish
I used my standard MinWax Fast-Dry polyurethane varnish as a finish. This shot shows the first coat going on.
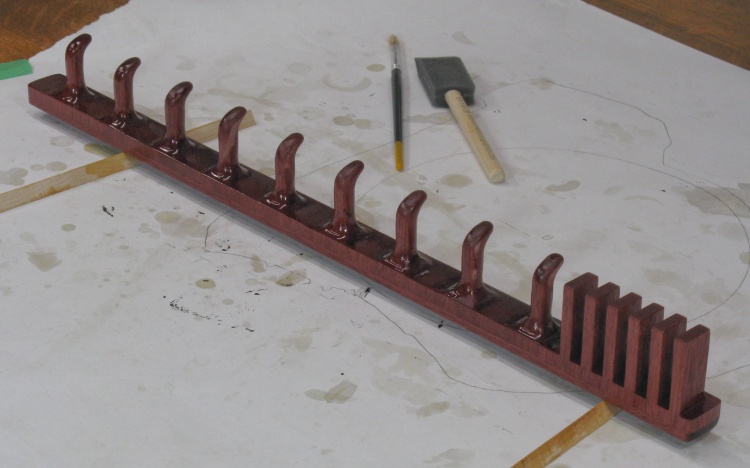
First coat of varnish drying.
The first coat of varnish, still wet.
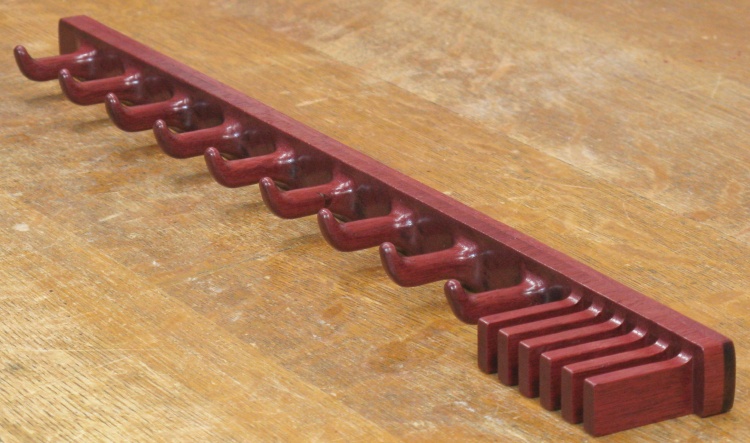
Done
Completed.


