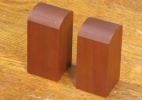
The originals
My original blind supports were made out of Purpleheart so they were a nice dark red that matched the blinds. They were also pretty simple in design; too simple as it turned out. Although it was one of those only-just-slightly-annoying situations where I would need to readjust the blind if it slipped off the round top of the supports and then didn't worry about it until next time. But when I was looking for a worthwhile project, the get-rid-of-the-annoyance factor was a point in favour of new ones.
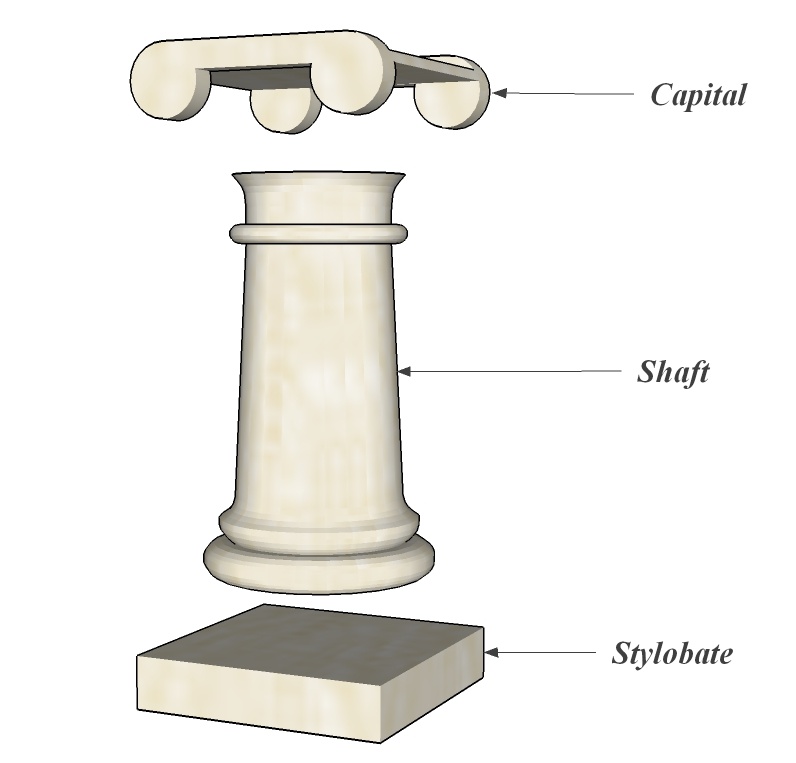
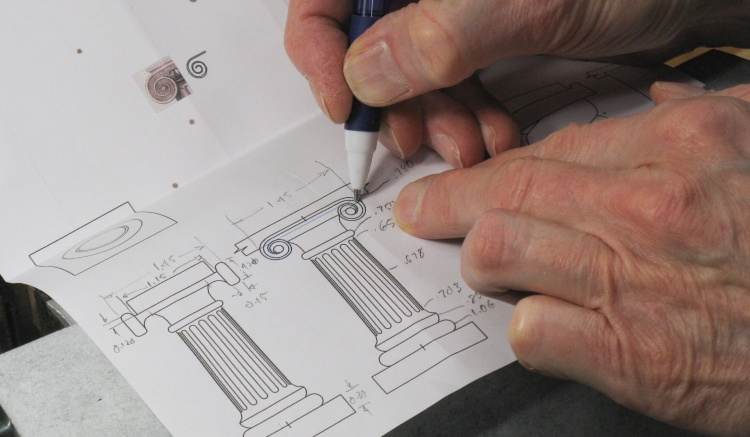
Of course I could have changed my approach to the problem and used say a precisely-positioned cord stop to achieve the same thing, but I was kind of in the fix-the-lousy-design mindset so I stayed in that particular rut. I wanted to do a bit of carving so I opted for a more ornate design, settling on one based on a classic Greek column.
Of course I could have changed my approach to the problem and used say a precisely-positioned cord stop to achieve the same thing, but I was kind of in the fix-the-lousy-design mindset so I stayed in that particular rut. I wanted to do a bit of carving so I opted for a more ornate design, settling on one based on a classic Greek column.

The bigger-than-life-size supports (unless you are looking at this on your phone)
Makin' it like the Greeks
So the ancient Greeks seemed to know what they were doing column-wise and obviously they didn't want big square pieces on whatever huge lathes they used to mill down the marble columns (don't assume I researched this for too long), so like them I'd make the supports in three pieces.
The central shaft would be turned on the lathe and then the top and bottom pieces (capitol and stylobate for those "in the know") would be made separately and attached later.
The central shaft would be turned on the lathe and then the top and bottom pieces (capitol and stylobate for those "in the know") would be made separately and attached later.
Shaft Fabrication
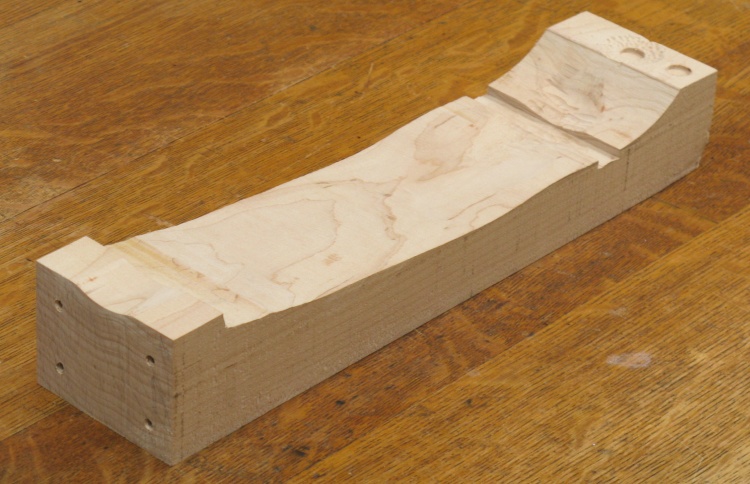
An...experienced piece of maple
I didn't need a huge piece of maple so I figured I could get it out of this well-used scrap that had been a cut-off, a pattern template, some kind of jig and who knows what else.

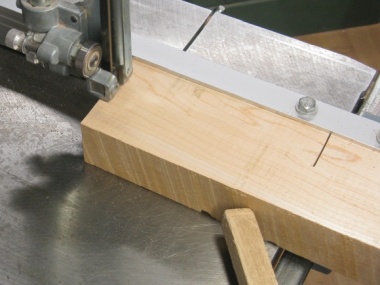
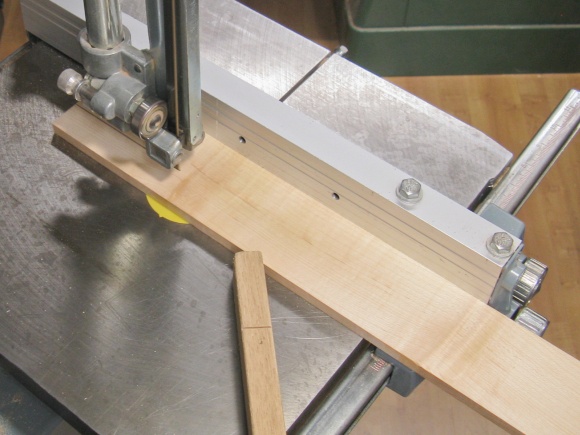
Cutting out a suitably-sized blank
I just needed a 1.3"-square piece which the bandsaw was happy to help me achieve.
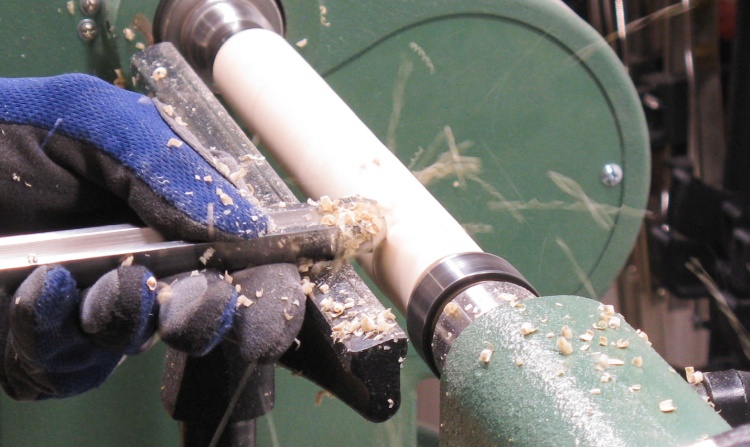
Finishing off the blank rounding
The first step was rounding the maple into a cylinder. Here the roughing gouge is making lots of nice spinny shavings toward that end.
Marking for the first shaft
I pencilled on various critical points for the first shaft (aligned with the virtual profile projected by virtual reality glasses in virtually the right place) and those lines would guide the cutting. All true except for the virtual bits.
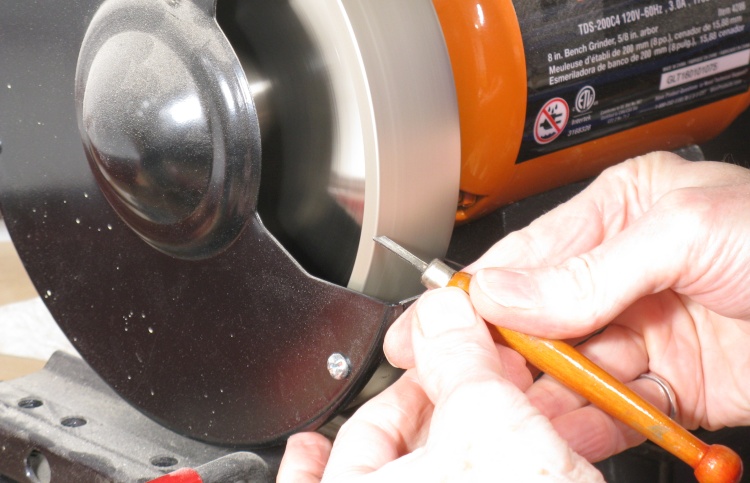
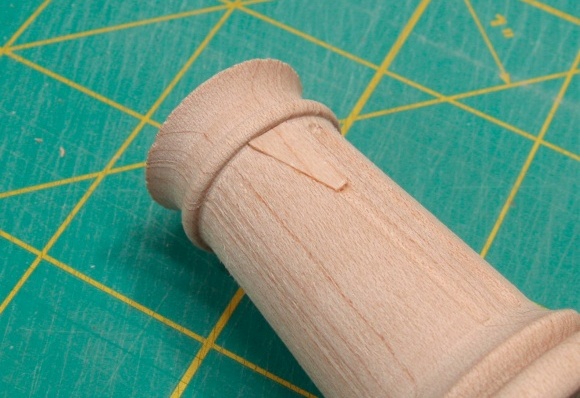
Grinding a custom cutter for a tricky notch
One of the notch shapes in the shaft had a sharp bottom which is essentially impossible to do with conventional turning tools.
My solution was to made a custom cutter out of an old carving chisel. That was done in pretty short order just using the corner of the grinder as shown here.
My solution was to made a custom cutter out of an old carving chisel. That was done in pretty short order just using the corner of the grinder as shown here.
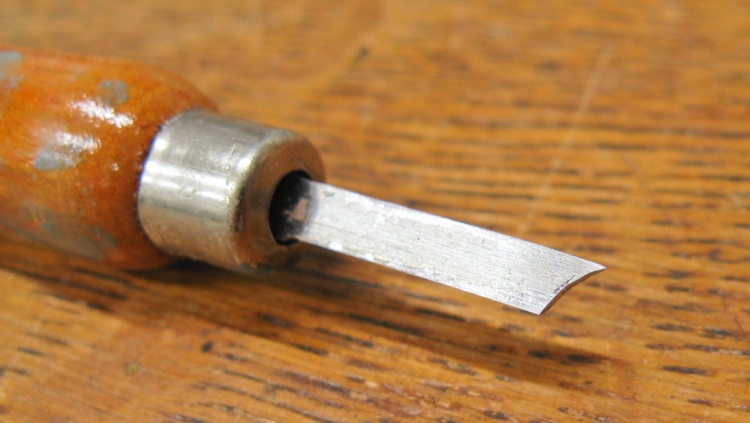
The cutter profile
This shows the profile of the cutter.
The blade is pretty small - only about 0.15" wide.
The blade is pretty small - only about 0.15" wide.
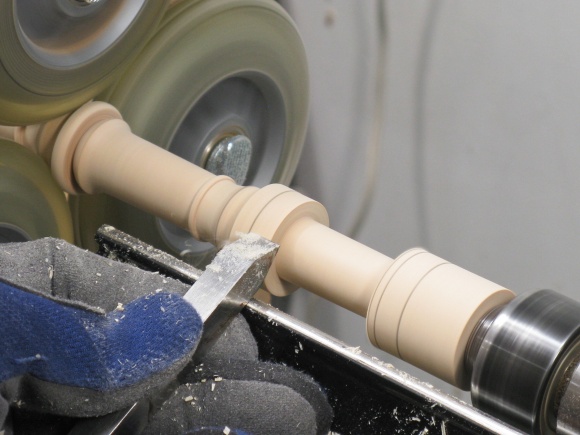
I needed only two shafts but I made four so I could choose the best two. The following sequence shows a number of the operations used to shape the last of the four shafts.
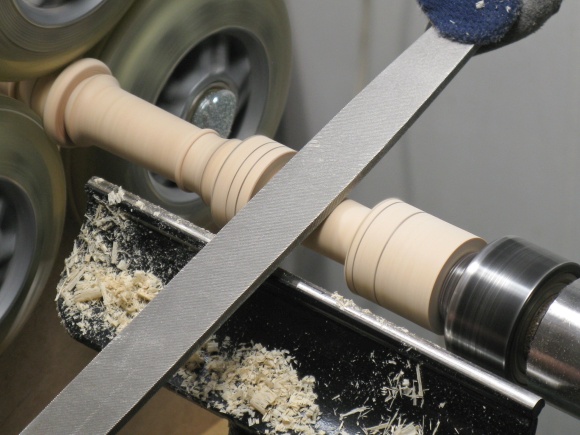
Smoothing the slope with a file
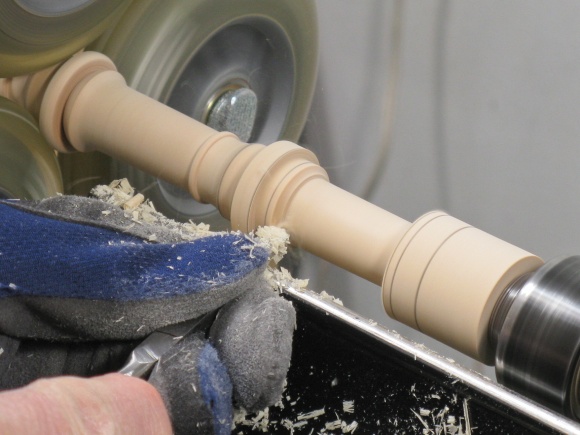
Reducing base diameter
Adjusting bottom corner

Checking diameter
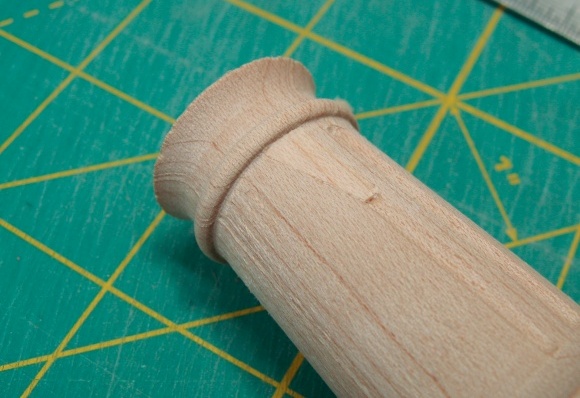
Rounding bottom
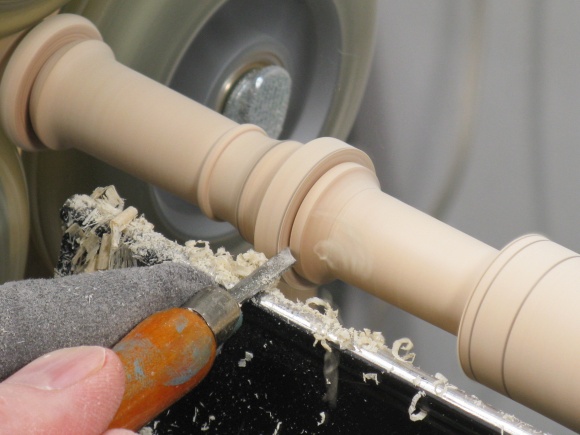
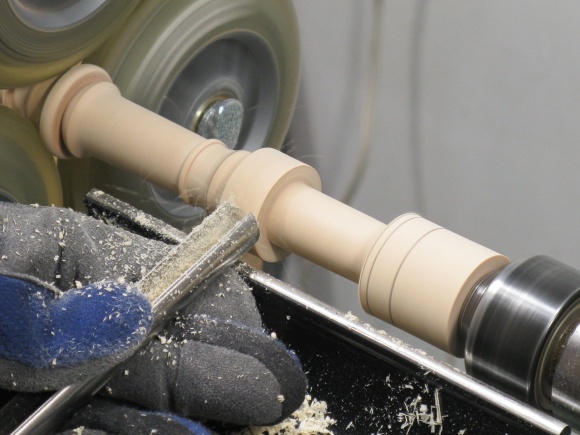
Using custom tool for sharp notch
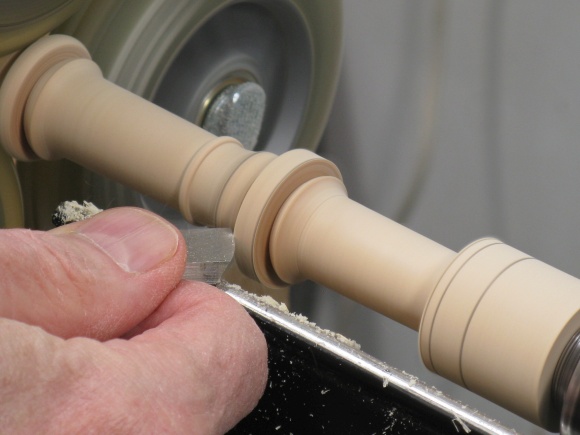
Chamfering corners
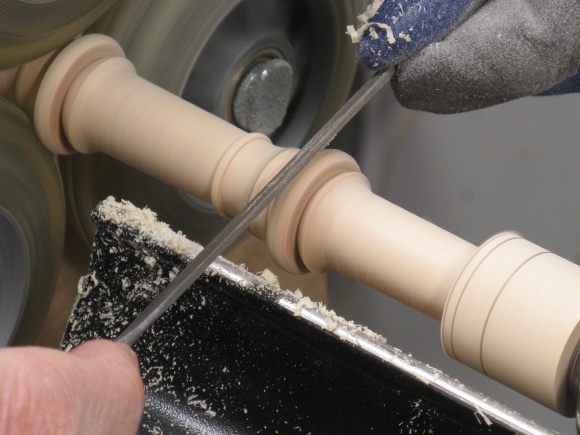
Rounding with a file
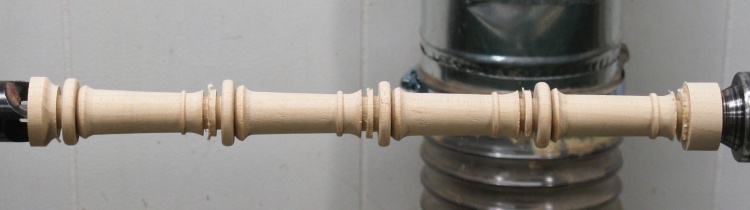
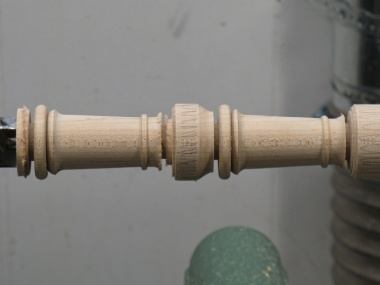
Turning finished on four shafts
When I was done I had this string of four shafts, all identical unless you look closely or, God forbid, measure them.
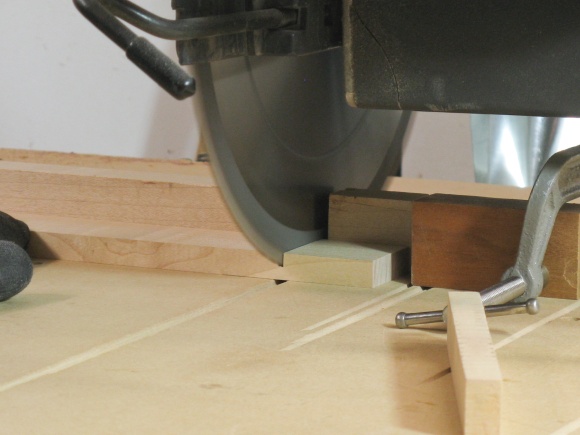
Cutting apart the shafts
It isn't practical to cut something perfectly flush on the rather imprecise bandsaw so the shafts were cut apart leaving small nubs on each end.
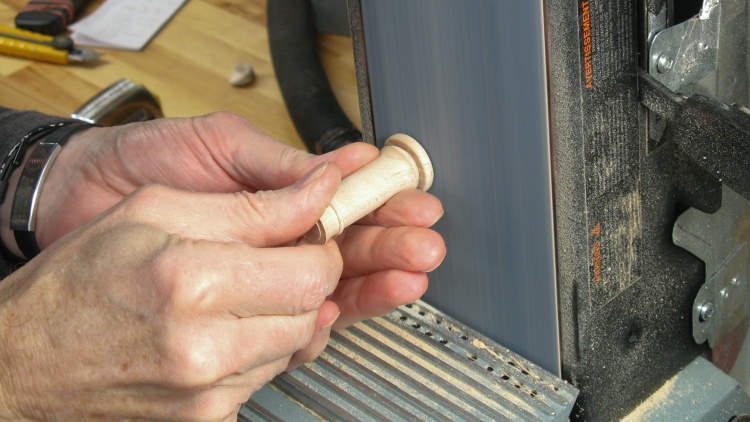
Flattening ends on belt sander
Those end nubs were sanded flush with the top and bottom using the belt sander.
In fact, that didn't do a precise "flushing" job either - the surfaces ended up slightly domed toward the middle - so the centre areas were sanded a bit more using a small drum sander on a Dremel rotary tool.
In fact, that didn't do a precise "flushing" job either - the surfaces ended up slightly domed toward the middle - so the centre areas were sanded a bit more using a small drum sander on a Dremel rotary tool.
After finishing off the four shafts, I looked at them and decided that they were probably too thin and looked a bit odd with the size of base and top I needed; Nothing for it but to make some fatter ones.
Turning the new ones was a fairly simple process - maybe an hour or so with the same kinds of steps shown for the initial shafts. This little sequence skips most of that.
Turning the new ones was a fairly simple process - maybe an hour or so with the same kinds of steps shown for the initial shafts. This little sequence skips most of that.
New piece of maple
New blank
A pair of new, stouter shafts

New shafts with the original scrawny ones in the background
This shows the new "Sumo" shafts with the old set standing dejected in the background.
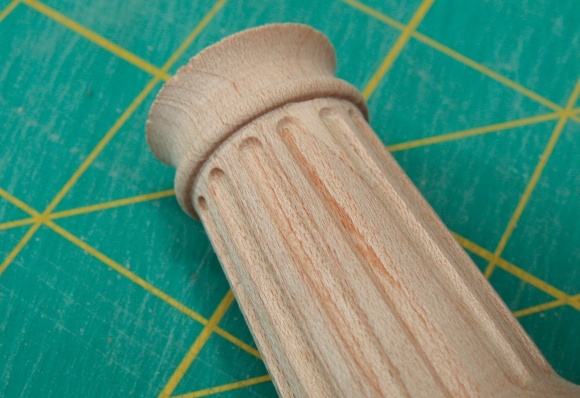
Routing splines into a support
The last operation on the shafts was to add the vertical splines. This was done on the router table using a round-ended 1/8" Dremel bit.
I made a little jig to hold the pieces at the correct angle and started routing.
I made a little jig to hold the pieces at the correct angle and started routing.
Unfortunately I had just relied on friction to hold the piece in place and that wasn't quite effective enough, as seen by the off-course path the bit took on one of the splines. I was going to start over and turn another shaft but decided I'd try a repair instead. This photo grouping shows that process.
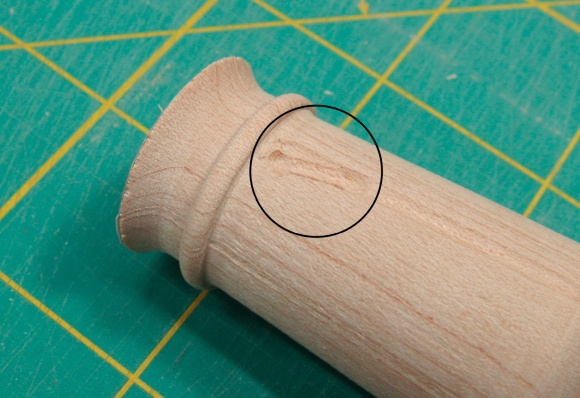
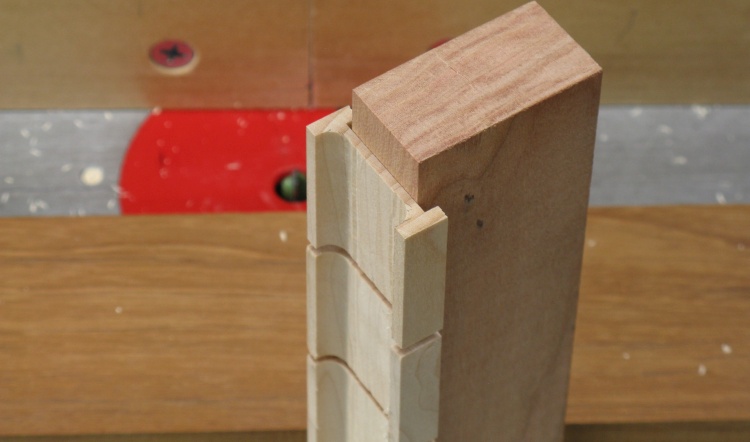
Oops
Triangular area cut out and matching plug glued in
Plug sanded smooth
Plug area after routing
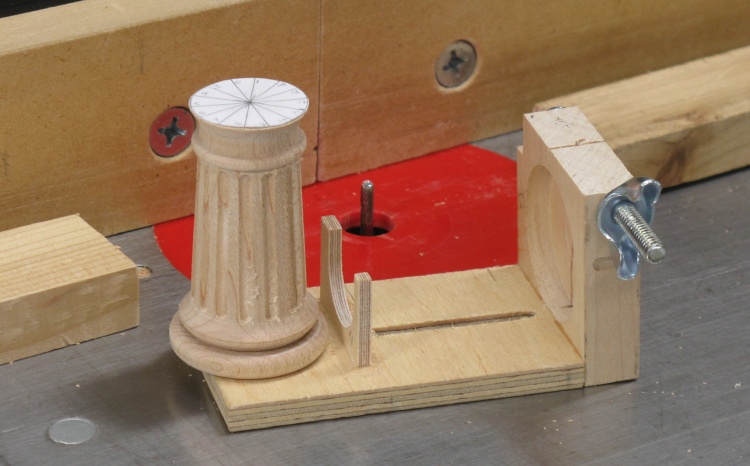
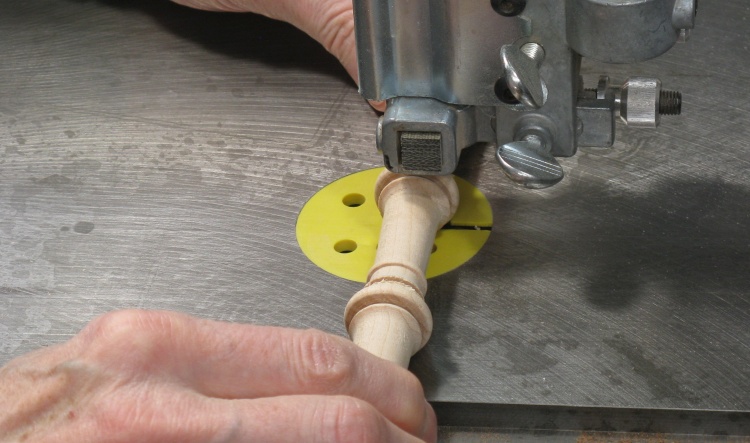
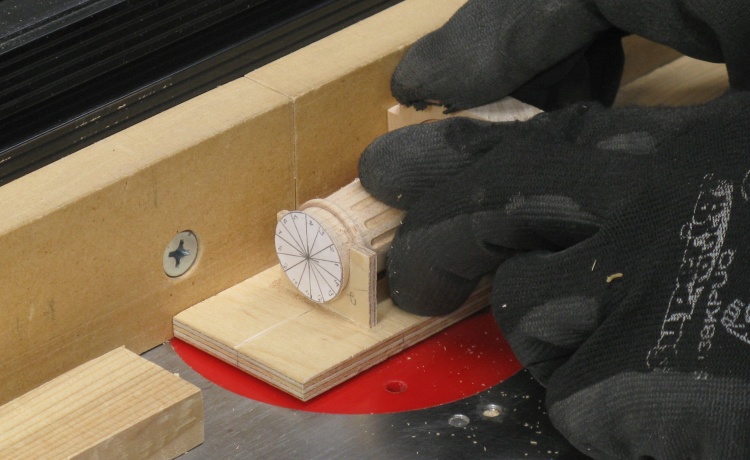
A completed shaft sitting on the routing jig
The fix worked decently so I stuck with the repaired shaft.
I also improved the jig by adding a thumbscrew-tightened clamp to firmly hold the piece.
This shot shows one of the completed shafts sitting on the jig. A paper reference taped to the top guided the angular setting for each of the 14 splines.
I also improved the jig by adding a thumbscrew-tightened clamp to firmly hold the piece.
This shot shows one of the completed shafts sitting on the jig. A paper reference taped to the top guided the angular setting for each of the 14 splines.
Top and Bottom Fabrication
The bottom and the starting pieces for the top don't get much simpler than this; just some square pieces of maple.
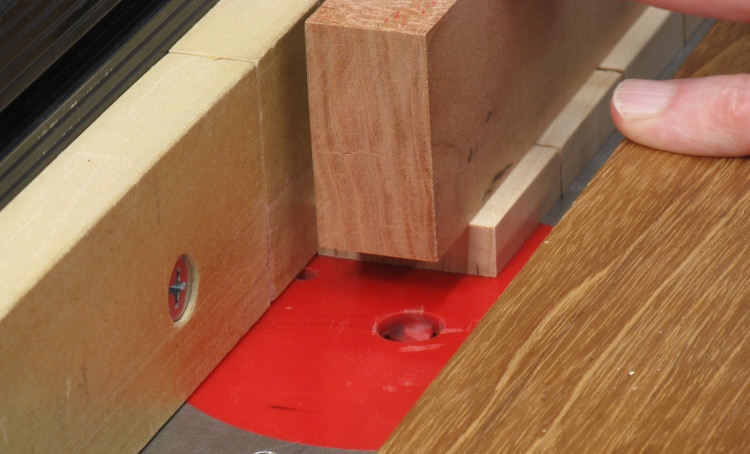
Ripping to width
Crosscutting to length
Starting to route some pieces for the tops
As with the shafts I made some extra pieces as insurance to cover the perils of hand carving.
In this shot the capital pieces are taped to a larger board for safe handling and they will get routed top and bottom by the barely-visible spinning bit.
In this shot the capital pieces are taped to a larger board for safe handling and they will get routed top and bottom by the barely-visible spinning bit.
Tops shaped and still stuck to the handling board
Capitols routed to shape and ready for carving.
Tracing design onto a top
The spiral (AKA scroll) designs for the tops were traced on with the aid of carbon paper.
The scroll designs were a bit too small to carve even with my smallest carving chisels so I went with the grind-them-in option.
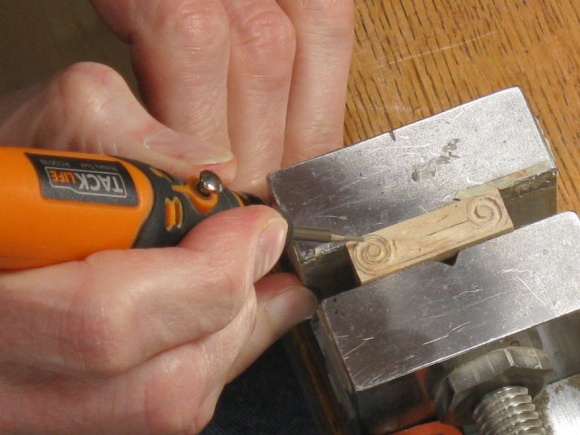
Using a small diamond grinding bit to form the spirals
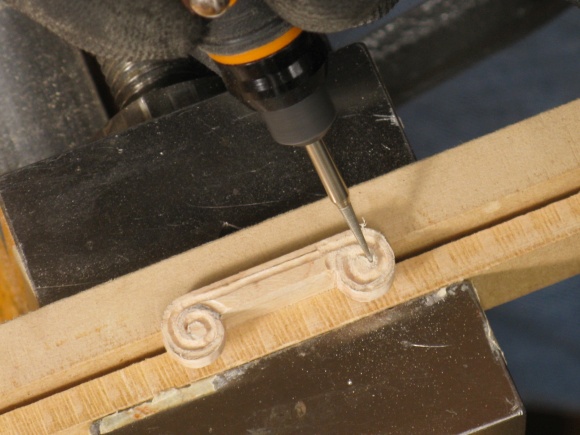
...and a pointy one one for the sharp corners
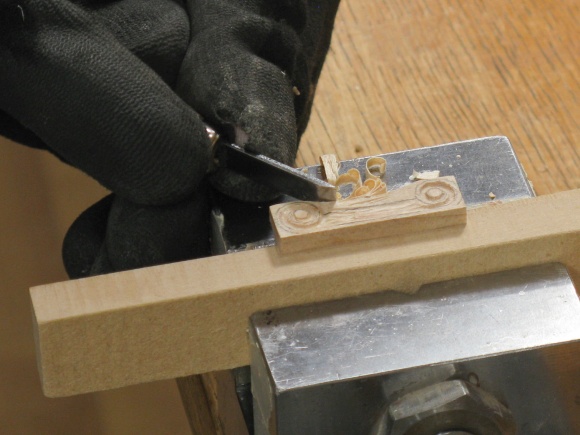
Carving the bottom shape
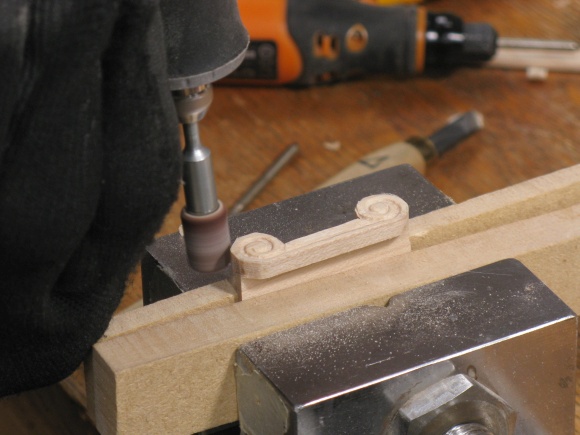
Rounding off a corner with the aid of a Dremel tool
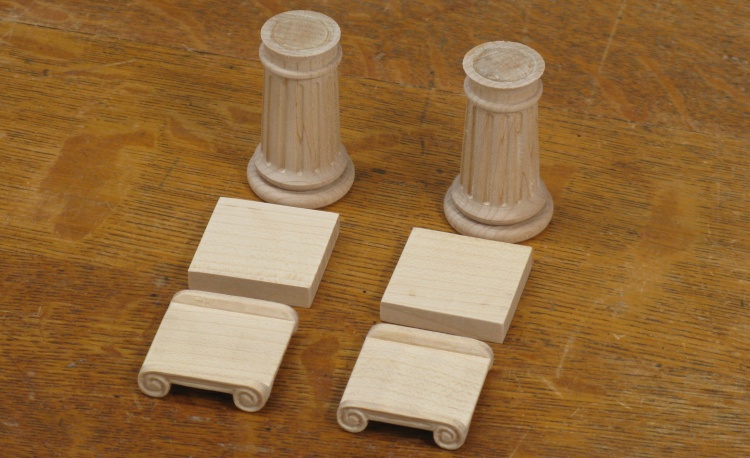
All the bits ready to go
This shot shows all the pieces completed.
I had also added a few minor things including grooves near the periphery of the ends of shaft (to help prevent glue squeeze-out) and the date on the bottom (to help future archaeologists).
I had also added a few minor things including grooves near the periphery of the ends of shaft (to help prevent glue squeeze-out) and the date on the bottom (to help future archaeologists).
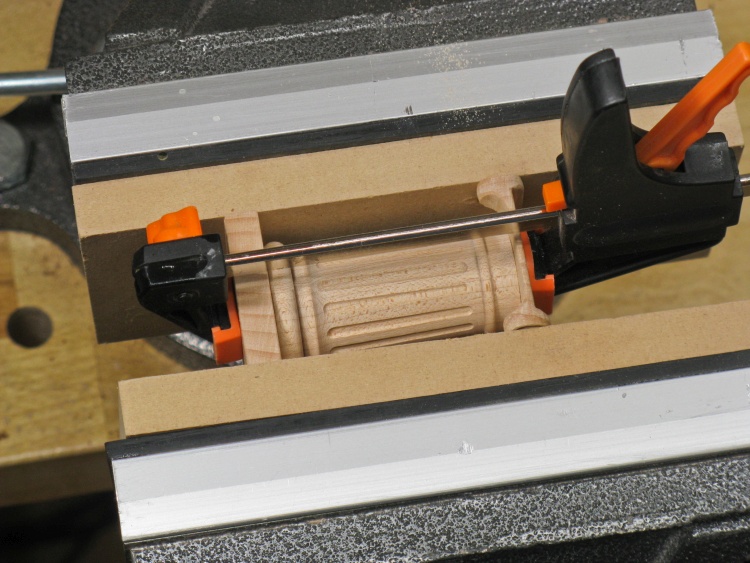
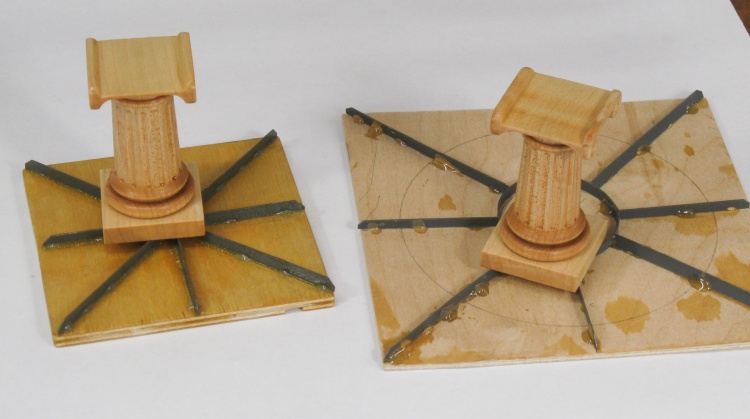
Gluing together one of the supports
Each support was clamped together with the aid of the vise to keep top and bottom correctly aligned. The shaft was just centered by hand before tightening the clamp.
Both of them ready to go
And that was it for the woodworking.
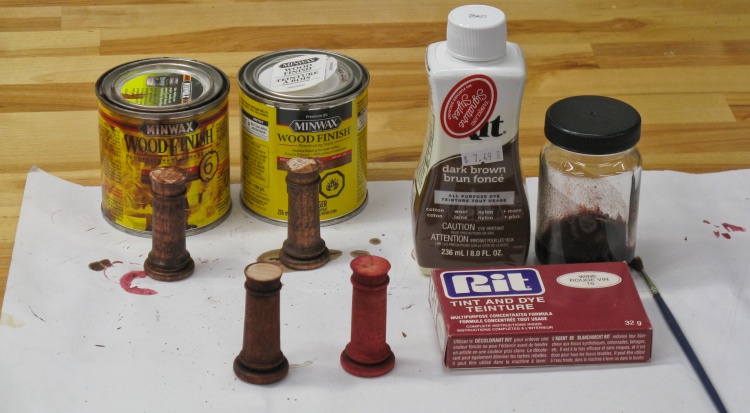
Some stain & Dye testing using the old shafts
I had planned to stain the supports a dark reddish to better match the blinds and window frame and to that end I tried a couple stains and some dyes as well, using the original too-skinny shafts.
Unfortunately none of the finishes gave a very consistent colour so I decided to stick with the natural maple look.
Unfortunately none of the finishes gave a very consistent colour so I decided to stick with the natural maple look.
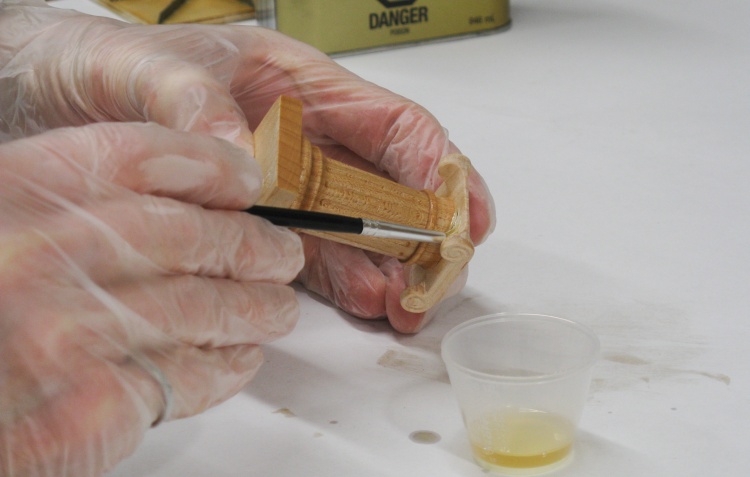
Starting with the varnish
I used my standard Minwax Fast-Dry Polyurethane for the varnish and here I'm starting on the first coat.
Both supports with first coat of varnish
First coat (of three) on.
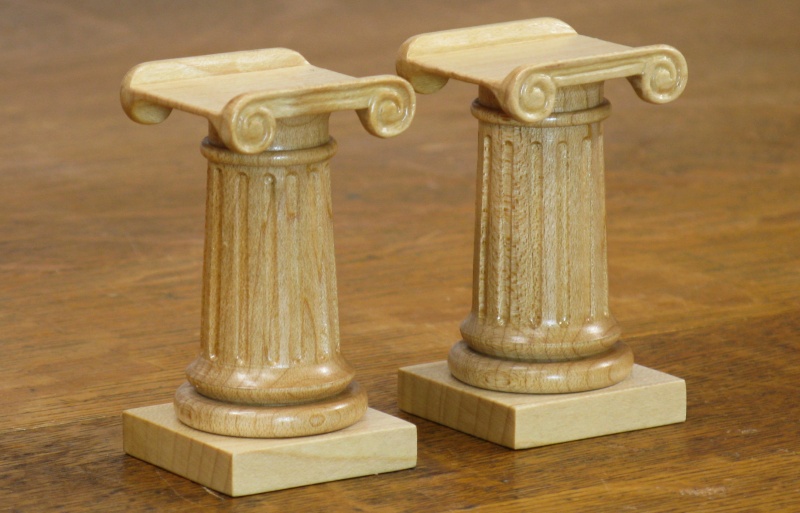
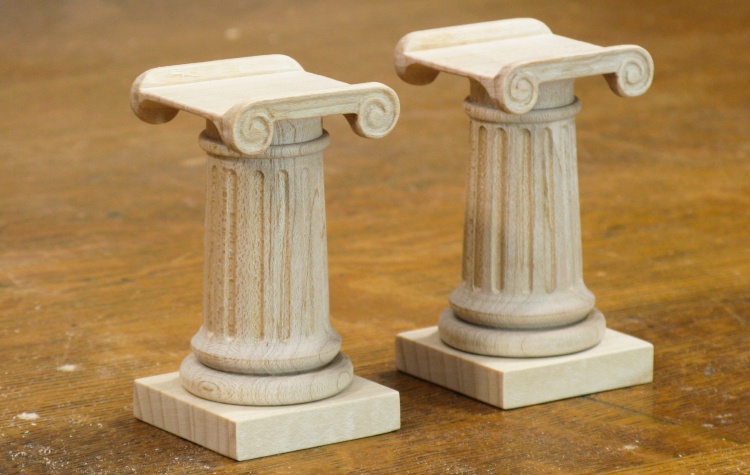
Done
Completed.


