I have some plastic containers that I use for parts, like when I disassemble something and want to keep the parts in order. But those are mostly rectangular and a bowl is a much more convenient shape from which to remove parts. When working on the phone stands I actually grabbed a scrap of Cherry with the intent of whipping up a few small bowls. Unfortunately when cutting the scrap to size on the band saw I managed to contact the end of a finger with the band saw blade, making a rather ragged gash.
That sort of put me off the bowls for a while but the three blanks were still sitting on my bench a few months and about 4 projects later. The bowl idea was still a good one and my finger has healed almost perfectly so I was ready to get back on the horse. Which is a lousy analogy since technically the band saw would be the equine and I've "ridden it" dozens of times since. Anyhoo, on to the bowls.
That sort of put me off the bowls for a while but the three blanks were still sitting on my bench a few months and about 4 projects later. The bowl idea was still a good one and my finger has healed almost perfectly so I was ready to get back on the horse. Which is a lousy analogy since technically the band saw would be the equine and I've "ridden it" dozens of times since. Anyhoo, on to the bowls.

The plan
A wonky-shaped scrap of cherry
Yah, I didn't have any sort of plan except make small bowls of the thickness of the blanks.
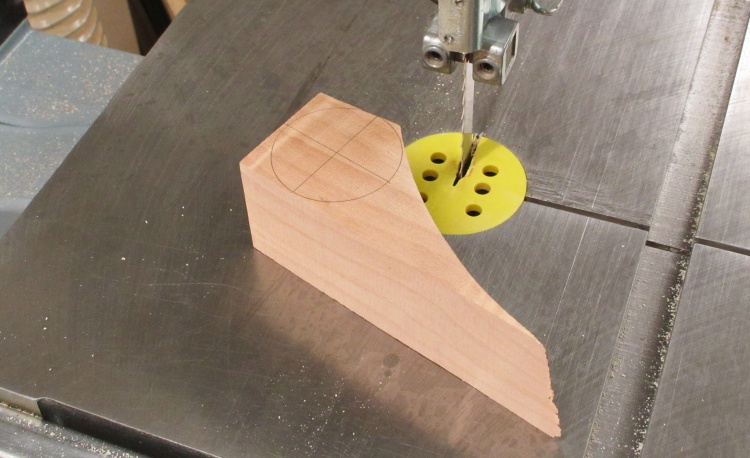
I grabbed this scrap of cherry that may have been left over from a chair made long ago or maybe a drawer set? Anyway it was too weirdly shaped for anything substantial but I could get some 2"-diameter bowls out of it.
I was cutting it to the drawn-on circle when I injured my finger. I later finished up the cutting-out (yes, with a wood holder this time) and then cut it into three and set those blanks aside on my bench.
Three little bowl blanks
The blanks are rather crudely cut out due to the thick blade on the band saw preventing tight curves but that's not a big issue. They are big enough to have a 2"-diameter circle inside and are about 0.65" tall.
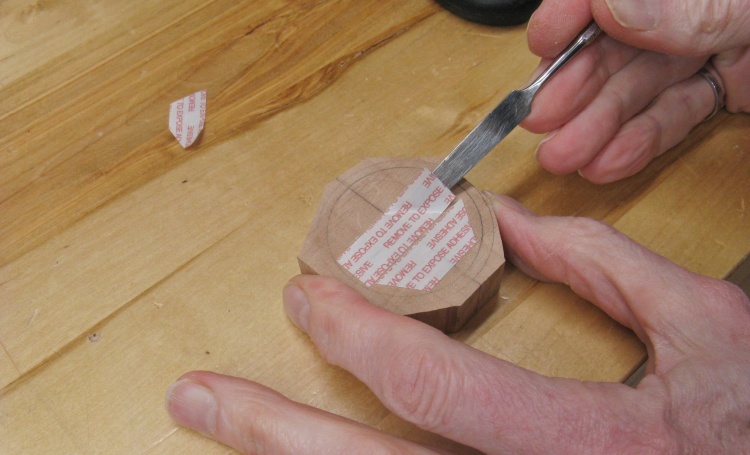
Adding tape to the back of the first blank
It's convenient if you have oversized wood for turning so then you can screw on a faceplate or clamp to the wood with adjustable jaws. But if that extra isn't available you can still do the turning using different techniques. One no-extra-wood technique is to adhere the wood to a suitable flat surface. In the past I've used adhesives but double-sided tape usually works well without having to wait for the glue to cure/set/dry.
I made sure my mounting surface and the blank itself were flat and employed my usual 3M window-film tape. In this shot I'm removing the tape backing.
I made sure my mounting surface and the blank itself were flat and employed my usual 3M window-film tape. In this shot I'm removing the tape backing.
Giving it a good squeeze to make sure tape is adhered
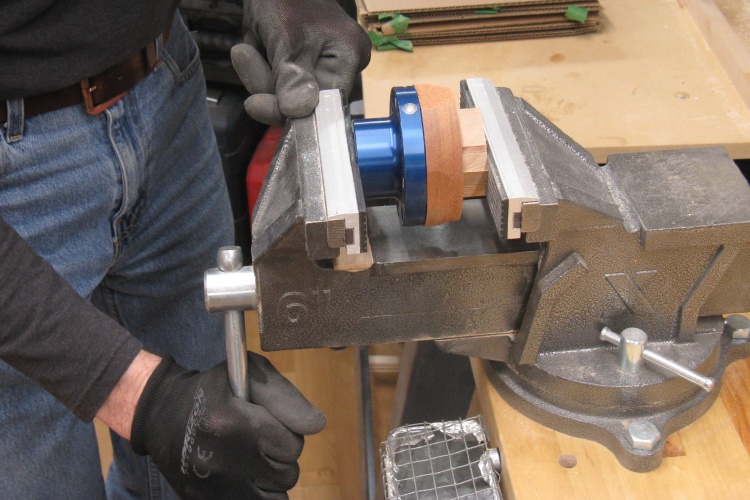
To make sure the tape adhered well, I gave the taped-on blank a good squeeze in the bench vise.
The stack-up in the vise is the blue aluminium face plate with a brown (mahogany) disc screwed to it and then the blank taped to that.
The stack-up in the vise is the blue aluminium face plate with a brown (mahogany) disc screwed to it and then the blank taped to that.

Already at the hollowing stage
Once on the lathe, I started by marking the face with a 2" diameter circle and then rounding off the sides. That was a 2 or 3 minute job entirely devoid of photos.
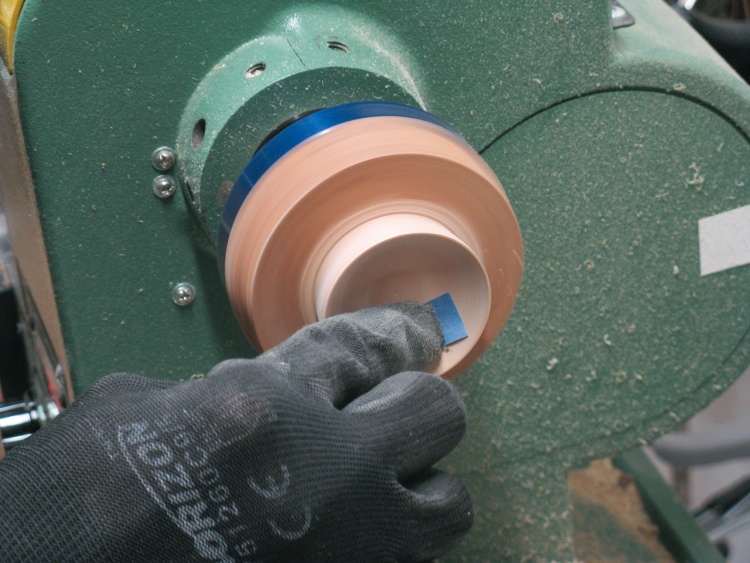
At the time of this shot I've started the hollowing using a small bowl gouge.
At the time of this shot I've started the hollowing using a small bowl gouge.
Sanding the inside
Hollowing a tiny bowl is a pretty simple procedure and a few minutes of work finished that off. In this photo I'm sanding the inside before starting work on the bowl bottom.
Jam chuck, spacer and hold-on jig
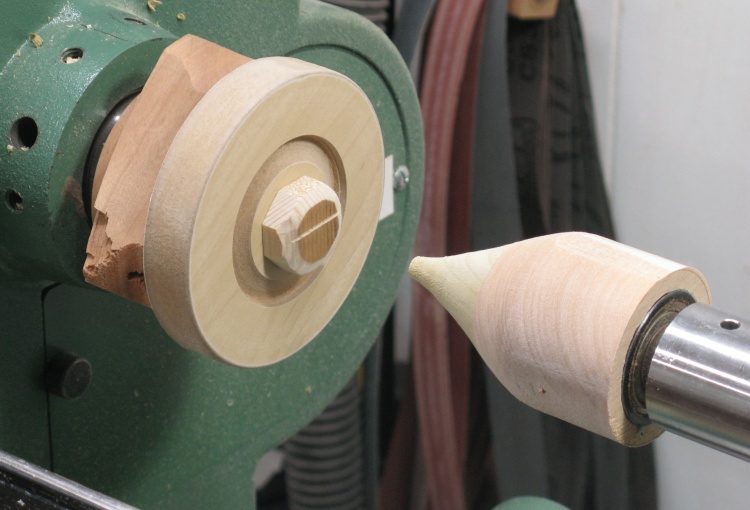
The usual procedure to do a bowl bottom is to use a jam chuck - a plate with a hole that tightly holds the bowl rim. That would still work fine for these bowls so I made a little one as seen here and also added a precisely-thick center bumper so the bowl bottom was supported against holding and cutting forces.
The live center has a point which digs into the wood so I couldn't use that to hold the bowl against the jam chuck. Instead I made the hooch-jug-shaped cover with a small flat face which will contact the bottom of the bowl without marring it. The cover slips over the live center which allows it to turn freely.
The live center has a point which digs into the wood so I couldn't use that to hold the bowl against the jam chuck. Instead I made the hooch-jug-shaped cover with a small flat face which will contact the bottom of the bowl without marring it. The cover slips over the live center which allows it to turn freely.
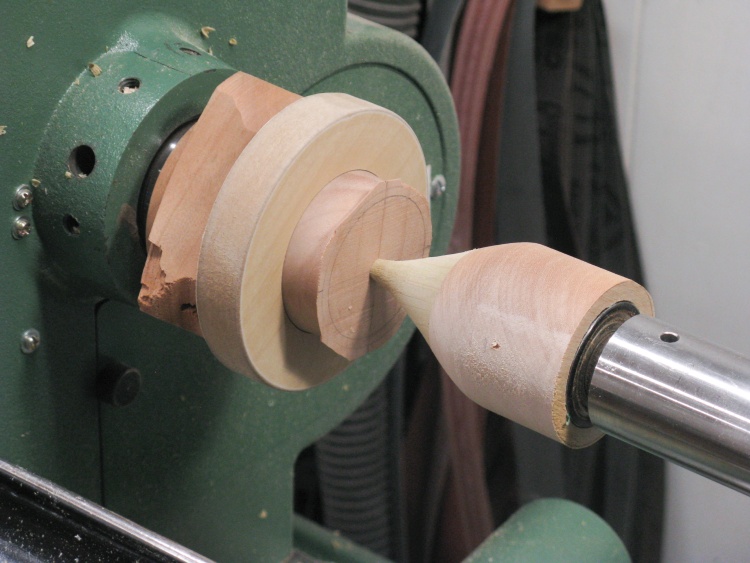
The bowl flipped around and in jam chuck
The bowl has been flipped around to access the bottom, put in the jam chuck cutout and is held in place by the hooch jug.

The first bowl done
The bottom was shaped and sanded which pretty much finished off the bowl. Here is it sitting with the other blanks.
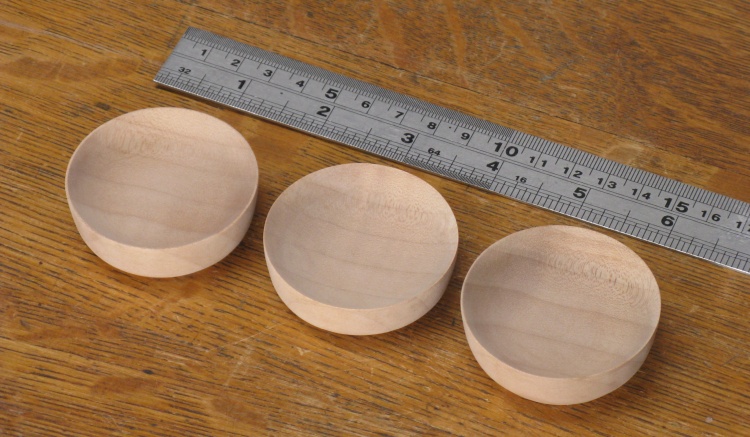
Three tiny bowls
A couple more like that and this shot shows the three bowls with the woodworking completed.
Bowls with first coat of varnish in place
I used my regular three coats of polyurethane varnish with steel-wool roughening between coats. In this photo the first coat of varnish has been applied.
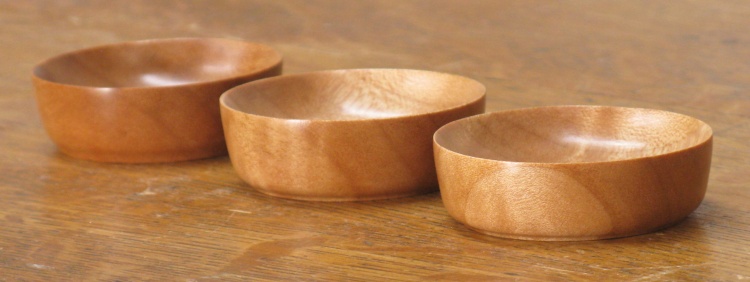
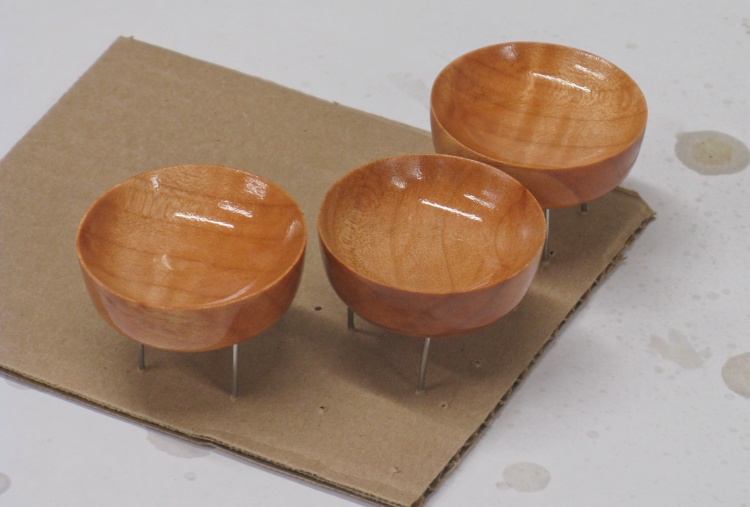
All done
The three completed bowls.
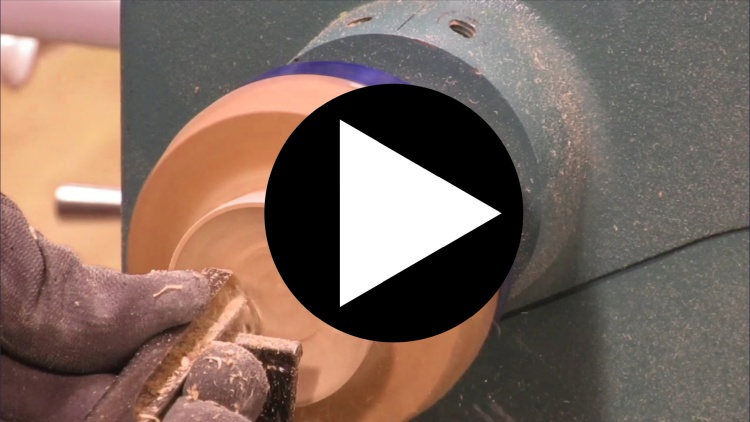
I was rather negligent at taking in-process photos but I compensated by doing a video of the whole process on one of the bowls. It runs at 5-times speed and is a bit over 8 minutes long.
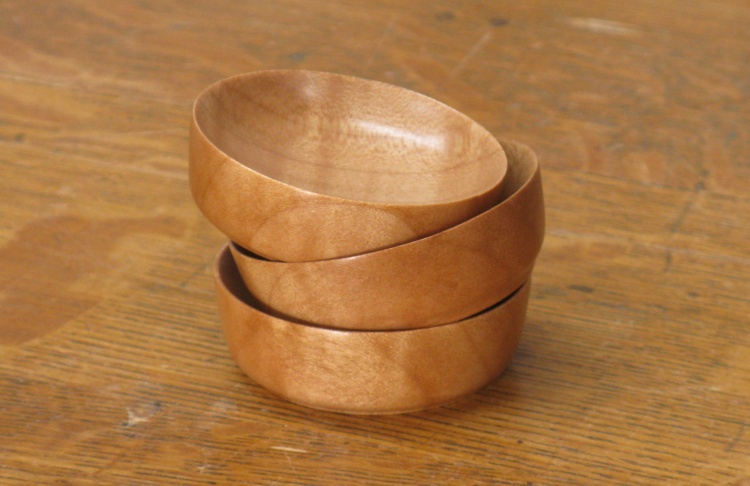
A tidy little pile of bowls
While I prefer the look of thin-walled bowls, these needed a gradual slope to the rim to make part removal easier so that defined the inside profile.
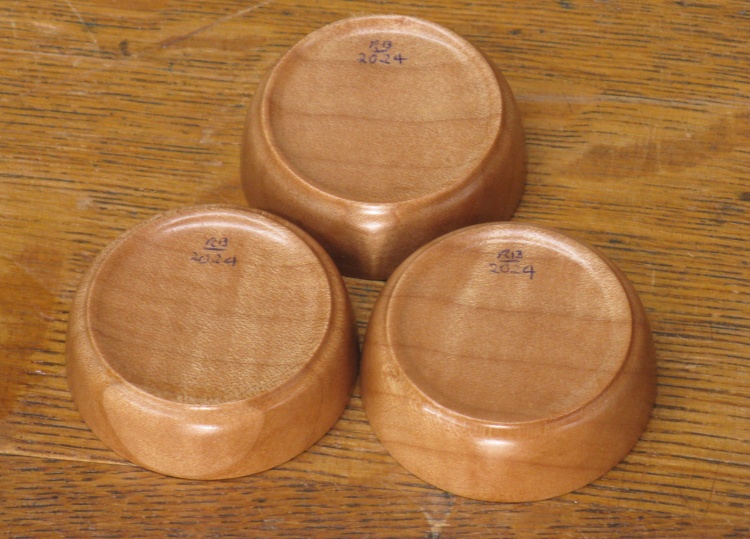
The bottoms have a conventional circular foot
The bottoms were turned with the usual circular foot, putting the wood thickness at the center of the bowls at around 1/8".
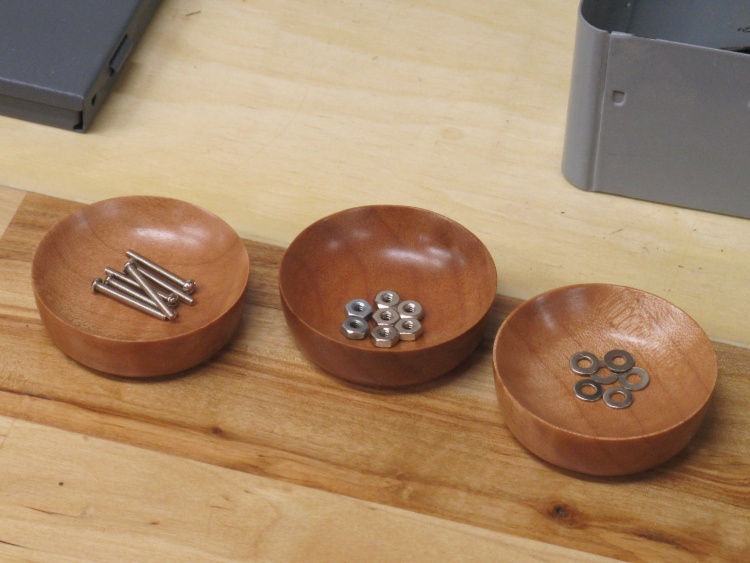
The bowls in (simulated) action
Completed.


