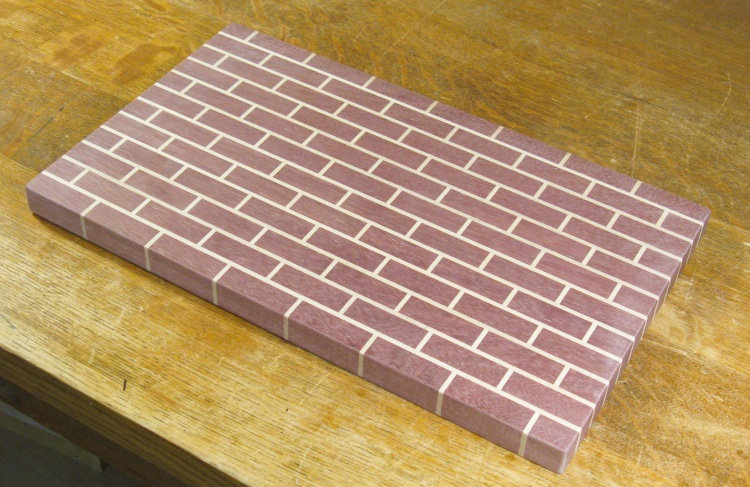
I spent a bit of time choosing a brick shape whose proportions I liked and then tried some sketches with different mortar widths to see how they would look. I ending up with the design seen here with the bricks being 0.6" x 1.8" with 0.115"-thick mortar sections between them. While actual masonry bricks come in a variety of colors, I opted for emulating the classic "brick-red" tone and chose purpleheart with it's nice dark red color to contrast with the maple.
This breadboard is side grain (as opposed to end grain) so it shows off the woodgrain a bit better on top and bottom. The board went together fairly quickly for something with lots of pieces - it took just over a week at my in-no-hurry pace - mostly because I was able to avoid assembling individual segments.
This breadboard is side grain (as opposed to end grain) so it shows off the woodgrain a bit better on top and bottom. The board went together fairly quickly for something with lots of pieces - it took just over a week at my in-no-hurry pace - mostly because I was able to avoid assembling individual segments.
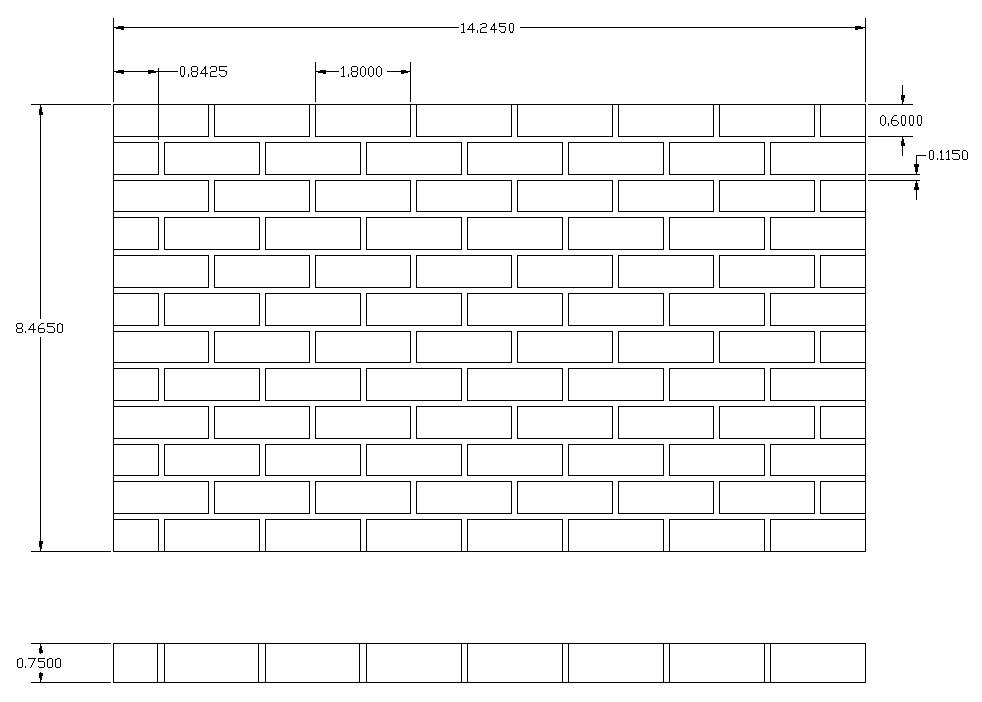
Your basic brick wall plan
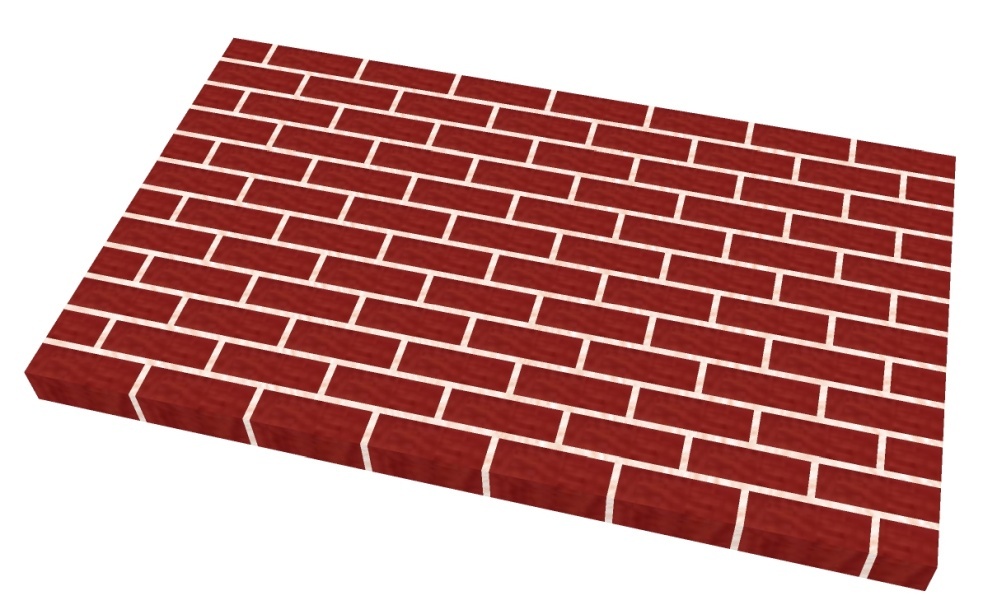
A completely digital simulation
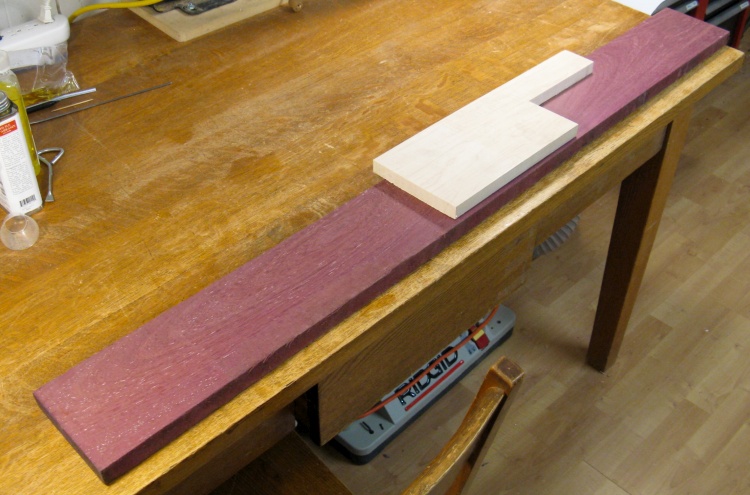
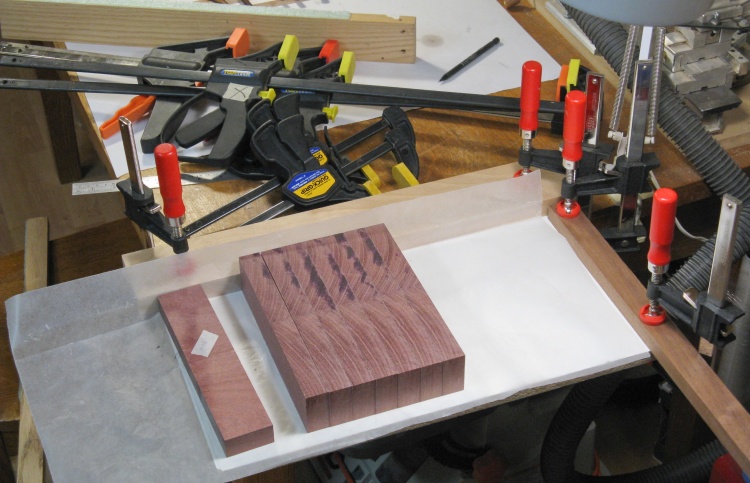
A nice purpleheart plank, and a bit of maple too
This purpleheart plank would be more than enough for the breadboard. Sitting on top of it is a piece of maple that was intended to be used for the mortar, although I later decided that it needed to be thicker.
With the board composed of many small bricks, I could have cut up almost any size or shape of plank to get the number I needed. However I had recently come across a method which simplified the process by using a small number of steps. That method actually made a completely different type of laminated breadboard but I decided it could be adapted to this one. The process is shown below;
With the board composed of many small bricks, I could have cut up almost any size or shape of plank to get the number I needed. However I had recently come across a method which simplified the process by using a small number of steps. That method actually made a completely different type of laminated breadboard but I decided it could be adapted to this one. The process is shown below;
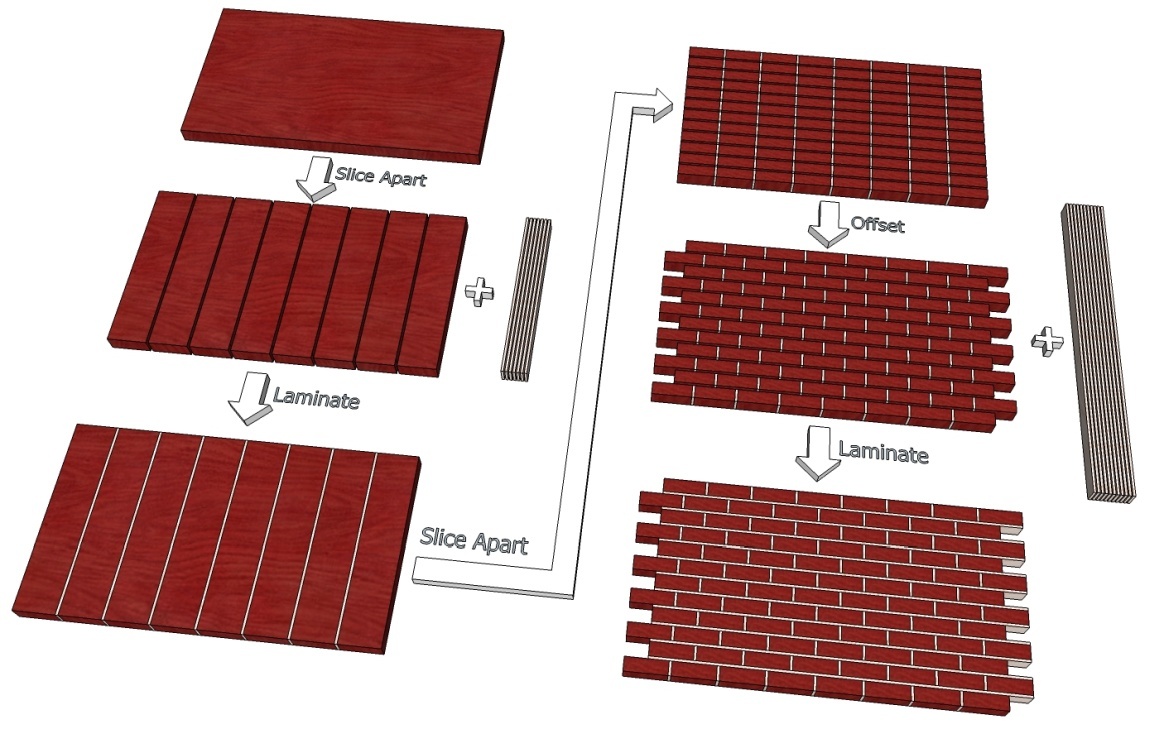
The process
I could have started by making two narrower versions of the board, each based on one plank width but I decided to make a single wider plank instead which would just get me to the first stage of the above process. It was a matter of cutting a couple lengths of the plank and laminating them into one wide enough for the whole board;
Cutting a couple lengths of purpleheart
Jointing for square edges
Gluing together
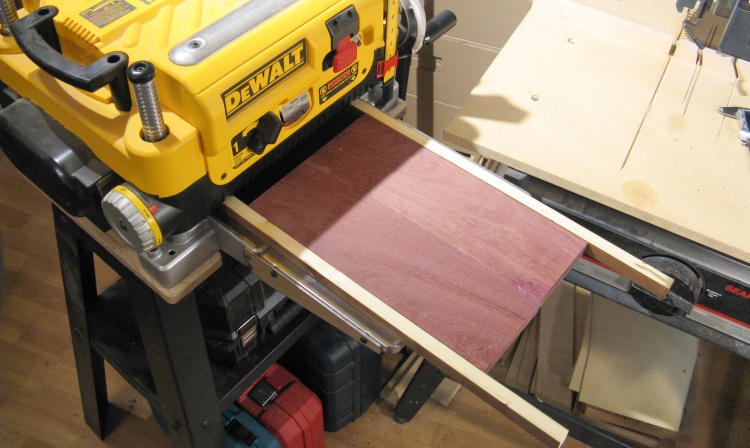
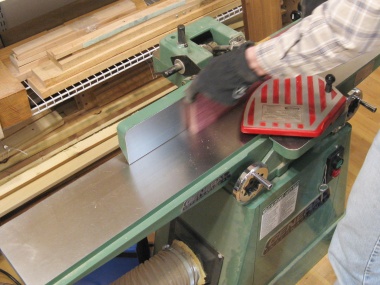
Evening-out purpleheart with planer
This laminated blank was run through the planer to equalize any height differences between the two sides.
I fed a couple extra-length flanking sticks through with the purpleheart to prevent snipe at the wood ends.
I fed a couple extra-length flanking sticks through with the purpleheart to prevent snipe at the wood ends.
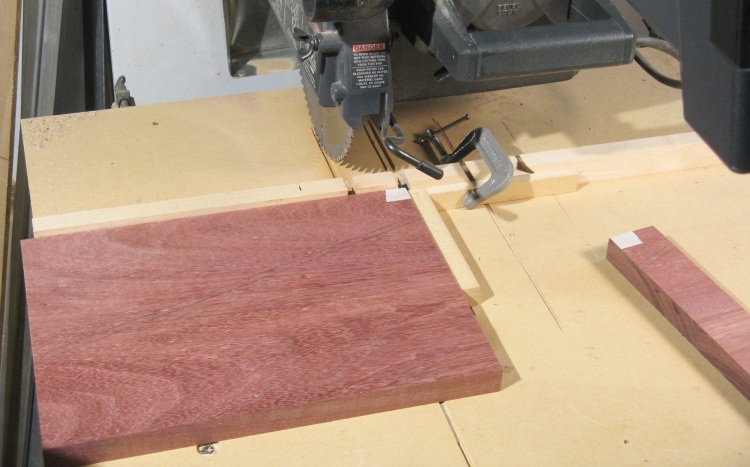
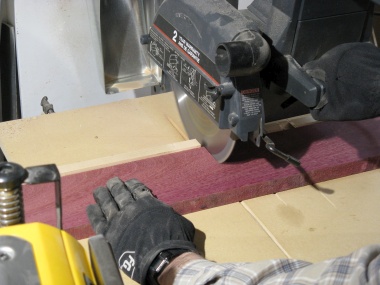
Slicing into 1.8" widths
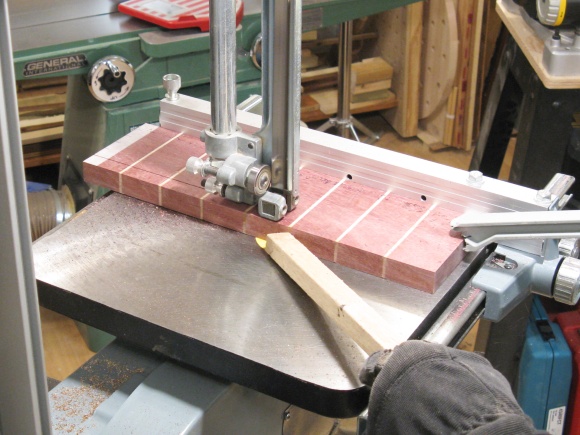
Then it was on to step 2; the slicing of the blank into eight equal-length pieces. That was done on the radial arm saw as seen here, with a stop clamped in place to ensure each piece was exactly 1.8" wide.
In this photo you can see a longish stick between the purpleheart and the clamped-on stop. Before cutting I remove the stick so the cut-off piece is not trapped against the stop. This results in a cleaner cut as the cut-off piece can move aside a bit when the blade goes back to its starting position.
In this photo you can see a longish stick between the purpleheart and the clamped-on stop. Before cutting I remove the stick so the cut-off piece is not trapped against the stop. This results in a cleaner cut as the cut-off piece can move aside a bit when the blade goes back to its starting position.

The eight pieces
The eight pieces ready for the next step.
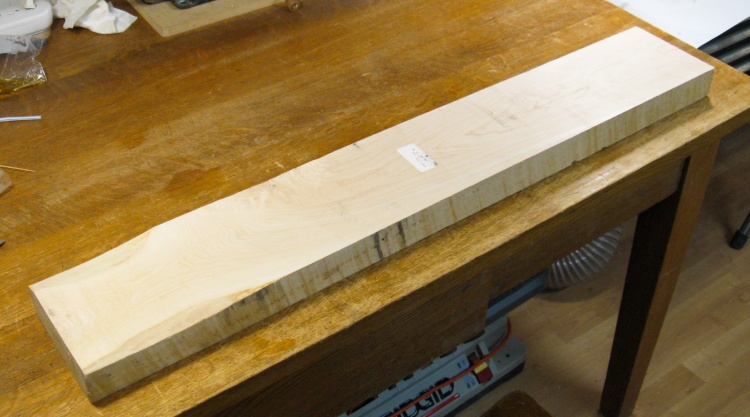
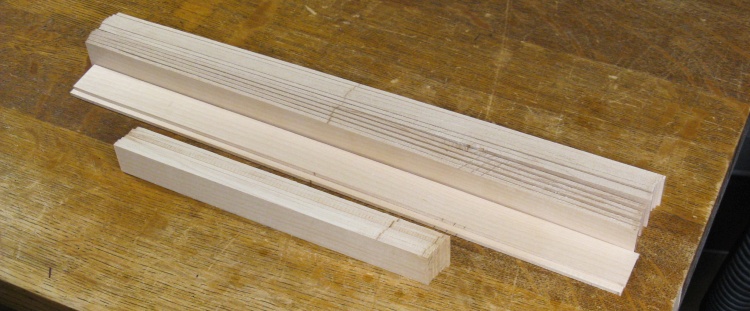
A thicker piece of maple
The next step required mortar pieces so I looked into making those.
The purpleheart was close to 1" thick and the maple I originally chose was only 0.75", so I tossed that back onto the shelf for a less-demanding project and instead grabbed this nice thick 2" piece. I actually only needed a bit off the corner of this one, so I cut that off and got ready to chop it up.
The purpleheart was close to 1" thick and the maple I originally chose was only 0.75", so I tossed that back onto the shelf for a less-demanding project and instead grabbed this nice thick 2" piece. I actually only needed a bit off the corner of this one, so I cut that off and got ready to chop it up.
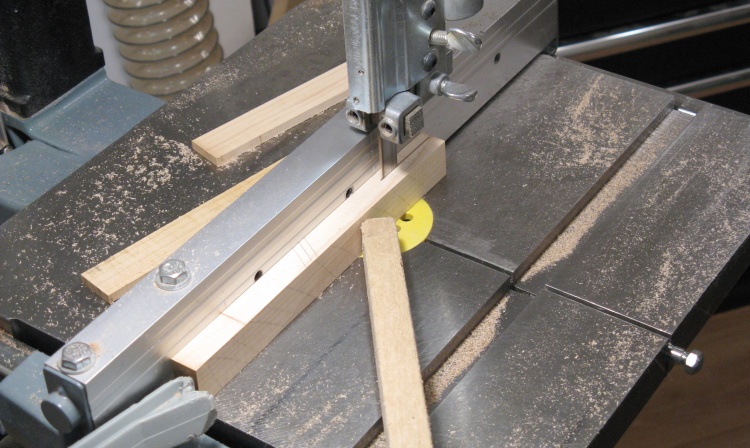
Slicing into pieces for mortar
The maple pieces (in two distinct lengths) were cut out of wider maple pieces using the bandsaw. They were cut on 0.2" centers, giving about 0.16"-thick blanks. The extra would be planed off to clean up the faces and get to the finished thickness.
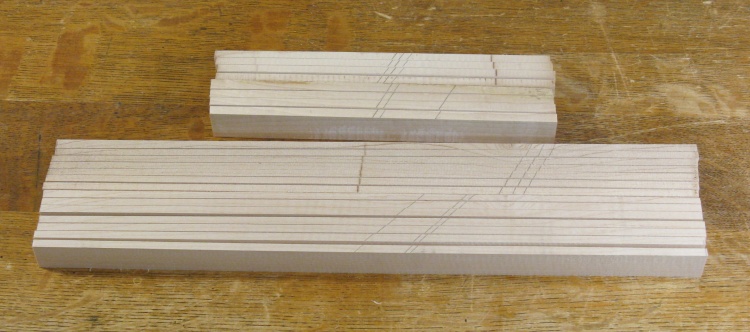
The 18 pieces I'll need (plus a few spares)
The board needed seven of the 8.5" pieces and 11 of the 15.2" pieces. These are the hot-off-the-bandsaw piles.
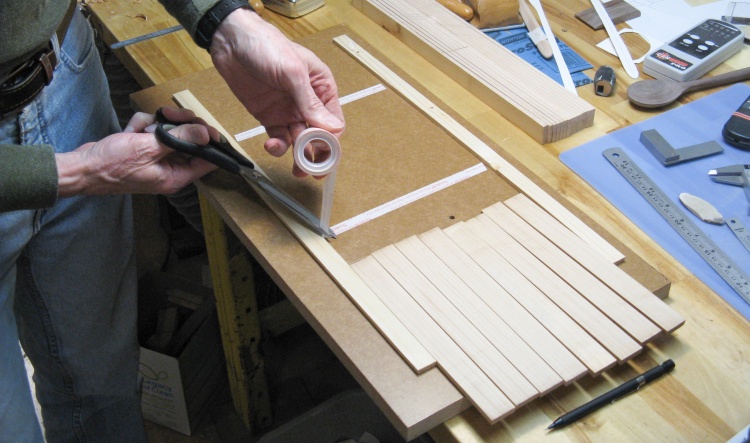
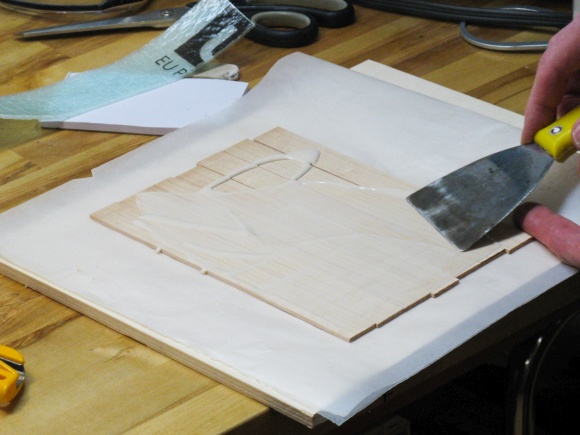
Adding tape to hold down maple
These were thinned down in the planer with the help of the sled. Here I'm applying tape that will adhere the wood to the sled for its trip through the planer.
Maple taped to planer sled
The previous picture has the shorter pieces and this one shows half of the longer pieces, which have already been taped down. The extra one at the end is a scrap which helps keep things from moving when going through the planer (the thin tape doesn't grip very well to the rough surface left by the bandsaw blade).
I planed the first side of the pieces until the saw marks were gone then pried them up, flipped them over, and did the second side down to the correct thickness.
I planed the first side of the pieces until the saw marks were gone then pried them up, flipped them over, and did the second side down to the correct thickness.
The mortar pieces thickness-planed to 0.115"
And once again the mortar piece piles, but now correctly thicknessed.
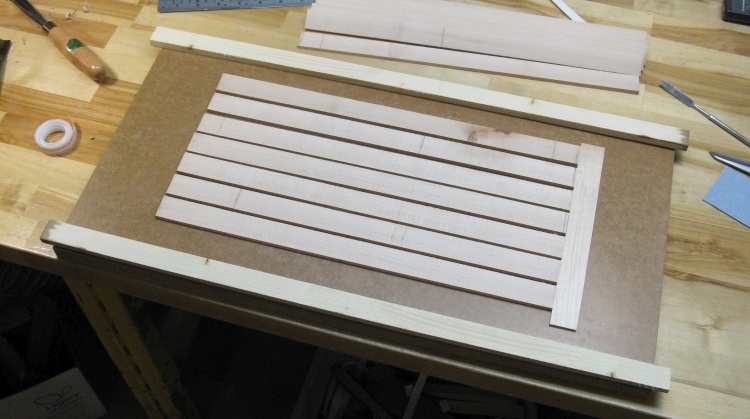
The setup used for first-stage gluing
OK, now with the mortar pieces available, the construction can resume;
This setup provides a flat surface and a square corner to build the composite blank. The pieces have been turned sideways to be able to apply glue to all the edges at once.
This setup provides a flat surface and a square corner to build the composite blank. The pieces have been turned sideways to be able to apply glue to all the edges at once.
The following group of photos show the first stage gluing-up process; The glue is applied to one edge of each purpleheart piece (except the end piece) and one side of each short mortar piece. Then they are just stacked together and clamped. A piece of waxed paper prevents the assembly from gluing itself to the structure supporting it.
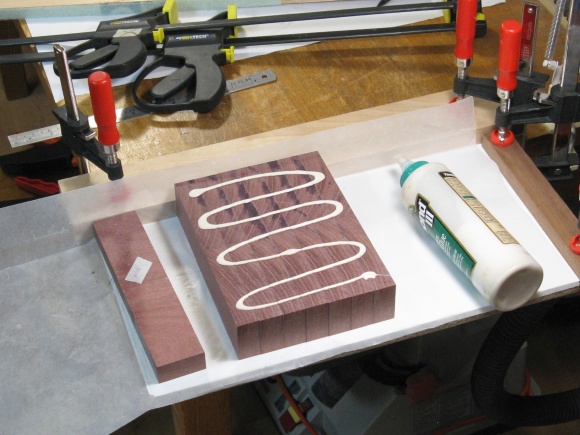
Glue ready to be spread
Spreading glue on mortar pieces
Starting the horizontal stack
All the pieces in place
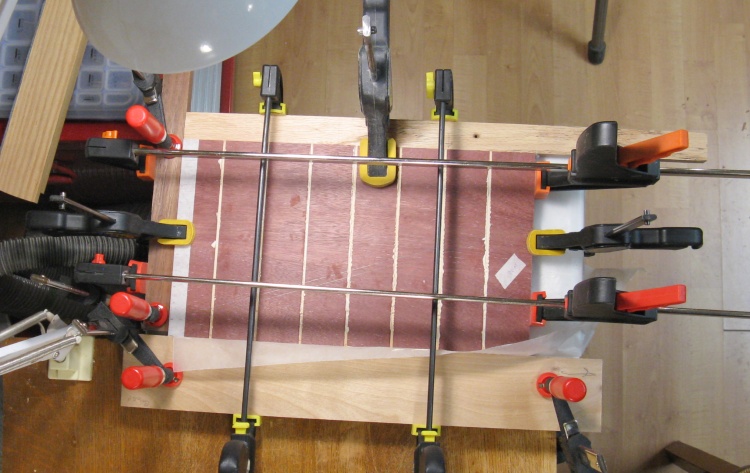
Clamped
A few clamps squeeze the assembly for a half-hour or so and then they come off and the glue finishes hardening overnight.
I used Titebond III for gluing, which is fully waterproof.
I used Titebond III for gluing, which is fully waterproof.
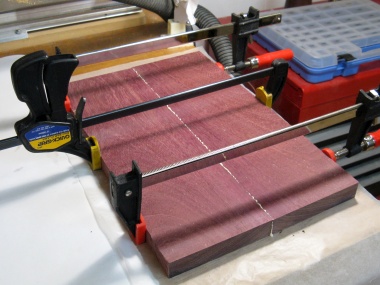
The blank, marked for next cuts
That was scraped a bit to remove any excess glue, which resulted in the laminated blank shown here.
The tape on the right-hand end marks it for the next stage of cutting.
The tape on the right-hand end marks it for the next stage of cutting.
I started by cutting out and discarding the very center 1/8" or so, which removed the glued joint between the two planks. Then it was a matter of slicing off pieces just a bit wider than the 0.6" finished width that were needed. I aligned the marked tape line with the center of the blade to make each cut. The width didn't need to be perfect as they would be sanded to the proper thickness next.
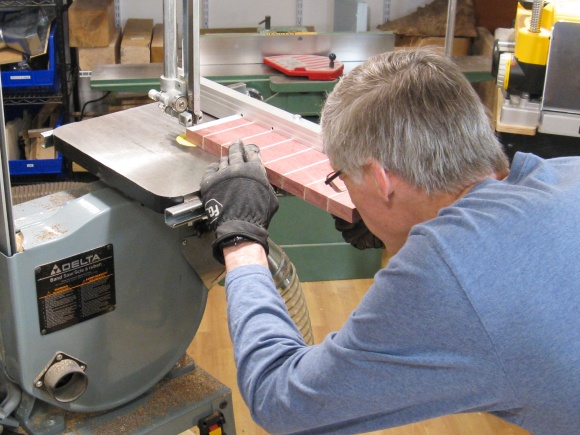
Lining up a cut
Taking a slice off
The twelve courses
That cutting process produced 12 courses of bricks, nicely arranged here.
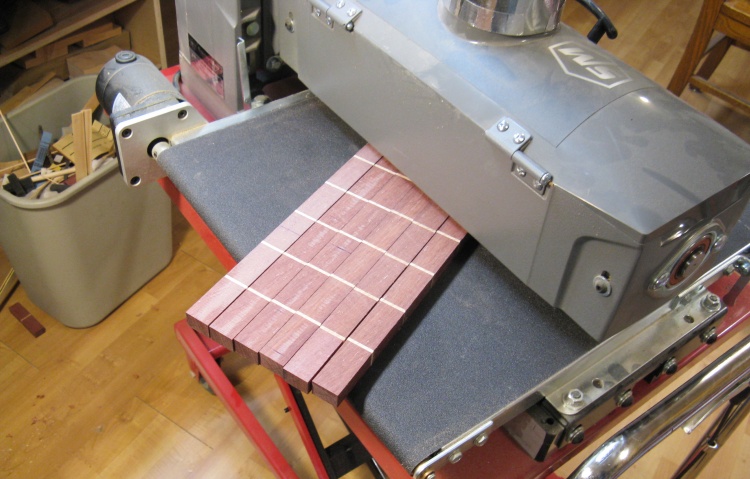
Sanding to 0.6" width
The width of the courses needed to be 0.6" so I ran them through the drum sander to even the edges and reduce the width.
I usually take only about 0.005" off per run through (with 80 grit on the drum), so it took a number of passes on each side to get to the desired thickness. But of course it's not like it's tough to do - you just stand around waiting for the wood to come out the outfeed side and then feed it back in on the infeed side, perhaps at a different angle for variety.
I usually take only about 0.005" off per run through (with 80 grit on the drum), so it took a number of passes on each side to get to the desired thickness. But of course it's not like it's tough to do - you just stand around waiting for the wood to come out the outfeed side and then feed it back in on the infeed side, perhaps at a different angle for variety.
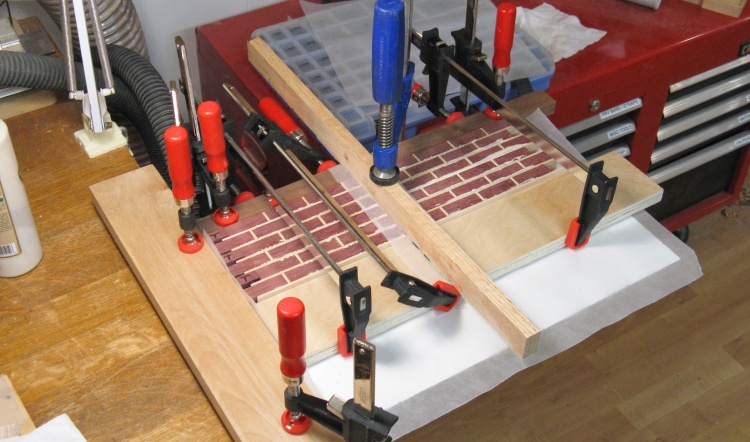
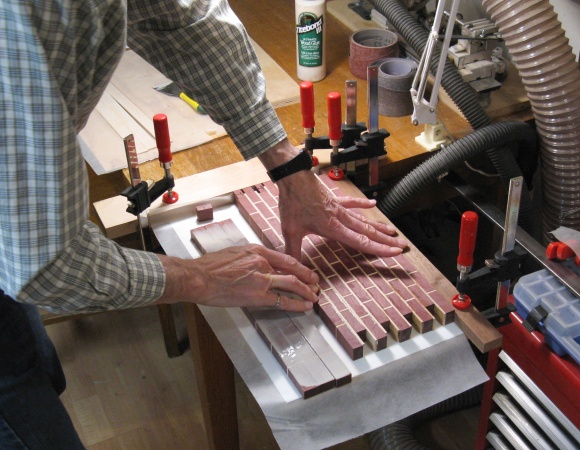
Half the board getting glued together
I decided to glue up only half the board at once (to reduce the panic factor) and this was done by stacking alternating brick and mortar layers on a setup similar to the initial gluing.
I had cut some scrap pieces that were exactly one-half the brick+mortar width and those went at the end to stagger alternate courses appropriately.
I had cut some scrap pieces that were exactly one-half the brick+mortar width and those went at the end to stagger alternate courses appropriately.
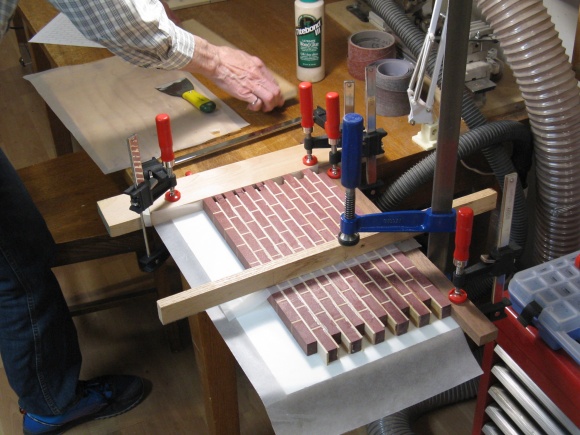
After the glue dried on the first half, I decided to add the second-half pieces directly to it to build the rest of the board. The photo grid below provides the unnecessary detail missing from the first-half gluing.
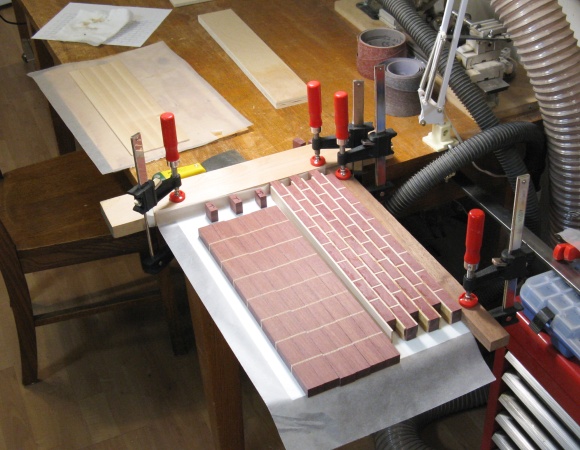
Lining things up to glue second half
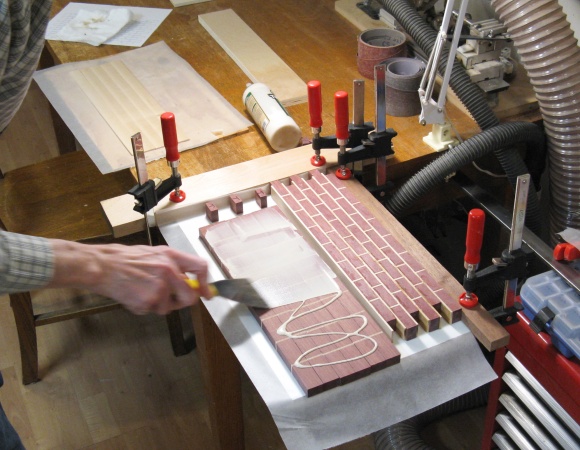
Spreading glue on brick courses
Starting the assembly
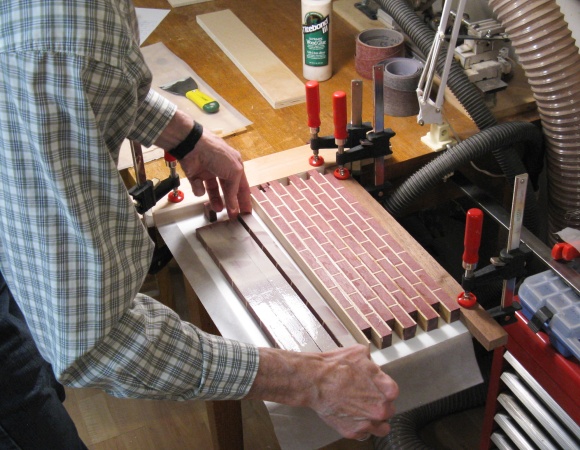
Adding a course
First clamp keeps things flat
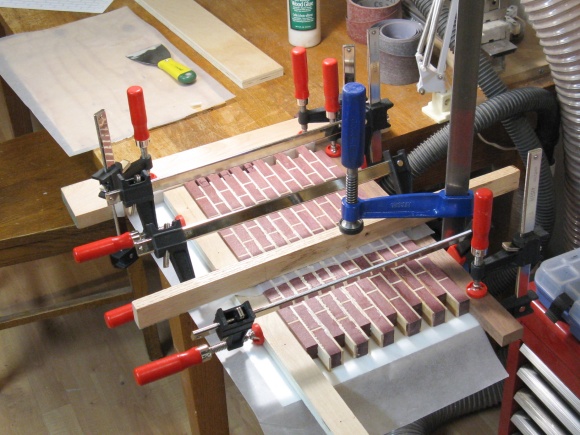
The other three squeeze the glue joints
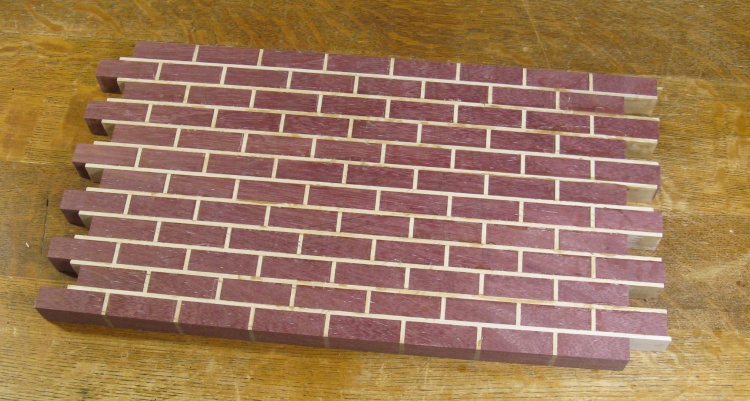
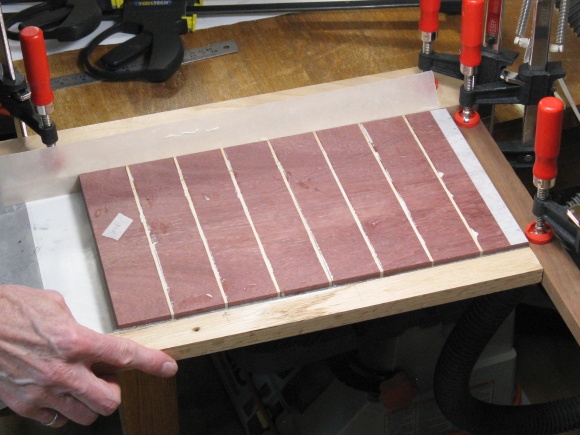
Needs a bit of edge trimming
The result was this almost-looking-like-a-breadboard piece seen here.
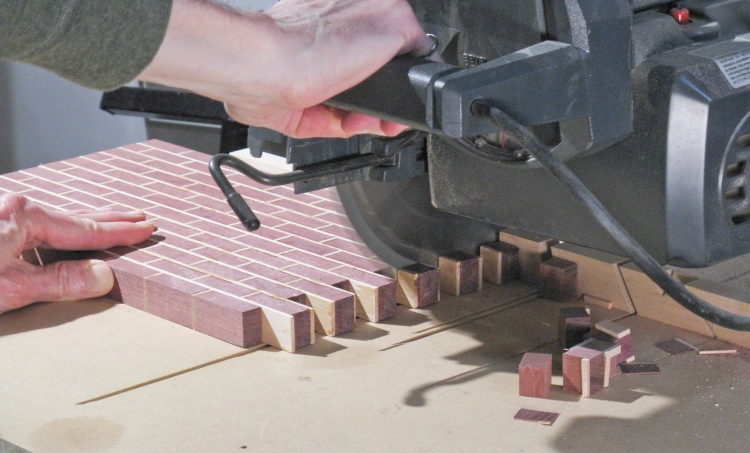
Edge trimming with radial arm saw
The extra side bits were trimmed off with the radial arm saw.
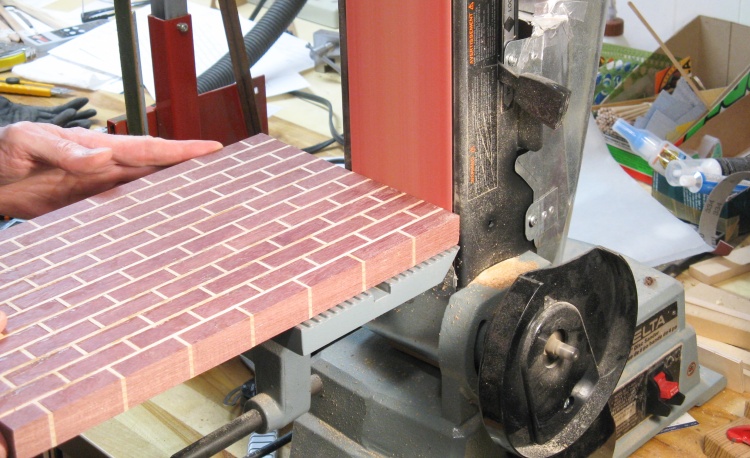
A bit of end clean-up
And then the ends were smoothed off a bit using the belt sander.

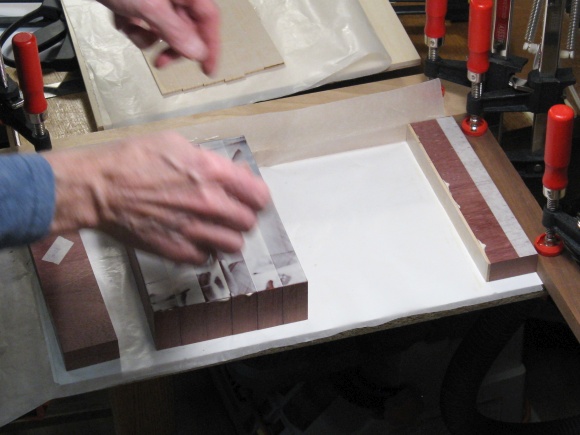
Getting ready for drum sanding to remove glue and smooth out the faces
The bricks and mortar were not exactly even on the surfaces, plus there was copious glue squeeze-out to be removed. The drum sander was the solution to both those problems.
After evening both sides using 80 grit, the sander was switched over to 120 grit to help remove sanding marks.
This photo shows a run early in the process before even the glue was sanded off.
After evening both sides using 80 grit, the sander was switched over to 120 grit to help remove sanding marks.
This photo shows a run early in the process before even the glue was sanded off.
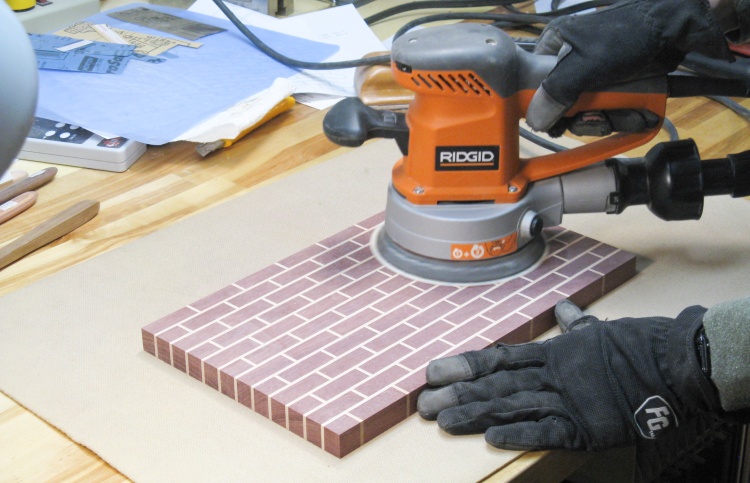
Some orbital sanding with a finer grit
After coming off the drum sander, the faces were smoothed out a bit more using the random orbital sander with grits to 320 to remove any remaining sanding marks.
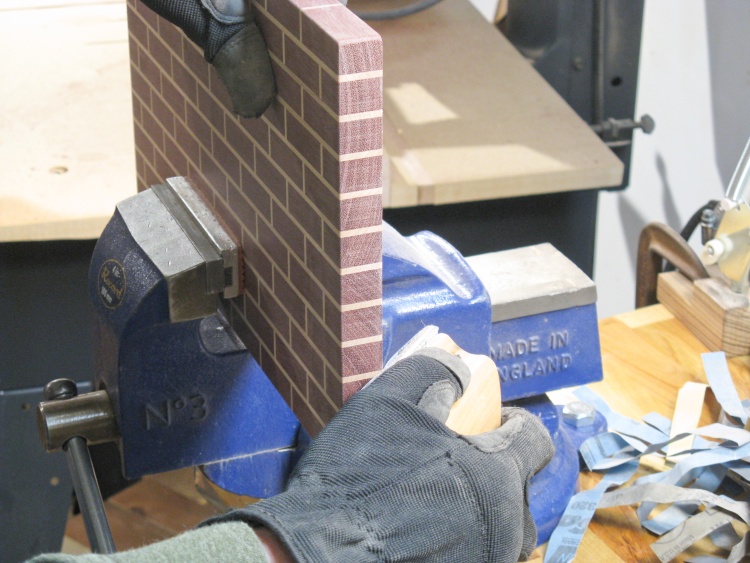
Hand-sanding edges and corners
And finally the corners were rounded a bit and the edges sanded using a block and elbow grease.
I also incised a circle and added initials and the year in one corner.
I also incised a circle and added initials and the year in one corner.
Woodworking done
That was it for the woodworking.
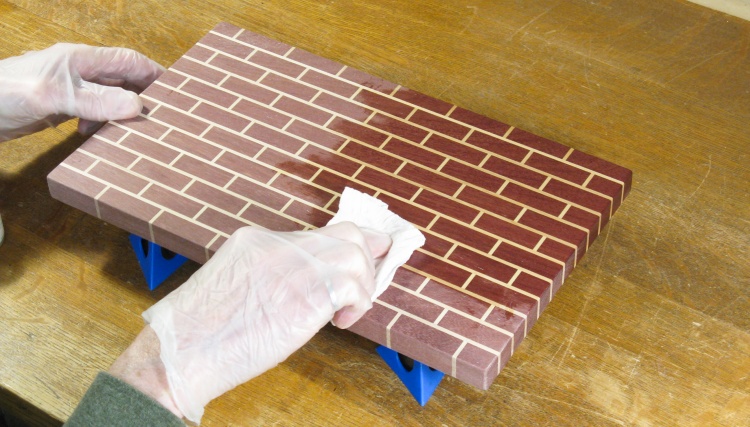
Adding a coat of wax
Lastly was adding a finish. I gave it a couple coats of Clamham's Beeswax Salad Bowl Finish.
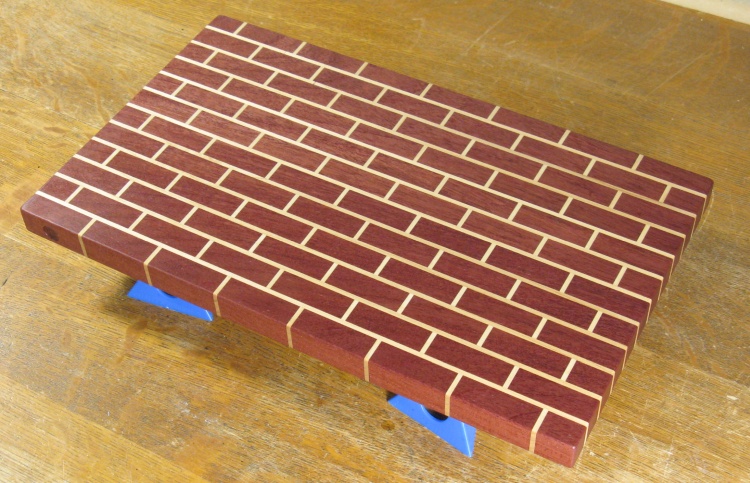
Done
Done.


