These items fall into category of breadboard (or the more generic "cutting board") mostly because they have a food-safe wax as a finish. Cutting boards can be made in either end-grain or edge-grain and of course these are end-grain construction to display the cedar growth rings.
What surprised me was how small the diameter of the trees must have been that produced the 4x4 posts. Based on the grain and sapwood location of the post I bought, it looks like the tree diameter was something on the order of 7-8" which seems remarkably small to be making into lumber. Although slender, this particular example was at least 50 years old based on the growth rings.
I was a bit disappointed by the cracks in the posts; all of them had cracks on at least one side and sometimes two or three sides. In retrospect this is unsurprising since cracks are very common in logs when they dry out and are most prevalent near the core. This was supported by a check at Rona (who appeared to have a different cedar supplier) and their posts had very few cracks but also no core in the post.
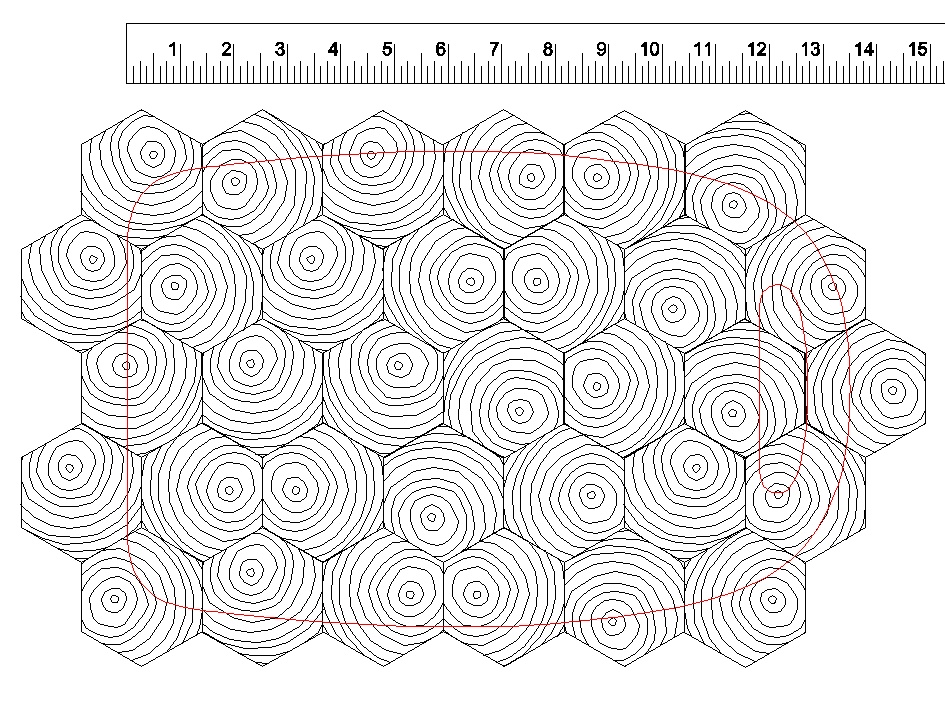
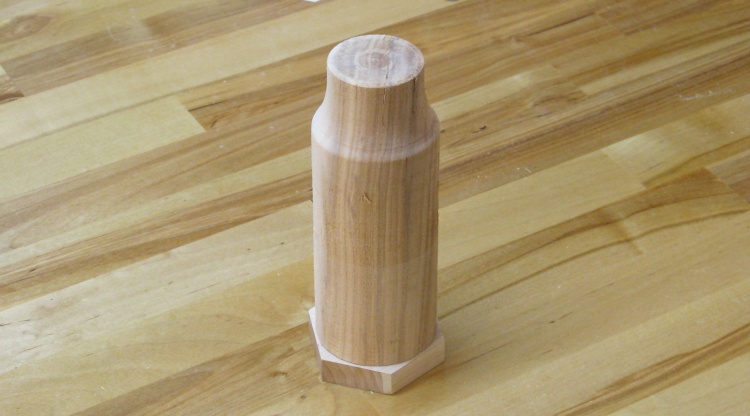
It should look something like this
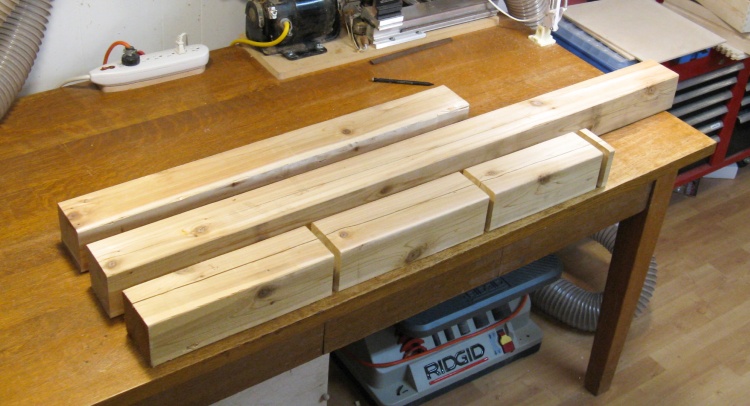
The cedar post, already subdivided
I bought the single 10-foot post shown here, which I have already chopped into a few pieces before this photo was taken. It seemed to have fewer cracks and a slightly more-centered core than most of the others at the local Home Depot.
I could maybe have found a better post elsewhere, but I thought a single strategic stop was probably a better idea than a tour of the city's lumberyards when a pandemic was on.
I could maybe have found a better post elsewhere, but I thought a single strategic stop was probably a better idea than a tour of the city's lumberyards when a pandemic was on.
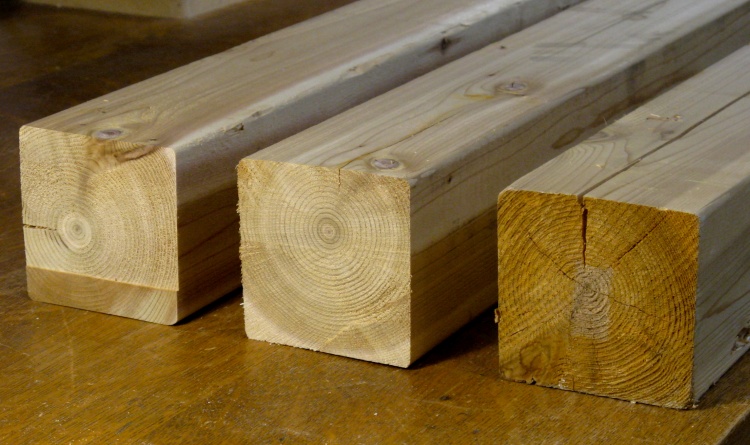
Off-center cores and cracks
Evidently the tree that this post came from was less than perfectly straight as can be seen from the range of core positions just in the one post.
Obviously, there's some room here for a genetically engineered version with the wiggle gene removed...
Obviously, there's some room here for a genetically engineered version with the wiggle gene removed...
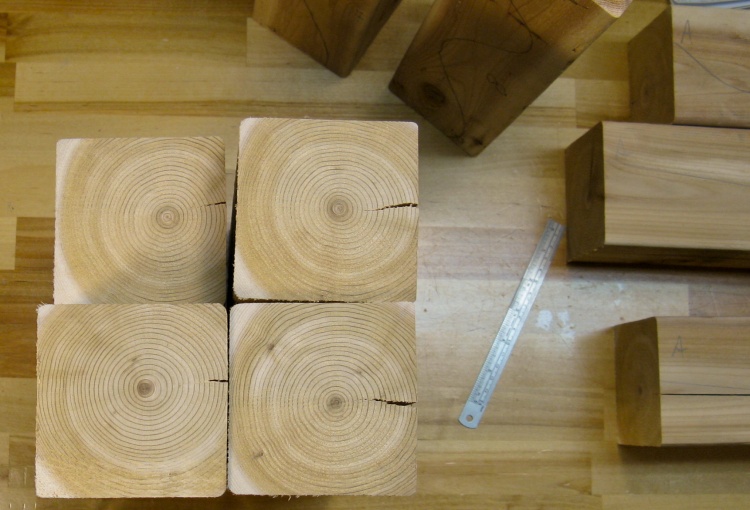
Some mid-post grain samples
I had originally hoped to have the core centered on each hexagonal tile but it became evident that the proximity of cracks to the core would prevent this from happening, unless I wanted cracks in the breadboard (spoiler: I didn't).
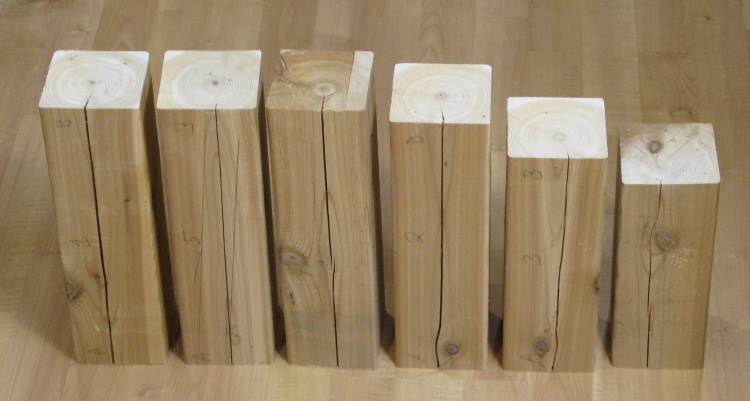
So the first thing I did was to cut the post into pieces about a foot long to see what things looked like inside. This photo shows the ends of four of them and only one has a decent area intact around the core.
I picked out the best pieces to use for the breadboard and resigned myself to the fact that the cores would be off-center. Ultimately, I think that made a more-interesting looking pattern, so that was a bit of a silver lining to the cracked-post cloud.
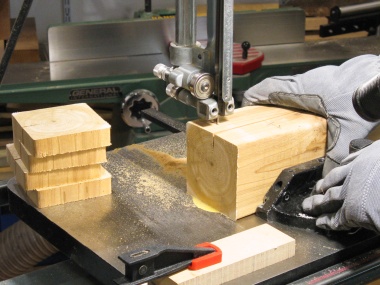
Slicing off blanks
I would have liked to use the radial arm saw to cut the post into blanks but the blade didn't reach all the way through, so I needed to use the rougher-cutting bandsaw. Here I'm chopping off pieces just under an inch thick.
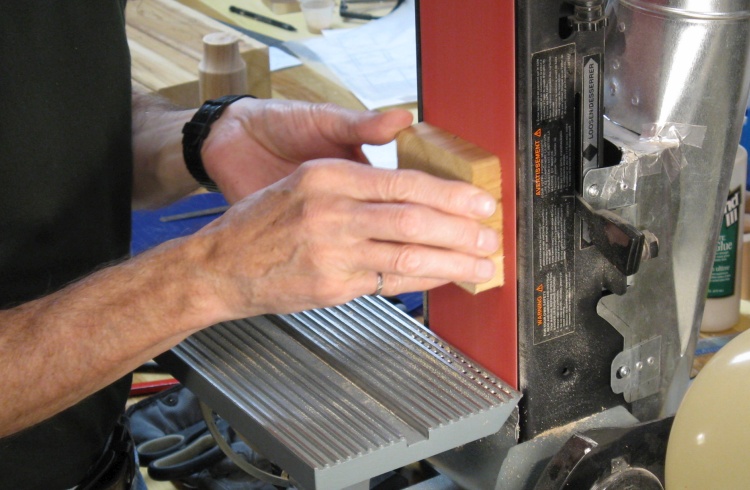
Sanding the rough faces
I was going to need to draw the shape onto these pieces and that wasn't easy to do on the just-sawn surface so I sanded both faces to remove the saw marks.
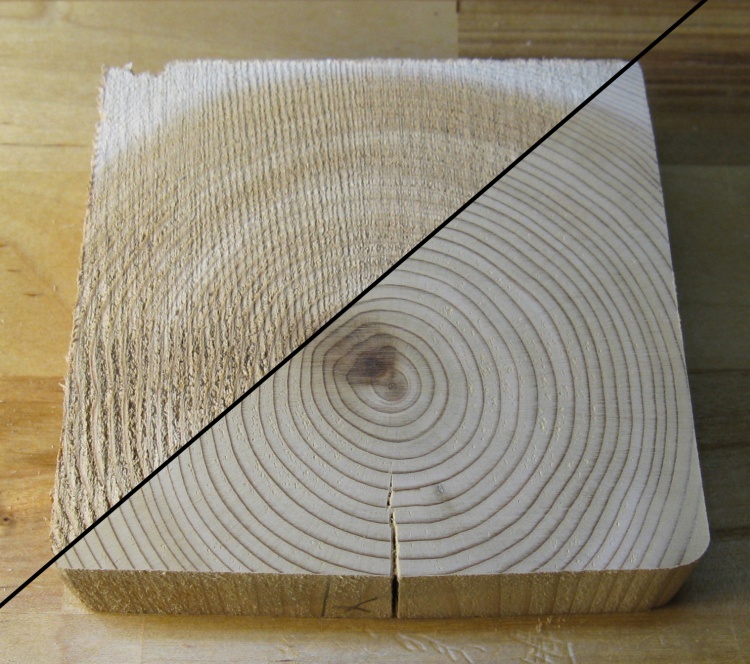
Before and after sanding
This composite photo shows the same piece before and after about 30 seconds of sanding using 120 grit on the belt sander. It's your basic night and day kind of thing.
I had determined from making a previous trivet that the most consistent way to make hexagons was routing to a pattern. So before going much further I needed to make the pattern (since I had thrown away the one I had previously used - Doh!).
Of course the pattern should be made as perfectly as possible or the resulting hexagonal tiles don't fit together well. I had also developed a technique to do this and below are shots of a couple randomly-selected steps in that 6-or-so step process.
Of course the pattern should be made as perfectly as possible or the resulting hexagonal tiles don't fit together well. I had also developed a technique to do this and below are shots of a couple randomly-selected steps in that 6-or-so step process.
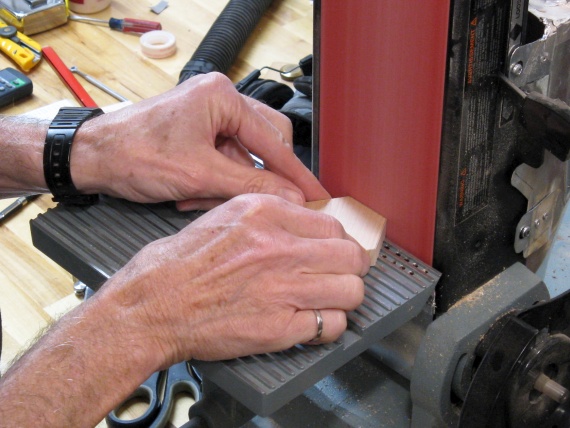
Flattening the first side of the pattern
Getting ready to route to the correct side-side width
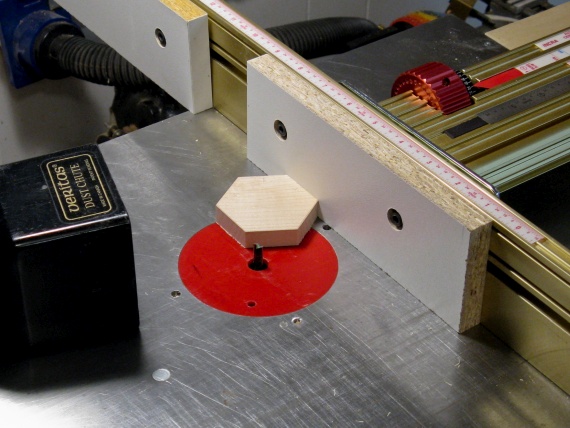
Small pattern with a big handle glued on
My first attempt at a pattern turned out pretty decent - probably better than the one I'd thrown away - largely due to the better technique I'd previously developed to make it.
To do the routing, I glued a large cylindrical handle onto the pattern. This would let me hold it solidly while keeping hands away from the bit.
To do the routing, I glued a large cylindrical handle onto the pattern. This would let me hold it solidly while keeping hands away from the bit.
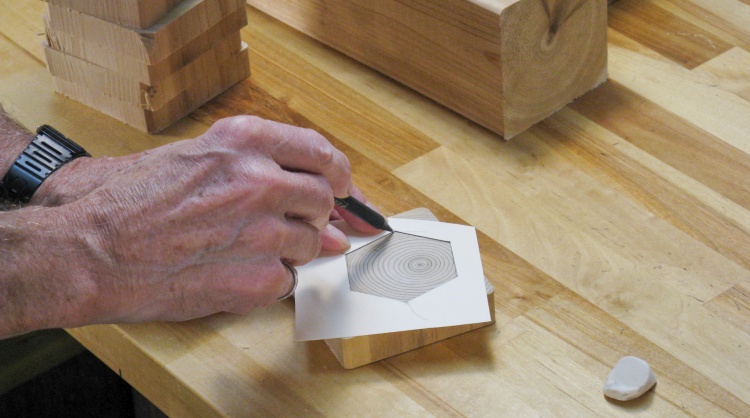
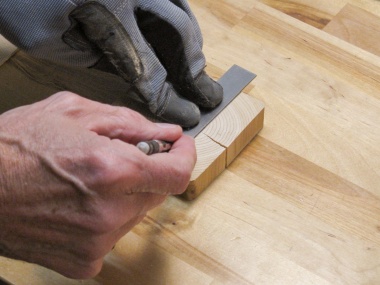
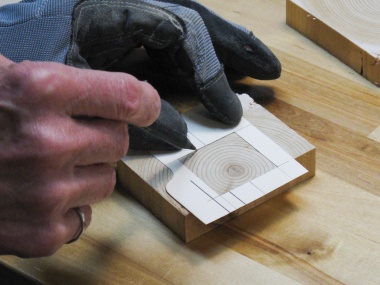
Marking the blanks
I cut out a cardboard stencil and used that to mark the hexagonal shape on each blank, excluding any cracks.
I usually positioned the core near one of the flat edges although a few had cracks far enough away that I could center the core.
I usually positioned the core near one of the flat edges although a few had cracks far enough away that I could center the core.
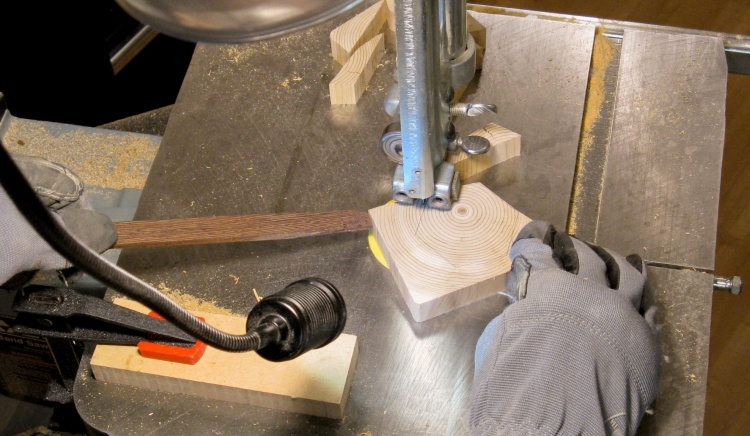
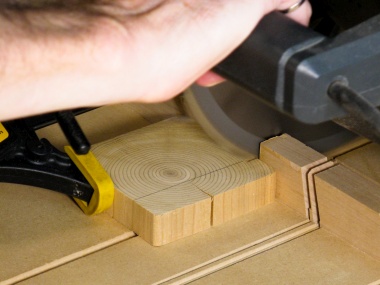
Cutting out rough hexagons
And then the hexagonal tiles were cut out a bit oversized using the bandsaw.
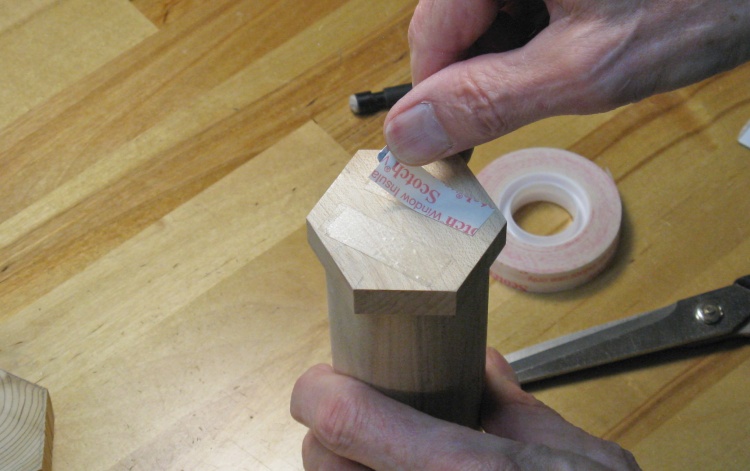
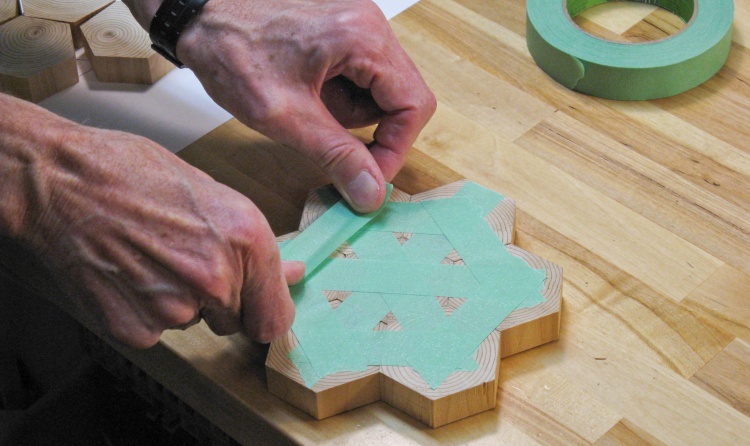
Adding tape to the pattern
To route the rough-cut tiles to the correct shape, they needed to be solidly attached to the pattern. I used my go-to 3M window-film tape and here I'm adding a fresh strip to the bottom of the pattern.
The tape only lasted for two or three tiles before it lost enough adhesion that I needed to replace it.
The tape only lasted for two or three tiles before it lost enough adhesion that I needed to replace it.
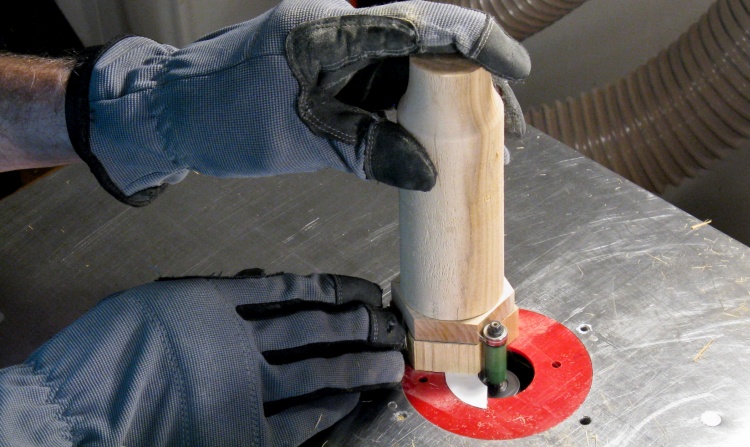
Routing a piece using a pattern-following bit
Then using the pattern-following bit (AKA flush-cut bit) on the router table, I just routed to the pattern around the six sides of the hexagon. Then I pried off the freshly-cut tile and moved on to the next one.
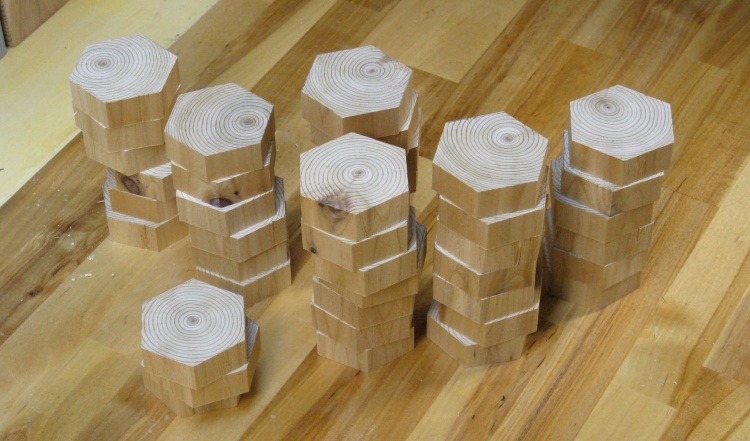
And eventually, a nice pile of hexagons
After a few hours of puttering, I had a nice pile of hexagonal tiles. I needed 33 tiles but I made a bunch of extras since they were easy enough to do.
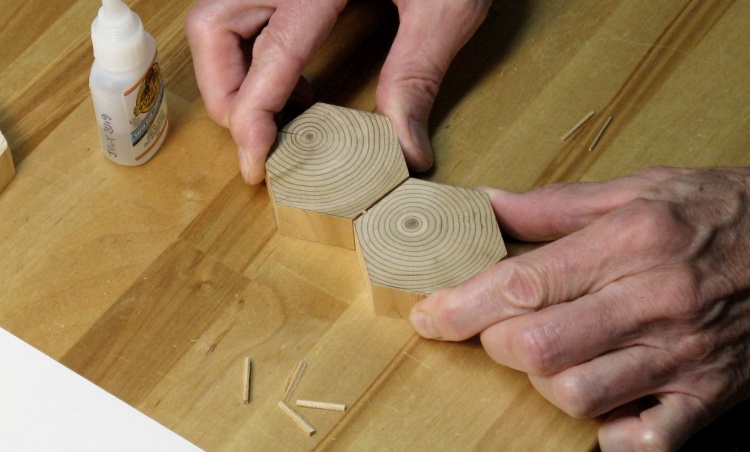
Repairing some edge notches
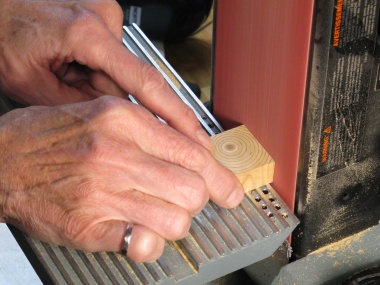
Ocassionally a small shard would break out of the side during the routing operation which, if left unaddressed would result in a void in the breadboard. So of course I addressed that: I super-glued in some of the shards that had come out that I gathered with the simple expedient of sweeping the floor.
In this photo I'm using a spare hexagon to squeeze the just-glued shard in place (to eliminate the super-gluing-the-fingers risk).
The protruding parts of the glued-in shards were then sanded flush to the side.
In this photo I'm using a spare hexagon to squeeze the just-glued shard in place (to eliminate the super-gluing-the-fingers risk).
The protruding parts of the glued-in shards were then sanded flush to the side.
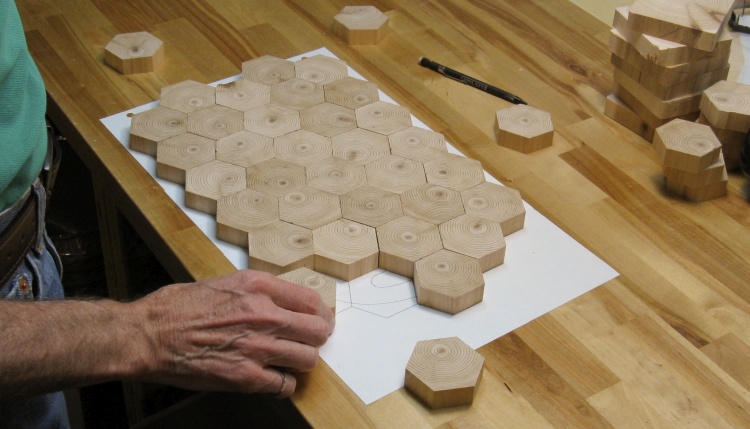
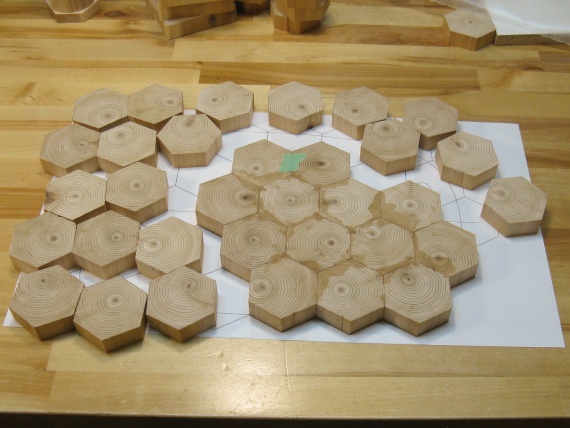
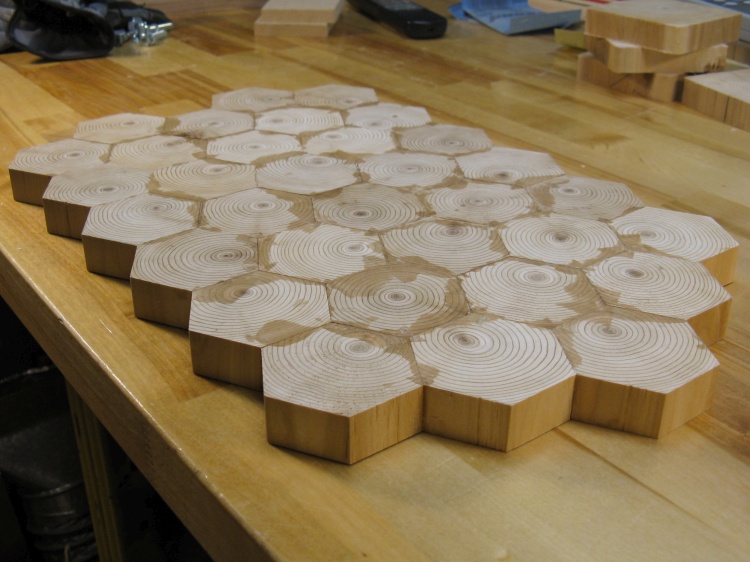
Arranging the tiles on the plan
I arranged the tiles on the paper plan with suitable orientations of the core centers.
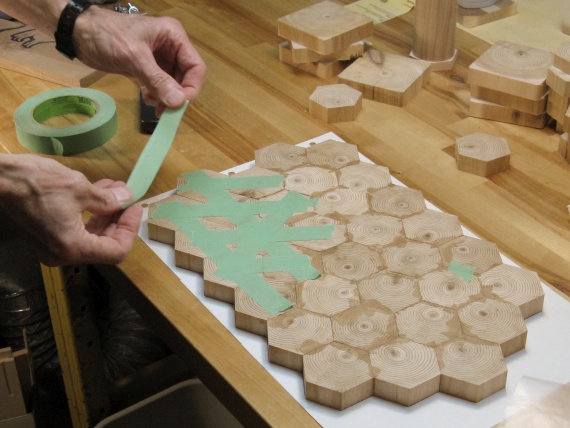
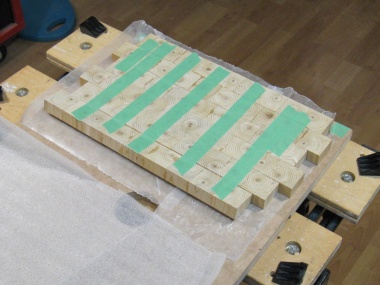
Taping the first group to be glued
There were lots of joints so my technique was to glue only smallish groups each time. This is a group of seven tiles from the center of the board. The stretched masking tape will act like clamps to hold the pieces together while the glue is drying.
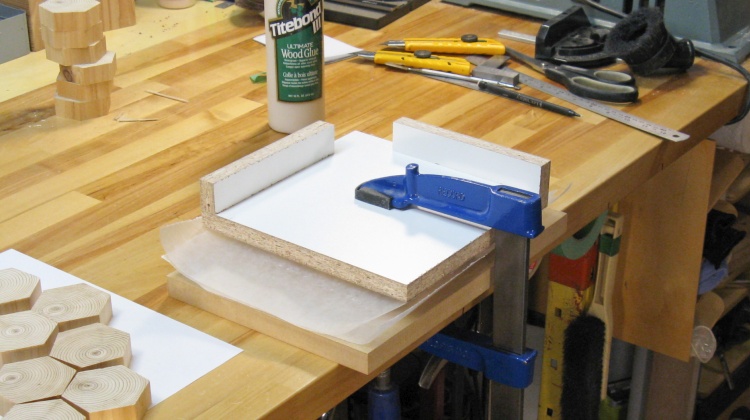
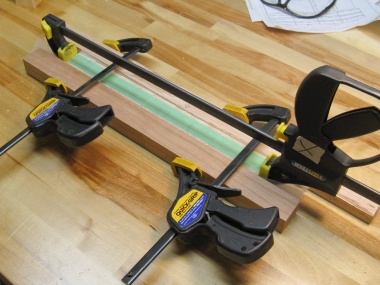
Clamping to hold things flat while glue sets
I flipped the taped-together group upside down so the joints could opened and then applied glue and flipped it back over. Then it was squeezed between some flat pieces of wood to ensure it remained flat as it dried.
The next two photos are a couple of interim shots as the gluing progressed.
Part way done
Last pieces to be glued on
All the gluing complete
It took about a half-dozen gluing steps and then it was all together.
I had much fewer problems getting the hexagons to fit together without gaps than I did on the previous hexagonal-tile board. I attribute that to a more-accurate pattern.
I had much fewer problems getting the hexagons to fit together without gaps than I did on the previous hexagonal-tile board. I attribute that to a more-accurate pattern.
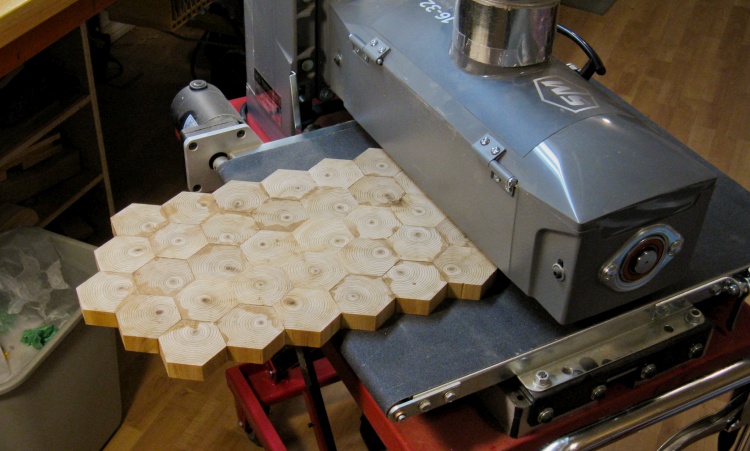
Starting to sand the surface flat
After the glue had dried, the next step was to smooth things off. There were minor thickness variations between the pieces, and of course a bunch of extra glue to get rid of.
Here the drum sander is on one of its first passes. I used 80 grit to even out both sides and then 120 and 220 grits to remove the major sanding marks.
Here the drum sander is on one of its first passes. I used 80 grit to even out both sides and then 120 and 220 grits to remove the major sanding marks.
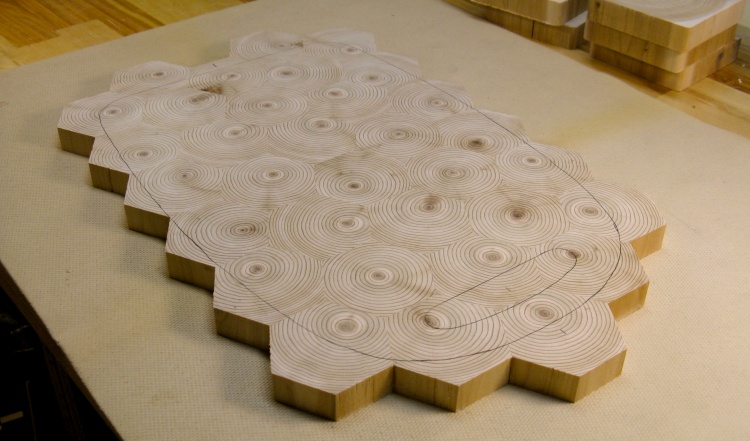
Sanding complete and marked with shape
The faces still had some minor sanding marks, but that was about as good as the drum sander could do and was fine at this stage.
So next I traced the outline of the breadboard onto the newly-smoothed surface using carbon paper.
So next I traced the outline of the breadboard onto the newly-smoothed surface using carbon paper.
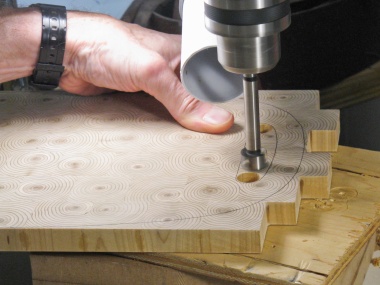
As this matrix of photos shows, the handle hole was hollowed using Forstner bits on the drill press, followed by a bit of chisel work and then sanding with a small drum. The outside was cut on the bandsaw and then smoothed on the belt sander.
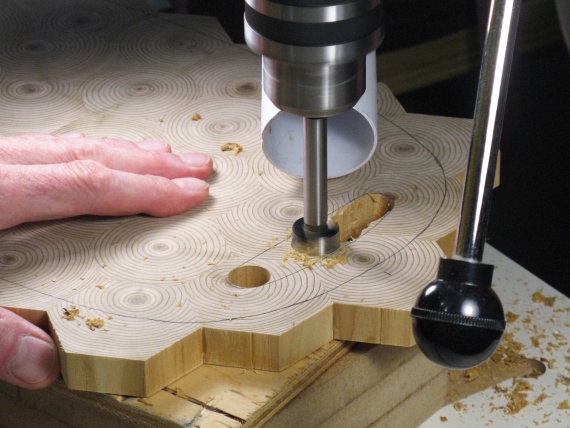
Drilling for the handle hole

Smoothing the handle hole
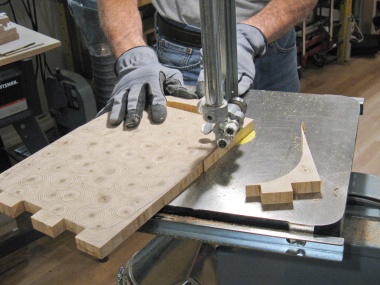
Cutting outside shape
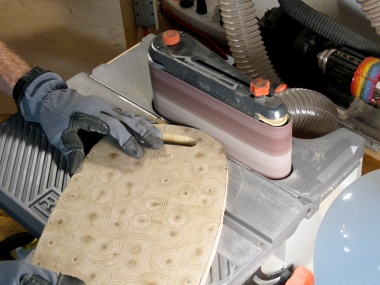
Sanding the perimeter
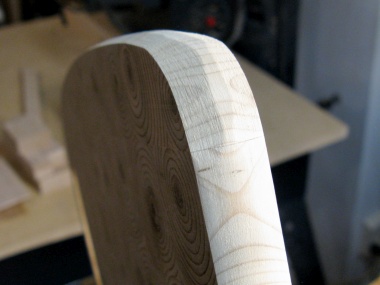
Outside trimming done
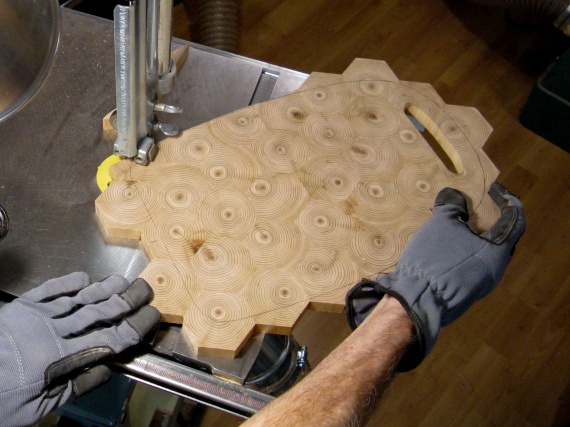
This shows the shaped breadboard which is almost done except for rounding all the edges.
I followed a technique I had used for previous boards like this, which was faceting the edges and then rounding them off with sandpaper strips.
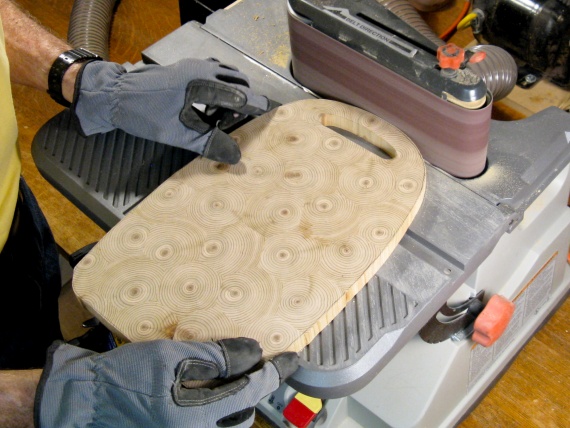
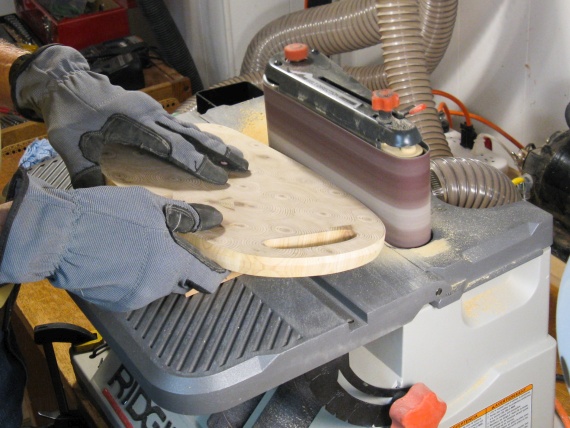
The top two photos show the faceting stage. For the perimeter I was able to use the belt sander with a wedge taped to the table to establish the sanding angle. The handle hole was done by hand using a small sanding drum. Then it was all rounded off using sandpaper strips from 120 up to 320 grit.
The top two photos show the faceting stage. For the perimeter I was able to use the belt sander with a wedge taped to the table to establish the sanding angle. The handle hole was done by hand using a small sanding drum. Then it was all rounded off using sandpaper strips from 120 up to 320 grit.
Bevelling outside edges
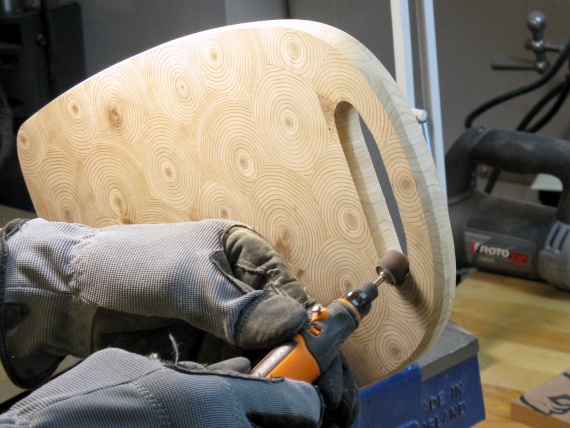
Bevelling handle hole
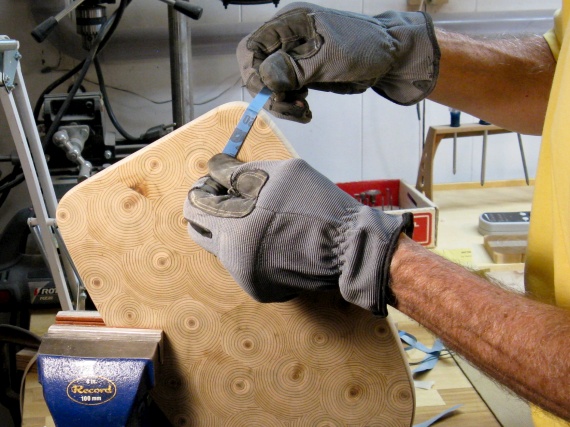
Rounding outside edges
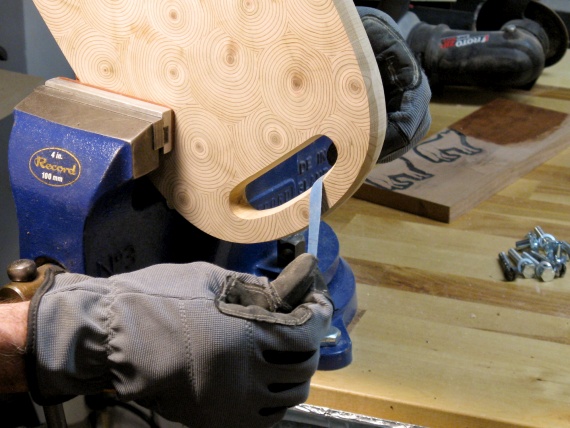
Rounding handle edges
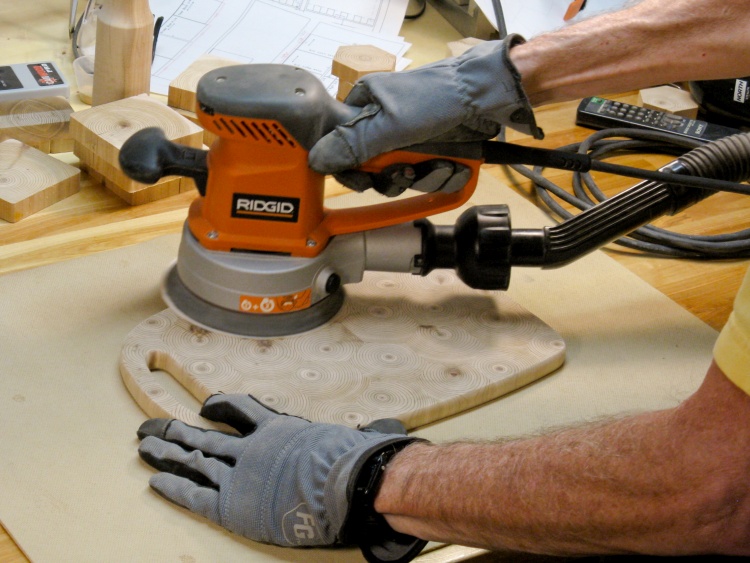
A little random-orbital sanding to finish off the faces
With the edges done, I then did final sanding of the faces using the random orbital sander. This took just a minute or so at 220 then 400 grit until all sanding marks were removed.
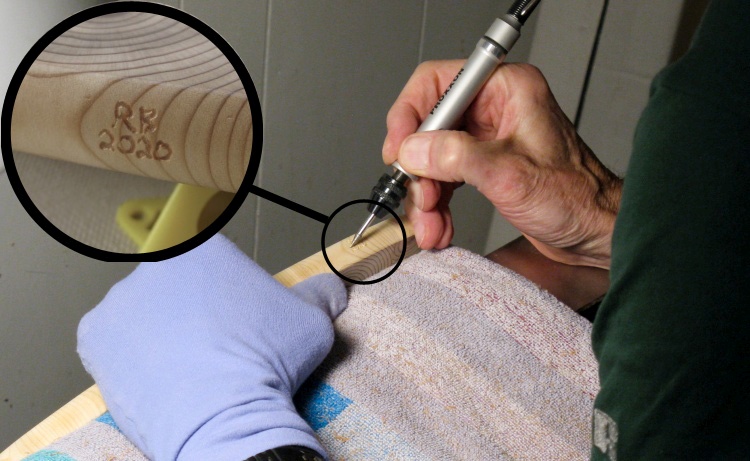
Carving initials into the side
The last step was to mark the board with my initials and the year. My usual technique of inked lettering wasn't appropriate so I used a pointed grinder to carve in a less-obvious mark.
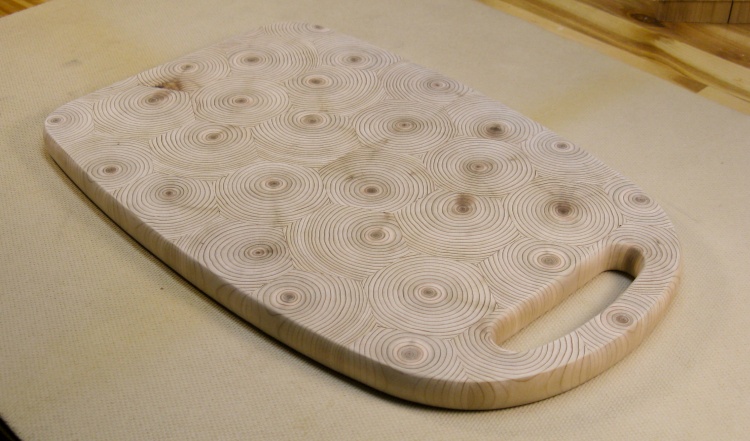
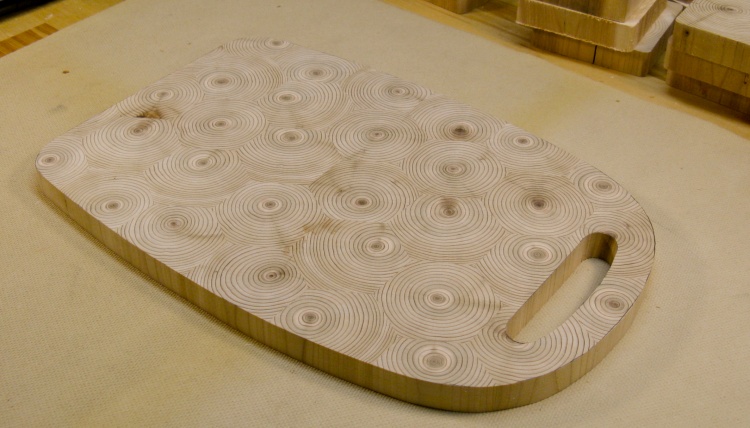
Woodworking done
That was it for the woodworking.
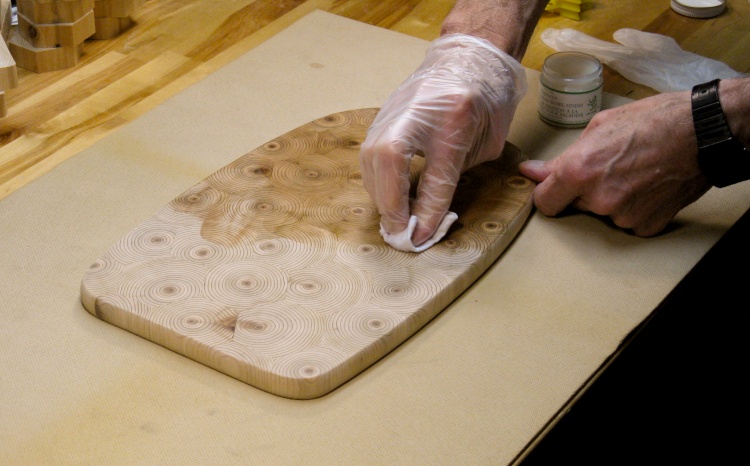
Starting to apply wax
The finish I used is a food-safe wax (beeswax/mineral oil combination) which is simply shmeared on, left to dry and then buffed up.
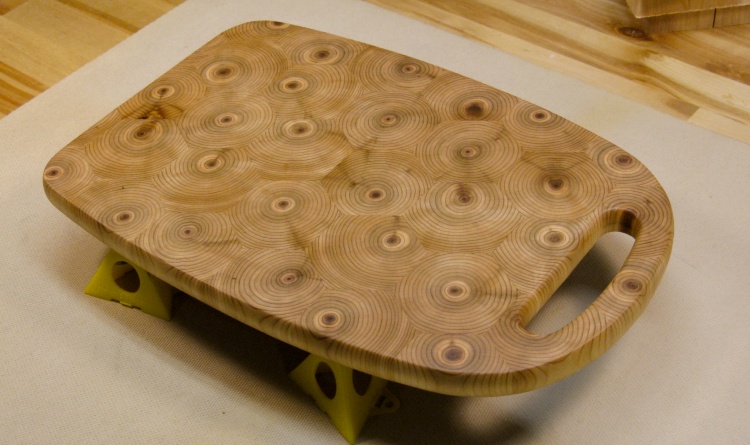
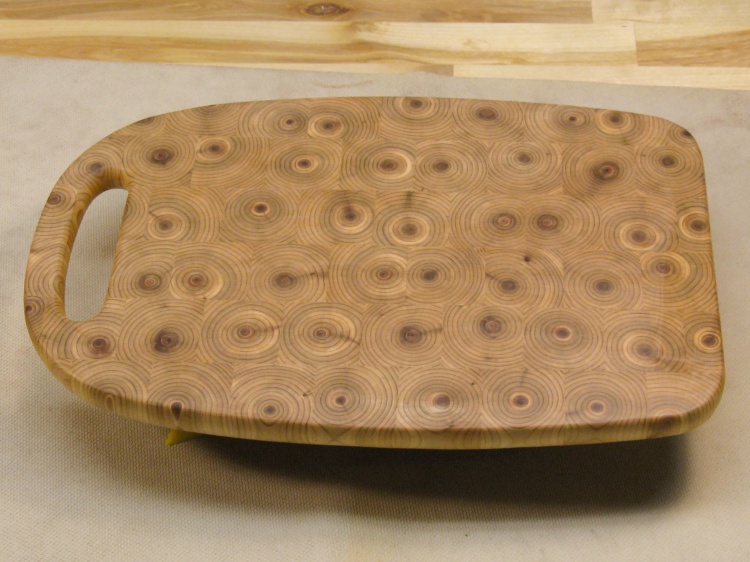
The breadboard with the wax drying
This shows the breadboard with a coat of wax, pre-buffing. Although it doesn't say it's needed, I followed with a second coat to make sure it was well-covered.

Done
Done.
Once More, With
The square-tile version
So I still had more than half the post left cluttering up my workroom floor. Since I had no other plans for the wood, I thought I'd just bang out a second, slightly different version of the breadboard.

The square-tile version
I thought smaller tiles would be good to get more cores in and also avoid cracks that might be closer to the core on this already-rejected-once group of post pieces.
After some consideration of tile shapes I opted to go with square which would at least be straightforward to make.
Of course with smaller tiles, I was going to need more of them - 56 to be exact. Fortunately I had enough wood left.
After some consideration of tile shapes I opted to go with square which would at least be straightforward to make.
Of course with smaller tiles, I was going to need more of them - 56 to be exact. Fortunately I had enough wood left.
A lot of this detail is identical to the above, so here is a more-compact summary. Obviously making the blanks was just the same;
Slicing off blanks
More than I should need
Sanding the blank faces
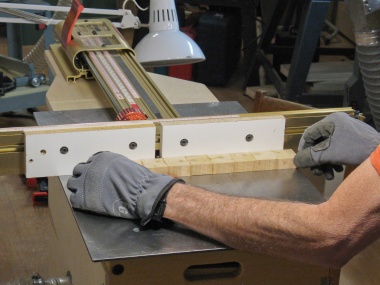
The tile shaping was done on the radial arm saw rather than by using the router and the tiles were simply clamped to the fence and cut. After cutting a right angle in the correct spot on each tile, I used a stop for the last two cuts to make sure the size was accurate;
Marking uncracked wood
Cutting to that line
Marking the tile location
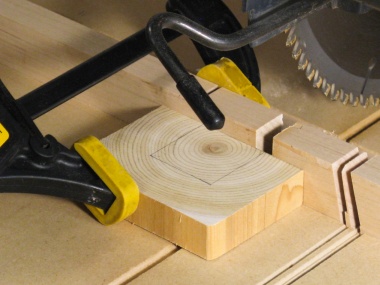
Cutting first edge by eye
Cutting with stop for better accuracy
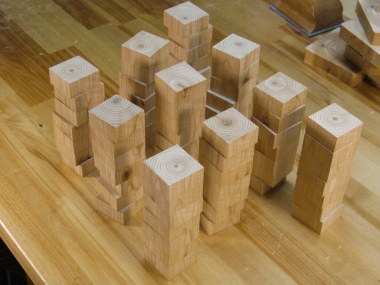
Towers 'o tiles
My saw apparently hadn't been perfectly vertical when it cut the tiles, so I needed to touch up some edges on the belt sander first. After that, the tiles were arranged in rows, taped together for easier handling and then glued and clamped;
Squaring up an edge

Arranging a row
Glue 'n clamp
I used the router table set up as a small jointer to smooth off and straighten the sides of the individual rows of tiles. Then the rows were taped into position, glued and clamped.
Jointing the edge
Taped together before gluing

Clamping the glued pieces
The sanding process was identical to the first breadboard; 80, 120 and 220 grits on the drum sander.
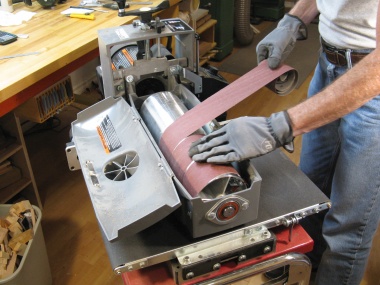
Wrapping on a new grit
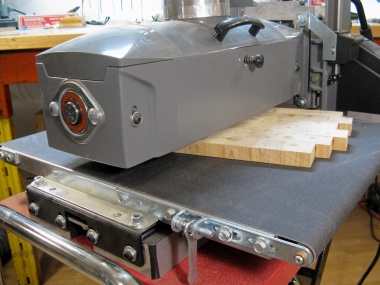
Going into sander
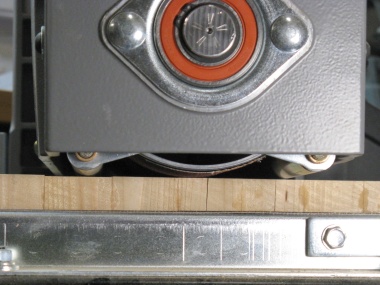
Closeup of sander end
Then this board was shaped and sanded using the same methods as the first one;
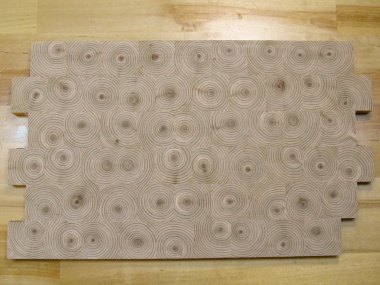
Sanding done
Drilling handle hole
Cutting to outside profile
Smoothing the outline
Edge faceted and part-sanded
Woodworking done
Woodworking done on #2
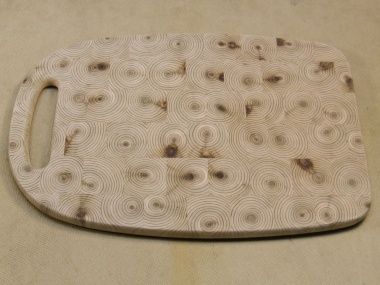
This photo shows the second breadboard after it received a coat of wax.
It's a bit surprising how many of the 1" slices of the post have the dark indicators of branches. I avoided the ones that obscured the core but there must have been branches every few inches on the tree this came from.
It's a bit surprising how many of the 1" slices of the post have the dark indicators of branches. I avoided the ones that obscured the core but there must have been branches every few inches on the tree this came from.
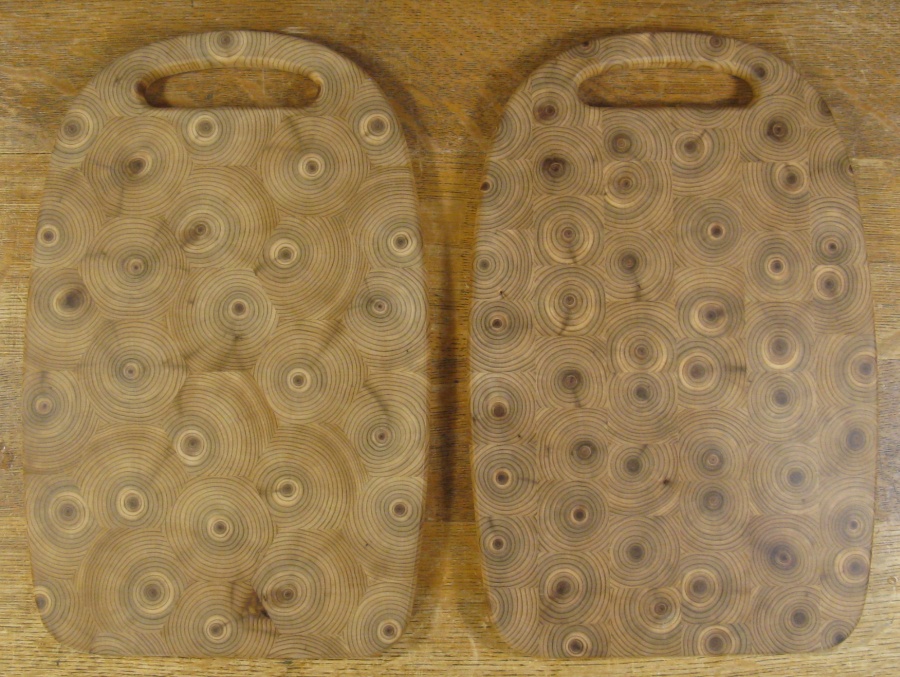
Both versions
Here's both versions side-by-side; original hexagonal-tile on the left and square-tile on the right.
You get more cores with the square tile, but I might prefer the more-growth-rings look of the original.
You get more cores with the square tile, but I might prefer the more-growth-rings look of the original.


