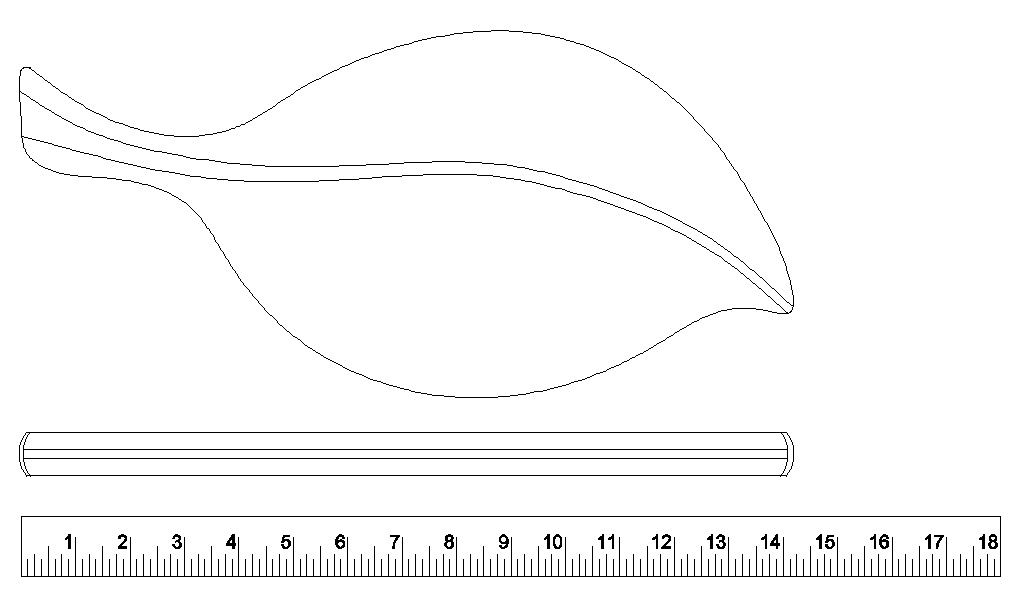
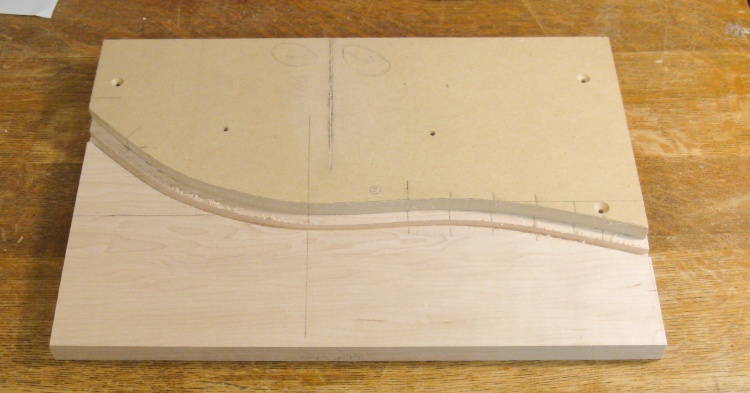
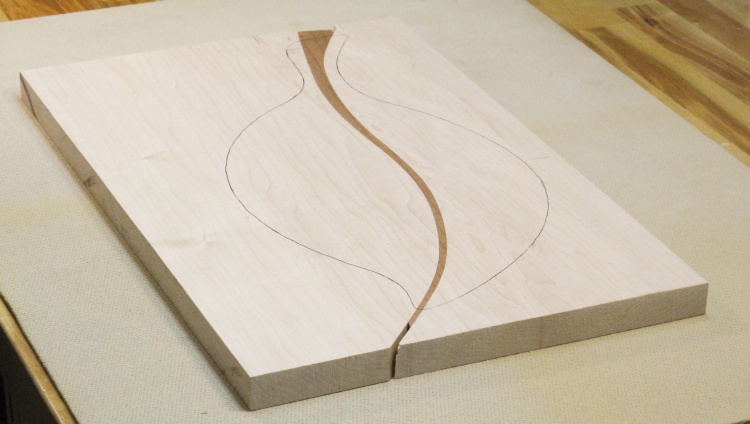
I originally had a more-abstract design in mind for a laminated trivet but then I found out that a generous acquaintance was something of a collector of interesting breadboards, so I changed the focus a bit. The piece turned into a breadboard (which was really just a finishing difference) and I thought that this leaf design might appeal more to her. The board would have a bit more "realism" to it and still let me use the laminated construction I was planning on.
I selected maple for the leaf portion and then perused options for contrasting "vein" woods. It eventually occurred to me to use roasted curly maple which was a rich brown color and would provide a satisfying "all-maple" construction.
I selected maple for the leaf portion and then perused options for contrasting "vein" woods. It eventually occurred to me to use roasted curly maple which was a rich brown color and would provide a satisfying "all-maple" construction.
Plans don't get much simpler than this
Tracing one of the pattern shapes
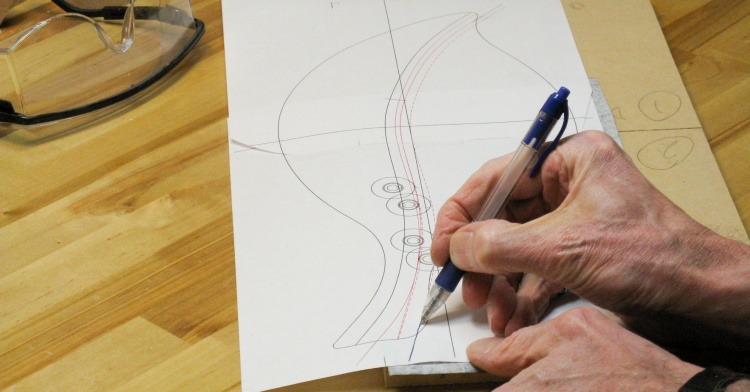
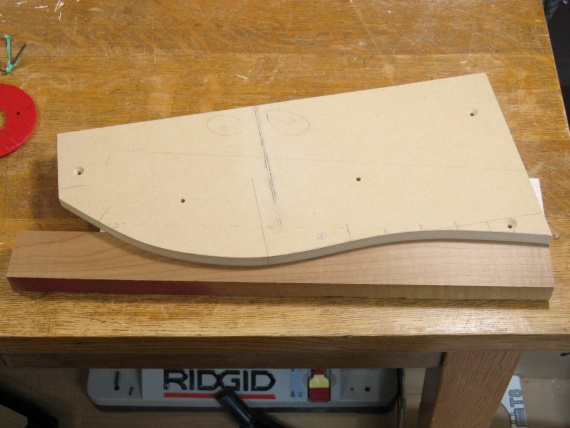
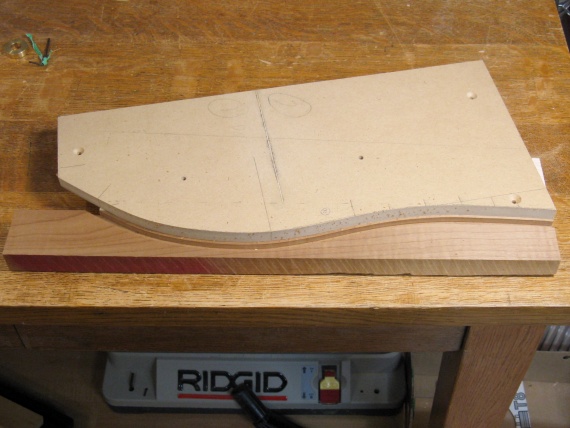
To laminate two curved pieces, the best way is to cut them both with a common pattern. So then the first step was to make a pattern.
Actually that was the second step too since a pattern was needed for each edge of the vein portion. They could theoretically be done with a common pattern (shifted and tilted) but I didn't like the resulting curves as much.
In this photo, I'm tracing one of the pattern shapes onto a thinnish piece of MDF.
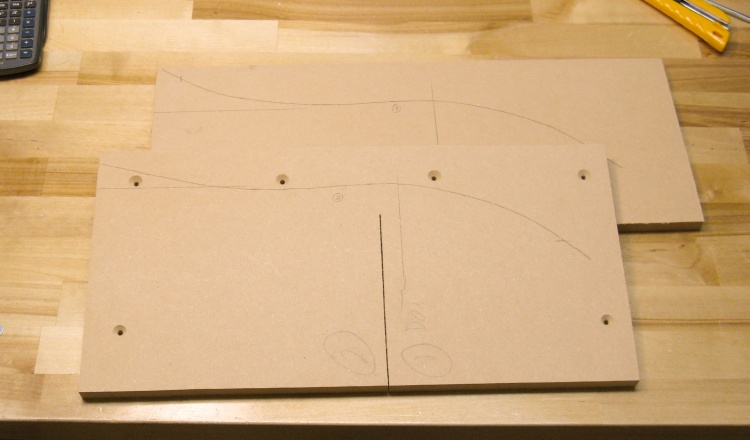
Both patterns marked
These are the MDF scraps that will turn into patterns for the two very-similar curves the breadboard needs.
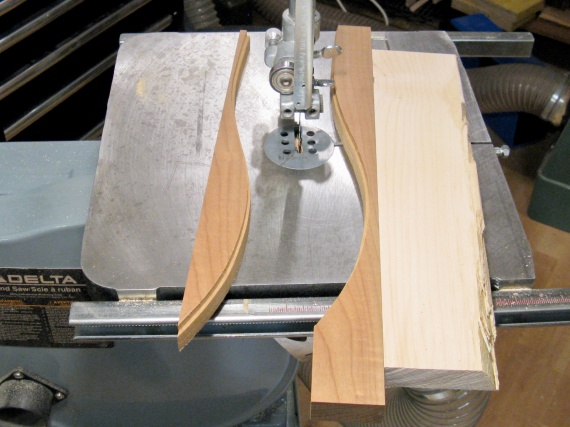
As usual the patterns were cut out a bit large with the bandsaw and then the belt sander was used to get the edges closer to the marked lines. To get a very smooth curve I feel my way along the edge with a finger and then hand-sand any perceptable irregularities. Lumps and dips seem more evident to a finger than to the eye in many cases.
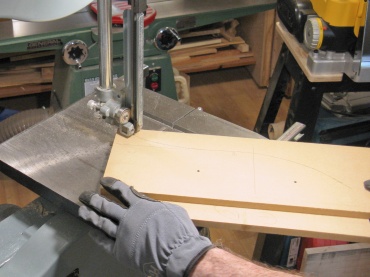
Cutting patterns on bandsaw
Sanding to marked lines
Smoothing with hand sanding
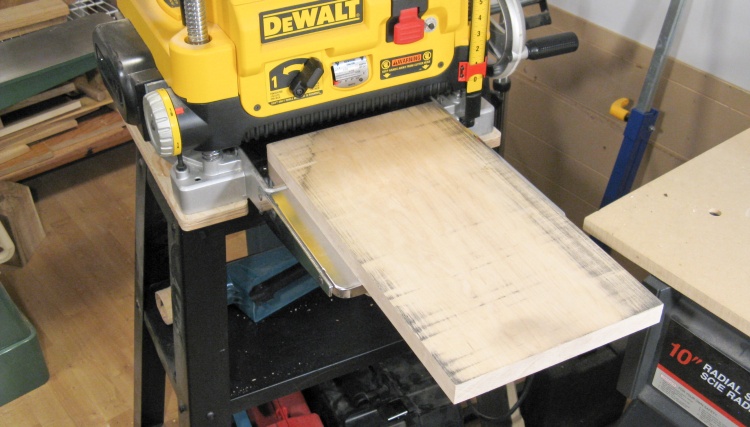
Planing the maple slab
Then with the patterns ready to go, I got out the wood for the leaf.
I had used this particular plank as a router sled for years, but I switched to a rectangle of MDF for that which freed up this nice thick piece of maple. It is flipped upside-down to how it was used for a sled and shows the dark rub marks of going through the planer hundreds of times.
I had used this particular plank as a router sled for years, but I switched to a rectangle of MDF for that which freed up this nice thick piece of maple. It is flipped upside-down to how it was used for a sled and shows the dark rub marks of going through the planer hundreds of times.
First pattern taped to maple
After the maple was planed to the correct thickness, the first pattern was taped to the top. You can see various alignment marks I added to help realign pieces later on. The holes in the pattern are just leftovers from whatever I used this wood for in the past.

The bit used for routing to a pattern
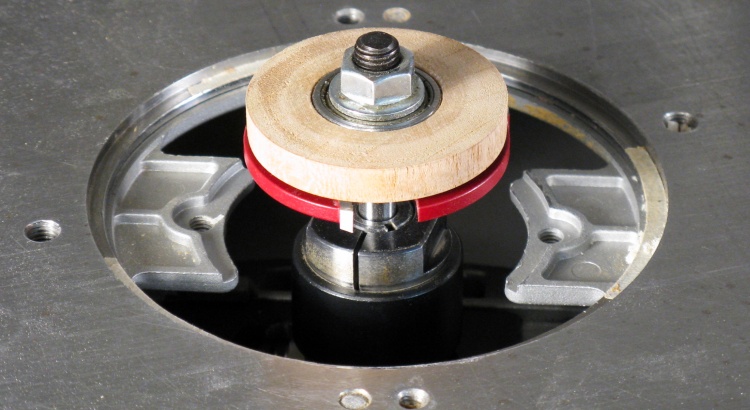
This is the pattern-cutting setup. It uses a 1/4" bit that comes up through a collar. The pattern rubs against the brass ring and a 1/4" groove is cut 11/32" from the pattern. No, I'm not sure why that rather odd distance was used.
Notch routed in maple
And here the groove has been cut. In this case the edge of the groove closest to the pattern is the curve that is needed.
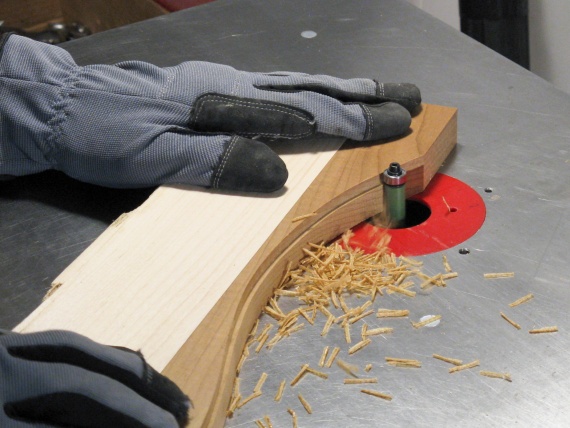
The board is pretty thick so it would be tough to route all the way through, if the bit was even long enough. So instead I just went 1/4" or deep and the next steps would complete the separation.
The board is pretty thick so it would be tough to route all the way through, if the bit was even long enough. So instead I just went 1/4" or deep and the next steps would complete the separation.

Routing flush to the original notch
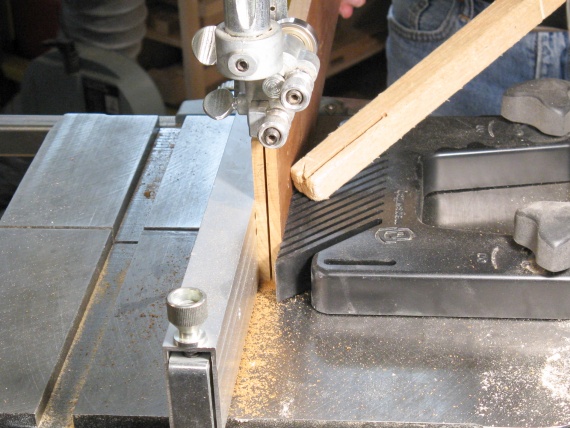
So then to separate at the groove, the bandsaw was used to cut the maple down the center of the groove (not shown).
That of course left a bulge that needed to be removed so the flush-cutting router bit shown here is used to remove the bottom bits of the groove.
That of course left a bulge that needed to be removed so the flush-cutting router bit shown here is used to remove the bottom bits of the groove.
Then a similar process happens with the vein wood. The same pattern is used to route a notch with the same curve into the roasted curly maple (RCM), the notch is cut down the middle and the edge is routed smooth.
The piece of RCM I used was large enough for the leaf but not really large enough to stick the pattern to, so I taped another piece of maple of the same thickness to the edge so it was easier to work with.
The piece of RCM I used was large enough for the leaf but not really large enough to stick the pattern to, so I taped another piece of maple of the same thickness to the edge so it was easier to work with.
First pattern now on roasted curly maple
Notch routed
Cut in center of notch
Routing flush to the original notch
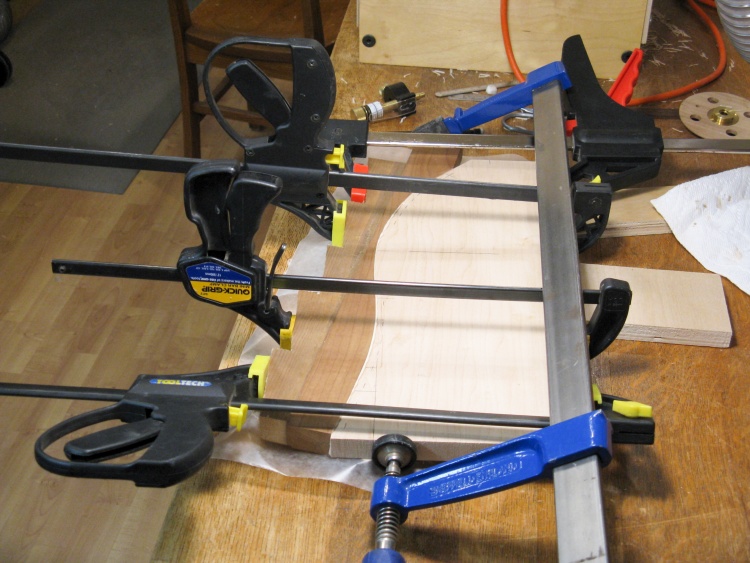
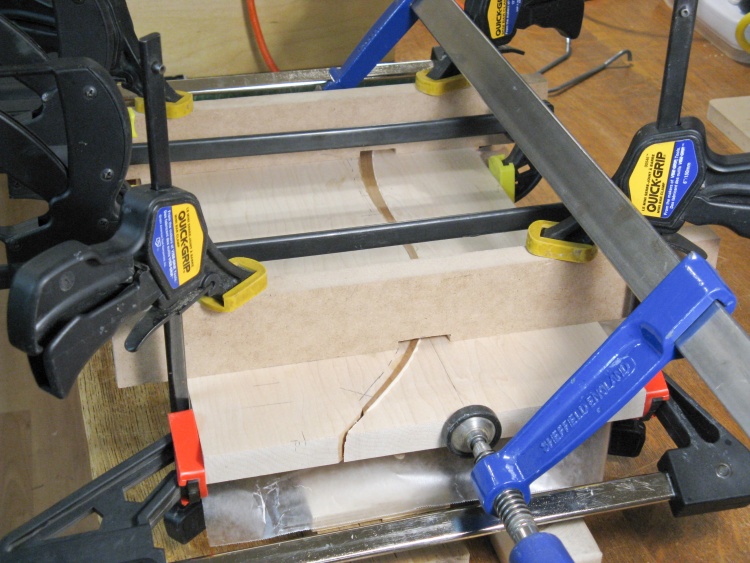
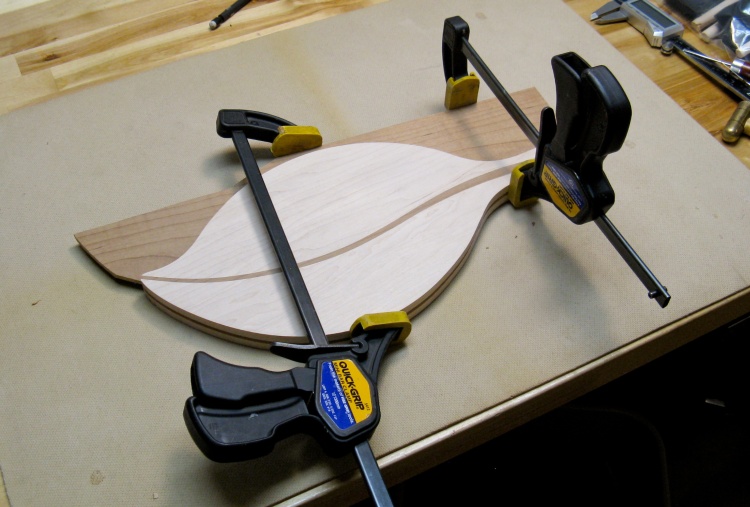
Gluing together the first two pieces
So with the first piece of the maple and one edge of the RCM having the same curve, they could be glued together.
The glued joint was angled so I made the stepped piece of scrap on the left so the clamps went on straight. Meanwhile the big blue clamp kept the pieces from sliding in the angled direction.
I made the RCM thicker than the regular maple so precise vertical alignment wasn't necessary.
The glued joint was angled so I made the stepped piece of scrap on the left so the clamps went on straight. Meanwhile the big blue clamp kept the pieces from sliding in the angled direction.
I made the RCM thicker than the regular maple so precise vertical alignment wasn't necessary.

Getting ready to cut the other side of the vein with second pattern
The next step was to trim the second side of the RCM using the second pattern. Here that pattern has been taped to the glued-together assembly.
Then the same process as before; route the groove using the pattern, cut the groove with the bandsaw and trim flush. This was done first with the glued assembly as shown below and then (off-stage) to the other half of the original maple piece.
Notched with second pattern's curve
Cutting in center of notch again
Gluing on second piece after shaping it
So now the second piece of maple has a matching curve to the glued assembly and they can be glued together as well.
I made some MDF cauls (with gaps for the thicker center vein wood) to make sure the maple pieces were aligned vertically. The caul clamps were tightened to align the maple before the normal clamps applied pressure to the joint. Again the large blue clamp kept the joint from sliding.
I made some MDF cauls (with gaps for the thicker center vein wood) to make sure the maple pieces were aligned vertically. The caul clamps were tightened to align the maple before the normal clamps applied pressure to the joint. Again the large blue clamp kept the joint from sliding.

Shaving down protruding insert wood
I used a spokeshave to trim down the excess thickness of the vein wood most of the way before putting it through the planer for final flattening.
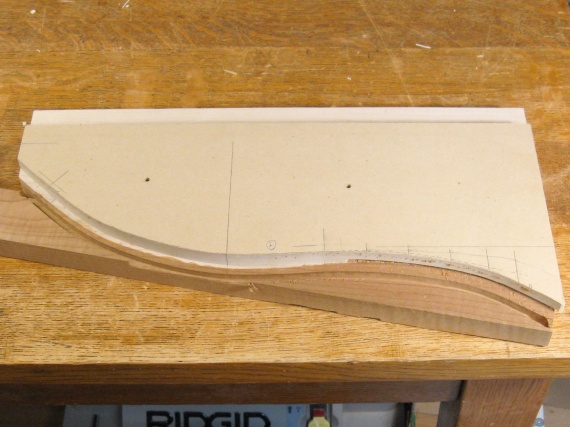
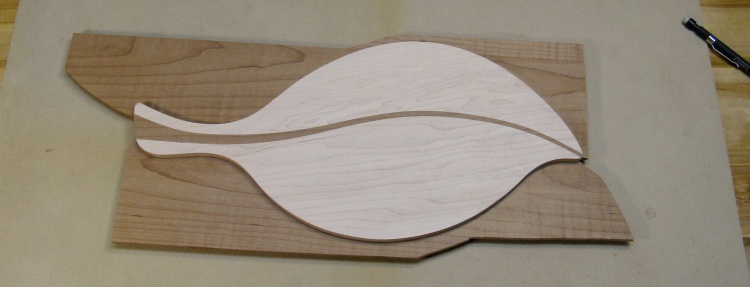
The blank for the breadboard completed
Here the blank for the breadboard is complete.
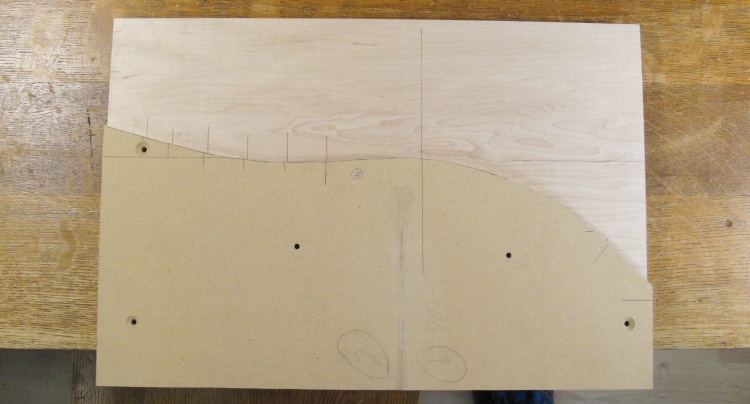
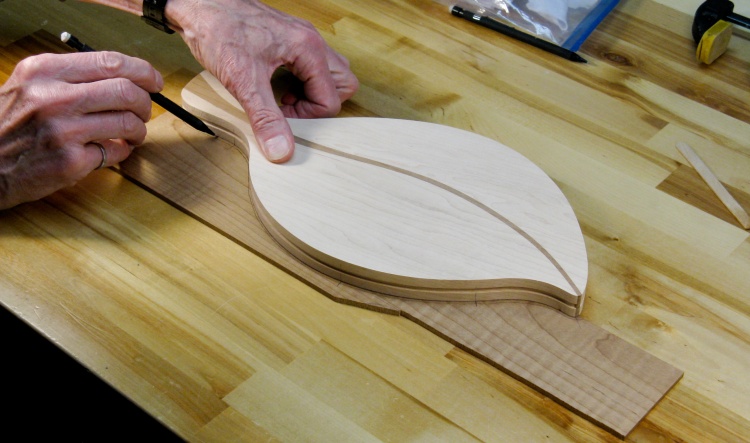
The breadboard shape traced on
The next step was to trace on the final shape, done with my usual technique of a full-sized plan and carbon paper.
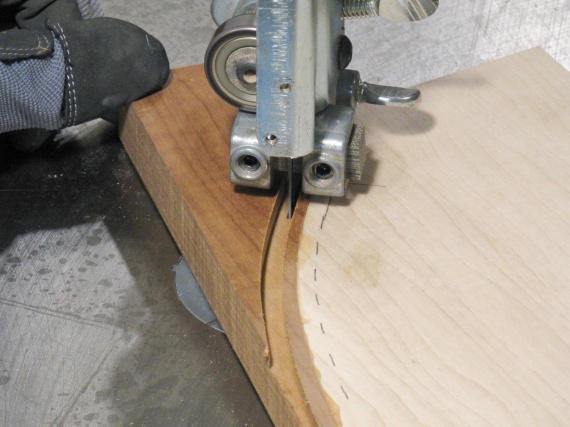
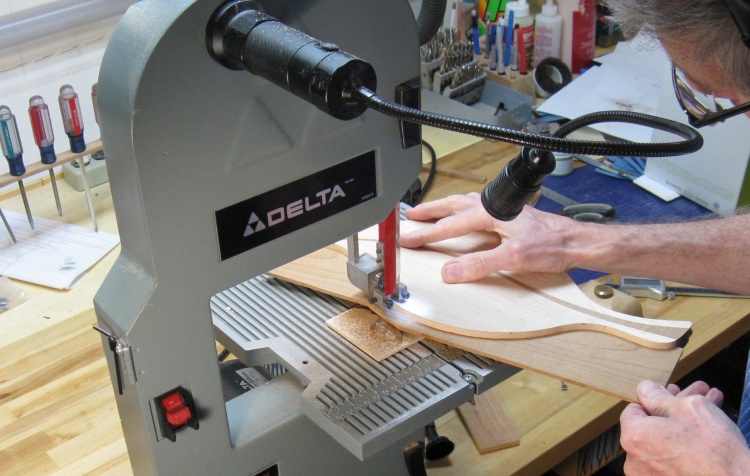
The leaf shape was cut out a bit large using the bandsaw and the edges were sanded closer to the lines with the reciprocating belt sander.
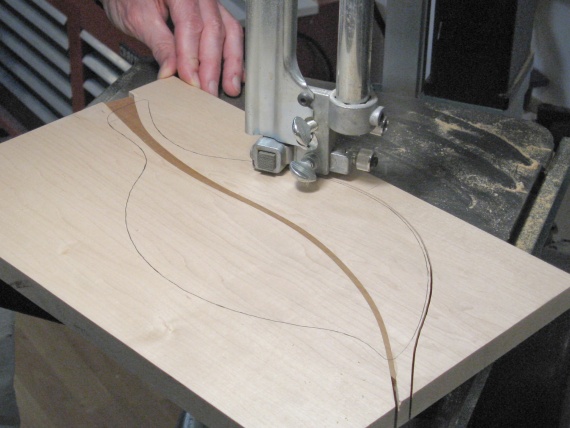
Cutting out the leaf shape
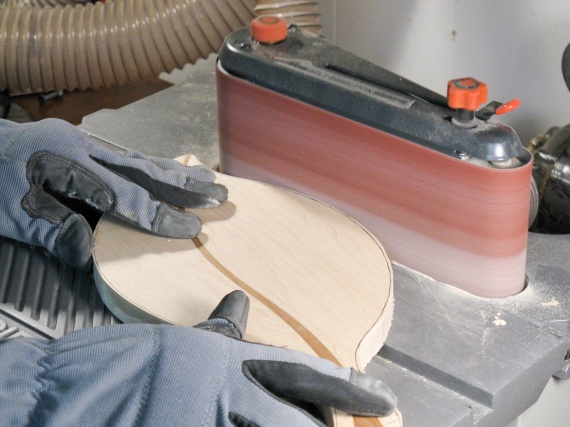
Sanding down to the lines
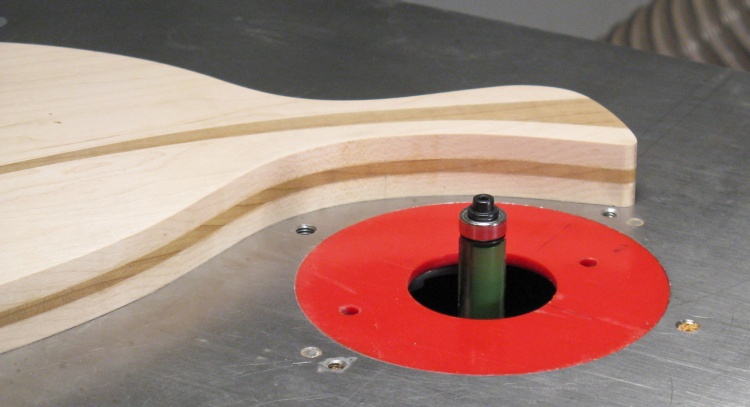
Modified bit to cut shallow notch
To add the side trim, the edge needed a shallow slot cut all around. I had a router bit with an appropriate width but it would have cut a 3/4"-deep notch, which was a bit much.
To reduce the notch depth I turned a disc that fit tightly over the guide bearing at the top, leaving only about 0.08" of cutting edge exposed.
To reduce the notch depth I turned a disc that fit tightly over the guide bearing at the top, leaving only about 0.08" of cutting edge exposed.

Edge notched about 0.08" deep
Here is the edge after routing.
For the edge trim pieces I cut a couple thin sections from another piece of RCM. The bandsaw was used to rip it into two thinner pieces which were passed through the planer until they were just slightly thicker than the notch width. That's the new MDF router sled that replaced the maple used for this breadboard. It's varnished on the top for better longevity and waxed on the bottom to slide through the planer easier.
Cutting up some more RCM for edge trim

Planing to correct thickness
Marking trim for one side of leaf
I just traced the leaf outline onto the trim pieces to determine the shape.

Cutting trim sheet to marked line
I also drew another line in about 0.08" from the traced line to guide where to make the cut (and one outside too, but I ended up not needing that one).
In this photo I'm cutting one of the trim pieces with the small bandsaw just inside of the inside line.
In this photo I'm cutting one of the trim pieces with the small bandsaw just inside of the inside line.
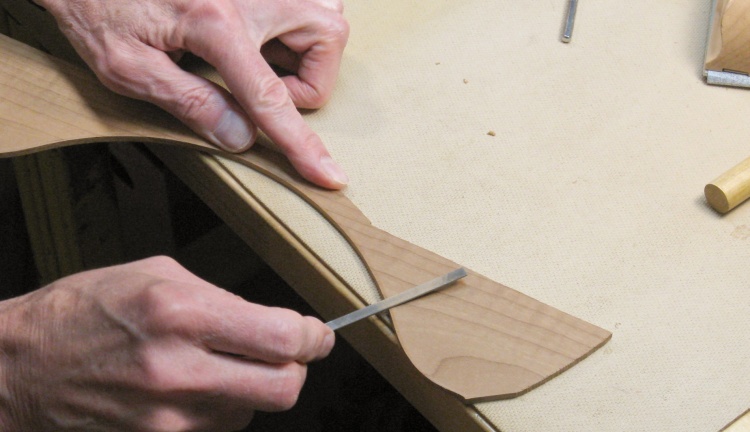
Bevelling edge for tight fit
The trim pieces were intentionally made slightly too thick so I could bevel an edge and have them wedge tightly into the slot with no gap. Here I'm using a small file to do that beveling.
Gluing one half of the edge trim in place
After some careful end trimming and fitting, I finally glued the trim into the slot on one side, clamping to hold it in place.
Second piece of trim glued in as well
Once the same process was performed on the other side, this left the breadboard with a couple wings as seen here.
Removing trim "wings"
The next step was to cut off those wings as close to the edge as practical (which was around 1/8" since I didn't want to risk damaging the main edge).
Trim routed flush
And finally the trim was cut even with the rest of the edge using a flush-cutting router bit.

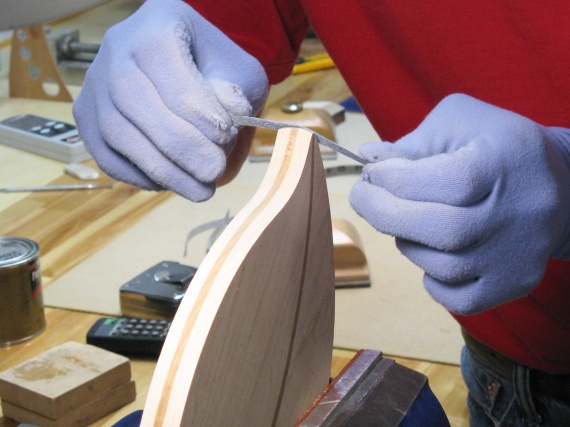
Sanding a bevel into the edge
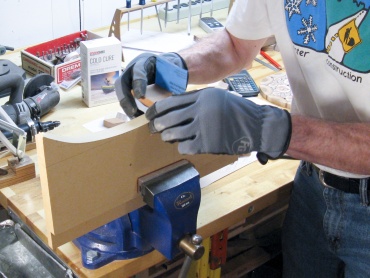
The plan was to have rounded edges on the trivet but using the router to shape them is a bit risky since some portions would be routed against the grain which is a risk for chipping. So instead I took the safer route of sanding them round.
Fortunately I still had the pile-of-scraps jig left over from my next project. Now that's not quite as chronologically impossible as it sounds since I started my next project before this one, but due to the time needed to apply varnish it fell behind just before the finish line, so to speak.
Fortunately I still had the pile-of-scraps jig left over from my next project. Now that's not quite as chronologically impossible as it sounds since I started my next project before this one, but due to the time needed to apply varnish it fell behind just before the finish line, so to speak.
Bevelled edge ready for rounding
I had used a guide and pencil to mark the limits of the angled sanding areas on the edges (barely visible outside the edge trim in the previous shot) and I sanded to those lines to get a consistent edge profile. That gave this nice bevelled edge ready for further rounding.
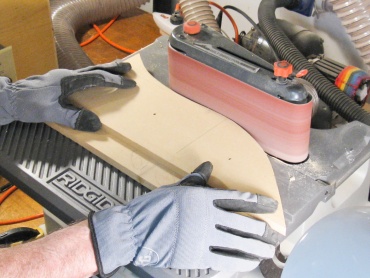
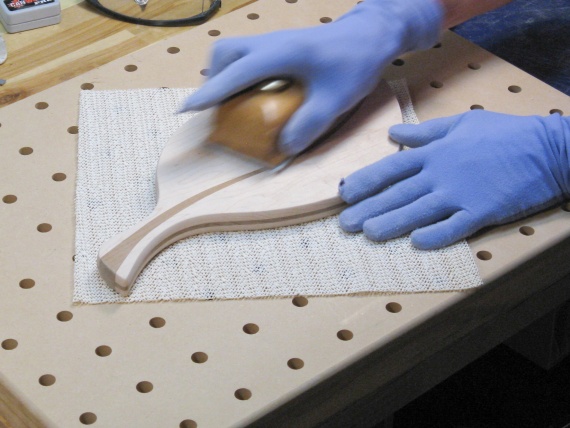
Then it was just some sanding to finish things off. I started by using strips of 120-grit sandpaper to round off the corners of the edges, followed up by 220 and 320 to eliminate the sanding marks and round off the remaining corners a bit. That was it for the edges, so then just a bit of finish sanding on the surface (up to 400 grit) finished off the faces as well.
Rounding the edge
Some final surface sanding
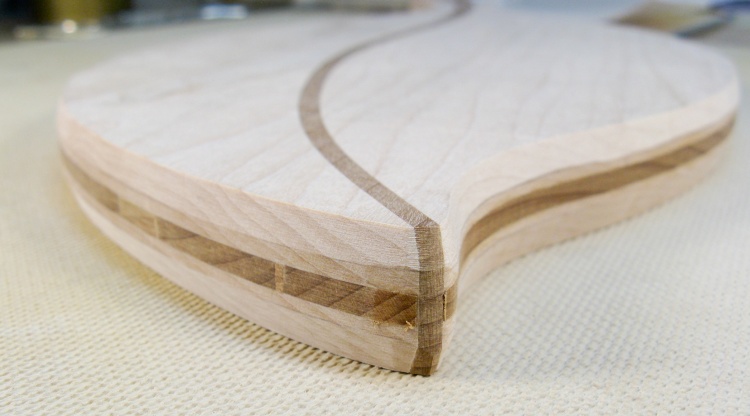
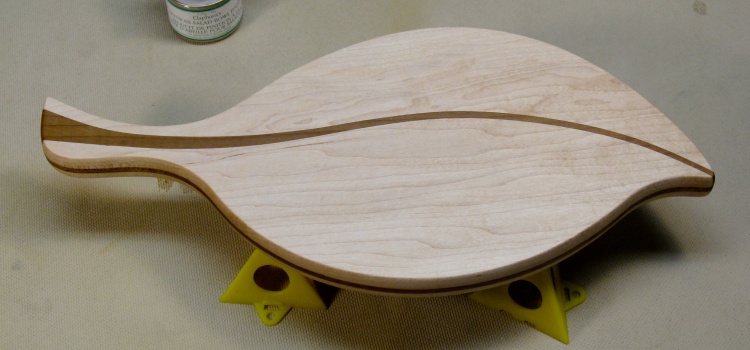
Woodworking complete
And that's the breadboard with all the woodworking complete.
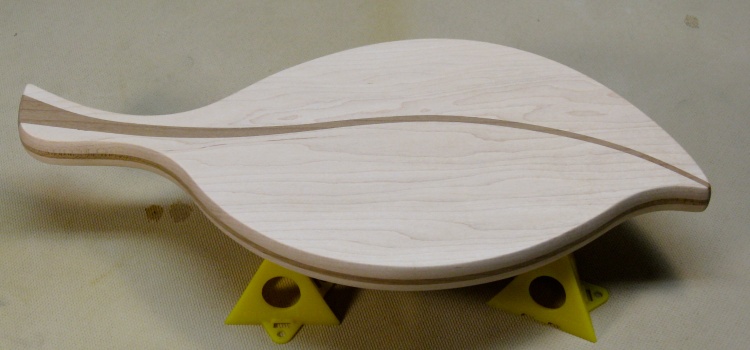
Done
I was just pulling out the varnish and a brush before I remembered that the breadboard didn't get varnished - whew!.
Instead I applied a coat of a beeswax/mineral oil finish made for salad bowls and the like, and then later buffed it up.
Instead I applied a coat of a beeswax/mineral oil finish made for salad bowls and the like, and then later buffed it up.


