I was rather thin on cabinet-building experience so I checked out typical construction on-line and visited my brother who is something of an expert, having built a number of cabinets including those for a deluxe kitchen. That research mostly answered my jointery questions and then the other main decision was choice of material: I had originally envisioned using melamine, but after a bunch of dithering detailed comparitive analysis, ended up settling on plywood primarily due to better moisture resistance; melamine swells up significantly with moisture - for example a spilled jug of windshield washer fluid.
Another advantage of plywood over melamine is that it can be glued with simple butt joints rather than needing a routed slot as is usually the case for melamine (due to the difficulty of gluing directly to melamine's slippery plastic face). However, I thought that routed slots would make assembly and positioning easier; plus if I prefinished the plywood then glue squeeze-out wouldn't affect the finish as it could just be wiped off the already-varnished surface.
Plywood's disadvantages include thickness variations and having to deal with the edges to make them presentable. For the former, my design was mostly tolerant of the variations and for the latter, the plywood I used had decent looking edge plys so they looked reasonable just sanded and varnished. Plywood boards can also be somewhat warped but that was just something to deal with in the construction.
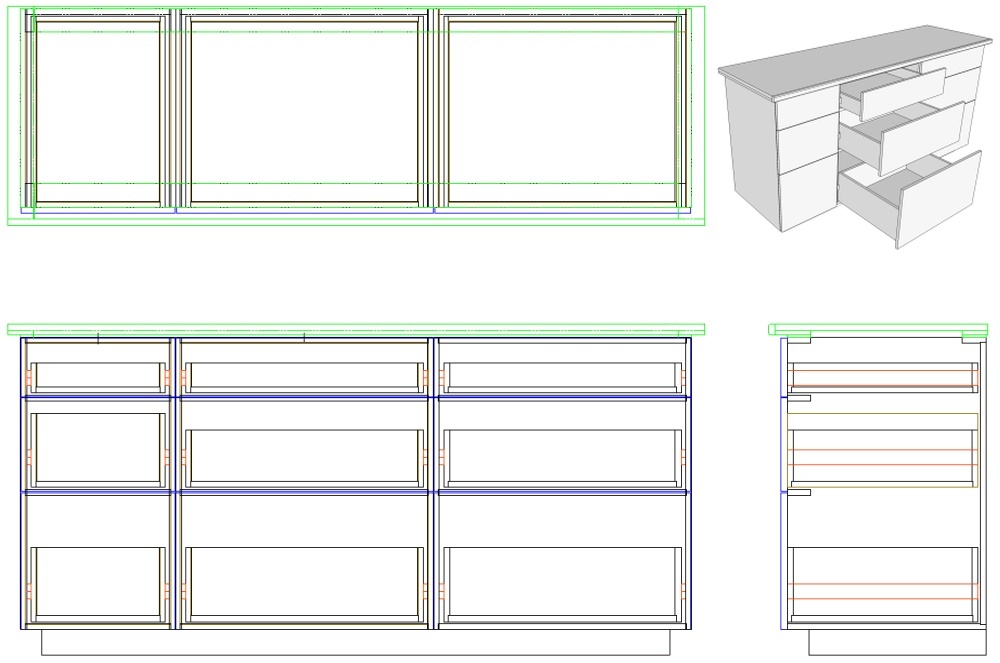
Cabinet Plans
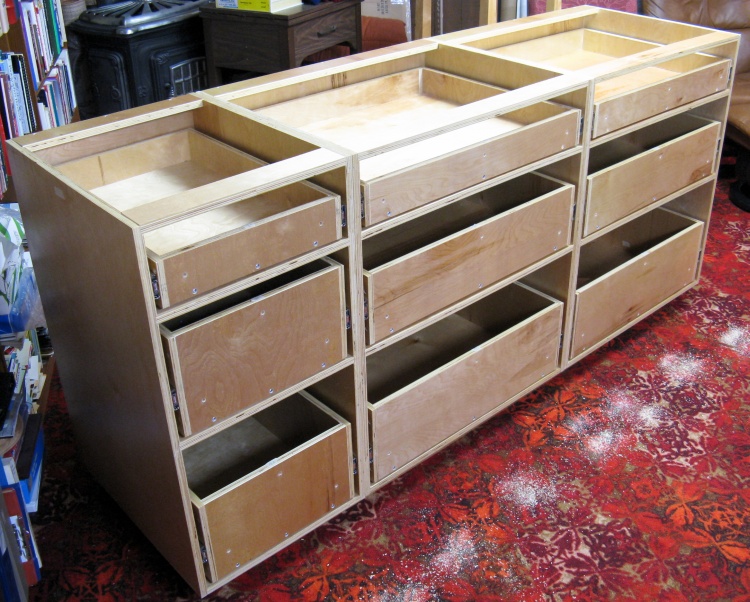
The innards
And as I like to do these days, I also made up 3D sketches like the one included above.
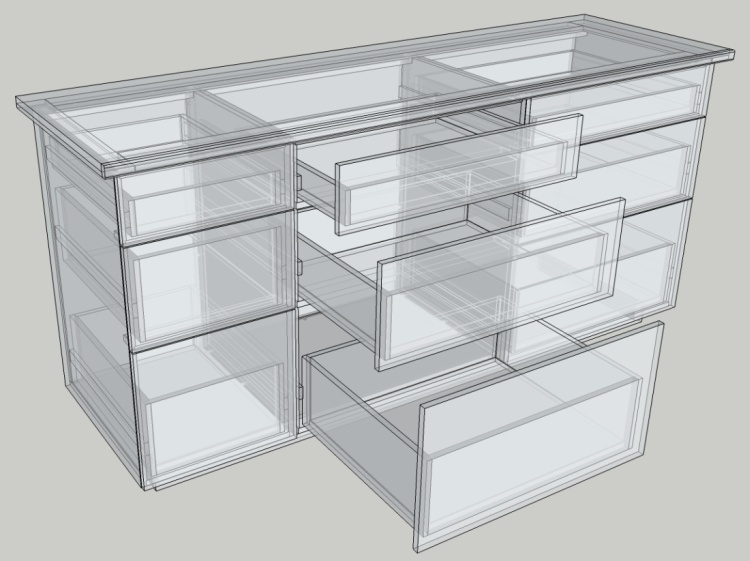
An "X-Ray" version showing the internal construction is always interesting so here is one of the complete cabinet (although I didn't bother adding the drawer pulls or slide details).
An "X-Ray" version showing the internal construction is always interesting so here is one of the complete cabinet (although I didn't bother adding the drawer pulls or slide details).
Cabinet and Drawer Pieces
The "cut list"
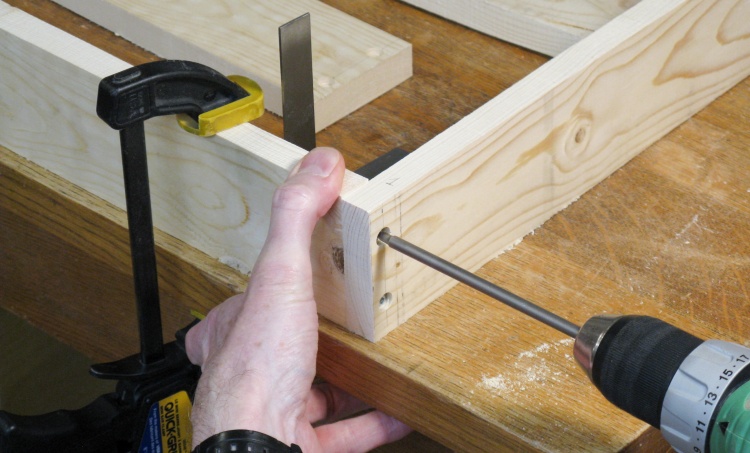
Now the first thing you need when building cabinets is a table saw to cut up the sheets. Unfortunately I don't have one of those so I had to make due with my bandsaw which would handle only much smaller pieces than a full 4x8' sheet.
So I could either use the painful process of cutting the sheets smaller with a handheld circular saw or get the sheets pre-cut. I opted to go pain-free, using the pre-cut route and getting the sheets chopped mostly into 24x48-inch pieces.
Surprisingly, that approach didn't require any more wood - it still took six sheets - but on some internal pieces the grain direction had to go the short dimension rather than the more traditional long dimension. That would be a consideration for kitchen cabinets, but for the garage - nah.
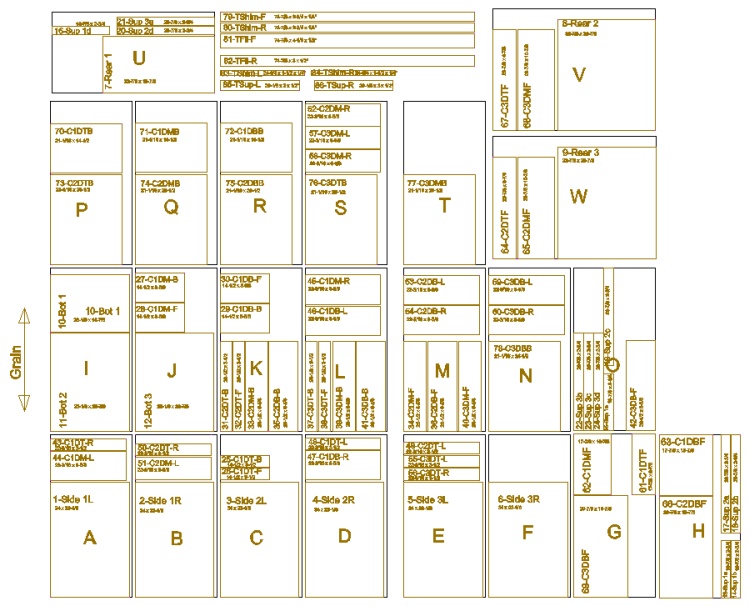
This diagram shows the 24x48-inch pieces (plus a couple at 30x48-inch) with the individual cabinet parts and dimensions indicated on them.
So I could either use the painful process of cutting the sheets smaller with a handheld circular saw or get the sheets pre-cut. I opted to go pain-free, using the pre-cut route and getting the sheets chopped mostly into 24x48-inch pieces.
Surprisingly, that approach didn't require any more wood - it still took six sheets - but on some internal pieces the grain direction had to go the short dimension rather than the more traditional long dimension. That would be a consideration for kitchen cabinets, but for the garage - nah.
This diagram shows the 24x48-inch pieces (plus a couple at 30x48-inch) with the individual cabinet parts and dimensions indicated on them.
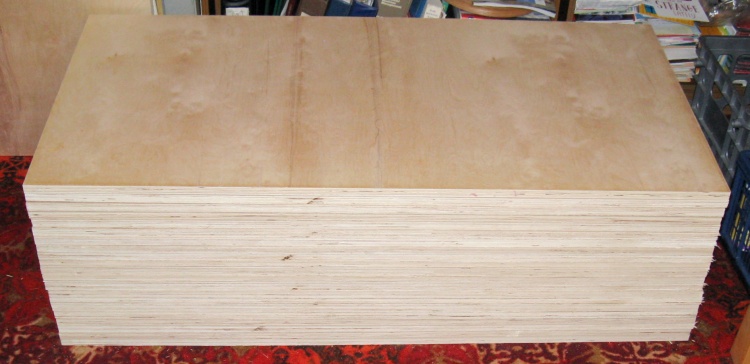
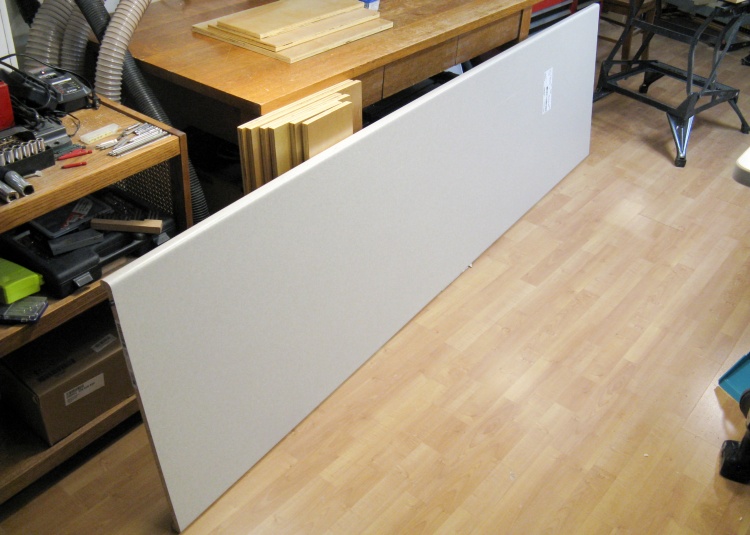
A nice pile of pre-cut plywood
Rona charges a buck a cut so the toll for me to avoid doing the cutting myself was a mere $17; Ha - I spent more on screws. The Rona guy was pretty accurate as can be seen in this well-dressed pile of plywood quarter-sheets, stowed temporarily on the 70's-vintage rumpus room carpet.
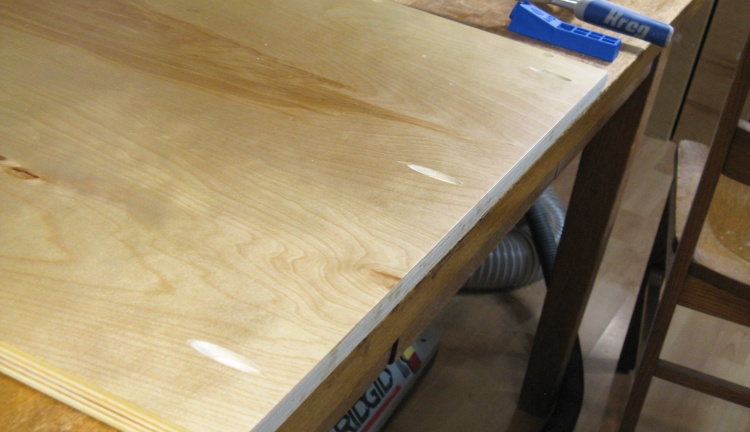
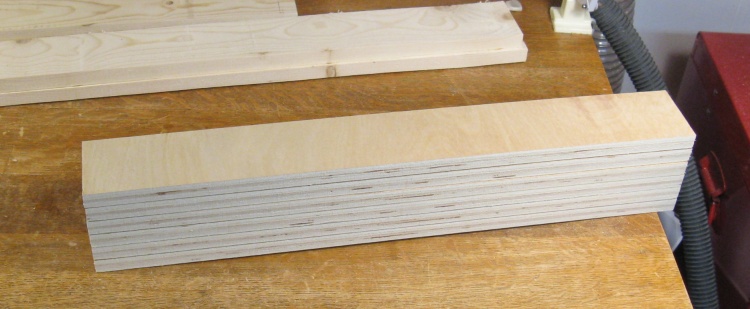
The plywood I used was birch with an 18mm thickness, an 11 ply construction and thin face veneers. In fact the veneer was only 0.008" thick - about the same as three sheets of paper. The danger of that thinness is that if the face needs to be sanded for any reason, you risk sanding right through it. Fortunately my design didn't require any sanding so it was no problem for me.
The plywood I used was birch with an 18mm thickness, an 11 ply construction and thin face veneers. In fact the veneer was only 0.008" thick - about the same as three sheets of paper. The danger of that thinness is that if the face needs to be sanded for any reason, you risk sanding right through it. Fortunately my design didn't require any sanding so it was no problem for me.
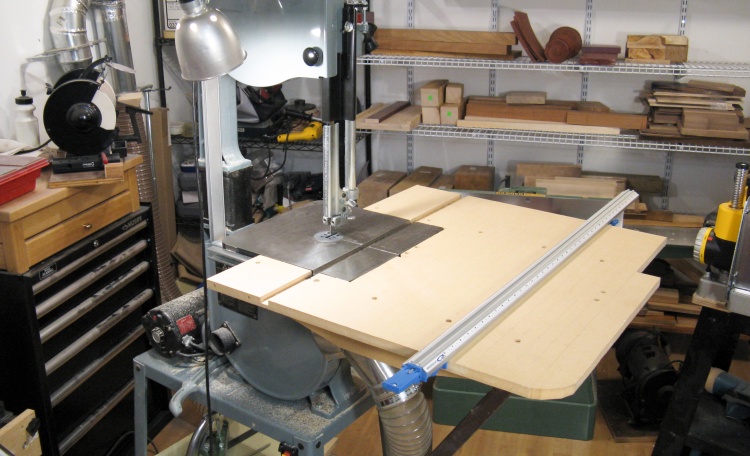
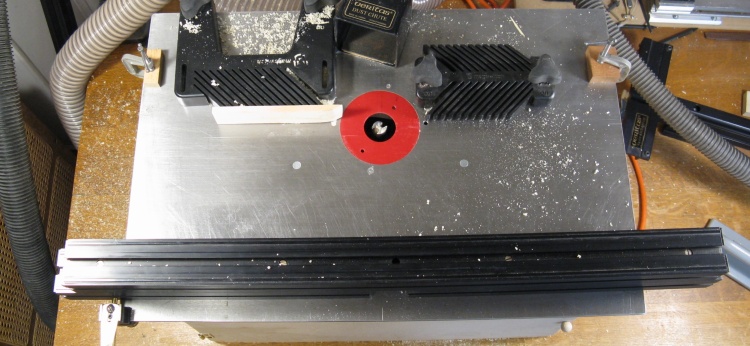
Bandsaw setup
This photo shows the bandsaw with an extension table I use to cut large pieces. The table to the right of the blade will hold a fair sized sheet but you can only cut up to about 13" to the left of the blade before it runs into the structure of the saw.
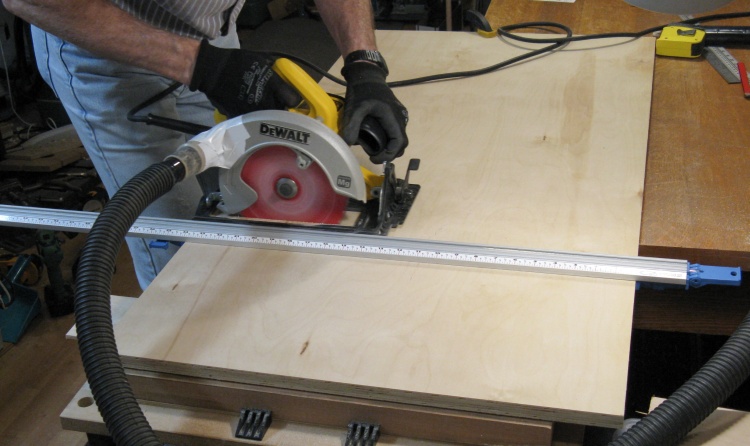
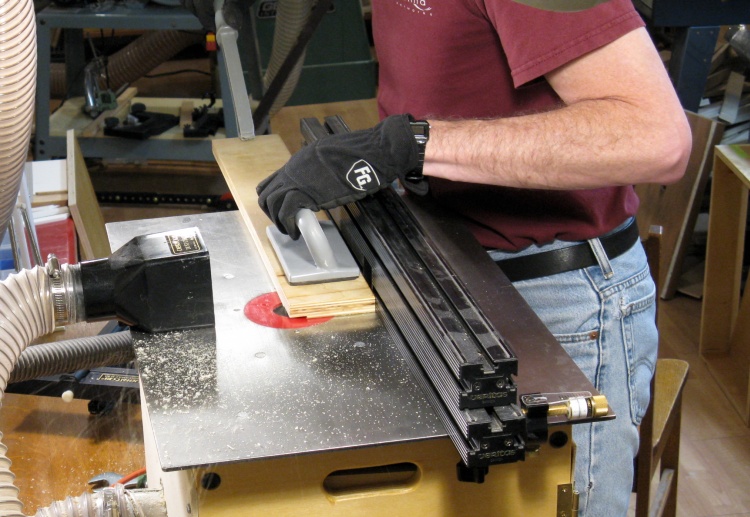
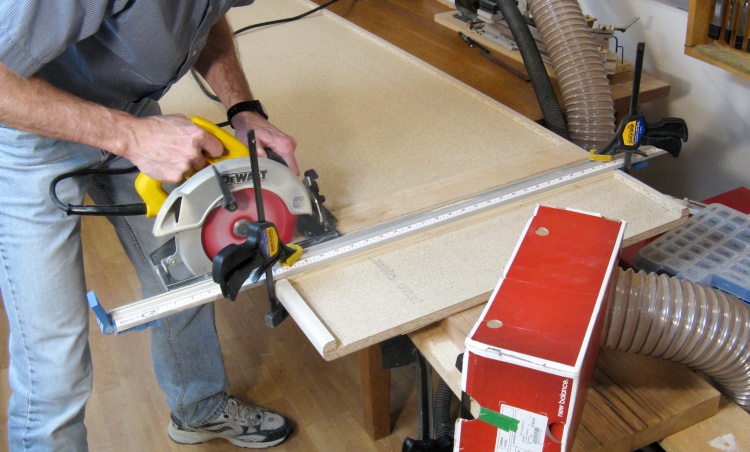
Circular-sawing to reduce size
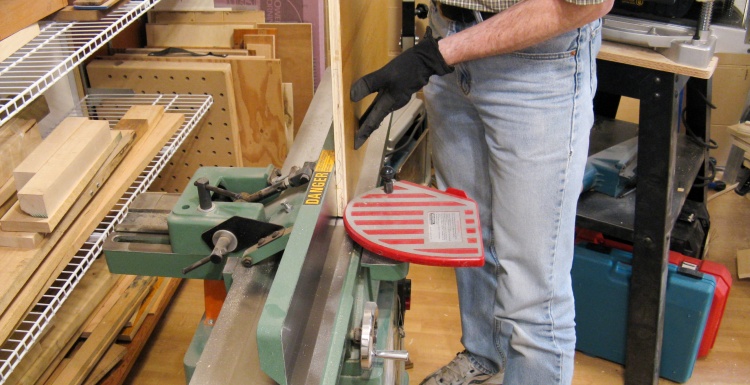
Unfortunately even with the smaller 24x48" sheets, there were several where pieces longer than 13" needed to be cut off. Those I did using a circular saw and a clamp-on saw guide as shown here. Fortunately, that was still way more convenient than cutting a 4x8-foot sheet.
I kludged up a dust collection system for the circular saw using a short piece of plastic pipe and a bunch of white duct tape since normally the saw just shoots the sawdust out; less than ideal if you are anywhere other than outdoors.
I kludged up a dust collection system for the circular saw using a short piece of plastic pipe and a bunch of white duct tape since normally the saw just shoots the sawdust out; less than ideal if you are anywhere other than outdoors.
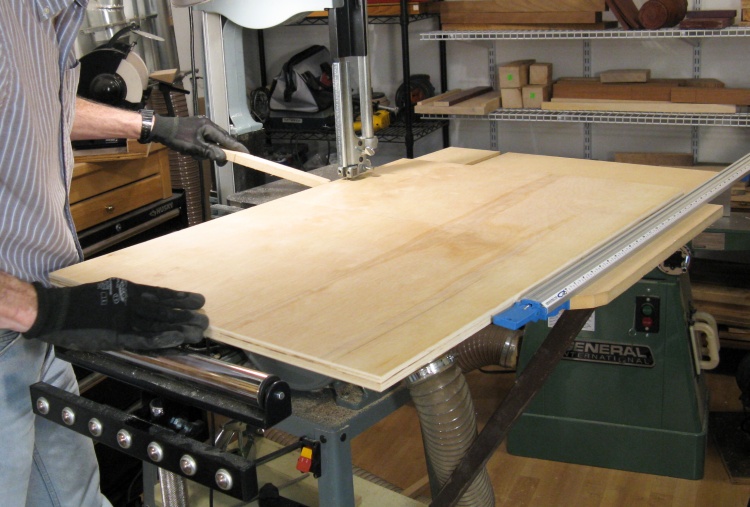
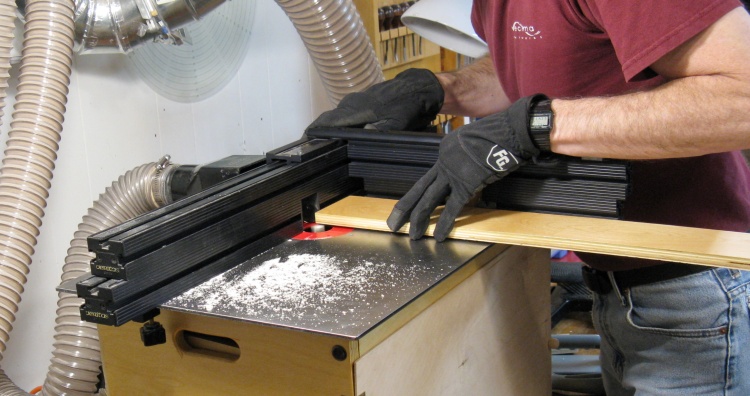
Narrowing a piece on the bandsaw
Once a sheet had the larger pieces removed, it could go on the bandsaw for width trimming or making smaller pieces. Here a largish piece is getting an inch or so trimmed off one side.
The aluminum fence visible on the right is clamped to the table at the appropriate distance from the blade to get the desired width of cut.
The aluminum fence visible on the right is clamped to the table at the appropriate distance from the blade to get the desired width of cut.
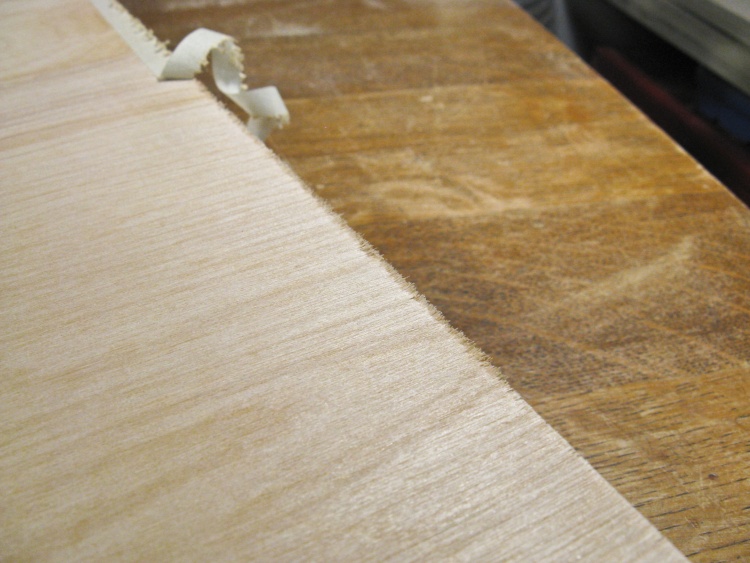
Cross-grain cutting
The shot above shows the plywood being sawn in the same direction as the grain of the outside veneer, which produces a nice smooth cut. By contrast, making a cut across the grain direction results in splinters. To minimize those, I added masking tape to the bottom side of the board along the route of the cut.
After cutting, the tape is removed leaving the splinters (center section in picture), which are then sanded off (lower portion) to clean up the edge. When cutting without the tape, the splinters are about twice as long.
After cutting, the tape is removed leaving the splinters (center section in picture), which are then sanded off (lower portion) to clean up the edge. When cutting without the tape, the splinters are about twice as long.

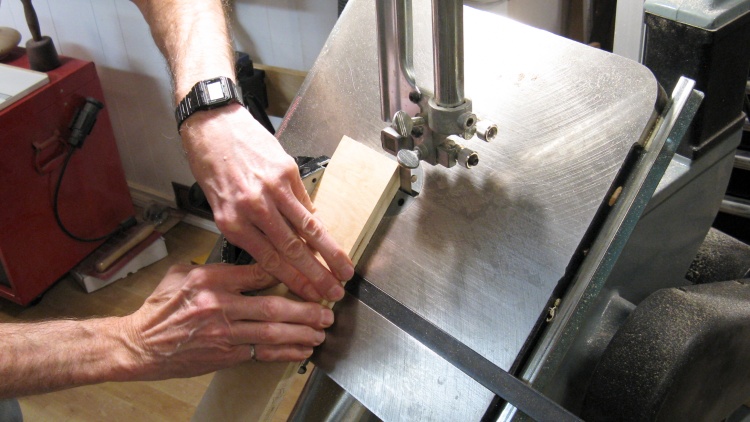
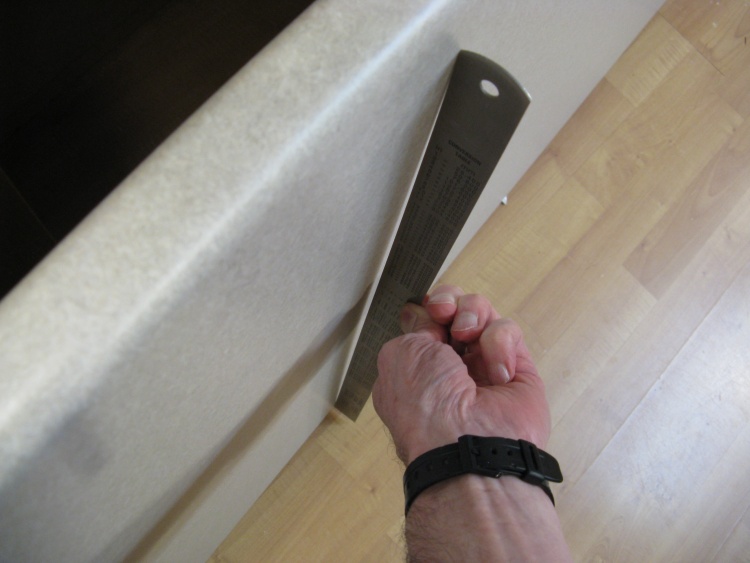
Numbering a piece
Once a piece was cut to size, I numbered the end to identify it so each piece had a number from one through 78.
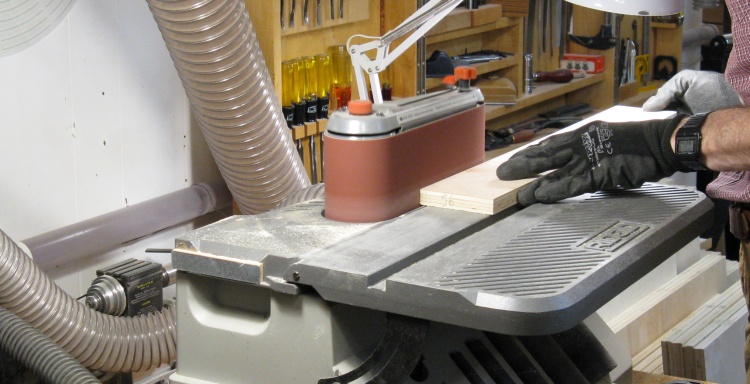
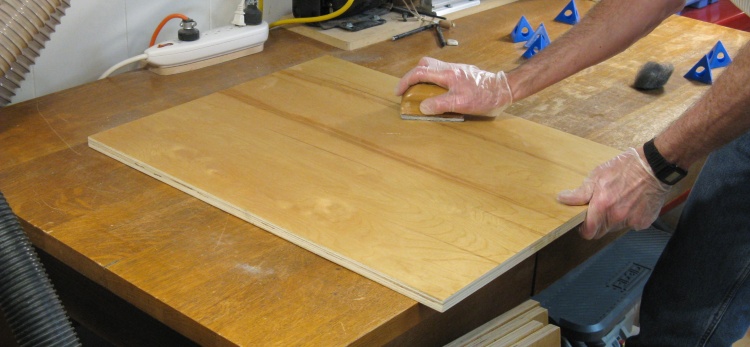
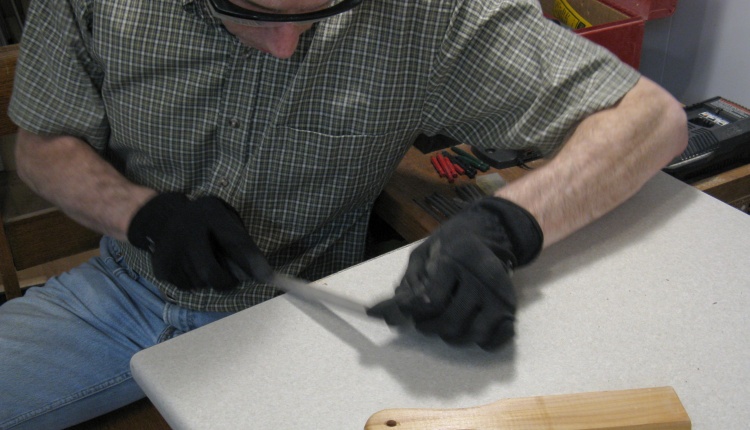
Sanding the visible edges
The saw left the edges fairly rough so any that would be visible after the cabinet was assembled were sanded smooth on the horizontal belt sander.

Hand-sanding the corners
After that, all the corners were hand-sanded to round them a bit and remove any splinters.
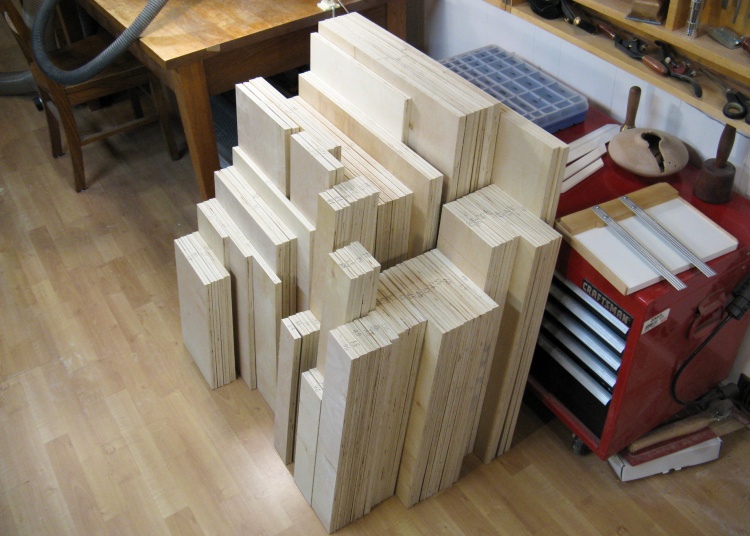
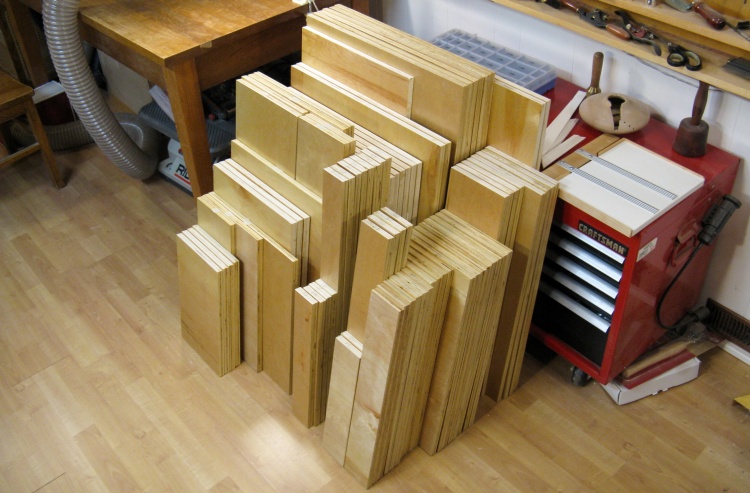
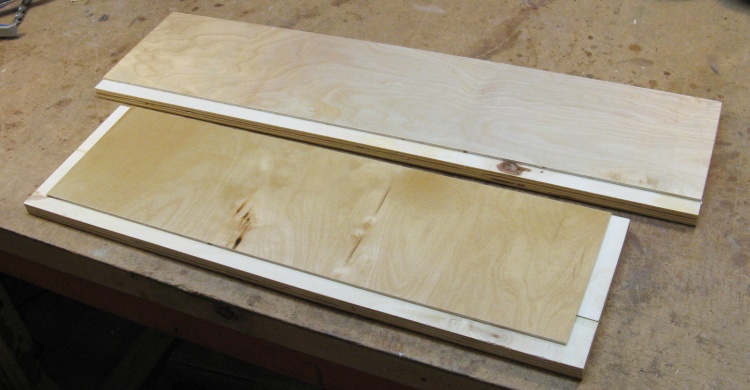
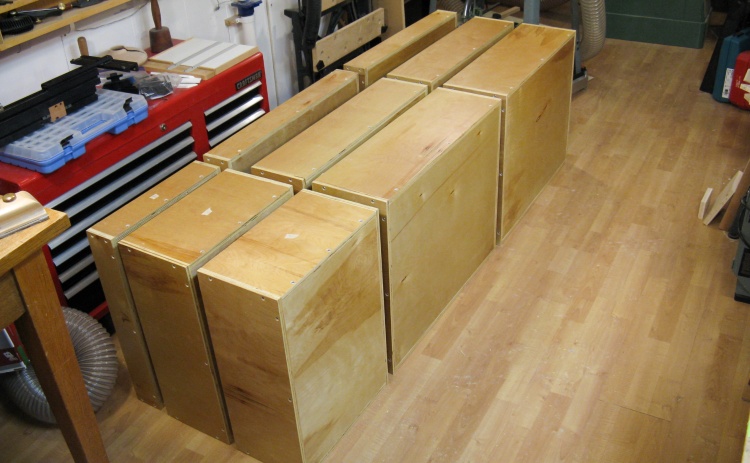
All the pieces cut to size and edge-sanded
Eventually all 78 pieces (which comprised three cabinets and nine drawers) had been cut to size and edge sanded. Here they are all nicely arranged for the family photo.
Varnishing
Starting on the varnishing
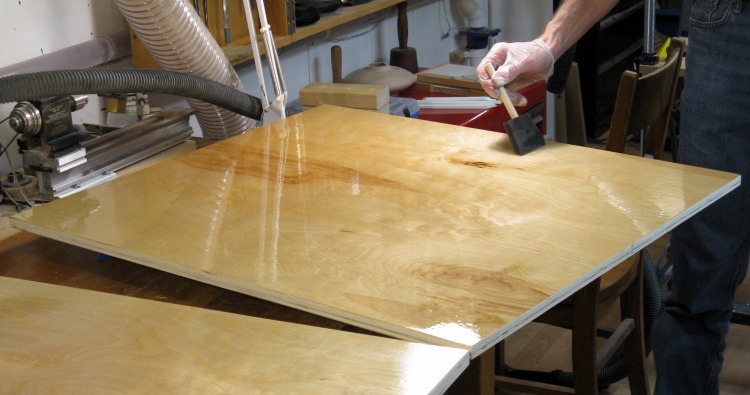
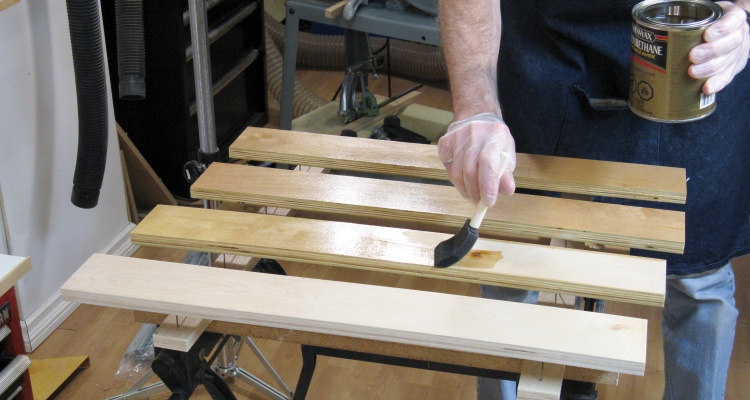
As alluded to previously, I decided to pre-finish the pieces prior to assembly. All the faces and any edge that was not going to be glued got two coats of varnish. Normally I would do three coats but I was able to put on more than normal since there was no danger of drips on the horizontal faces and I was careful to avoid putting too much on the vertical edges.
I started with the largest pieces and worked downward in size with this photo showing a couple of cabinet backs getting a coat of varnish. I would do both sides and any required edges in one session and position the pieces on small plastic stands for drying.
I started with the largest pieces and worked downward in size with this photo showing a couple of cabinet backs getting a coat of varnish. I would do both sides and any required edges in one session and position the pieces on small plastic stands for drying.
Workroom vent fan connected to central vac hose
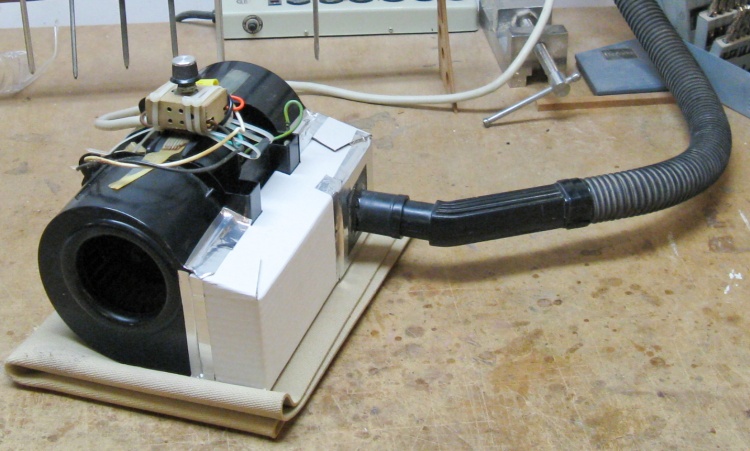
The finishing was done in my workroom which can cause the house to smell like varnish. Since the finishing was going to take a couple weeks, I wanted a way to avoid the fumes. I didn't have any convenient holes connecting the workroom to the outside, but I do have a central vac that vents outside so I rigged up this old vent hood fan to blow out through the central vac piping (with the central vac off, of course) and let it run 24/7 for a couple weeks.
The fan seemed to work pretty well and you could only smell the varnish close to the closed workroom door. Since it was winter I did a quick calculation to see how much heat I was pumping out with the smelly air and it worked out to the equivalent of only a few minutes of furnace operation to replentish the heat pumped out in a day.
The fan seemed to work pretty well and you could only smell the varnish close to the closed workroom door. Since it was winter I did a quick calculation to see how much heat I was pumping out with the smelly air and it worked out to the equivalent of only a few minutes of furnace operation to replentish the heat pumped out in a day.
Roughing up the first coat of varnish
The varnish needs to be roughed up between coats for good adhesion. Normally I use steel wool but with just big flat surfaces to do I was able to use sandpaper, which was much quicker.
After sanding, I vacuumed the surfaces and then used a tack cloth to remove any remaining sanding dust before adding the next coat.
After sanding, I vacuumed the surfaces and then used a tack cloth to remove any remaining sanding dust before adding the next coat.
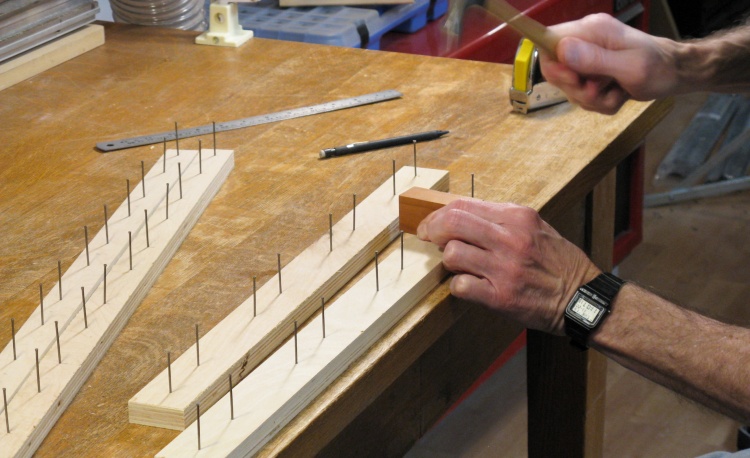
Making some varnishing stands
I had only enough of the plastic painting pyramids (the blue guys in the previous photo) to varnish four pieces at once so for the smaller pieces I made up a couple sets of simple finishing-nail stands that would support four or 8 small pieces each. This photo shows me completing the last of them, with the nail being pounded down (with a little 5 oz hammer) until the top is even with the wood block.
Getting down to the smaller pieces
This photo shows the first coat on some of the smaller pieces.
When I started the varnishing I did only two large pieces at a time and one coat per day. But as the pieces got smaller I was able to do 8 or even 12 pieces, and also stored half-dried pieces elsewhere so I could do two coating sessions per day.
When I started the varnishing I did only two large pieces at a time and one coat per day. But as the pieces got smaller I was able to do 8 or even 12 pieces, and also stored half-dried pieces elsewhere so I could do two coating sessions per day.
The varnishing aftermath
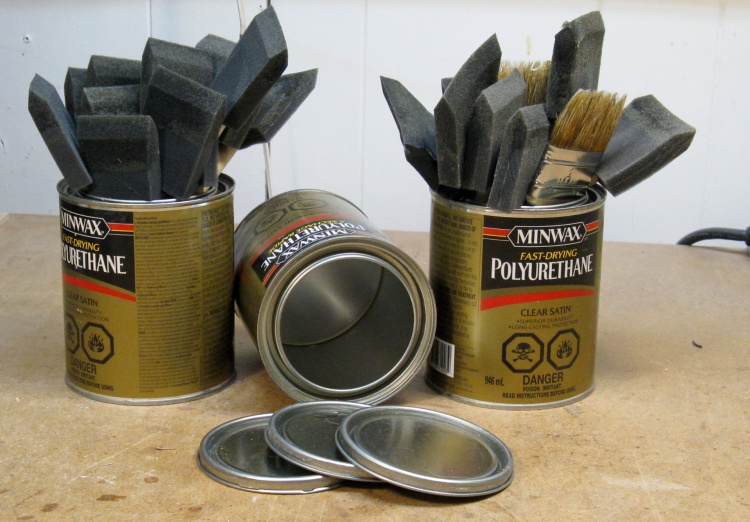
As shown in this completely candid and totally not staged photo, it took three liters of varnish and some large uncounted number of brushes.
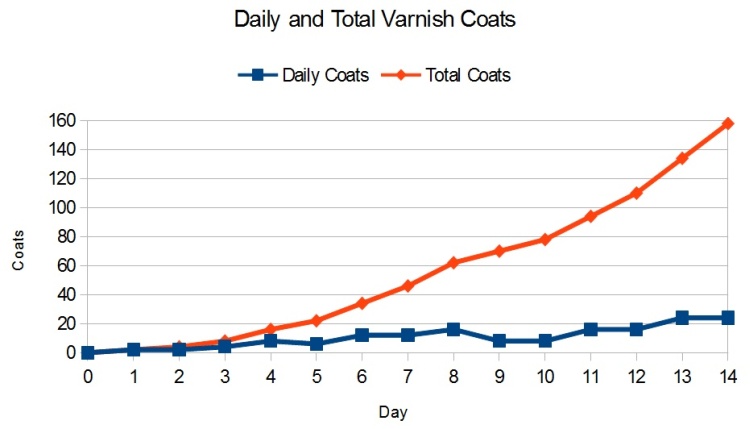
Varnish coats vs. time
"Yes, but what was the exact rate of varnishing progress?", you ask. Fortunately I anticipated this critical question and provided an appropriate informative graph.
There were 78 pieces, each needing two coats for 156 coats total (actually 158 since the first two pieces got three coats).
Overall it took two weeks of once or twice-daily varnishing sessions as the graph clearly illustrates.
There were 78 pieces, each needing two coats for 156 coats total (actually 158 since the first two pieces got three coats).
Overall it took two weeks of once or twice-daily varnishing sessions as the graph clearly illustrates.
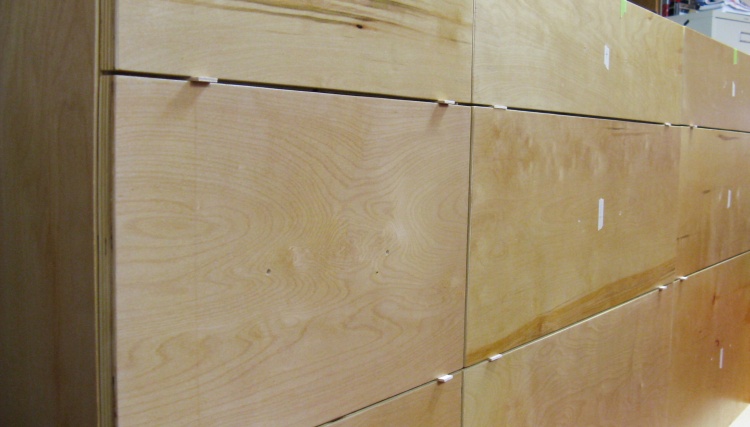
Varnished and ready to go
And then all the pieces got together again for the "after" family photo.
The lighter-colored ends visible have no varnish since those edges will be glued when the cabinet and drawers are assembled.
The lighter-colored ends visible have no varnish since those edges will be glued when the cabinet and drawers are assembled.
Drawer Assembly
The classic exploded view of a drawer
This sketch shows how the six drawer pieces are going to fit together. The bottom is recessed into the edges to avoid visible vertical seams and the front and back also fit into the sides.
The pieces will then be glued on all the recessed areas when the drawer is assembled, with screws for alignment/clamping.
At this point the pieces have all been cut to size and varnished, but the four edge pieces need to be routed to get the recesses seen here.
The pieces will then be glued on all the recessed areas when the drawer is assembled, with screws for alignment/clamping.
At this point the pieces have all been cut to size and varnished, but the four edge pieces need to be routed to get the recesses seen here.
Routing a short-sided drawer piece
This is the sort-of-backwards routing setup I used for the drawer edge pieces. It puts the top edge of the routed section a fixed distance from the top of the piece. That way the top of the edges should all be the same distance above the bottom piece even if there are differences in drawer edge heights.
Actual routing setup used
I added some featherboards to help hold the wood against the fence as shown in this picture. The left featherboard is modiified with a piece of wood since the "feathers" go the wrong direction when the wood is moved from right to left.
Adding recesses on the short side of the wood
For routing the short sides of the edge pieces, I used a different setup with a 90-degree sled holding the piece square.
A couple drawer pieces after routing
This is what a couple of drawer pieces - a side and a front - look like after routing (a different-sized drawer than previous pictures).
All the recessed sections were the same 1/8-inch depth.
All the recessed sections were the same 1/8-inch depth.
Hmmm...surface mount or countersunk?
I screwed a couple drawers together - one with countersink holes and one without - to compare the looks. The countersunk version (lower drawer) looked a bit more finished, so I went with that technique.
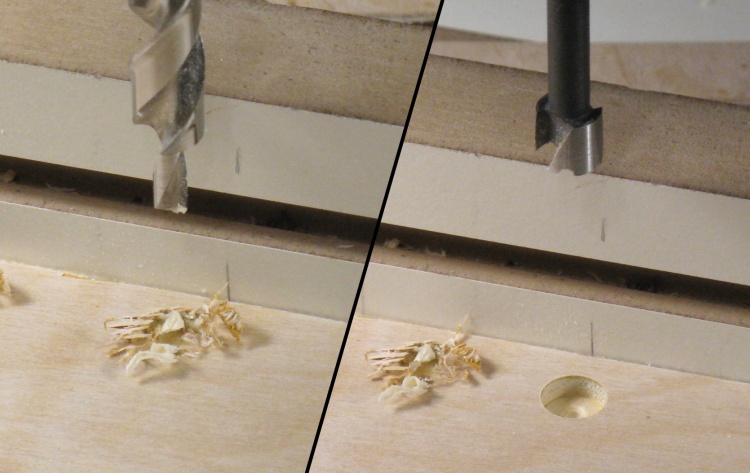
Combo bit vs. forstner holes
For the countersunk screw holes, the normal way is to drill a counterbore with a forstner bit and then drill the clearance hole. However I had a stepped drill bit of just the right size from a pocket hole jig that might let me do it in one drilling step.
Unfortunately the stepped bit leaves a rather...imperfect...hole. This fancy divided image shows the holes left by the stepped bit and then the forstner. To my eye, the forstner hole looked maybe a bit cleaner.
Unfortunately the stepped bit leaves a rather...imperfect...hole. This fancy divided image shows the holes left by the stepped bit and then the forstner. To my eye, the forstner hole looked maybe a bit cleaner.
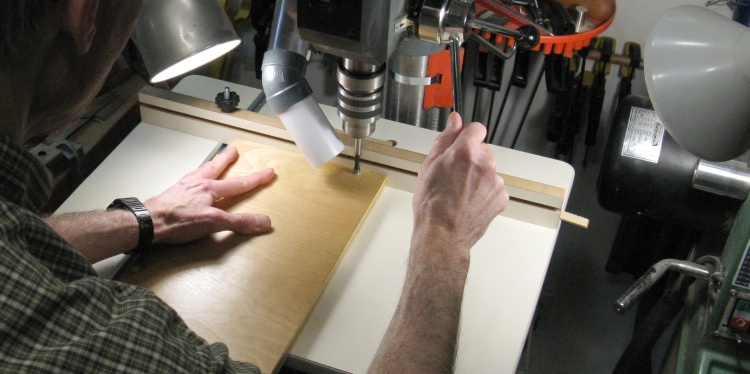
First drill counterbore holes...
So then it was the two stage approach. This shot from the parrot-cam shows the first step being the drilling of a shallow 3/8" counterbore...
...then the clearance holes
...and then the clearance hole for the screw. The fence on the drill press table was used to get a consistent distance from the edge.
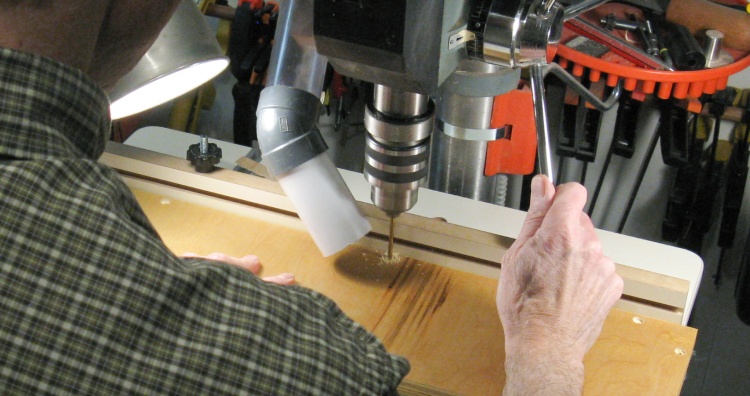
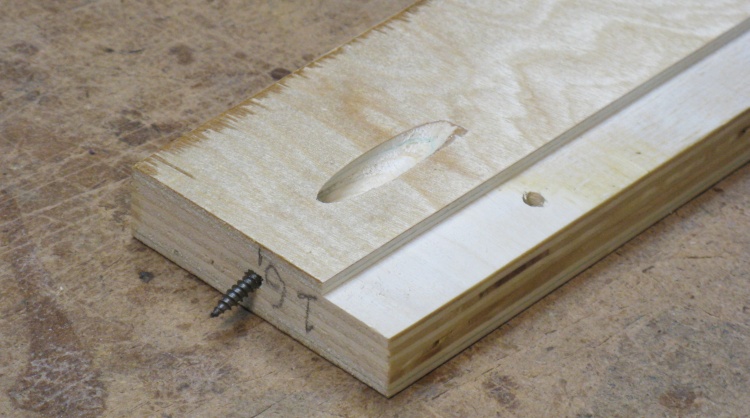
Drilling pilot holes
A bit of testing showed that there was some danger that the screws going directly into the edge of the plywood would split it.
To prevent that, I drilled pilot holes prior to assembly.
To prevent that, I drilled pilot holes prior to assembly.

Test assembly of a drawer
The drawer sides were all assembled without glue to check the fit and get all the screw holes in the right places.
Checking the fit of a drawer bottom
Once the sides were together, the bottom pieces were checked for fit. Everything had been cut to the nominal size, so due to imperfect cutting (hard to believe, I know), there was often one or more dimension that was slightly oversized and needed to be trimmed.
Trimming an edge on the jointer
Any oversized pieces were trimmed with a pass or two on the jointer until the fit was good.
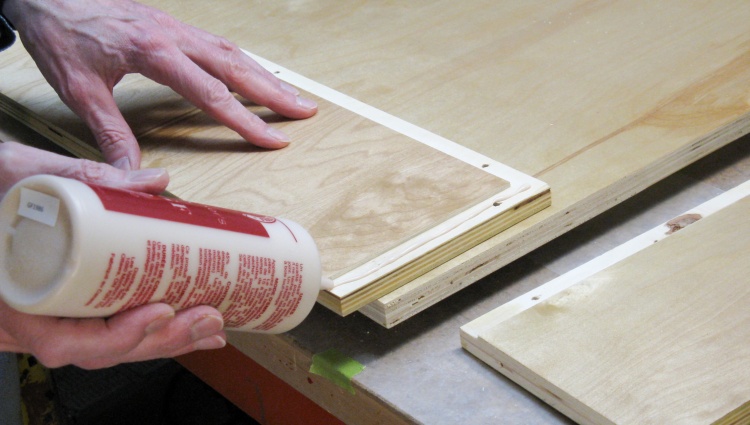
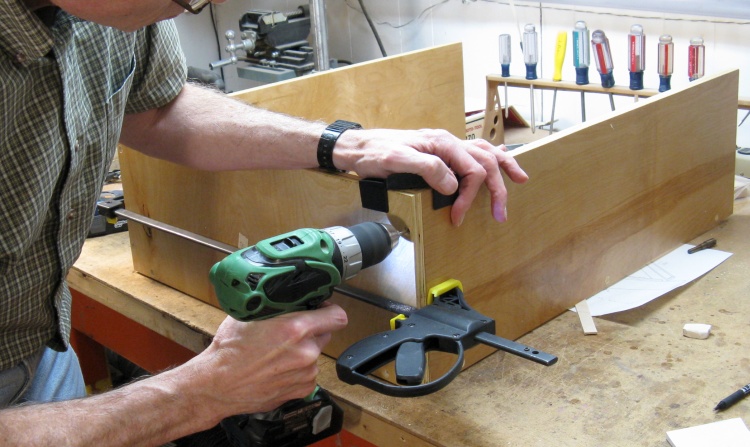
Starting to glue the drawers
So with all the drawer pieces fitting nicely, one by one they were disassembled and then reassembled, this time with glue.
Reassembling the drawers
The construction of the drawers automatically kept them square, so it mostly was a matter of screwing everything together. Any glue squeeze-out was just wiped off the varnished surface with a damp cloth.
All the drawers done
Here's the completed set of drawers, pretty much blocking off my access to tools. They still need the fronts added but that needs to wait until after cabinet assembly.
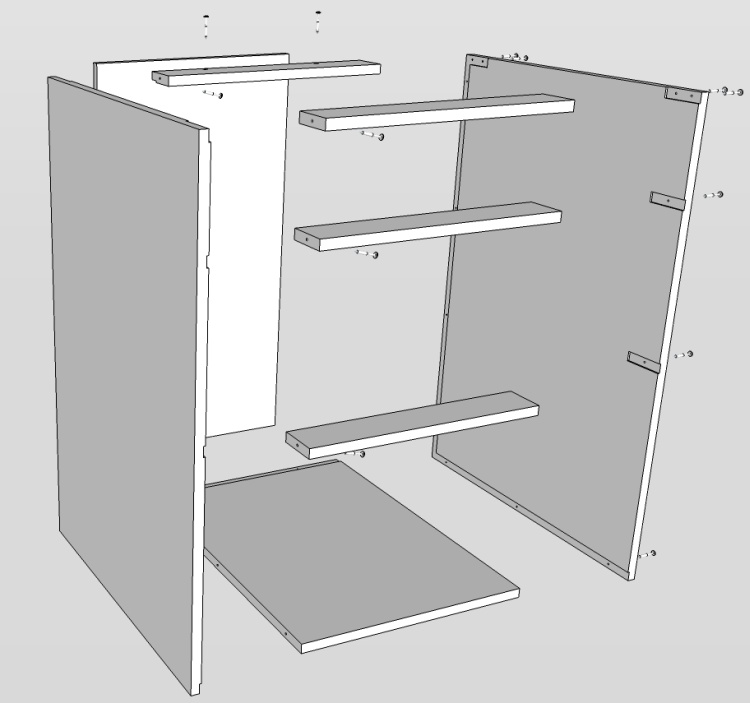
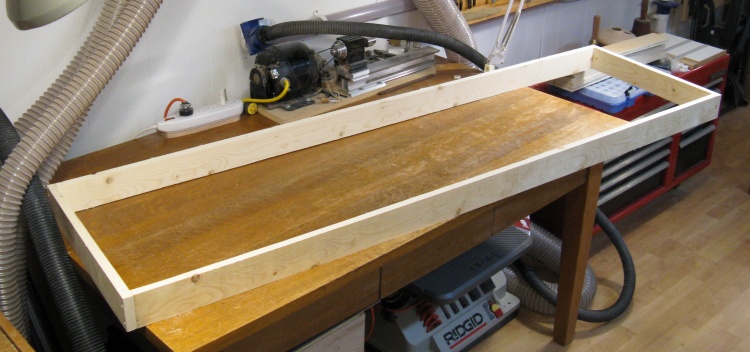
Cabinet Assembly
Cabinet assembly (with screws!)
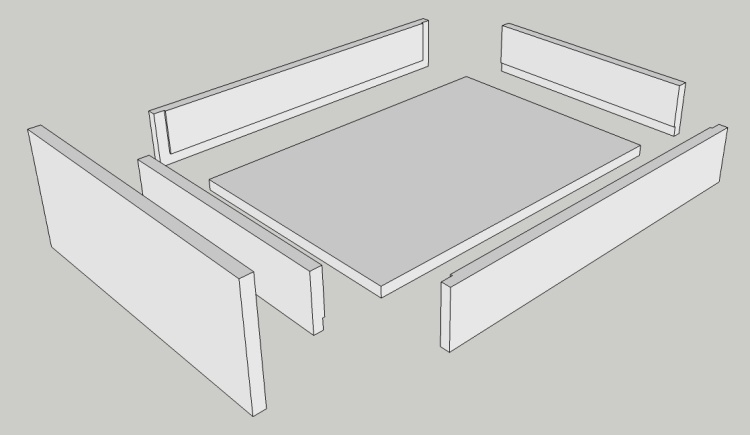
With all the drawers together, it was time to start on the big stuff. I actually started with the smallest big stuff; the narrower 18" cabinet, which is the one shown in this exploded view. The two other cabinets at 30" wide are identical except for the width.
Like most other modern cabinets, this is a frameless design. Older designs have a frame around the openings for aesthetics but that reduces the size of the opening which is especially undesirable for drawers.
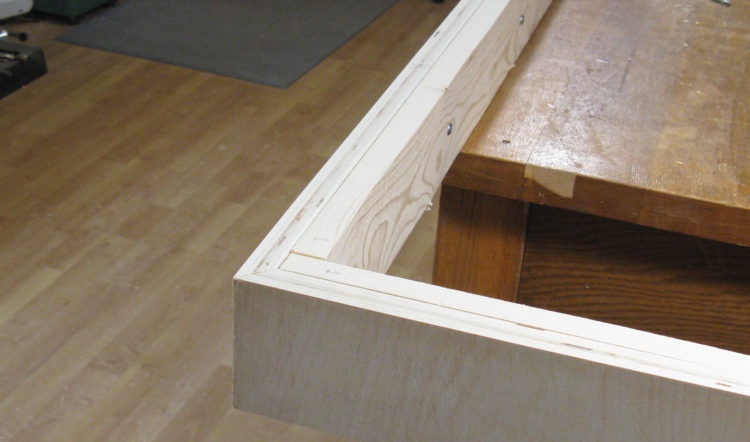
The back, bottom and supports of the cabinet are recessed into the sides in a similar fashion to the drawers.
Note that the left side panel has been left free of holes for a cleaner look. The internal components will attach to it from the inside using shorter screws in pocket holes.
Like most other modern cabinets, this is a frameless design. Older designs have a frame around the openings for aesthetics but that reduces the size of the opening which is especially undesirable for drawers.
The back, bottom and supports of the cabinet are recessed into the sides in a similar fashion to the drawers.
Note that the left side panel has been left free of holes for a cleaner look. The internal components will attach to it from the inside using shorter screws in pocket holes.
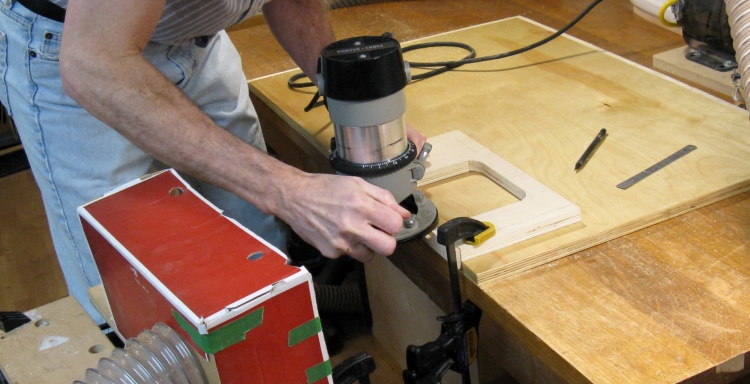
Routing a slot in the cabinet side
The recesses along the edges were formed using the router table in a conventional manner, but the shorter slots couldn't easily be done that way.
Instead, I used a hand-held router guided by a simple pattern cut from a scrap of plywood. I don't actually have a hand-held router of my own but I was able to borrow one from a woodworking buddy (thanks Gary!).
Instead, I used a hand-held router guided by a simple pattern cut from a scrap of plywood. I don't actually have a hand-held router of my own but I was able to borrow one from a woodworking buddy (thanks Gary!).

Slot for a support
This is one of the slots that holds a support at the front edge of the cabinet. The wooden pattern is sized to constrain the 5.25"-diameter base of the router so it makes the approprate-sized slot.

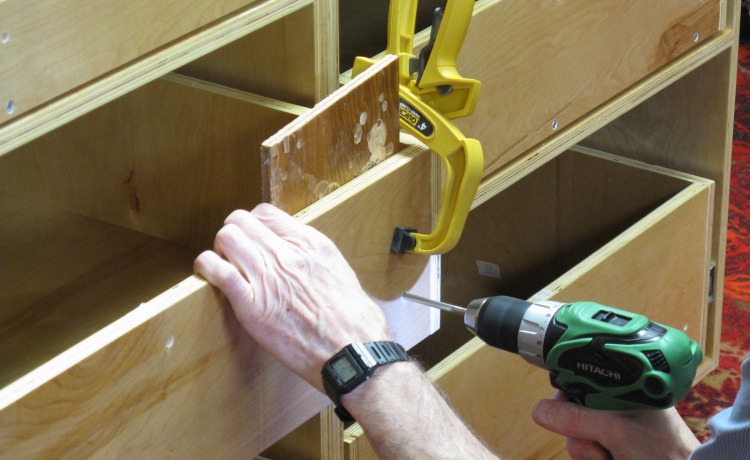
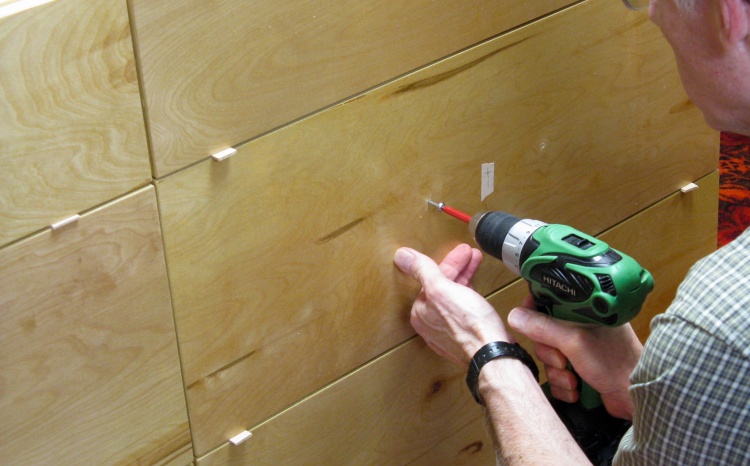
A little marking jig
I needed to mark the hole positions on the outside of the cabinet for the screws going into the ends of the supports, so rather than doing a bunch of measurements I made a little jig that slid over the edge in the routed slot and included a hole to pencil-mark the position.

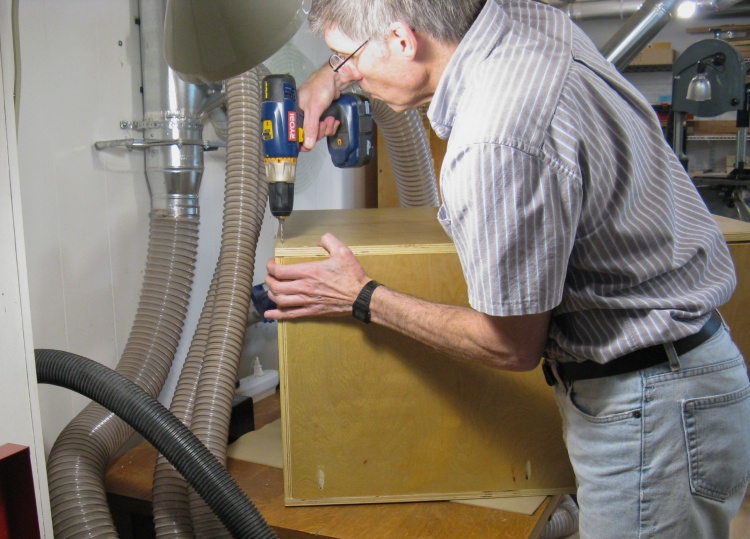
Drilling a pocket hole
A pocket hole allows a screw to have its head inside the wood with the point protruding to connect two adjacent pieces. It is essentially the refined and high-class version of the carpentry toe-nail.
This blue jig allows the hole for the screw to be drilled at an angle into the face of the wood. It uses the stepped drill bit that made such a lousy hole shown previously, but works fine in this application.
The larger hole is for the screw head that goes part-way in, and then the smaller hole for the screw shaft comes out the end of the wood.
A screw in the pocket
With a screw in place, the end extends out at an angle. The drill and screw lengths are chosen so that the screw goes only part-way through the connecting panel.
A few pocket holes in the cabinet back
The pocket holes were used only for pieces connected to the two end panels. The internal side panels used the simpler through-holes since they would not be visible.
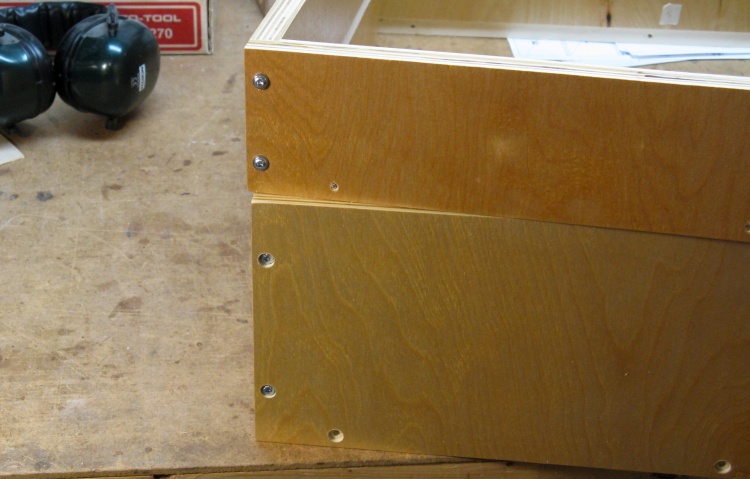
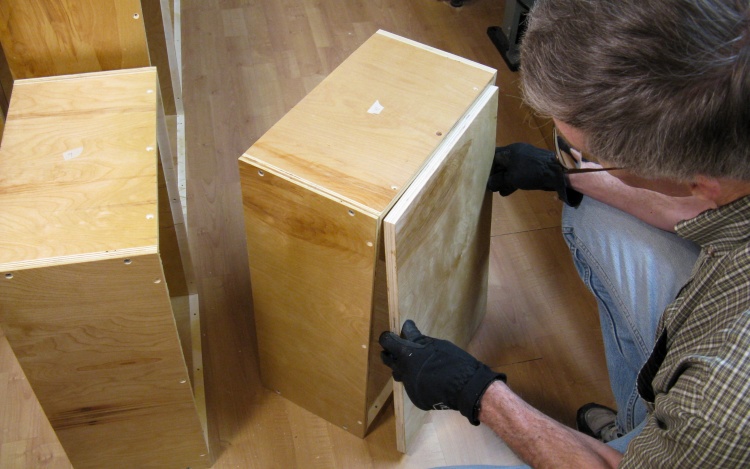
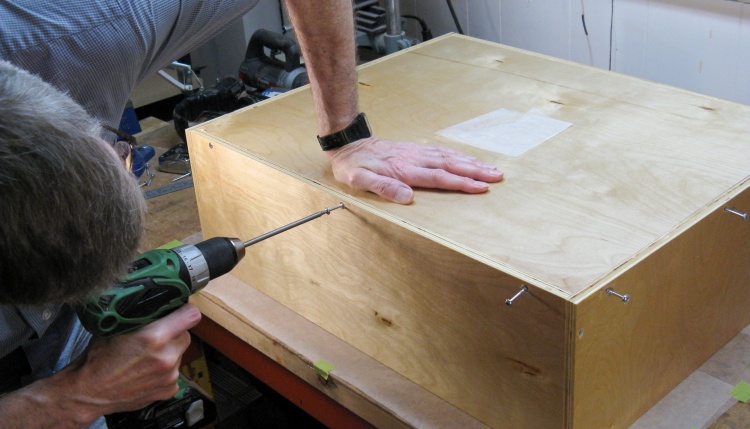
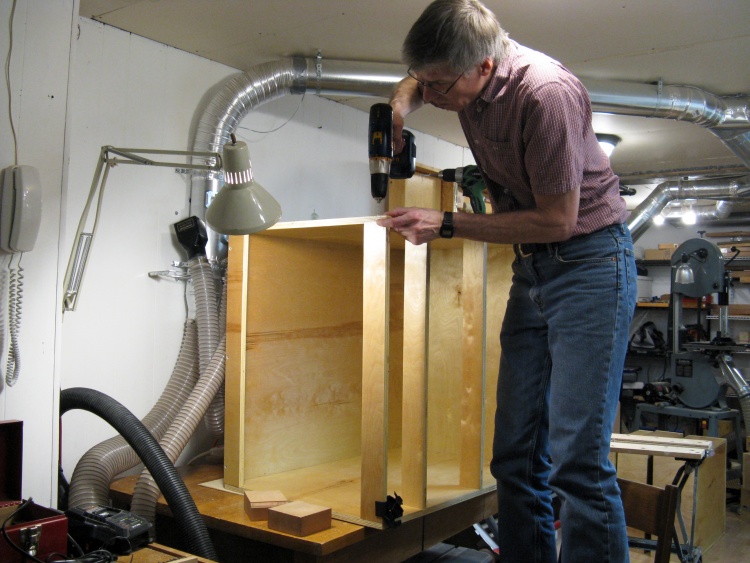
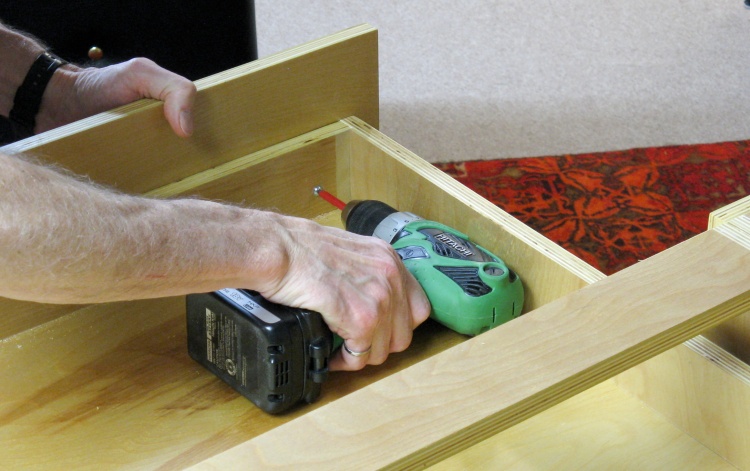
The first cabinet getting assembled
The first cabinet was dry assembled after pre-drilling for screws.

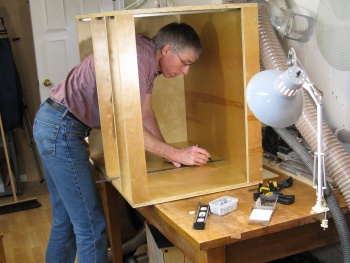
The 18" cabinet assembled
This is the 18-inch wide cabinet with all the pieces together.
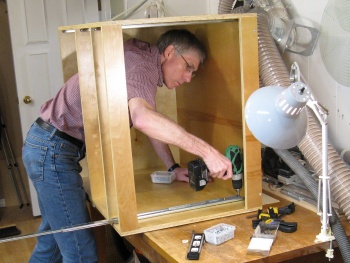
Adding a slide
I pulled one side off the cabinet again to make it easier to install the slides. Here the first one is being screwed into place.
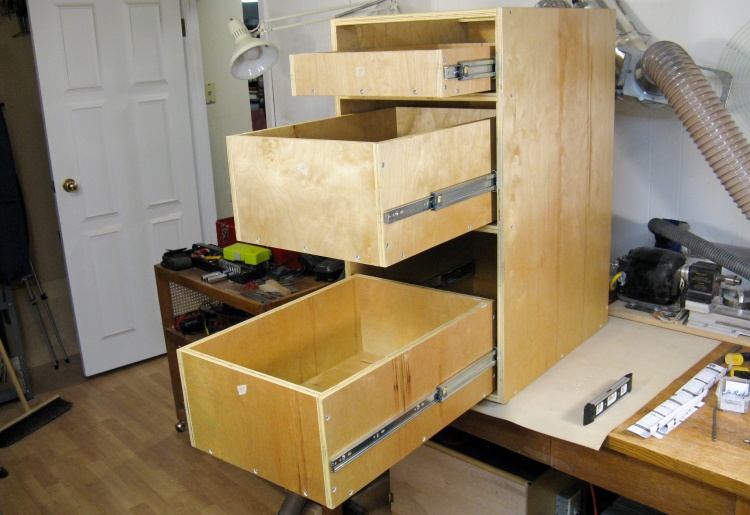
Drawers in the 18" cabinet
With all the slides in place on both the cabinet and drawers, this is the look of the first of the cabinets, minus drawer fronts.
Varnished and ready to go
And then it was the same process for the other two cabinets; they were dry assembled, the slides were installed and the drawer fit checked.
The backs needed a bit of trimming in a couple cases but otherwise they went together well.
The backs needed a bit of trimming in a couple cases but otherwise they went together well.
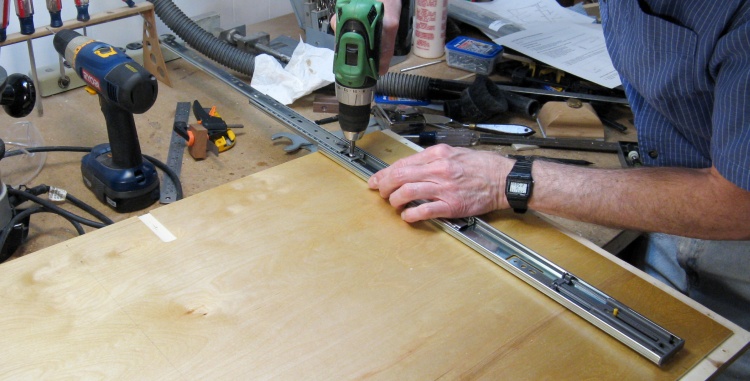
Marking cabinet for its slide
Installing slide
Marking drawer for slides
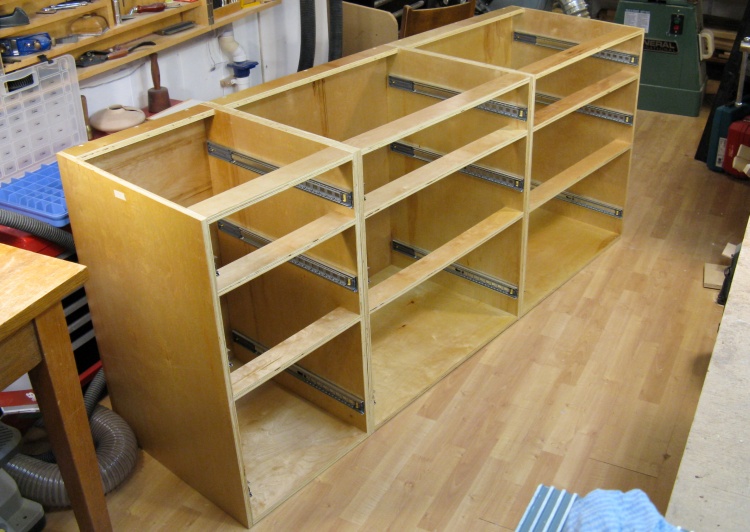
The three cabinets connected together
The last two cabinets were large enough to install the slides while they were still assembled as shown above. The drawers had the appropriate slide pieces installed as well.
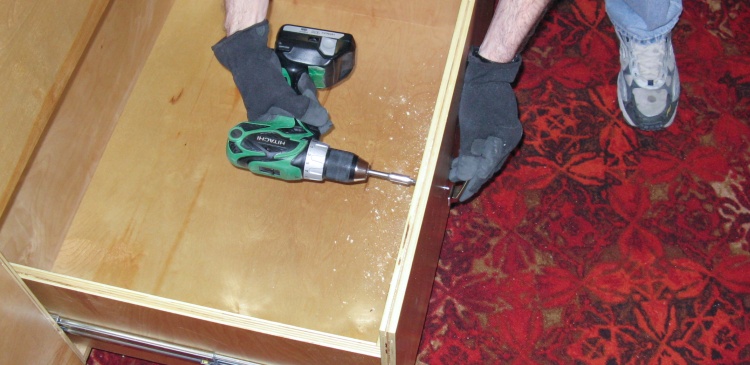
Then as was done with the drawers, each cabinet was disassembled and reassembled after having glue applied.
This photo shows the three cabinets reassembled and temporarily attached into the group of three.
Then as was done with the drawers, each cabinet was disassembled and reassembled after having glue applied.
This photo shows the three cabinets reassembled and temporarily attached into the group of three.
Base Assembly
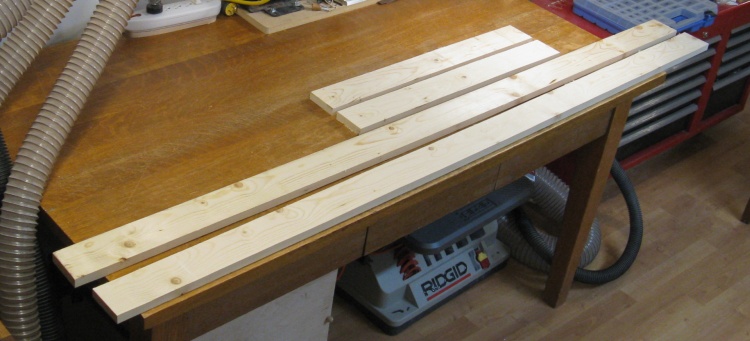
Base frame pieces
The cabinet will mount on a separate base so that it is supported about three inches off the floor. The base itself is a rectangular frame and this photo shows the four sides, just cut from 2x4s.
Base frame "veneer"
In order to have the base match the cabinets, I cut up some plywood scraps to laminate onto the three exposed sides of the base. Here a half-dozen pieces have been cut to width for that purpose.
Mitering plywood for the corners
The corner pieces of the plywood covering were mitered on the bandsaw for a clean corner joint.
Screwing together the frame
The four pieces of the base frame were first screwed 'n glued together...
Base frame assembled
...with this being the assembled frame.
Plywood-clad frame
Then the plywood pieces were fit onto the frame and also glued in place with a few screws to hold them together while the glue dried.
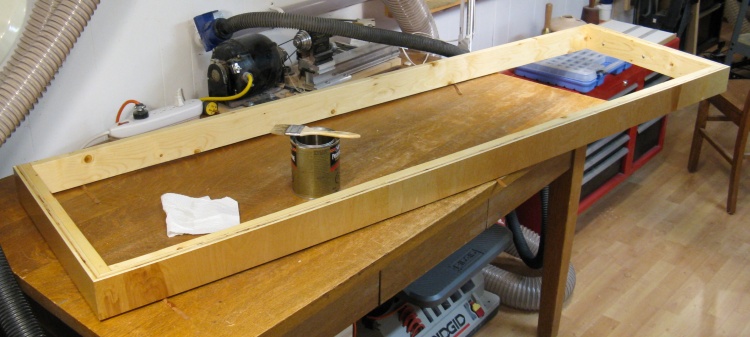
Varnished and ready to go
And finally the base was given a couple coats of varnish before being declared done.
Top Assembly
A piece of molded laminate for the top
I wanted a laminate top for the cabinet but also wanted a rounded front edge. It didn't seem practical to bend my own so I just bought a section of countertop.
This one is 25" deep by 10' long.
This one is 25" deep by 10' long.
Bit of a front-to-back warp
Most of the available countertops were warped the long direction, but that wouldn't be hard to correct. However what I didn't think to check was the warp from front to back. When I got it home, I discovered that the piece turned out to have 1/4" of warp that way. Since the cabinet doesn't have much structure at the front, I didn't think I could just add screws to pull it flat, and I ended up taking that piece back.
I searched around and found one that was a bit less warped - maybe 1/8" front to back like the photo. I decided to laminate it to a piece of plywood to reduce the warp.
I searched around and found one that was a bit less warped - maybe 1/8" front to back like the photo. I decided to laminate it to a piece of plywood to reduce the warp.
Cutting to length
But first it was cut to length using a circular saw with a blade made for plywood. This produced a nice smooth edge on the laminate.

Gluing on the first piece of anti-warp plywood
I bought some 3/4" plywood and my strategy was to glue the plywood to the underside of the top with appropriate clamping to remove the warp.
I used a center brace which was forced downwards with the orange tie-down straps on the vertical wood pieces. I tightened the straps until the top was flat and then let the glue dry.
I used a center brace which was forced downwards with the orange tie-down straps on the vertical wood pieces. I tightened the straps until the top was flat and then let the glue dry.

Underside of laminate top with plywood attached
That seemed to work well since the top ended up being dead flat when it was installed. This is a shot of the underside after the plywood has been attached.
Filing even the edges of the laminate end caps
The ends of the top are unfinished but they sell matching laminate pieces for the ends. These come with heat-activated adhesive, so they get ironed on and then trimmed to be flush. After cutting off the excess with tin snips (no, not the recommended technique), the edges were filed flush as shown here.
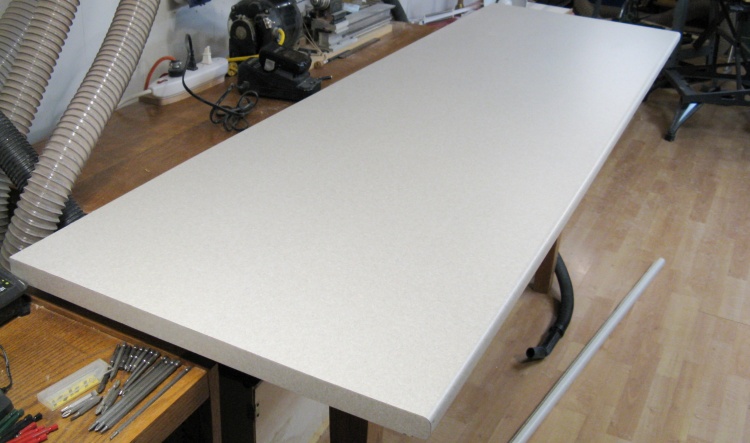
The completed top
This photo shows the completed top.
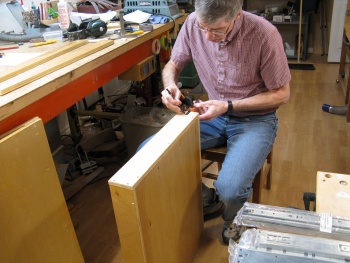
Drawer Front Assembly

Using a pattern to mark handle screw hole locations
The next thing was to prep the drawer fronts for installation.
The prep just consisted of drilling screw holes for the handles. Here, I'm using a transfer punch to mark hole positions with the aid of a thin plywood jig positioned correctly on the front. After marking, the holes were then drilled using the drill press.
The prep just consisted of drilling screw holes for the handles. Here, I'm using a transfer punch to mark hole positions with the aid of a thin plywood jig positioned correctly on the front. After marking, the holes were then drilled using the drill press.
Cabinet assembled and ready to have drawer fronts added
To position the drawer fronts, I needed to reassemble the cabinet, so I set it on the base in the rumpus room and screwed together the three sections.
Drilling for front-fastening screws
The drawers needed to be drilled to accept the three screws that would secure each front. I clamped on a backing board and drilled these by hand.
The drawer fronts precariously balanced in position
Then the nine drawer fronts were set in place and spaced with little pieces of 1/8-inch-thick plywood.
The bottom drawer of each section was supported at the correct height with a pile of wood with wedges to allow adjustment.
The bottom drawer of each section was supported at the correct height with a pile of wood with wedges to allow adjustment.
Fixing position of fronts using screws through handle holes
Then with all the fronts positioned exactly where I wanted them, I drove screws through the handle holes into the drawer fronts. These screws would only be used to hold the fronts in position temporarily.
Adding "proper" front-holding screws
With the fronts held in position, I could remove the spacers, open the drawers and drive in the proper screws from the inside.
Installing handles
Once the fronts were secured from the inside, the screws through the handle holes were removed. The holes made by those temporary screws in the drawer were redrilled to be clearance holes for the handle screws.
Finally the handles were installed using the screws that came with the handles.
Finally the handles were installed using the screws that came with the handles.
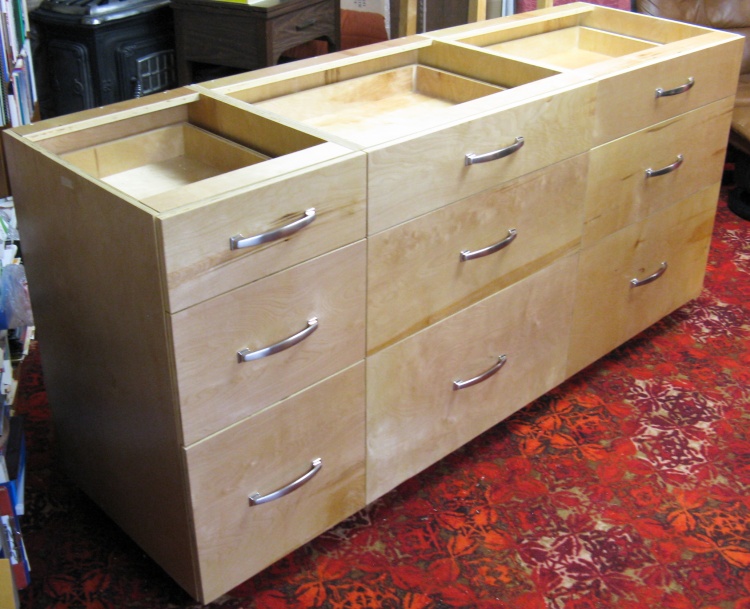
Top-less cabinet with drawer fronts & handles
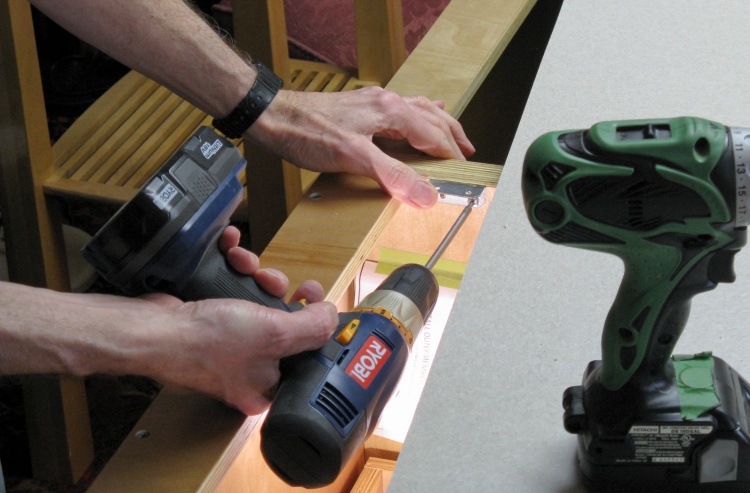
The handle screws were a universal design meaning that they were long enough for almost any application but which also means they're too long for many applications, including mine. So each screw needed to be shortened a bit, which I did using a cut-off wheel on a rotary tool. In addition, they had a Posidrive head which is almost, but not quite, like Philips. Fortunately I found a Posi driver in amongst various driver sets, so I was able to use that.
Here the cabinet can be seen with drawer fronts and handles in place. The only thing missing is the top, but that won't be installed until later.
Here the cabinet can be seen with drawer fronts and handles in place. The only thing missing is the top, but that won't be installed until later.
Adding some brackets to attach the top
The last bit of detail was to add brackets for attaching the top. I used eight 4-hole brackets to get extra screws for more strength.
Old Unit Replacement
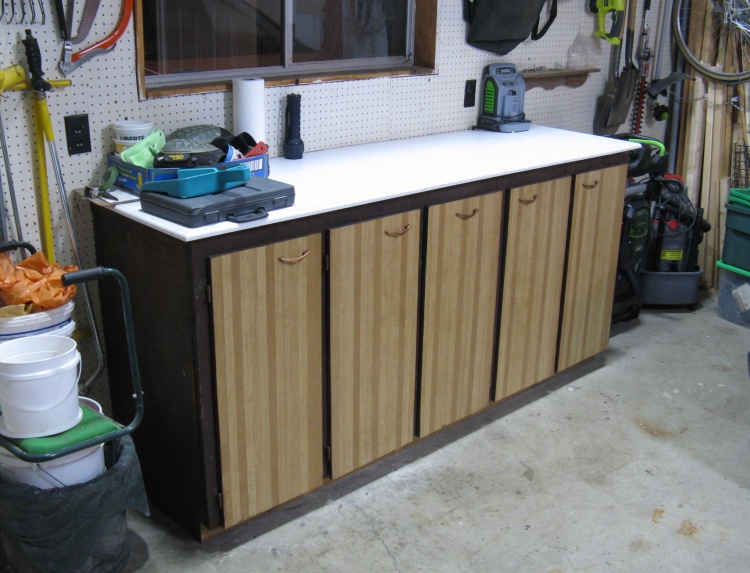
The current cupboard-based cabinet
With the new cabinet complete, I needed to remove the old one. Step one was to empty it, which only took five or 10 minutes.
Step two was to pry it from the wall, but after about half an hour's frustrating work with a number of different pry bars I had managed to pry it only about 1/8". I gave up for the day.
Step two was to pry it from the wall, but after about half an hour's frustrating work with a number of different pry bars I had managed to pry it only about 1/8". I gave up for the day.
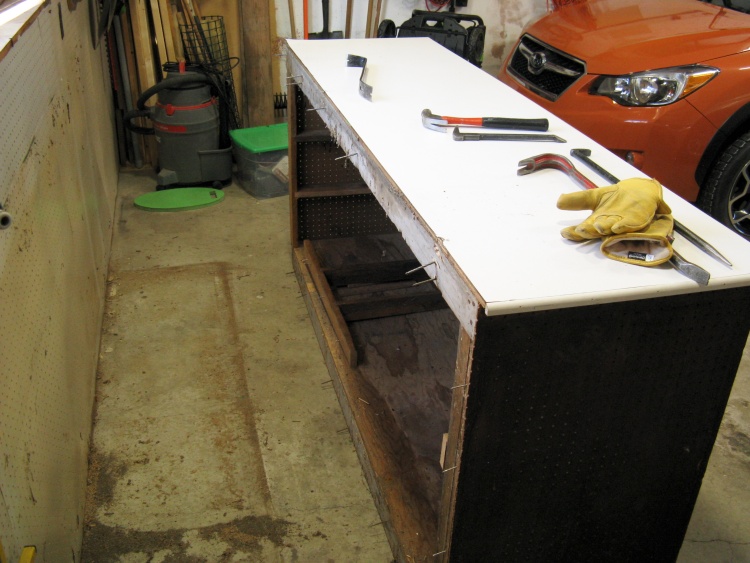
Cabinet yanked off the wall
Another frustrating session the next day got it to 3/4" in some places. I was almost ready to pull it to pieces, but later in the day I was demonstrating to Sue how difficult it was and managed to get a pry bar in at a productive angle and made visible progress. Re-energized, another half-hour or so saw it completely released from the wall.
It was chipped in a few places but still in one piece.
It was chipped in a few places but still in one piece.
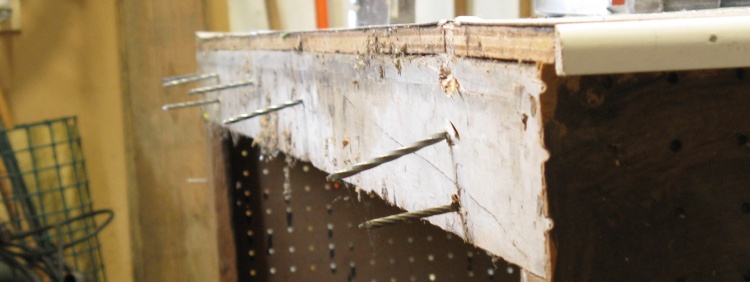
This is why it was a bit tough to do
The issue was a plethora of 4-inch twist nails at both top and bottom.
However, I was happy to have it off in one piece. To get rid of it, I put it on Kijiji for free and 45 minutes later someone had come with a truck and a buddy and it was gone.
However, I was happy to have it off in one piece. To get rid of it, I put it on Kijiji for free and 45 minutes later someone had come with a truck and a buddy and it was gone.
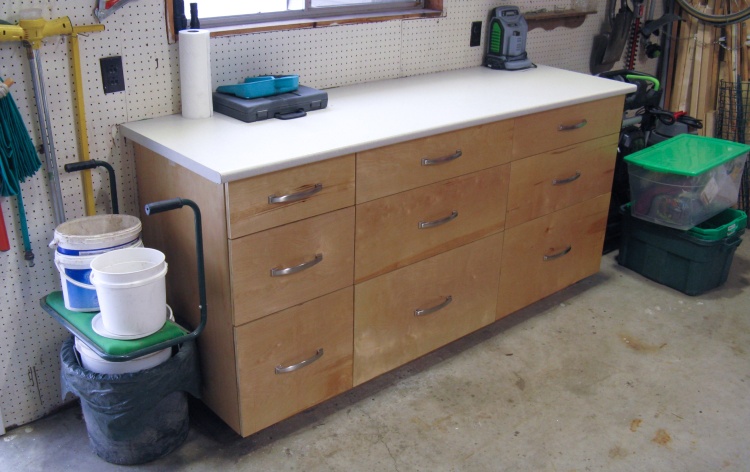
New cabinet in place
After that, putting the new one in was kind of anticlimactic; I placed the base in position, carried the cabinets up one at a time and placed them on the base. The cabinets were screwed to each other and the base, and then the top was screwed on and the drawers installed.
Another 10 minutes of filling the drawers and: Done.
Another 10 minutes of filling the drawers and: Done.


