The classic
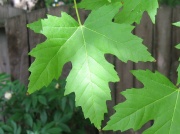
Since this is pretty much the equivalent of a paper-weight (heavy and decorative), the field was rather open as to what it might end up looking like. Now I do like carving and I confess to a weakness for foliage, so when those attributes intersected with the Canadian-ness of the puck, the resulting shadow it cast looked just like a Maple leaf! We have a couple flavours of Maple tree in our yard but the Silver Maple has leaves with the iconic shape so I copied the outline of one I'd photographed a couple years ago.
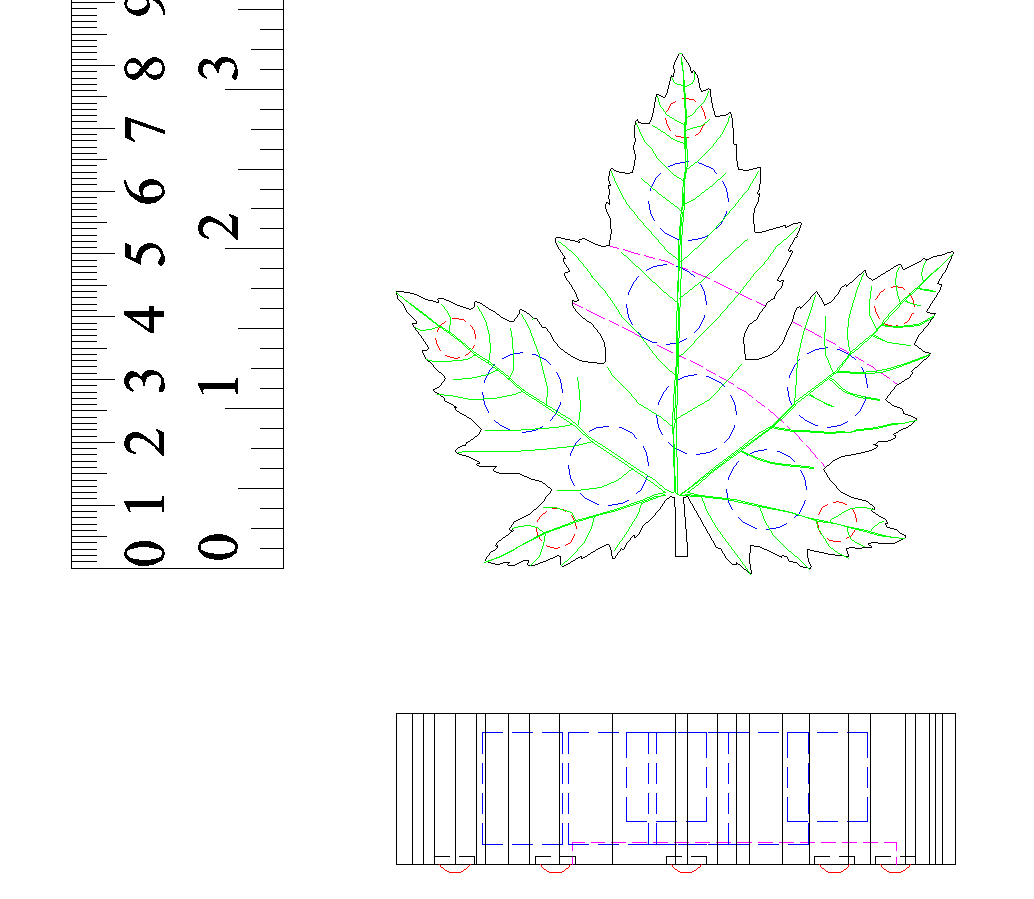
The color-coded leaf with blue weights, red feet, green veins and a purple cable slot
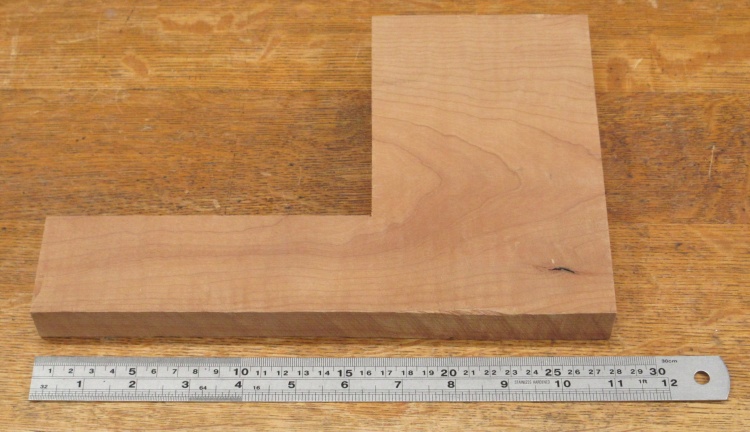
A suitable scrap of Cherry
I had a few pieces of Cherry kicking around the shop but settled on this big L, which had a nice rich color and a wavy grain.
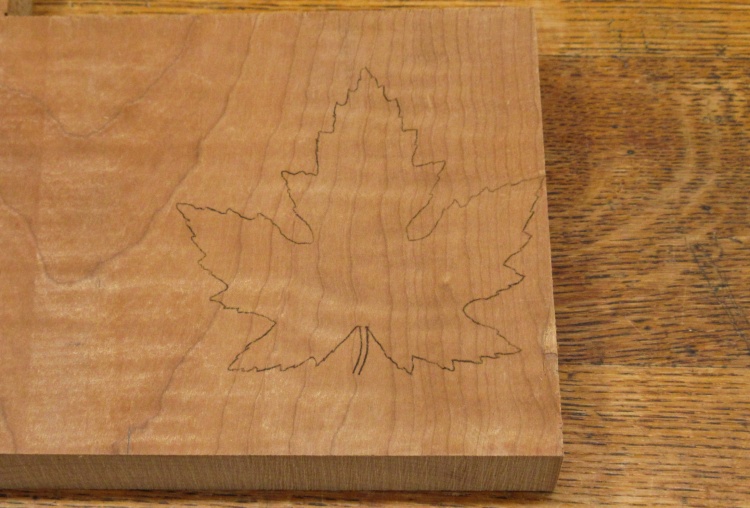
The leaf outline traced out
A full-sized plan, some carbon paper and a couple minutes of tracing produced this very leafy-looking shape.
I was a bit surprised how many "jaggies" the leaf had. Perhaps I'm just used to the flag version which is rather more idealized and cleaned up.
I was a bit surprised how many "jaggies" the leaf had. Perhaps I'm just used to the flag version which is rather more idealized and cleaned up.
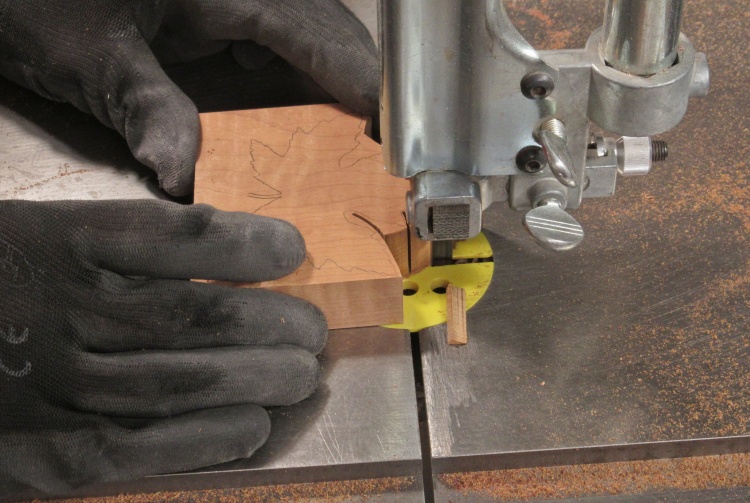
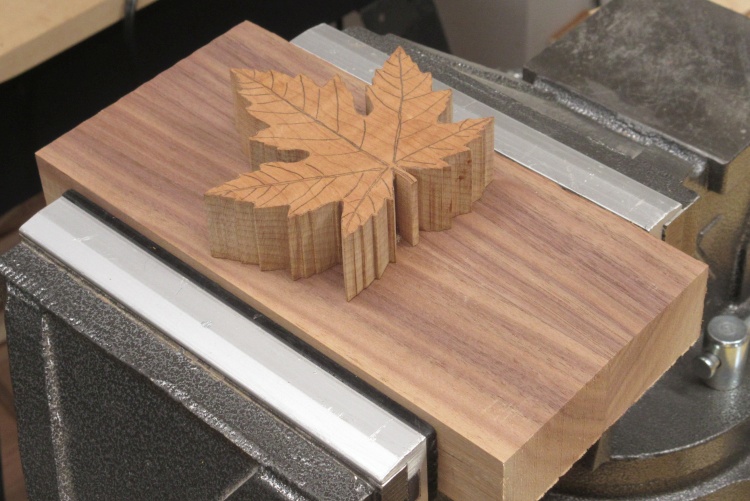
Cutting out the shape
The bandsaw was employed to cut out the leaf.
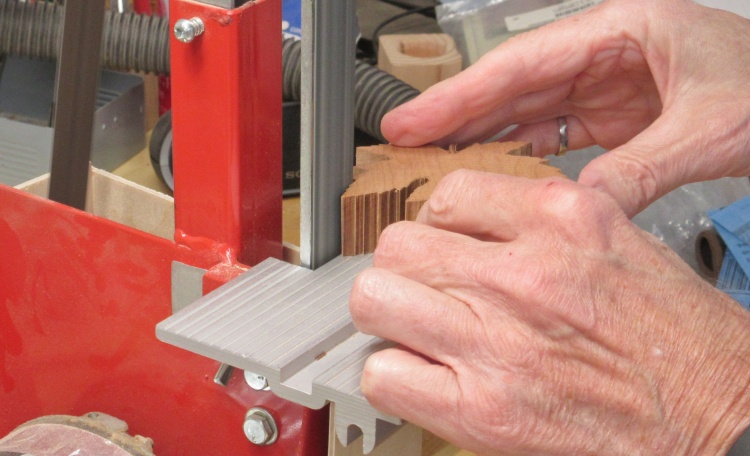
Some belt sanding on the plethora of edges
The edge jaggies multi-toothed leaf margin resulted in lots of short sides so the 1" belt sander was used to smooth off any of the edge surfaces it could reach.
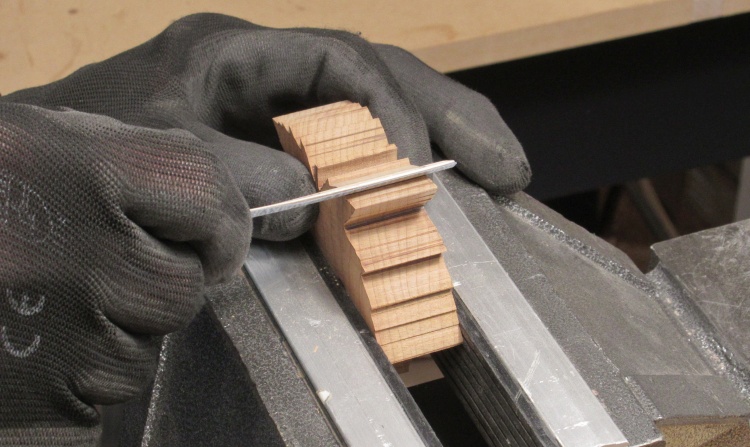
Edges finished off with hand sanding
The belt sander couldn't get into the deeper notches so needle files and a variety of sanding sticks were used to finish off the edge sanding.
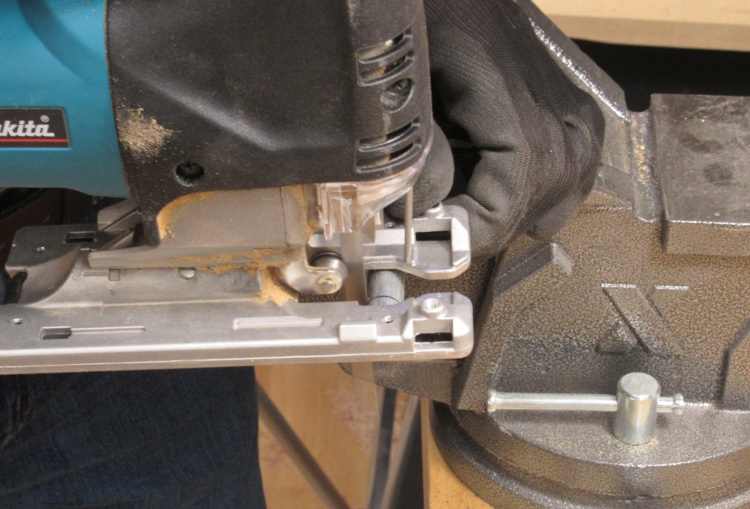
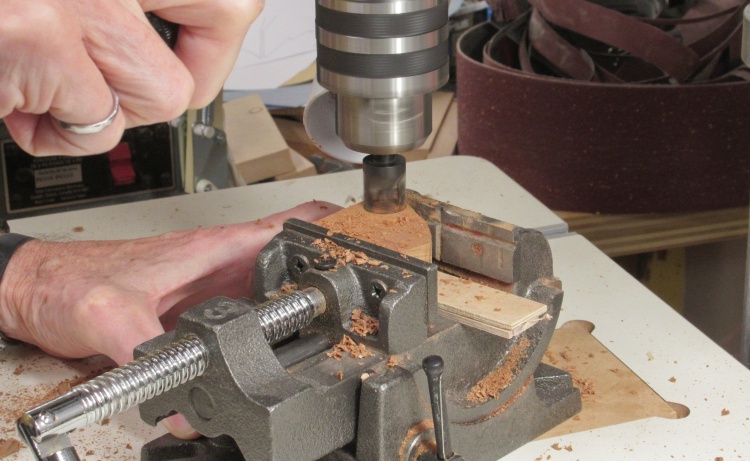
Cutting off a short section of bar
Eventually I needed to carve the veins into the top (for which I also needed to check techniques) but before that I wanted to add the weights, the cable slot and the foot holes.
Now the Romans used a soft and heavy metal called plumbum for a bunch of things, but these days unless we're trying to impress people with our Latin knowledge, usually just call it lead. It is 40% more dense than steel so I considered plumbum (impressed?) fishing sinkers for the weights. Unfortunately they tend to be odd shapes and the same size hole would actually hold a higher weight of perfectly-fitting cylindrical steel. Plus I was oddly* reluctant to use the toxic lead.
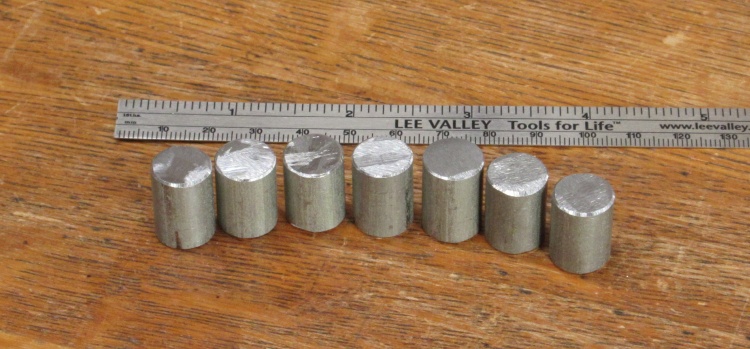
In this shot the jig saw is being used to cut off about 0.7" of a 1/2" steel bar, which will comprise one of the weights (worth about 17g or 0.6 oz).
Now the Romans used a soft and heavy metal called plumbum for a bunch of things, but these days unless we're trying to impress people with our Latin knowledge, usually just call it lead. It is 40% more dense than steel so I considered plumbum (impressed?) fishing sinkers for the weights. Unfortunately they tend to be odd shapes and the same size hole would actually hold a higher weight of perfectly-fitting cylindrical steel. Plus I was oddly* reluctant to use the toxic lead.
In this shot the jig saw is being used to cut off about 0.7" of a 1/2" steel bar, which will comprise one of the weights (worth about 17g or 0.6 oz).
Seven "leaf weights" ready to go
After a bit more work with the jig saw and then the grinder for deburring, the seven weights were done.
Sort of.
I belatedly realized that two of the weights needed to be shorter due to the cable slot reducing the leaf thickness. So a couple slightly shorter pieces of bar stock were chopped off the rod after this shot was taken.
Sort of.
I belatedly realized that two of the weights needed to be shorter due to the cable slot reducing the leaf thickness. So a couple slightly shorter pieces of bar stock were chopped off the rod after this shot was taken.
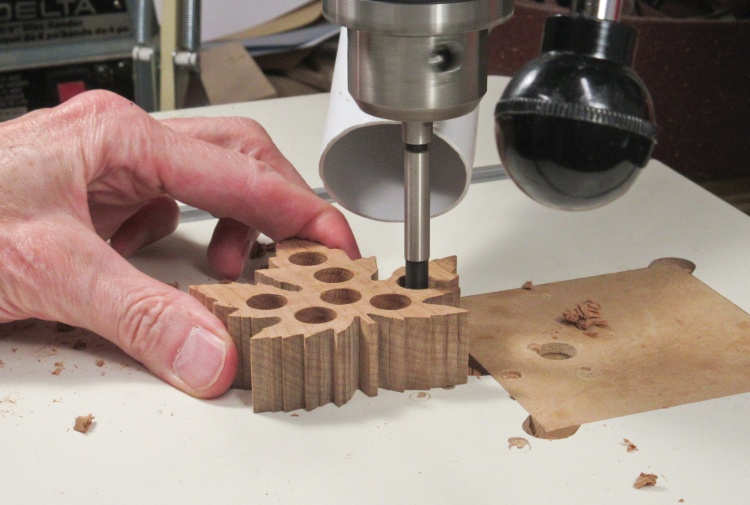
Drilling weight holes
Holes for the weights were drilled using a 1/2" Forstner bit. The holes needed to go within about 1/8" of the top surface but Forstner bits have a central point that extends past the bottom of the hole, so I needed to stop short to avoid breaking through the top side.
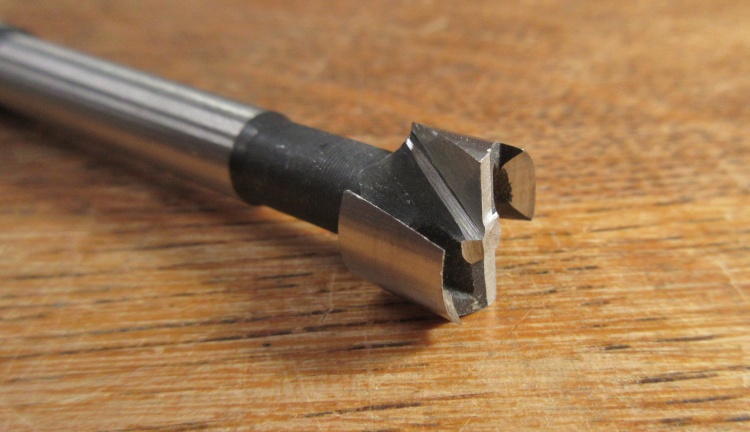
A modified Forstner bit to make a flat-bottomed hole
To flatten the hole bottoms I ground the point off a spare 1/2" Forstner bit as shown here and used that to drill the remaining depth.
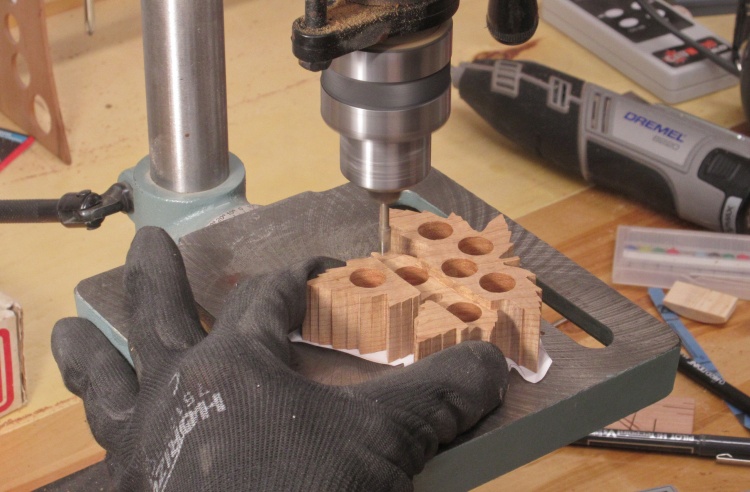
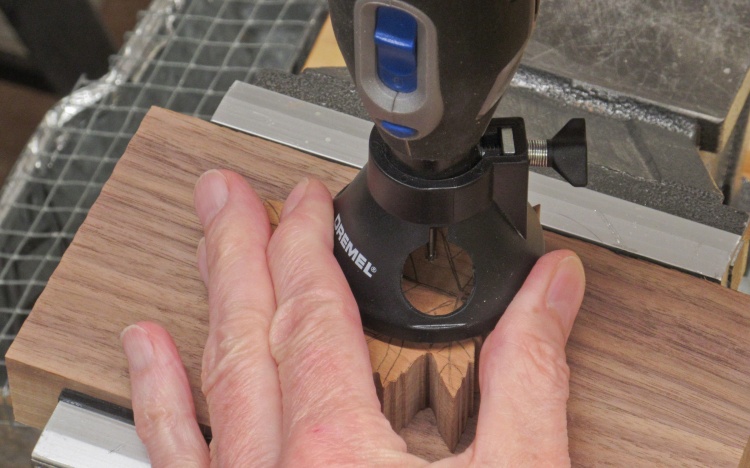
Cutting in a slot for the cables
I also needed a slot for the cables in the bottom, so I used a Dremel router bit in the small drill press running at high sped to mill that out.
Cutting tapered plugs for the weight holes
Lastly I needed plugs to fill the weight holes and this shot shows one of the tapered plugs being cut from a scrap of Maple.
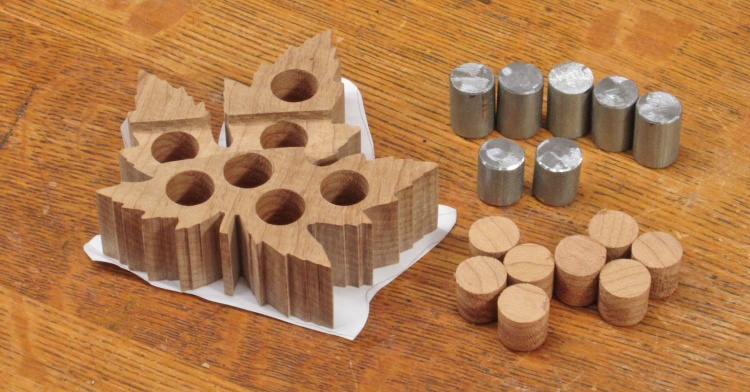
Leaf, weights and plugs ready for assembly
OK: holes, weights and plugs ready to go together.
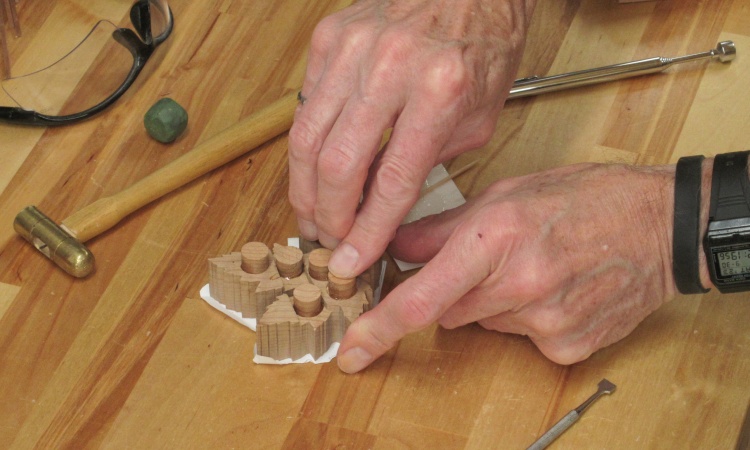
Gluing in the weights with a plug chaser
I used epoxy to glue the weights in place, each of which was capped with one of the tapered plugs.
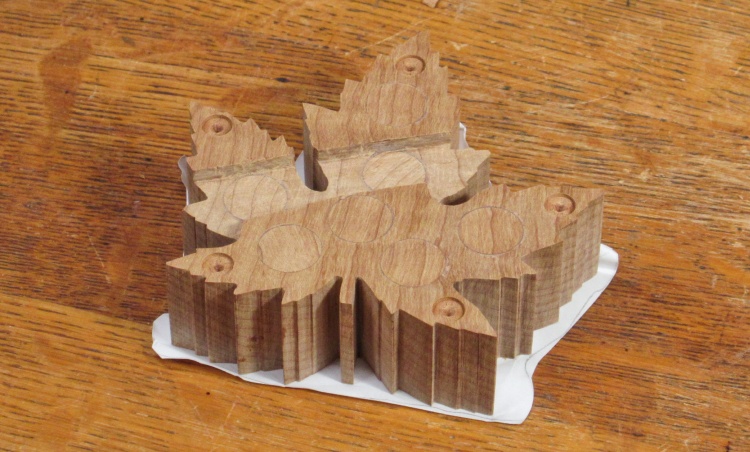
Sanded flush and foot divots added
Then after:
- sanding the bottom smooth,
- re-machining the slot and
- drilling some divots for the feet;
the bottom was (almost) done.
- sanding the bottom smooth,
- re-machining the slot and
- drilling some divots for the feet;
the bottom was (almost) done.

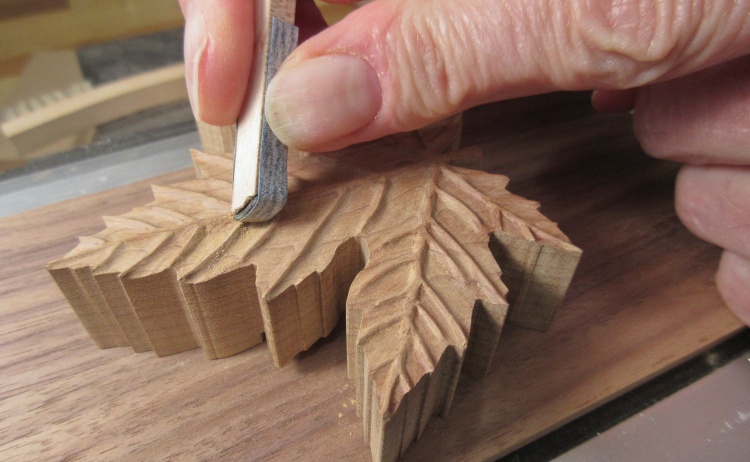
Checking out some vein carving techniques
Next up was carving the veins into the top side. Leaf veins are often carved as a narrow trough just because it's easier than the alternative, but I went with the alternative, which was to carve away everything but the veins.
I tried out a few techniques on a cherry scrap. It didn't look great but I hoped to do better on the actual leaf, which I will admit is a bit of a dangerous approach.
I tried out a few techniques on a cherry scrap. It didn't look great but I hoped to do better on the actual leaf, which I will admit is a bit of a dangerous approach.
Now it's the top side's turn
The jagged edges made clamping the leaf...problematic, so I taped it to a scrap of Walnut and clamped that in the vise.
Removing some "bulk" material
I started by using a dremel with routing attachment to route out the larger areas between the veins both to remove the bulk of the wood and to establish a consistent carving depth.
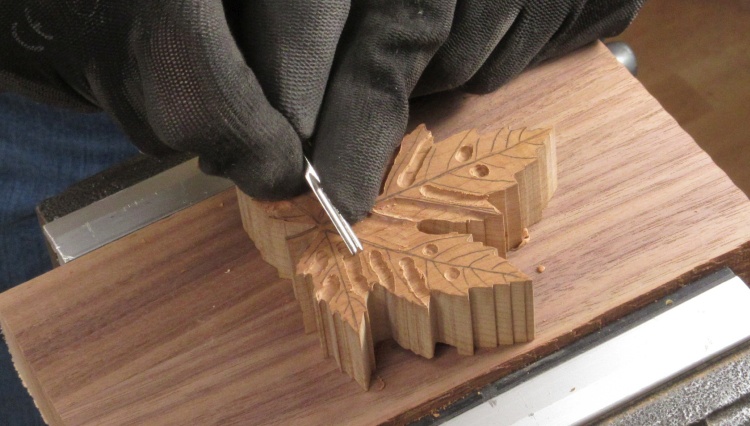
Starting to outline the leaf veins
Then it was on to the carving. I used a set of miniature tools - primarily this small gouge - with an even smaller one to get into the corners.
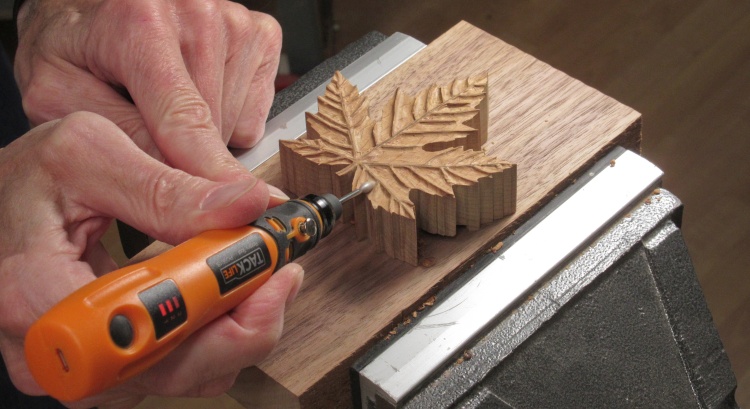
Some post-carving smoothing
Once the carving was done (probably two or three hours effort), I did some smoothing and rounding with an abrasive bit in the little orange rotary tool.
And finally hand sanding
And then of course the surface, edges and corners were sanded by hand. I used a variety of custom sanding tools to get into the various edges and corners.
220 grit was used first and then it was finished off with a round of 320 grit.
220 grit was used first and then it was finished off with a round of 320 grit.
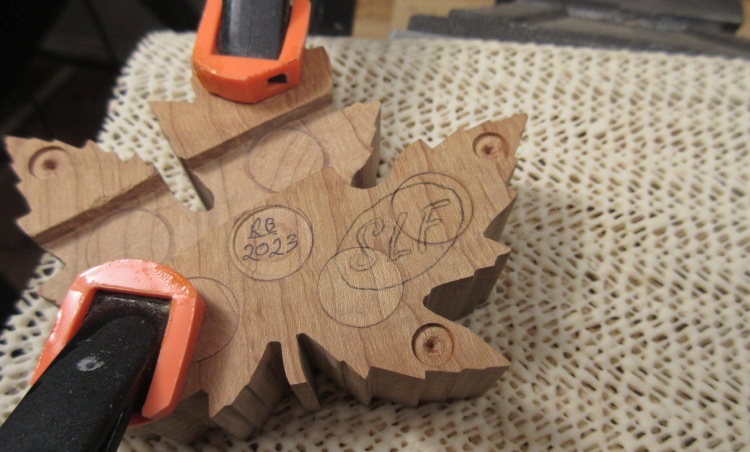
Flipped back over, with some initials marked
While carving and sanding it occurred to me to add Sue's initials to the bottom. So when the top was done, the leaf was flipped back upside-down. I'd already written in my initials before starting the top but the plan was to carve Sue's in there.
I chose a font I thought looked nice - Freestyle Script - and traced the initials in an ellipse on the bottom as seen in this shot.
I chose a font I thought looked nice - Freestyle Script - and traced the initials in an ellipse on the bottom as seen in this shot.
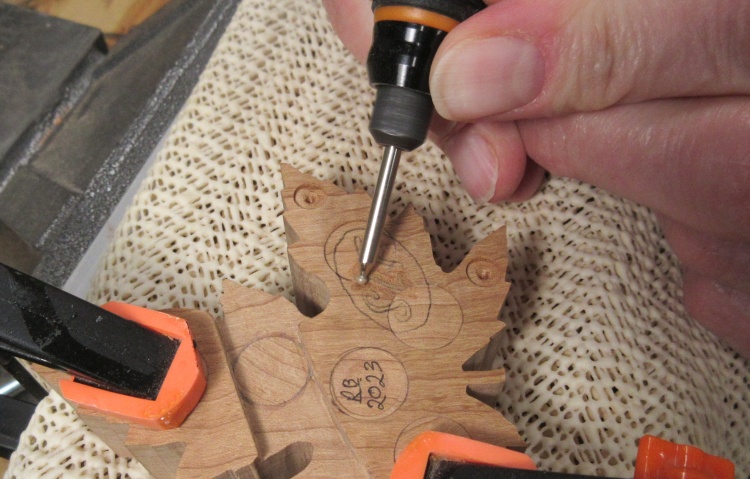
Using a tiny grinding bit to outline the initials
The initials were carved using the rotary tool and a couple tiny abrasive bits like the one seen in this shot.
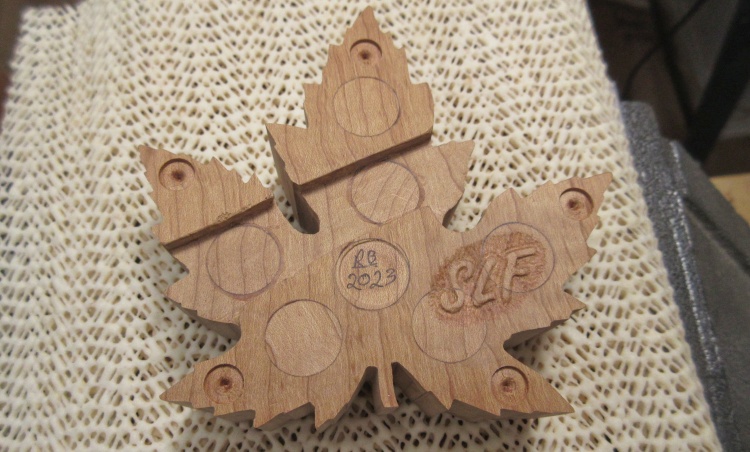
Initials done
I gotta say, the carved-in SLF initials look a whole lot classier than my felt-pen written RB version.
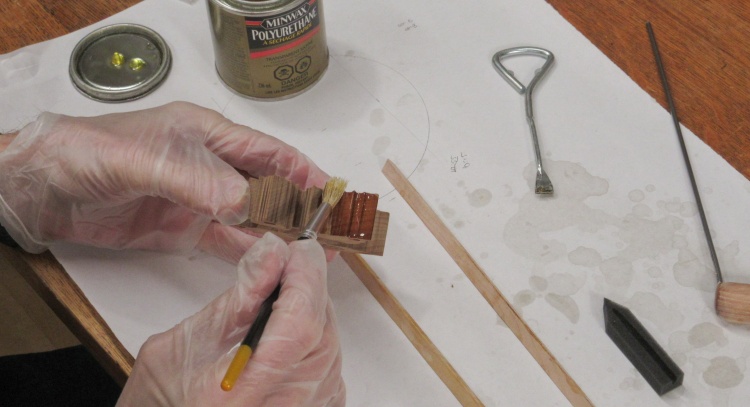
Applying the first coat of varnish
And that was it for the woodworking.
Next up was adding the finish and here I'm putting on the first coat of polyurethane varnish.
Next up was adding the finish and here I'm putting on the first coat of polyurethane varnish.
Perched on some nails for drying
Here the first coat of varnish is still wet and the leaf is mounted on a custom 5-nail bed for drying.

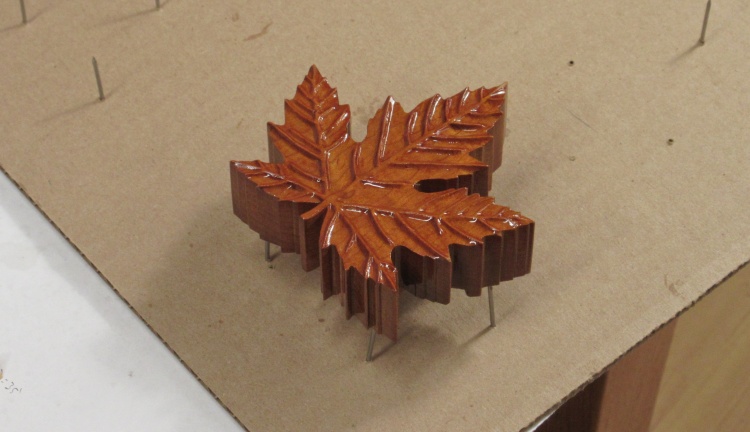
Complete
The leaf received three coats of varnish. It looked a bit shinier than I like when done (largely due to all the inside corners on the top that reflect light) so I roughed up the surface with fine steel wool to make it a bit more matt. Finally I added the five small vinyl feet to help keep it from sliding around.


