Lithium-ion batteries have some great features, but uniformity among the many custom shapes is not one of them. This of course leads to a corresponding number of custom chargers. Many of the chargers we have are for the batteries of various vintages of digital cameras that we still use for one application or another and while one of them actually takes standard-sized rechargeable AA batteries, it is the only one so it needs its own unique charger too.
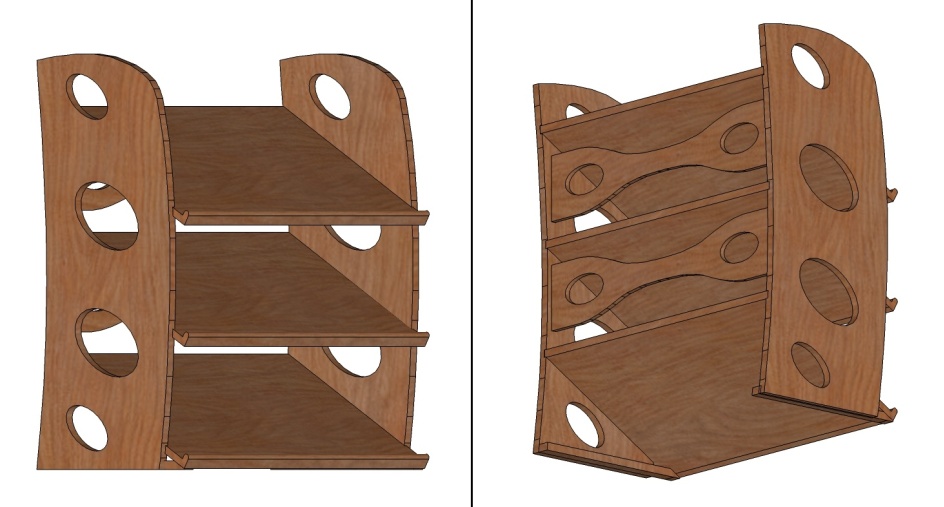
This rack holds the six different chargers we still use, with a bit more room for a couple small cameras that normally reside on my desk as well. Rather than have a rack with an array of dark little cubbyholes, I embraced the retail-store aesthetic by making sloped shelves to reveal the charger details to enable easier selection. Lips on the front of the shelves keep the chargers from sliding off.
This rack holds the six different chargers we still use, with a bit more room for a couple small cameras that normally reside on my desk as well. Rather than have a rack with an array of dark little cubbyholes, I embraced the retail-store aesthetic by making sloped shelves to reveal the charger details to enable easier selection. Lips on the front of the shelves keep the chargers from sliding off.
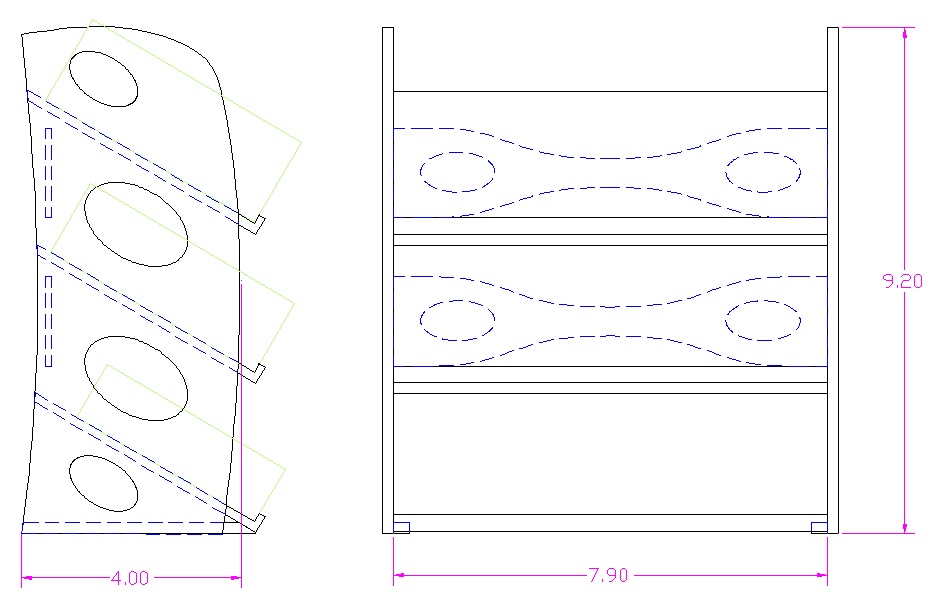
The plan
The wood-grain version of the plan
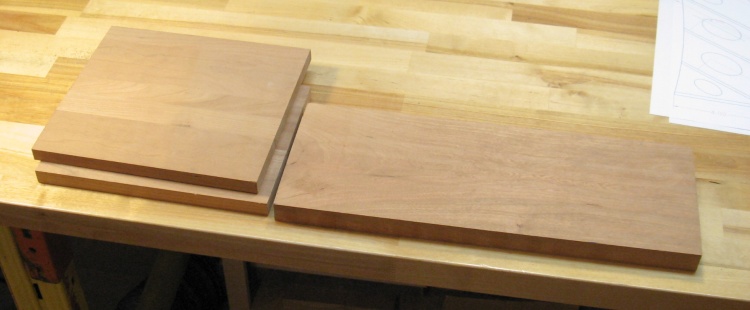
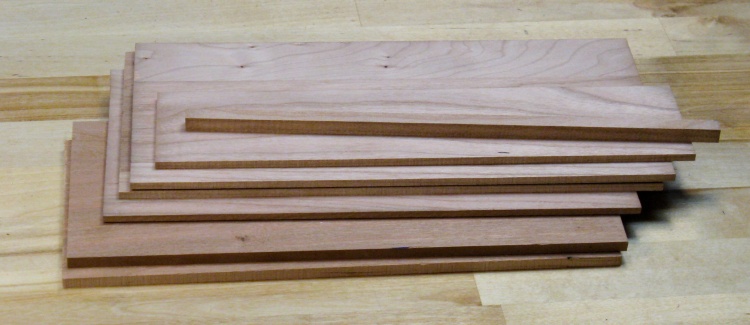
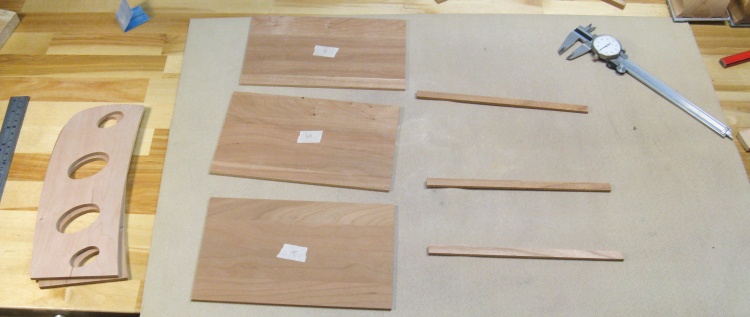
The raw materials
For the material I used some smallish cherry planks. Now, these would be considered scraps to someone who builds furniture, but for a project this size, these are "lumber".
The choice of cherry was made to match both my desk and the paper trays that these would sit beside and which look like this:
The choice of cherry was made to match both my desk and the paper trays that these would sit beside and which look like this:
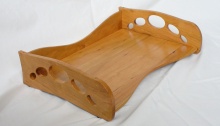
A neighboring paper tray
Cutting a plank for a couple shelves
I started by cutting the planks into thinner pieces. Here one of the squarish pieces will provide the wood for two of the shelves. These planks are actually laminated from narrower pieces and while I don't recall the source of this wood, it should look just fine for the shelves.
The wood for the sides by contrast is a solid plank.
The wood for the sides by contrast is a solid plank.
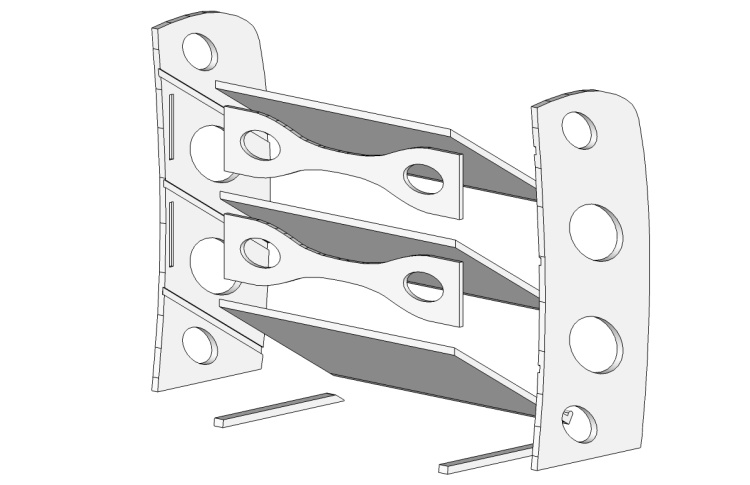
An exploded view showing the rack pieces
Before getting too much further, this exploded view gives an idea of what I needed to make. There are nine pieces that form the rack.
I didn't initially plan on the two vertical "bow-tie" pieces at the back but decided later that they should be added to improve the rigidity.
I didn't initially plan on the two vertical "bow-tie" pieces at the back but decided later that they should be added to improve the rigidity.
Pieces cut for the sides and shelves
This is the little stack of pieces I ended up with. They are cut a bit oversized but planed to the proper thickness. From the bottom up, the pieces are for:
- Two sides
- Three shelves
- Three shelf lips
- Two feet
which is everything except the two back pieces - those were made later.
- Two sides
- Three shelves
- Three shelf lips
- Two feet
which is everything except the two back pieces - those were made later.
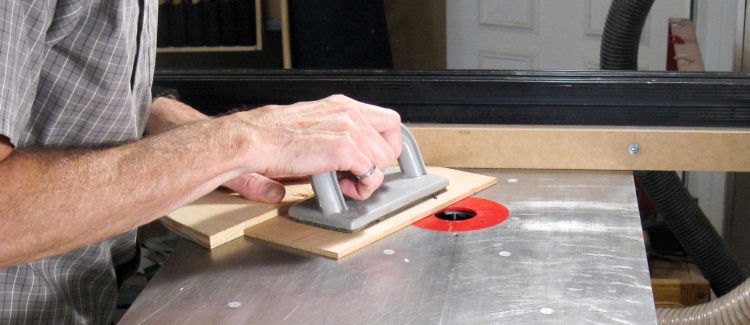
Using a jig route shallow dados in the sides
With the wood roughly the right size, I started adding the needed details to the two side pieces. The first step was to add the sloped dados (slots) on the inside faces into which the shelves slide.
The slots needed to be at a 30° angle to horizontal so I made a 30° jig using a scrap of plywood (visible here under my left hand) to guide the sides as they were slid over the router bit. The slots were cut only about 0.025" deep.
The slots needed to be at a 30° angle to horizontal so I made a 30° jig using a scrap of plywood (visible here under my left hand) to guide the sides as they were slid over the router bit. The slots were cut only about 0.025" deep.
The two sides with dados cut for the shelves
This photo shows the insides of the two side pieces after routing.
The slots were made with a 1/8" router bit and needed to be slightly wider (around 0.150", or a rather awkward 19/128" if we're sticking to fractions) so two passes on the router were made for each slot, offset by moving the fence a small amount.
The slots were made with a 1/8" router bit and needed to be slightly wider (around 0.150", or a rather awkward 19/128" if we're sticking to fractions) so two passes on the router were made for each slot, offset by moving the fence a small amount.
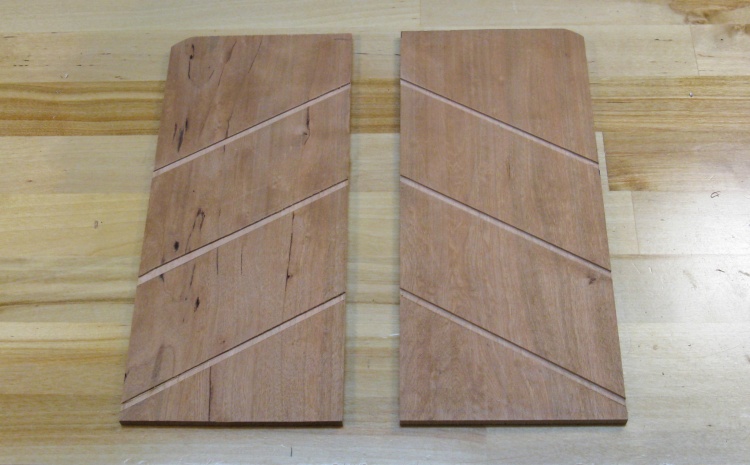
Cutting the sides to shape
It was convenient to have the sides rectangular for the routing process but after that was done they needed to be shaped to the final contour.
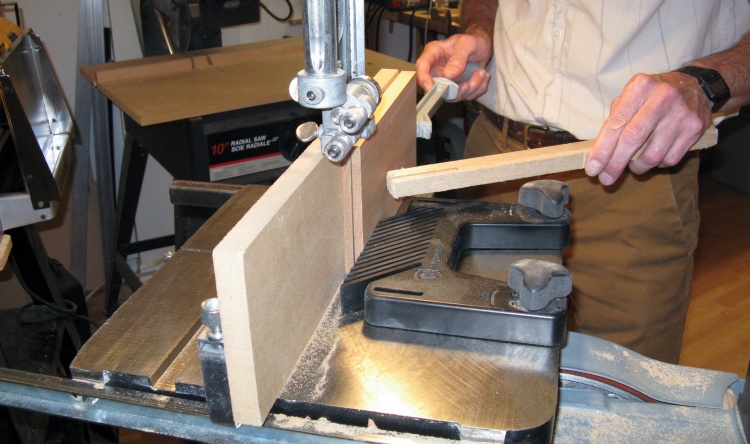
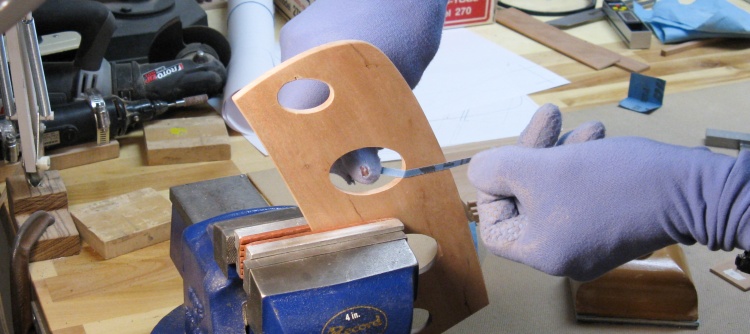
I taped the two sides together and then traced the shape onto one face and here I'm using the band saw to cut the proper curvey contour into the edges.
I taped the two sides together and then traced the shape onto one face and here I'm using the band saw to cut the proper curvey contour into the edges.
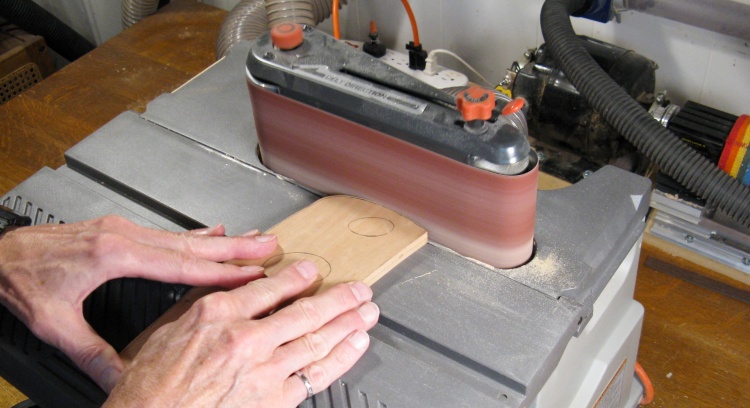
Smoothing out the bandsaw-cut curves
The sawn edges end up fairly rough so they were then smoothed and sanded closer to the lines using the horizontal belt sander.
Randomly inserted thought; Know what we need? An on-line map of Home Depot so when they say your item is in Aisle 61 Bay 11 you know where to go instead of wandering the store until giving up and then fruitlessly looking for someone in an orange apron to ask. BTW Aisle 61 turns out to be outside in the garden center - who knew?
Yah, Home Depot has an app, but the app has no map.

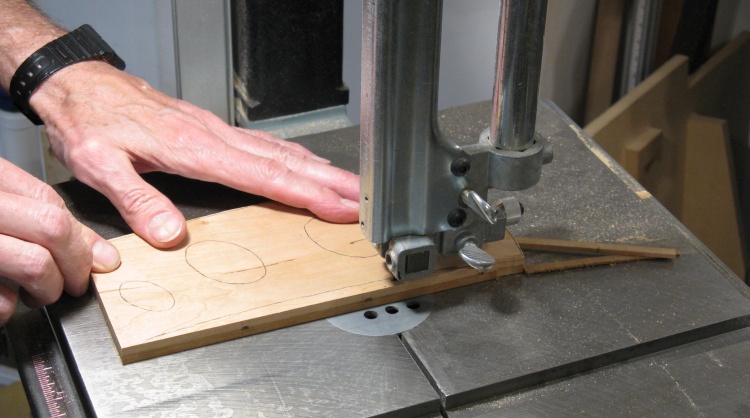
Using a couple side-by-side holes for the ellipses
Now where was I? Oh yah - charger rack.
So for the elliptical openings, most of the material was removed using appropriately-sized Forstner bits to drill pairs of overlapping holes.
So for the elliptical openings, most of the material was removed using appropriately-sized Forstner bits to drill pairs of overlapping holes.
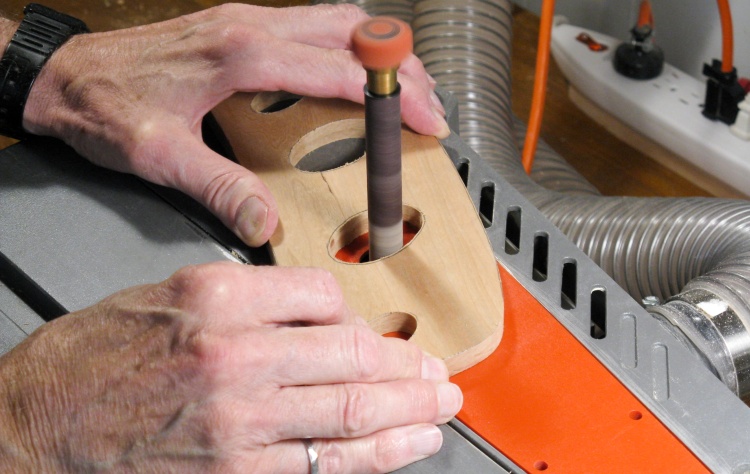
Shaping ellipses to the lines
...and then the openings were smoothed and brought to the proper contour by using the spindle sander to get close to the marked lines.
The shelves and the lips to be added to the ends
With the sides (mostly) done, I turned to the shelves. They couldn't be much simpler - they really just needed to have the lips glued onto the lower edge.
Gluing the lip to one of the shelves
Here one of the shelves is having the lip glued on. The lip pieces were made a bit long, and then they were trimmed by belt-sanding so the ends were flush with the shelf sides.
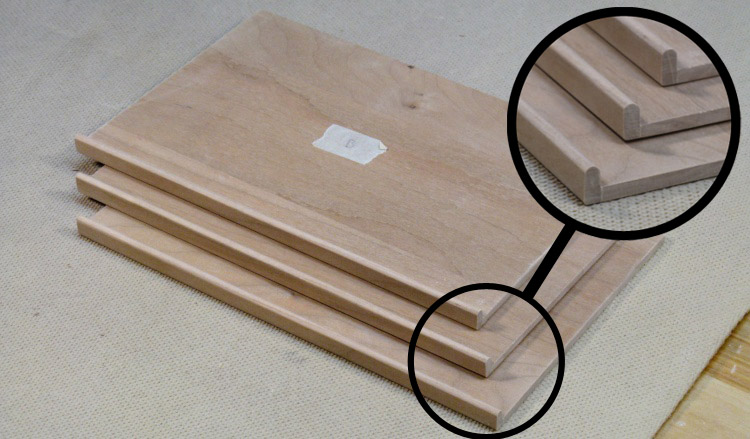
The three shelves with lips added and rounded
This shows the three assembled shelves.
The lip pieces had been rounded on the top edge prior to the assembly as the end view shows, and here they have also been trimmed so their ends are flush with the shelf edges.
The lip pieces had been rounded on the top edge prior to the assembly as the end view shows, and here they have also been trimmed so their ends are flush with the shelf edges.
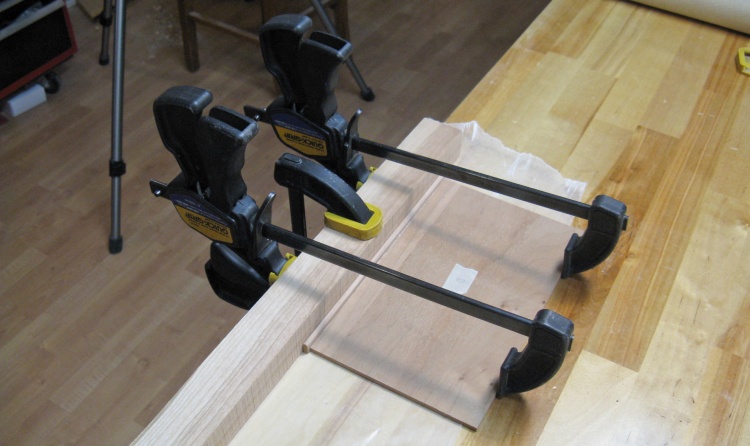
Getting ready to thin another piece, this time for the back braces
I did a test fit of the shelves and it seemed like the rack might be a bit wobbly side-to-side so I decided to add some support in the form of a couple back braces.
I still had a piece of the original wood so I set about thinning it down to about 1/8" for the braces. Here I'm adding double-sided tape to affix it to the planer sled.
I still had a piece of the original wood so I set about thinning it down to about 1/8" for the braces. Here I'm adding double-sided tape to affix it to the planer sled.
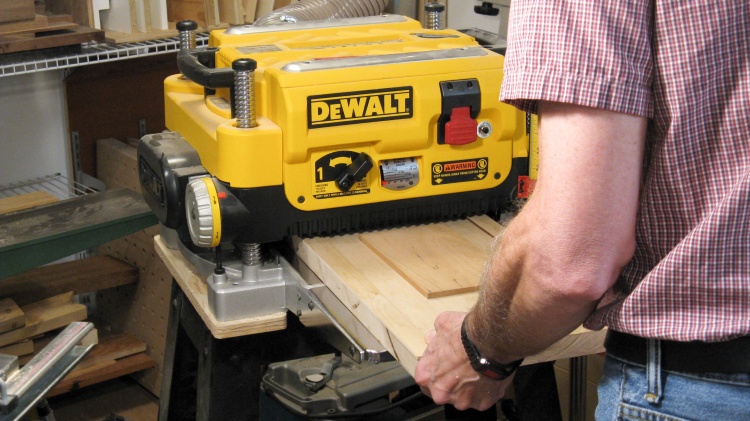
Planing the back piece thinner using a sled
I tape sacrificial wood strips to the long edges of the sled which prevent snipe of the short piece of wood in the middle. The sled also raises the wood so that it can be planed arbitrarily thin - the planer on its own bottoms out at 1/8" or a bit more.
Here it's going in for the first of a number of passes through the planer. I usually take only a 0.02" to 0.03"-thick cut each pass for a smoother surface and to prevent the taped-on piece from being dislodged.
Here it's going in for the first of a number of passes through the planer. I usually take only a 0.02" to 0.03"-thick cut each pass for a smoother surface and to prevent the taped-on piece from being dislodged.
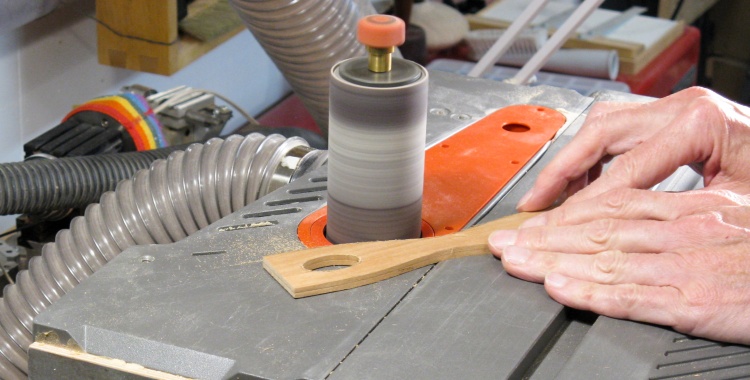
Shaping the back pieces on the spindle sander
Once the piece was the right thickness and cut into a couple smaller sections for the two braces, I then used the same process as for the sides;
- taped them together
- marked one face with the proper contours
- cut them out on the bandsaw and drilled out the elliptical openings
- smoothed the edges with the sander.
Here some disembodied hands are using the spindle sander to smooth the outside contour.
- taped them together
- marked one face with the proper contours
- cut them out on the bandsaw and drilled out the elliptical openings
- smoothed the edges with the sander.
Here some disembodied hands are using the spindle sander to smooth the outside contour.
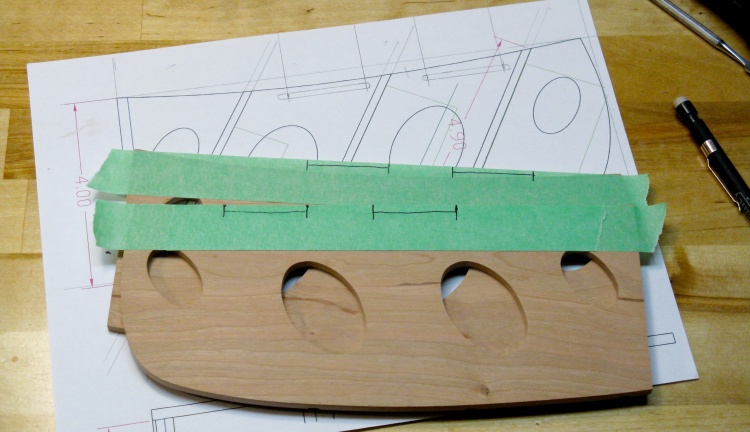
Side pieces marked for routing slots for back braces
I needed to add some more slots to the sides to accept the braces. Here the limits have been marked on tape on the outside of the walls to help guide the cutting on the router table.
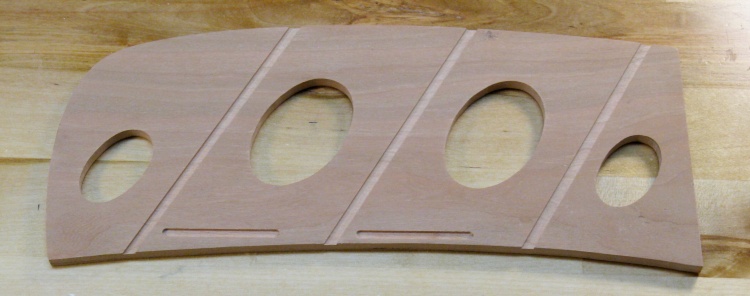
Side piece with all the slots in it
There - all the needed slots cut now.
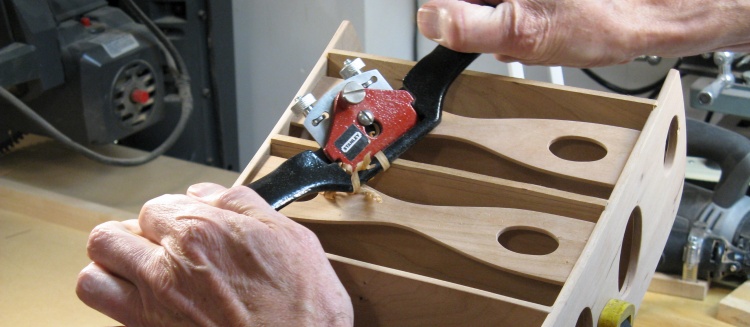
Rounding off the edges
That was mostly it for the fabrication of the pieces. I then sanded the faces and edges of the two sides, rounding the sharp corners a bit as seen here.
These are the gloves I usually wear for sanding; they keep skin oil off newly-sanded surfaces and keep my hands from getting too dry. These are gardening gloves and apparently targeted to female gardeners since this color is listed as (wince) Periwinkle. But I'm going to call them steel blue.
These are the gloves I usually wear for sanding; they keep skin oil off newly-sanded surfaces and keep my hands from getting too dry. These are gardening gloves and apparently targeted to female gardeners since this color is listed as (wince) Periwinkle. But I'm going to call them steel blue.
Gluing it all together
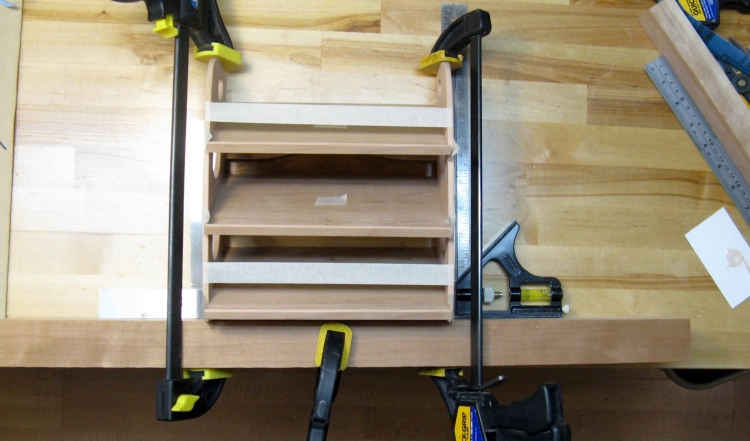
With just shallow slots holding the pieces, it was really tricky trying to allign all the pieces for gluing. To simplify that, I did it in two stages.
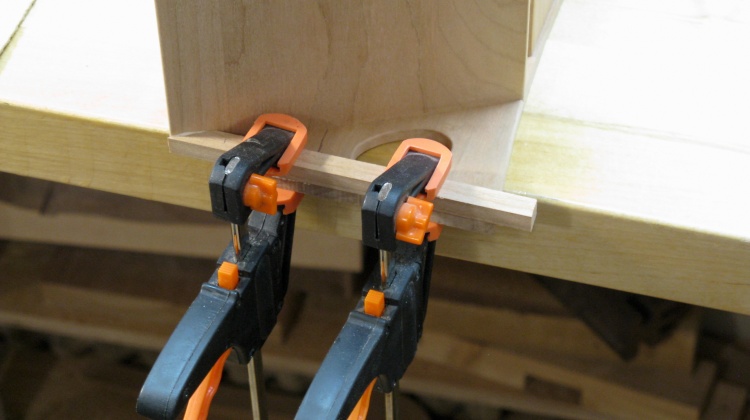
The first stage is shown here where only the two back braces were glued in. The bench top along with the clamped-on fence were used to keep the rack square for drying.
The second stage involved adding some glue to the shelf slots and sliding the shelves into place.
The first stage is shown here where only the two back braces were glued in. The bench top along with the clamped-on fence were used to keep the rack square for drying.
The second stage involved adding some glue to the shelf slots and sliding the shelves into place.
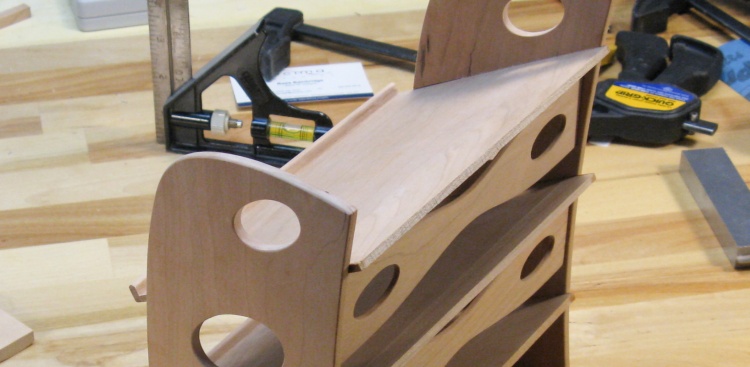
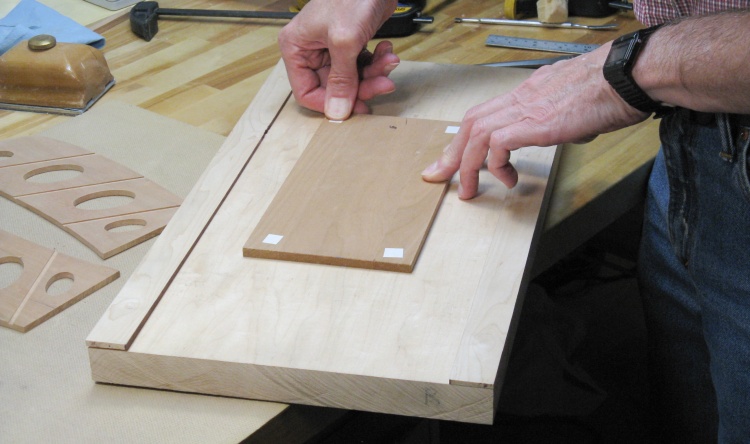
The shelves were left long so they stick out the back
I had purposely left the shelves long so that they could be more-accurately trimmed to match the rack. This photo shows them sticking out about half an inch.
Trimming off the shelves
I used the belt sander to remove most of the excess shelf length and then the spokeshave to get it closer to the final length. It was completed by sanding the edge by hand.
Gluing on the feet
I was a bit concerned about the rack being tippy front-to-back since the chargers extend past the front of the side walls. The plan was to add some long feet to extend the standing surface out to the edge of the shelves which would reduce any tendency to tip forward.
So the final assembly step was to trim the foot pieces to nestle under the bottom shelf and glue them into place on each side as shown here. They were made a bit long and then trimmed to length after the glue was dry.
So the final assembly step was to trim the foot pieces to nestle under the bottom shelf and glue them into place on each side as shown here. They were made a bit long and then trimmed to length after the glue was dry.
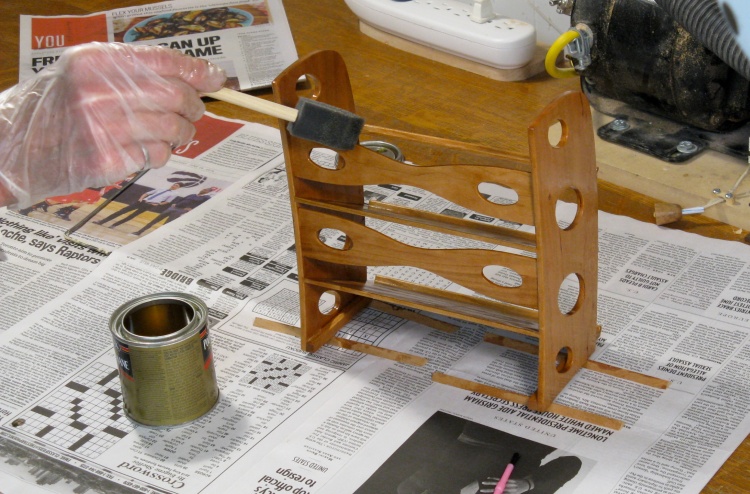
Applying the first coat of varnish
That was it for assembly so the next thing to do was apply the finish. In this shot I'm brushing on the first coat of a thin varnish.
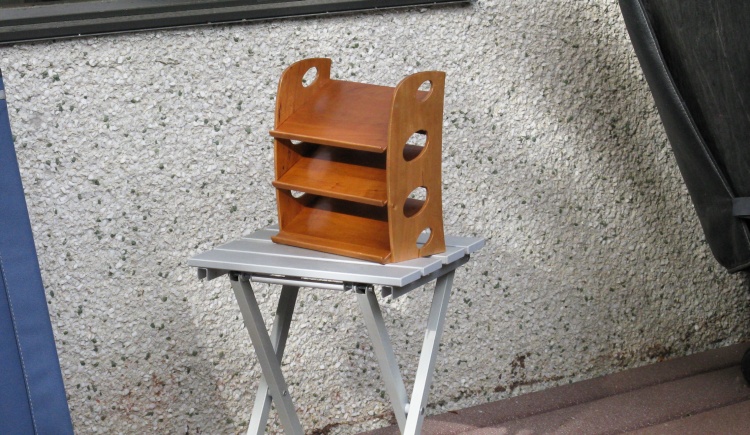
A bit of time in the sun to enhance the complexion
For some reason the first coat of varnish hadn't dried completely even after 24 hours, so I stuck it out in the sun to help it dry. I hoped that would also darken up the wood a bit as cherry is wont to do upon exposure to the sun. Ultimately any improvements to the tone turned out to be fairly subtle, but the final color looks decent so I have no complaints.
The rack received another coat of varnish, some more sun-bathing and then a third coat of varnish before it was done.
The rack received another coat of varnish, some more sun-bathing and then a third coat of varnish before it was done.
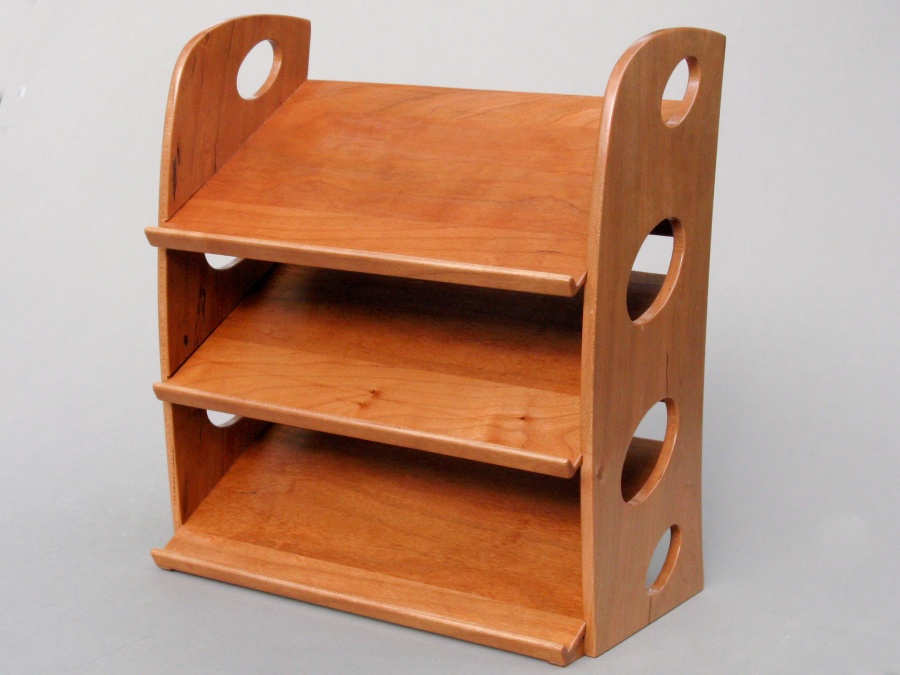
Done


