Really the hardest part of this little cup was figuring out how to make it. I knew the desired size ("coffee cup") and I could just have turned a coffee cup replica from a single piece of wood, but that's probably simpler than I can handle. So then what shape? What wood? Different woods? Segmented or inlaid? Carved? Pierced? Inscribed? Etc. Ultimately I settled on a shape I liked and perhaps it is no longer a surprise that I eventually decided on a segmented Purpleheart construction. All righty then; here's how it was made:
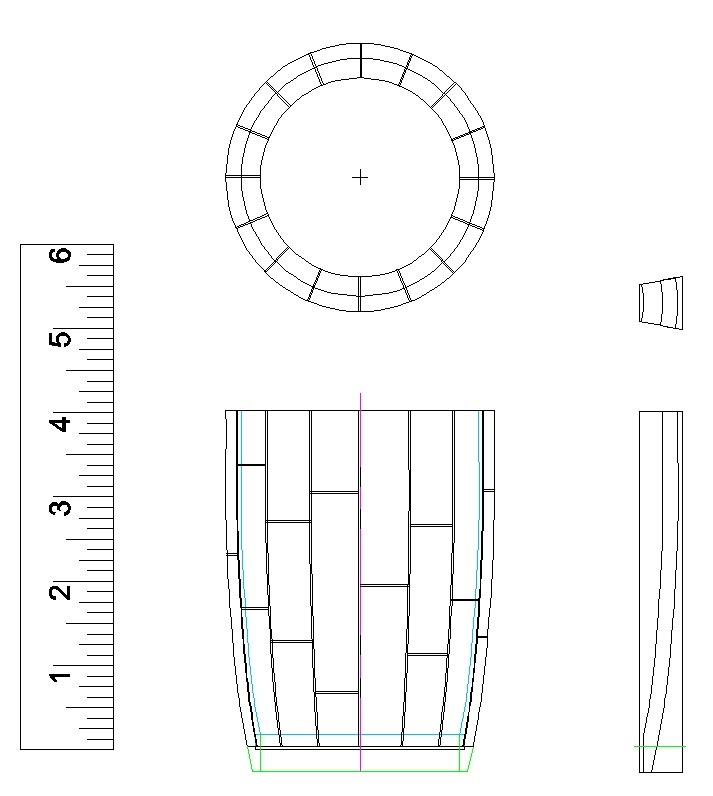
The plan is nailed down
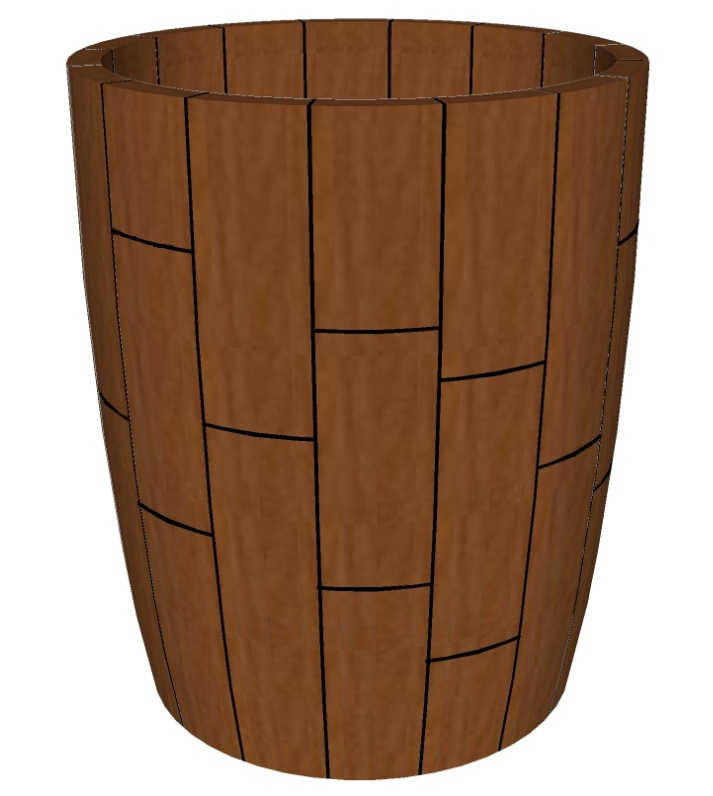
An utterly superfluous 3D model
Stave Construction
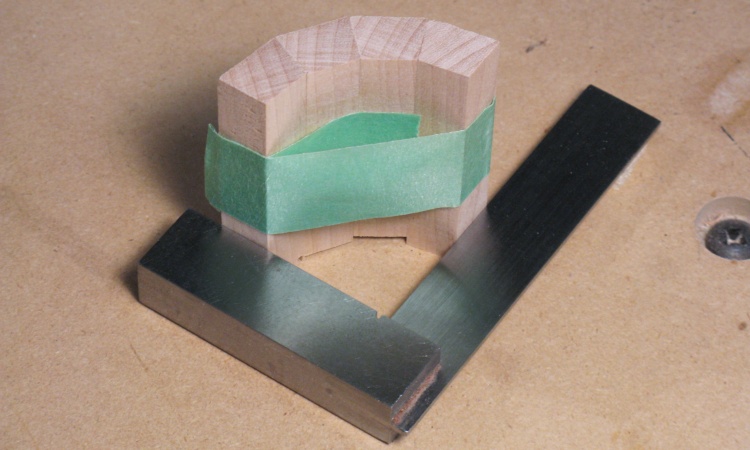
Maple test staves look good
My plan was to use the jointer to put the proper angle on the edges of the staves. I set it up to 11.25° less than square and jointed both edges of a test maple piece.
I chopped that piece into four and taped them together to form what should be a 90° angle. And it was pretty much bang-on.
I chopped that piece into four and taped them together to form what should be a 90° angle. And it was pretty much bang-on.
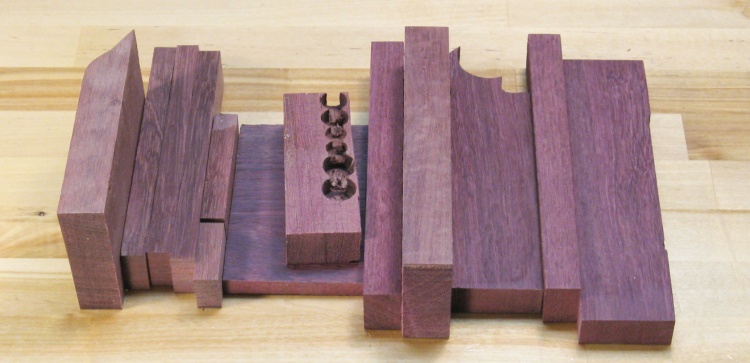
A schwack of Purpleheart scraps
The angle-forming technique looked good so then I needed the real staves.
They would be only four inches long and composed of shorter pieces so they didn't need to come from a big plank. I happened to have a bunch of Purpleheart scraps left over from other projects so I pulled those out and decided that I would need only about half of them.
They would be only four inches long and composed of shorter pieces so they didn't need to come from a big plank. I happened to have a bunch of Purpleheart scraps left over from other projects so I pulled those out and decided that I would need only about half of them.
Cutting into stave-size pieces
The staves would be around 0.65" wide and 0.5" thick so I started cutting up my scraps to get closer that size.
About 70 linear inches should be enough
I needed about 65-70 linear inches and these now-roughly-cut 10 blanks should provide that.
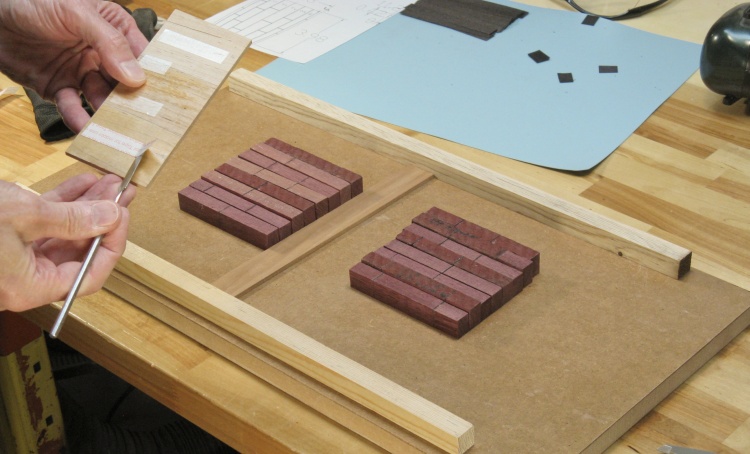
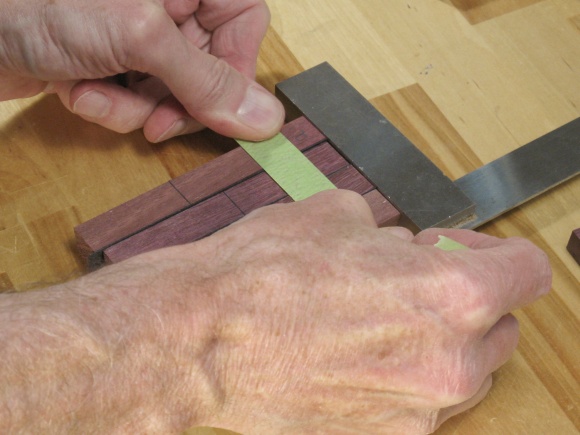
Marking segments
The next step was to cut the blanks into segments of the proper size. Here I'm marking lengths and blade widths on a piece prior to cutting.
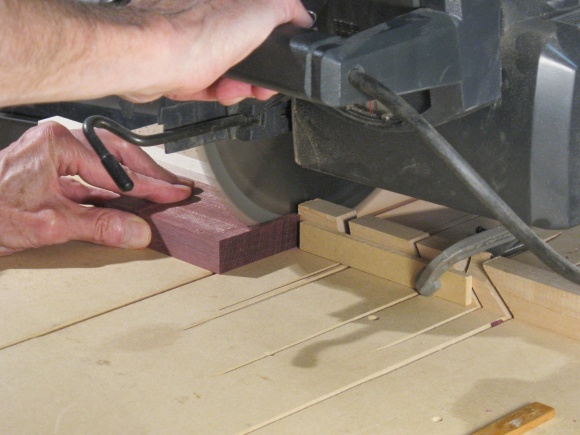
Chopping blanks into varying-length segments
The blanks were cut up using the radial arm saw since it leaves a nice flat surface on the ends.
A long time ago in a galaxy far, far away...
Here the segments have been arranged into two groups in the traditional Star Wars receding backstory format, each paragraph of which will form half the diameter of the cup.
The order of the staves was chosen to prevent joints on adjacent pieces from lining up.
The order of the staves was chosen to prevent joints on adjacent pieces from lining up.
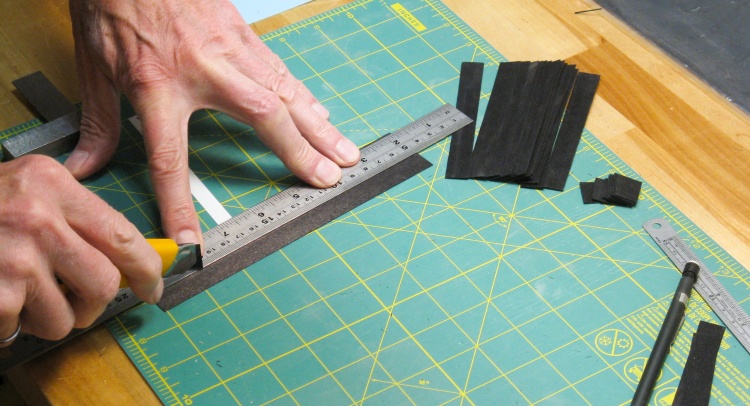
Slicing up the veneer
Before the stave segments can be glued together, the inter-segment veneer pieces were needed.
In this shot I've already cut up the small pieces for between the segments and I'm working on the longer between-stave pieces.
The veneer is some unspecified species of hardwood that has been dyed black. I needed only about 50 sq. in. and was able to mooch some off a buddy (Thanks Gary!). It's about 0.02" thick and I was able to cut it up using a utility knife.
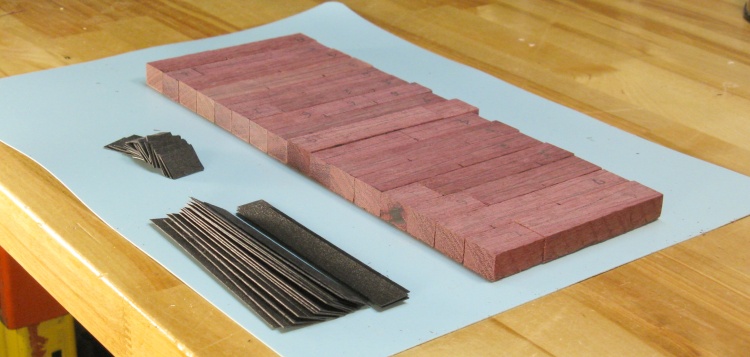
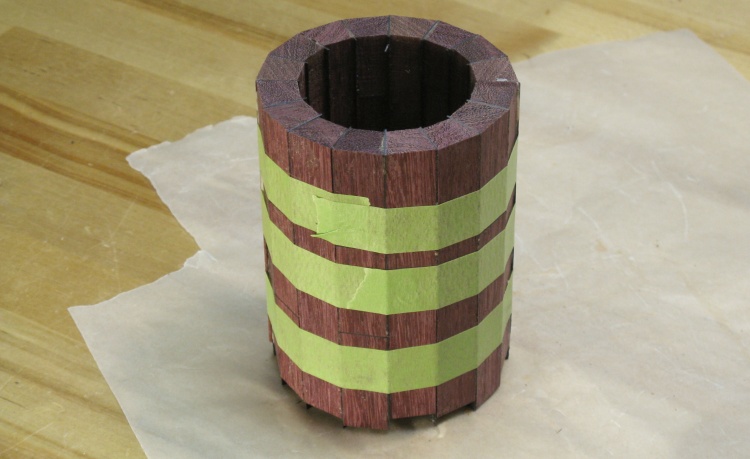
The cup "kit" (minus bottom)
All the pieces for the cup are here (except for the base), positioned on this unfortunately-coloured baby blue cutting mat.
The mats come in multi-colour packs and I tend to use the "good" colours first. I say first since they don't last long - it's easy to cut right through them with a utility knife when cutting paper or tape or whatever, so red, dark blue and yellow have been "used up" already. That's why I bought the 10X-more-expensive Olfa cutting mat seen in the photo above - well worth it.
The mats come in multi-colour packs and I tend to use the "good" colours first. I say first since they don't last long - it's easy to cut right through them with a utility knife when cutting paper or tape or whatever, so red, dark blue and yellow have been "used up" already. That's why I bought the 10X-more-expensive Olfa cutting mat seen in the photo above - well worth it.
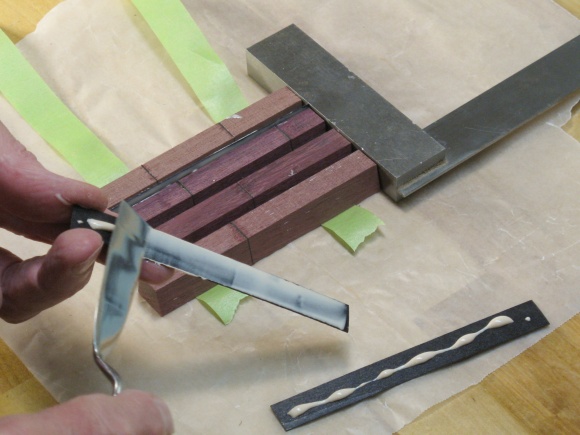
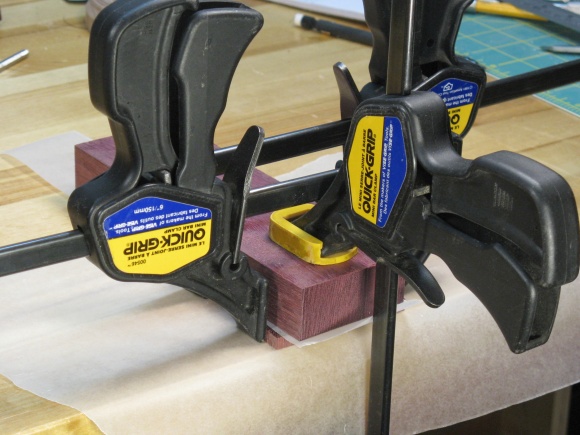
Then the individual segments were glued together into staves just over 4 inches long with small squares of veneer between the segments.
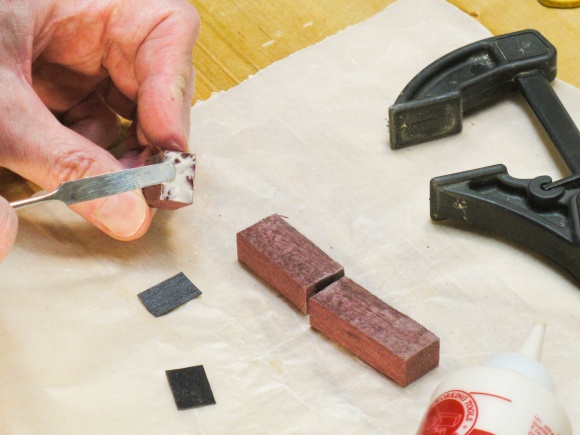
Adding glue between segments
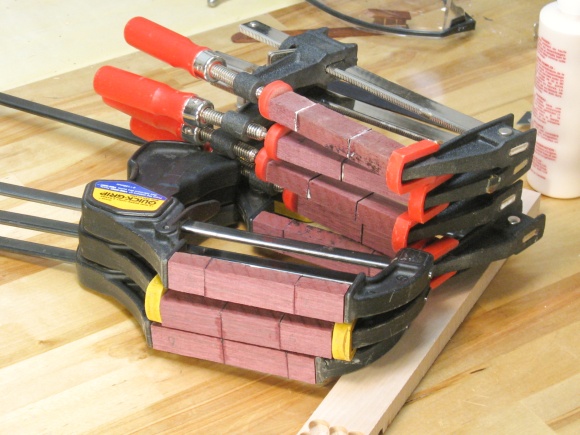
Half the staves assembled, clamped and drying

The reformed backstory
Here they are again, this time assembled into the sixteen staves it will take to form the cup.
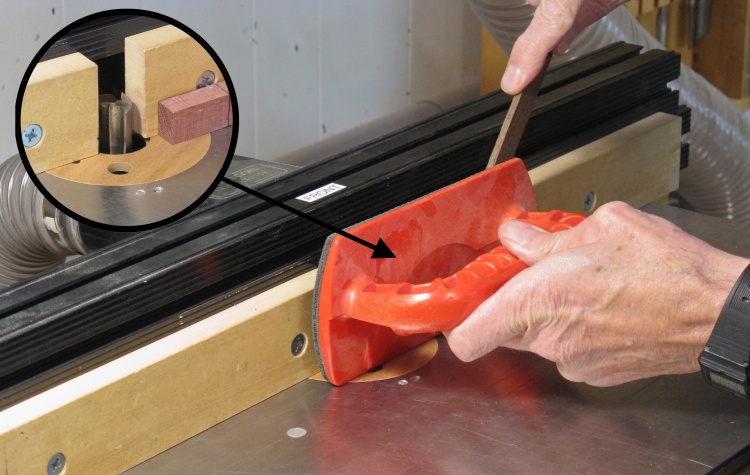
Flattening a couple edges on each stave
None of the pieces were straight after the assembling process so I flattened out two adjacent sides by jointing them.
I would normally use the actual jointer but it was still set up for the 11.5° angle and I didn't want to mess it up so instead I set up the router to do the jointing.
I would normally use the actual jointer but it was still set up for the 11.5° angle and I didn't want to mess it up so instead I set up the router to do the jointing.
Assembling pieces (and stops) on the planer sled
The stave thickness wasn't too critical but I needed all the widths to be the same. To achieve that I ran them through the planer to get them all to a consistent 0.65" wide.
For short pieces like these I use the planer sled. I've taped down the stave pieces on a their flat edges and in this shot I'm adding tape to a backstop piece to reduce the possibility of the planer dislodging stave pieces as they go through.
For short pieces like these I use the planer sled. I've taped down the stave pieces on a their flat edges and in this shot I'm adding tape to a backstop piece to reduce the possibility of the planer dislodging stave pieces as they go through.
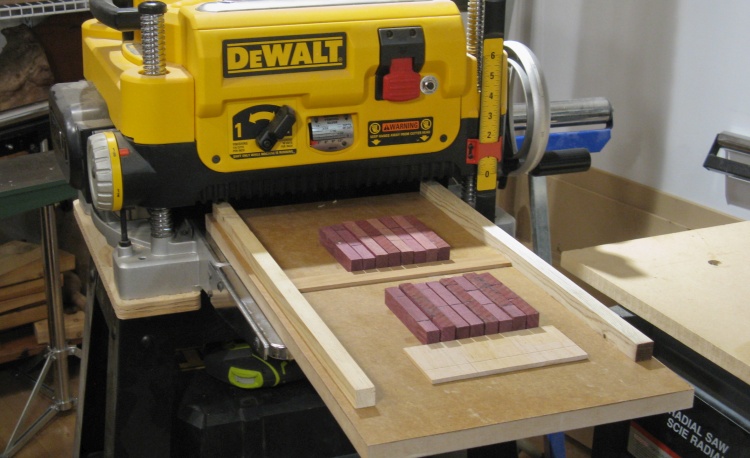
Ready to go through the planer
The sled was run through a few times, taking 0.01" to 0.02" off each pass. As usual the side wood pieces prevent planer-caused snipe.
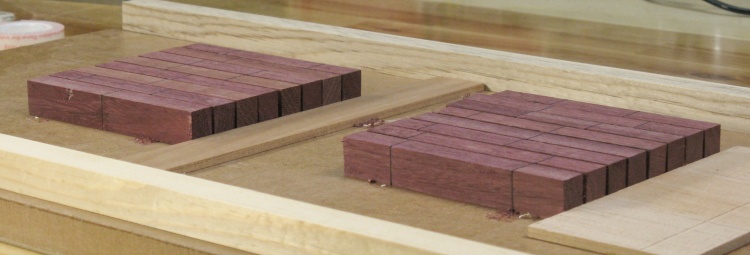
All stave widths now consistent
This shot shows the now-consistent size of the staves.
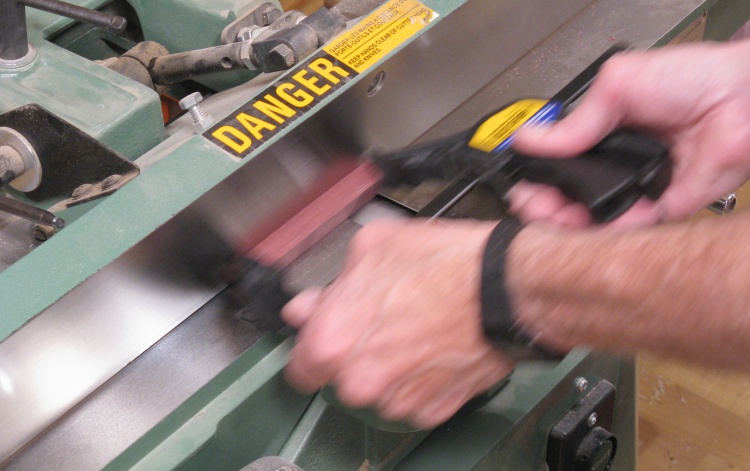
Jointer set to form 11.25° angle on sides
So then it was finally time to use the jointer to set the angle of the sides. I used a clamp to hold the stave flat to the fence as I ran it across the blade. The machine was set to take about 0.01" per pass and it took nine to 12 passes until the side was fully formed. Then the stave was flipped over to do the other side.
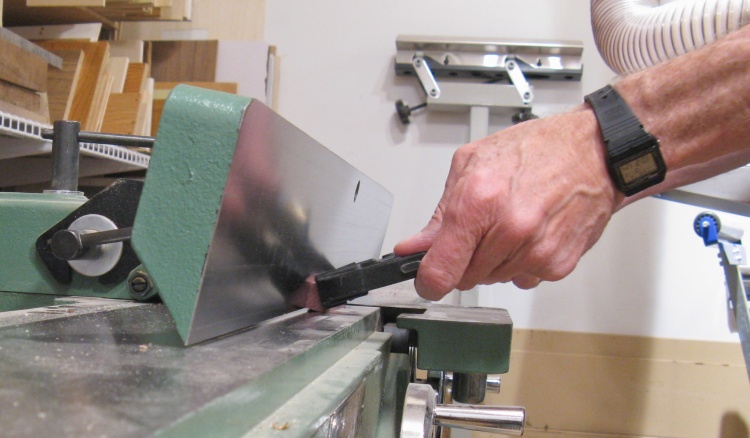
End view showing tilted fence
This is just an end-view photo which makes the angle of the fence a bit more evident.
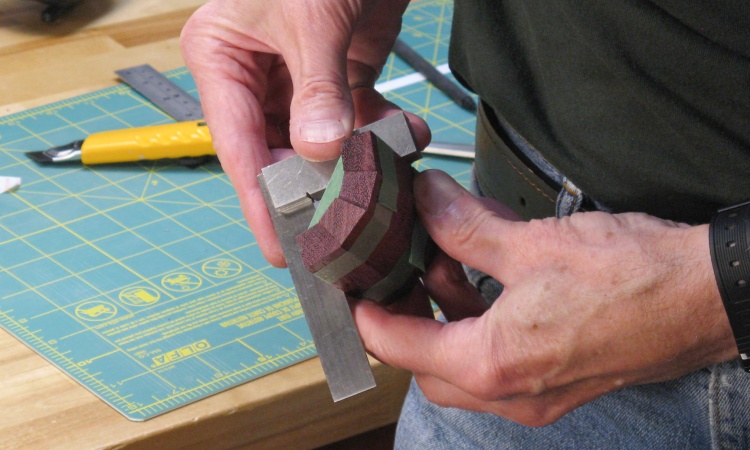
Four should form a 90° angle
After making the first four staves I taped them together and checked the angle as I had done with the test pieces about 20 photos ago. I was pleased to find that it was still very close to 90°.
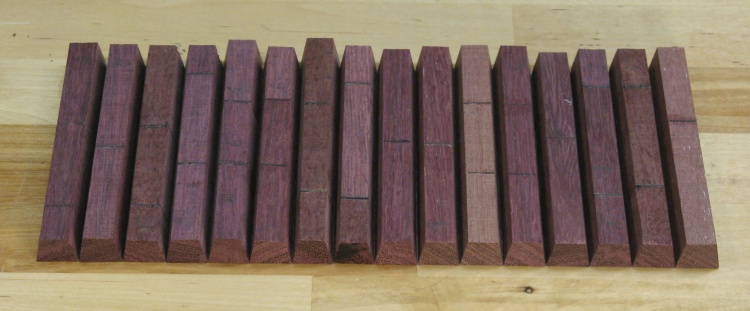
16 staves ready to go
Here are all sixteen staves with proper side angles.
I often made spares for things like this but I didn't think of it this time. Fortunately all the pieces worked out OK.
I often made spares for things like this but I didn't think of it this time. Fortunately all the pieces worked out OK.
Cup Assembly
Having 16 staves meant I could make four quarter-cups and check that they formed a nice right angle. Then I could make half-cups and make sure the edges were even before finally putting them together as a full cup.
I started by joining sets of four staves and three veneer pieces with stretched masking tape. That kept everything in the correct relative positions while I applied glue. Then the staves were just curled up and taped. The tape tension held all the joints together until the glue set.
I started by joining sets of four staves and three veneer pieces with stretched masking tape. That kept everything in the correct relative positions while I applied glue. Then the staves were just curled up and taped. The tape tension held all the joints together until the glue set.
Stretching tape to "clamp" four staves
Adding glue and veneer between pieces
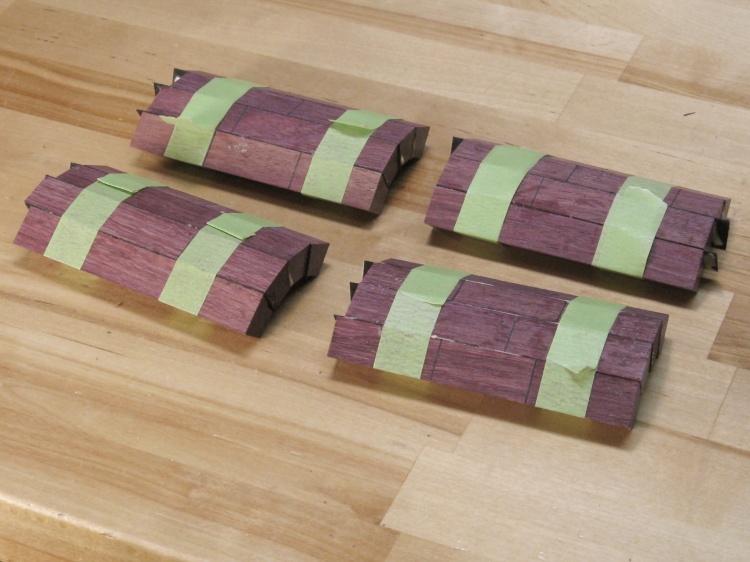
Four "quads" glued
This shot shows the four quarter-cups with the glue drying.
As mentioned, each four-stave set forms a nice 90° angle between the ends. Adding the veneer between them doesn't change that; it just increases the diameter.
As mentioned, each four-stave set forms a nice 90° angle between the ends. Adding the veneer between them doesn't change that; it just increases the diameter.
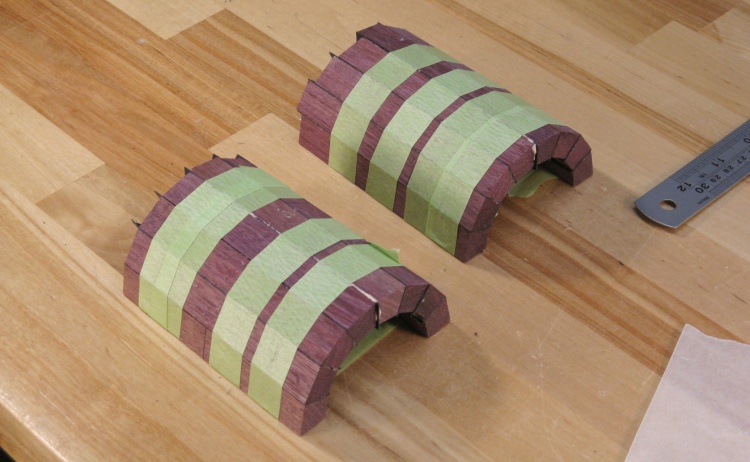
Then two halves glued
After confirming that all the angles were good, I glued pairs of quarter-cups together with the same taping technique.
And finally the whole megillah
The jointer angle must have been bang-on since the halves went together nicely with no adjustment.
Turning
The turning was going to be a bit tricky since both ends were open. I had also decided (although I confess that I can't remember why now) that the bottom should be flat, meaning that it needed to be added after the inside was turned. Ultimately it took a few more steps than your average turning so to help keep track I have illustrated them here.
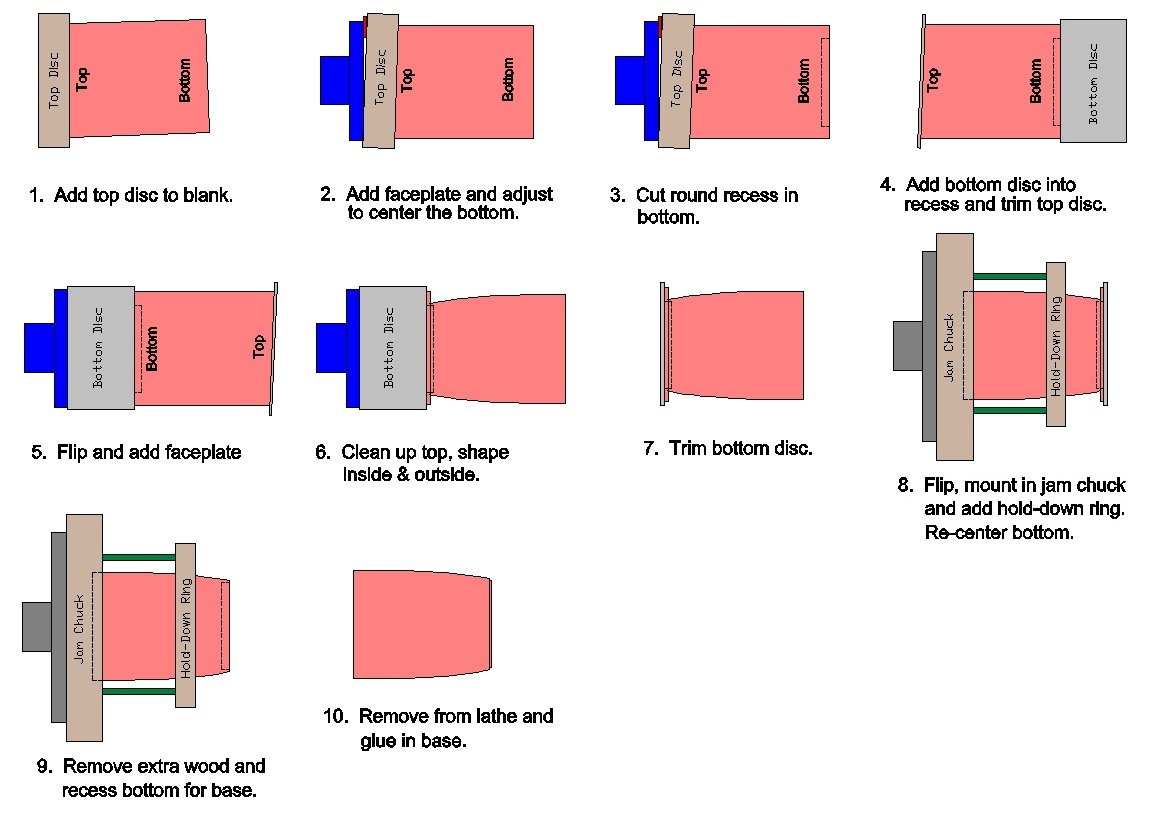
The Rube Goldberg version of a turning sequence
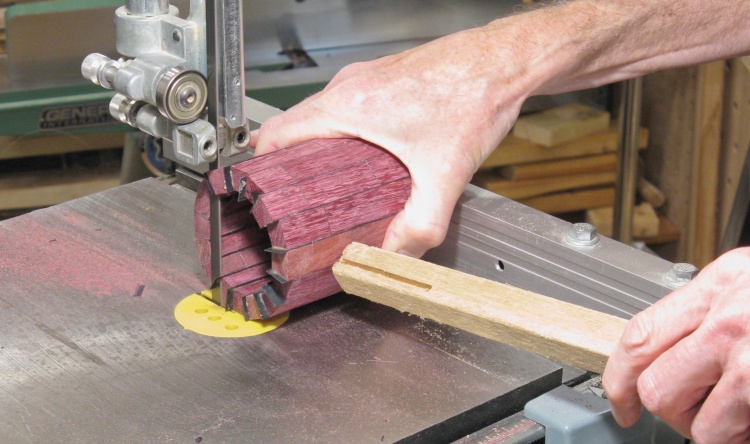
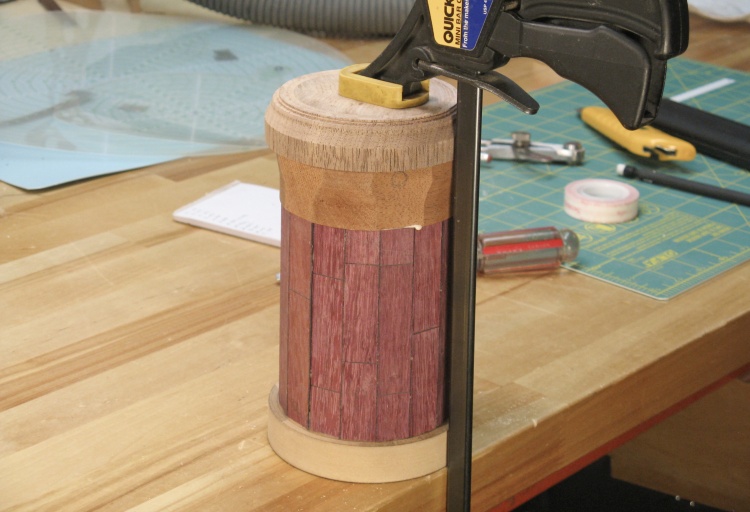
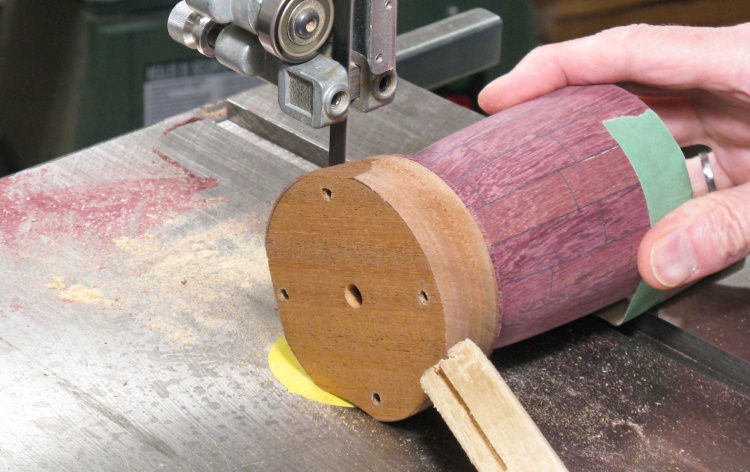
Trimming the not-quite-perfect bottom
I hadn't tried to make the staves the exact same length and had glued the cup with the tops aligned. So to start out I trimmed the bottom on the bandsaw.

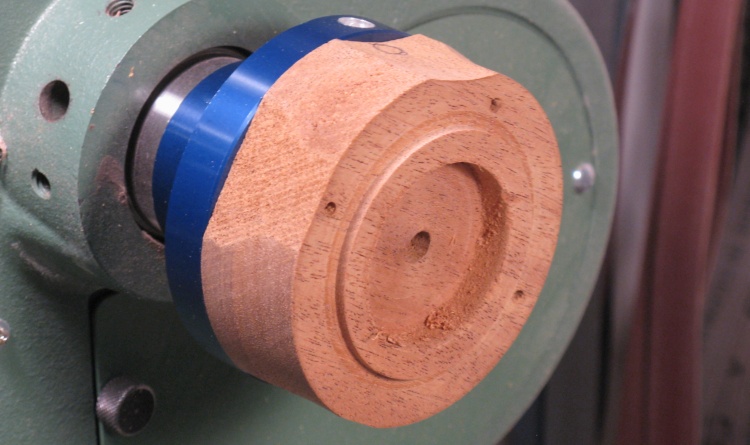
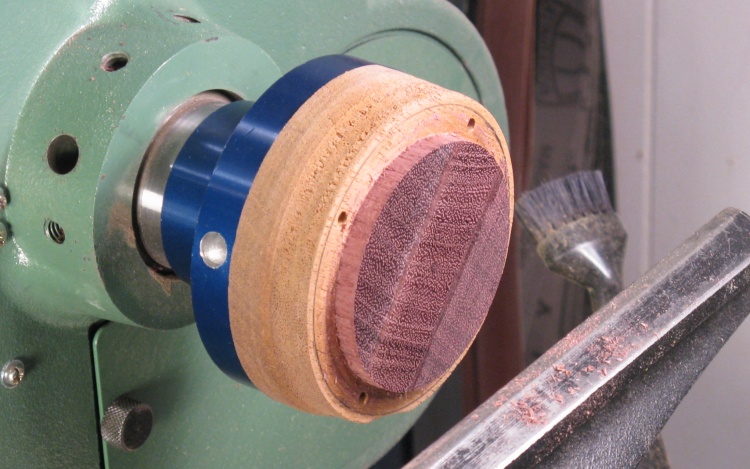
Glued onto a faceplate
Step 1:
The top (on the bottom here) got a light sanding and then it was glued to a disc of MDF attached to the blue faceplate. That would let me turn the bottom and get it ready for a temporary base.
The top (on the bottom here) got a light sanding and then it was glued to a disc of MDF attached to the blue faceplate. That would let me turn the bottom and get it ready for a temporary base.
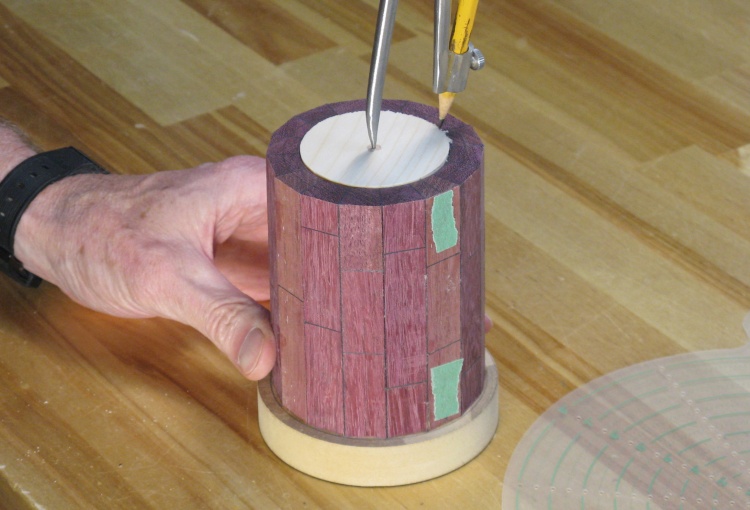
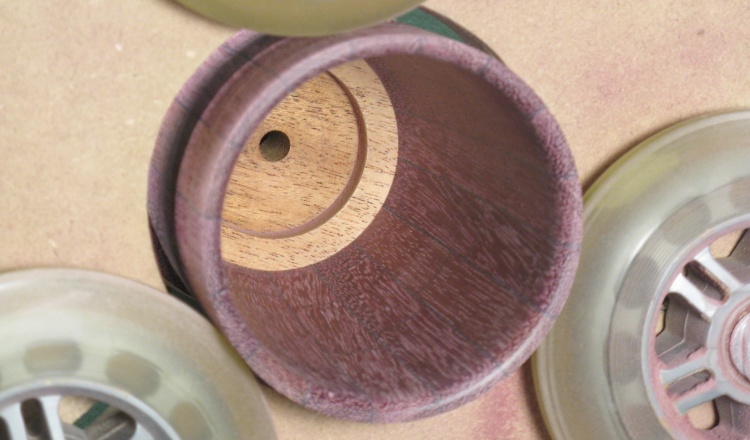
Finding the center of the bottom
The cup wasn't guaranteed to be mounted straight so the bottom may not be correctly aligned with the top and its faceplate. There wasn't a lot of extra material on the bottom due to the tapering of the cup so I wanted it well-centered on the wood.
To find the center of the bottom I made a tapered disc which got wedged into the hole, then found and marked the center and drew a circle where I would cut it away.
To find the center of the bottom I made a tapered disc which got wedged into the hole, then found and marked the center and drew a circle where I would cut it away.
A stepped disc to eventually mount on the bottom
I re-used this old piece of Mahogany to make a bottom disc. I cut in a ring of the diameter to fit into the hole I was planning to make in the base.
Step 2:
As I had expected, the top and bottom centers weren't exactly aligned. Spinning the assembly showed the bottom center point swinging around in about a 1/10" circle. After a few iterations, I found the correct thickness and placement of a wood shim between the faceplate and top disc to tilt the cup so the bottom was correctly centered.
As I had expected, the top and bottom centers weren't exactly aligned. Spinning the assembly showed the bottom center point swinging around in about a 1/10" circle. After a few iterations, I found the correct thickness and placement of a wood shim between the faceplate and top disc to tilt the cup so the bottom was correctly centered.
Correcting the centering
Pretty much perfect centering now
Cutting the bottom to fit the stepped disc
Step 3:
First the wedged-in center wood was popped out.
Then with the bottom centered I could trim it flat and cut a recess to fit the bottom disc (which it can be seen waiting in the wings for its cue).
First the wedged-in center wood was popped out.
Then with the bottom centered I could trim it flat and cut a recess to fit the bottom disc (which it can be seen waiting in the wings for its cue).
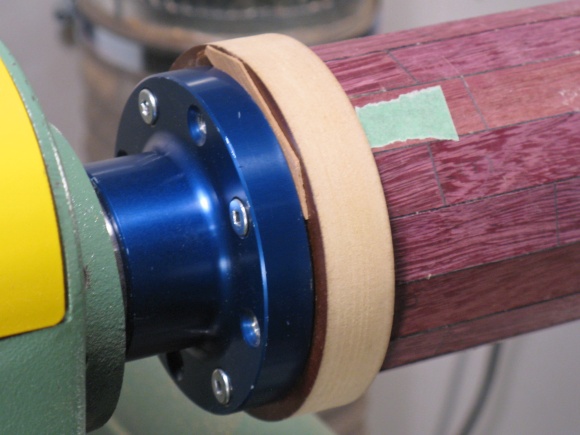
Stepped disc glued onto the bottom
Step 4:
Bottom Disc - you're on! The cup came off the lathe and the bottom disc was glued on.
Off-stage, the MDF top disc was cut down so I wouldn't need to make as much dust on the lathe (MDF turns back into its constituent dust when turned).
Bottom Disc - you're on! The cup came off the lathe and the bottom disc was glued on.
Off-stage, the MDF top disc was cut down so I wouldn't need to make as much dust on the lathe (MDF turns back into its constituent dust when turned).
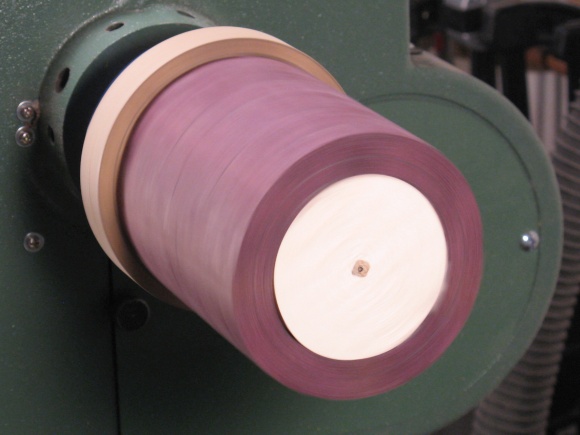
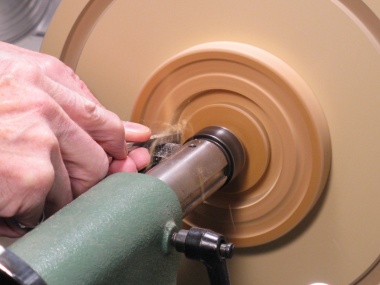
Marking reference lines
Step 5:
The new assembly has been flipped and mounted to the lathe. By the time of this shot, the top has already been cleaned up and the cup rounded using a roughing chisel and a scraper.
Then here I'm penciling on reference lines for the shaping.
The new assembly has been flipped and mounted to the lathe. By the time of this shot, the top has already been cleaned up and the cup rounded using a roughing chisel and a scraper.
Then here I'm penciling on reference lines for the shaping.
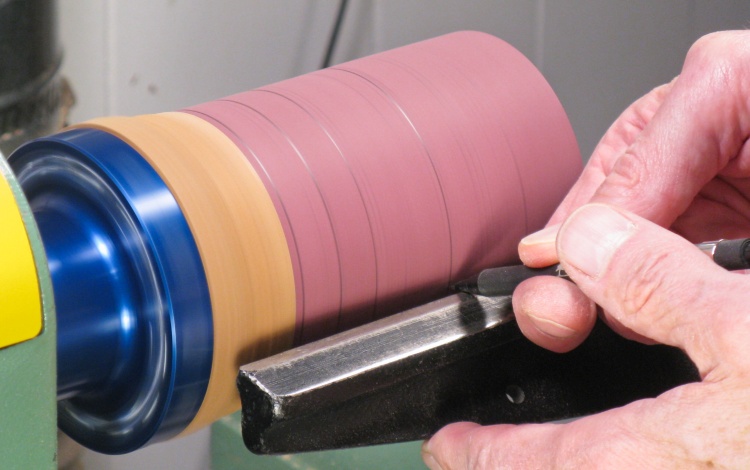
Cutting reference diameters
Step 6:
The first step I use to form a particular curve is to cut reference diameters to match the plan.
The first step I use to form a particular curve is to cut reference diameters to match the plan.
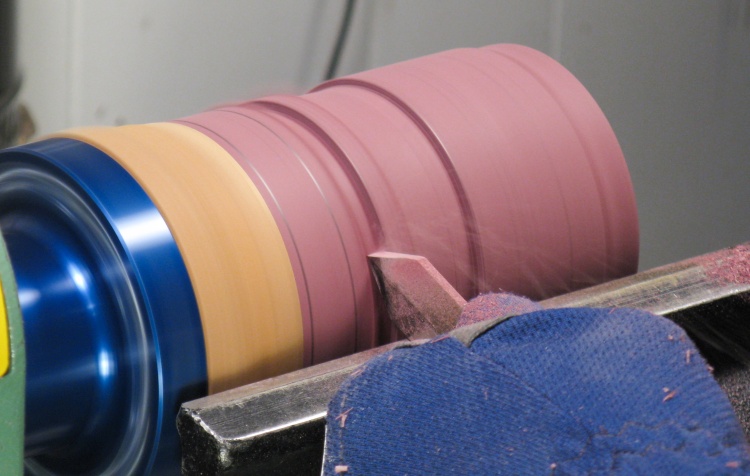
Outside shaping done
The corners of the reference notches are then joined smoothly as seen in this shot. And that's it for the outside shaping.
Then it was time to work on the inside (still Step 6 here). As usual I set up a steady rest but without having the normal solid wood to deal with, I could just start thinning the inside walls to match the outside.
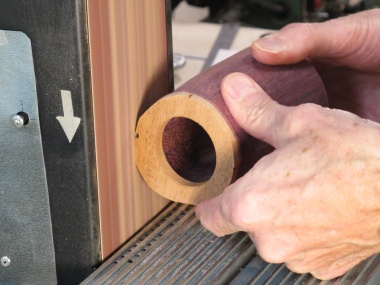
Starting to work on the inside
Part way done
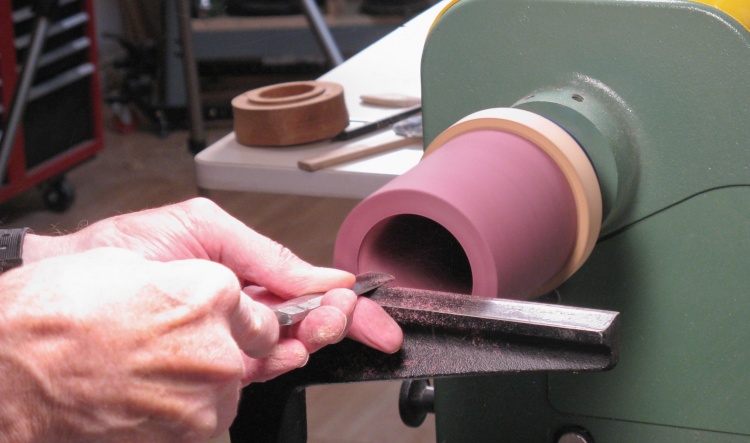
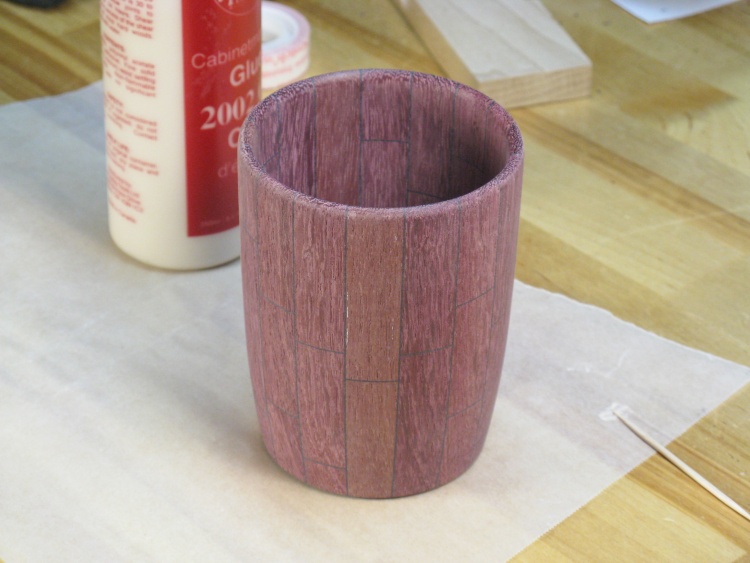
The completed insides
This photo shows the inside turning done with walls being turned to about 0.18" thick.
It's a whole bunch easier to turn a short open cup like this than my more-usual tall narrow vessel and the inside took maybe an hour.
It's a whole bunch easier to turn a short open cup like this than my more-usual tall narrow vessel and the inside took maybe an hour.
And then of course there is sanding
Of course, then there was the sanding.
Now on a tall narrow vessel, maybe you don't need to have the inside quite as perfect as it can be. The flip side of the short cup is that the inside is very visible. Purpleheart is pretty hard so it took a fair amount of effort to get it looking perfect; probably three or four hours.
I'm always so happy when the sanding is done...
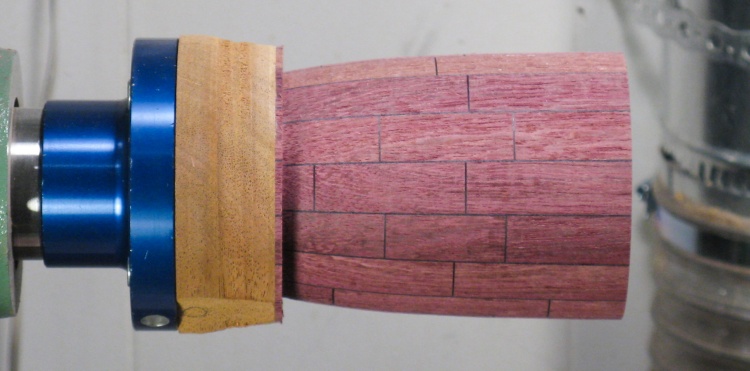
A nicer inside after sanding
A much smoother inside after being sanded to 320 grit (and rounding the top).
Trimming off most of the bottom disc
Step 7:
Finally progressing to the next milestone; the cup was pulled off the lathe and most of the bottom disc was cut off.
Finally progressing to the next milestone; the cup was pulled off the lathe and most of the bottom disc was cut off.
Step 8:
So now I need to set up to work on the bottom again meaning that I needed to hold the finished top and ensure the bottom was centered. I decided to use a jam chuck, but that really only turns the wood - it doesn't hold it in. For the hold-in part I would make a ring that fit the cup and was screwed to the jam chuck.
So now I need to set up to work on the bottom again meaning that I needed to hold the finished top and ensure the bottom was centered. I decided to use a jam chuck, but that really only turns the wood - it doesn't hold it in. For the hold-in part I would make a ring that fit the cup and was screwed to the jam chuck.
Making a hold-down ring
Trimming the bottom flange
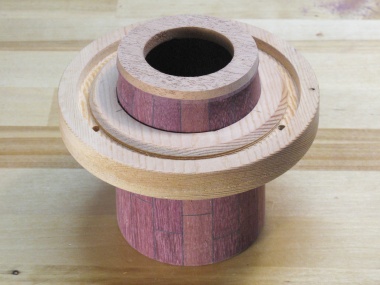
Checking the fit of the ring
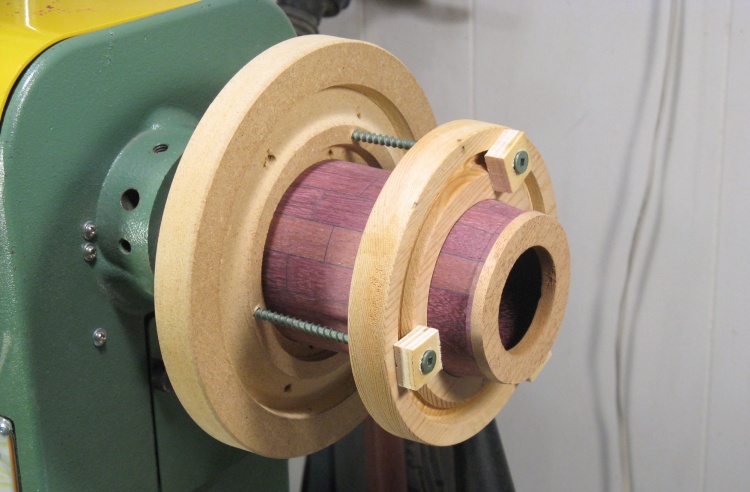
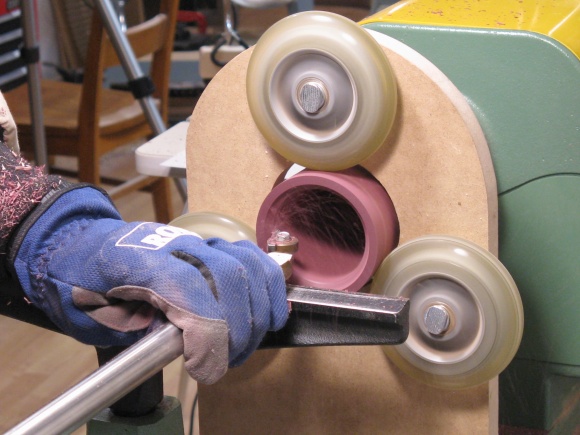
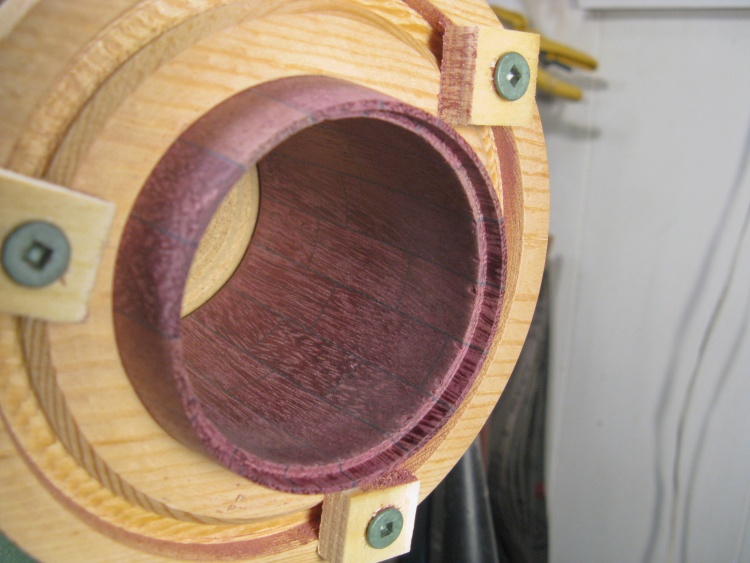
Mounted in jam chuck with hold-down ring in place
This is the rather complex result with the screws holding the ring (and cup) tight to the jam chuck.
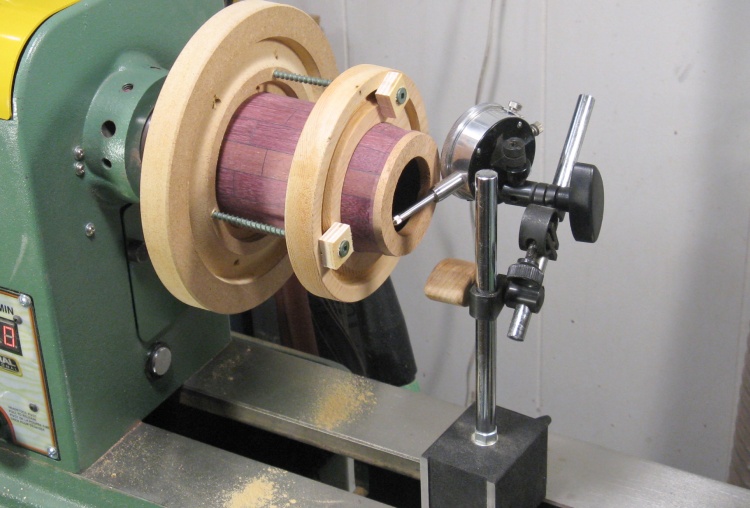
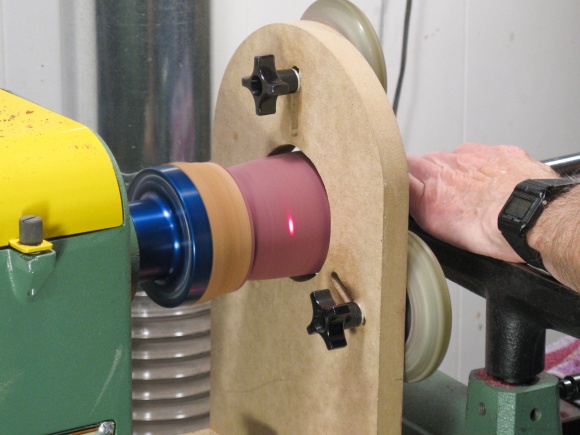
Dial indicator added to tweak centering of bottom
The second part of Step 8 is to center the bottom. Due to various imperfections (Yours Truly not excluded), the bottom wasn't quite centered.
I employed the dial indicator and tapped the cup around with a small hammer until things were properly centered.
I employed the dial indicator and tapped the cup around with a small hammer until things were properly centered.
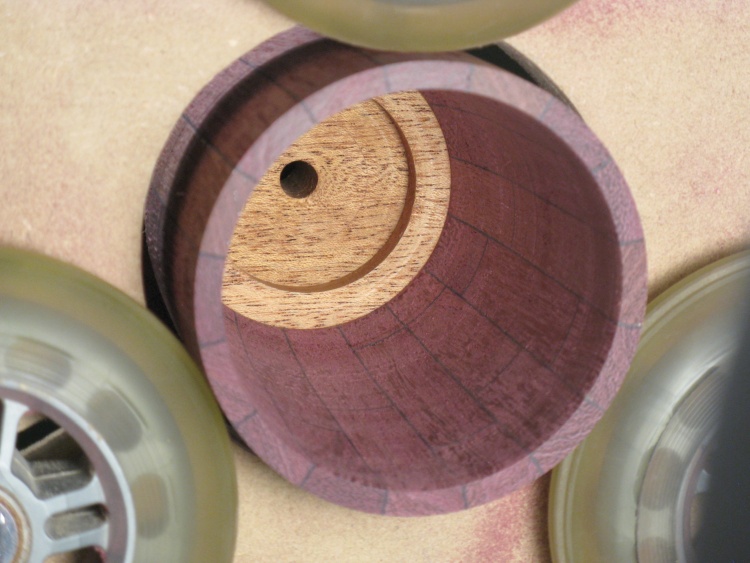
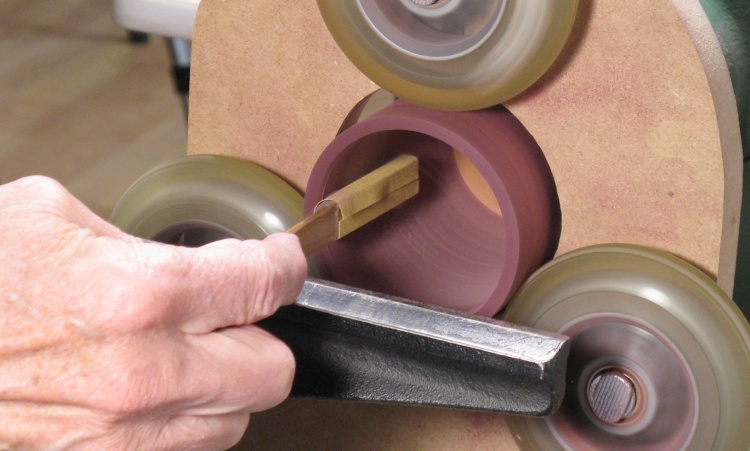
Bottom notched for base
Step 9:
Then it was just a few minutes work to trim off the extra bottom wood and turn a new recess.
Then it was just a few minutes work to trim off the extra bottom wood and turn a new recess.
And now a brief inter-step interlude while a base gets made for the cup;
The base was made with the same grain direction as the staves, so it is end grain on the faces. It was just a matter of cutting three slices from a small plank and laminating them edge-to-edge.
The base was made with the same grain direction as the staves, so it is end grain on the faces. It was just a matter of cutting three slices from a small plank and laminating them edge-to-edge.
Slicing up a little plank for the base
Gluing three slices together
The base blank
This little square should be just enough to make the base.
Base turned to proper diameter
And here I got to reuse that Mahogany disc again. It was attached to the faceplate, turned flat and the base blank was taped to it. In this shot it has already been turned to the correct diameter.
After this shot, the base had a foot turned into it and received the attention of some sandpaper.
We now return to our regularly scheduled stepping.
After this shot, the base had a foot turned into it and received the attention of some sandpaper.
We now return to our regularly scheduled stepping.
Base glued in (just have to take my word for it)
And finally, Step 10:
The base was glued into its recess using a very small amount of toothpick-applied glue to prevent squeeze-out. Here it is sitting to dry.
The base was glued into its recess using a very small amount of toothpick-applied glue to prevent squeeze-out. Here it is sitting to dry.
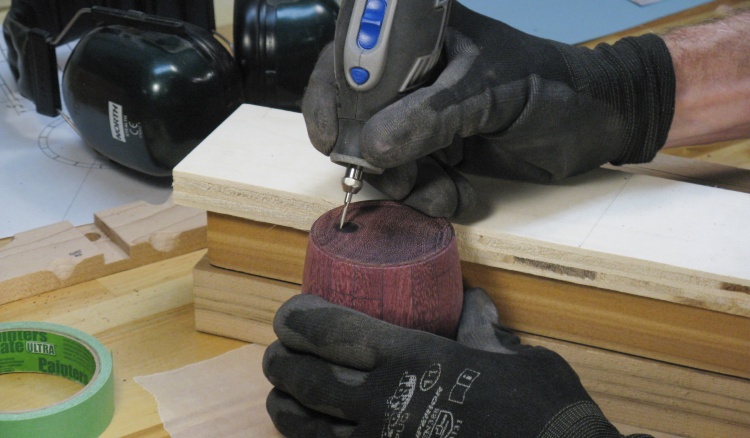
Engraving initials
As usual I put my initials and the year on the bottom. However, the circular indentation ended up black (due to dark wood and some burning from the tool used to cut the indentation). I didn't have much luck sanding off the dark wood so instead I just engraved the characters onto the bottom.
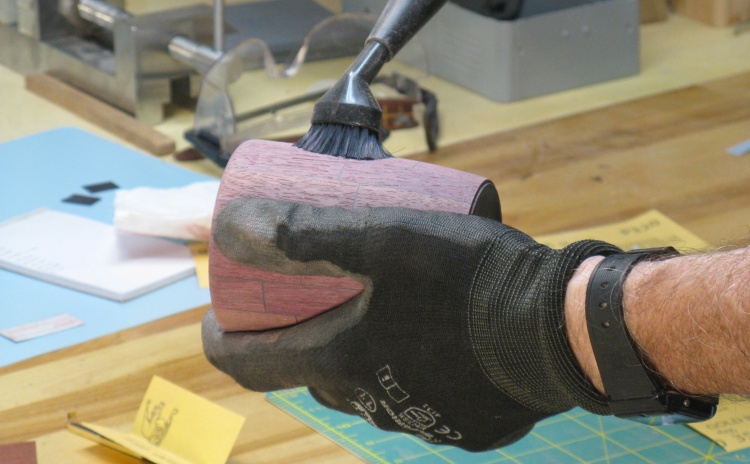
Vacuuming off any the sawdust
That was it for the woodworking so I got it ready for finishing with a quick sanding and then vacuumed off the sawdust.
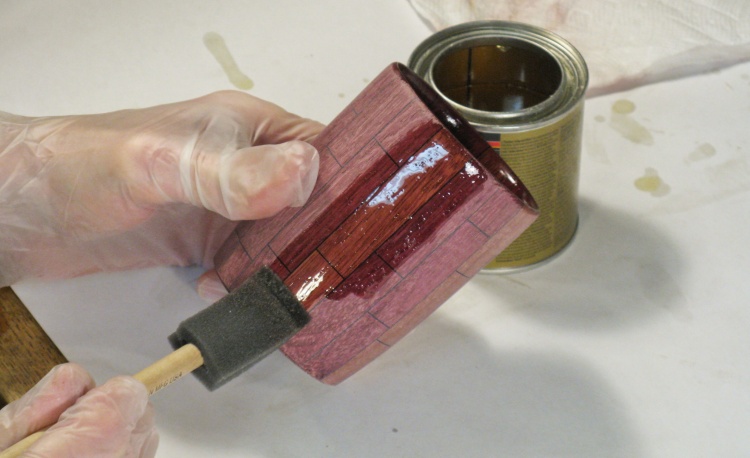
Starting to varnish
While the turning process was a bit involved, the varnishing was simplicity itself. A single brush was adequate to do all the surfaces.
First blurry coat of varnish
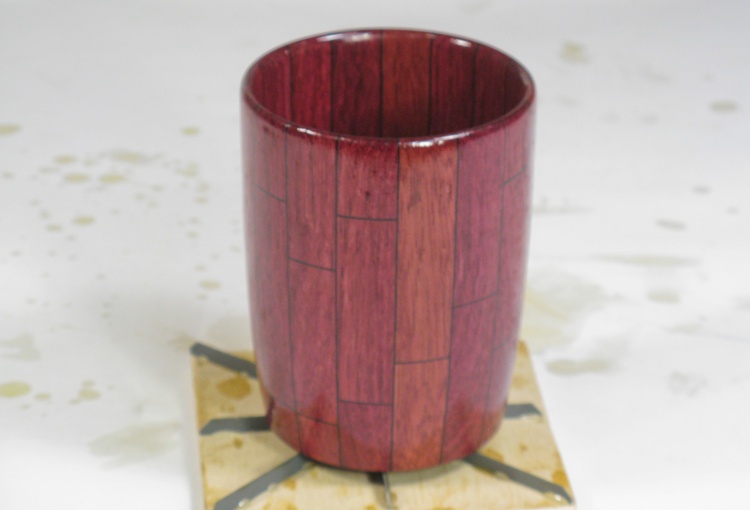
I used my standard three coats of varnish. Here the first coat is still wet (and perhaps a bit out of focus).
Done


