I did a bit of research on deck designs and requirements and then put together a plan to replace the existing deck. I started with the current deck dimensions and then incorporated the changes that my mother-in-law wanted for the new one. These included increasing the width of the staircase and moving it to the lawn side, narrowing the deck a bit and covering the South side to prevent leaves and debris from blowing underneath.
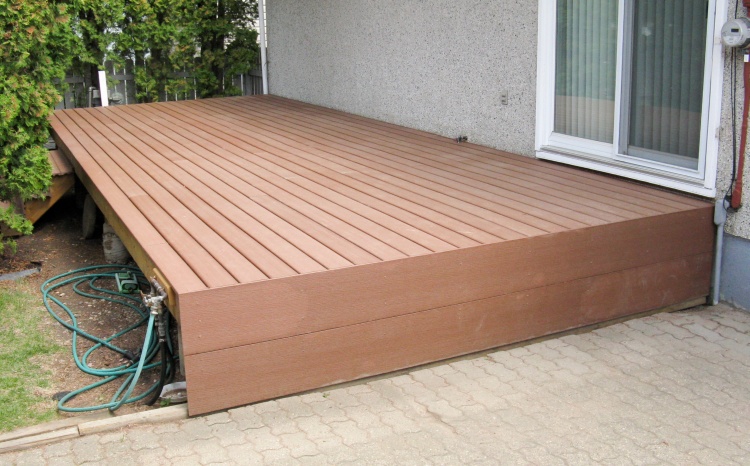
The major aim of the new deck was to make it maintenance-free to banish the dreaded yearly scraping/sanding/painting/staining/board replacing tasks. That pretty much disallowed using wood for the decking or railing. However the structure was of course wood and being pressure-treated will no doubt outlast me. For the decking we used a decent low-cost composite (something of an oxymoron) and went with a powder-coated aluminum railing. Maintenance should be limited to the odd sweep or rinse.
The deck is on the West of the house and the South side is unobstructed so the deck is in the sun for the hottest part of the day. When describing this to a friend, she suggested starting the project early in the year and we took this to heart and got going in early May. We also tended to work in the morning when at least part of the area was in shade.
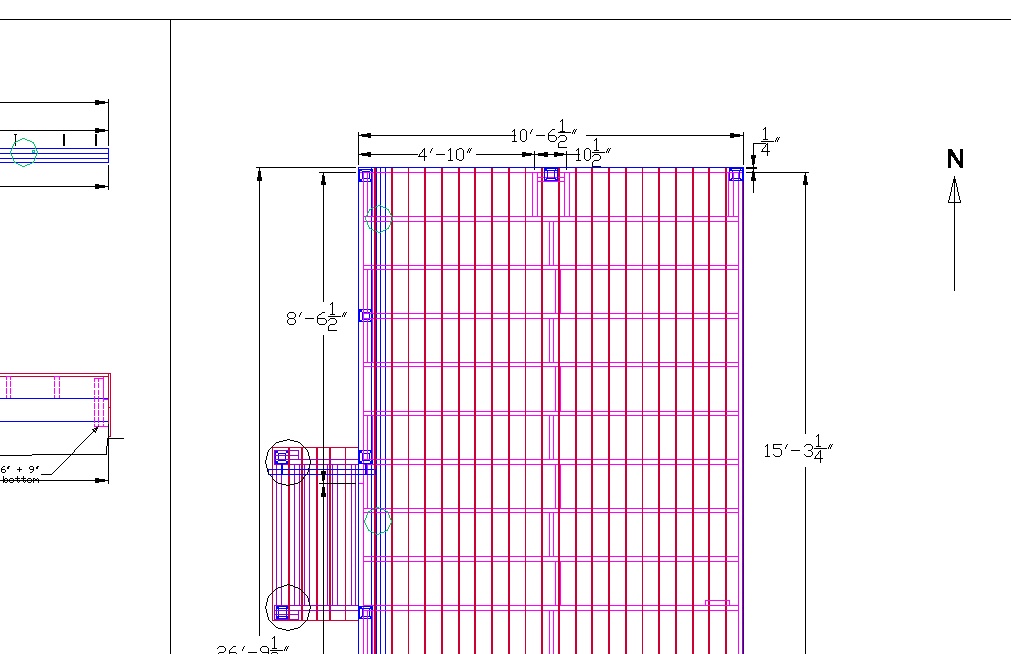
A sample of the deck plan
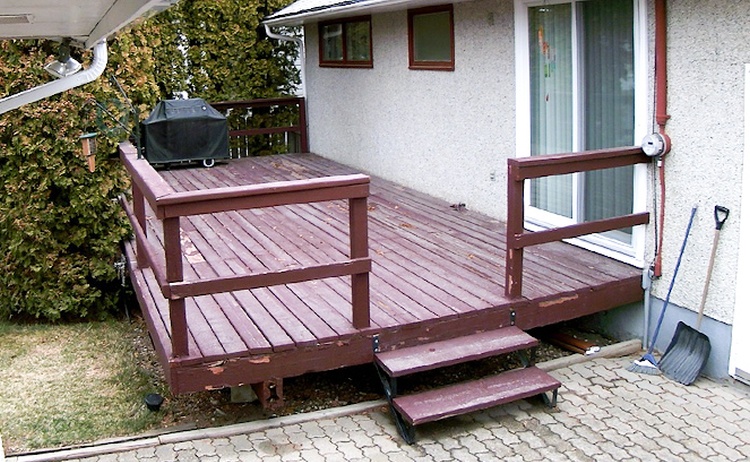
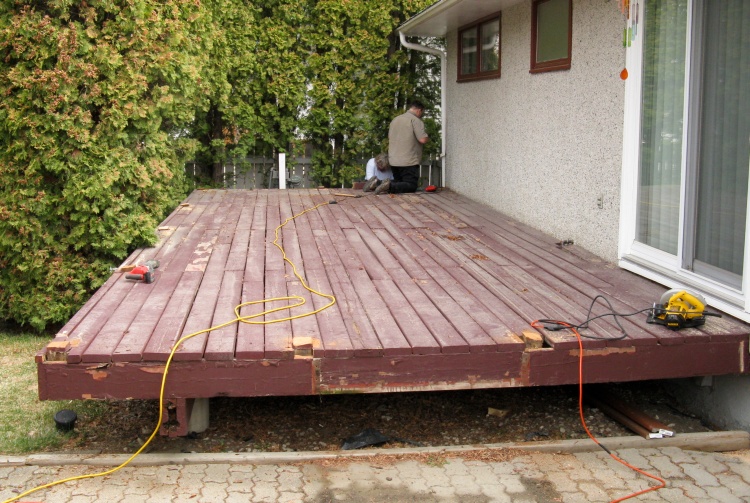
The elderly high-maintenance deck
This shows the original deck. It doesn't look too bad in this shot but some areas exhibit an unsettling softness. A number of boards have been replaced over the years but the composting of the main beam had become something of an issue.
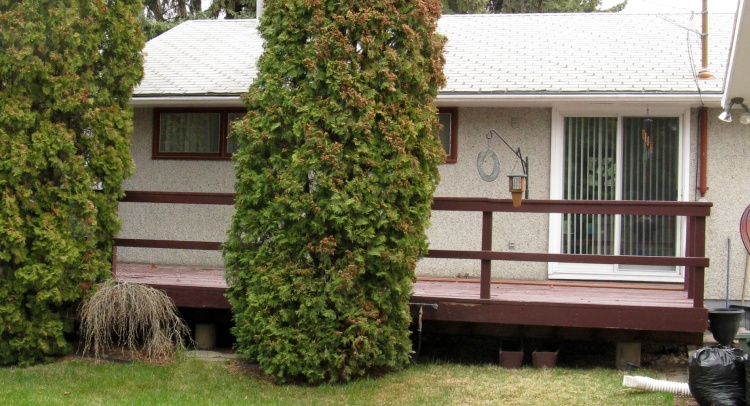
View from the West
This is the view from the lawn. The rather pathetic-looking Weeping Caragana between the two cedars will need to find a new home to make space for the relocated stairway.
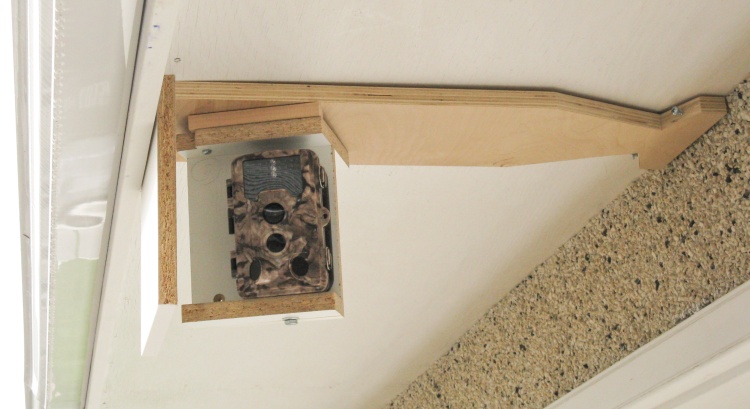
Camera set up in garage eaves to view the deck
I thought it might be interesting to have a time-lapse video of the deck construction so I bought a cheap trail camera with a wide angle of view, knocked together an under-eaves mount for it, and set it up on the garage pointing toward the deck.
I turned it on only when were were there working and then it was set to take a frame each 10 seconds. The demolition video shows 2 frames each 10 seconds so runs at 150 times normal speed. The much-longer construction video uses only every second frame, so it runs at 600 times normal speed; so there's no long boring "Now how are we going to fix this?" pauses.
I turned it on only when were were there working and then it was set to take a frame each 10 seconds. The demolition video shows 2 frames each 10 seconds so runs at 150 times normal speed. The much-longer construction video uses only every second frame, so it runs at 600 times normal speed; so there's no long boring "Now how are we going to fix this?" pauses.
Destruction Step 1: Railing & post removal
Step one was to remove the old deck.
Although technically there was a Step 0 which was to order a 15 yard roll-off bin that was parked at the curb ready for the wood.
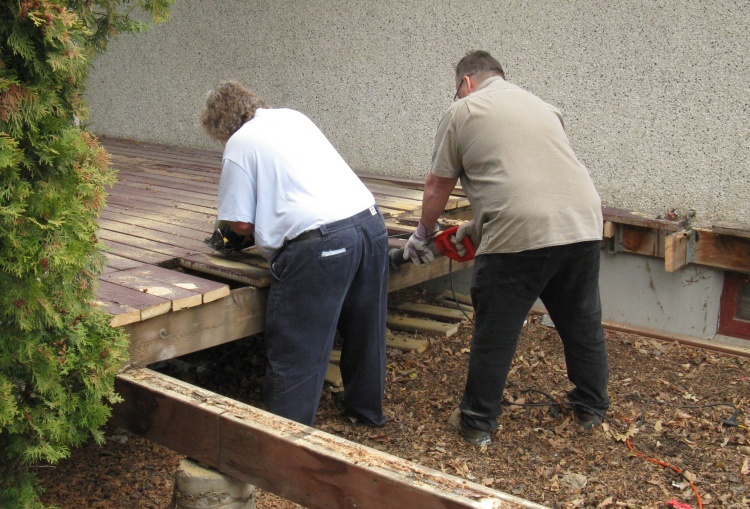
We arranged with family to meet on a Saturday in early May for "destruction day" and seven of us worked at it starting at 9:00 in the morning. Here the staircase is already off, the railing is down and the last post is being cut off with a reciprocating saw.
Although technically there was a Step 0 which was to order a 15 yard roll-off bin that was parked at the curb ready for the wood.
We arranged with family to meet on a Saturday in early May for "destruction day" and seven of us worked at it starting at 9:00 in the morning. Here the staircase is already off, the railing is down and the last post is being cut off with a reciprocating saw.
Chopping it into bin-sized pieces
Rather than try to remove individual deck boards (rusty-nailed/screwed/stained in place) we just chopped the decking parallel to each joist and then cut the joist in half to fit into the bin better. This resulted in 6' sections of a joist with a bunch of 16" pieces of deck board attached.
Here Sue on the left wields the circular saw cutting through the deck while Greg chops the joist in half with the reciprocating saw.
Here Sue on the left wields the circular saw cutting through the deck while Greg chops the joist in half with the reciprocating saw.
Bin filling team awaits the next chunk of deck
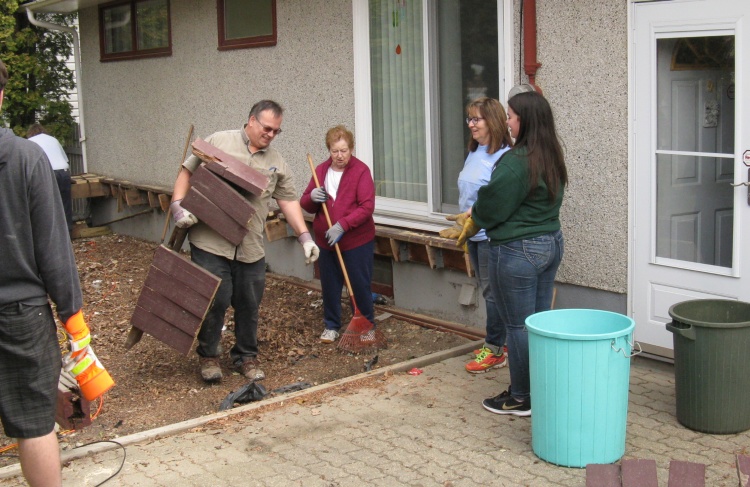
Here a chunk of deck is moved to a staging area on the driveway while the bin packing team waits patiently. We generally removed the short deck pieces from the lengths of joist using the "boot" method before packing them in the bin.
Meanwhile mother-in-law Lois rakes up 38 years of accumulated debris from the gravel under the deck. Unfortunately for the archaeologists amoung us, there was little of interest - a few candy wrappers and a bunch of 3-1/2" nails from the original deck construction. Back to the lab to keep cleaning that femur...
Meanwhile mother-in-law Lois rakes up 38 years of accumulated debris from the gravel under the deck. Unfortunately for the archaeologists amoung us, there was little of interest - a few candy wrappers and a bunch of 3-1/2" nails from the original deck construction. Back to the lab to keep cleaning that femur...
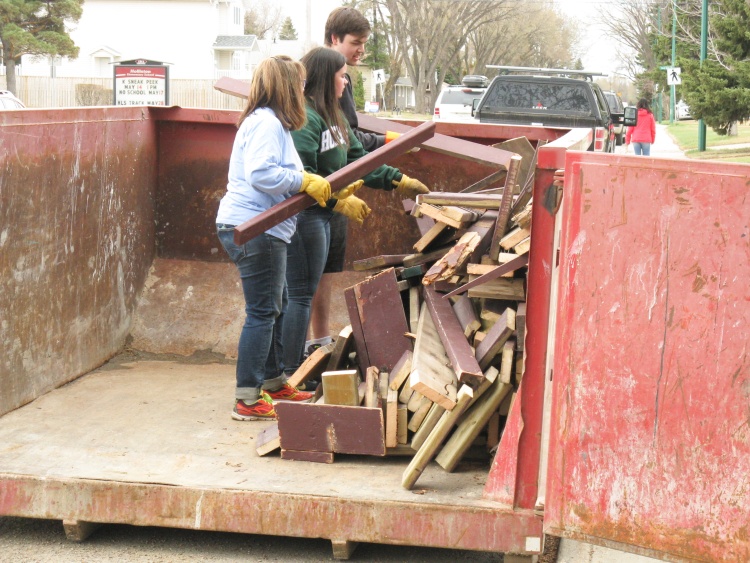
Bin fill staging area
Cindy, Brooke and Jordan handled the transport and bin filling duties.
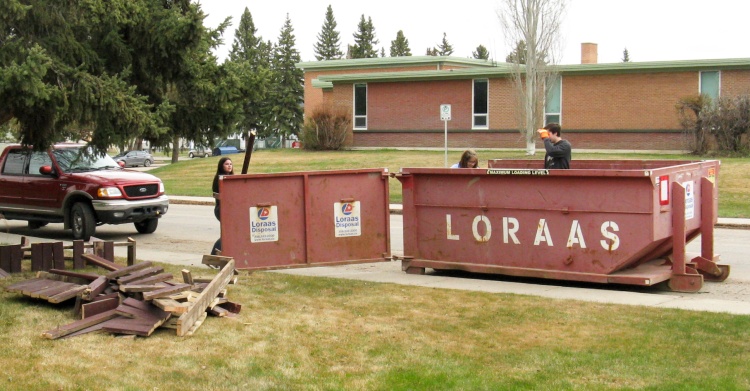
I did an estimate that suggested volume of the wood in the deck was around 9 yards, so it couldn't be too "fluffy" when it went into the 15 yard bin.
To help with that we removed the decking pieces from the joists and then Cindy and her Team of Talented Offspring packed the bin so tight the termites were crawling out to breathe*. The bin was pretty full when we were done, so that turned out to be a wise plan.
* Through their spiracles of course.
High-efficiency scrap packing
The bin had a convenient back door so rather than just trying to heave everything in over the side, you could open it and walk in to implement the perfect harmonious feng shui arrangement of your debris.
3 hours later: Ready for new deck
We weren't sure how much we would get done on Destruction Day but by noon it was all over - just in time for pizza.
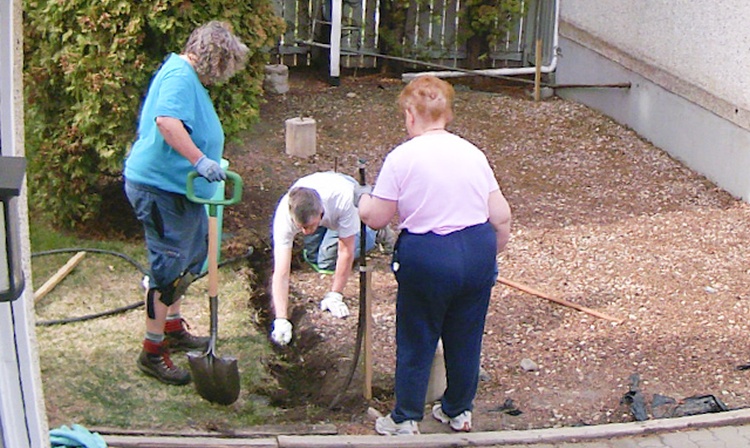
Moving underground sprinkler hoses
The underground sprinkler header needed to be moved a few feet to the corner of the new deck, so we dug up the hoses and repositioned them, leaving the ends extra-long for eventual reconnection when the deck frame was in place.
Here Sue and Lois emulate city workers while the poor sap that drew the short straw works on the water main.
Here Sue and Lois emulate city workers while the poor sap that drew the short straw works on the water main.
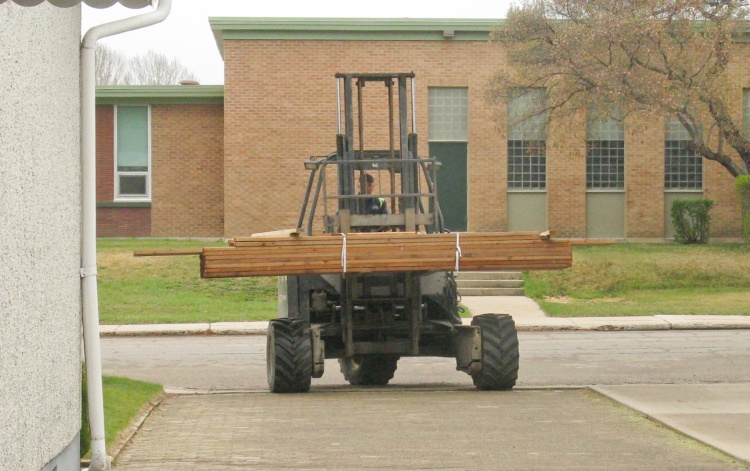
And here comes the wood
We ordered the wood from Home Depot and they delivered first thing in the morning. And did you know they open at 7:00? Yah, neither did I. Fortunately we live only a few minutes away so after their call woke us up, we had time to scramble out of bed, throw on some clothes and stumble to the car. We got there just as the truck was arriving.
We used treated wood of course and these days the brown wood has become more common than the green. To my eye it looks a bit nicer plus it's less, well, green.
We used treated wood of course and these days the brown wood has become more common than the green. To my eye it looks a bit nicer plus it's less, well, green.
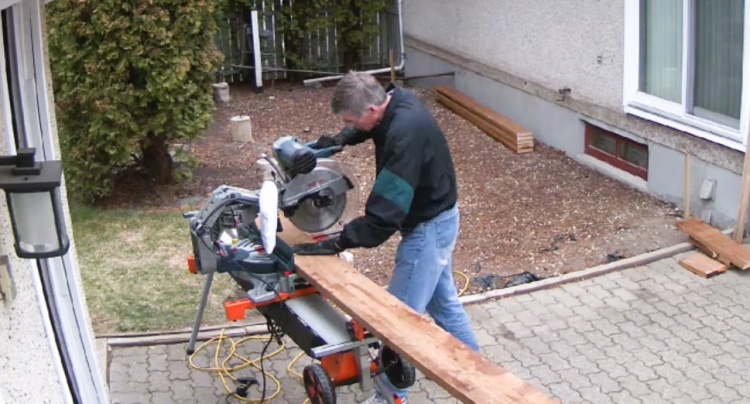
Chopping up the wood for the beam
The plan was to start by making the main beam. There are guidelines for constructing laminated beams with requirements of where the joints in the wood need to be. So with that plan in mind, here I'm cutting up the 8 specific-length pieces that we needed.
Once again I was able to borrow the excellent compound 12" mitre saw from a buddy to help in the construction (Thanks again Gary!)
Once again I was able to borrow the excellent compound 12" mitre saw from a buddy to help in the construction (Thanks again Gary!)
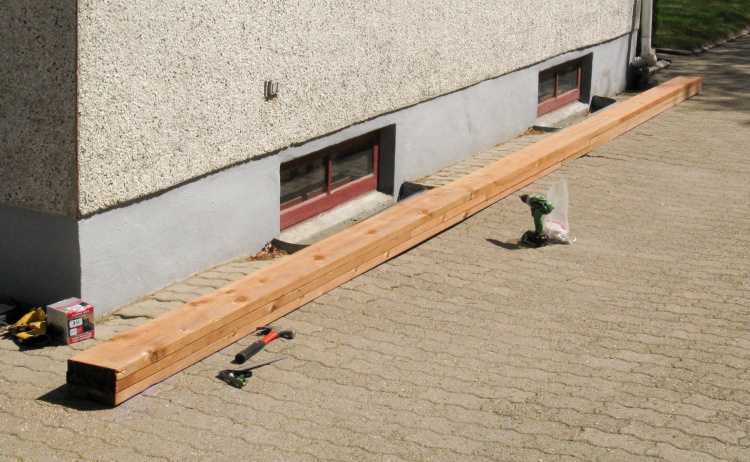
Step 1: Build a beam. Here it's hammer-ready
The next morning we got started constructing the main beam which would stretch the full deck length of almost 27' and which was formed from three layers of 2x8s nailed together.
Here the pieces have been positioned together on the driveway ready for nailing.
Here the pieces have been positioned together on the driveway ready for nailing.

Let the hammering begin!
I had managed to crack a finger bone in my right hand a couple weeks previous which was still healing (because: stupidity) so I wasn't up to doing any hammering, much less the 100 or so 3-1/2" nails needed to hold the beam together. Fortunately Sue bravely stepped up and in pre-lunch and post-lunch sessions managed to get it all together with only a temporary case of rubber-arm.
So to avoid hammering, the deck was put on a strict nail-free diet of structural, deck, composite and fastener screws. The only exceptions were the joist hangers (which could be done with a nail gun) and the beam (Sue).
So to avoid hammering, the deck was put on a strict nail-free diet of structural, deck, composite and fastener screws. The only exceptions were the joist hangers (which could be done with a nail gun) and the beam (Sue).
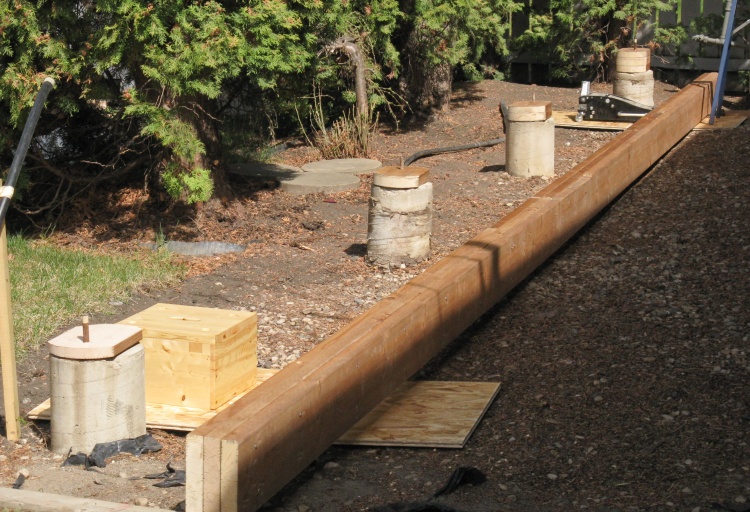
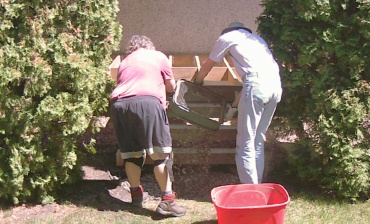
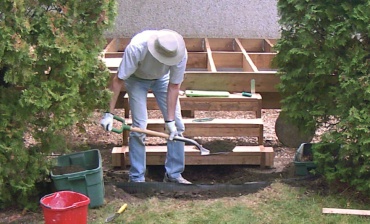
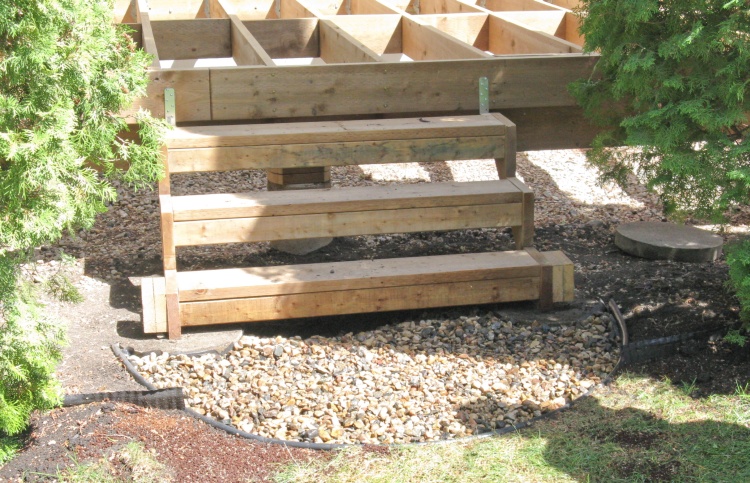
Footings modified for height & levelness
Through clever use of mechanical advantage and the misuse of a couple wheelers, we managed to position the ~230 lb beam beside the footings, ready to be mounted. We then carefully drilled holes to accept the rebar that can be seen protruding from the footings and which would prevent it from shifting.
While the concrete footings were is good shape, they were nowhere near level. The local oral history has it that the next-door neighbour's brother-in-law put the footings in back in the misty depths of the past (well, early 80's), but he must have neglected to check for levelness beforehand. As a result there was several inches height difference from one end to the other. To compensate, we added treated wood spacers to the concrete footings to bring them all to the same level.
While the concrete footings were is good shape, they were nowhere near level. The local oral history has it that the next-door neighbour's brother-in-law put the footings in back in the misty depths of the past (well, early 80's), but he must have neglected to check for levelness beforehand. As a result there was several inches height difference from one end to the other. To compensate, we added treated wood spacers to the concrete footings to bring them all to the same level.
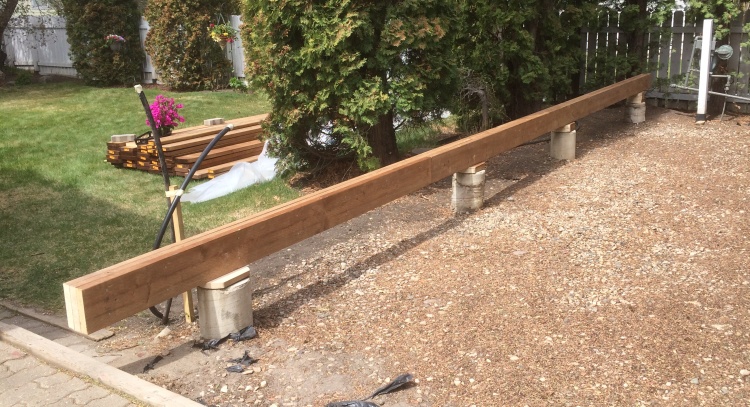
The beam in place
Experienced Where's Waldo fans will be able to find a black hydraulic floor jack, a blue metal sawhorse and a wooden stand in the previous photo. These were used to aid in the positioning and lowering of the beam onto the pilings. This shot shows the beam in position with, I'm happy to note, no crushed body parts under it.
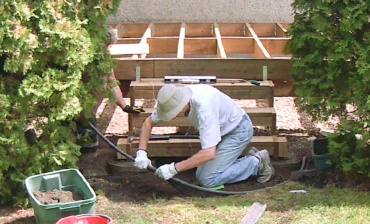
Bolting the ledger board to the house
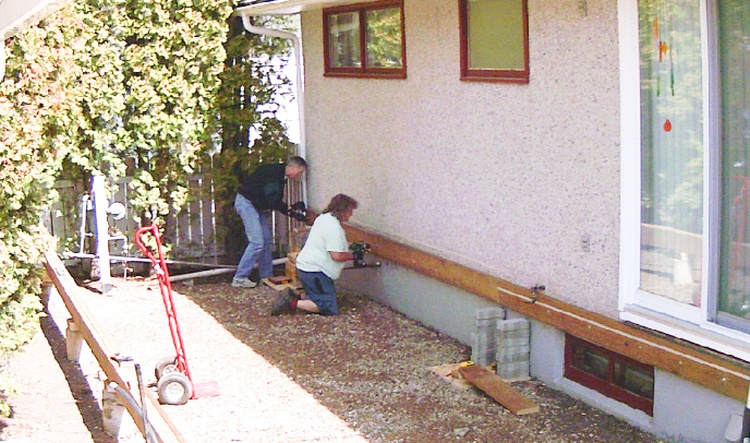
Then it was over to the other side of the deck to attach a ledger board to the house. I had come up with a cunning plan to mark the boards to be able to reuse the original holes through the stucco, but made sure I had a concrete drill as a backup. Unfortunately a number of the original holes would have interfered with joists so we reused only a few and just drilled new ones as required, using lag bolts to hold the board in place.
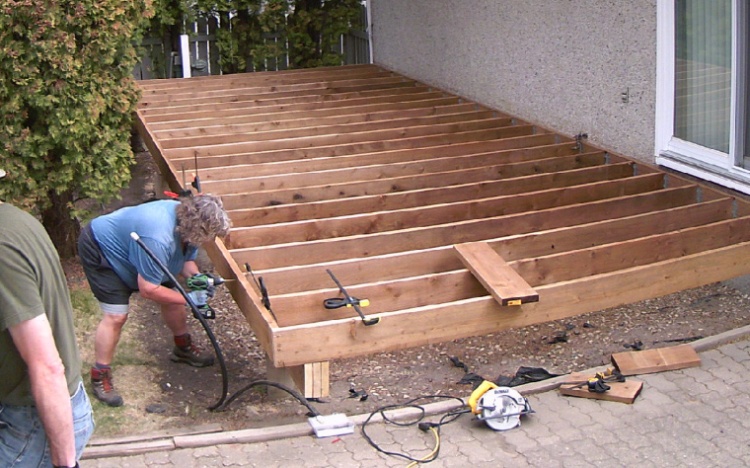
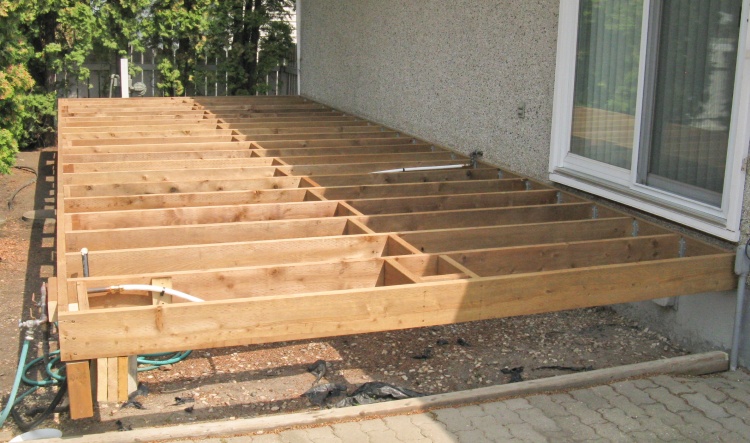
Installing joists - already 1/3 done!
Then is was time for the "real" construction - installing the joists. That went pretty quickly; I'm only about an hour into it here.
For attachment at the beam end I used only a single temporary screw, while the house end I used joist hangers attached with the help of a nail gun lent by a brother who had recently built a deck (Thanks Other Gary!).
I was working by myself on these so I supported the house end of the joist with a stand plus wood shims to get the joist at the exact height of the ledger board.
Neighbour progress update
Before starting construction, I had cut a bunch of shims from a 3" length of 2x4. I made a little pile of 1/4", 1/8" and 1/16" shims and they turned out to be surprisingly useful. I used them above for height adjustment, a few photos down for joist adjustment (the intended purpose) and four or five different places as the deck was being built - obviously a well-spent 10 minutes of work.
The next door neighbour Keith would periodically pop over for a progress update and see how we were building things. You know how us old retired guys like to gab...
The next door neighbour Keith would periodically pop over for a progress update and see how we were building things. You know how us old retired guys like to gab...
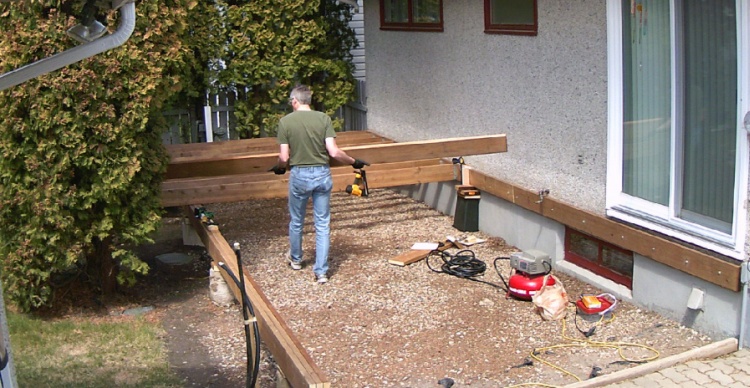
Trimming joists to final length
In fairly short order all the joists were in place.
We used 12' 2x8s for the joists although we needed a length of only 10' 6". However I didn't want to rely on the house or ledger board being perfectly straight so I didn't cut them to length first. Instead I left them the original length until they were all in place. Then I snapped a chalk line across them to mark the ends so I could cut them all at the right point so I'd know that the deck edge was straight and the deck boards could go on straight.
To ensure the cuts were square I made a plywood jig that would be clamped to the joist. You can see it here and that the first few joists have already been cut off with a circular saw.
Shims under joists where needed
The joists turned out to vary a fair amount in height; the "8-inch" dimension of 2x8s is normally quite close to 7.5" but on these it varied from maybe 7-1/8" to 7-3/8". The beam exhibited a similar variation so to ensure a flat surface for the first deck board, I strung a line across the tops of the joists and added wooden shims under any low joists to bring all the top edges to the same level.
This photo shows a 1/8" shim under one of the joists. The joists were then fastened to the beam with a couple "toenailed" deck screws (toescrewed?).
This photo shows a 1/8" shim under one of the joists. The joists were then fastened to the beam with a couple "toenailed" deck screws (toescrewed?).
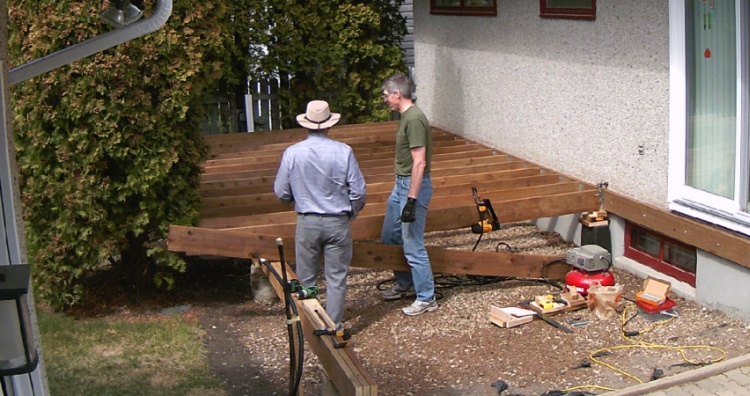
Installing the rim board
With the joists cut off and levelled, the rim board could be put on. This involved clamping the board on to the joist ends and then in accordance with the deck's "screwtarian" diet, driving in 3-1/8" structural screws using a cordless driver. Here Sue is doing one of the last joints. The thin black clamp seen between the joists was used to make sure the joist being attached was vertical.
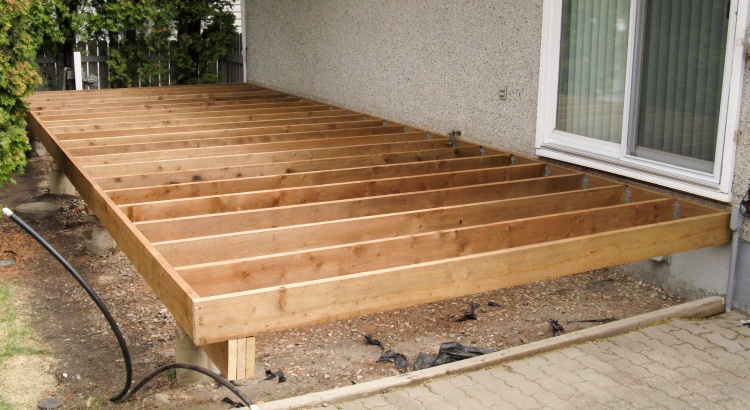
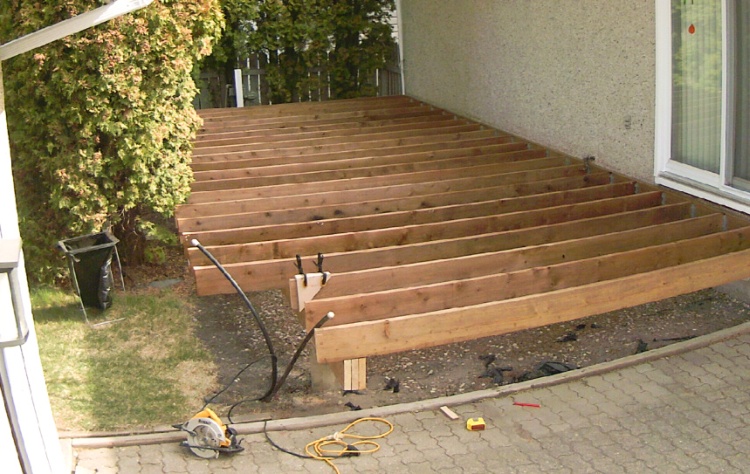
The basic frame is done
This is a photo of the completed basic frame. It seemed like a significant milestone (and I suppose it was from at least a visual perspective) but it was really the easy part of the deck.
Plumbing for underground sprinklers is extended to lawn side of deck
The underground sprinkler pipe emerges from the house wall and had to make its way to the corner of the deck. Rather than copper as on the original deck, we used PEX since it could just bend to the profile needed.
I decided to try "Sharkbite" plumbing couplers. You just push the copper or PEX pipe into the ends and it holds and seals - no crimping, screwing, clamping or soldering. They seem costly ($10) but they are very simple to use. My two joints took only a few minutes and there were no leaks or drips - probably the best plumbing experience I've had.
I decided to try "Sharkbite" plumbing couplers. You just push the copper or PEX pipe into the ends and it holds and seals - no crimping, screwing, clamping or soldering. They seem costly ($10) but they are very simple to use. My two joints took only a few minutes and there were no leaks or drips - probably the best plumbing experience I've had.
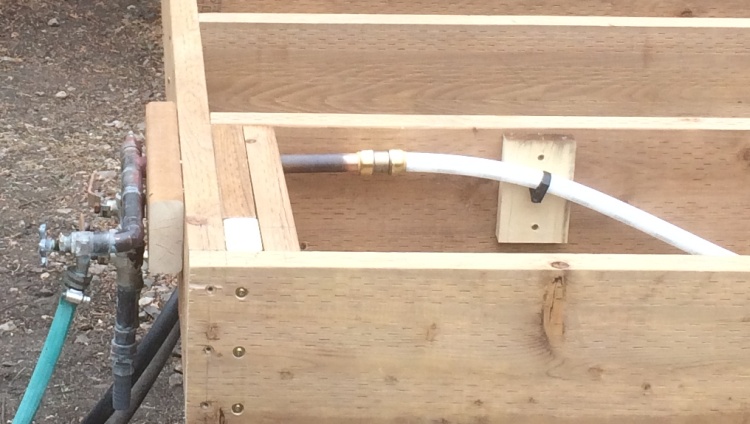
Sharkbite coupler connecting old sprinkler header & PEX
This shows the old tarnished copper sprinkler header, the gold Sharkbite coupler and the white PEX at the corner of the deck.
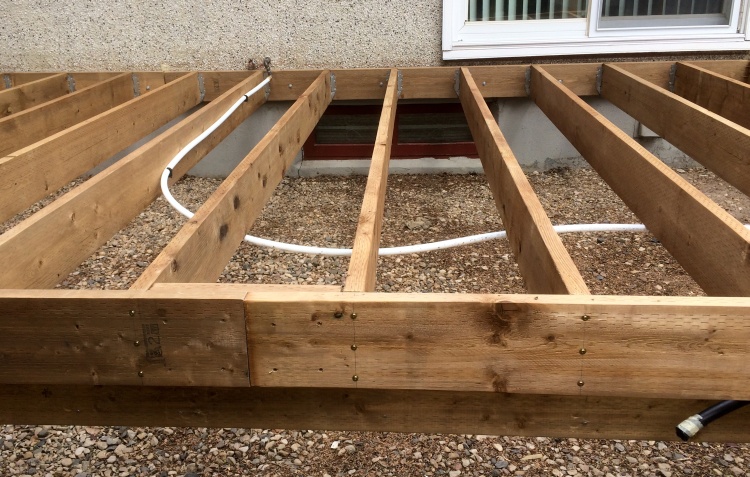
With blocking installed, the frame is complete except for the stairs
The next task was to add the blocking which is composed of short pieces of 2x8 between the joists held in with 3" or 3-1/2" deck screws. This shows the frame with the blocking thankfully completed since it was kind of tedious and actually took longer to do than the joists.
We put in a row of blocking down the middle which strengthens the deck by keeping the joists from buckling. In addition, blocking was needed for each of the 10 positions where railing posts will sit to provide a solid base to receive the mounting screws.
We put in a row of blocking down the middle which strengthens the deck by keeping the joists from buckling. In addition, blocking was needed for each of the 10 positions where railing posts will sit to provide a solid base to receive the mounting screws.
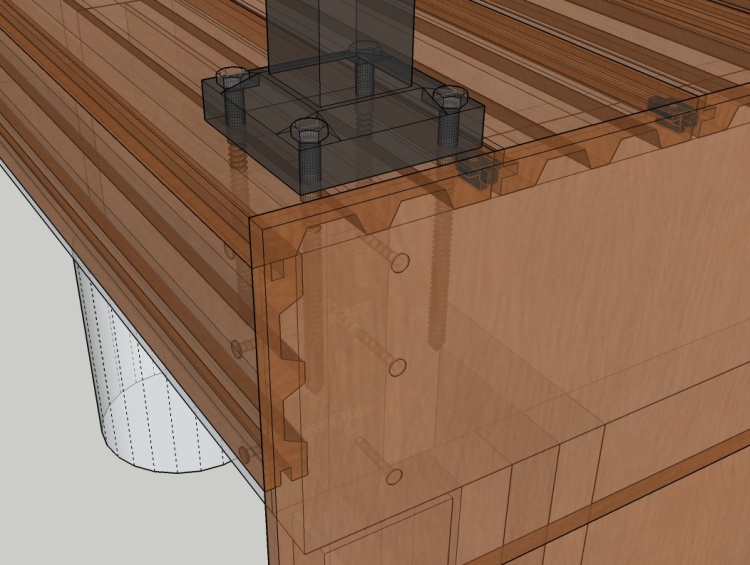
A busy corner for fasteners
And of course like most DIY backyard deck builders, I made a 3D computer model of the deck.
Besides looking really cool, this let me do things like check for interference at this busy corner where the post bolts, the joist-to-rim fasteners and the blocking fasteners must all coexist without intersecting.
Besides looking really cool, this let me do things like check for interference at this busy corner where the post bolts, the joist-to-rim fasteners and the blocking fasteners must all coexist without intersecting.
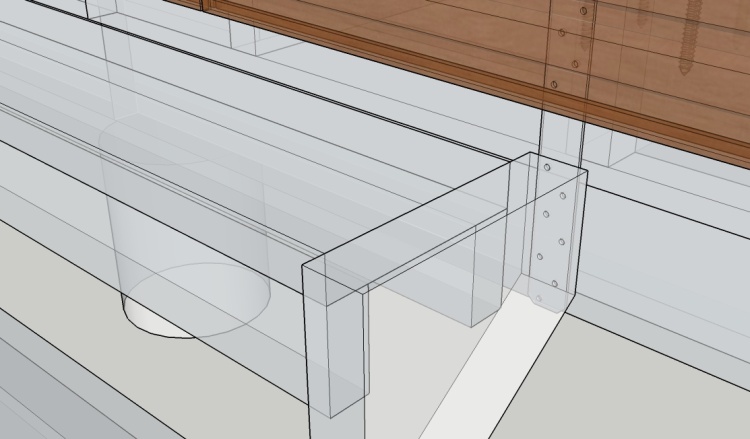
Stair construction X-ray view
We built a set of stairs from wood stringers bridged by box beams of 2x4s and 2x8s. This X-ray image shows the box beam of the top step.
Also visible is the metal strap used to hang the stairs from the rim board (Simpson Strong-Tie #HRS12 for those making a parts list).
Also visible is the metal strap used to hang the stairs from the rim board (Simpson Strong-Tie #HRS12 for those making a parts list).
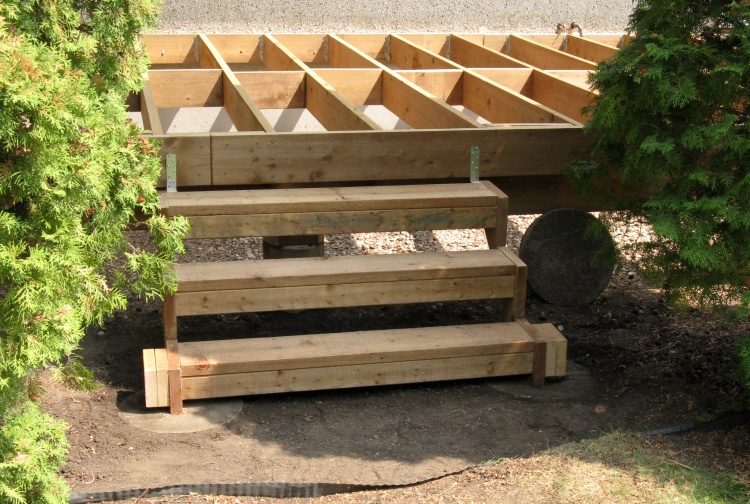
And then a set of stairs was added
The stairs aren't particularly attractive but they will eventually be hidden with decking material. The wood blocks on each side provide a solid base into which the railing post is screwed.
The stairs are positioned between the cedars where the Caragana used to be. On the same day we started joist installation it was unearthed and moved to a new home out in the country where it should receive substantially more sunlight.
Unfortunately the base of the stairs was dirt which would of course be mud whenever it was wet. We needed something cleaner for that area.
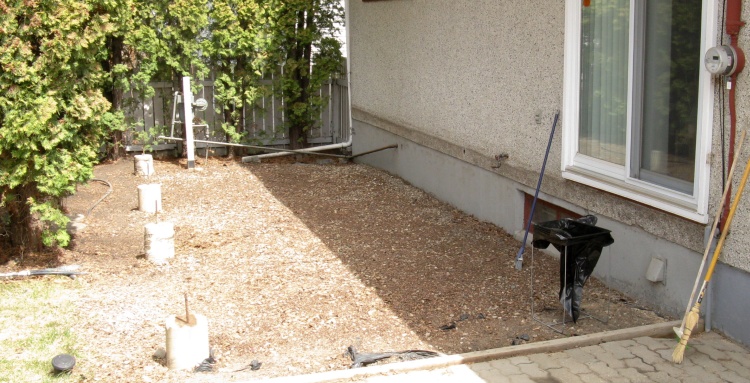
Adding cleaned gravel
Installing edging
Removing excess soil
The mud-less stair base
We decided to put in a gravel base for the stairs. The area was marked out, dug down about 2" deep, lined with landscape cloth, edged with plastic lawn edging and finally filled with gravel.
There was oodles of gravel under the deck so we just gathered what we needed and used a sieve to clean it before adding it to the area.
There was oodles of gravel under the deck so we just gathered what we needed and used a sieve to clean it before adding it to the area.
The material we selected for the decking was a Veranda brand, only available at Home Depot. It was reasonably priced for a composite decking ("only" 2.5 times treated wood) and was an older style where the composite is consistent throughout. Most other composite decking is "capped" meaning they have a plastic top or wrap, but most are 50% to 150% higher cost and don't necessarily offer much advantage although you can get more variety in patterns and they may be more scratch-resitant.
Back in April I had ordered a single deck board, both so we could see what a larger sample of the decking looked like, and to make sure the ordering/delivery was going to work smoothly. That order arrived in under a week and we confirmed the look was what we wanted. Therefore I confidently ordered the rest of the boards for the deck about a week before we needed them, but they took over a week to arrive, and when they did they were the wrong type.
Back in April I had ordered a single deck board, both so we could see what a larger sample of the decking looked like, and to make sure the ordering/delivery was going to work smoothly. That order arrived in under a week and we confirmed the look was what we wanted. Therefore I confidently ordered the rest of the boards for the deck about a week before we needed them, but they took over a week to arrive, and when they did they were the wrong type.
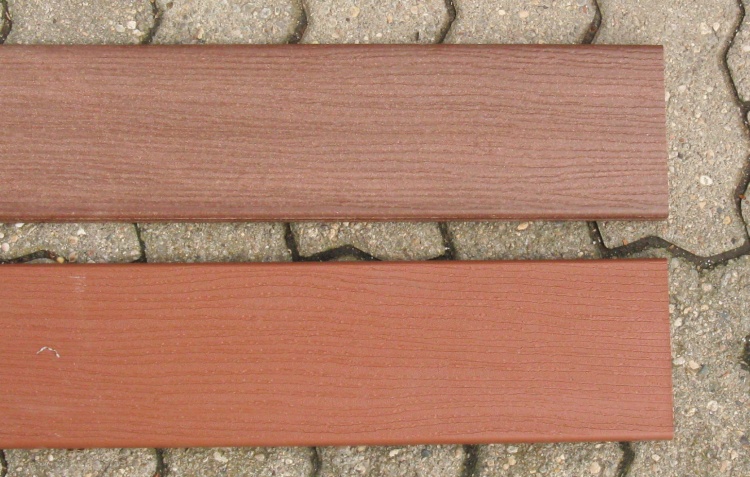
The Right Stuff, top & the Wrong, bottom
Turned out Home Depot's system said that the same material we had just ordered/received a few weeks before was obsolete, so they changed to a different decking with the same "Redwood" color name without even bothering to check with me. We had already looked at and rejected that type since it was much too orangish and slippery to boot.
Fortunately they were at least apologetic and worked with the supplier to find enough stock of the type we wanted to complete the deck and that arrived in another week or so.
Fortunately they were at least apologetic and worked with the supplier to find enough stock of the type we wanted to complete the deck and that arrived in another week or so.

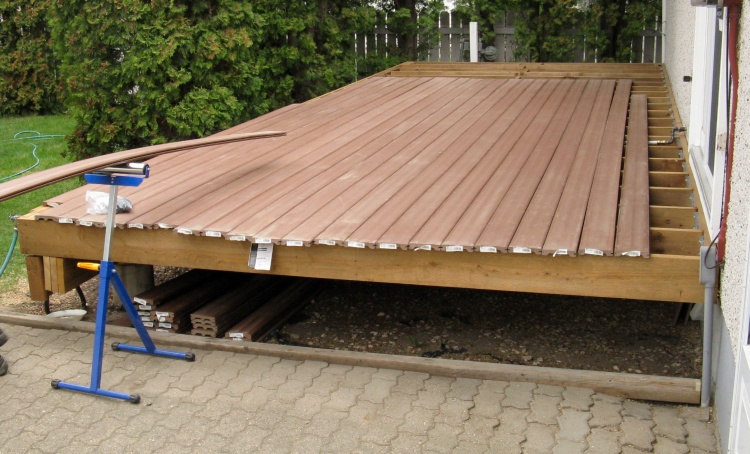
The same delivery guy, this time with long floppy deck boards
This is the belated delivery of the decking material. This time we made sure to get up by 7:00 so it was a slightly less panicky start to the day ("though we still didn't have time for breakfast", he grumbles). The delivery includes 20-foot boards which explains the length and droop of the material. It was too long to get between the houses, so they put it on the driveway and we carried it into the back yard piece by piece.
The institutional-looking building across the street is indeed an institution; specifically an elementary school, so we were subjected to various bells ringing throughout the day and once a very slow and repetitive band tune when they left a door open. I gotta say I prefer the bells.
The institutional-looking building across the street is indeed an institution; specifically an elementary school, so we were subjected to various bells ringing throughout the day and once a very slow and repetitive band tune when they left a door open. I gotta say I prefer the bells.
Arranging the boards to check exact width
We started piling the deck boards under the deck but decided there was no reason they couldn't go on top, so there is a pile there too.
I had cleverly designed the width of the deck to exactly fit 23 boards (and associated spaces) so we could just use 23 full-width rows to avoid cutting the last row narrower. Here we've started to lay out the boards with spacers to confirm the deck width - fortunately it worked out exactly.
I had cleverly designed the width of the deck to exactly fit 23 boards (and associated spaces) so we could just use 23 full-width rows to avoid cutting the last row narrower. Here we've started to lay out the boards with spacers to confirm the deck width - fortunately it worked out exactly.
Needed a narrow strip at the house
And then we decided that since we had extra deck material, we could add a fascia piece to the long side. Since we wanted that flush with the deck boards, that meant that the first board had to overlap the edge by almost an inch. So after that the deck needed 23 and a bit rows. This shows the "bit" needed at the house. The best laid plans, etc...
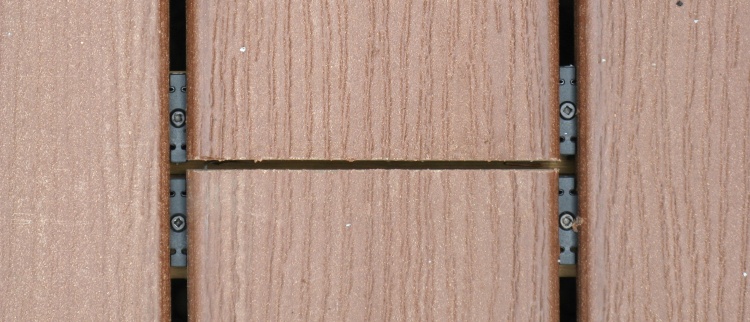
A hidden fastener in place (with a surface screw to the left)
The deck boards are slotted on the edges as can be seen in the photo above and "hidden fasteners" are used between the boards to both hold them down and correctly space them at 1/4".
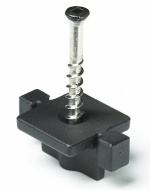
Hidden fastener
This photo shows a hidden fastener installed between boards and also a surface screw just beside it.
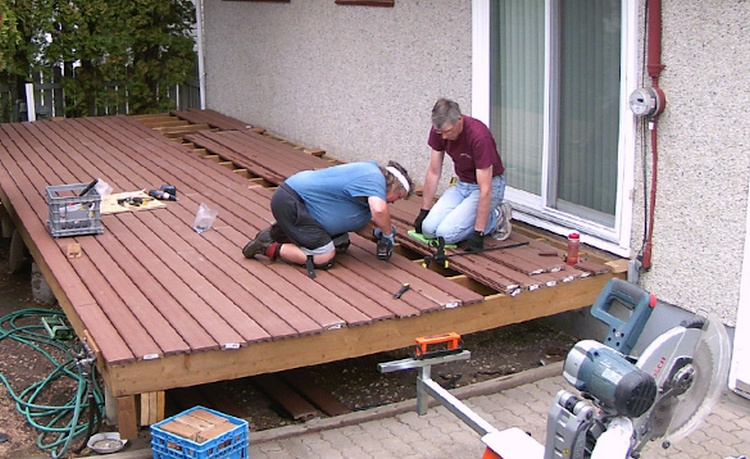
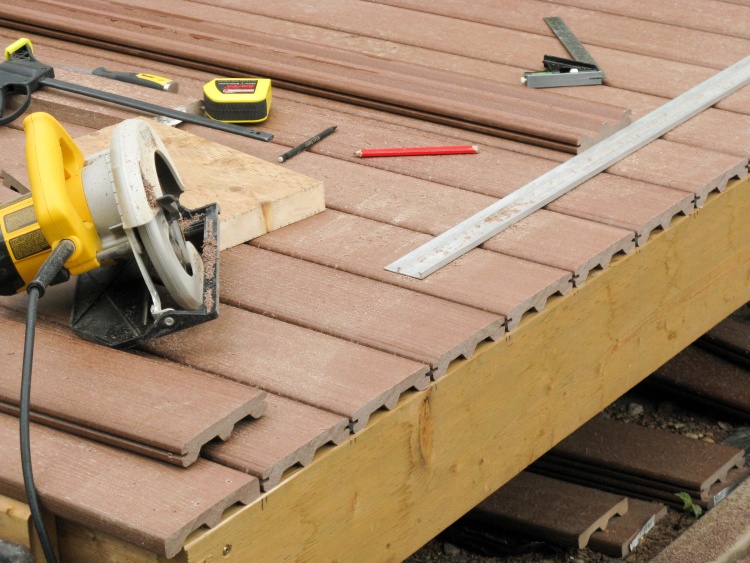
The outside board getting mounted with screws
The first row of boards didn't have the slots for hidden fasteners (to look more finished from the edge) so it needed to be surface-screwed to the frame. Here both of us are putting in screws - two every 16" - to hold it down. The screws have small heads that could be driven a bit below the surface and then the surrounding material could be tapped down with a hammer to make the holes less obvious.
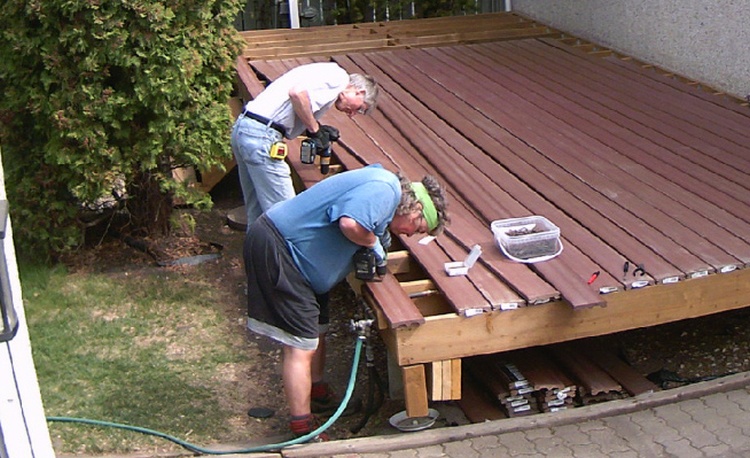
A few days later putting 15th row in place
Installing the boards was a bit tedious since there was a fastener at each joist - 22 per row or about 500 in total. It took us about half an hour per row but by the end after refining our technique we were down to about 20 minutes. Keeping the long rows straight (since most deck boards were warped) meant we had to proceed carefully.
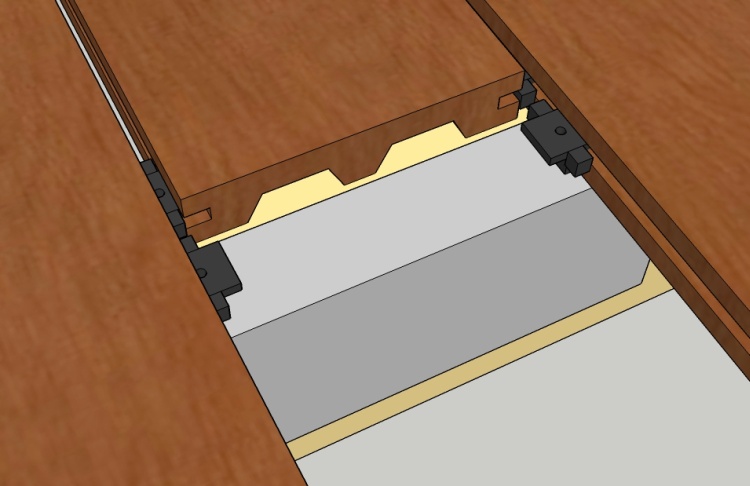
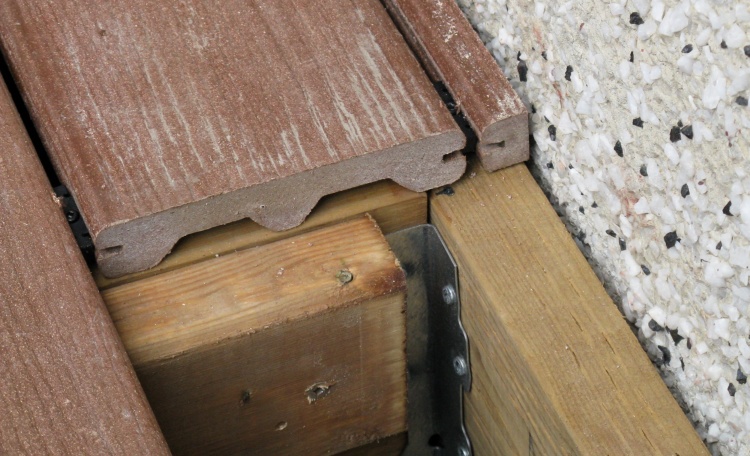
Need an extra block to hold a second set of fasteners at each joint
The deck boards need a fastener at each end so where there is a joint between boards on the deck, two adjacent sets of fasteners are used. Since a joist isn't wide enough to hold two side-by-side fasteners, an 8" block is added to hold the second set.
This image shows one such joint with one of the deck boards out and the extra block shown in grey, attached to the sorta yellowy joist (couldn't quite find the right color for brown treated wood in the 3D modelling program).
The boards were 16 and 20 feet long so there was usually only one joint per row.
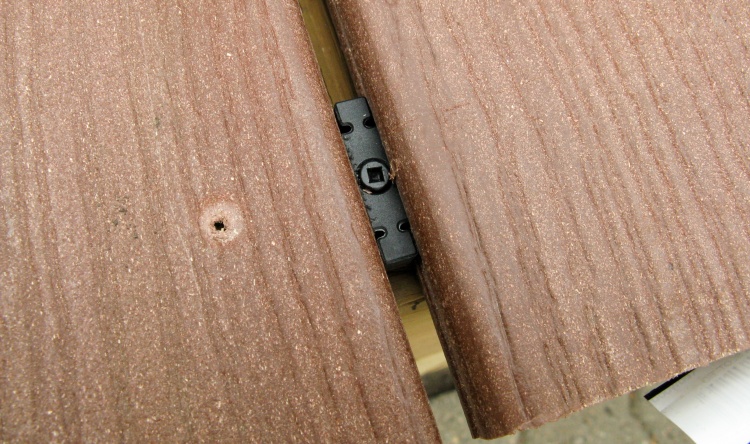
A mid-row joint
This is a shot of one of the joints showing the hidden fasteners on each board.
The boards are gapped with 1/8" between the ends to allow for expansion when it gets warmer.
And yah, looking at the previous image my color selection in the modelling program ain't so hot for the deck boards either.
The boards are gapped with 1/8" between the ends to allow for expansion when it gets warmer.
And yah, looking at the previous image my color selection in the modelling program ain't so hot for the deck boards either.
The South side is cut flush with the joist
Our process was to align the ends of the deck boards with the North edge of the framing and let them overlap the South end by about an inch. When they were all in place, we set up a straightedge and cut all the South ends off evenly.
Deck boards and South fascia boards in place
We then added two pieces of 12"-wide fascia material to the South end to close it off.
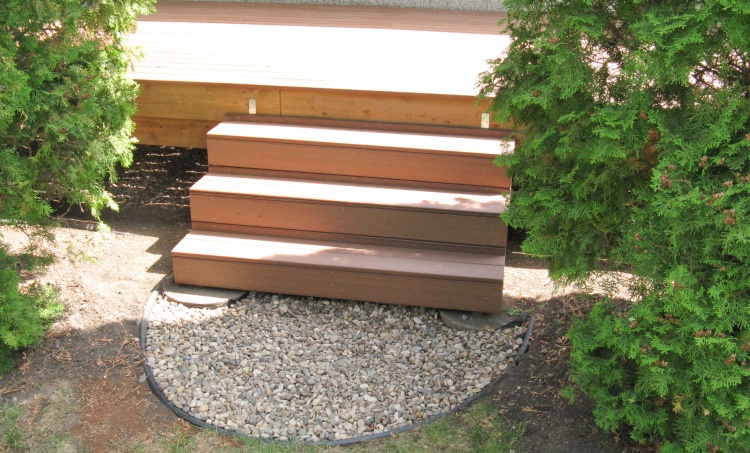
Stairs faced in composite decking as well
The next task was to cover the stairs with composite. This took a couple days since there were lots of pieces to cut but the end result looks much better than the bare wood.
Working on the stairway handrails
That was almost all for the actual deck and the next thing up was the railing. Lois wanted a metal railing so we used a black powder-coated aluminum railing system (Railblazer brand).
We started by installing the stair posts and the handrail to make going up and down a bit safer.
We started by installing the stair posts and the handrail to make going up and down a bit safer.
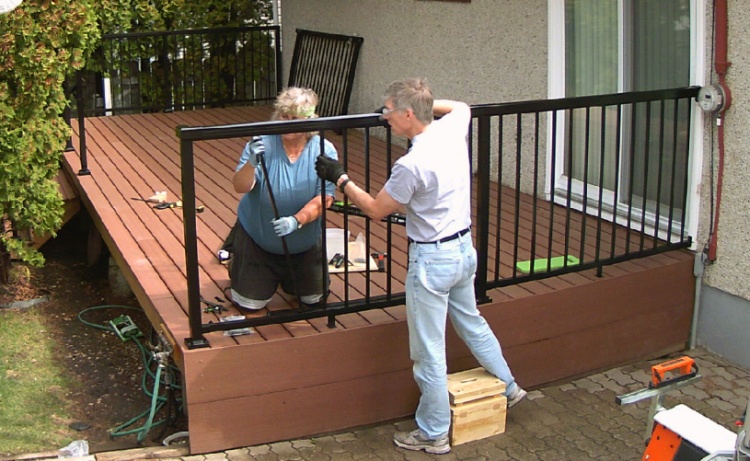
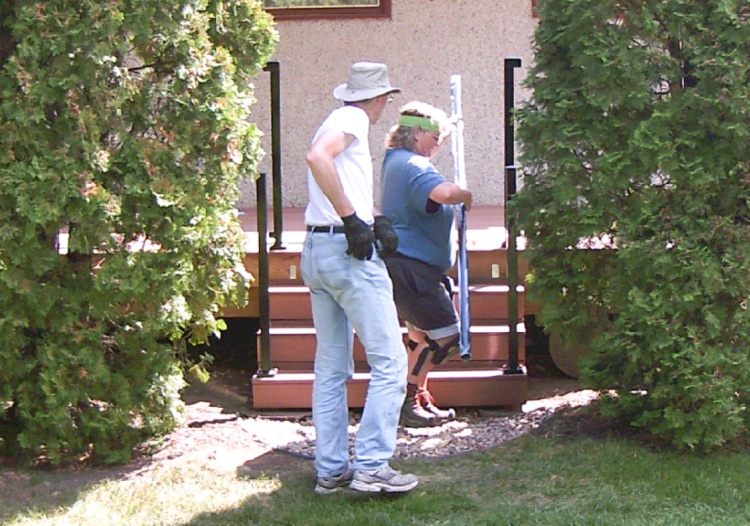
And then on to the deck railing
The railing comes as components, including:
- posts
- top & bottom rail sets
- baluster & spacer sets.
The posts are screwed in with 6" lag bolts and then leveled if necessary using shims. Then the railing is cut to length and installed at one end, and finally the spacers and balusters are alternated slid into the rails. End spacers sometimes need to be shorter to center the posts in the opening properly.
Here we're working on the sixth of 9 sections. It went together pretty quickly, taking only about half an hour per section.

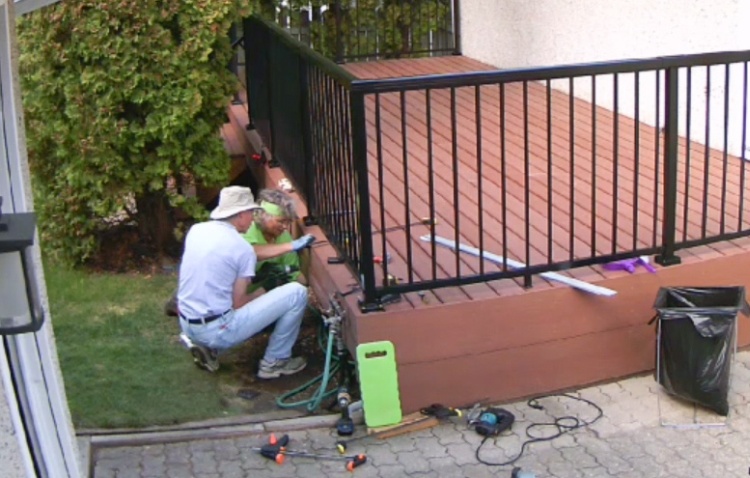
Railing detail - the base of a post with cover in place
This shows the lower rails which like the top ones are are screwed to brackets on the posts. There are also snap-on covers for the base of the posts to hide the mounting bolt heads.
We discovered that two posts were missing the mounting lag bolts, but Home Depot cheerfully replaced them. Later we discovered one post was badly dented, and HD cheerfully replaced it. Even later we found we were missing end caps on the handrail and HD cheerfully replaced them too. Good customer service, but it was three extra trips I could lived without.
We discovered that two posts were missing the mounting lag bolts, but Home Depot cheerfully replaced them. Later we discovered one post was badly dented, and HD cheerfully replaced it. Even later we found we were missing end caps on the handrail and HD cheerfully replaced them too. Good customer service, but it was three extra trips I could lived without.
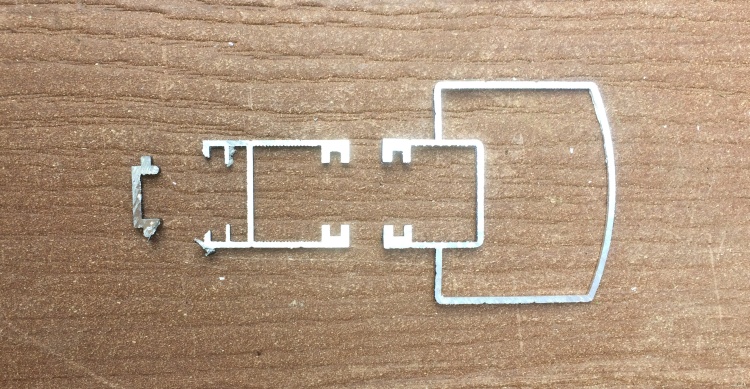
Profile of spacer, bottom rail & top rail
I cut one set of rails a bit long and needed to trim off a bit to correct them. These are the trimmed-off pieces showing the profile of the spacer, the bottom rail and the top rail (sideways to how they sit in real life).
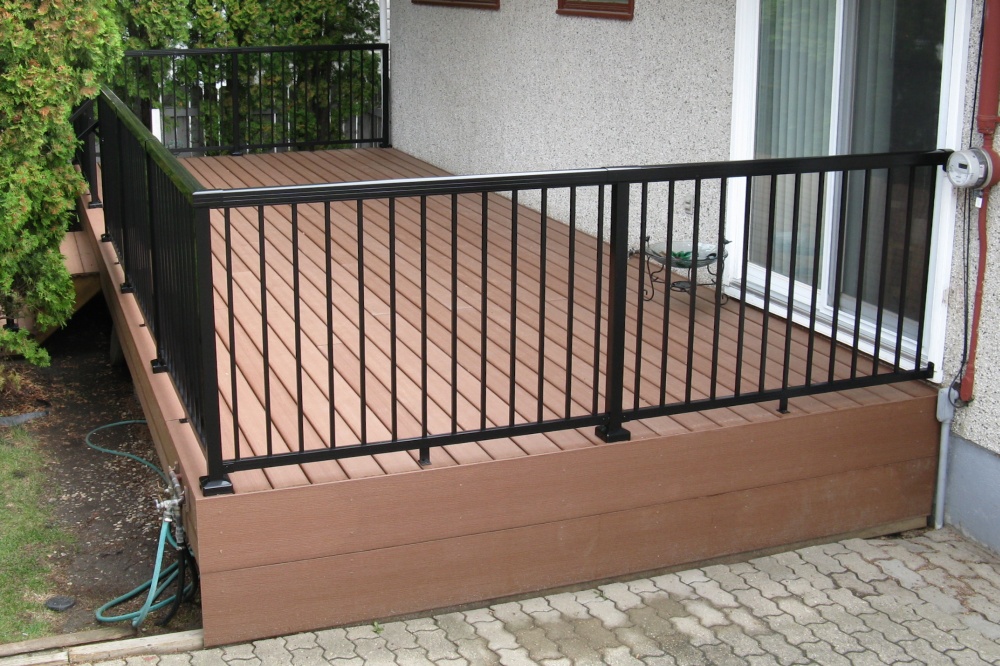
Adding the West fascia
We had neglected to add the fascia on the West side, being a bit too eager to get to the railing. However that was all that was left when the railing was done. We attached a couple spare pieces of deck board all along the West side, which cleaned up the look of that side.
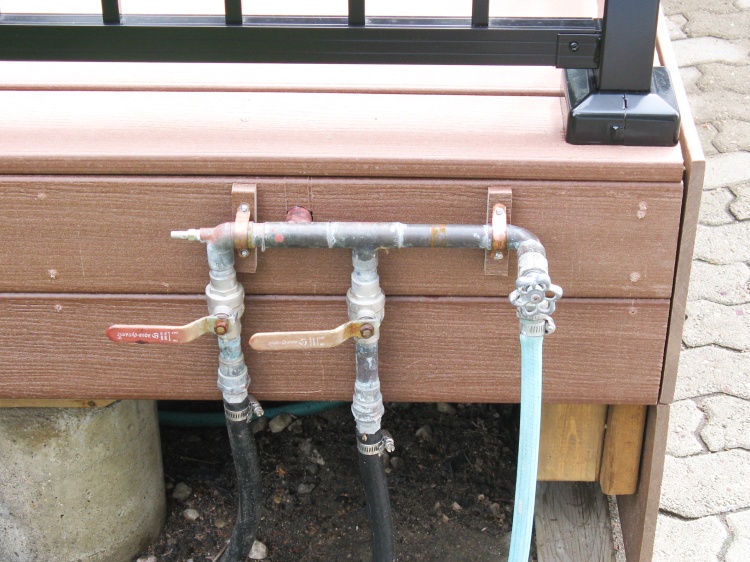
The ancient sprinkler header
We had kept the old tarnished copper sprinkler header since it worked fine. It was remounted on the new fascia with a couple of copper straps.
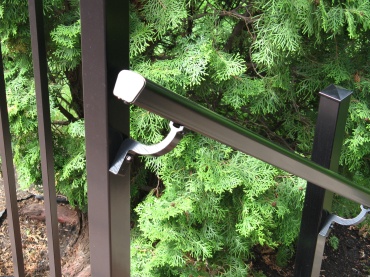
Handrail detail
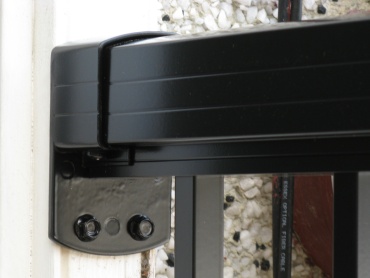
Railing wall bracket
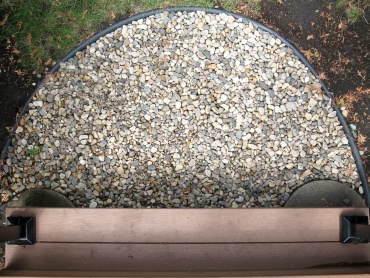
Gravel patch
The above photos give a few more details.
The Chief Project Statistician has reviewed the tapes for deck construction and came up with the following stats:
The Breakdown:
The Chief Project Statistician has reviewed the tapes for deck construction and came up with the following stats:
| Earliest work start: | 8:00 AM |
| Latest work finish: | 8:30 PM |
| Shortest work day: | :30 |
| Longest work day: | 4:15 |
| Total hours: | 62 (mostly 2 people) |
| Elapsed calendar weeks: | 6 |
| Thumbs hit with hammer: | 0 |
Completed


