I of course had an elaborate fence design in mind for the North side but my only real criterion was that I wanted a fence that didn't need a finish applied so with that proviso told the neighbours that we could build anything they liked. They had a nice seating area bordered by the fence and thought about what they would want to see there and after surveying the options they decided on a tall picket design. It was almost painfully simple in comparison but at least would be easy to build and repair.
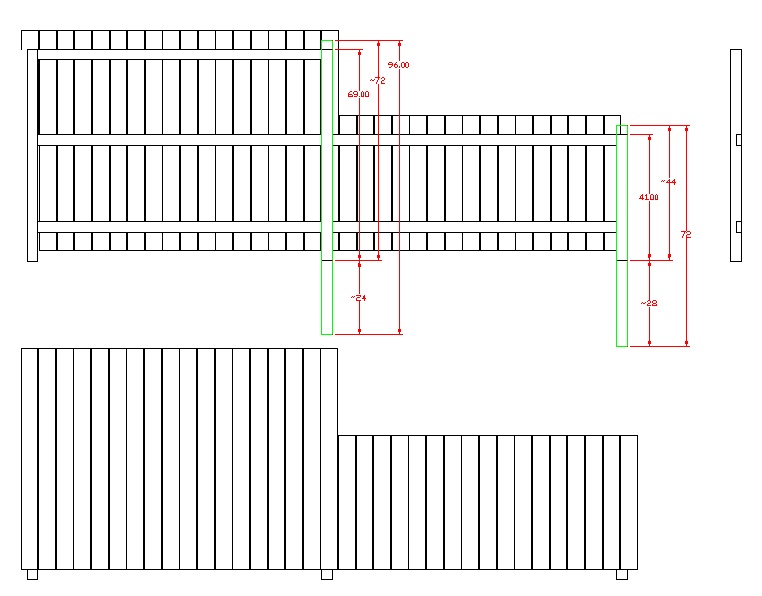
Some pretty simple plans
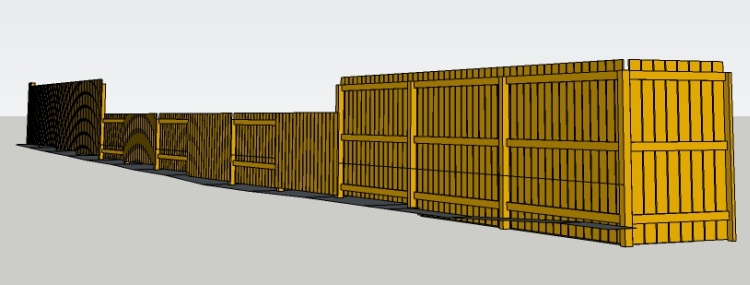
Overall view from the South East, less everything else in the world
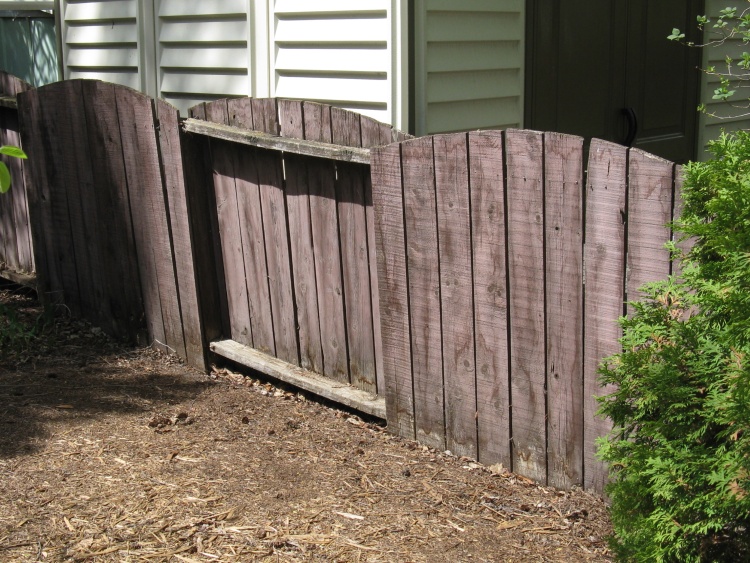
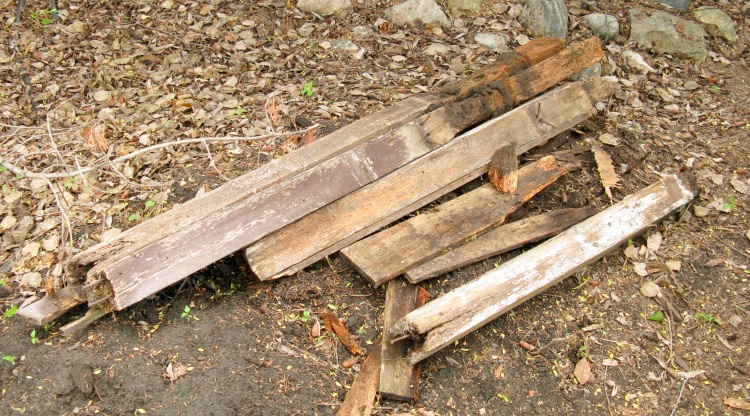
Some of the better-looking sections of the old fence
The old fence was a "good neighbour" design with 4-foot sections of pickets on alternating sides. It had mostly sagged to the ground so the bottom rail was largely mulch and there were lots of other rotted parts.
On the other hand, it was made of rough-cut 1"-thick planks with an incredibly durable stain. We assume the fence is 40 or more years old and we haven't stained it in the 25 years we've been here. Of course the color is an odd purpley-reddish with some sections heading toward bluish so the color durability is a bit of a mixed blessing.
On the other hand, it was made of rough-cut 1"-thick planks with an incredibly durable stain. We assume the fence is 40 or more years old and we haven't stained it in the 25 years we've been here. Of course the color is an odd purpley-reddish with some sections heading toward bluish so the color durability is a bit of a mixed blessing.
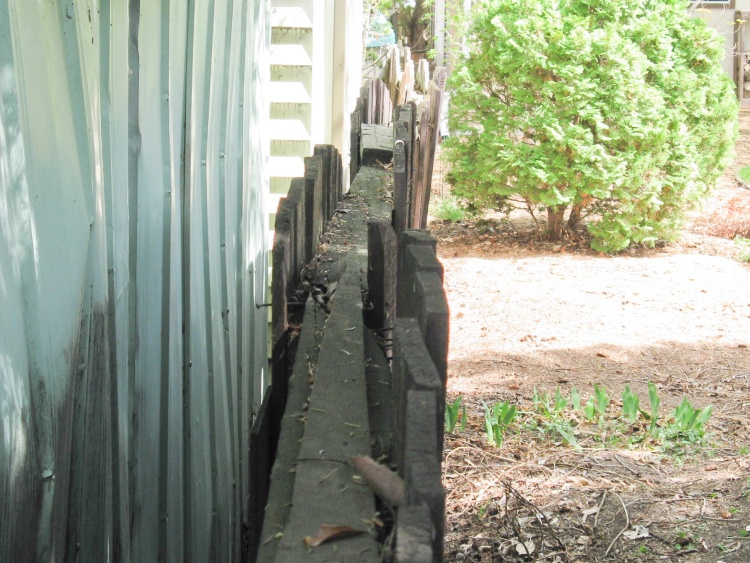
Not quite perfectly straight any more
The fence longevity must at least be partly due to being shielded from the wind by adjacent sheds, trees and bushes since many of the posts were rotted at ground level. The 2x4 repairs on these sections were in place before we moved in.
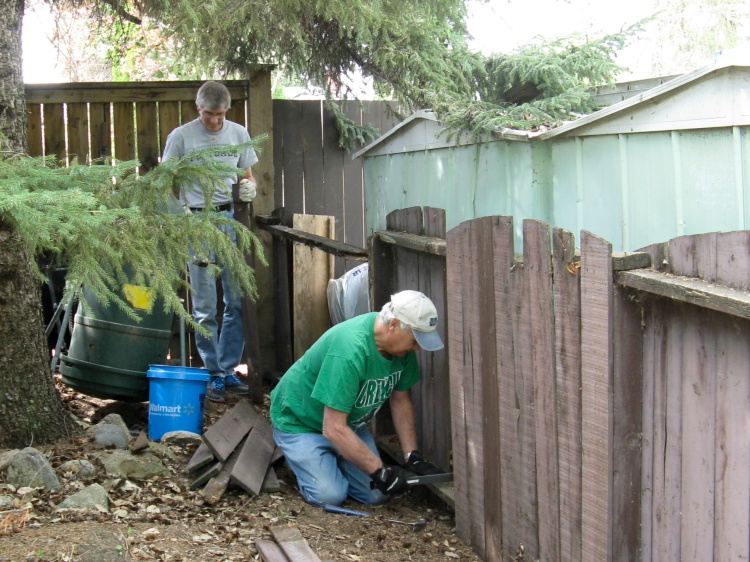
Yours Truly and Ray disassembling the fence
After settling on what to build with the North neighbours Ray and Betty, I went out one afternoon in mid-May to spend 15 minutes and see how hard it would be to take down.
However, Ray spied me and showed up with his hammer and we ended up disassembling almost all of it. Here we are starting at the West end, bordered by the back alley.
However, Ray spied me and showed up with his hammer and we ended up disassembling almost all of it. Here we are starting at the West end, bordered by the back alley.
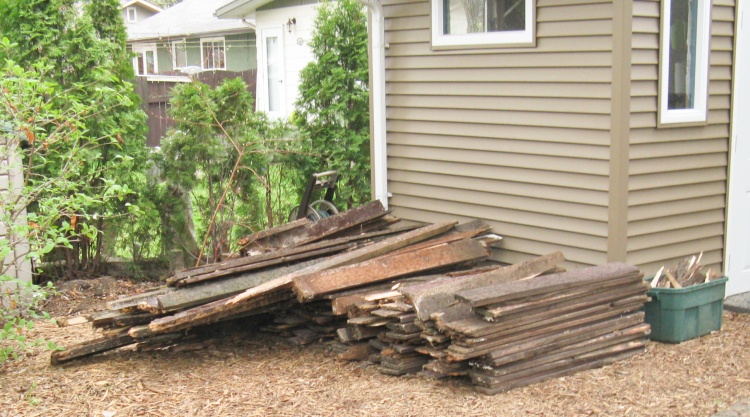
Neatly piled for disposal
The disassembly of most of the fence took only about 90 minutes, including stacking the wood by the shed. Ray pulled apart the rest a couple days later.
This pile is the whole fence except for the few posts that didn't just break off and the still-standing East end.
A few days later we had someone come by to haul the wood away.
This pile is the whole fence except for the few posts that didn't just break off and the still-standing East end.
A few days later we had someone come by to haul the wood away.
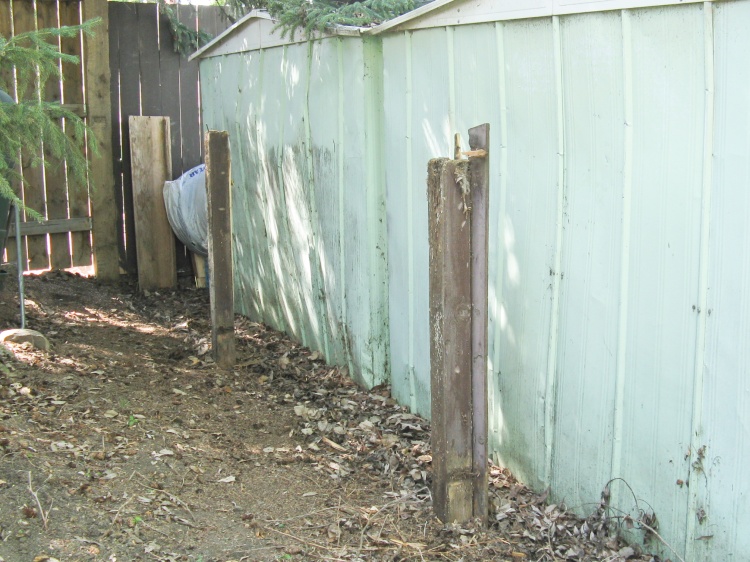
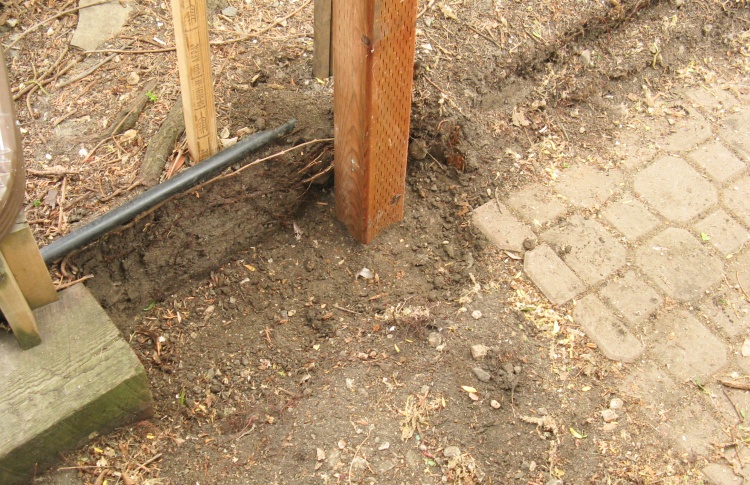
Two of the four posts needing removal
Of the 15 posts in the original fence, most were broken already or broke off during disassembly, leaving just four standing, two of which are shown here.
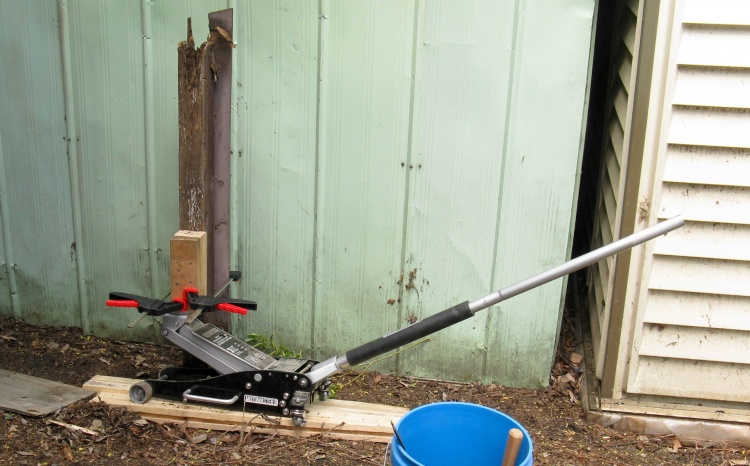
Jack-assisted removal
I have a nice high-lift hydraulic floor jack that seemed like it would be useful to help lift the posts out. I screwed together a block from 2x4 scraps. It had some screws sticking out to create barbs on the inside and this was clamped to the post. Then the jack was employed to lift the post using the block.
That worked pretty well with the bulk of the time taken up just arranging for some supporting boards under the jack.
That worked pretty well with the bulk of the time taken up just arranging for some supporting boards under the jack.
A couple pulled posts
This pile has a couple of the posts that I pulled out (and a couple broken-off versions too). You can see the underground part is noticably thinner where the wood has rotted away.
I was setting up to pull out the last post but it seemed loose so after a bit of wiggling I was able to actually pull it out of the ground by hand. It was a pretty slow-mo operation, so it just needed the Six-Million-Dollar-Man di-di-di-di sound effect to be perfect. At any rate the neighbours watching were impressed.
I was setting up to pull out the last post but it seemed loose so after a bit of wiggling I was able to actually pull it out of the ground by hand. It was a pretty slow-mo operation, so it just needed the Six-Million-Dollar-Man di-di-di-di sound effect to be perfect. At any rate the neighbours watching were impressed.
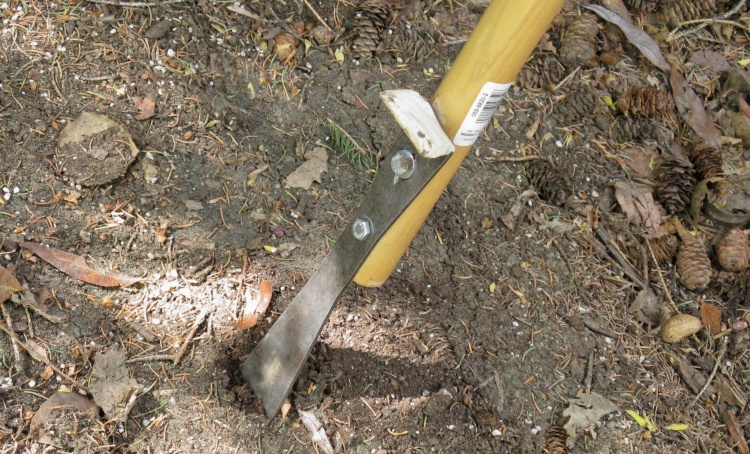
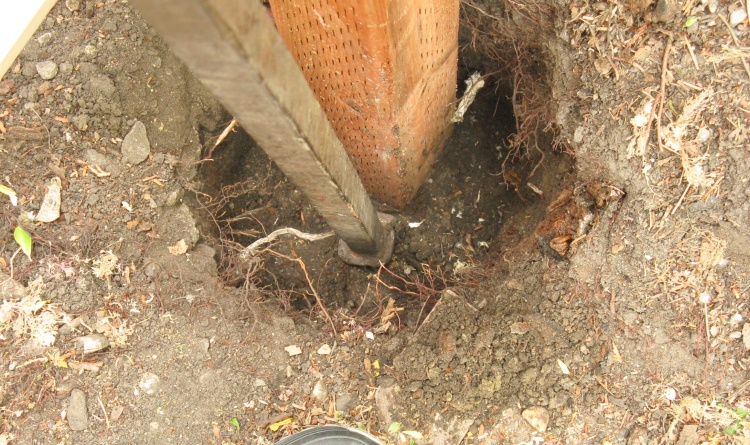
Kludged-together root-chopping tool
So with all the posts out, it was time to start the holes for the new ones.
And of course on the first hole came the first root. I decided I needed a root-chopping tool so I bolted together this old shovel handle and a pry bar. After sharpening, it worked pretty well for roots up to about 1/2" diameter.
And of course on the first hole came the first root. I decided I needed a root-chopping tool so I bolted together this old shovel handle and a pry bar. After sharpening, it worked pretty well for roots up to about 1/2" diameter.
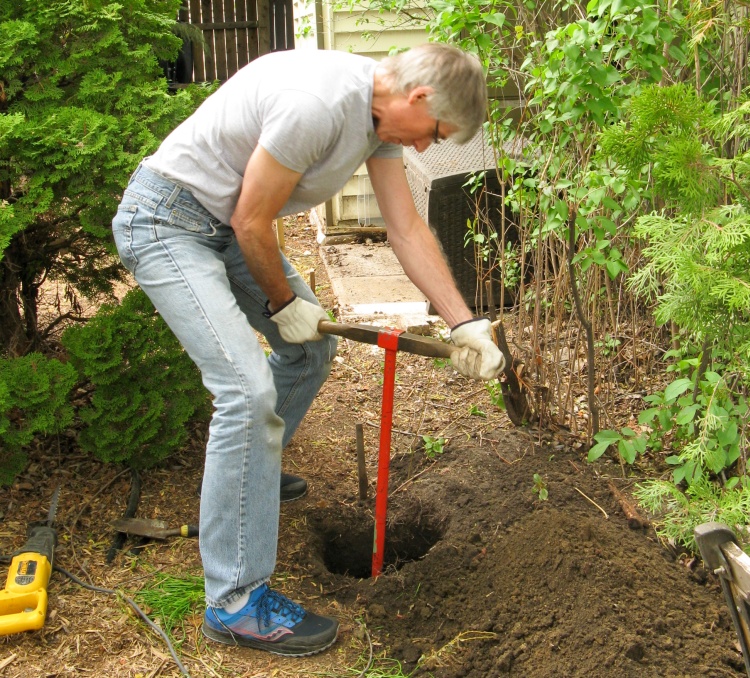
Augering a hole
Then it was on to the hole augering. Here I'm nearing the finished depth of a hole in the middle of the yard. I used a standard rotary post hole auger borrowed from my brother-in-law (Thanks Greg!).
The new post positions were mostly offset from the old ones although a couple right-next-to holes needed adjacent broken-off post bits chipped out to be able to finish the hole.
The new post positions were mostly offset from the old ones although a couple right-next-to holes needed adjacent broken-off post bits chipped out to be able to finish the hole.
Root chopper seeing some action
Almost every hole needed some root chopping so the chopper turned out to be handy.
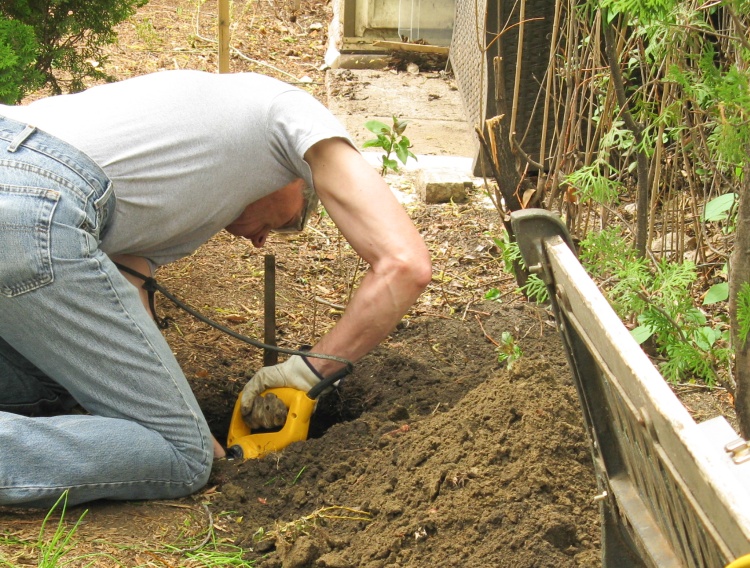
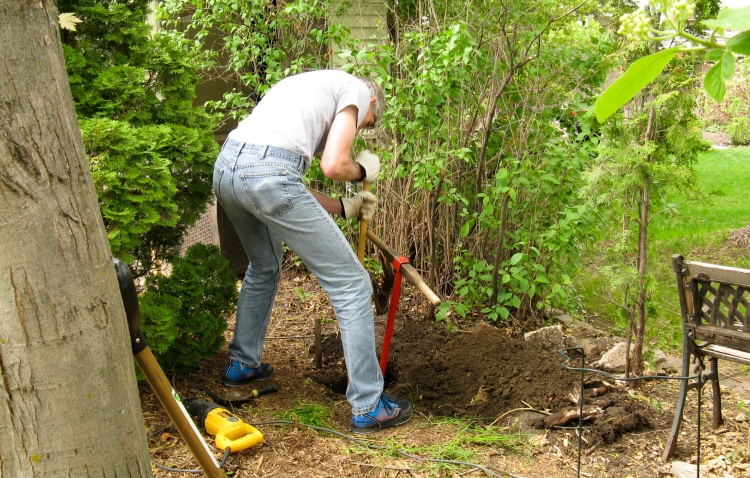
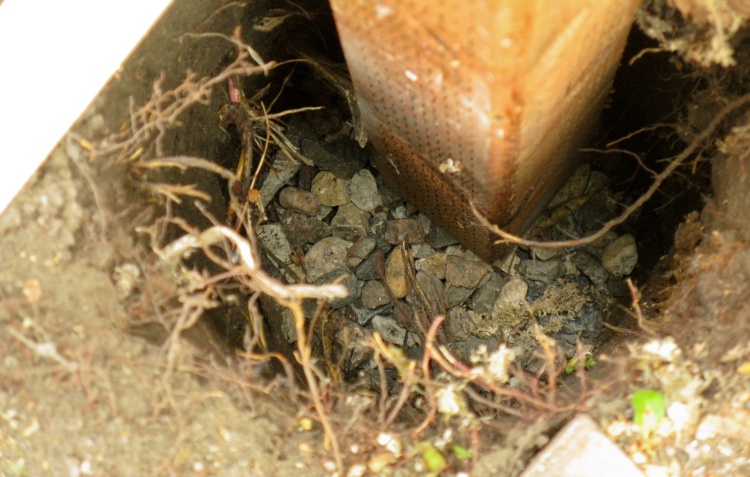
Reciprocating saw for larger roots
Of course, there were larger roots as well, and those needed the attention of the reciprocating saw. In addition to some smaller roots, this particular hole had a 1", a 1.5" and a 2"-diameter root that the saw helped excise.
Here I'm using Ray's saw after I took over digging a hole he was halfway through when he had to run off to do an errand. Between the two of us, we dug the 13 holes over the course of about four days. They were dug about 27-30" deep and were mostly pretty easy holes (few rocks or gravel) so we can't complain.
Here I'm using Ray's saw after I took over digging a hole he was halfway through when he had to run off to do an errand. Between the two of us, we dug the 13 holes over the course of about four days. They were dug about 27-30" deep and were mostly pretty easy holes (few rocks or gravel) so we can't complain.
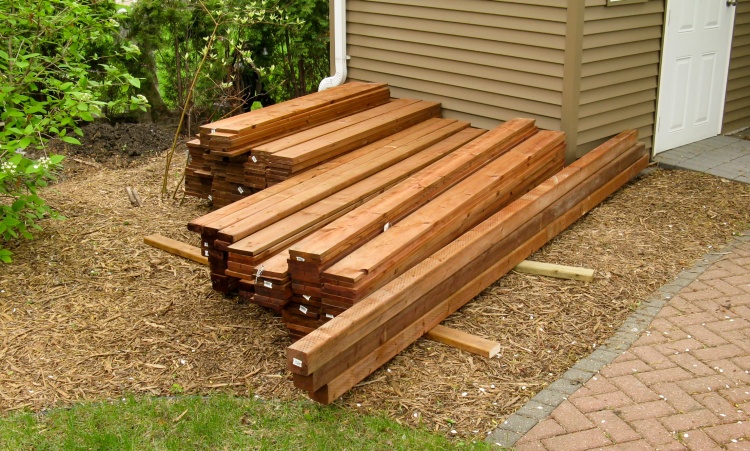
The new wood
There was a bit of delay in getting the wood since the Co-Op where I'd ordered it didn't have the 9' 4x4s in stock and weren't sure when they would get them. After waiting close to a week, they just delivered the rest of the wood so we could get started. And then later that day they showed up again, this time with the missing 4x4s.
This photo shows the pile of new treated brown wood stacked next to the shed (before the late 4x4s showed up).
This photo shows the pile of new treated brown wood stacked next to the shed (before the late 4x4s showed up).
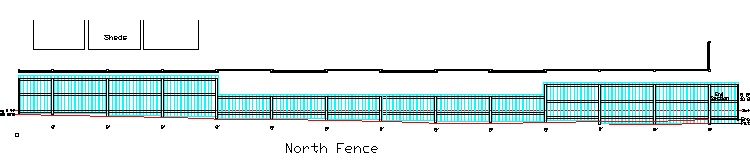
Fence South elevation
This shows the "South elevation" in architect-speak. There will be tall sections at both ends flanking a shorter center portion. The pickets will have the lengths trimmed in each section to clear the somewhat sloped ground contour.
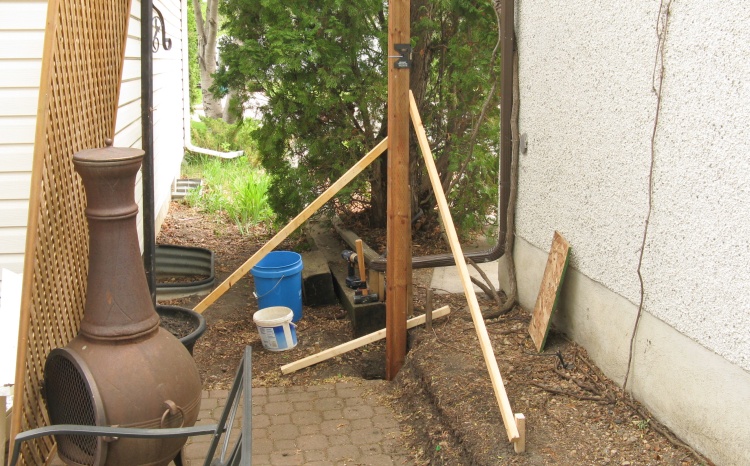
The first post ready for planting
This photo shows the first fence post going in. It is the most Easterly one and I was doing it by myself so I employed a couple of staked-down boards to help hold it vertical.
I strapped on a post level (which has bubble levels on two sides of the post) to give a continuous indication of the "verticality" of the post.
I strapped on a post level (which has bubble levels on two sides of the post) to give a continuous indication of the "verticality" of the post.
A base of coarse gravel
I added two or three inches of coarse gravel to the holes to aid drainage at the bottom. This was tamped down to make a solid base for the post.
Soil tamped firmly around post
And then the hole was re-filled with the dirt originally dug out of it. It was tamped firmly all around the post every several inches of fill to hold the post solidly. I kept an eye on the level attached to the post to make sure it remained vertical as the dirt was added.
The first post in place
Here the first post is in place, at the corner of the neighbor's paving-stone patio.
Once this one was in, I strung a line from this post to the back fence and we used that as a guide to align all the other posts.
Once this one was in, I strung a line from this post to the back fence and we used that as a guide to align all the other posts.

Now all posts in place
Subsequent posts went more quickly since Ray and I worked on them together and one person could hold the post and tamp one-handed while the other filled. So a few days later, they were all done and fairly decently aligned.
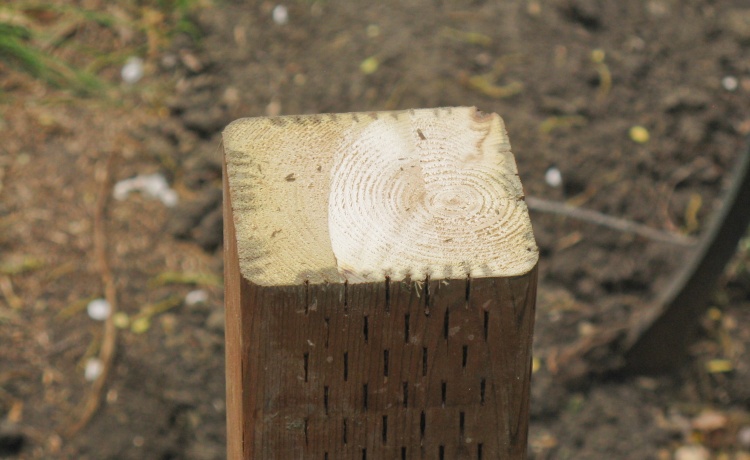
Tops cut off to equal heights
When we put the posts in, we didn't worry about the exact height but just made sure they were a couple inches taller than they needed to be. So once they were all in they had to be trimmed to the correct heights.
That was done with a circular saw (one cut from each side) using a clamped-on jig to make sure the cuts were square and even. They were pretty square although evenness varied a bit as can be seen from this shot (which is actually one of the better ones).
But no one is likely to notice unless Google maps satellite view gets way, way better resolution.
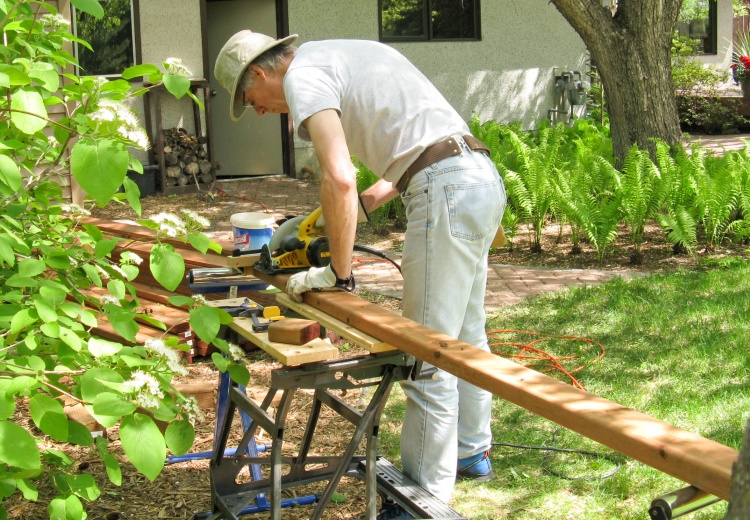
Cutting a 2x4 rail to length
Then it was time to start the fence proper. The first step was adding the rails; two per section for the short bits and and three for the tall sections.
I measured each rail individually and here I'm cutting one to length with a circular saw.
I measured each rail individually and here I'm cutting one to length with a circular saw.
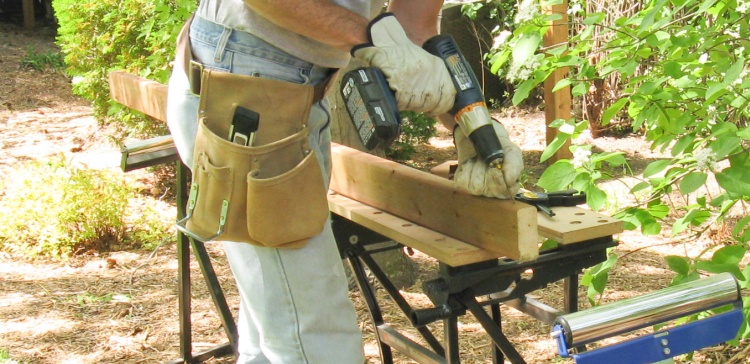
Pre-installing rail screws
Rather than use the convenient but ugly metal brackets to attach the rails to the posts, we used screws designed for attaching composite decking. They are thin enough to drill through without splitting the wood and have a small head so they embed themselves in the wood and become invisible.
The screws were put in at an angle, two each end, and like in this shot I usually started them before putting the rail in place.
The screws were put in at an angle, two each end, and like in this shot I usually started them before putting the rail in place.
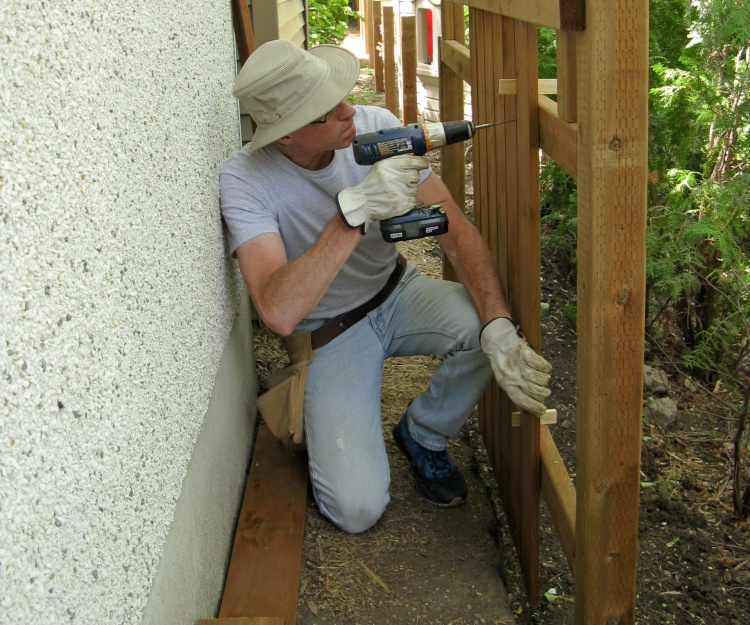
Screwing in some short pickets
While Ray worked on the tall section around his patio, I started on one of the short sections. Here the rails are in place and I'm screwing in a picket next to the garage wall.
I used a jig to help get the tops of the pickets even. This was screwed to the top rail and positions a 2x4 exactly(ish) 6" above the top rail.
The pickets are spaced 1/2" apart, the spacing aided by using some appropriately-cut pieces of wood positioned between the pickets.
I used a jig to help get the tops of the pickets even. This was screwed to the top rail and positions a 2x4 exactly(ish) 6" above the top rail.
The pickets are spaced 1/2" apart, the spacing aided by using some appropriately-cut pieces of wood positioned between the pickets.
Adding rails to a short section
We went section-by section, adding rails followed by pickets to each. Here a short section is getting the rails installed.
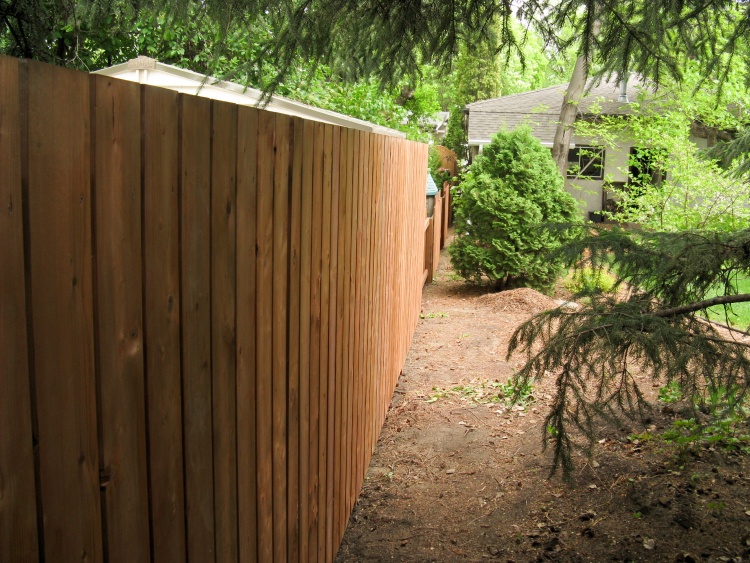
Complete - View from West
It took about four days of our hour-or-two-a-day Retired Guys pace to complete adding the pickets, and this photo shows a view from the West of the completed fence.
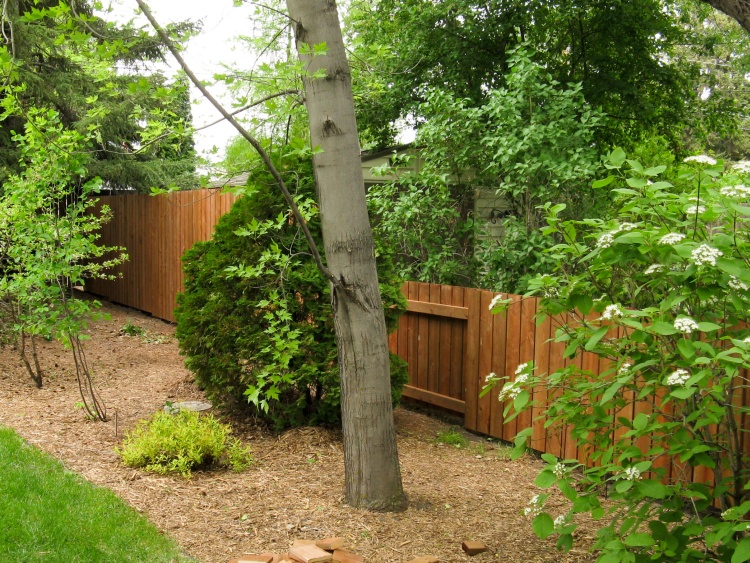
Mid-section view
Here's a nice summer-y shot of the midsection of the fence.
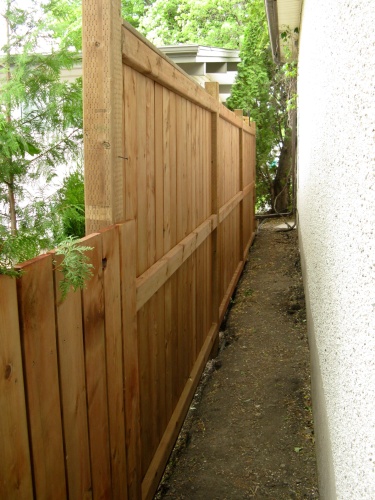
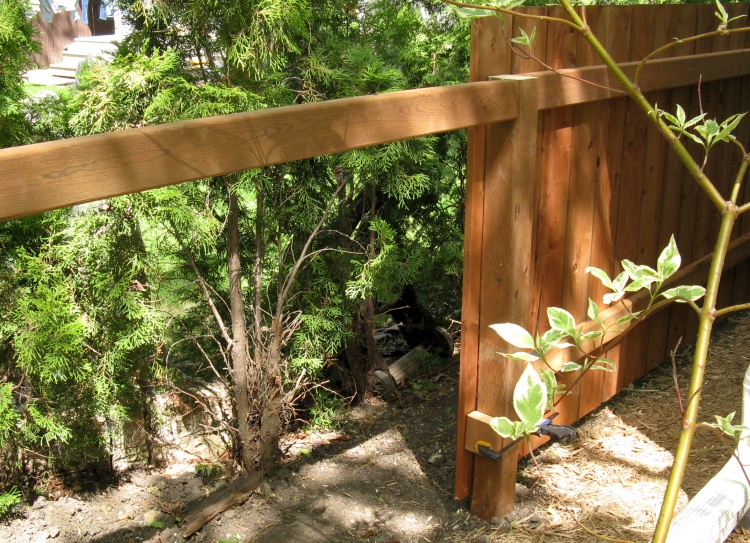
Completed East end
The West end next to Ray & Betty's patio was built a bit differently with a plate on top, some trim on their side to hide tops and bottoms of the pickets and (eventually) capped posts.


