The circle sander jig mounts on the belt sander to enable an accurately-round sanding of an approximately-round starting piece. In operation, a short spindle is taped to the bottom of the piece to act as an axle. With that inserted into the jig, the piece is rotated by hand until the perimeter is consistently sanded.
The piece should be close to round to start, but the jig includes a spring that allows the axle to move away from the sanding belt a bit when a larger-diameter section is encountered. The disc of wood is just manually rotated until the spring no longer needs to be compressed anywhere on the diameter.
The piece should be close to round to start, but the jig includes a spring that allows the axle to move away from the sanding belt a bit when a larger-diameter section is encountered. The disc of wood is just manually rotated until the spring no longer needs to be compressed anywhere on the diameter.

A dimension-infested drawing of the pieces
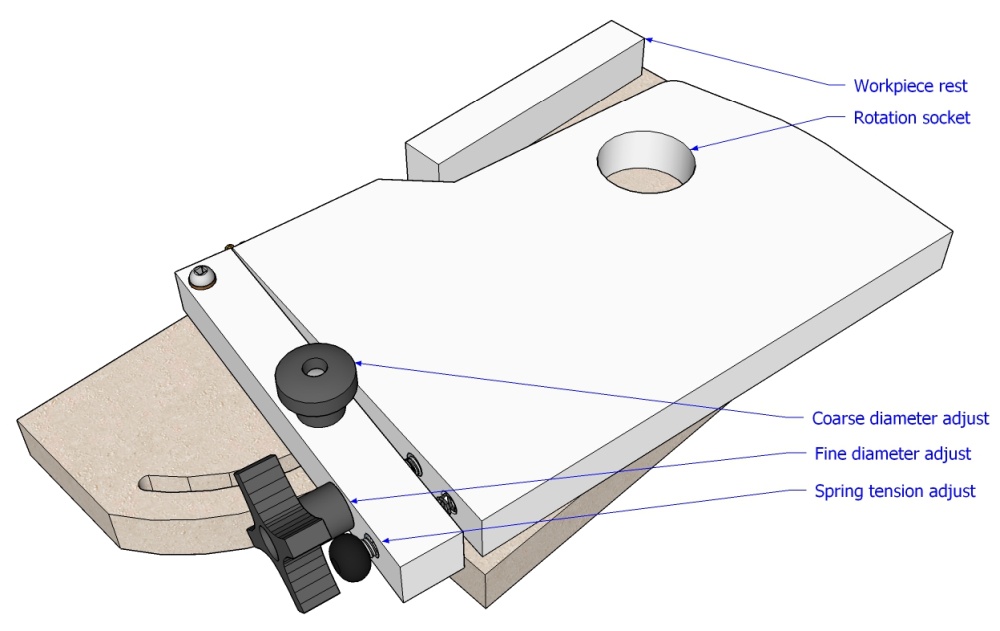
The annotated jig as it appears in the digital world
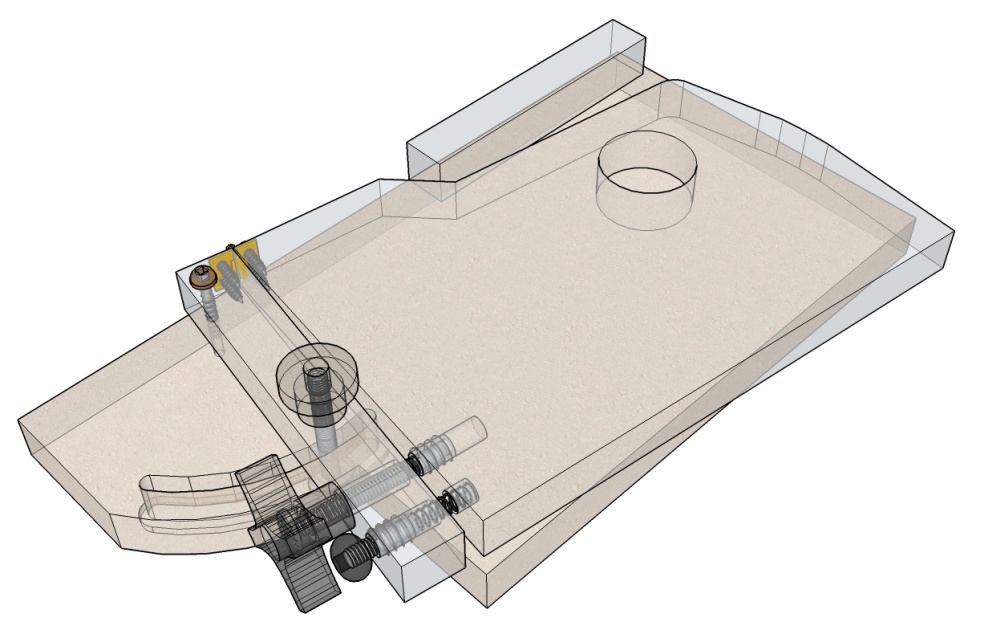
The workings revealed
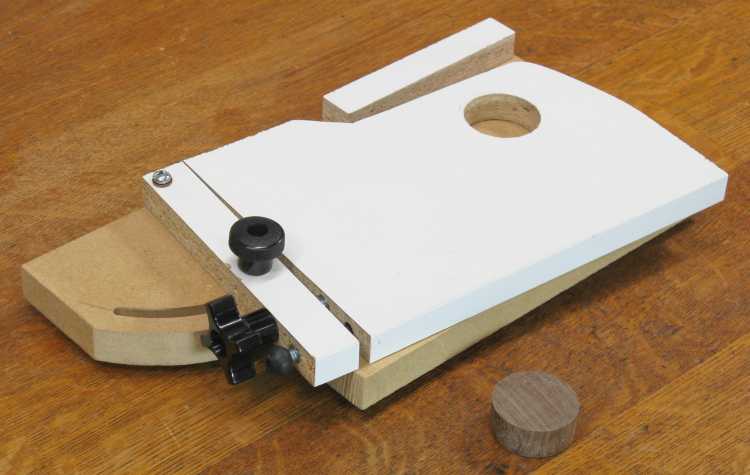
The actual wood version of the jig
The jig was built using an MDF base and a melamine top. The melamine provides a nice low-friction surface so the workpiece rotates with little resistance. It uses mostly 1/4-20 hardware with a few wood screws thrown in.
The tape-on axle is the little walnut disc sitting beside the jig. It was turned to be a close fit in the 1-1/2" hole in the jig.
The tape-on axle is the little walnut disc sitting beside the jig. It was turned to be a close fit in the 1-1/2" hole in the jig.
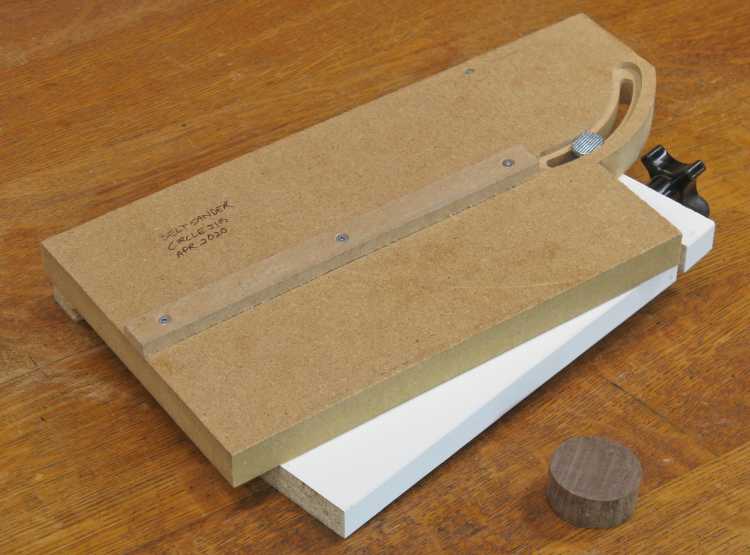
The B side
The bottom of the jig has a protrusion that fits into the mitre slot of the sander table, letting the jig be moved in and out of range of the sanding belt.

Adding tape to axle
The first step in using the jig is to add tape to the axle and stick it in the center of the piece to be sanded. Taping is preferable to alternative techniques like drilling a pivot hole since of course it leaves the wood unmarred.
Then with the wood mounted in the jig, the proper distance to the belt is set using the top knob to hold it in place. Fine adjustments of the diameter can be made using the side knob.
Then with the wood mounted in the jig, the proper distance to the belt is set using the top knob to hold it in place. Fine adjustments of the diameter can be made using the side knob.
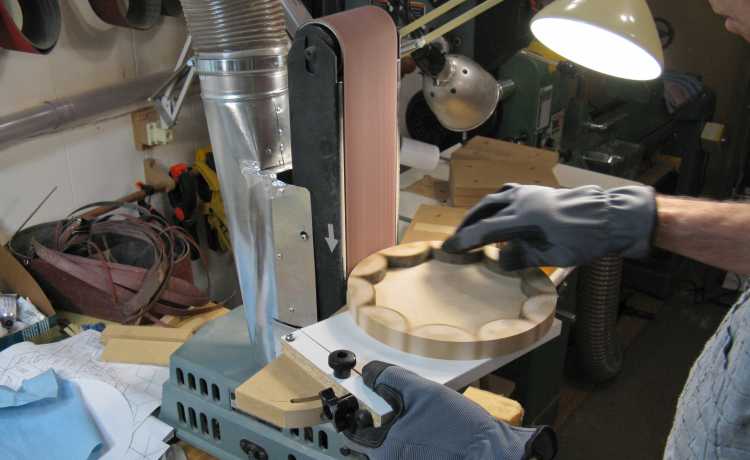
The jig in action
With the jig set close to the proper diameter, it is slid over to the belt and the workpiece turned by hand until the whole outside has been consistently sanded.
The top section can pivot away from the belt against spring tension if needed for larger-diameter sections. This pushes out the fine adjustment knob via the oversized bolt clearance hole but eventually the top section sits at the minimum diameter with the fine adjustment knob flush with the wood.
Once the whole diameter has been sanded, if there are any spots that remain un-sanded the fine knob would be adjusted to reduce the diameter a bit.
Here I'm sanding the outside of a log trivet (which is what the jig was originally made for).
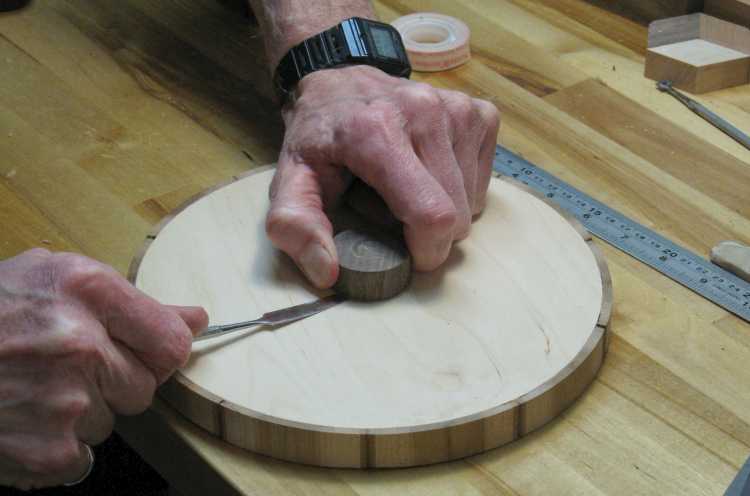
Removing the taped-on axle
When done, the axle is removed from the workpiece. In this shot I'm using a thin metal spatula to help release the tape.


