This is one of those things where we'd think about the need for it when going out the door as we struggle to dig out the right key fob. Then by the time we are back home, that thought has been overwritten by the slow traffic, the need to shovel the walk, the lack of capers at the Save On Foods ("how can they be out of a staple like capers?!"), etc. But eventually repitition helped it soak in to the brain matter deeply enough to become an actual concious thought; "We need a key bin!". And the rest is history.
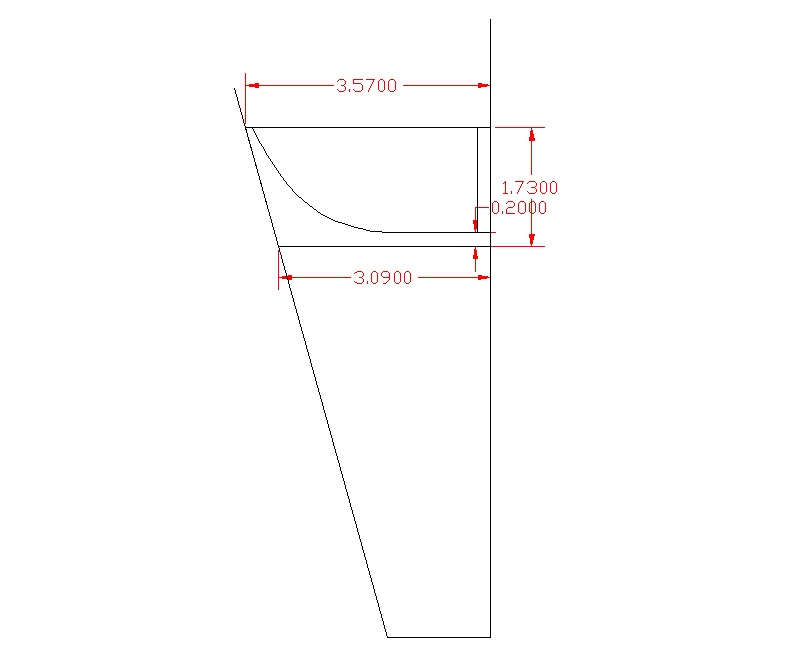
The plan, such as it is
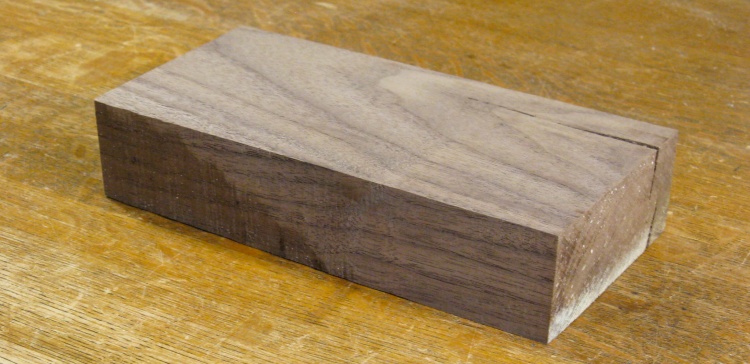
A suitable piece of walnut
The bin was to go into a walnut table so walnut was the obvious choice for the wood.
I tend to have lots of scraps of walnut around and this little plank-end was just big enough for the bin if the cracks were ignored.
I tend to have lots of scraps of walnut around and this little plank-end was just big enough for the bin if the cracks were ignored.

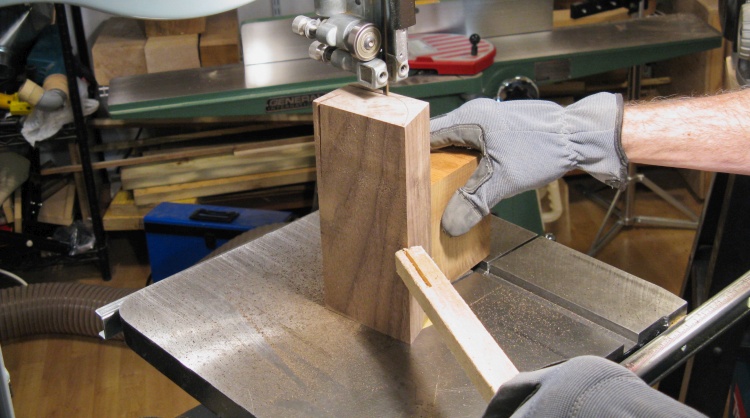
Cutting the angled edge
After squaring it up a bit, I cut one edge at the appropriate angle to fit into the magazine rack of the table (15° as it turned out).
I checked the fit after it was cut and it sat solidly in the table. I had thought it might need to be supported it from the bottom but fortunately that turned out to be unnecessary.
I checked the fit after it was cut and it sat solidly in the table. I had thought it might need to be supported it from the bottom but fortunately that turned out to be unnecessary.
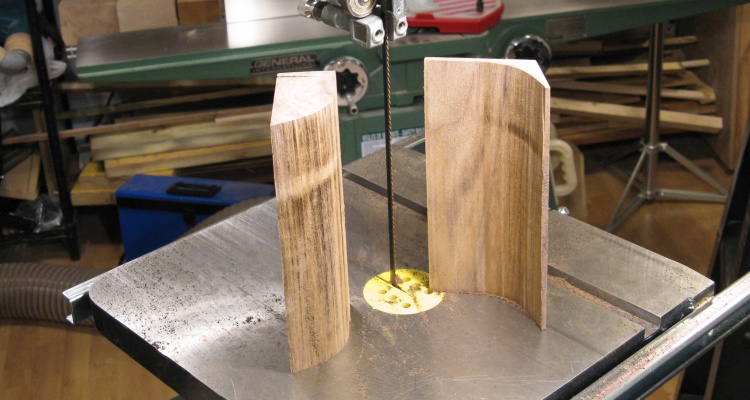
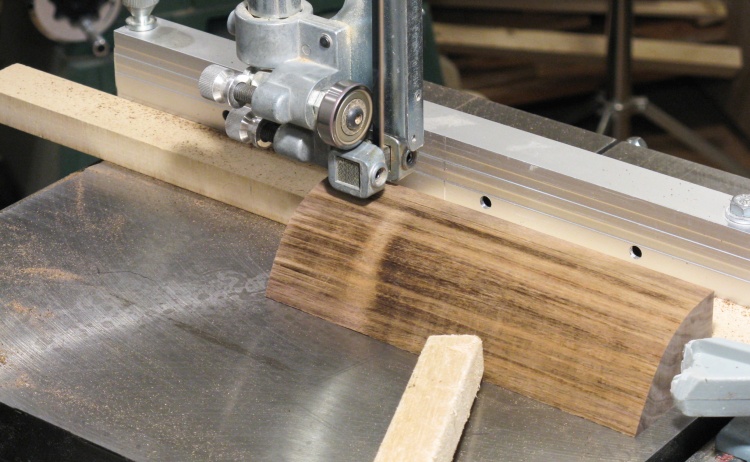
Cutting the curved contour
After taping on a square piece of wood to keep the bin vertical and to provide a handle, I marked the curve on the end and cut it on the bandsaw.
Contour cut
I used a fine-toothed blade which cut only very slowly but as I had seen in the past, produced a very straight cut through the wood. Call me fussy but I'll take slow and accurate over fast and totally wrecking the project any day.
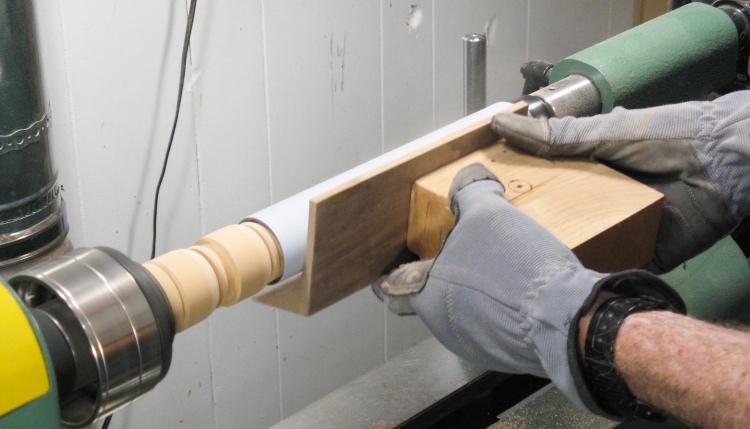
Smoothing off the curve
I configured the lathe as a long-drum sander and smoothed off the saw marks on the inside of the curve.
There was still an inch-long crack near the back edge at the bottom, but I was able to just add glue and clamp it closed to get rid of it.
There was still an inch-long crack near the back edge at the bottom, but I was able to just add glue and clamp it closed to get rid of it.
Cutting a slice for the walls
With the curve looking good, the next step was some internal walls.
I took a slice from the chunk I'd cut off the curve and used that to form two internal walls.
I took a slice from the chunk I'd cut off the curve and used that to form two internal walls.
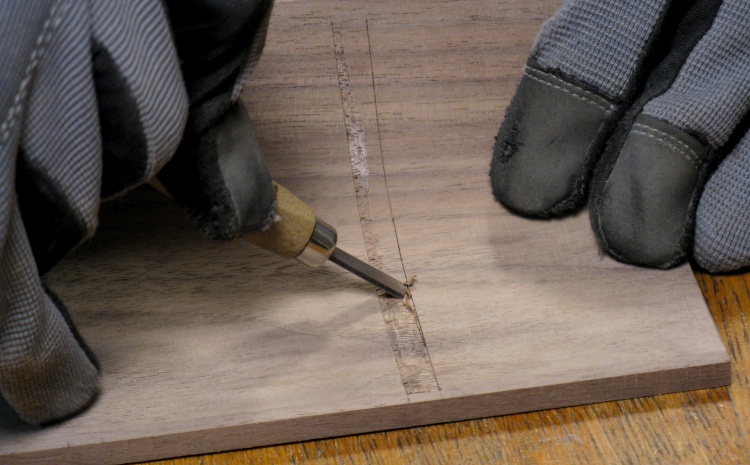
Marking location of slots for internal walls
Here the internal walls have been made with a contour that followed the curve. The plan was to cut a slot along the curve (AKA dado) for each wall into which they would fit.
Here the edge of the wall is being marked with a sharp blade to define the edge of the dado.
Here the edge of the wall is being marked with a sharp blade to define the edge of the dado.
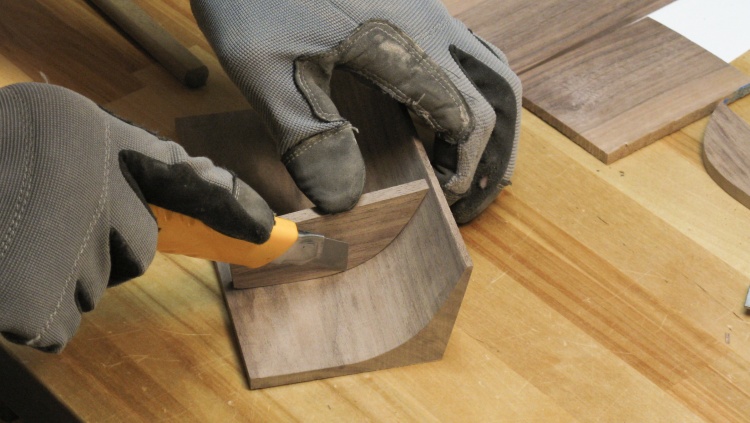
Starting to carve out one of the wall slots
The area between the cuts was removed with a small chisel and then there were a few more rounds of deepening the edge-cuts and chiseling until the dado was around 1/16" deep.

Slots done
Here both dados are done.
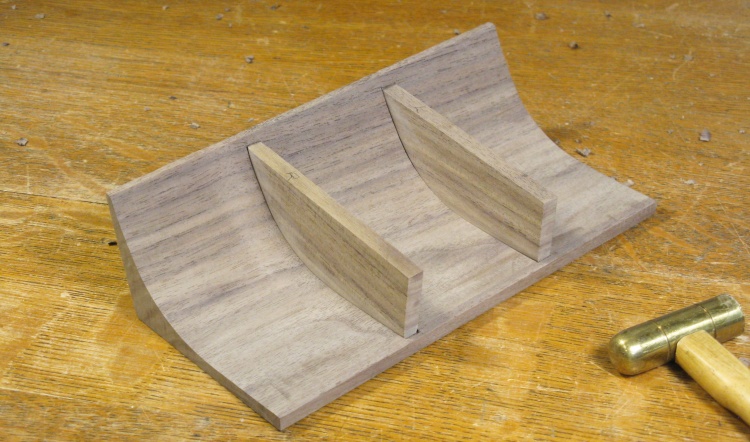
Internal walls mounted in place
This shows a test fit of the walls. The top edges of the walls were rounded and sanded after this photo was taken.
The dados were a bit narrower than the walls, so the walls were tapered a bit at the bottom edge to fit snugly and were glued into place (along with a dadoed back wall which isn't in this photo).
The dados were a bit narrower than the walls, so the walls were tapered a bit at the bottom edge to fit snugly and were glued into place (along with a dadoed back wall which isn't in this photo).
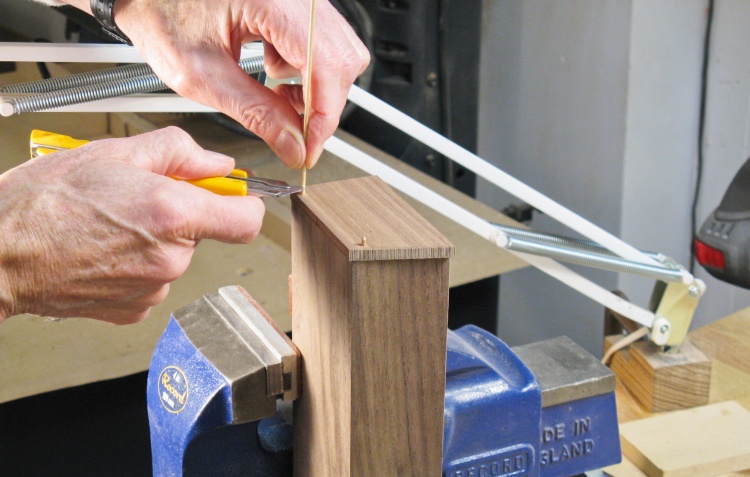
Installing alignment pins for an end wall
The last pieces were the two sides. These came from another piece of thin plank of leftover walnut since my original piece wasn't quite high enough.
The plan was to shape them to align with the different-height front and back walls so first I added a couple small wooden pins as shown here to locate the walls and ensure alignment was consistent as they were shaped and later glued.
The plan was to shape them to align with the different-height front and back walls so first I added a couple small wooden pins as shown here to locate the walls and ensure alignment was consistent as they were shaped and later glued.
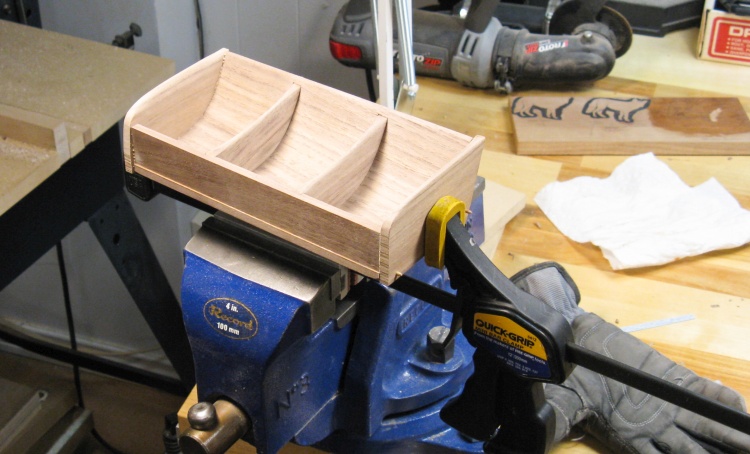
End walls glued
Here the end walls have been shaped. They were made a bit oversized on all edges except the top, which will allow them to be sanded flush with the rest of the bin faces after assembly.
In this shot the end walls have been glued and are clamped and drying.
In this shot the end walls have been glued and are clamped and drying.
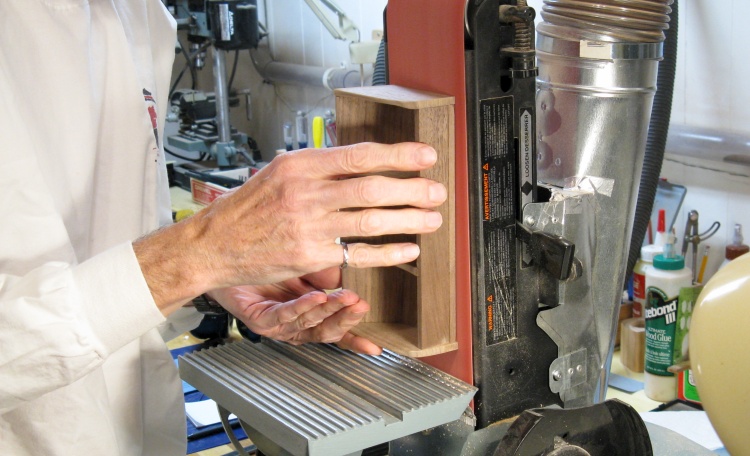
Making everything flush
Then the oversized ends were sanded down to bring them flush with the back, bottom and front walls.
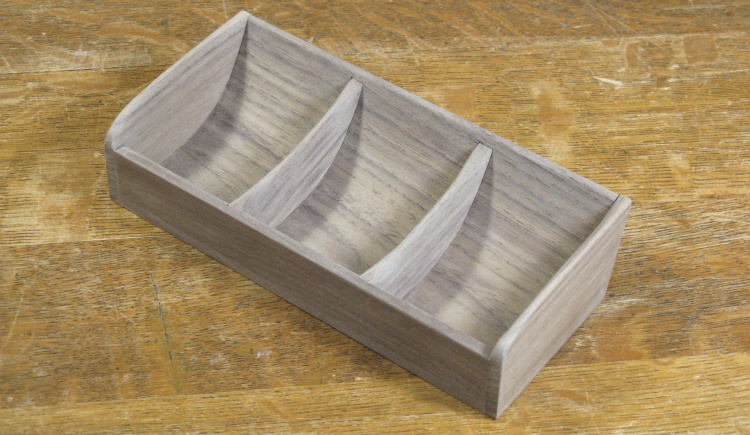
Woodworking done
Then after a bit more hand-sanding, the woodworking was complete.
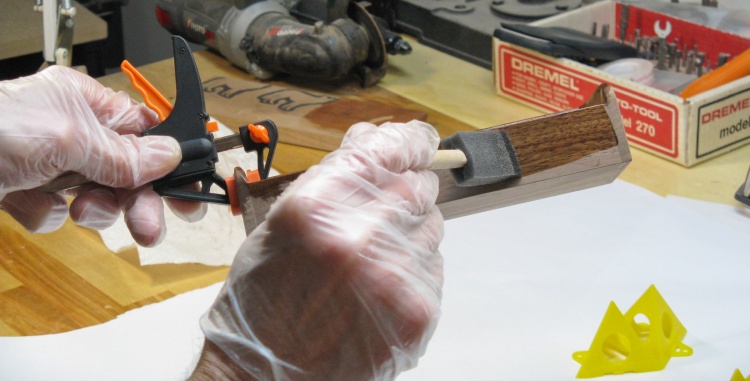
Applying the first coat of varnish
The bin received my standard finish of three coats of fast-dry polyurethane varnish. Here I'm holding the bin with a small clamp as the varnish is applied with a foam brush.
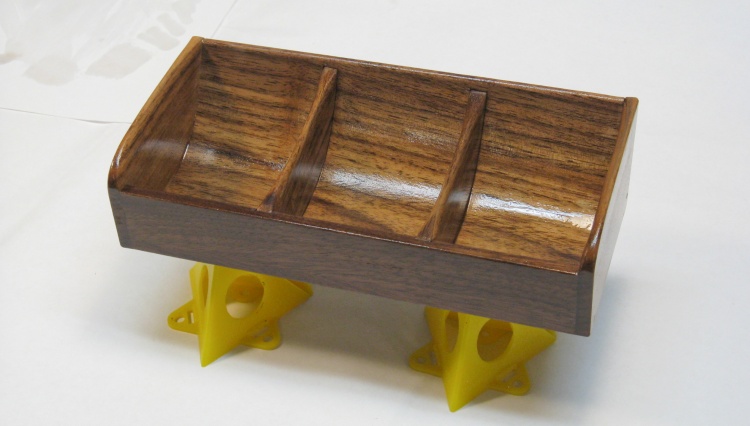
First-coat-of-varnish shot
First coat of varnish, still wet.
Once dry, the surface received two rounds of being roughened with fine steel wool, cleaned off and re-varnished with a cloth-covered foam brush.
Once dry, the surface received two rounds of being roughened with fine steel wool, cleaned off and re-varnished with a cloth-covered foam brush.
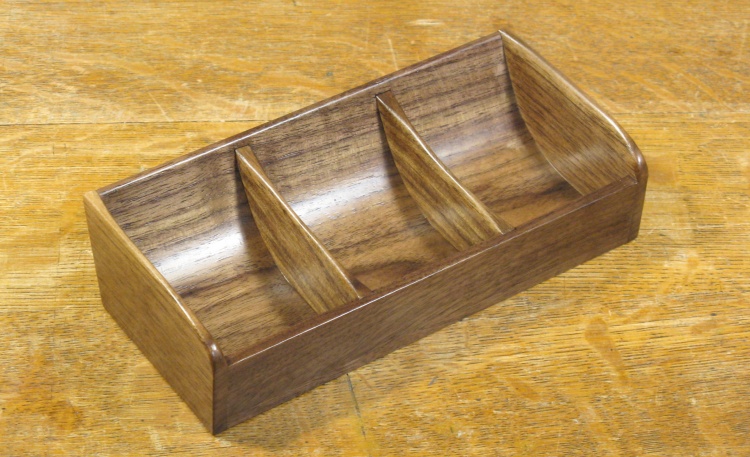
Done
Complete.


