It didn't make much sense to build my own lattice so I just bought 4x8' sheets of commercial material. Of course just a rectangular sheet looks pretty utilitarian, so I thought I'd shape the tops. They were also going to need frames for support.
Many years ago I was considering building a fence from the standard green treated wood, but I wondered what an unfinished fence would look like after a few years. I tried to note treated-wood fences whenever I drove through the city and I saw green ones, brown ones and old grey weathered ones so it wasn't clear what I would get. Of course I later found out that the wood changes colour over time, going in that progression from green to a very nice brown, and then fading to grey after ten years or so (or "silver" as the wood purveyors like to call it).
I decided to use the brown treated wood (which reportedly just has a brown stain added) and I expect that it will follow the same colour curve as the regular green material, minus for the initial green stage. Any treated wood supplier suggests that the wood should have a water-repellent finish applied but I was planning to go the low-maintenance route and leave it unfinished.
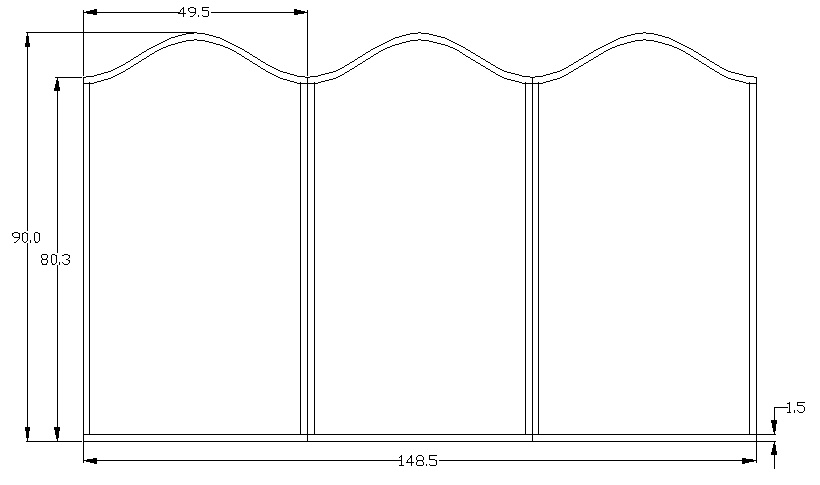
The general plan, in the traditional inches
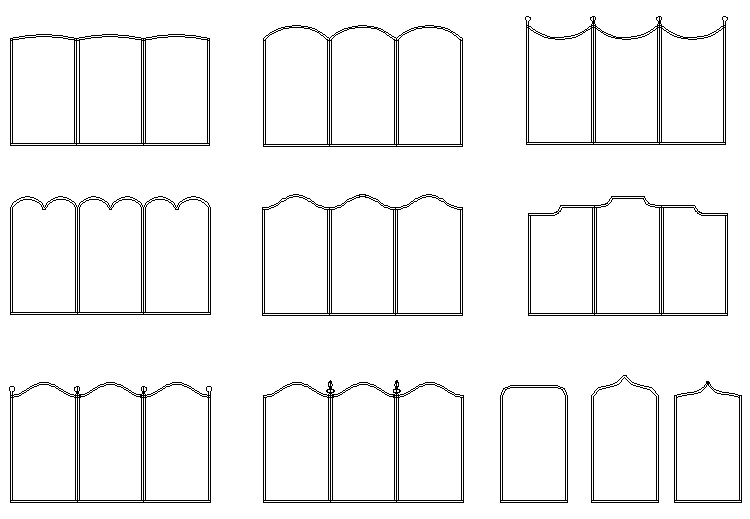
A few options for shapes
I played around with options for the shape of the lattice sections. I decided I liked the unadorned sinusoidal profile in the center best; perhaps due to my electrical engineering background, or just because I have impeccable taste. Or perhaps not enough imagination...
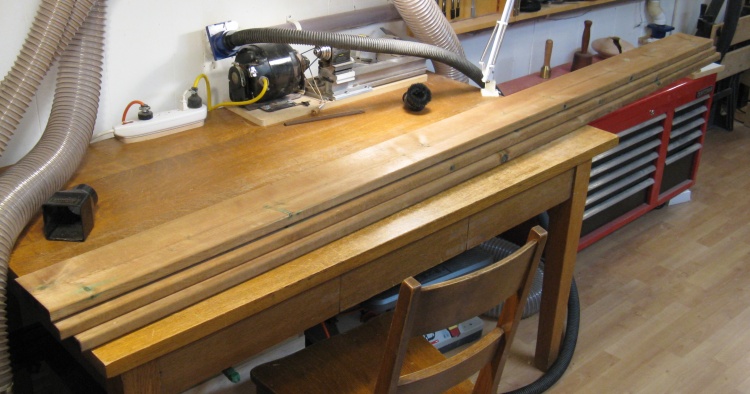
Wood for the tops of the frames
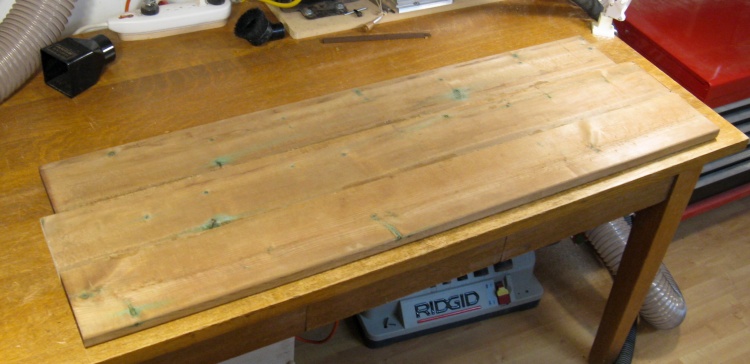
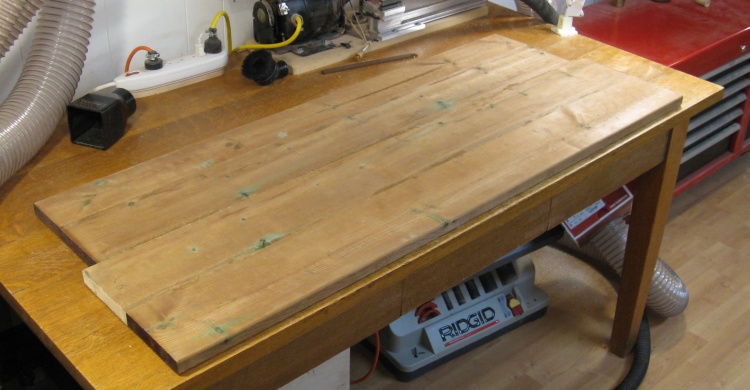
I started with three planks of "five quarters" brown treated wood (deck boards really) that would be laminated into a shorter but wider section.
The boards were surprisingly wet despite coming from indoors at Home Depot. I imagined that they had just brought the pallet in from outside, but later investigation showed that the treatment uses preservative-infused water that is forced into the boards. So unless it is a special "kiln dried after treatment" version, this is pretty normal.
The boards were surprisingly wet despite coming from indoors at Home Depot. I imagined that they had just brought the pallet in from outside, but later investigation showed that the treatment uses preservative-infused water that is forced into the boards. So unless it is a special "kiln dried after treatment" version, this is pretty normal.
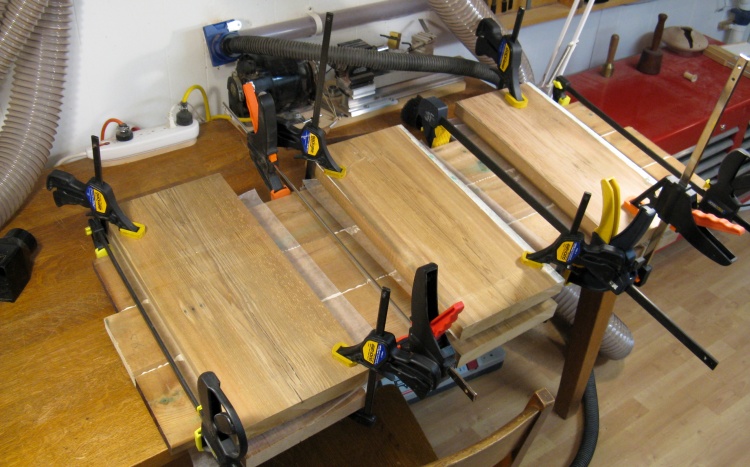
Clamping three planks together
I was going to need a wide piece of material from which to cut the tops. I could technically have used a more-efficient layout but opted for the more straight-forward approach shown here.
The initial three planks were shortened, jointed to render the edges flat and straight, and glued together. The wide planks in this photo are just being used to squeeze the three pieces together to minimize their offset while the glue dries.
The initial three planks were shortened, jointed to render the edges flat and straight, and glued together. The wide planks in this photo are just being used to squeeze the three pieces together to minimize their offset while the glue dries.
Three planks together and ready to go...not
This is the assembly of three planks that will be used for the three curved top rails. Except I found I forgot one plank - it should have been four planks wide. D'oh!
OK - four planks together
Fortunately easy enough to fix - jointed the top edge and the edge of a new piece, and glued the latter on in the same manner as above. OK, now it's ready to be used for the top rails.
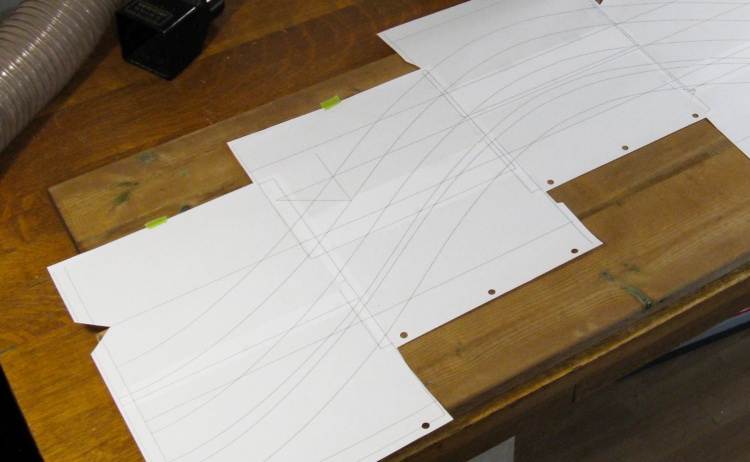
Full-size plan to trace the tops
I used a full-sized paper plan, printed out on our standard 8-1/2 x 11 printer and carefully taped together. As usual, with carbon paper under the plan, a ball-point pen followed the lines to trace the pattern on to the wood.
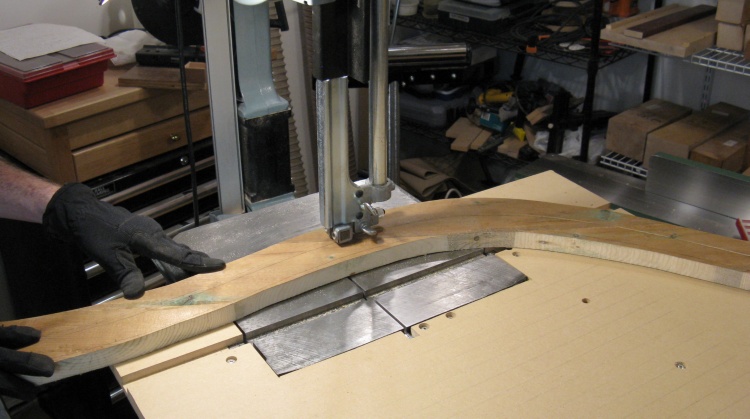
Cutting out the tops on the bandsaw
The assembly of four planks went on to the bandsaw, to which I had attached the MDF extension table used for larger items. I first cut off the edges, and here I'm separating two frame tops.
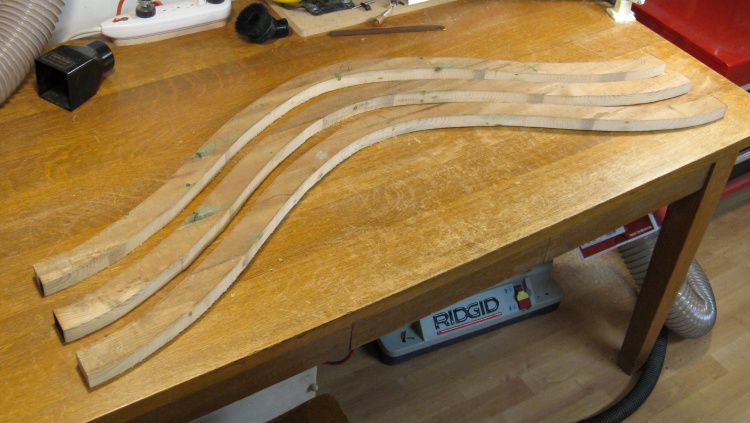
The three rough-cut tops
Here are the three top frame sections just off the bandsaw. They will need to be smoothed out a bit since the surface is, let's say, "imperfect" from my bandsawing.
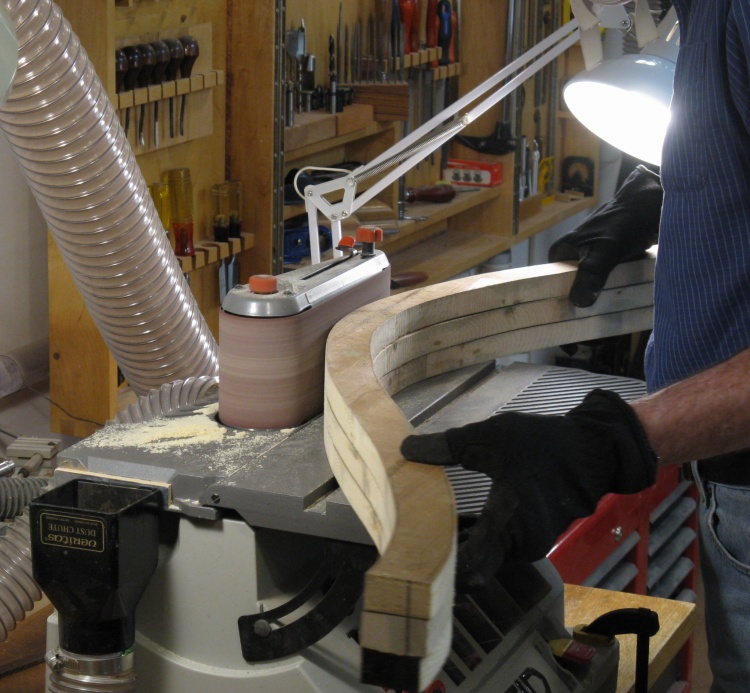
Using the belt sander to smooth out the curves on the tops
I taped all three pieces together to do the shaping, and used the horizontal belt sander to smooth the surface out. The lines I traced from the plans are really only rough guides since they tend to be rather wiggly. As a result the sanding is done to the proper vicinity of the line, but the curve is checked by eye to make sure it is regular.
Old versions of treated wood used a fairly toxic preservative (E.g CCA which includes arsenic in the recipe). It wasn't too clear whether there was any significant risk to using the CCA wood, but switching to a less-toxic preservative made sense and the new versions are less toxic ("micronized copper" in the lumber I used). But given that the dust from even untreated wood is considered a carcinogen (usually, and depending on the type of wood and where in the world you are and how much you are exposed and what other complicating factors you have) it made sense to take extra precautions with the treated wood, so in addition to the dust collection system that is attached to each piece of power equipment, I wore gloves and if there was a lot of sawdust being generated, then a dust mask as well.
Old versions of treated wood used a fairly toxic preservative (E.g CCA which includes arsenic in the recipe). It wasn't too clear whether there was any significant risk to using the CCA wood, but switching to a less-toxic preservative made sense and the new versions are less toxic ("micronized copper" in the lumber I used). But given that the dust from even untreated wood is considered a carcinogen (usually, and depending on the type of wood and where in the world you are and how much you are exposed and what other complicating factors you have) it made sense to take extra precautions with the treated wood, so in addition to the dust collection system that is attached to each piece of power equipment, I wore gloves and if there was a lot of sawdust being generated, then a dust mask as well.

Cutting up a new batch of wood for the side and bottom frames
With the tops done, I then needed the bottom and side frames, which being straight were more, well, straightforward. I used another three planks and ripped each of them into three pieces as shown here.
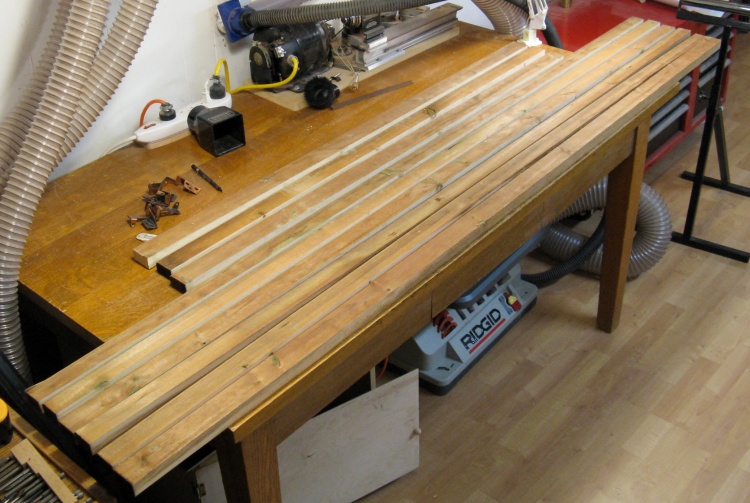
Side and bottom frames cut to size
This is the collection of base and side frame pieces (along with a completely unrelated pile of old hinges on the table).
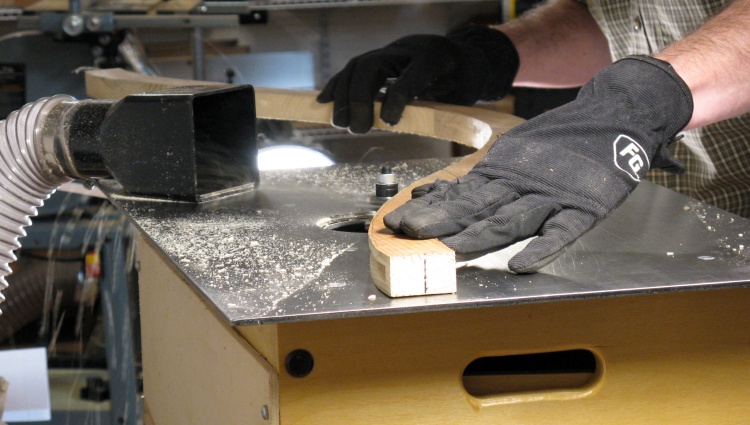
Routing a slot in one of the frame tops
The last woodworking step was to create a slot in the frames for the lattice. I needed a 10mm-wide slot, and fortunately I had a router bit whose width could be adjusted to the right value. Here I'm routing the slot on one of the curved top frame pieces.
Unfortunately, the bit would create a slot only 1/2" deep. That was OK for the top but for the straight frame sections, I really wanted 3/4". So for those I ended up deepening the initial slot in a second operation using a vertical cutting bit.
Unfortunately, the bit would create a slot only 1/2" deep. That was OK for the top but for the straight frame sections, I really wanted 3/4". So for those I ended up deepening the initial slot in a second operation using a vertical cutting bit.
Assembling the frames to the lattice
So with the frame done, the next step was assembly. I opted to do that in the garage where there was more room.
Assembly consisted of simply slipping the slotted frames over the lattice. Of course with imperfectly straight frames and lattice, with lattice staples and rough edges, etc., etc., the "slipping" was a bit involved. However here I'm on the third side and tapping the frame onto the lattice with a wooden mallet.
Assembly consisted of simply slipping the slotted frames over the lattice. Of course with imperfectly straight frames and lattice, with lattice staples and rough edges, etc., etc., the "slipping" was a bit involved. However here I'm on the third side and tapping the frame onto the lattice with a wooden mallet.
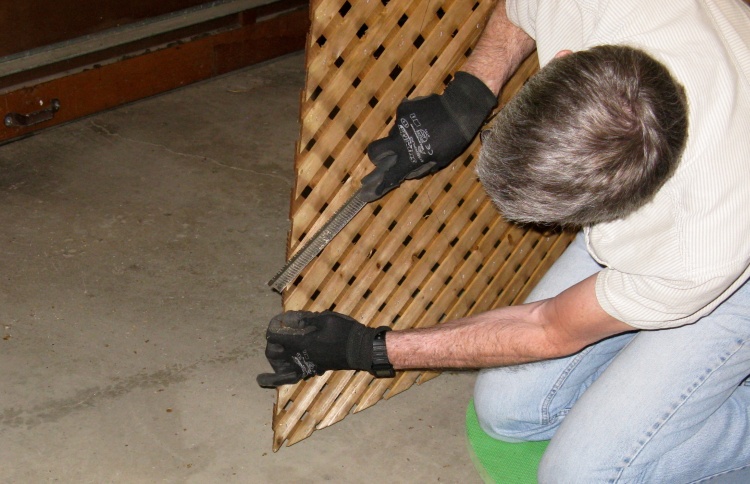
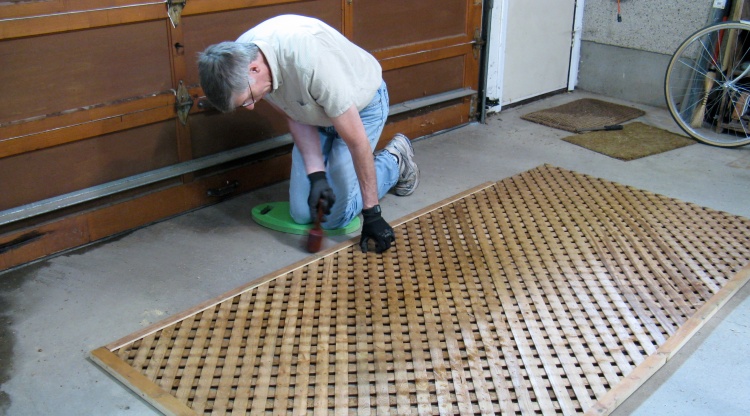
Bevelling the lattice edges for easier fit into the frame slots
To help with the assembly, I bevelled the lattice edges where necessary with a rasp since they sometimes had rough edges due to the factory cut. I also made sure to pound in any staples near the edge that might interfere with the frames.
I also submit this photo as evidence that I do not (yet) have a bald spot. And if prior-generation genetics play out in mine then I'll keep my hair, except for greyness/thinness.
I also submit this photo as evidence that I do not (yet) have a bald spot. And if prior-generation genetics play out in mine then I'll keep my hair, except for greyness/thinness.
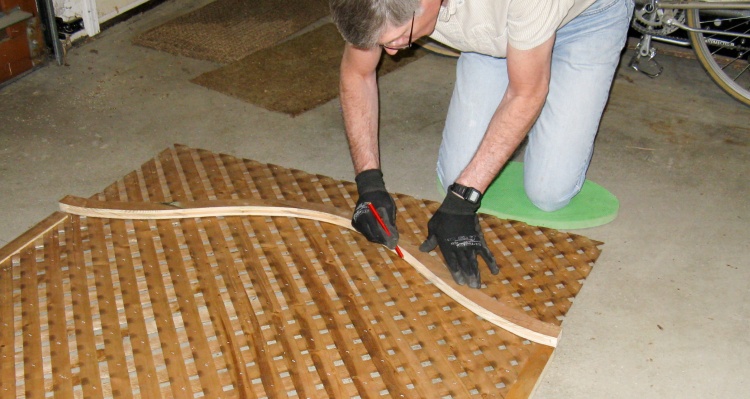
The lattice is marked for cutting to fit the top part of the frame
Once the bottom and side frames were on and positioned, I marked the lattice for cutting, using a top frame for a guide.
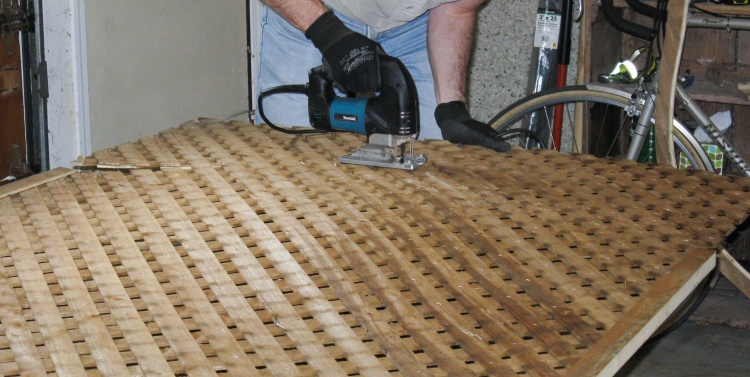
Cutting the curved top into the lattice
Then with the lattice up on supports, the excess parts of the lattice were cut off using a jig saw.
In the background is visible my Nishiki Olympic road bike which is now 36 years old. Well, except for both tires and tubes of course. And the chain. And both wheels, rear axle, brake pads, crank, cables, fenders, seat, freewheel and deraileur - those are all newer. But the frame is ancient. I use it for exercise in the summer and have considered getting a modern, lighter, easier-to-ride bike, but that doesn't make any sense; for exercise it's supposed to be hard.
In the background is visible my Nishiki Olympic road bike which is now 36 years old. Well, except for both tires and tubes of course. And the chain. And both wheels, rear axle, brake pads, crank, cables, fenders, seat, freewheel and deraileur - those are all newer. But the frame is ancient. I use it for exercise in the summer and have considered getting a modern, lighter, easier-to-ride bike, but that doesn't make any sense; for exercise it's supposed to be hard.
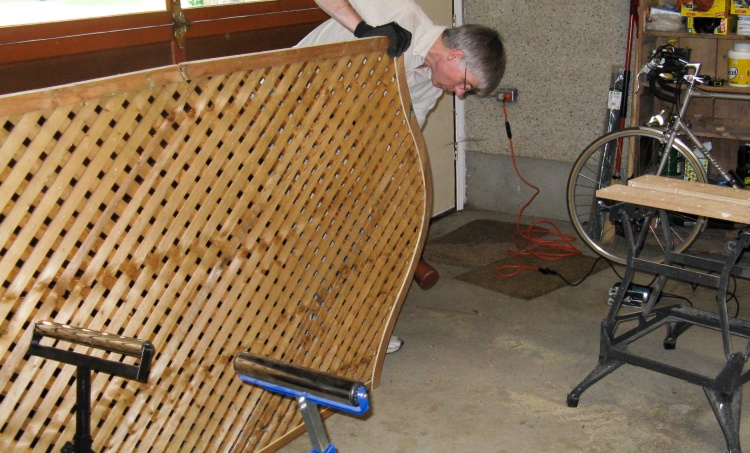
The penultimate assembly step was to slip the tops of the frames onto the lattice as shown here with this one being tapped into place.
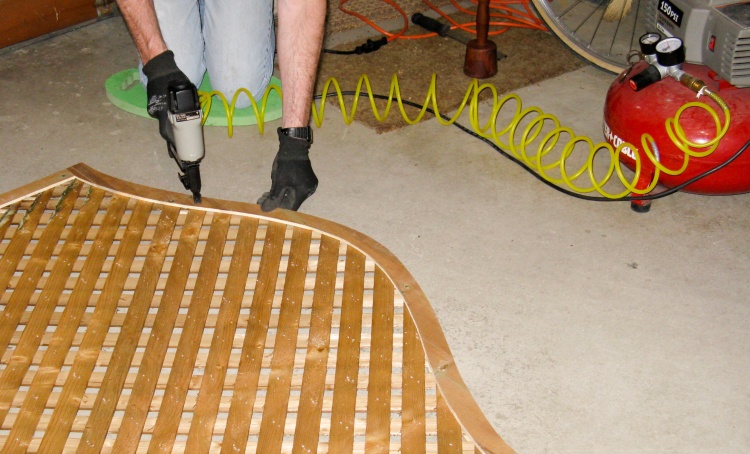
Tacking the frame to the lattice
And then lastly the frames and lattice were nailed (or perhaps "braded" ) together using 3/4" brad nails.
The pneumatic brad nailer is quite satisfying to use (kachunk, kachunk, kachunk) but it's something that doesn't get a lot of use in my usual woodworking activities.
The pneumatic brad nailer is quite satisfying to use (kachunk, kachunk, kachunk) but it's something that doesn't get a lot of use in my usual woodworking activities.
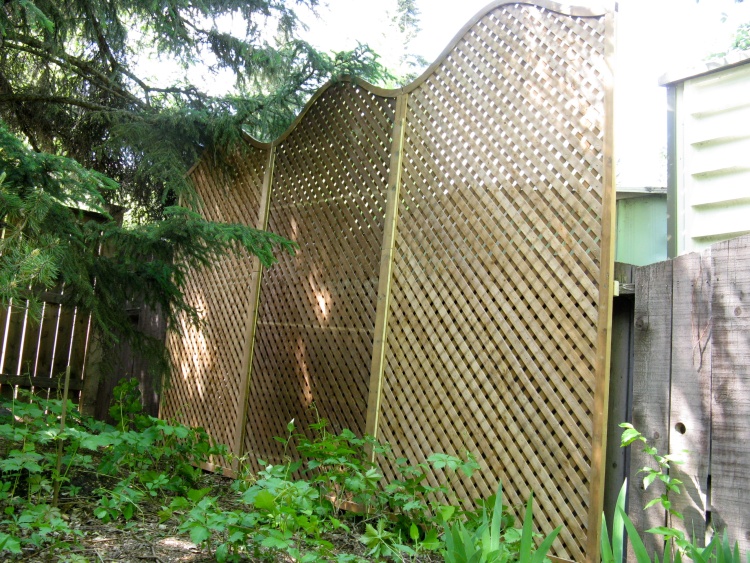
The three lattice sections after being assembled to the fence
It was then a matter of mounting the three lattice sections in place. My spouse and I wrangled them into place and wielding cordless drill/drivers, screwed them to the fence crosspieces and one of its posts. This area should be fairly well shielded from wind by the sheds and the trees in our yard, so I'm hoping that there is enough strength to support them against high winds.
Most of the greenery down low is Virginia Creeper vine, so perhaps with some redirection of the ground-based vines, they will be convinced to start to climb the trellis, which should look nice in summer and fall.
Most of the greenery down low is Virginia Creeper vine, so perhaps with some redirection of the ground-based vines, they will be convinced to start to climb the trellis, which should look nice in summer and fall.


