The main problem I had in making a mirror frame was deciding what style it should be. Unlike picture frames which tend to be relatively basic lest they detract from the actual picture, mirrors don't have that limitation. This seems to lead to a huge variety of styles ranging from the mundane to the bizarre. I'm not sure I'm a good judge of where the design that I arrived at falls in that spectrum, but I'd like to think it has at least a dash of "funky".
I didn't bother with much in the way of plans, but the design was based on a mirror frame I had seen which used mirrored tiles to form the frame. That actually looked a bit tacky to me, but the concept for the design seemed like it would work well with wood. I chose walnut for the frame since I wanted something a bit darker, and as a bonus it would match our front door.
I didn't bother with much in the way of plans, but the design was based on a mirror frame I had seen which used mirrored tiles to form the frame. That actually looked a bit tacky to me, but the concept for the design seemed like it would work well with wood. I chose walnut for the frame since I wanted something a bit darker, and as a bonus it would match our front door.
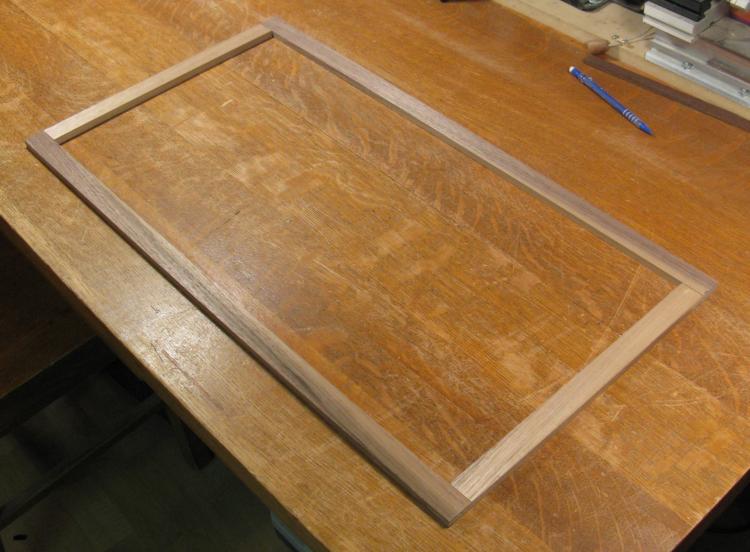
Basic frame
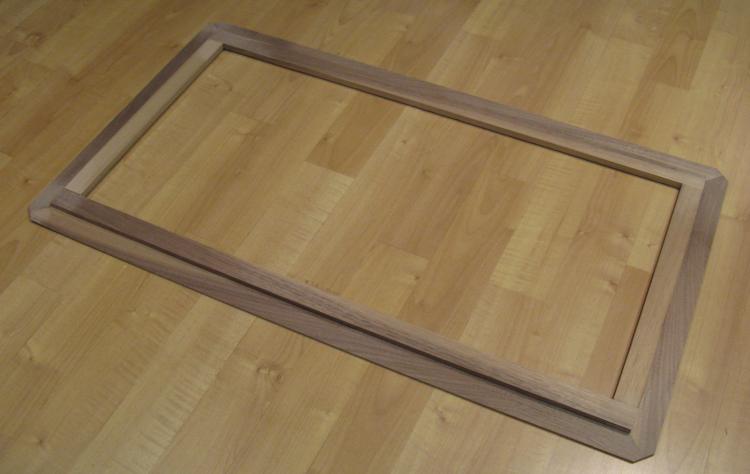
I started by making a basic frame of the appropriate size for a 12" x 24" mirror. This was a simple rectangular cross-section that I planned to use as a base to mount the wood tiles.
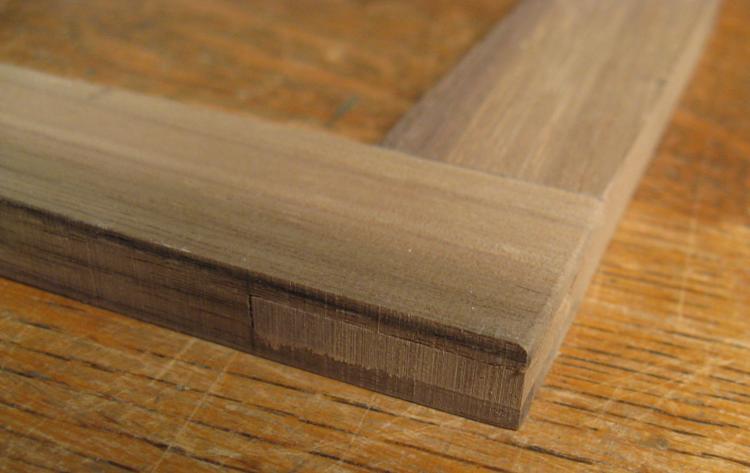
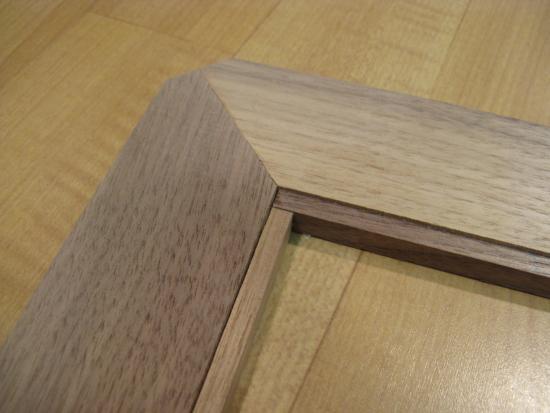
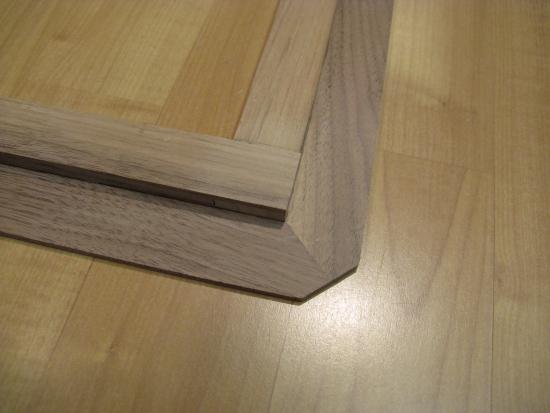
Frame corner
The corners were made with bridal joints to give lots of glue area to strengthen the frame and reduce any tendency to twist.
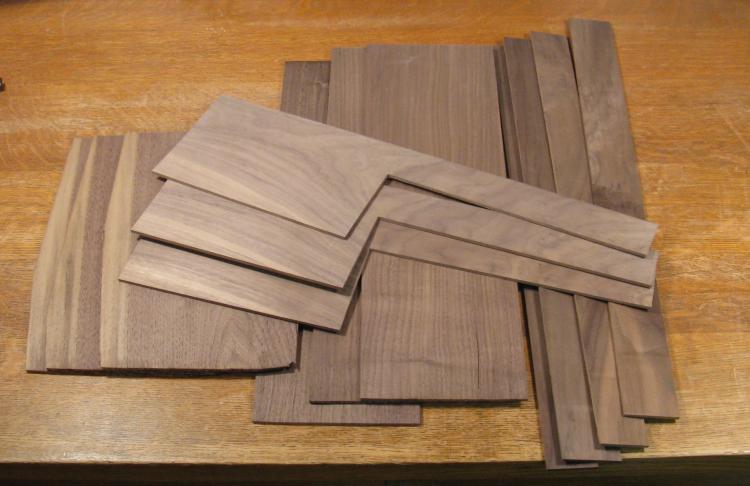
Blanks cut for tiles
I had no solid plan at this point for how the tiles were going to be attached to the frame, so I thought I'd start on the tiles and try a few things out.
Here there a number of blanks are ready to cut to size. The large variety of shapes is just due to my choosing planks that looked like they would be less useful for something larger.
These started as planks that were band-sawed (band-sawn?) into thinner sections and run through the planer for a consistent thickness of 1/8".

Scraping a blank
I decided that I would try to avoid what could turn out to be a daunting amount of sanding for this frame, so before cutting them up, I used a cabinet scraper to smooth the machine marks from the top sides of the blanks. This gave a nice finish that didn't need any additional work.

Various widths of strips cut out
The blanks were cut into strips of various sizes on the bandsaw...
Tiles cut to size
...which were then cut into individual tiles.
As can be seen, the cut edges are pretty rough from the bandsaw, so those were smoothed using a 220 grit belt on the belt sander.
As can be seen, the cut edges are pretty rough from the bandsaw, so those were smoothed using a 220 grit belt on the belt sander.
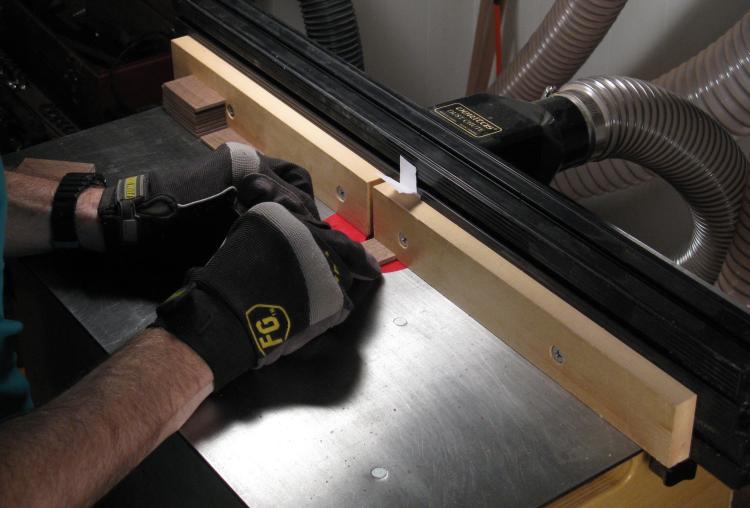
Bevelling the edges on the router
The last step to complete the tiles was to bevel the top corners, which I did using a router table. Here I'm running one through with a small pile of finished tiles on the left.
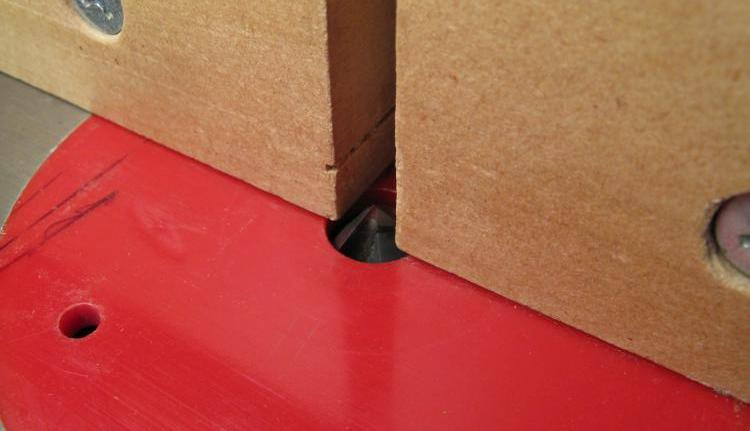
Router bit
Normally you want to use pushers so hands are nowhere close to the router bit, but in this case, only a tiny corner of the bit was exposed, making it pretty safe to do by hand.
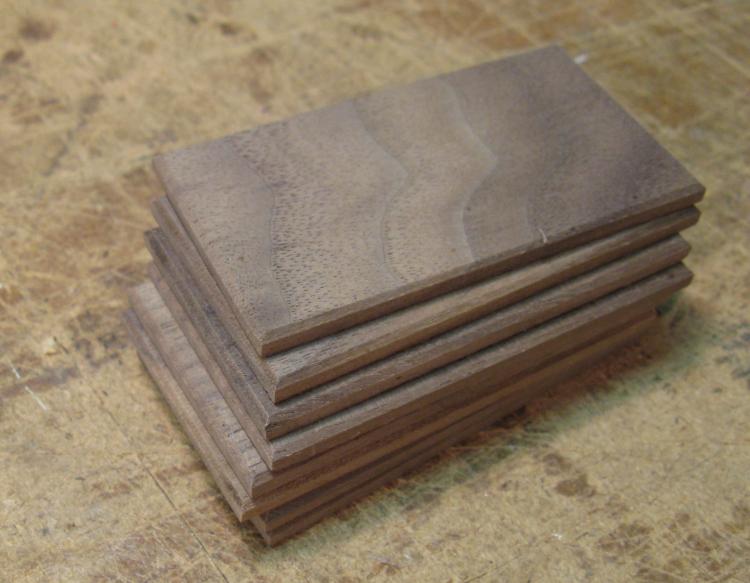
Finished tiles
Here's a few of the finished tiles of the largest size used.
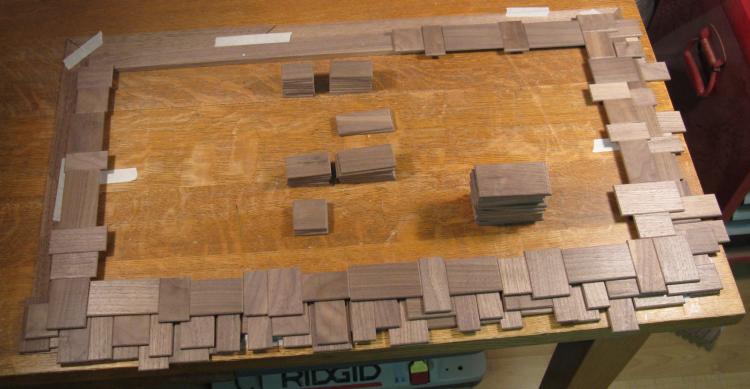
Starting the tile positioning
With a big stack of wood tiles, I started positioning them on the frame. I wanted one solid layer just on top of the frame to hold the mirror, and I decided to add a couple more layers below it and one or two on top.
As can be seen here, I started placing tiles with mixed grain orientations, but decided that it looked better with a consistent orientation on each side.
As can be seen here, I started placing tiles with mixed grain orientations, but decided that it looked better with a consistent orientation on each side.
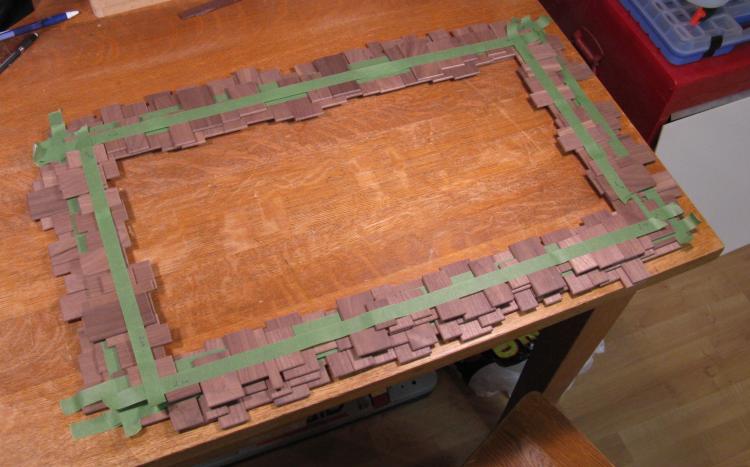
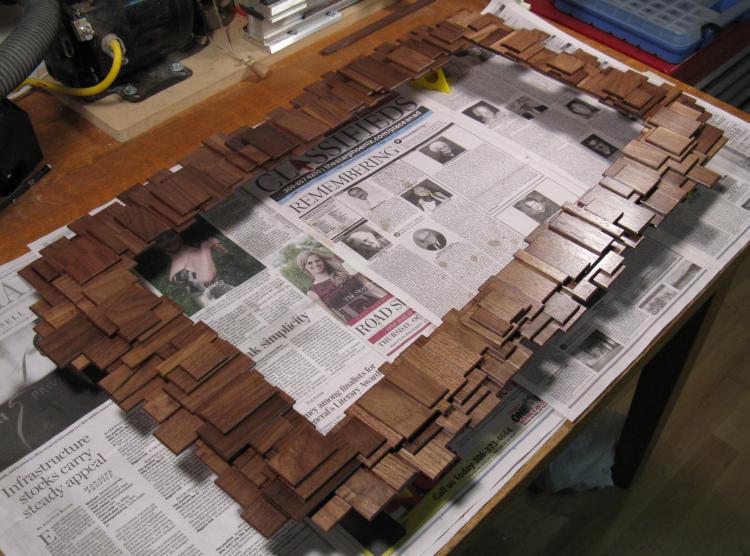
All tiles in place and positions preserved with masking tape
When I eventually had all the tiles in place, I wasn't sure how different it would look if I took it all apart and then started from scratch again to glue them in place, so I preserved the "design" by using masking tape to make a long assembly for each of the four sides and each of the four layers. This shot shows the tiles after they have been taped, removed and re-stacked.
The lower layers of tiles are just butted against the frame here. Gluing them to the frame like that wouldn't provide adequate strength, so they needed a base. For everything to stack up correctly, this base would need to be exactly two tile thicknesses below the top of the frame.
The lower layers of tiles are just butted against the frame here. Gluing them to the frame like that wouldn't provide adequate strength, so they needed a base. For everything to stack up correctly, this base would need to be exactly two tile thicknesses below the top of the frame.
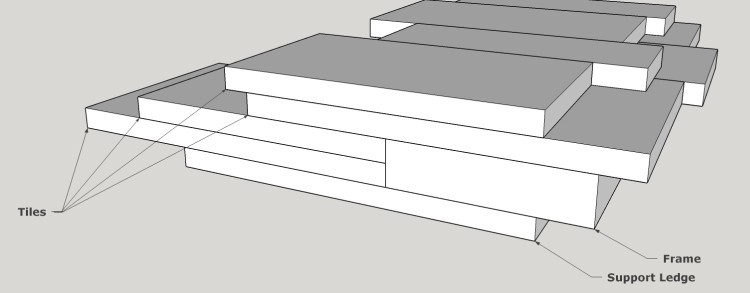
Frame structure
This 3D sketch shows a side view of the construction with the support ledge "in action".
Frame with tile support
To the right is the frame with the tile support ledge added. The main frame was milled down on its outside edge from the bottom side so its height matched the thickness of two tiles, and then a thin support frame was attached. Below are close-ups showing how it went together.
Bottom-side corner
Top-side corner
To hold the mirror in place, I opted for a thin piece (1/8" nominal) of foam-core as a backing with three cross-braces screwed to the frame. To avoid making the mirror assembly any thicker, I made cut-outs for the cross-braces. The shots below show one cut-out marked and then rather rudely chopped out with a chisel.
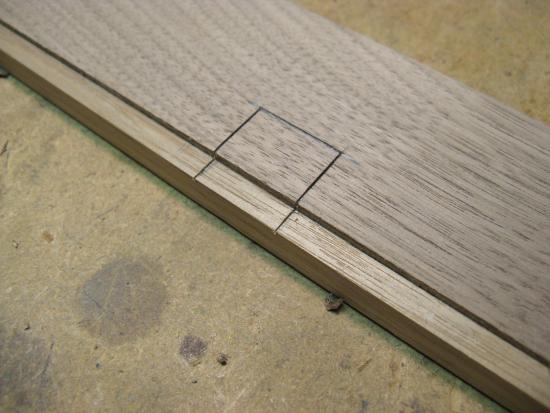
Cut-out marked
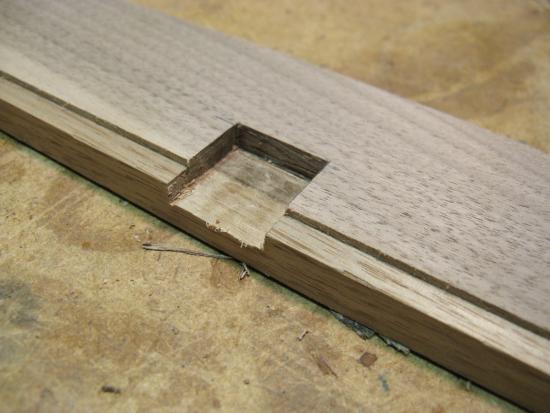
Completed cut-out
Bottom row being glued
The frame was then assembled by gluing on rows of tiles, starting with the bottom row. This shows one of the short sides being glued (and just held down with some handy weighty objects rather than being clamped).

Bottom row complete
Here the bottom row is complete and the tape has been removed.
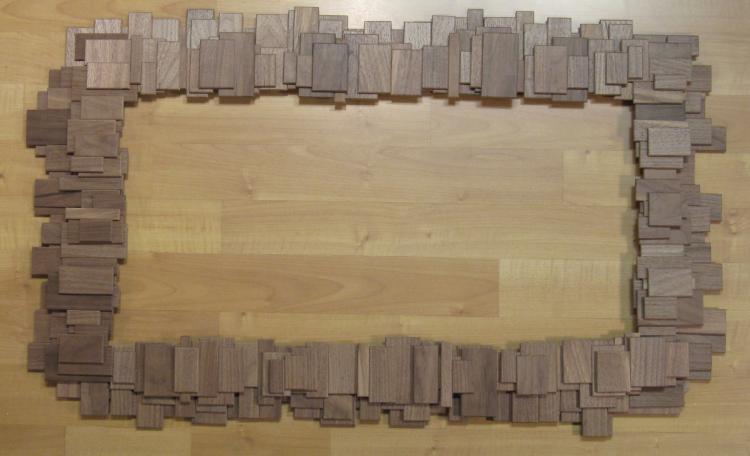
All layers complete
Each layer was glued on top of the last one, with this shot showing all the layers in place.
First coat of finish applied
And here the first coat of finish has been applied.
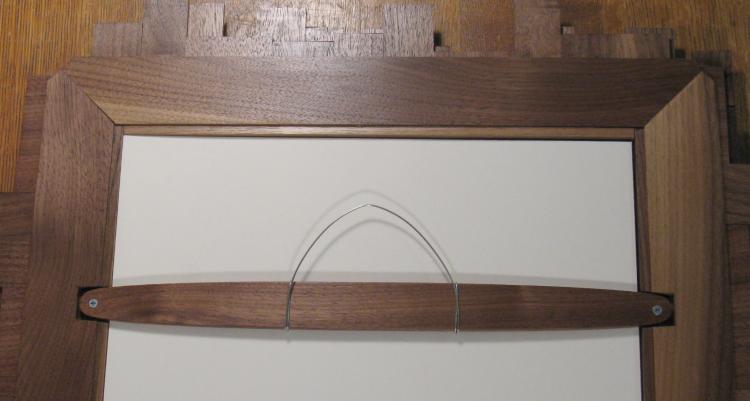
Wire hanger added
With the mirror assembled, a hangar was added to one of the braces. This is just a suitably formed piece of stainless steel wire.
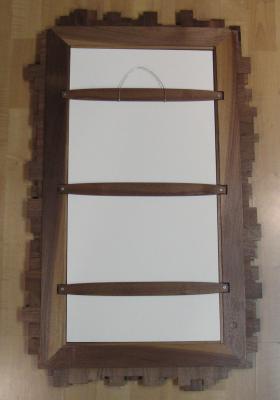
Back of mirror
And this especially crappy shot shows the back of the mirror with the backing material and the cross-braces in place.
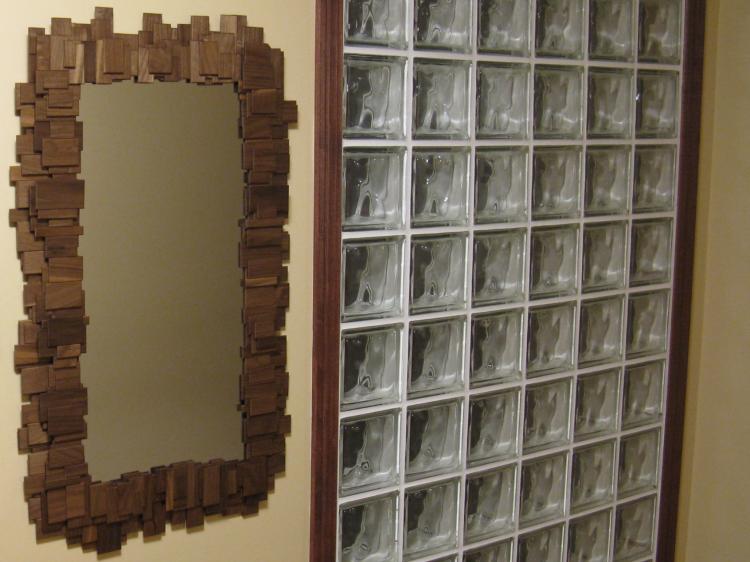
Completed mirror frame in place
Complete.


