This was a pretty simple little project but I was working on a plywood wastebasket at the time which was very involved and slow-going so I wanted something to fill the gaps while laminations dried. The messy phone cords have always been a slightly-annoying-when-I-notice-them kind of thing but then I noticed them again recently and it occurred to me that I could actually do something about the situation. They're hidden by the bed so not easily visible unless you are in the far end of the bedroom but it still seemed like it would make a fine filler project.
The headboard is walnut so it only made sense to make the phone base from walnut as well.
The headboard is walnut so it only made sense to make the phone base from walnut as well.

Your basic slightly-roundy-box with 4-sides
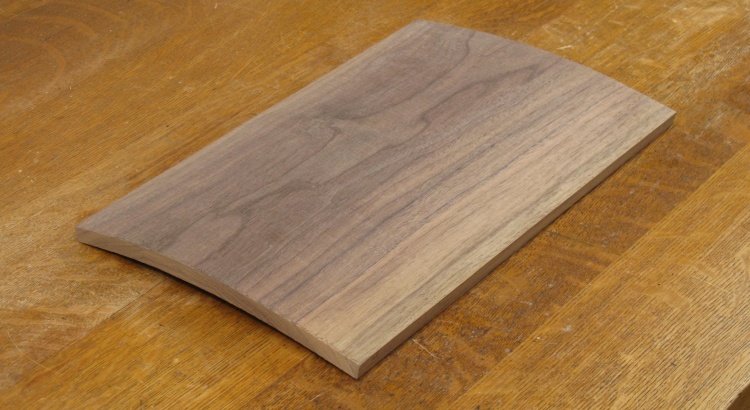
A slightly warped walnut board
I had a few pieces of thinly-cut walnut left over from a project that I did a half-decade ago (6.563 decidecades to be precise) and I grabbed the thickest of them. They had warped over the years but that could be fixed with some laminating.
This piece at about 8" x 14" would be enough to do the whole base if I was careful enough (spoiler: I wasn't).
This piece at about 8" x 14" would be enough to do the whole base if I was careful enough (spoiler: I wasn't).
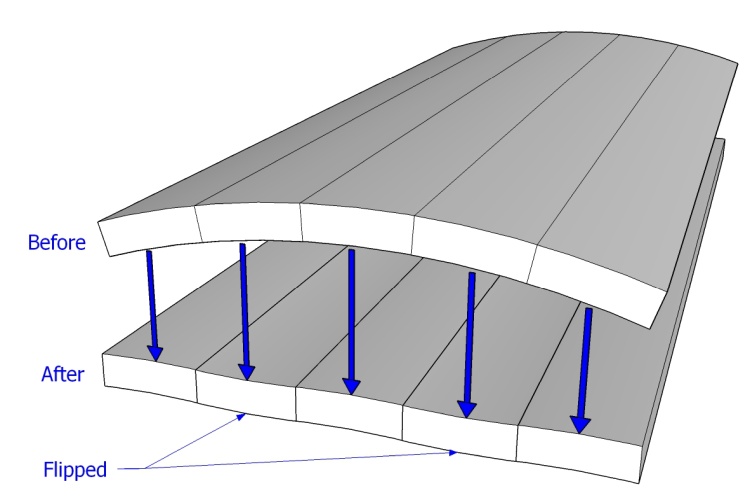
The planned solution to the warp
The plan was to cut the board into five narrow strips and reassemble them with alternate strips flipped over so they would have the opposite curvature. That would result in a flatter-but-wavy board which could then be planed into true flatness without much loss of thickness.
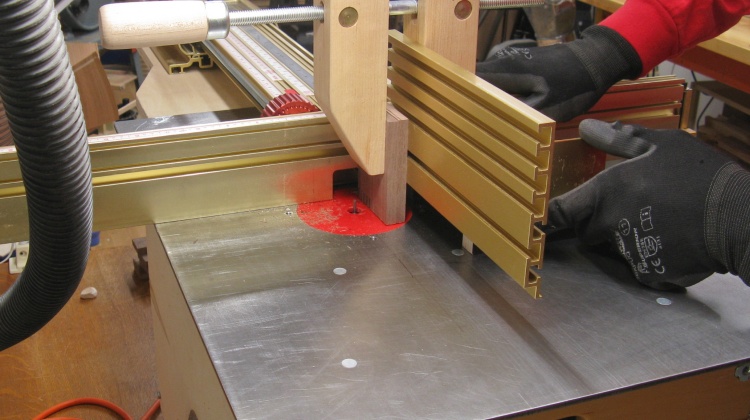
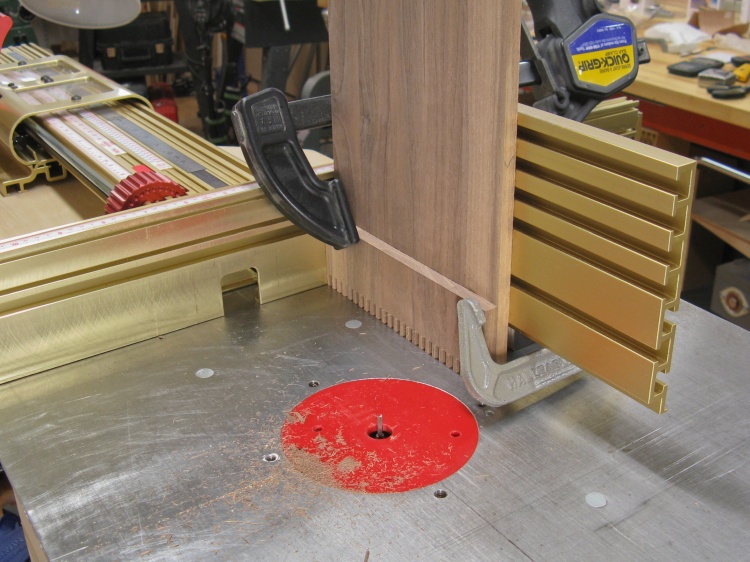
Cutting a test joint
But before I chopped up the board, I thought I should make sure my planned joint was going to work out.
The router table was configured for box joint cutting and I grabbed a couple small scraps of walnut as test pieces.
The router table was configured for box joint cutting and I grabbed a couple small scraps of walnut as test pieces.
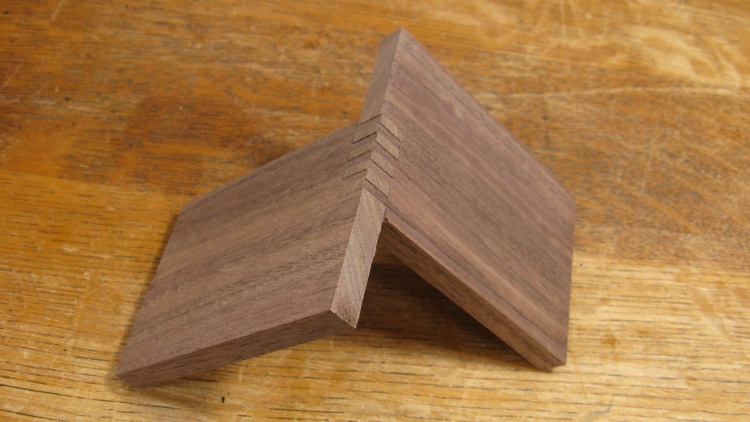
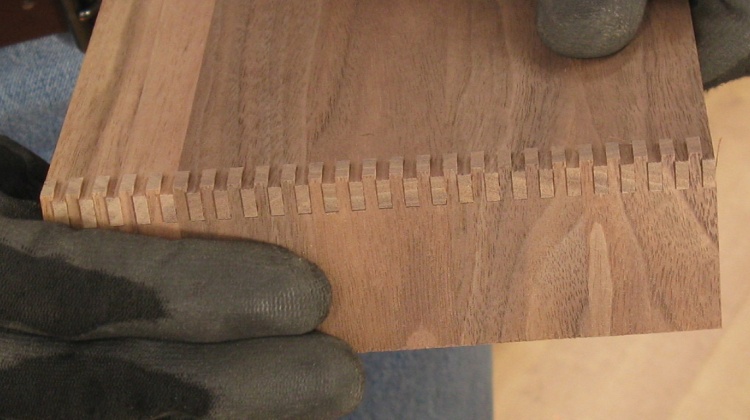
Looks good
I did only a few teeth but they seemed to fit together decently.
I was also pleased that the slots came out clean without using the backer boards often necessary to prevent chipping at the edges. Perhaps the small-diameter bit helped with that.
I was also pleased that the slots came out clean without using the backer boards often necessary to prevent chipping at the edges. Perhaps the small-diameter bit helped with that.
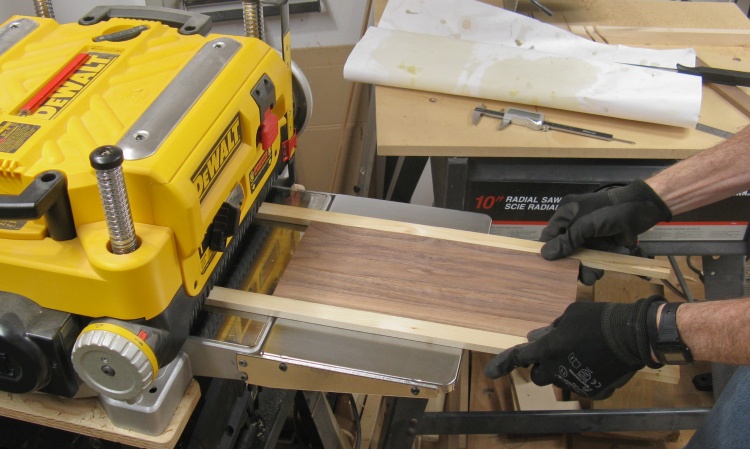
Cutting the board into slices
So then back to the walnut board where the first step was to slice it into pieces.
There was actually enough wood in this one piece for the top, ends and side of the phone base but I changed my mind about how wide to make the strips and managed to waste enough to need another little piece for the side. Fortunately I had no shortage of other little pieces.
There was actually enough wood in this one piece for the top, ends and side of the phone base but I changed my mind about how wide to make the strips and managed to waste enough to need another little piece for the side. Fortunately I had no shortage of other little pieces.
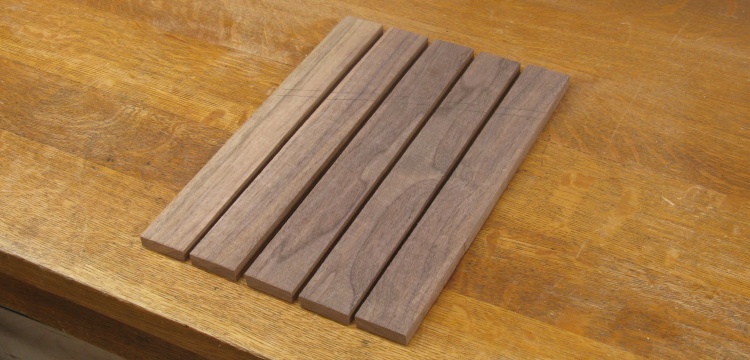
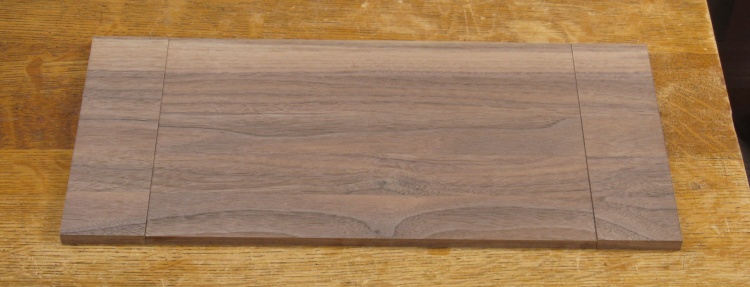
The slices awaiting further processing
Here the board has been cut into five slices and the next thing is to square them up so they fit together tightly.

Flattening the face of one of the slices
I started by flattening one face as seen in this shot, then planed the opposite face to flatten it and finally adjusted the width and jointed the sides so they were square and straight.
I was planning on using box joints to hold the top and ends together and I made sure to make the width of each piece an integer number of joint fingers so they would align with the slices. I'm not sure if a misalignment would be obvious but it wasn't much trouble to do.
I was planning on using box joints to hold the top and ends together and I made sure to make the width of each piece an integer number of joint fingers so they would align with the slices. I'm not sure if a misalignment would be obvious but it wasn't much trouble to do.
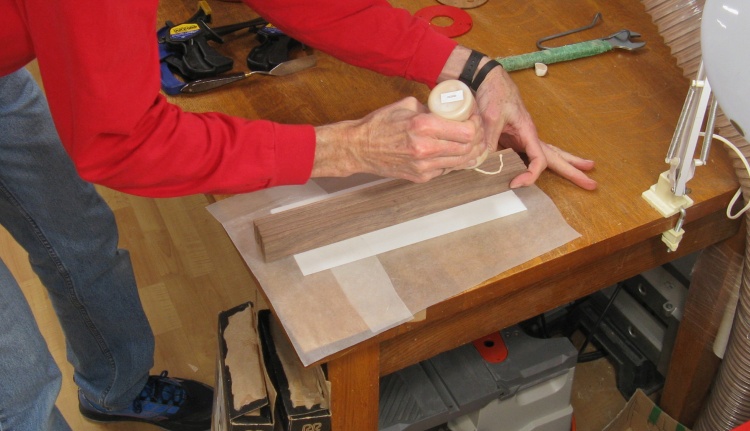
Applying glue to edges of slices
Then it was time to rebuild the board.
I applied glue to one edge of each slice, done together in a block since that's a whole bunch easier than doing them individually.
I applied glue to one edge of each slice, done together in a block since that's a whole bunch easier than doing them individually.
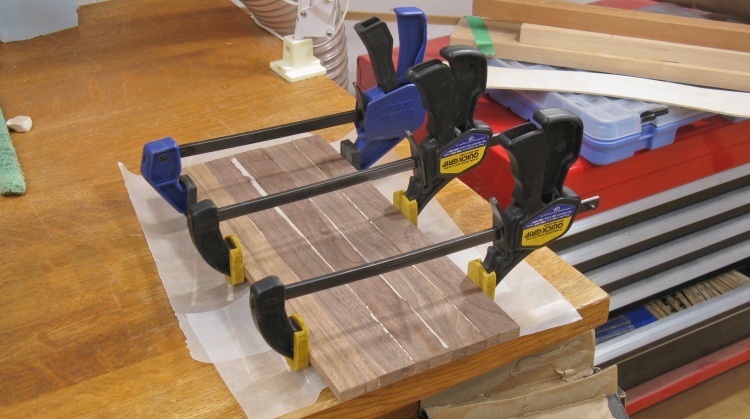
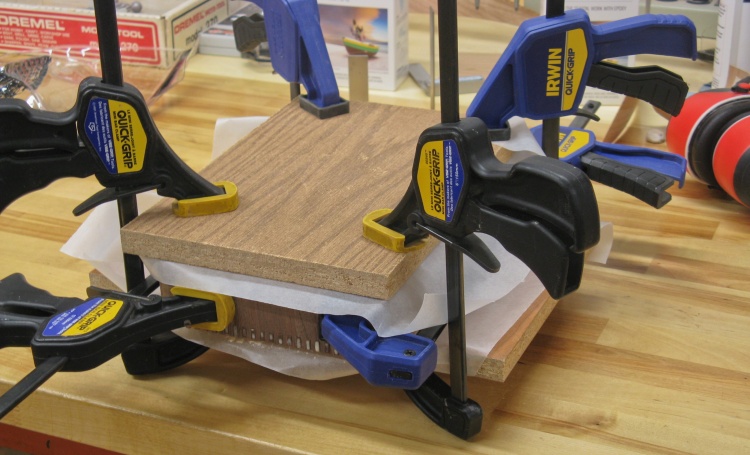
Slices glued and clamped
Then with the pieces pressed down to a flat substrate, they were clamped until the glue set.
Planing laminated board flat
When that dried, I then had my wavy version of the board. A few passes though the planer later and it was nice and flat. The walnut is flanked by some freehanded anti-snipe rails in this shot.
The two ends cut free
I cut segments off opposite ends of the board and these would form the vertical ends the base.
Doing it this way ensured that the grain matched between the top and the ends - a rather minor feature likely unappreciated by anyone other than myself.
Doing it this way ensured that the grain matched between the top and the ends - a rather minor feature likely unappreciated by anyone other than myself.
Routing one of the corner joints
So then with the top and ends ready to go, I proceeded to make joints for those corners and in this shot I'm almost through one of them.
The astute woodworker may notice that I'm cutting the top and end pieces at the same time with the same alignment. When the number of teeth+gaps in the joint is even (this one has 50 so it qualifies) they can be cut like this. Then when done, one of the pieces is flipped 180° which gives the correct alignment. Of course if you care about grain alignment (I did) then you have to remember to flip them before cutting (I did).
With an odd teeth+gaps number, the pieces need to be offset by a tooth width or cut separately, with neither case being as simple as the above technique.
Checking the joint fit
A test fit showed the joint going together decently ("and the grain aligning nicely" he modestly adds, breathing on his fingernails and polishing them on his vest).
Gluing together the four pieces of the base
After making a rectangular side wall, that along with the top and the two ends were glued together and clamped until set.
Assembled but not fully dried base
Typical PVA wood glues like the one I used on this piece call for tight clamping, but for less than an hour.
Here it is out of the clamps and obviously the glue isn't completely dry. It will be allowed to sit unmolested overnight while the glue fully dries before it gets anything more done to it.
Here it is out of the clamps and obviously the glue isn't completely dry. It will be allowed to sit unmolested overnight while the glue fully dries before it gets anything more done to it.
While the glue dries, just let me comment on restaurant meals. What is with the piling up of food as a purportedly fancy way to serve it? The first thing you have to do is to unstack it so it can be cut into pieces anyway. And then your roasted-carrots-with-some-green-top-still-on has bits of mashed-potatoes-with-cauliflower all over it and your pork's cranberry-mustard demi-glaze is all over your beets-roasted-in-honey or whatever. Just make individual piles, folks - saves the customer a bunch of work.
Sanding the joints flush
And then the next day the glue was nicely dried so I used the belt sander to smooth off the slightly protruding joint fingers on the top.
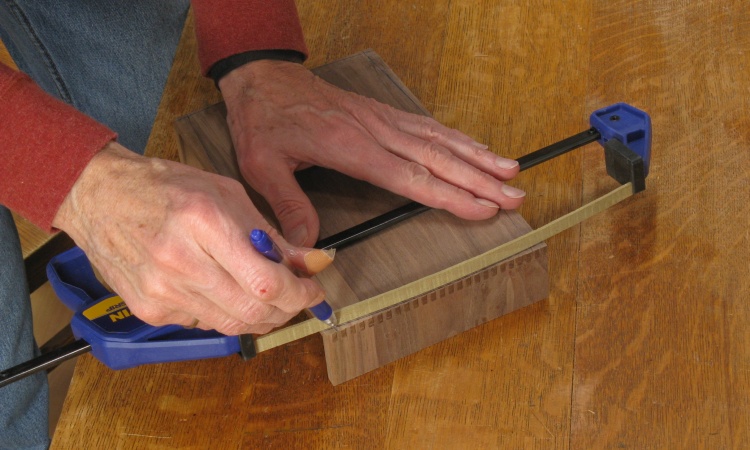
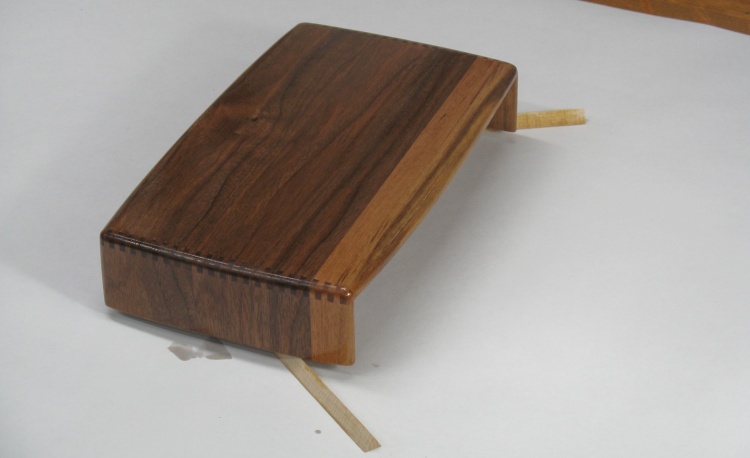
Marking a curved profile on the edges
...which provided a smooth surface on which to draw a shallow curve.
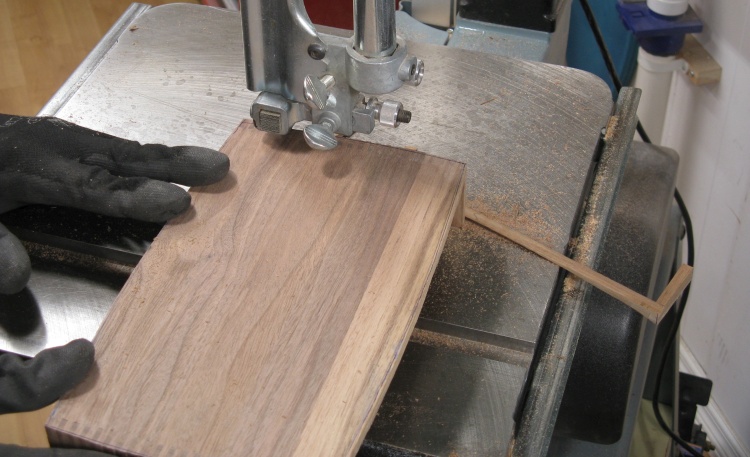
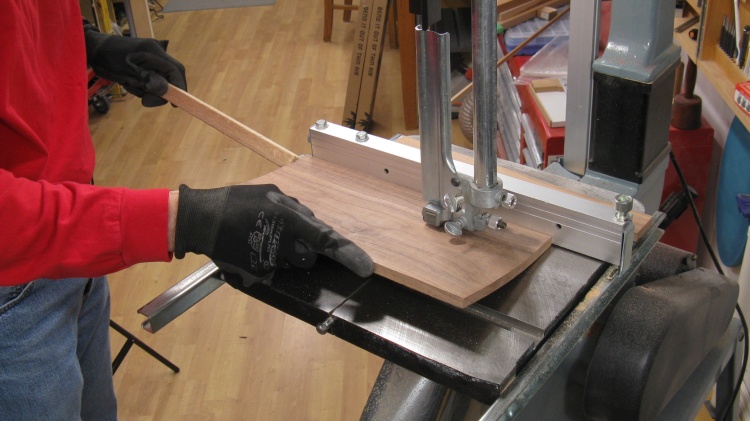
Cutting to that curved profile
Square corners and straight edges have their place but I don't want the bandsaw to get rusty from disuse. So here it's running through its paces, cutting curves into the sides of the base.
Pedant's Corner: Note the proper (I hope) usage of it's and its.
Pedant's Corner: Note the proper (I hope) usage of it's and its.
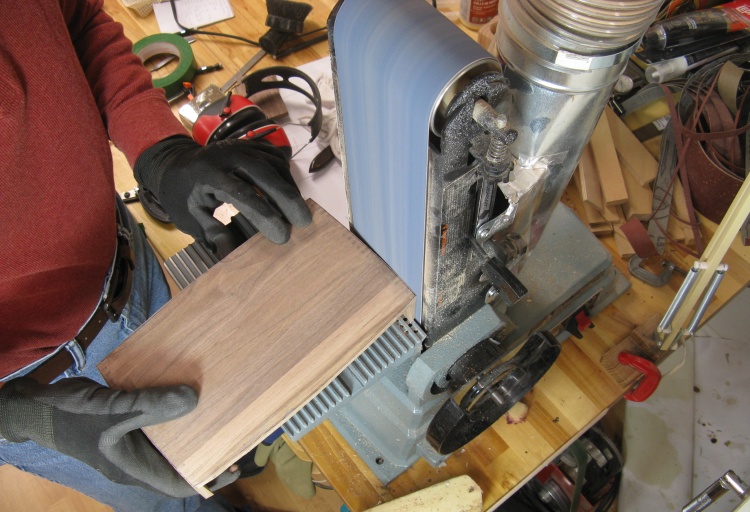
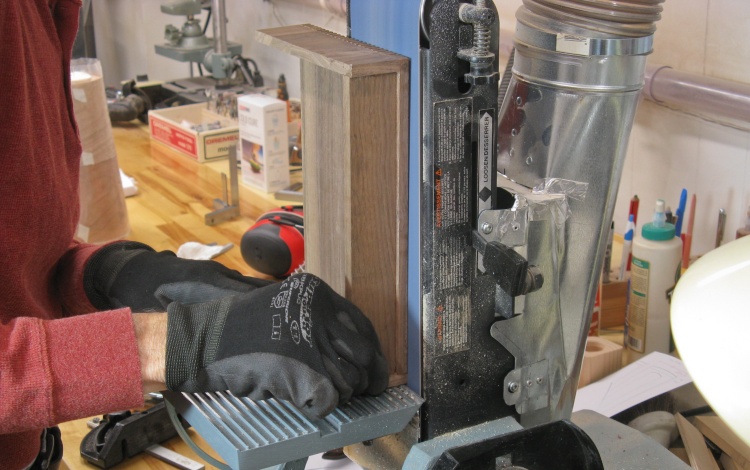
Shaping the edges on the belt sander
And really, as the most-used tool in the shop, the belt sander isn't too likely to get rusty but just in case here it's being used to smooth off the edges of the base.
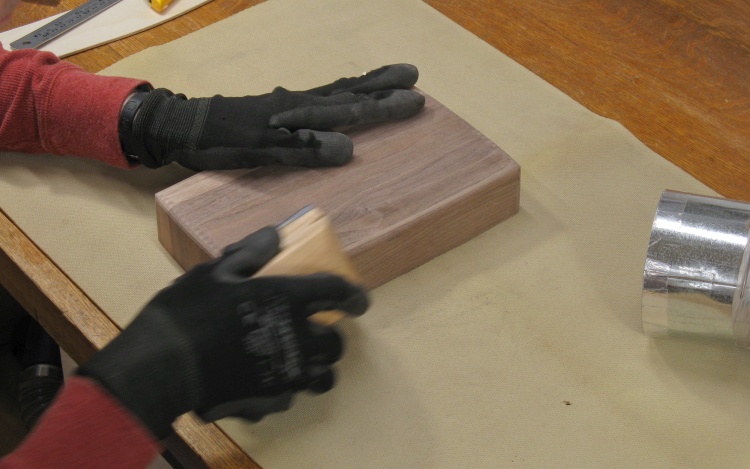
Some final hand sanding of the base
The corners were rounded on the sander as well and here I'm doing some hand sanding to smooth everything out. I sanded up to 320 grit for a decent finish.
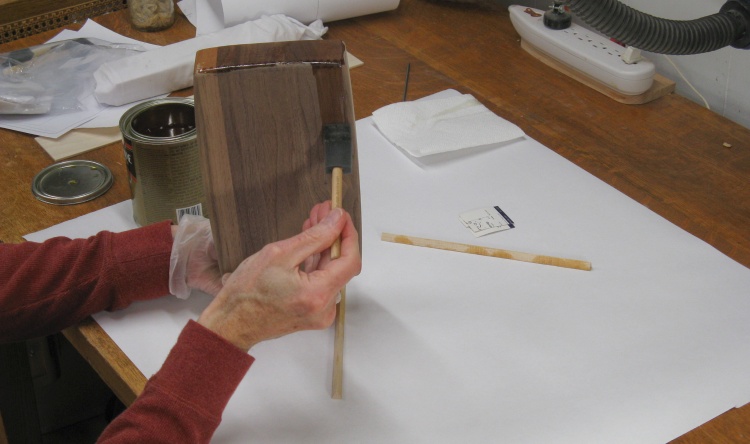
Starting on the varnishing
The phone base was destined to have my standard finish which consisted of three coats of Minwax Fast-Dry Poly, satin finish.
In this shot the first of those coats is going on.
In this shot the first of those coats is going on.
First coat of varnish on
The standard first-coat-of-varnish shot.
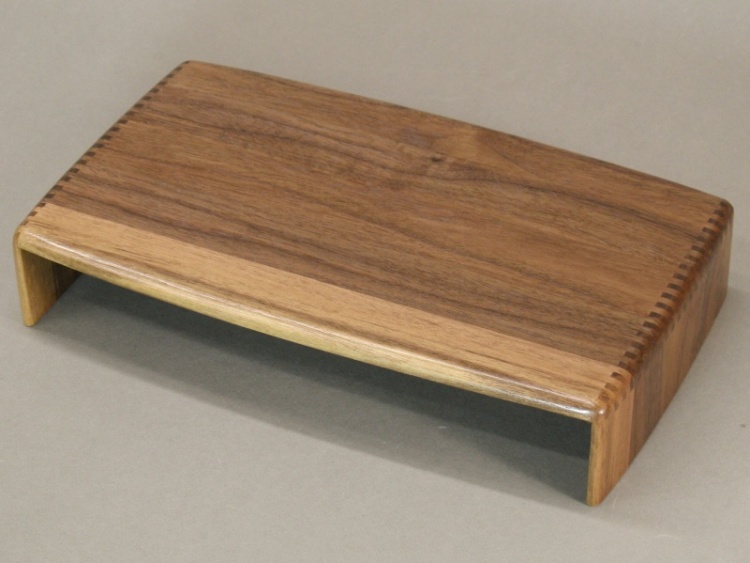
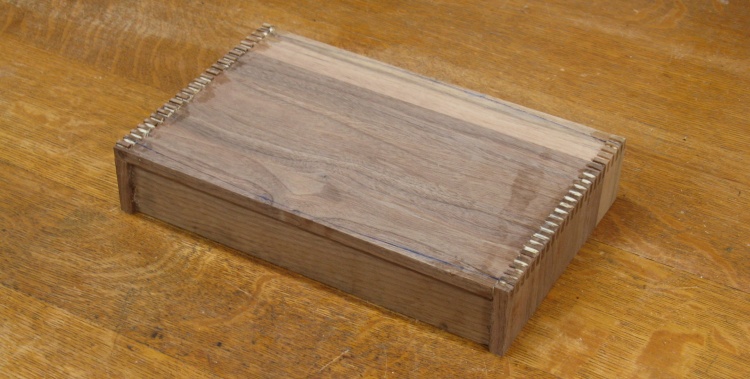
Done
The completed base.


