
Spice Rack
Coffee Pod Rack
Details
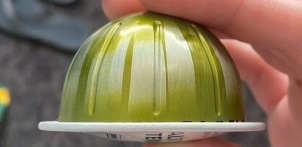
The coffee-pod rack was modelled on one spied on Pinterest. We considered various other designs that held the pods label-side up but ultimately settled on the dome-up design seen here. Having the dome upwards makes the rack tolerant of any of the three different pod heights, which varies depending on the quantity of coffee contained.

The three pod sizes
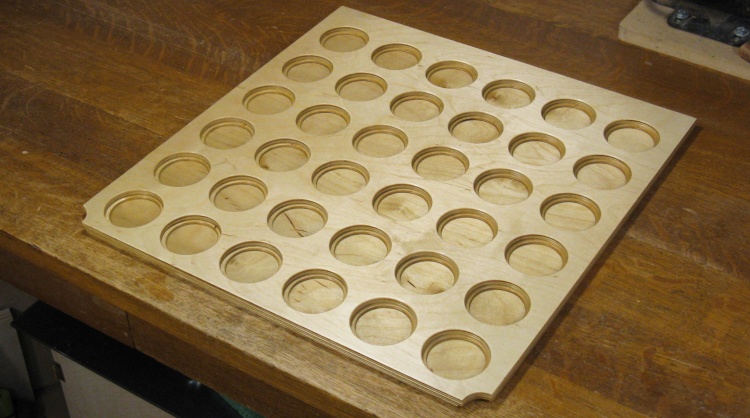
The Colorado Bulge
The one refinement we did go with was a recessed floor to acommodate the bulging label portion of the pod. That should let the pods lie flat rather than teetering on the bulge.
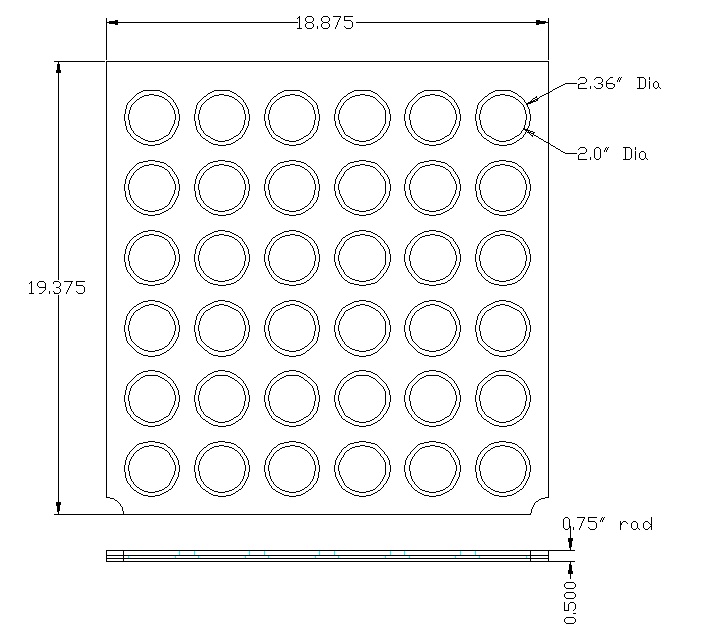
A pretty easy-to-draw plan
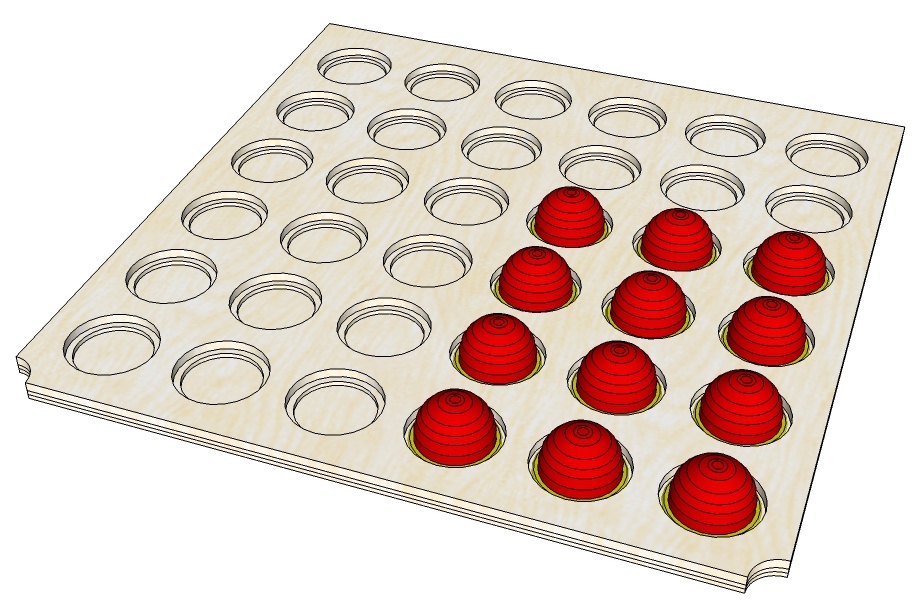
The rack with some nice red coffee pods
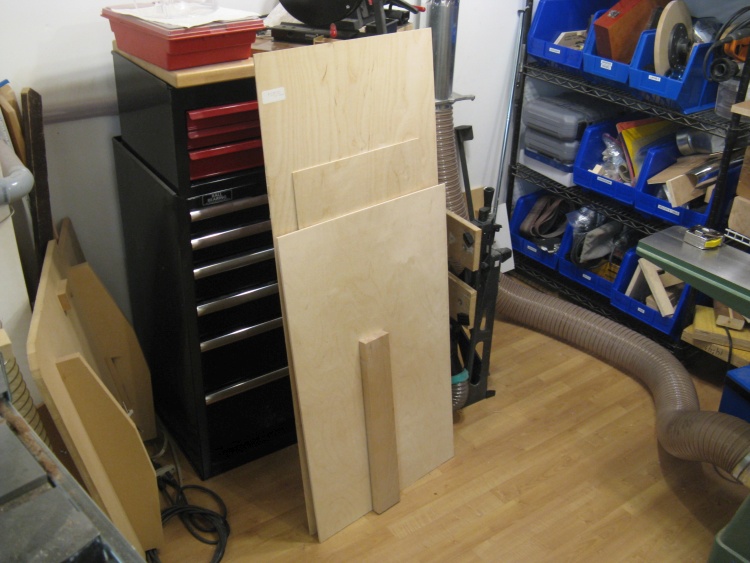
Enough wood for both racks
I dug through my sheet-goods pile and pulled out some appropriate plywood and some solid birch. I ended up using only part of the plywood shown here but ended up needing a larger piece of solid birch.
But First: How Do You Drill a Hole?
So drilling a hole is pretty straightforward unless you need a hole size for which you have no drill bit. I needed 51 mm and 60 mm diameter holes, but of course I didn't have those odd large-sized bits. I did have an adjustable hole saw which could be set to either diameter but it drilled pretty ugly holes and I needed the holes to have nice clean edges. Otherwise I had a fixed-size hole saw at one of the sizes and a large forstner in neither correct size.
I thought the first thing I'd do was try out the various bits and see what the holes looked like;
I thought the first thing I'd do was try out the various bits and see what the holes looked like;
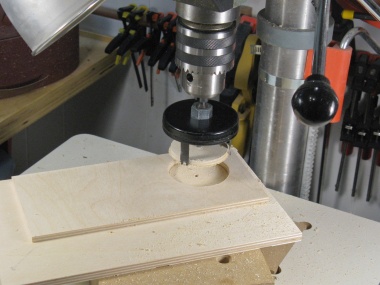
Adjustable hole saw
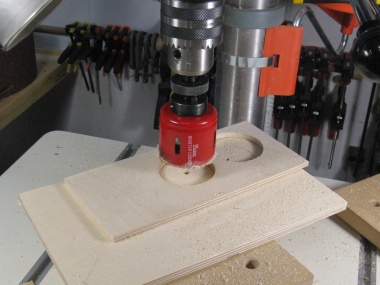
Fixed hole saw
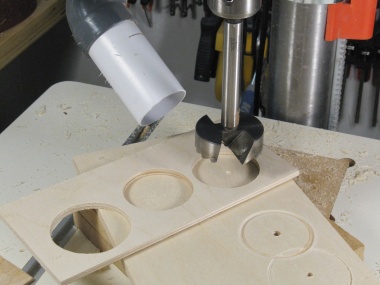
Forstner bit
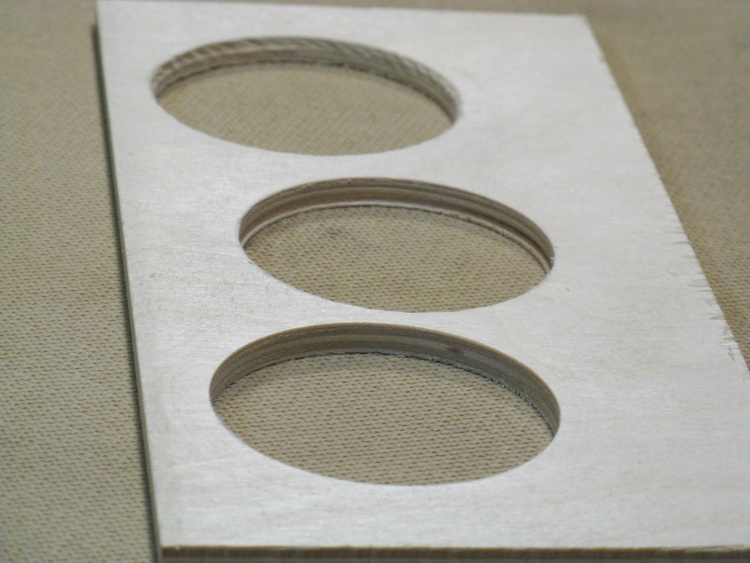
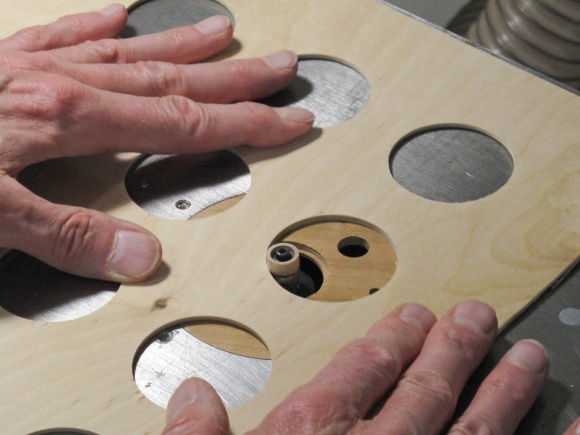
Hole qualities compared
This photo shows the three test holes with the adjustable hole saw furthest away (ugly), the fixed hole saw in the middle (not bad) and the forstner closest (nice).
So that told me that the adjustable hole saw was about as poor as I remembered - OK for a hole to put a conduit through a floor joist but not for anything you get to actually see. Plus the fixed hole saw was almost good enough.
So that told me that the adjustable hole saw was about as poor as I remembered - OK for a hole to put a conduit through a floor joist but not for anything you get to actually see. Plus the fixed hole saw was almost good enough.
Routing a nice hole
There is another outside-the-box solution which is to enlarge a hole using the router and a pattern.
I confirmed this by drilling a 1.5"-diameter test hole and then enlarged to 36 mm using an old circular pattern I had kicking around. It makes a hole with clean edges at the same size as the pattern.
So that technique would my solution for the 60 mm holes.
For the 51 mm holes, I would use a fixed 2"-diameter hole saw and then just sand the inside of the hole to clean it up.
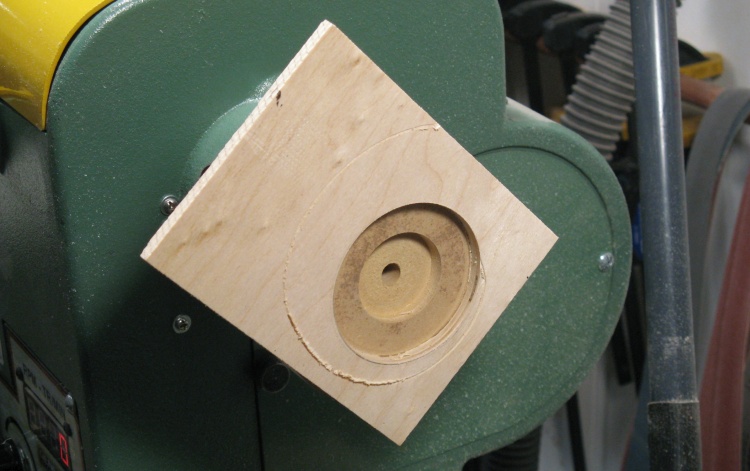
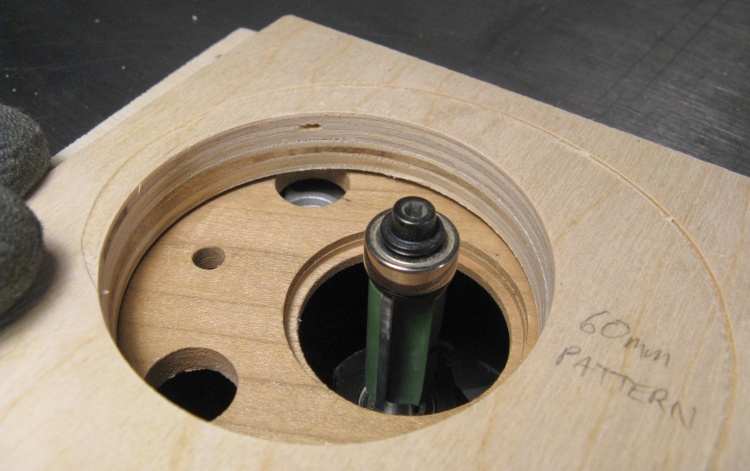
60mm diameter hole pattern
The last bit of hole business was to make a pattern for the 60 mm hole; I taped a piece of 1/4" plywood to a flat face on the lathe and cut a 60 mm hole as seen here.
Also seen here is a nasty spiral scratch made after I picked the wrong tool to start cutting the hole. Oh well, it won't affect the pattern operation...
Also seen here is a nasty spiral scratch made after I picked the wrong tool to start cutting the hole. Oh well, it won't affect the pattern operation...
Rack Construction

Starting to cut up the plywood
The pieces of plywood were too large to fit on either of my main saws so I resorted to my handy-but-not-especially-dandy cordless circular saw. However with a clamp-on guide it did a decent job of cutting the plywood sheets into the proper sizes without too much chipping of the edges. I cut them a bit oversized with the intention of trimming them later.
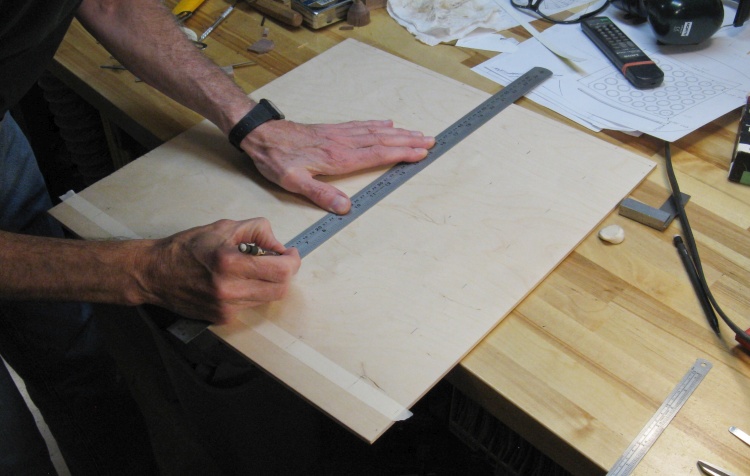
Marking hole locations on the top layer
The rack consists of three layers:
- a holey 1/4" top layer
- a holey 1/8" middle layer and
- a solid 1/8" bottom layer.
In this shot I'm marking the 36 hole locations on the top layer.
- a holey 1/4" top layer
- a holey 1/8" middle layer and
- a solid 1/8" bottom layer.
In this shot I'm marking the 36 hole locations on the top layer.
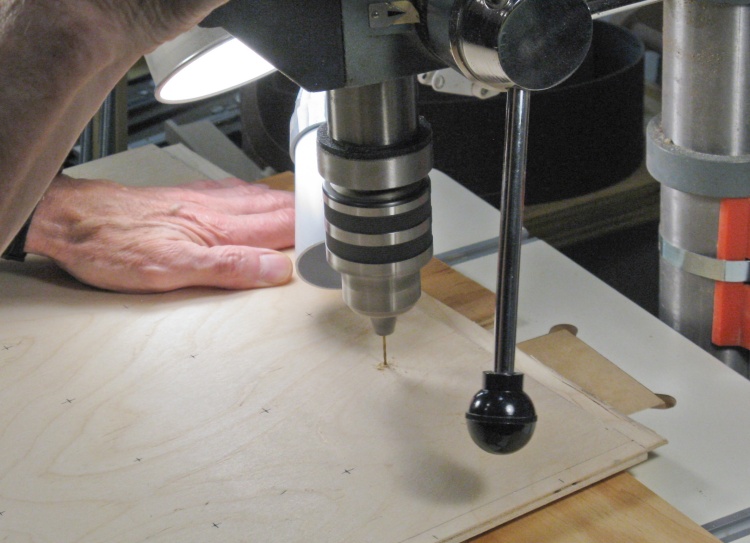
Drilling to mark holes in both layers
I wanted to make sure the holes in the top two layers were properly aligned so I drilled through both layers at the same time using a 1/16" bit to mark hole locations. I used a few precision alignment rods (AKA finishing nails) through 1/16" holes to keep the layers aligned.
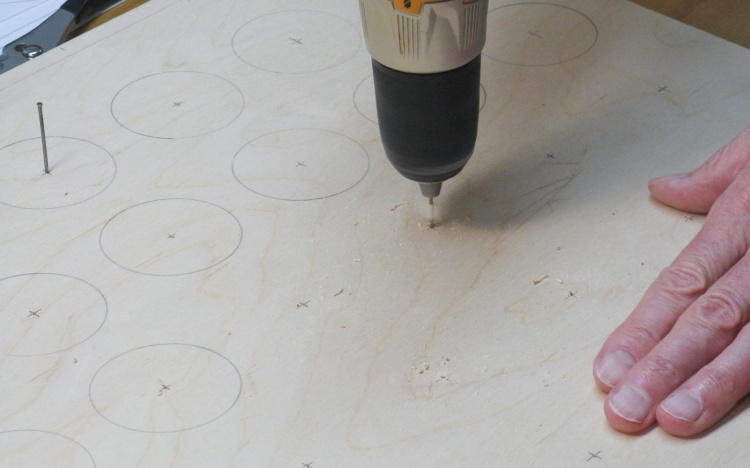
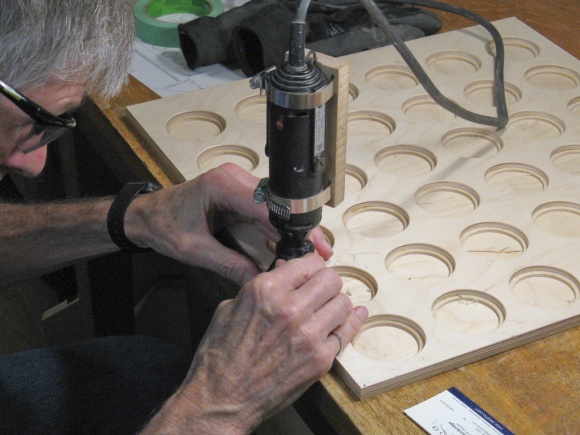
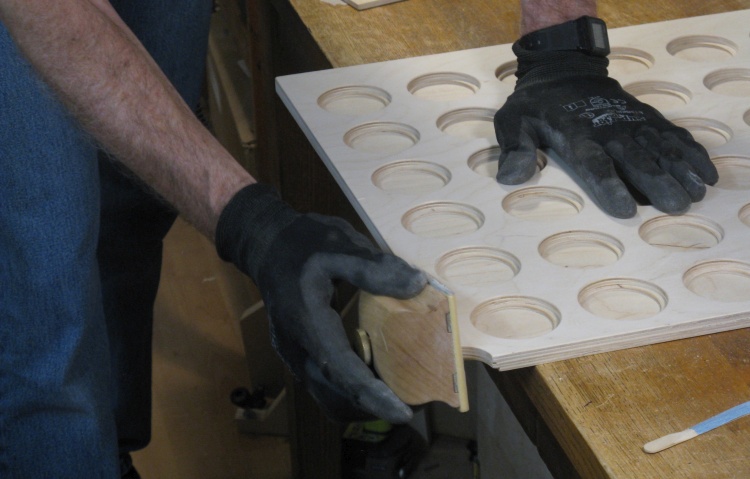
Hand-drilling the holes the drill press couldn't reach
My drill press can reach in only about 7" from the edge so the four middle holes needed to be drilled by hand (where holding a cordless drill in a hand counts as being "by hand" these days).
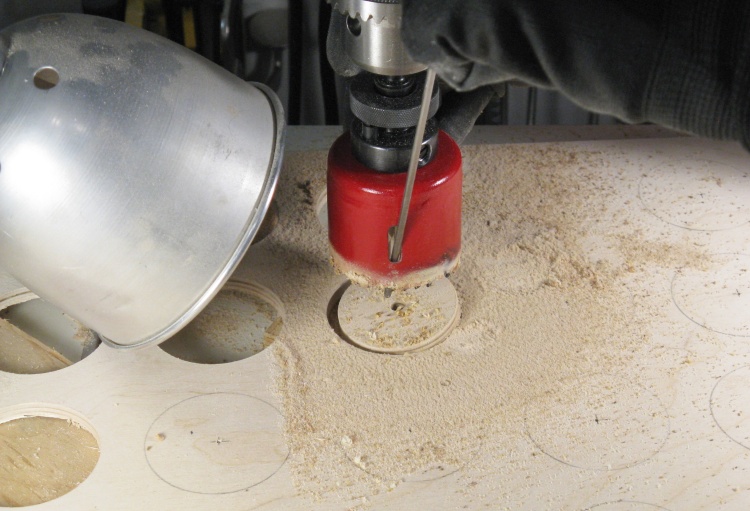
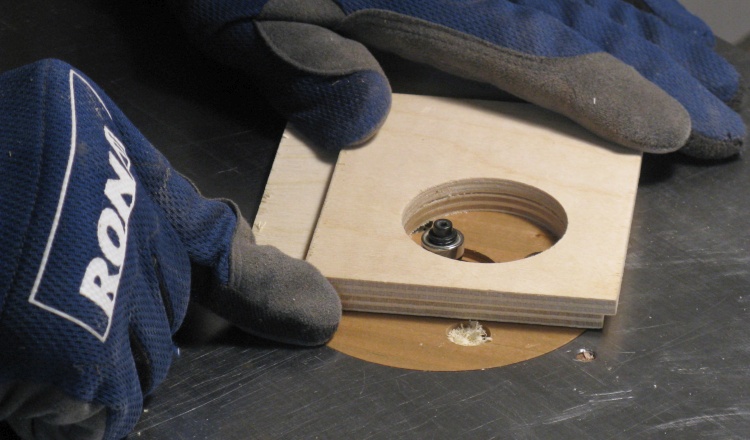
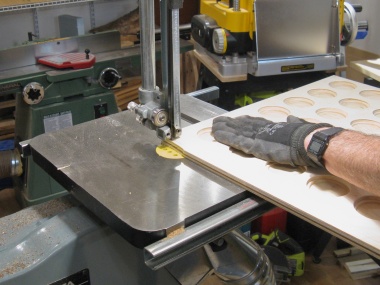
Drilling, then popping out the disc
For the 60mm holes, it wasn't critical what initial size hole was drilled so I used a 2-1/4" fixed hole saw for those.
In this shot I've just drilled a hole then pushed out the resulting disc with a metal rod in preparation for drilling the next one.
In this shot I've just drilled a hole then pushed out the resulting disc with a metal rod in preparation for drilling the next one.
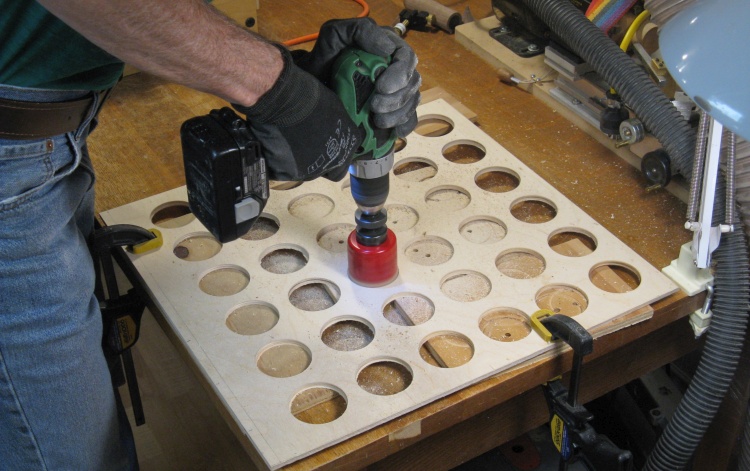
...and the hand drilling thing again
And then the "by hand" drilling thing for the center holes again.
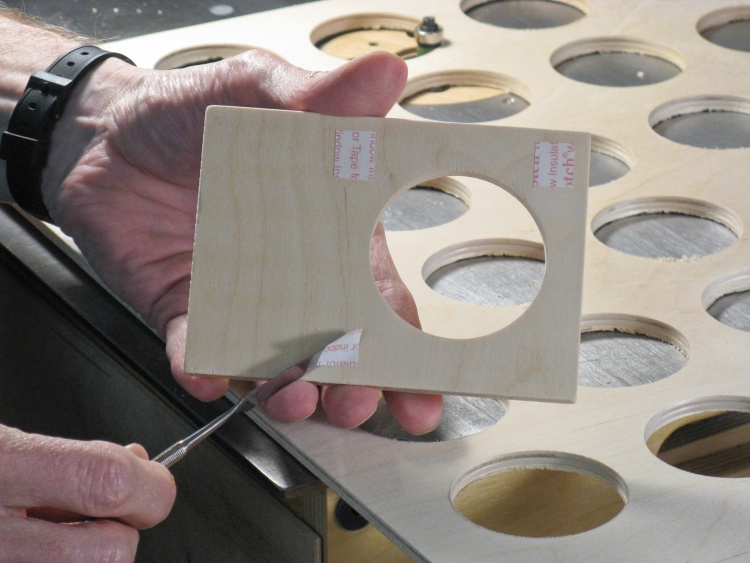
Removing tape liner on the pattern
Once the initial holes were drilled, they needed to be enlarged to 60 mm.
In this shot I'm peeling the backing off the thin double-sided tape I used to adhere the pattern to the top layer of the coffee pod rack.
In this shot I'm peeling the backing off the thin double-sided tape I used to adhere the pattern to the top layer of the coffee pod rack.
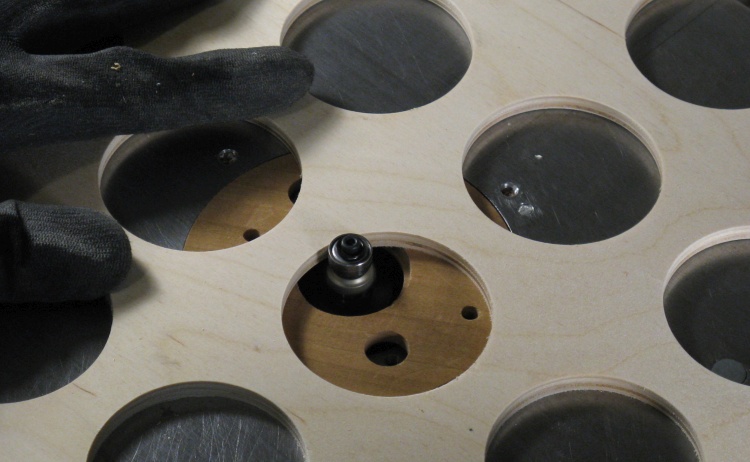
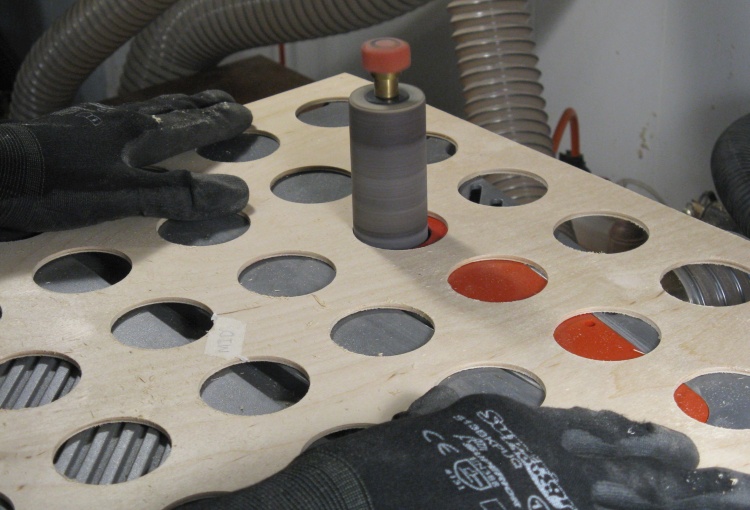
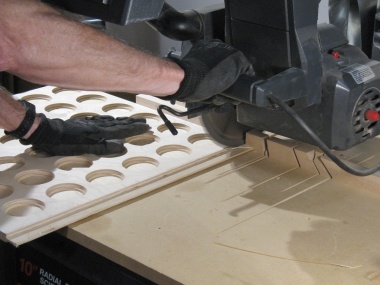
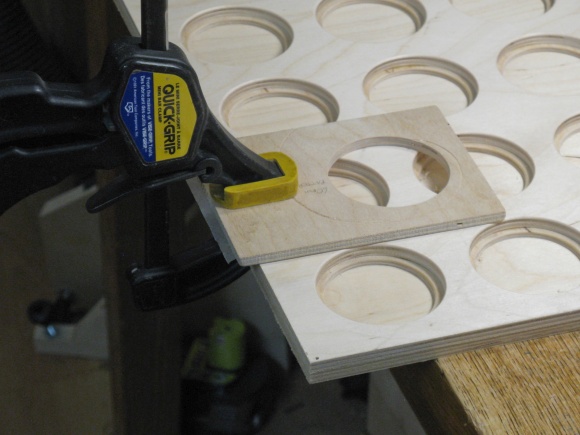
The first hole routed to size
I aligned the pattern by eye for each hole and pressed it down to hold it in place. Here it's on the first hole which has already been enlarged to the 60 mm diameter with the aid of the router flush-cutting bit.
Once a hole was enlarged, I pulled the pattern off and stuck it on over the next hole. The tape lasted five or 6 holes before the adhesion was low enough that I needed to replace it.
Once a hole was enlarged, I pulled the pattern off and stuck it on over the next hole. The tape lasted five or 6 holes before the adhesion was low enough that I needed to replace it.
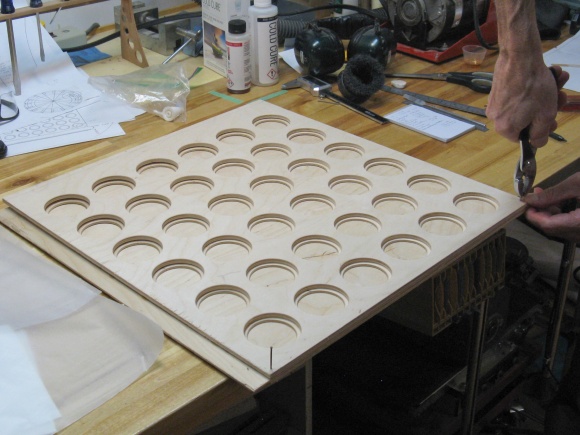
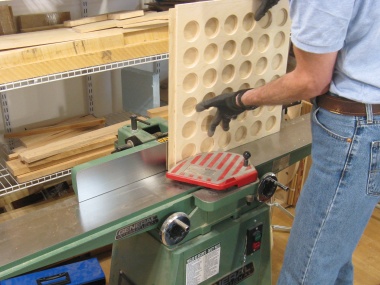
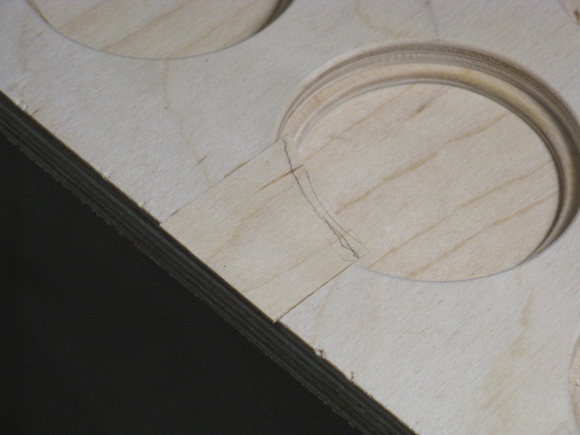
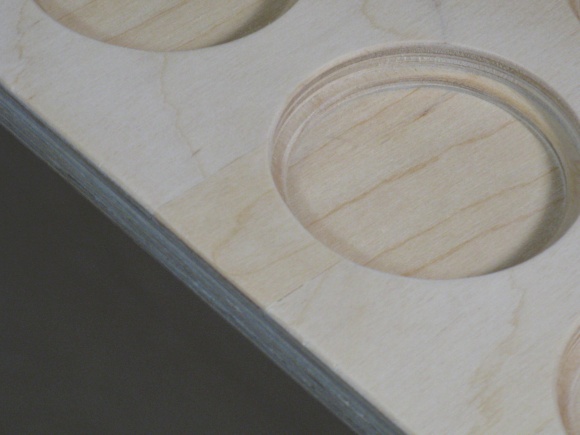
Rounding the top side
The edges of the holes are square but a small radius is preferrable so I used a 1/16" roundover bit to put a tiny radius on the top side.
Then it was the middle layer's turn
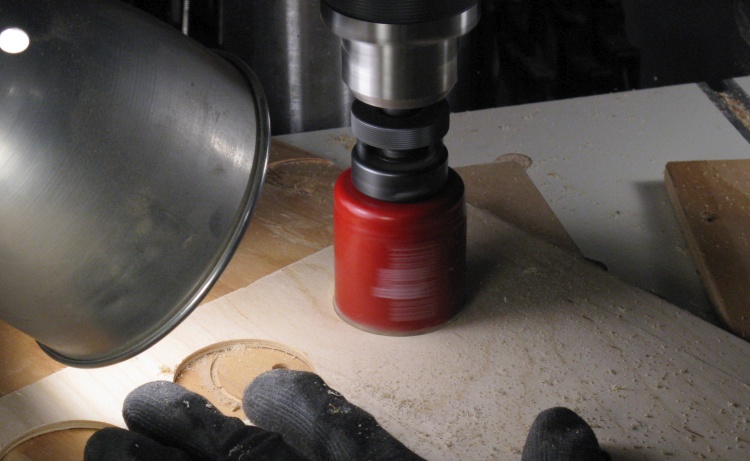
Then it was time to switch to the middle layer.
In this shot I'm drilling a 2"-diameter hole in the 1/8"-thick middle layer with a fixed-size hole saw.
In this shot I'm drilling a 2"-diameter hole in the 1/8"-thick middle layer with a fixed-size hole saw.
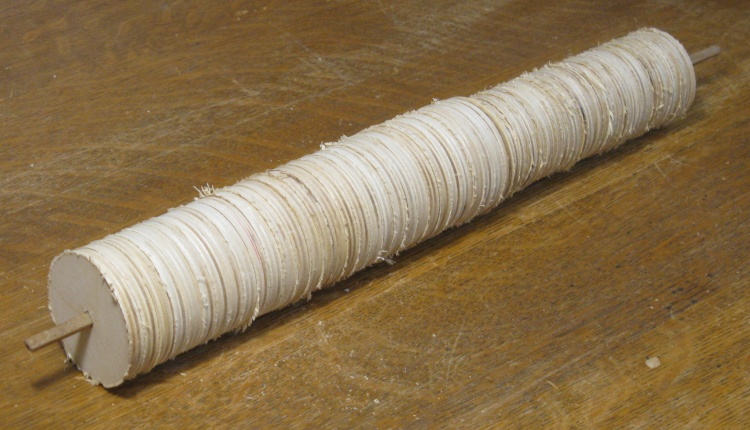
Now what could I make from a bunch of discs?
This is all the hole centers from both layers. I thought I'd just keep them around in case I could think of something to do with them. Still thinking...
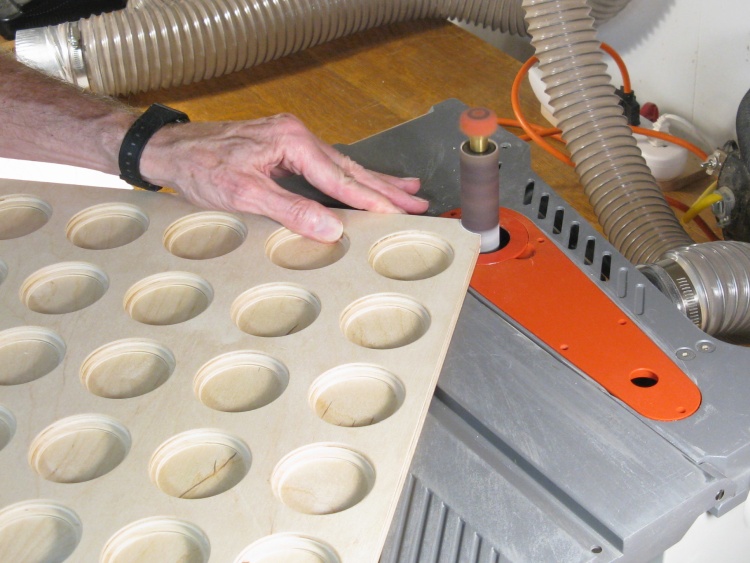
Sanding the middle-layer holes
The 2" holes were almost the right size and just needed some cleanup of the edges. A couple orbits around the spindle sander drum on each hole accomplished that task.
I wanted to do the rounding on the top side of this middle layer like I had done to the top but the 1/8" plywood turned out to be too thin. The roundover bit includes a ball bearing that supports the wood to keep it the proper distance from the center of the bit for a consistent cut, but it sits too high to touch the thin plywood.
My solution was to swap in a smaller ball bearing and then make a wooden ring that could be pressed onto the bearing and extend down further. Of course, making a small ring with precise inside and outside dimensions isn't a slam-dunk and in fact I had a couple rim shots before I got a "swish"; then the edge rounding was pretty straightforward.
My solution was to swap in a smaller ball bearing and then make a wooden ring that could be pressed onto the bearing and extend down further. Of course, making a small ring with precise inside and outside dimensions isn't a slam-dunk and in fact I had a couple rim shots before I got a "swish"; then the edge rounding was pretty straightforward.

Third time lucky
Rounding the middle layer top edges
Assembly & Finishing
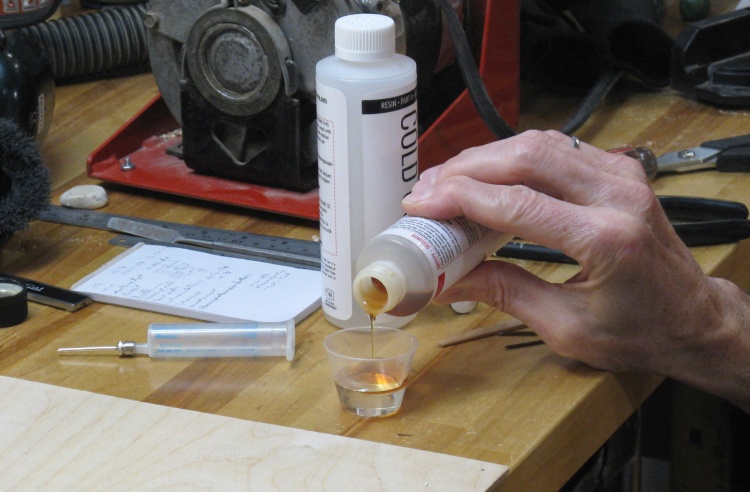
Carefully pouring epoxy hardener
Alrighty then - Assembly time.
The three layers were complete so they were ready to get laminated together (the bottom layer didn't need any work - it's just a plain sheet of plywood).
When making plywood (or in this case perhaps plyplywood?) I use epoxy since it has no moisture that could warp the wood. In this shot I'm mixing up 15 ml of slow-setting epoxy.
After mixing, 10 ml of the epoxy was decanted into the syringe seen here. The extra 5 ml was just in case I needed more but the 10 ml turned out to be sufficient.

Applying epoxy
In this shot I'm using the fine tip of the syringe to apply small beads of epoxy in the web between the holes.
The syringe tip is actually an old inflator needle that has been modified to have an opening of about 0.02" diameter. I was then able to just friction-fit it to the plastic syringe tip.
Epoxy was applied to the bottom side of the middle layer (as in this picture) and then to the bottom of the top layer.
The layers were stacked and aligned with the finishing nails through guide holes in the corners. In the left photo I'm pushing in the second nail. The right photo shows me adding a "ceiling clamp" where a board is wedged against the ceiling to provide clamping pressure in the middle of the bench. More conventional clamps provide pressure closer to the edge of the bench, all through thick planks that distribute the clamping force.
Aligning layers

Applying clamps

Clamped and drying
The layers are fully clamped in this photo and the clamps were left on for about a day to make sure the epoxy was fully set.
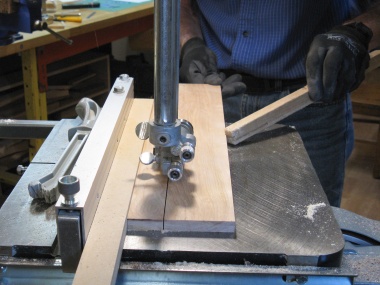
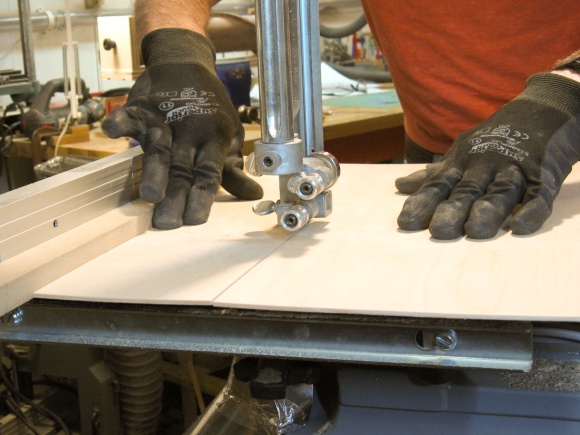
Once the glue was set the rack was trimmed to the final size using the bandsaw (to do the cutting with the top grain), the radial arm saw (for cutting across the top grain) and then the jointer to clean up the edges.
Trimming with-grain edges
trimming cross-grain edges
Smoothing the sides
Adding a finger notch in the corner
Finger notches were added in the two front corners to make it easier to remove the rack from the drawer that it (hopefully) fits closely inside.
Somewhere during the final trimming, some chips came out of the top layer at one edge. I decided to replace the chipped sections with a clean piece of the top ply. This shows some work on the larger of the two patches where first I routed out the old chipped section and then clamped in a replacement piece.
Routing out some splintered wood
Clamped to hold a glued-in patch
The left photo shows the raw and oversized patch in place, and the right photo shows it after it was sanded flush on all edges. It's surprisingly difficult to colour-match wood even when it is the same type and I fear that I didn't do too well with this patch. At least it looks better than the chipped wood.
Glued-in patch
...and after a bit of trimming
Some final sanding
Then there was just a bit of finish sanding to do on the edges and faces.
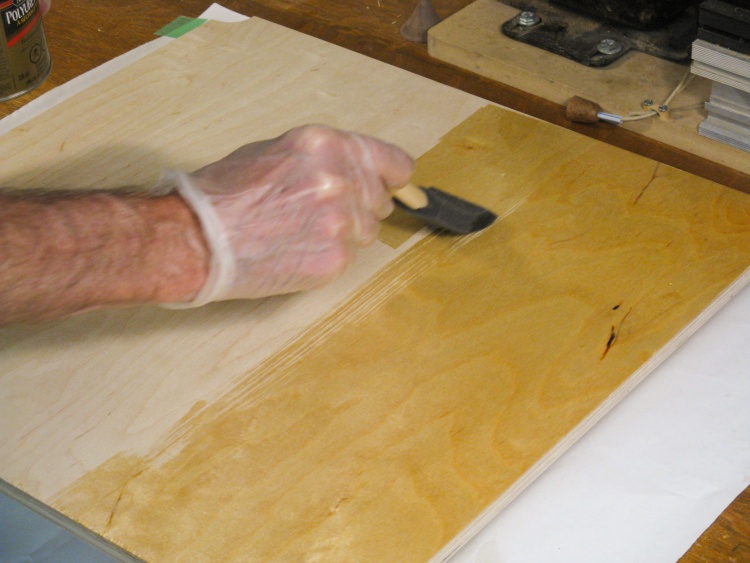
A coat of varnish going on
This shot shows the first coat of varnish going on with a foam brush. I used a bristle brush for the inside edges of the holes, which I then smoothed with the foam brush.
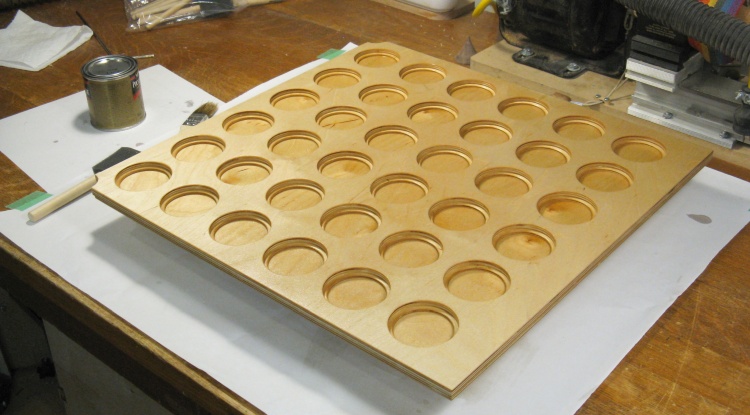
First coat of varnish done
Here the first coat of varnish is on and starting to dry.
I used my default approach of three coats of Miniwax Fast-Dry Polyurethane in a satin finish. After a coat dries, the surfaces are roughened with #0000 steel wool and/or 220 grit sandpaper and then cleaned thoroughly before adding the next coat.
I used my default approach of three coats of Miniwax Fast-Dry Polyurethane in a satin finish. After a coat dries, the surfaces are roughened with #0000 steel wool and/or 220 grit sandpaper and then cleaned thoroughly before adding the next coat.
Done
Spice Rack
Details
The function of the spice rack pretty much dictates the design. Like most, this one is your basic set of tilted shelves that make it easy to pull out the bottles with a finger on the top. Like the coffee pod rack, the main material is baltic birch plywood, although it uses solid birch to form the bottom edges of the shelves.
The bottles actually stick up past the top edge of the drawer but the opening is taller and we measured to confirm that they had adequate headroom.
The bottles actually stick up past the top edge of the drawer but the opening is taller and we measured to confirm that they had adequate headroom.
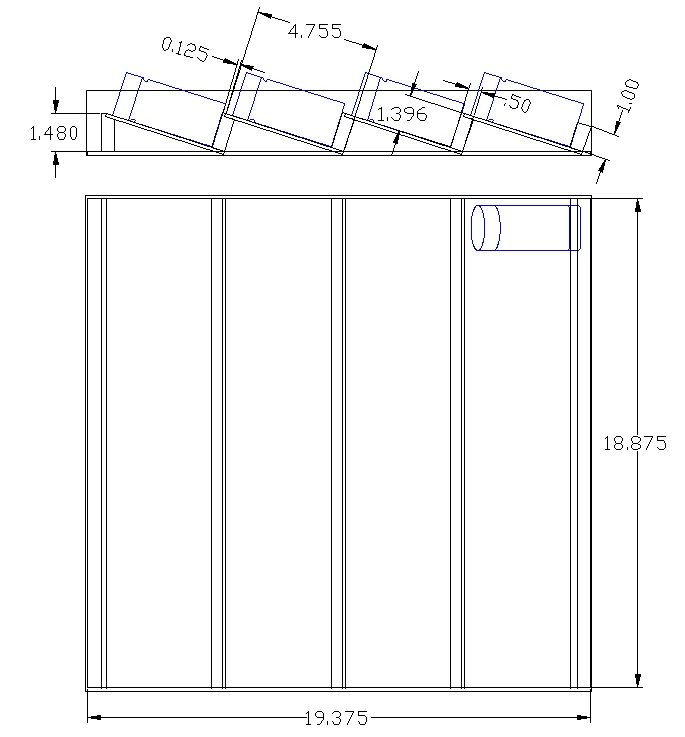
The spice rack plan
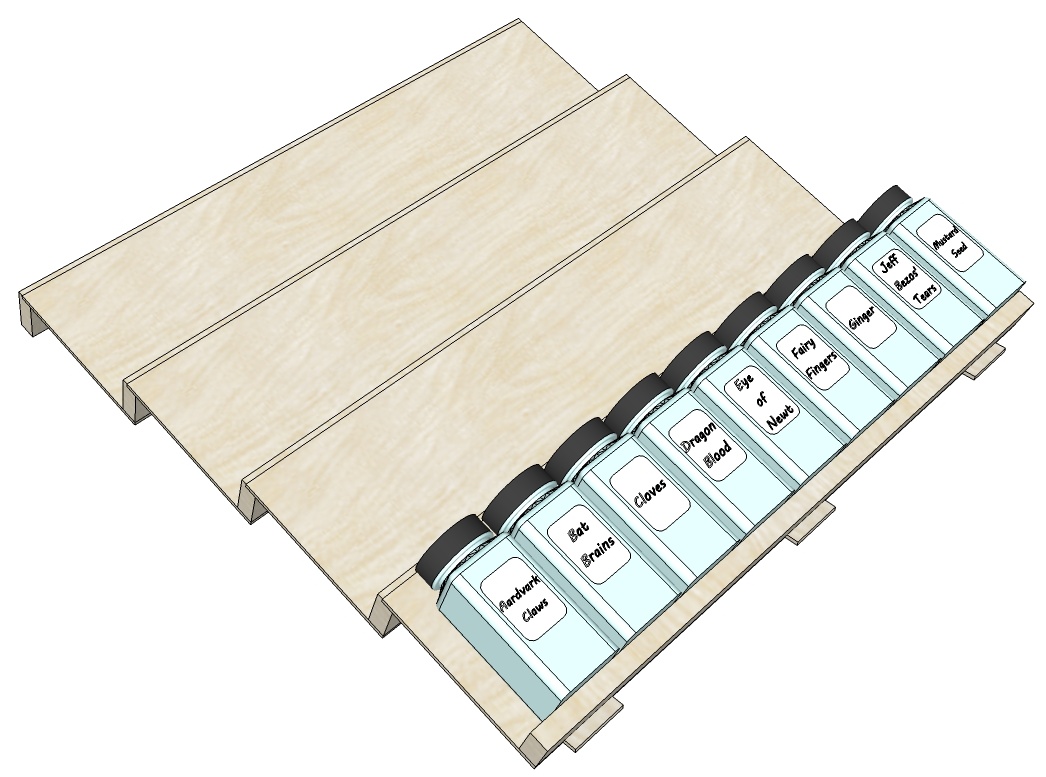
...and an oblique view courtesy of the 3D model
Prepping Pieces
The following photos show the standard operations to get straight, flat and correctly-sized pieces out of a birch plank. This produced the five pieces (in three varieties) used to support the plywood.
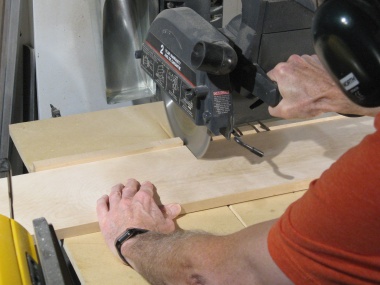
Chopping birch to length
Cutting into two pieces for easier handling
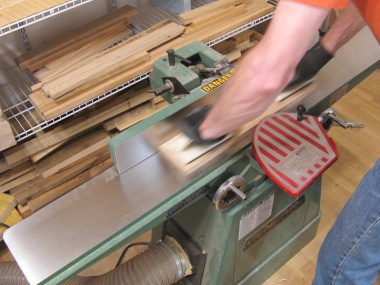
Jointing the pieces flat
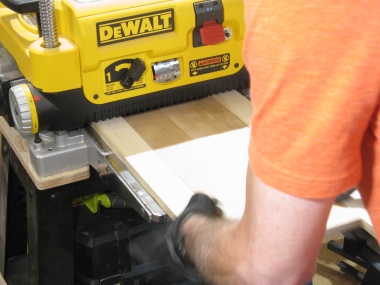
Planing to 1/2" thickness
Cutting into pieces
Routing a notch
Operations on the 1/8" plywood were a subset of above since it fortunately starts out flat.

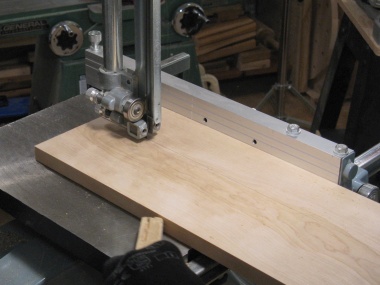
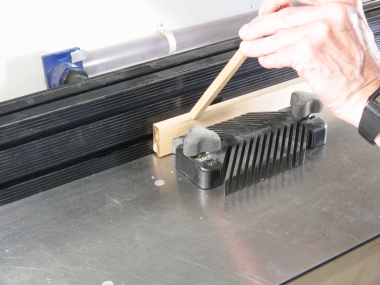
Smoothing the edge
Cutting into pieces
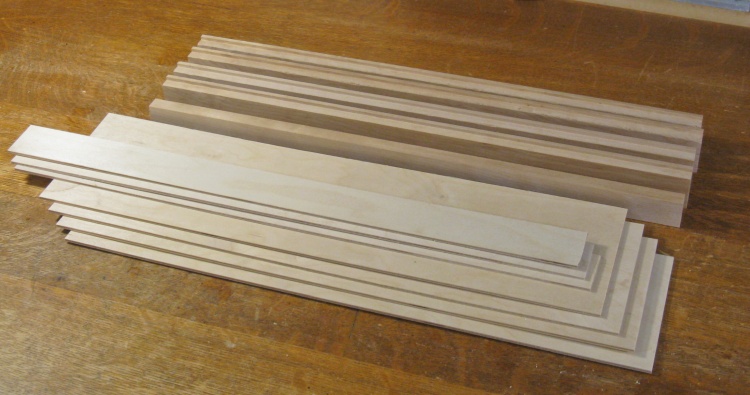
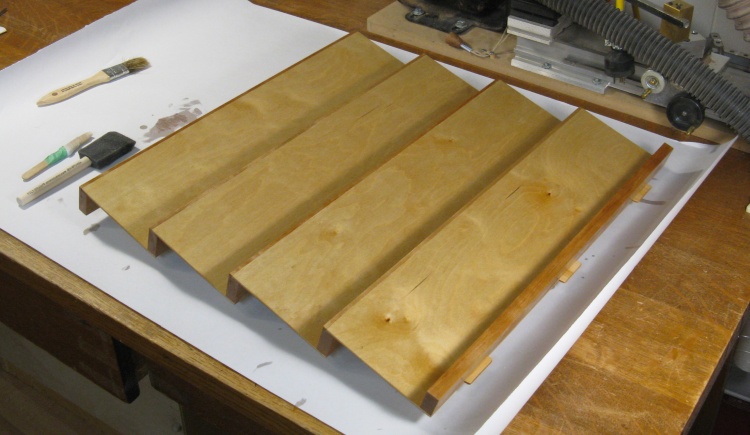
Spice rack parts ready to go
This shot shows all the parts needed for the rack. It includes the four shelves, five shelf ends and three long "feet" that will stiffen the structure.
Assembly
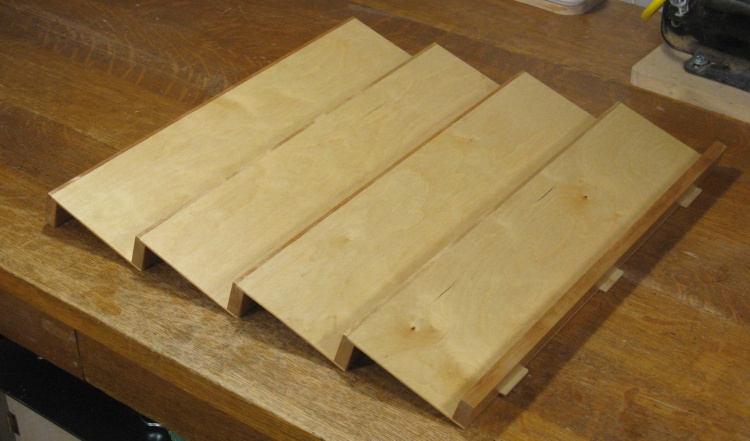
The assembly involved pure unadulterated gluing. I started by gluing the shelf into the notch of its associated step piece, then glued two of those assemblies together and finally all four.
Gluing the first shelf
..then two shelves together
...and finally the whole enchilada

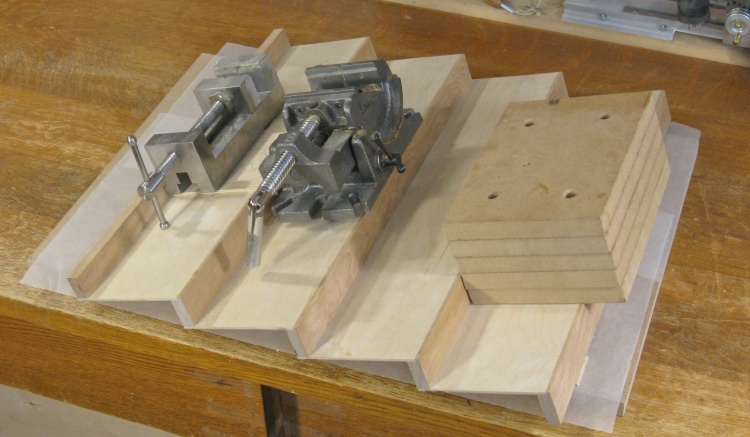
Notching the bottom edges for the feet
The step pieces were made a bit longer than the shelves so precise alignment wouldn't be required. After the gluing process, I sanded the ends even.
The next step shown here was to notch the bottoms to make a recess for the three feet that would tie the steps together. The notches were routed 1-1/2" wide using a couple passes of a 3/4" router bit.
The next step shown here was to notch the bottoms to make a recess for the three feet that would tie the steps together. The notches were routed 1-1/2" wide using a couple passes of a 3/4" router bit.
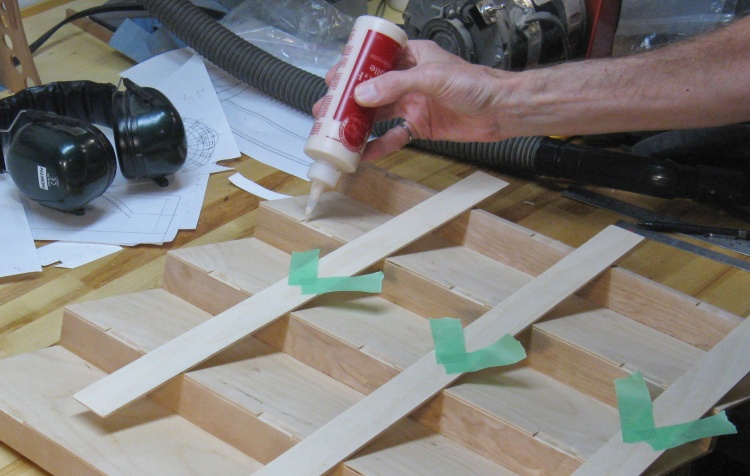
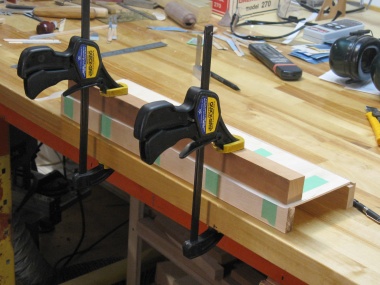
Gluing the feet in place
After tweaking foot widths to fit in nicely, they were glued in as shown here. The tape was just used to hold the feet in place as I flipped the structure back right-side-up for drying.
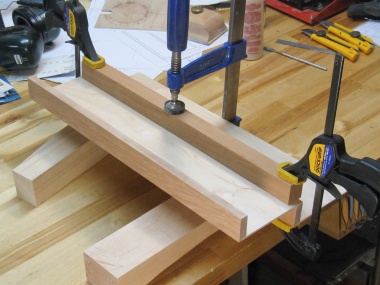
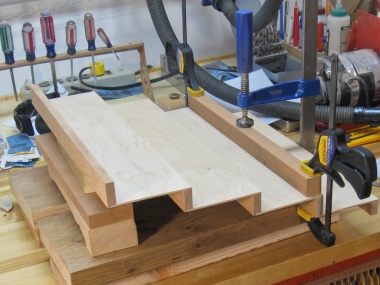
"Gravity clamps" holding until foot glue is dry
The rack was set on a flat MDF board to make sure the surface was even. Since it would have been tricky to try to use conventional clamps, the shelves were held down with various heavy items while the glue dried.
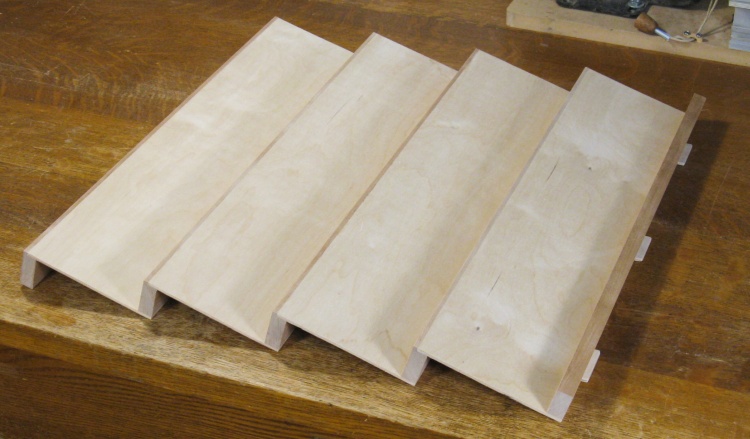
Woodworking done
And that was it for the woodworking. A last bit of sanding and it would be ready for the varnish.
First coat of varnish
As with the coffee pod rack, the spice rack received three coats of polyurethane varnish. This photo shows the first coat, still wet.

Inter-coat varnish sanding
The feet on the bottom created some acute angles on the underside that were a bit tricky to sand and varnish. I ended up making a few specialized sanding and varnishing tools to get into the corners.
Woodworking done
Completed.
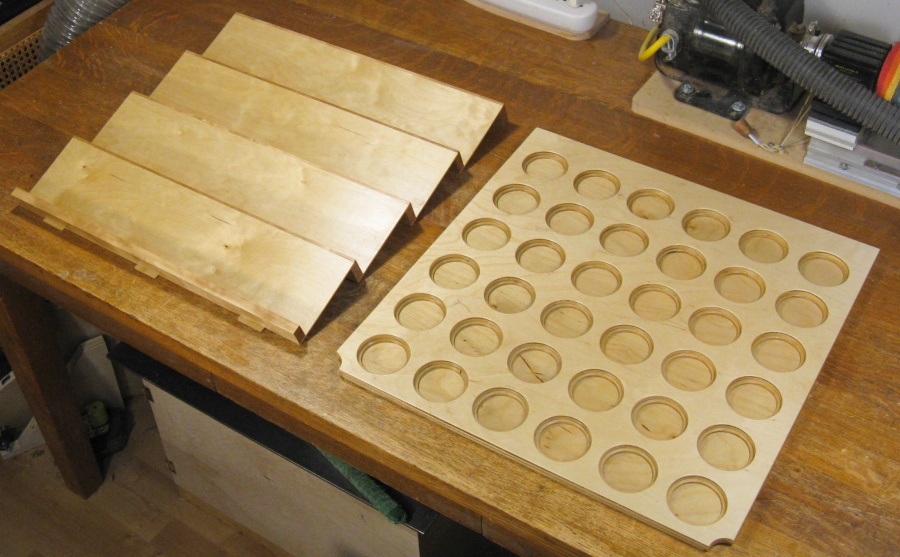
The pair of racks


