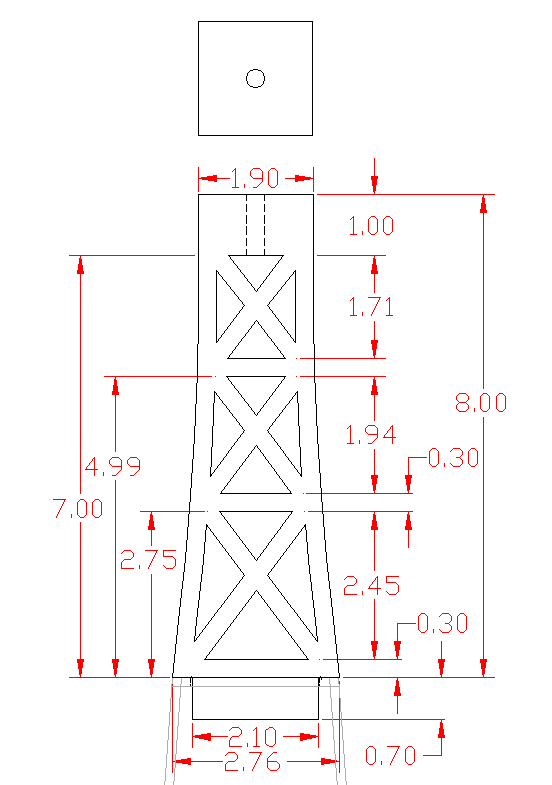
This was pretty much a blank-sheet-of-paper type of design where the riser could look like almost anything as long as it held the nut feeder at the correct height. I considered a simple turning to produce some sort of round-bodied shape but the square cross-section of the black metal obelisk called out for something a bit more compatible. I ended up with a girder-like construction where the bottom taper matches the obelisk but the riser sides are curved so the top remains large enough to solidly support the feeder. The final result gives off a bit of an Eiffel Tower impression. Since I didn't actually want to construct it per se, I thought to make it from a solid piece of wood.
Since there would be lots of short "girders", I didn't need a particularly strong wood and chose an old piece of Spruce. My thought was that it would be soft enough to make it practical to hollow out the inside without too much struggle. What it mostly did was gave me a brittle wood that cracked and broke several times, necessitating a high density of glued repairs. Fortunately a thick coating of paint hid my many sins.
Since there would be lots of short "girders", I didn't need a particularly strong wood and chose an old piece of Spruce. My thought was that it would be soft enough to make it practical to hollow out the inside without too much struggle. What it mostly did was gave me a brittle wood that cracked and broke several times, necessitating a high density of glued repairs. Fortunately a thick coating of paint hid my many sins.
You can almost smell the croissants...
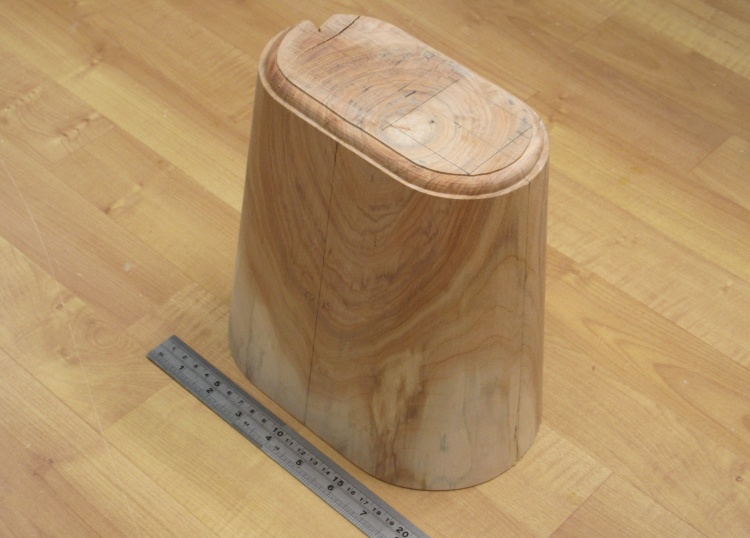
A wastebasket-shaped piece of Spruce
When last this oddly-shaped Spruce piece appeared in these pages, it was acting as a form for a Cherry wastebasket. It hung around the shop for the last couple of years, losing some height as I used a piece of wood from the top.
I was quite pleased with how the wastebasket turned out but had no plans to make another one so I decided to use half of this form for the riser.
I was quite pleased with how the wastebasket turned out but had no plans to make another one so I decided to use half of this form for the riser.
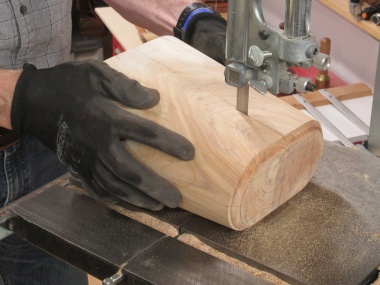
There were no right angles on the current shape so the bandsaw was used to remedy that scandalous lack. Using half the wood gave a piece just large enough to be able to cut the riser out of the middle but I initially cut it with parallel sides in hopes of making the fabrication easier. Ha!
Cutting
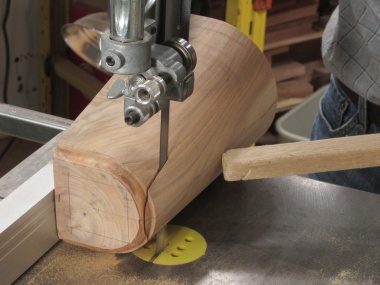
Cutting
...and more cutting
Tracing on the girders
The perhaps-slightly-too-optimistic plan was to cut openings through the full thickness of the rectangular block before cutting it into the final tapered shape.
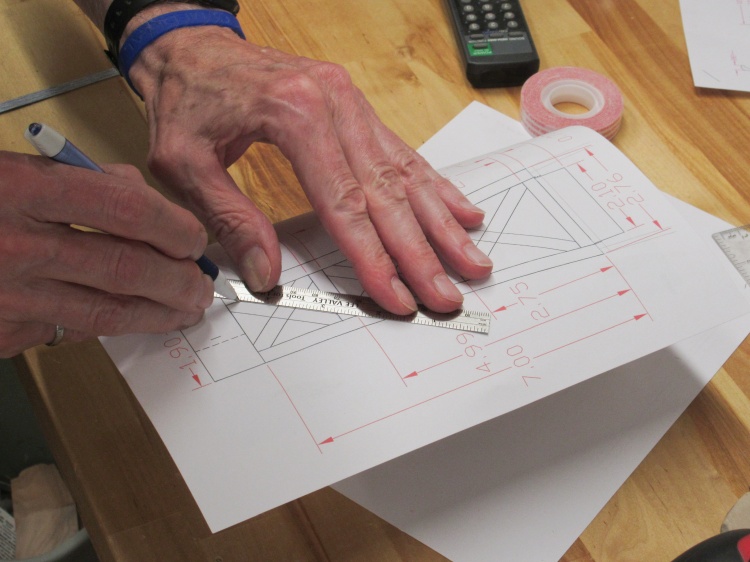
Step one was to mark the outline on each of the four sides, done with my usual TFSCWCP technique (Tracing Full Scale Plan With Carbon Paper). OK, that may need a bit of work if I want it to be a pronounceable acronym. Maybe TOPUC - Tracing Out Plan Using Carbon?
Step one was to mark the outline on each of the four sides, done with my usual TFSCWCP technique (Tracing Full Scale Plan With Carbon Paper). OK, that may need a bit of work if I want it to be a pronounceable acronym. Maybe TOPUC - Tracing Out Plan Using Carbon?
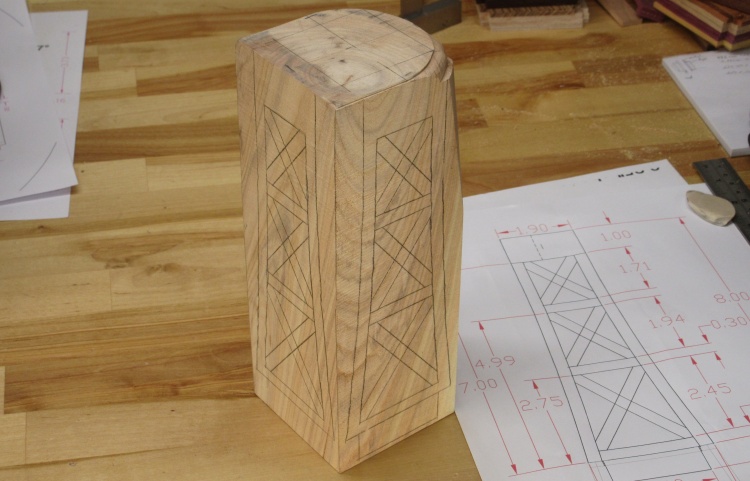
Marked and ready for shaping
Ready for shaping.

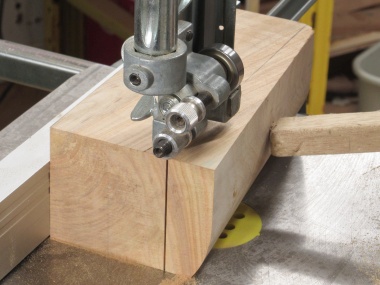
Drilling holes in each opening
Holes were drilled all the way through in each of the between-girder openings to provide starting points for cutting out the triangular shapes.
However it became increasingly clear that doing the cutting-out was going to be tough since the drill press stroke wasn't even enough long to drill the hole all the way through in a single go (had to use a 2-step procedure).
I thought about how to cut out the triangles on this thickness of wood but came up with no good way to do it.
Cutting to final tapered shape to reduce thickness
So plan B was to cut the riser to the proper tapered shape, a simple process on the band saw.
I didn't hold out a lot of hope for this plan either since the wide part of the riser was almost as thick as the original block but I forged ahead anyway.
I didn't hold out a lot of hope for this plan either since the wide part of the riser was almost as thick as the original block but I forged ahead anyway.

I unfortunately cut off all my nice patterns.
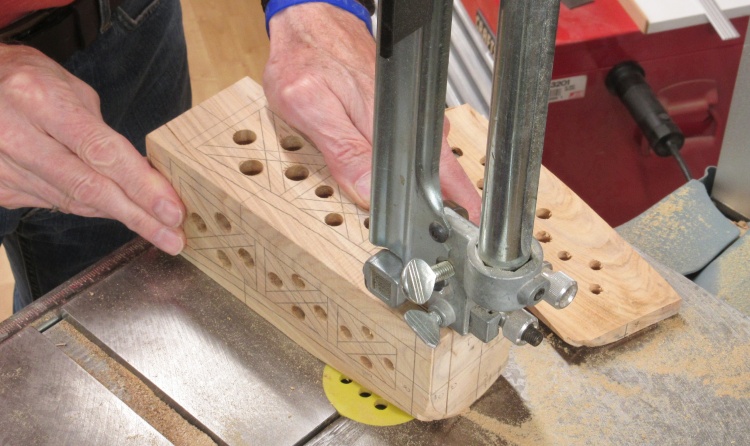
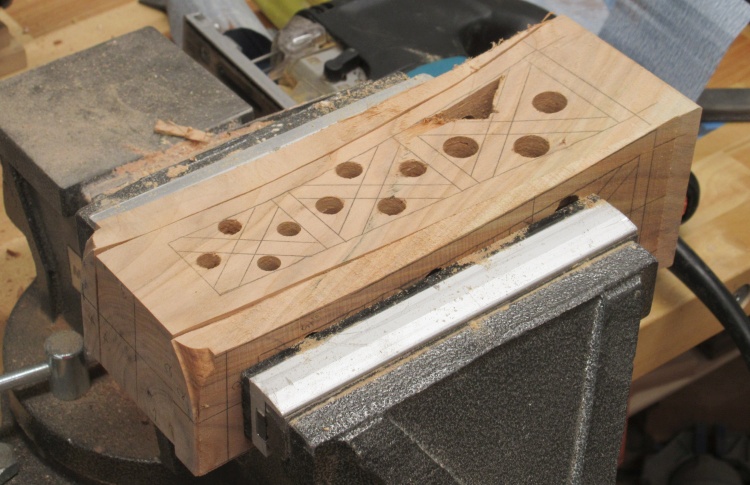
This is the properly-shaped riser with all the holes drilled through.
And of course I was going to have invoke the TOPUC protocol and mark all the girders on again.
And of course I was going to have invoke the TOPUC protocol and mark all the girders on again.
~Aside~
I was in the garage and noticed a flashlight we seldom use (an old rubber-coated incandescent D-cell job). I tried it and was unsurprised to find that the batteries were dead. The reason it was unused was that we had a couple newer flashlights in the garage - both LED models. Once you have a smaller/lighter/brighter LED flashlight in hand, the D-cell jobs become superfluous unless there's an intruder to subdue.
Back in the day, a D-cell flashlight was the thing to have. The standard flashlight held two D cells but even larger models with four cells promised longer life and ideally a brighter beam (not to mention being a longer club). We had a couple of the top-of-the-line aluminum Maglights, a 2-cell and a 4-cell but now they sit on the obsolete/unused flashlight shelf (yes, the danger of having a basement), replaced mostly with single-AA-cell flashlights that are easily bright enough for most uses. Of course most of the improvement is down to LEDs (along with the associated voltage booster circuits) replacing the incandescent bulbs. I imagine the big D-cell guys would have superior battery life compared to tiny flashlights but I'm not sure I've ever needed a flashlight for more than 10 or 15 minutes and usually a couple minutes covers it. Yay mini-flashlights.
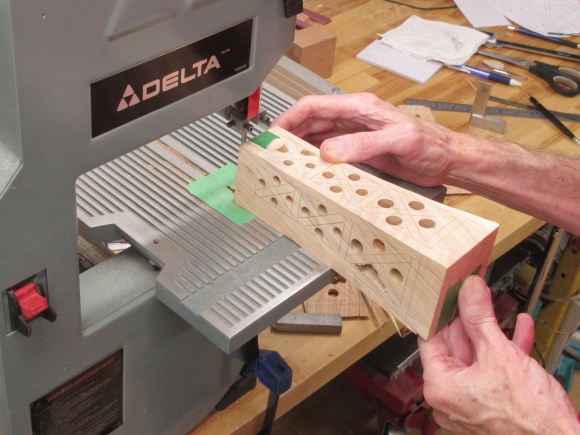
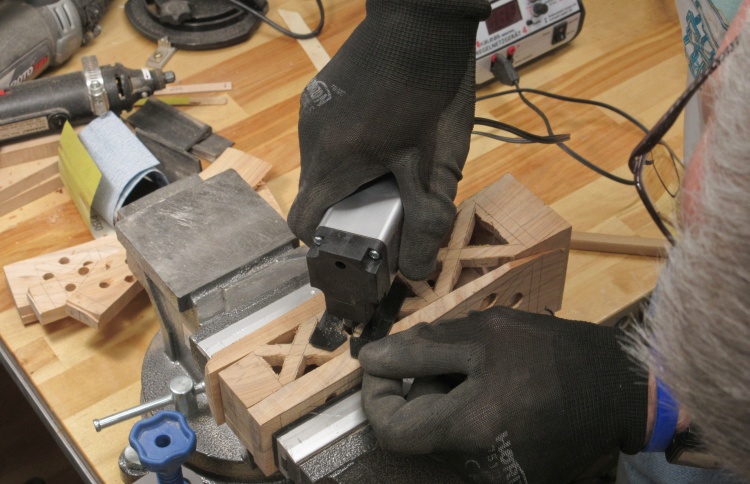
First attempt at cutting openings
The riser went into the vise with cut-offs added to maintain square clamping surfaces.
I used a jig saw to cut out one of the triangles but the blade wasn't even long enough to reach through the wood so I ended up with a pretty crude hole (and a nasty chip).
I used a jig saw to cut out one of the triangles but the blade wasn't even long enough to reach through the wood so I ended up with a pretty crude hole (and a nasty chip).
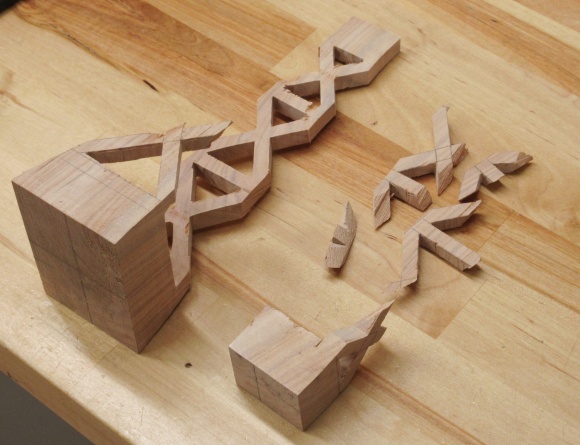
So then it was on to what I feared I'd need to do which was chop it up to get thinner pieces to work with. I cut two opposing sides off, leaving a 2-sided core piece that I hollowed out. I used the small bandsaw for the cuts since the saw kerf is only 0.025".
The side coming off
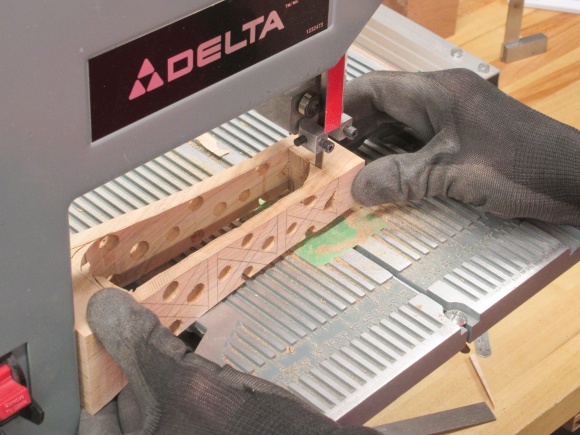
Hollowing the middle section
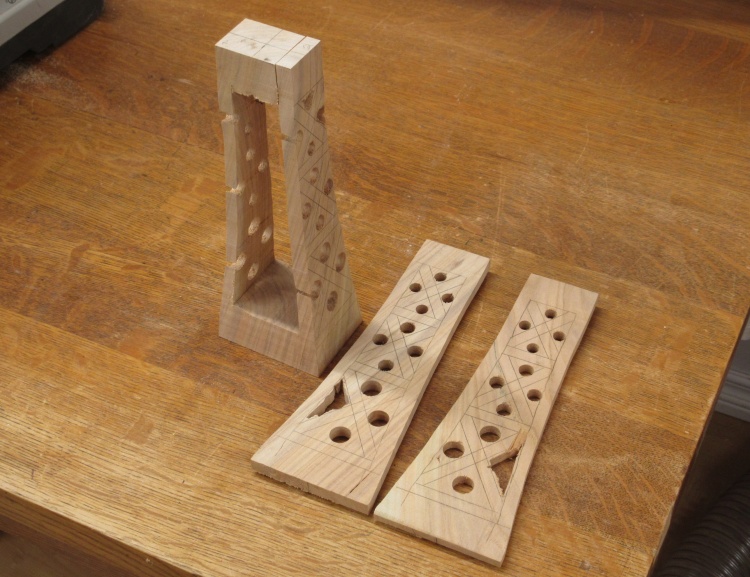
The easier-to-work-with pieces
OK - those I've gotta be able to shape.
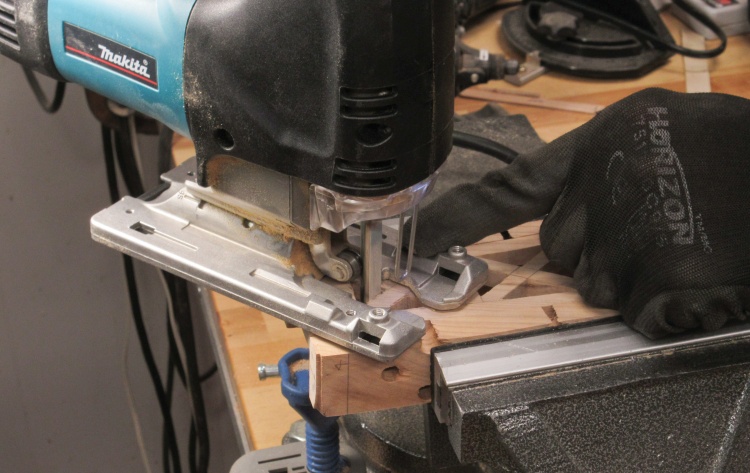
Mini-jigsaw to cut out triangular openings
And sure enough - it was possible. I used a mini jig saw to cut out the bulk of the triangular openings as shown here. The Spruce was pretty soft so this was quite manageable.
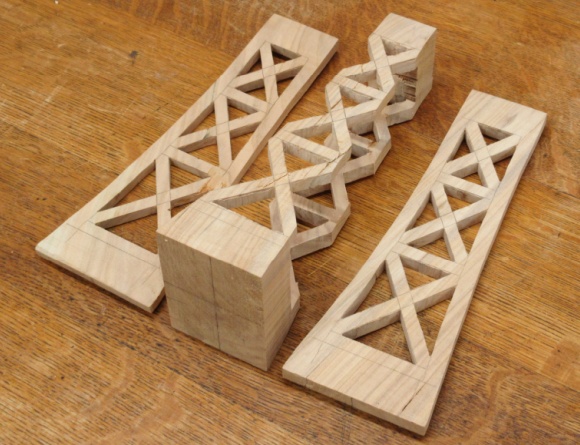
Full-sized jigsaw with sanding "blade"
And then to smooth the sides of the openings I used a full-sized jig saw with shop-made sanding attachments. That was followed by needle files to smooth all the way into the corners.
Unfortunately the sanding attachment on the jig saw was long enough to reach all the way through the 2-sided piece. A bit of misalignment when I was almost done caused a good bash resulting in the far side shattering into several pieces. Fortunately all the breaks were clean and I was able to glue the side back together. A few cracks in some of the other sides (either pre-existing or caused due to the work) were glued in a similar manner. The Spruce was very dry and brittle but I had hopes that gluing the four sides back together would make a decently strong composite riser.
Consequence of a hit with sander "blade"
Glued back together and ready for assembly
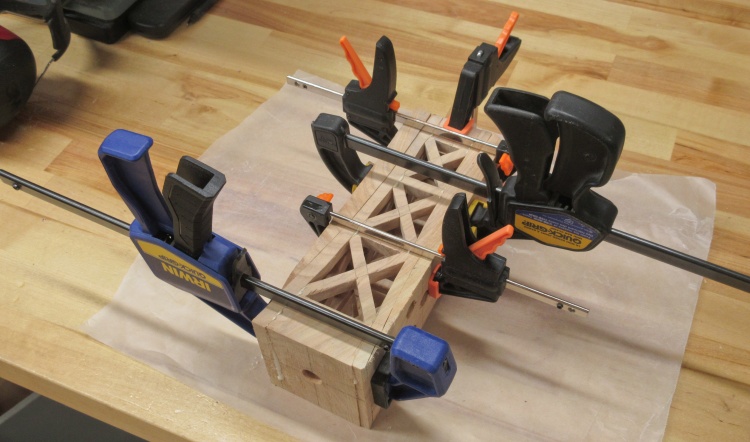
Gluing the four sides back together
While still in four pieces I added a press-in threaded nut to the underside of the top section to engage a 1/4-20 bolt that extends from the bottom of the feeder.
Once that was in place I glued the two sides back on to the center piece, again with the cut-off pieces inserted to make a parallel-sided stack that was easier to clamp.
Once that was in place I glued the two sides back on to the center piece, again with the cut-off pieces inserted to make a parallel-sided stack that was easier to clamp.
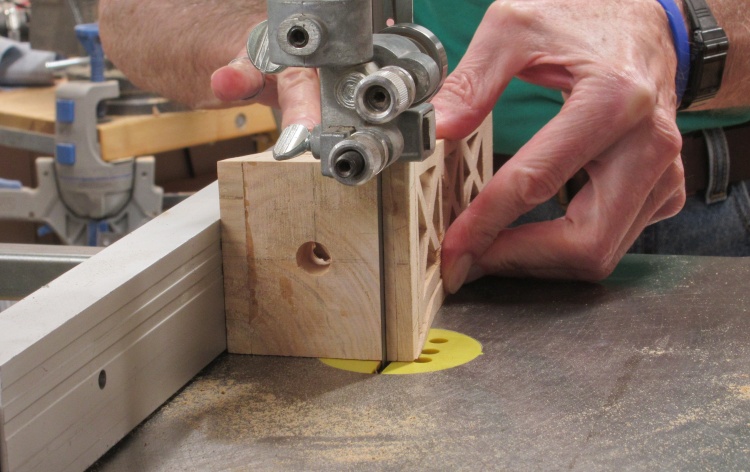
Shaping the bottom
Once the glue was dry, the bottom was trimmed to a smaller square that would fit nicely into the top of the metal obelisk.
Also visible in this shot is a center hole that was added to help with drainage.
Also visible in this shot is a center hole that was added to help with drainage.
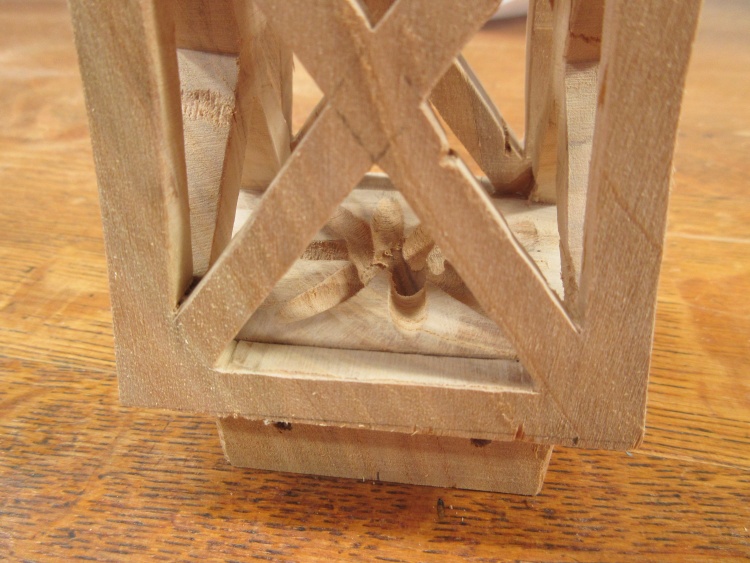
Inside bottom shaped to drain water
I also did a bit of rather rough shaping of the bottom to help with water drainage.
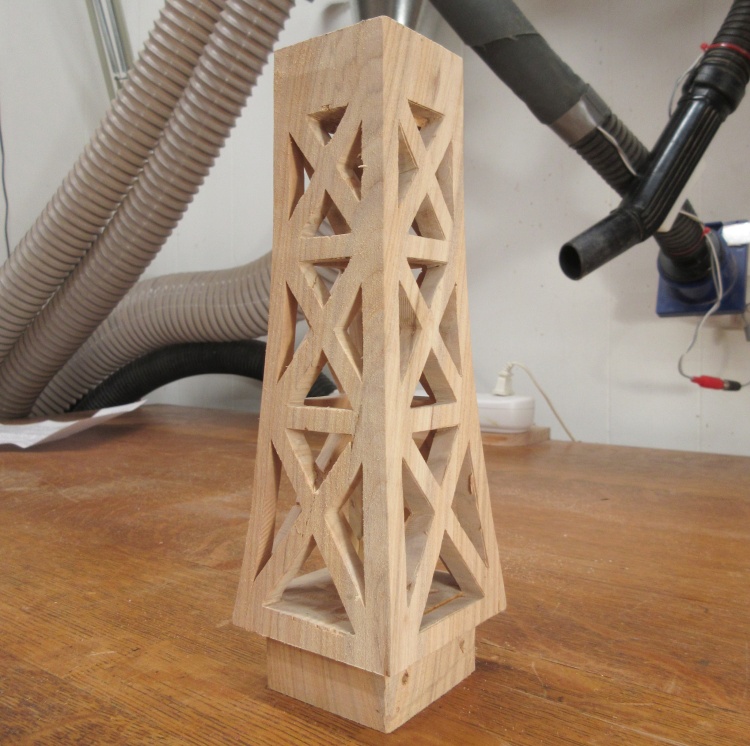
Woodworking done
The last step was to do a test fit of the riser into the obelisk and drill holes for the screws that will be used to secure it.
That completed the woodworking.
That completed the woodworking.
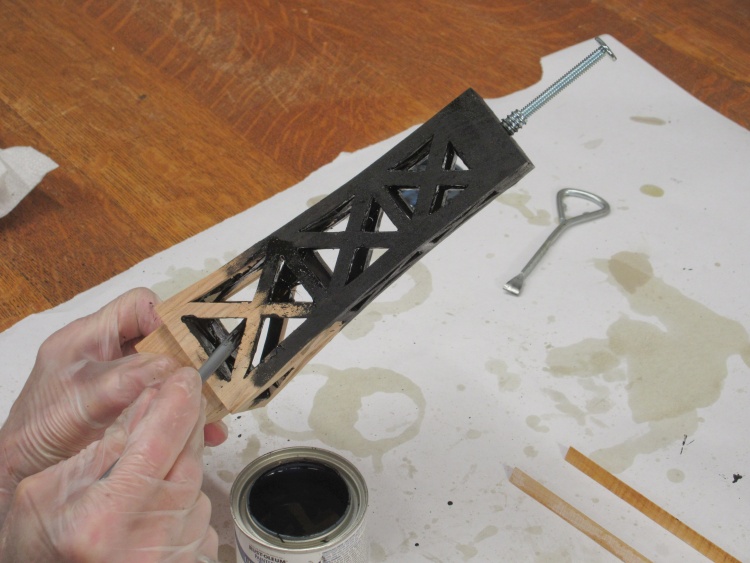
The first coat of paint (painfully) going on
That brings us to the painting stage.
I was going to have to cover all the inside and outside surfaces so I chose a small-handled brush that could fit through the holes and get to the inside edges and corners.
The T-bolt sticking out the top is just a temporary handle to use while the paint is wet.
I was going to have to cover all the inside and outside surfaces so I chose a small-handled brush that could fit through the holes and get to the inside edges and corners.
The T-bolt sticking out the top is just a temporary handle to use while the paint is wet.
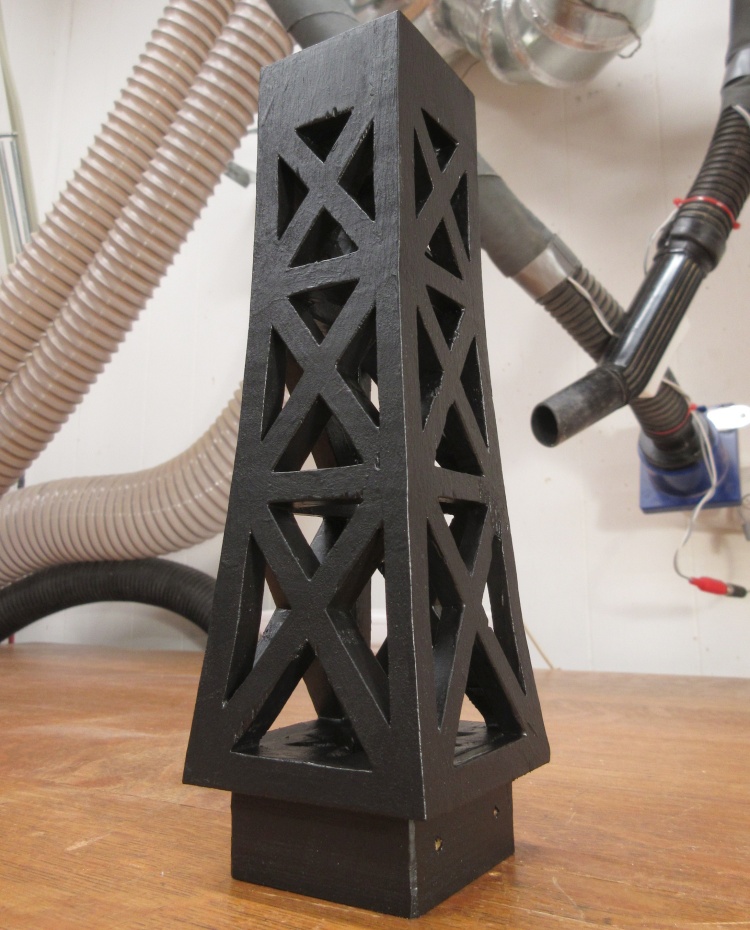
Ready to go
A couple of coats and it was ready to go.
Paint is a lot easier to apply than most conventional wood finishes - no sanding between coats, wiping off, etc. Of course this particular work is not exactly display-shelf-ready but I figure it will look fine from 10 feet away.
Paint is a lot easier to apply than most conventional wood finishes - no sanding between coats, wiping off, etc. Of course this particular work is not exactly display-shelf-ready but I figure it will look fine from 10 feet away.
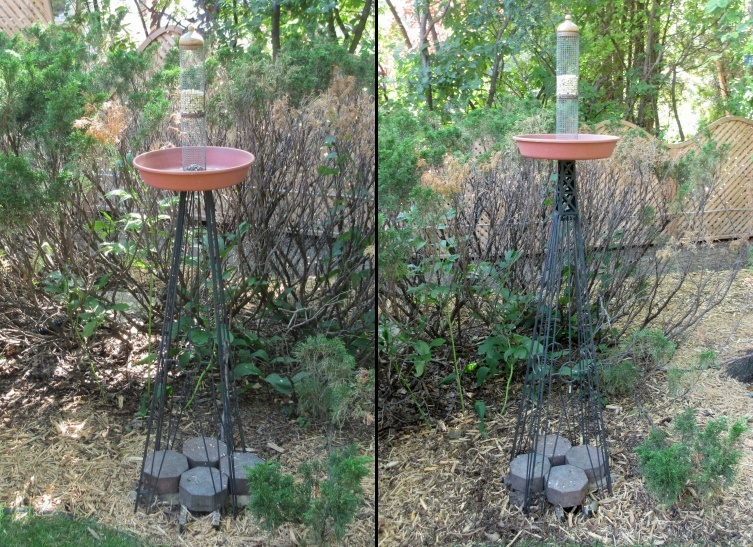
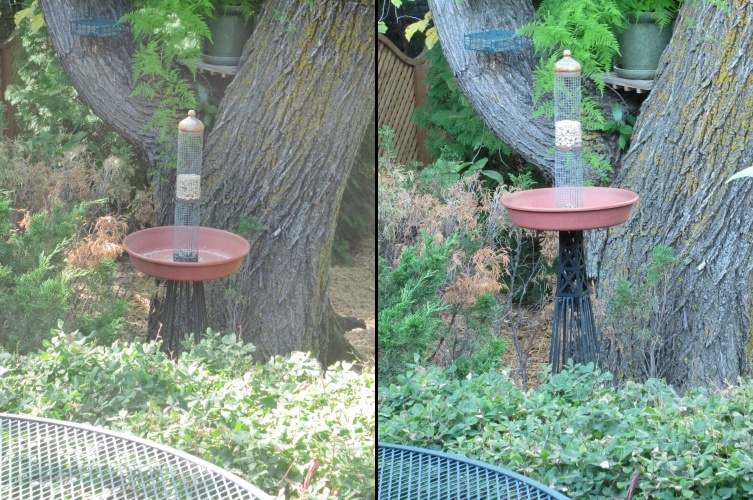
Before and after shots of the feeder
Here is a before-and-after comparison, viewed from the lawn. The "after" has also been re-levelled.
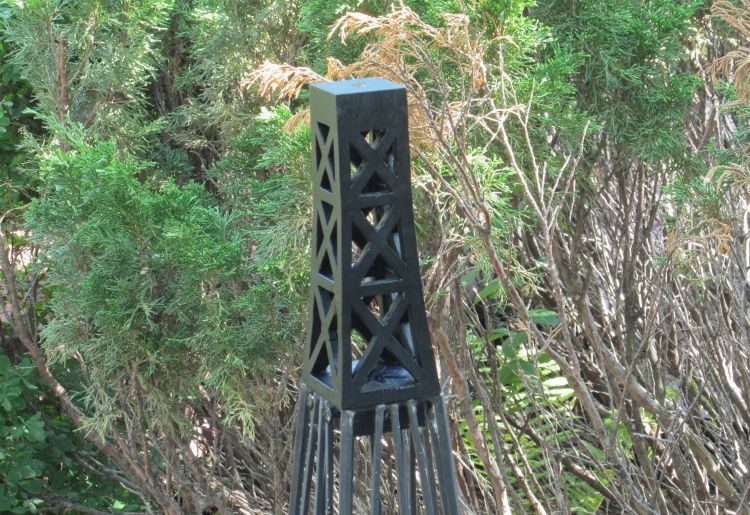
The riser itself (on imperfectly levelled obelisk)
This shows the riser mounted on top of the obelisk.
Pairs of black screws between the obelisk stringers hold it in place against wind/large birds/marauding squirrels.
Pairs of black screws between the obelisk stringers hold it in place against wind/large birds/marauding squirrels.
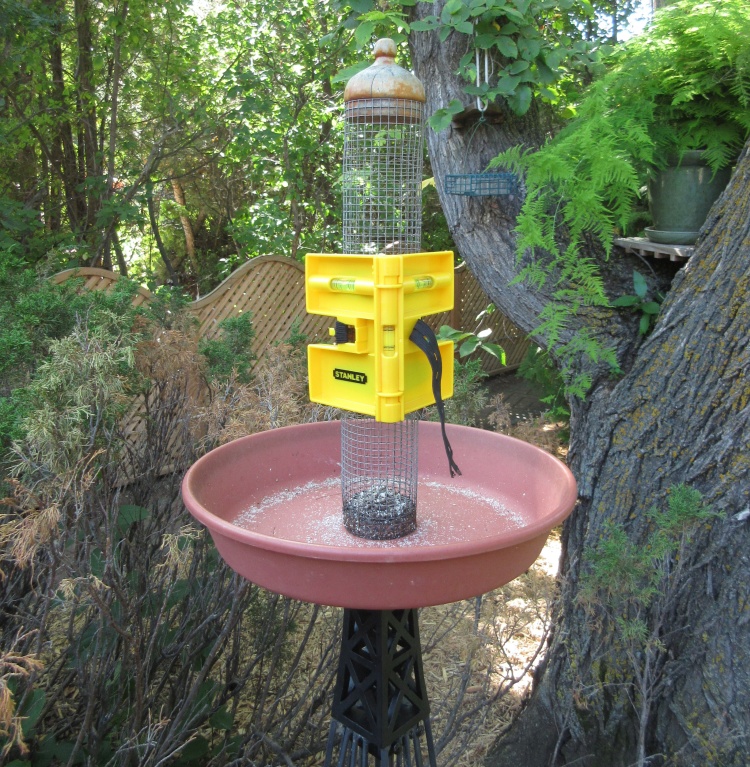
Working on that levelling issue
The whole obelisk and feeder had settled off-vertical by a noticeable amount so I strapped on a post leveller and tweaked the dirt under the base to remedy that issue.
The before/after view from the deck
Another before-and-after, viewed from the deck.


