I didn't really have a burning desire to make a spoon but we had bought a couple replacements for worn-out wooden spoons over the years and they were mostly flawed in some way to my perhaps over-critical eye - they were too thick or too crude-looking or too fuzzy or too long. This issue was pretty far down the ol' priority list but did make a suitable subject for a simple and practical project when I was looking for one. I figured that if I made my own spoon that I should be able to avoid at least those specific flaws.
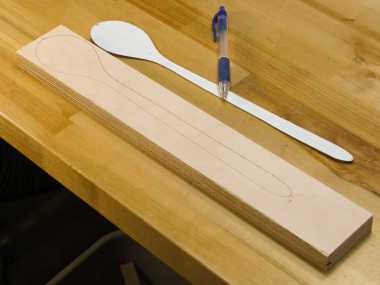
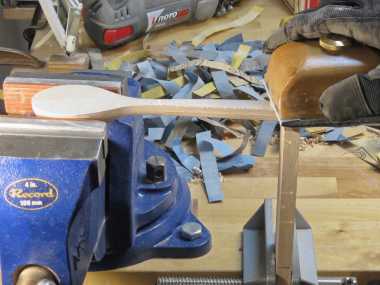
I examined our current spoons and looked through on-line images of wooden spoons and then based on those examples came up with a shape that I liked. That was a thinnish shallow-bowled spoon with an end about 2 x 3" and around 12" long with a slightly flared handle with a sort of oval-y/rectangular-y cross-section. Well, like this:
I examined our current spoons and looked through on-line images of wooden spoons and then based on those examples came up with a shape that I liked. That was a thinnish shallow-bowled spoon with an end about 2 x 3" and around 12" long with a slightly flared handle with a sort of oval-y/rectangular-y cross-section. Well, like this:
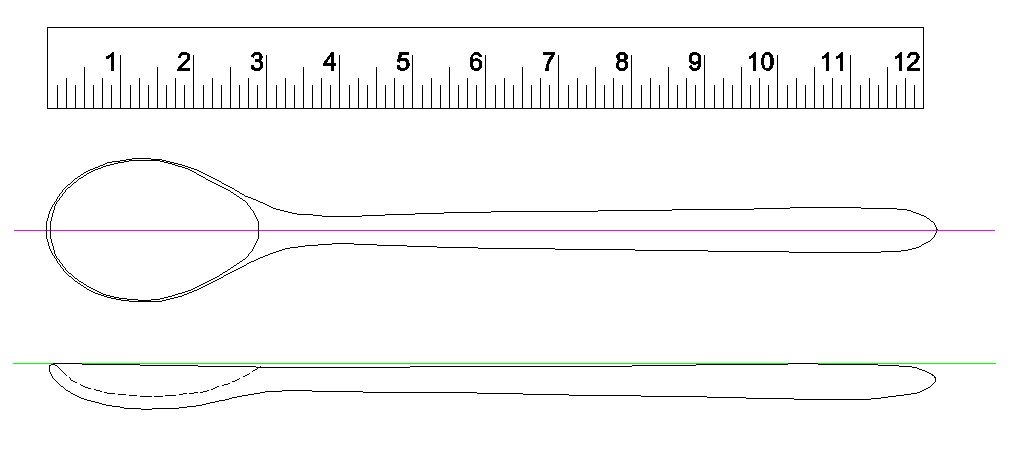
The classic mixing spoon
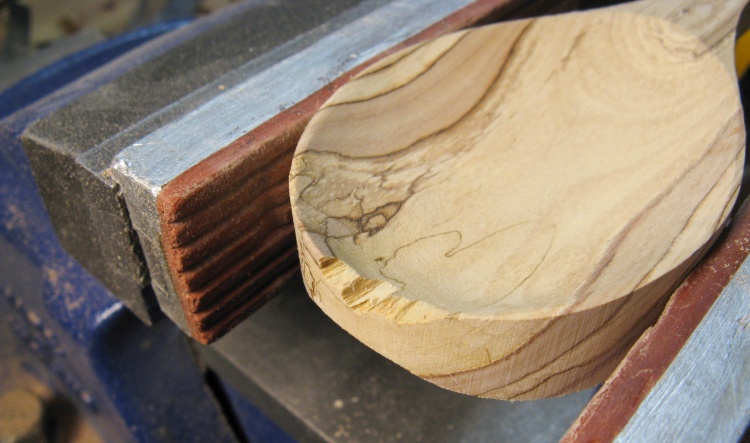
Walnut Spoon
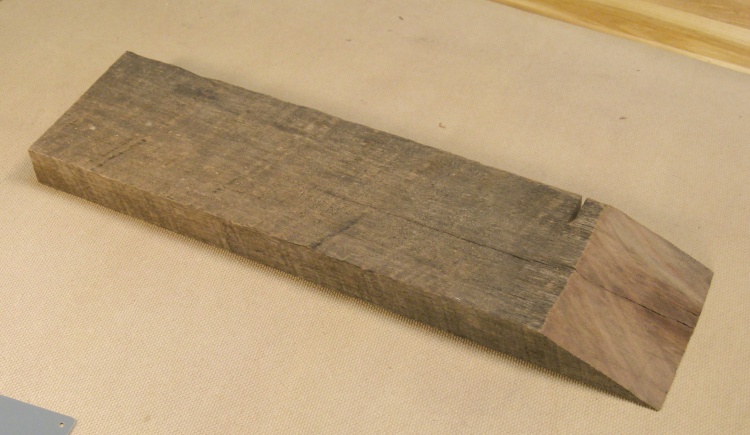
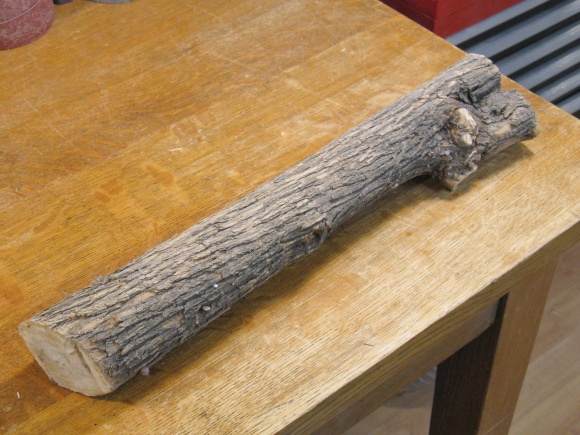
A rather rough-looking piece of walnut
I had what looked like a piece of an old weathered fence picket, rather sad looking with cracks and a partial cut in one side. However it was in my walnut pile and was in fact walnut.
I have to admit that I don't remember how I came about this piece or what use I had for the piece cut off at such a shallow angle at the end but it was about the right length and thickness for a spoon so I started chopping it up.
I have to admit that I don't remember how I came about this piece or what use I had for the piece cut off at such a shallow angle at the end but it was about the right length and thickness for a spoon so I started chopping it up.
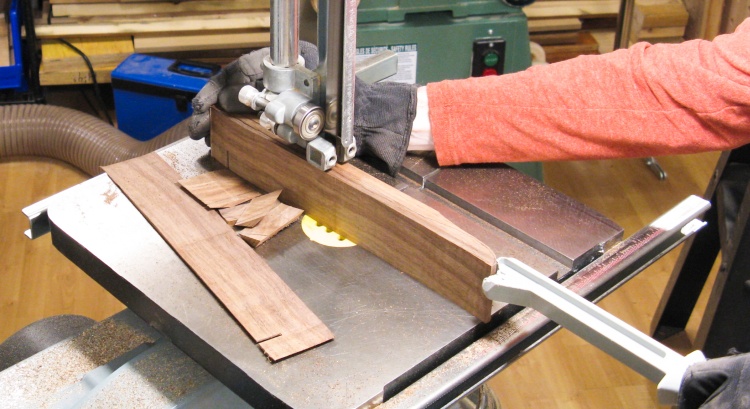
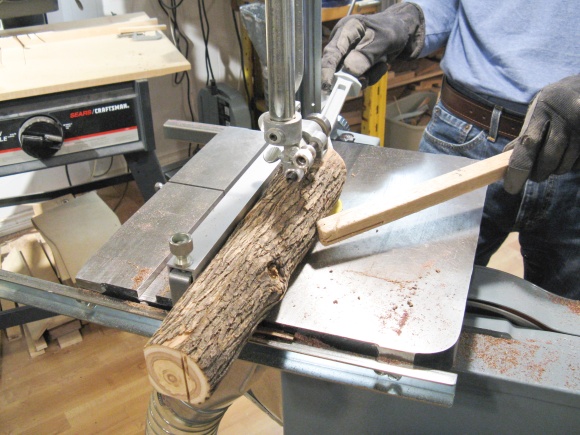
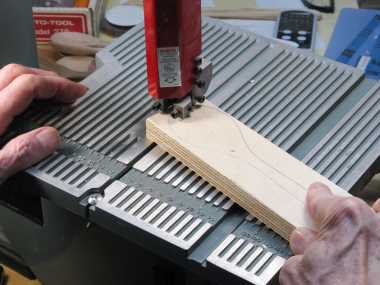
Cutting out the spoon profile
I traced the side profile onto one edge and cut it approximately to that shape on the bandsaw.
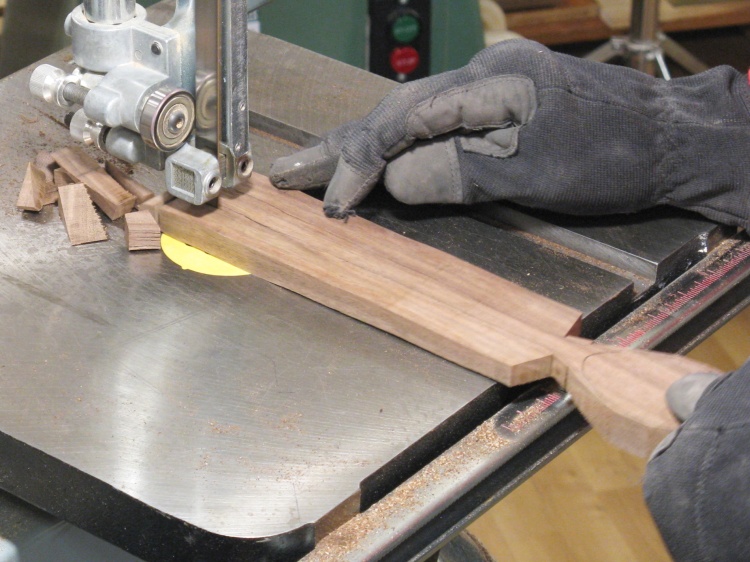
It looked like a more-respectable piece of wood when the weathered exterior was gone.
It looked like a more-respectable piece of wood when the weathered exterior was gone.
Shape marked on top side
Next step was to trace on the top profile using my full-size paper plan and carbon paper.
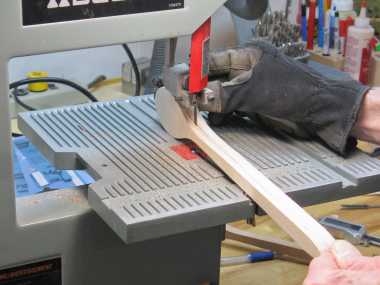
Cutting out the blank
Then it was back to the bandsaw to cut out that shape.
The blade I had on the bandsaw was quite wide so it wouldn't cut curves well. As a result I cut the curves by taking off little bits with straight cuts - hence that pile of wood bits.
The blade I had on the bandsaw was quite wide so it wouldn't cut curves well. As a result I cut the curves by taking off little bits with straight cuts - hence that pile of wood bits.
Your basic crude spoon blank
This shot shows the spoon blank cut out and in desperate need of some shaping.

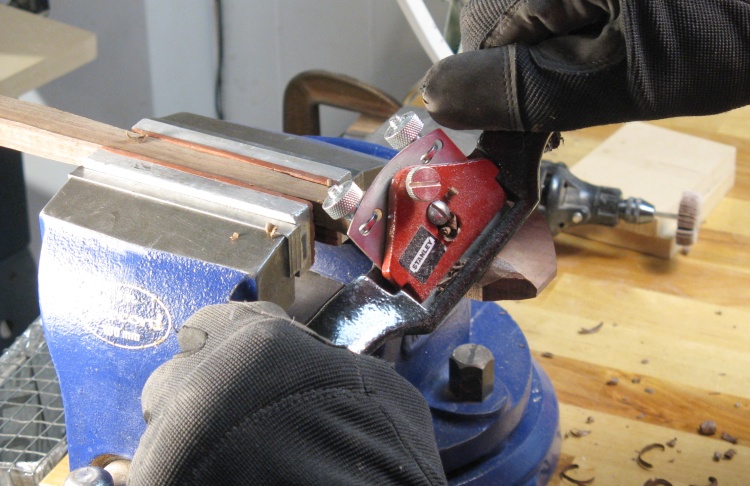
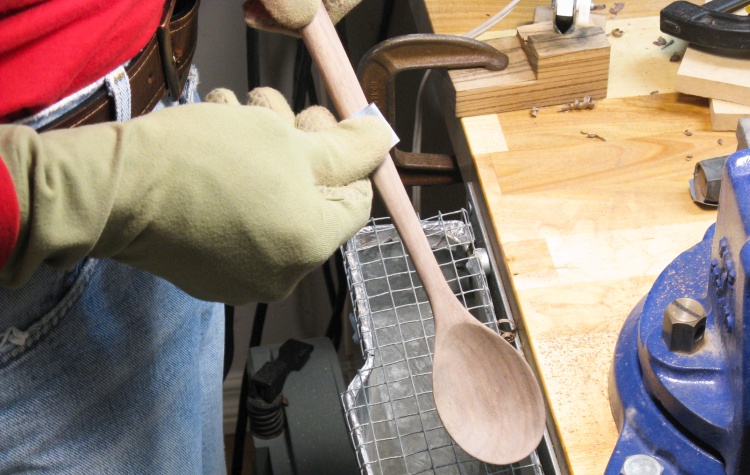
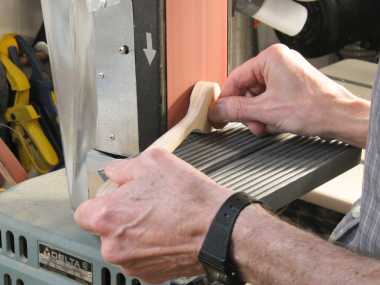
Clamped in place for carving
I started by carving out the bowl of the spoon so it needed to be held fairly solidly.
The bowl end was clamped in the rubber-lined jaws of the vise for a solid hold and then the handle was stabilized with a jury-rigged clamp.
The bowl end was clamped in the rubber-lined jaws of the vise for a solid hold and then the handle was stabilized with a jury-rigged clamp.
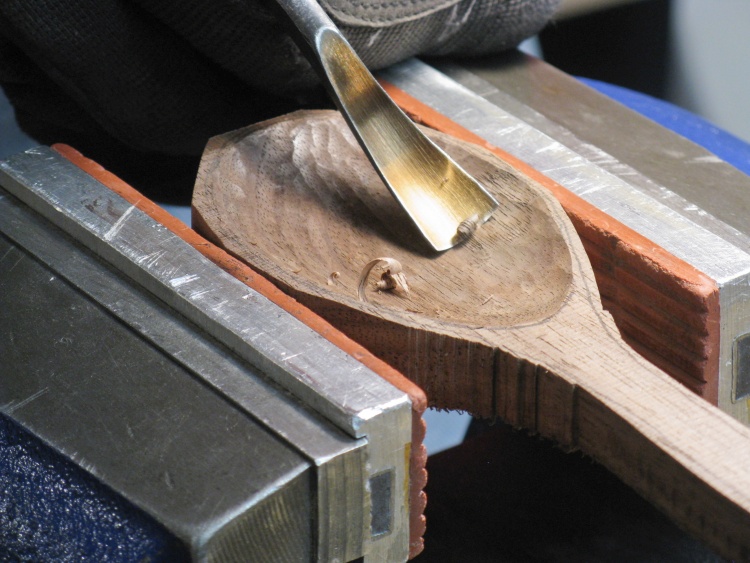
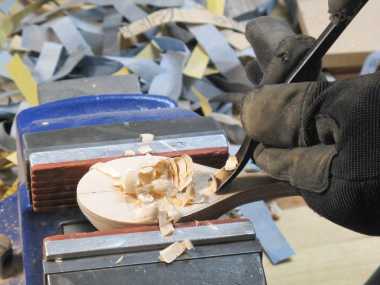
Carving out the bowl
I mostly used this appropriately-named "spoon gouge" to carve out the bowl of the spoon. Though for the record, the "spoon" designation refers to its shape rather than its intended use.
The carving is a bit troublesome because of grain direction; You get clean cuts only when carving down a slope and any further cutting into the "up" slope results in the gouge digging in and sometimes taking out a divot. The problem is that the up and down slope transitions are dependent on specific grain details which are not necessarily visible.
This particular walnut spoon was actually relatively good for that; the spoon bowl ended up with only one minor "wound" that needed special attention in sanding.
Starting to sand smooth
Once the bowl was deep enough and reasonably symmetrical, I started sanding using coarse 120 grit sandpaper taped to a rounded sanding form (lined with bike-tire rubber for a more conformable surface).
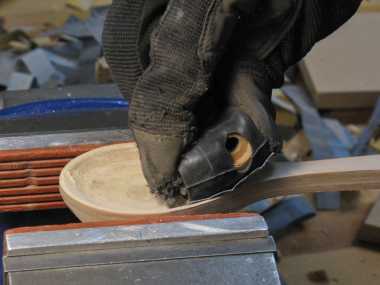
Flap sander used to remove a deeper gouge
One area had broken wood fibers due to difficult-to-carve grain and here I'm using an 80-grit flap sander on a Dremel to help sand out the resulting divot.
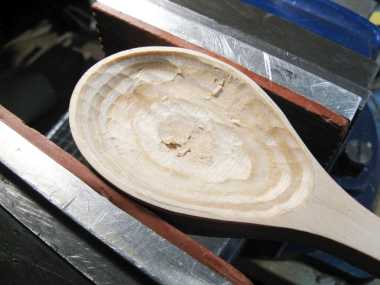
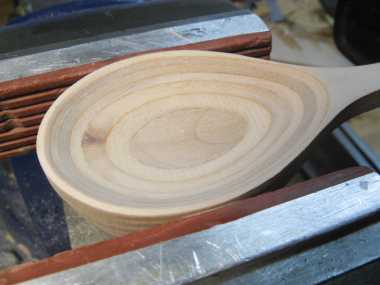
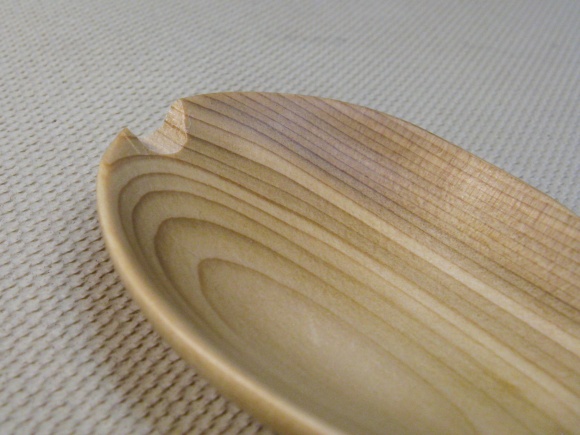
Spoon bowl after sanding to 400 grit
Then it was back to the 120 grit on the rounded sanding form and through 150, 220, 320 and 400 grits to get to this point.
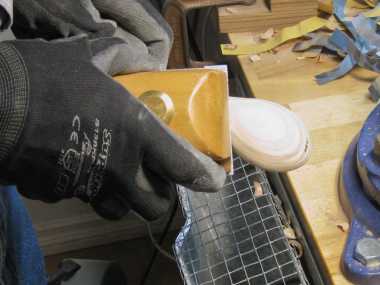
Starting to shape the bottom of the bowl
The bottom side had been roughly contoured when it was cut out on the bandsaw but was still square-cornered, so I removed most of the corners with a spokeshave.
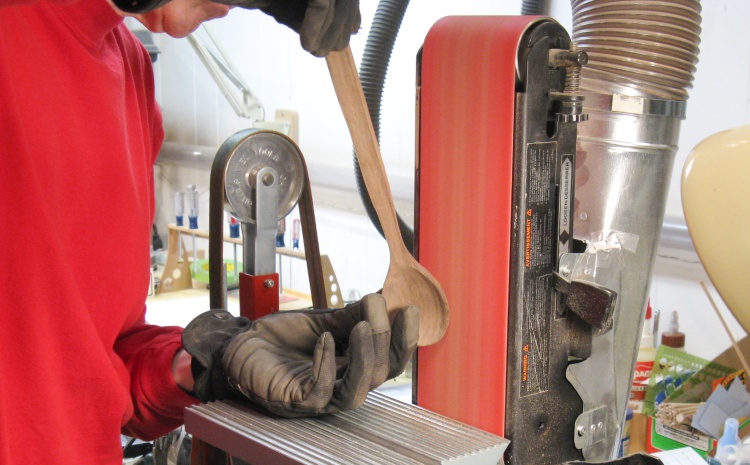
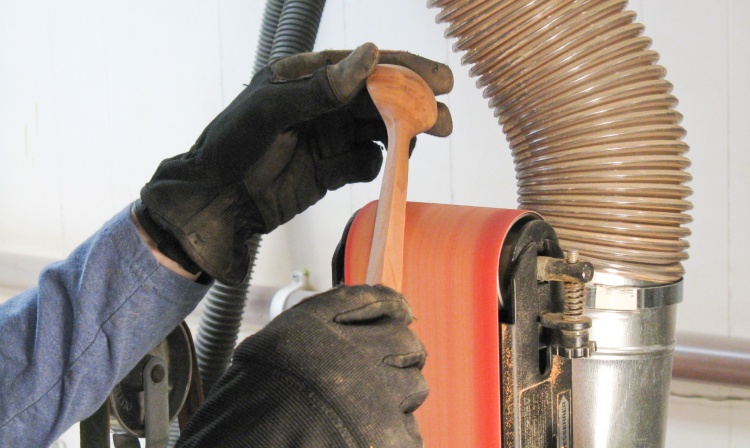
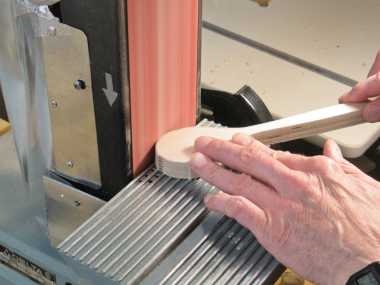
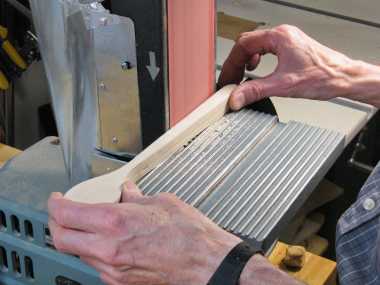
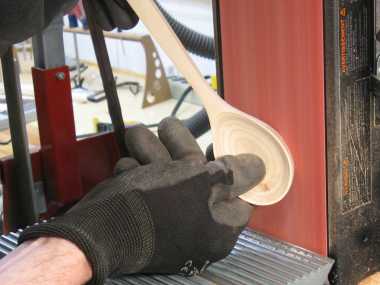
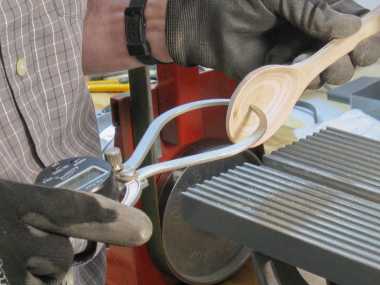
Some final shaping on the belt sander
Rounding of the perimeter of the bowl along with the last bit of bottom shaping was done on the belt sander with the sanding belt carefully chosen to complement my shirt.
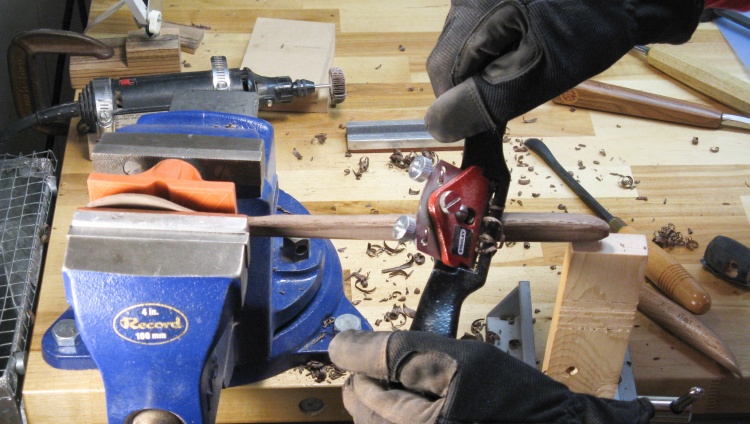
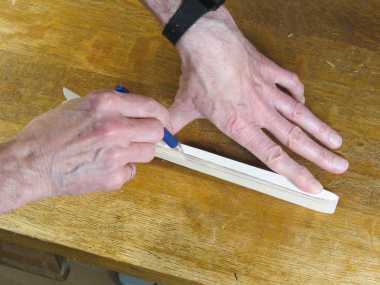
Same treatment for the handle
The handle got the same spokeshave treatment as the bowl which resulted in a faceted cross-section.
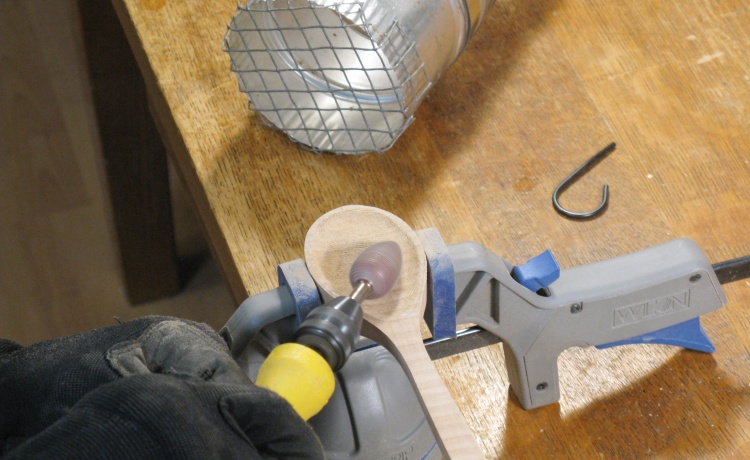
Rounding remaining facets with 120 grit
Everything was rounded off using 120 grit on a sanding block. Here I'm working on the handle over a dust collection intake.
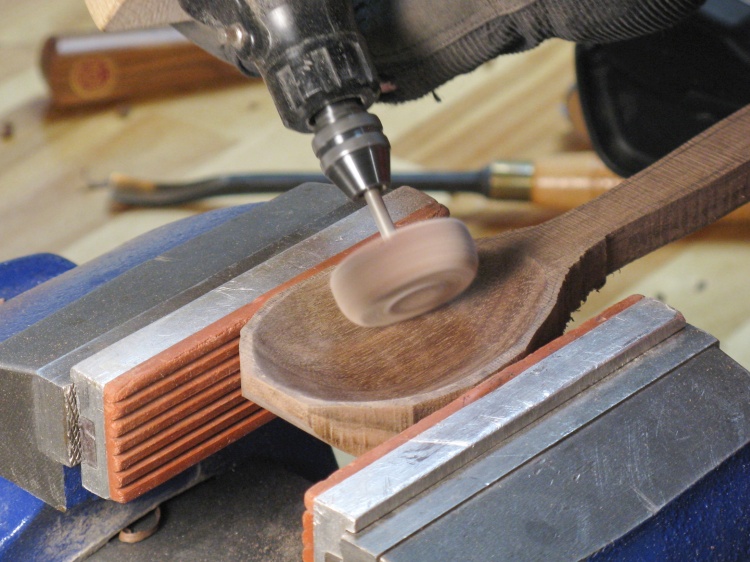
Finer sanding to 600 grit
Finer grades of sandpaper were used to progressively smooth the spoon. As before, I went through 150, 220, 320 and 400 grits, finishing up with 600 grit.
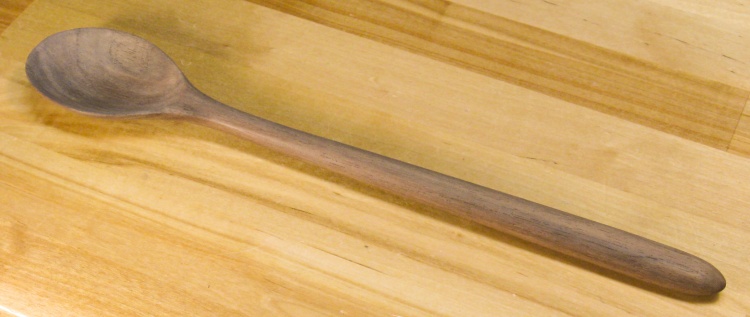
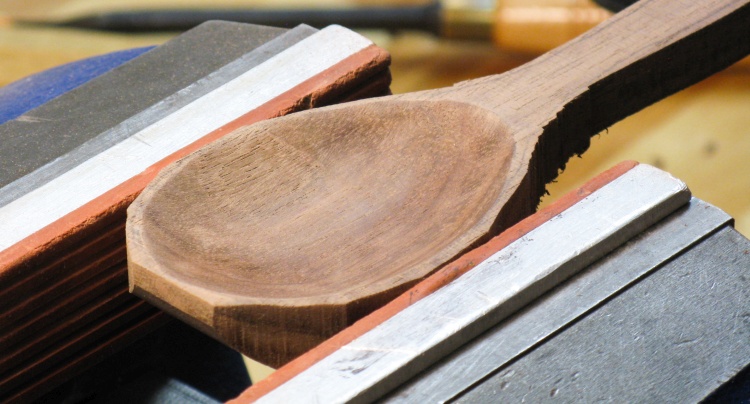
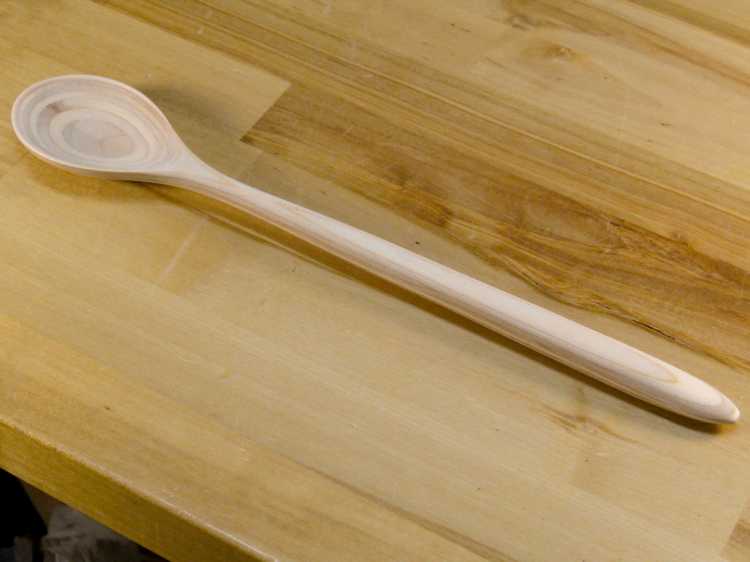
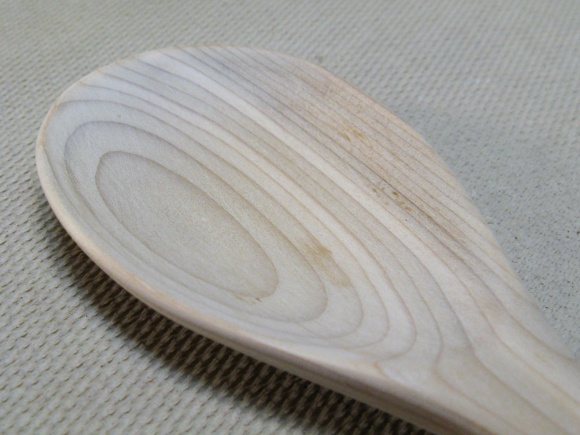
Ready for finishing
This photo shows the walnut spoon, complete except for finishing.
Finish Tests
My normal finishes weren't really appropriate for a cooking spoon and I didn't want to commit to a finish I had never tried before so I was going to have to nail down a finishing plan before going any further with the walnut spoon.
Some research suggested that Tung oil would be a decent finish - food-safe and relatively tough. I ran across a couple different suggestions for applying it, both directly and with a non-toxic solvent to help penetration and drying. In addition I tried a few other finishes for comparison purposes. I also ran across "the secret" to a smooth spoon involving burnishing the surface. Since I didn't know the effectiveness of any of this, that called for some testing. Step one (after finding a white lab coat and a clipboard of course) was to make a test matrix;
Some research suggested that Tung oil would be a decent finish - food-safe and relatively tough. I ran across a couple different suggestions for applying it, both directly and with a non-toxic solvent to help penetration and drying. In addition I tried a few other finishes for comparison purposes. I also ran across "the secret" to a smooth spoon involving burnishing the surface. Since I didn't know the effectiveness of any of this, that called for some testing. Step one (after finding a white lab coat and a clipboard of course) was to make a test matrix;
| Finish | Sanded | Burnished |
|---|---|---|
| Tung oil | D | E |
| Tung + Citra Solv | C | B |
| Tung + Citra Solv, overnight soak | F | A |
| Minwax Wipe-On Poly, satin | H | I |
| Minwax Fast-Dry Poly, satin | G | - |
| Osmo Polyx-Oil, satin | K | J |
| Osmo Polyx-Oil, satin | L (150 grit) | - |
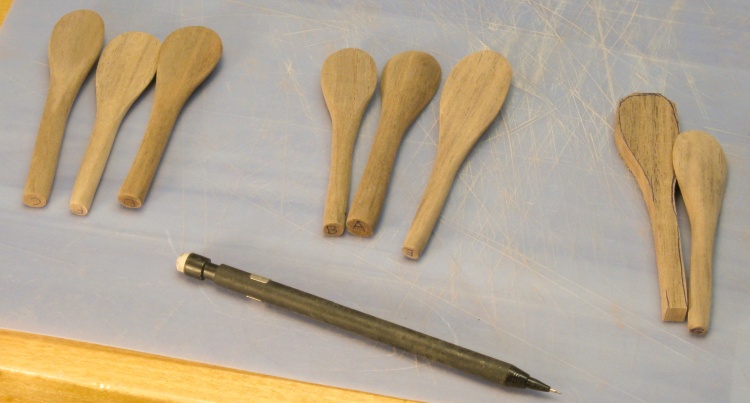
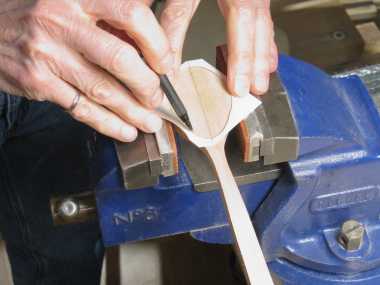
A few spoon-like shaped for testing finish application
I made a bunch of little spoon-shaped walnut test pieces about 3-1/2" long on which to try the various finishes. I carved their letter designation into the end of the handle to be able to tell which was which.
They do not quite achieve a state of full spoonness due to the lack of a concave bowl, since I figured that would have been more effort than it was worth.
They do not quite achieve a state of full spoonness due to the lack of a concave bowl, since I figured that would have been more effort than it was worth.

Sanding to 600 grit
Some of the test spoons were sanded up to 600 grit like the walnut spoon.
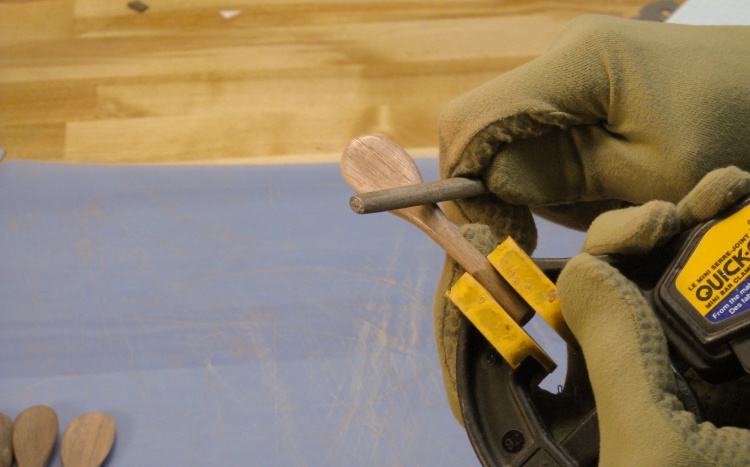
Burnishing surface
The others were sanded to 220 grit and then burnished.
In burnishing, a hard and smooth-ish object is rubbed over the wood to compress the fibers on the surface, which gives the wood a very smooth feel and supposedly toughens it up as well. Here I'm doing the burnishing with an actual burnisher which I would normally use to help sharpen scrapers.
In burnishing, a hard and smooth-ish object is rubbed over the wood to compress the fibers on the surface, which gives the wood a very smooth feel and supposedly toughens it up as well. Here I'm doing the burnishing with an actual burnisher which I would normally use to help sharpen scrapers.
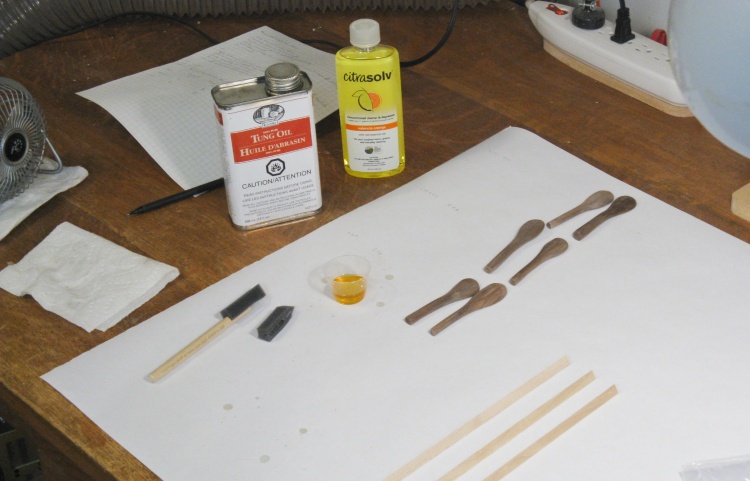
Getting ready to apply finish
In this shot, I'm getting ready to start the first round of finishing. I added a few more test spoons and finishes later.
The can contains pure Tung oil, a clear finish that is the consistency corn syrup. Next to it is a bottle of Citra Solv, a plant-based nontoxic solvent that will be used to thin the Tung oil on some of the test pieces.
The can contains pure Tung oil, a clear finish that is the consistency corn syrup. Next to it is a bottle of Citra Solv, a plant-based nontoxic solvent that will be used to thin the Tung oil on some of the test pieces.
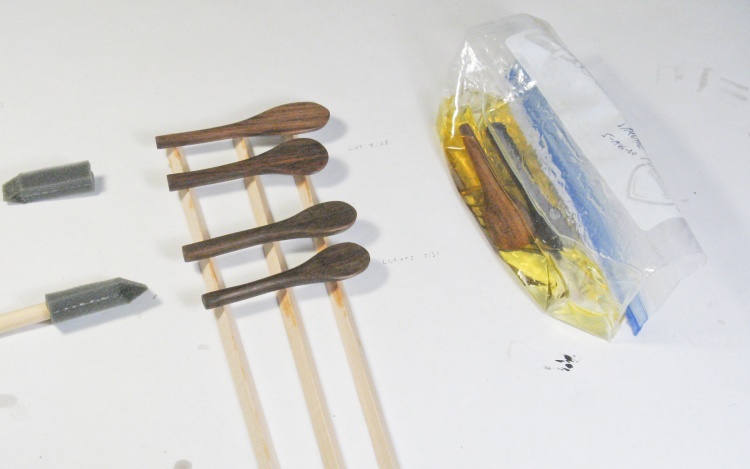
Four coated and two soaking
Two of the test pieces are soaking in a 50:50 Tung oil/Citra Solv mixture in the Ziploc bag where they will remain overnight. The others have either a coat of Tung oil or the same 50:50 mixture as in the bag. In the latter cases the finish was applied and then wiped off after 10 minutes.
Test pieces drying
The first six test spoons were set to dry and after the first coat had dried, they all eventually received another three coats of the appropriate finish (applied for 10 minutes and wiped off).
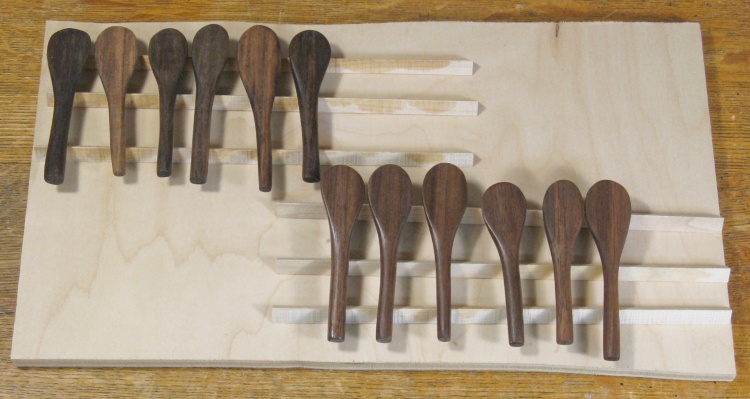
Each pair of spoons includes sanded and burnished spoons, with the significant color differences being attributable to different pieces of walnut rather than the finish.
Later I did test spoons with Fast-Dry Poly, Wipe-On Poly and another new finish for me (Polyx-Oil) as a comparison. The complete set is shown here.
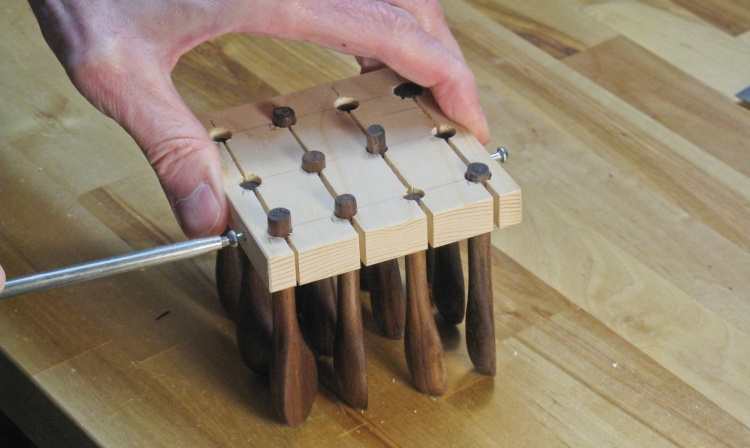
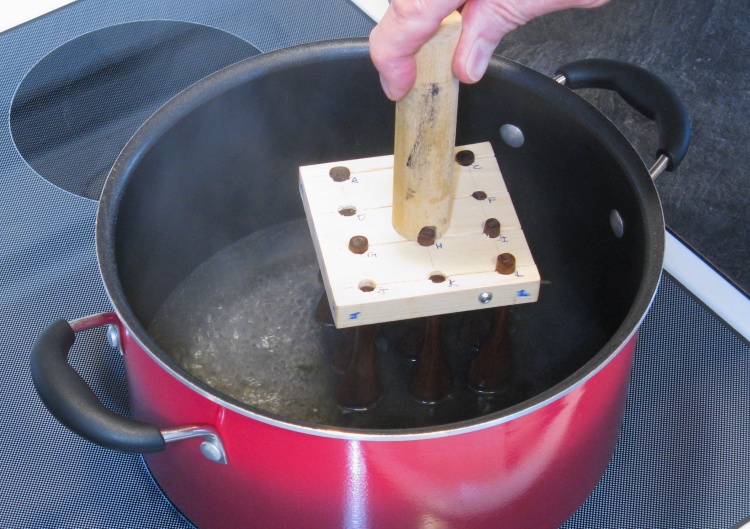
Assembling a 12-spoon array
The plan was to check the test spoon finishes with typical cooking duties. To ensure consistency I thought I'd best bind them together so time and exposure to the test elements were identical.
I made up this little frame and clamped the handles in with the spoon tips evenly aligned at the bottom.
I made up this little frame and clamped the handles in with the spoon tips evenly aligned at the bottom.
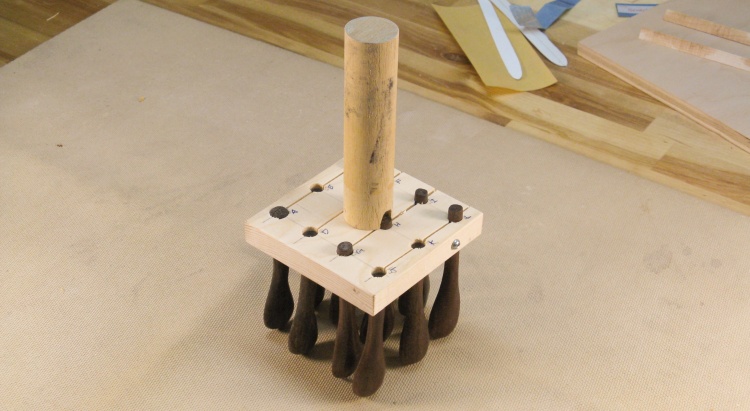
The composite test "spoon"
I attached this lovingly-made custom handle (AKA an old piece of dowel) for easier handling.
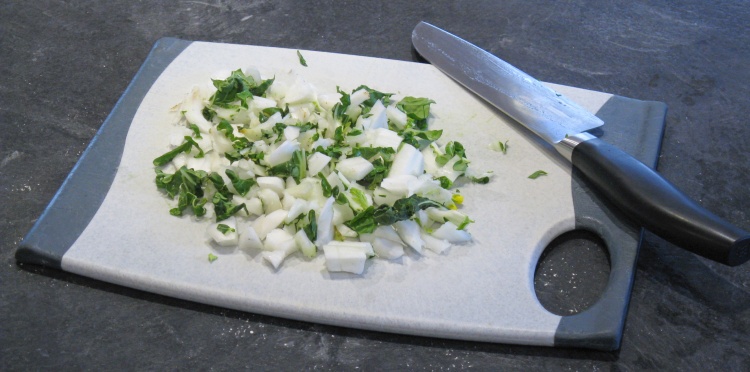
Some chopped bok choy for a test meduim
I wanted the first test to be fairly tough, which I designated the "boiling oil" test. To make it more realistic I chopped up some discarded bits of bok choy from last night's meal.
So do you eat the white part of the bok choy? We mostly just chop up the greens and a bit of the white with the remainder hitting the green bin. Eating the white bits seems...virtuous? but it's pretty crunchy...
So do you eat the white part of the bok choy? We mostly just chop up the greens and a bit of the white with the remainder hitting the green bin. Eating the white bits seems...virtuous? but it's pretty crunchy...
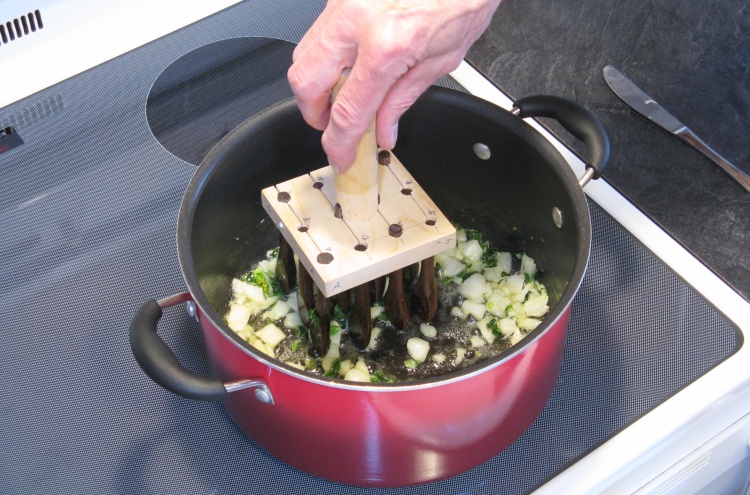
Test 1: bok choy with dangerous quantities of butter
I threw in a quarter-cup of butter for the "oil" component of the test medium and got things bubbling pretty vigorously. Then I stirred periodically using the composite test spoon for about 5 minutes (with the spoons in maybe 1/3 of that time).
Buttered-up test spoons
Here the spoons are resting between stirring events, buttered up pretty well.
After the 5 minutes I let the spoons cool down, washed them with warm water and dish soap and dried them off. Then the stir/cool/wash and dry cycle was repeated twice more.
After the 5 minutes I let the spoons cool down, washed them with warm water and dish soap and dried them off. Then the stir/cool/wash and dry cycle was repeated twice more.

Bok choy got a little overdone over three stiring sessions
I fear that 15 minutes of cooking was a bit too much for the bok choy. But damn I bet it tasted buttery...
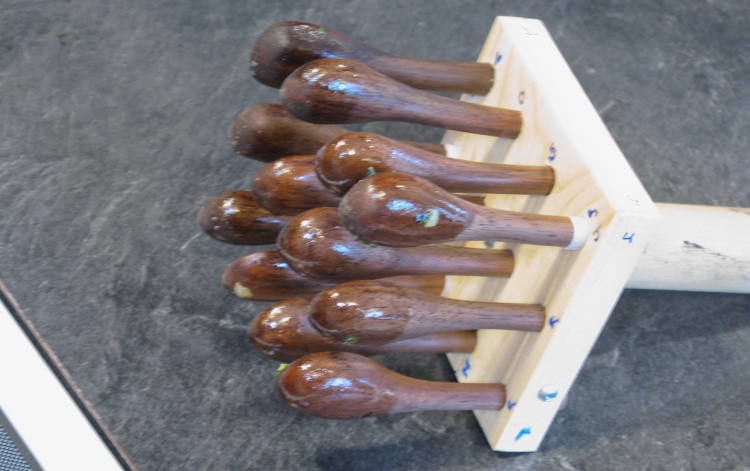
Test 2: Boiling water
I was pleasantly surprised to see that the spoons mostly came through the Boiling Oil/Washup test in pretty good shape. Next was the Boiling Water test which didn't involve any vegetable cruelty; just your basic 1/2" of boiling Saskatoon tap water - hard but pure. Once again the spoons were in there for maybe 1/3 of the single 5 minute interval.
Interestingly this appeared to be a tougher test than the oil. After washup there was some noticable effects on some of the test spoons.
Interestingly this appeared to be a tougher test than the oil. After washup there was some noticable effects on some of the test spoons.
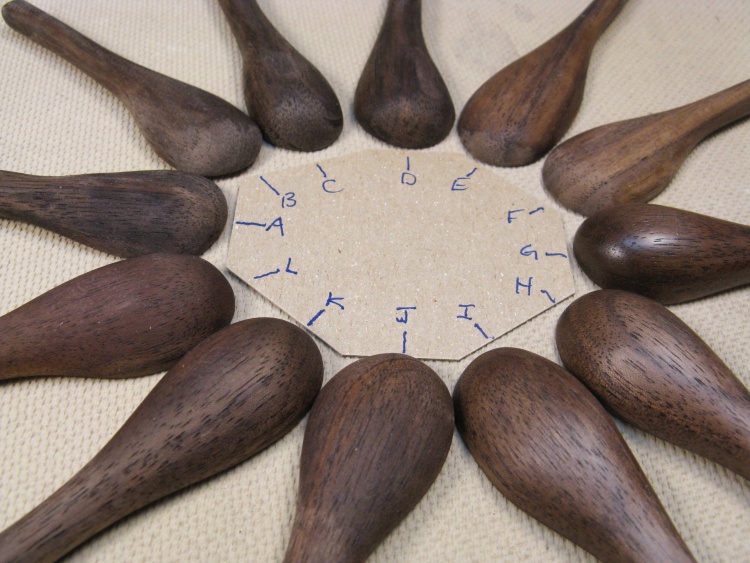
The resulting finish conditions
The spoons were extracted from the holder and arranged here. The rounded bottoms seemed to fare worse than the flat tops, perhaps due to more pores. I inspected, compared, observed, noted, summarized and concluded as follows:
| Finish | Staining | Wear | Looks | Smoothness | Application | Food-Safe |
|---|---|---|---|---|---|---|
| Tung oil (D&E) | 5 Undetectable | 2 End bare | 4 Darkens wood | 5 Best feel | 3 Slow drying | 5 Approved |
| Tung + Citra Solv (B&C) | 4 Slight | 2 End bare | 4 Darkens wood | 5 Good feel | 2 Slow drying, mixing | 4 Assumed |
| Tung + Citra Solv, soaked (A&F) | 4 Slight | 2 End bare | 3 Darkens wood | 5 Good feel | 2 Slow drying, mixing | 4 Assumed |
| Fast-Dry Poly (G) | 5 Perfect | 5 Perfect | 4 Bit shiny | 4 Plastic-y feel | 4 Intercoat sanding | 4 See notes |
| Wipe-On Poly (H&I) | 5 Perfect | 5 Perfect | 5 Natural | 5 Bit plastic-y | 4 Intercoat sanding | 4 See notes |
| Polyx-Oil, 600 grit (K&J) | 1 Quite noticable | 3 End thinner | 3 Dry looking | 4 Acceptable | 5 Simple | 5 Approved |
| Polyx-Oil, 150 grit (L) | 1 Quite noticable | 3 End thinner | 3 Dry looking | 3 Feels rough | 5 Simple | 5 Approved |
I looked over the test spoons closely and made the following general observations:
1. The burnishing didn't really help with staining, wear, looks or smoothness so there's little to recommend it.
2. The Tung oil is the poorest for wear, going down to bare wood after a few minutes of boiling water.
3. There was little difference between the three Tung oil application techniques. Pure Tung oil is perhaps marginally better than either application with solvent.
4. It is difficult to tell if the Tung oil finish is fully dry, making application more problematic.
5. Conventional varnish (Minwax Fast-Dry Poly) is excellent in all measures. It appeared completely unaffected by boiling oil (butter) or water. Main drawback is a more plastic look as the finish is thicker than the others.
6. Minwax Wipe-On Poly fared as well as the Fast-Dry but with a thinner coat. This gave it a better look and feel.
7. The Polyx-oil had some staining problems and some wear, and perhaps isn't quite as nice looking. Simple to apply.
Food-Safe Notes:
- The pure Tung oil (which is simply oil extracted from Tung nuts) is approved for food contact.
- The Tung oil mixed with Citra-Solv is most likely still fine since the MSDS for Citra-solve indicates no known toxic effects (and would largely or completely evaporate anyway).
- Similarly the Polyx-Oil is approved for food contact.
- I tried to investigate varnish food safety and while I didn't find anything that could be described as definitive, the general consensus seems to be that polyurethane varnish after fully drying is fine for food contact.
Conclusions:
Based on these tests, it looks to me like the Wipe-On Poly is the preferred finish.
A Few More Spoons

Might as well make a pattern
I thought I'd made a few more spoons out of different types of wood.
Tracing the shape onto the front and side of the wood blanks using a taped-on paper plan got old pretty fast, and I figured it it would be a whole bunch easier to have a cardboard cutout that could just be traced. So I spent a few minutes making top and side-profile outlines from thin cardboard. I later made one to mark the shape of the spoon bowl as well.
Tracing the shape onto the front and side of the wood blanks using a taped-on paper plan got old pretty fast, and I figured it it would be a whole bunch easier to have a cardboard cutout that could just be traced. So I spent a few minutes making top and side-profile outlines from thin cardboard. I later made one to mark the shape of the spoon bowl as well.
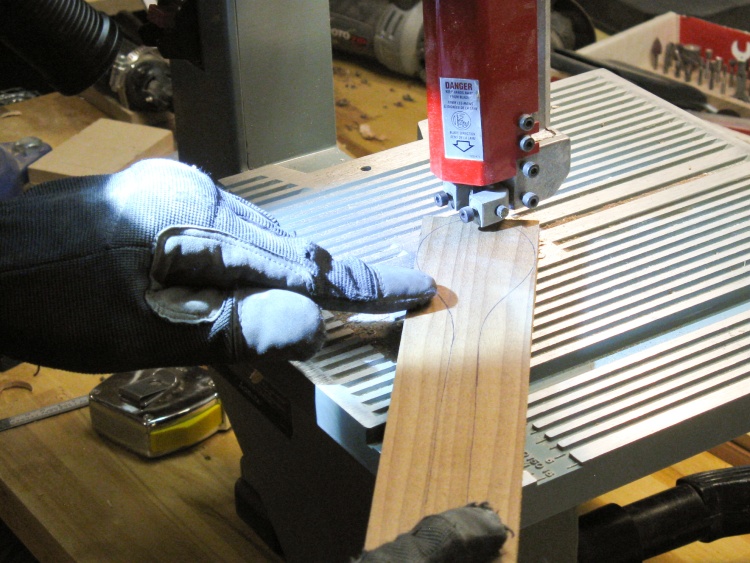
Cutting out with finer bandsaw blade
The spoon-building process remained fairly similar to the original walnut spoon but I streamlined things a bit.
One change was the aformentioned pattern and another was to use a bandsaw with a smaller blade that let me follow the curved lines a bit easier. In this shot I'm cutting out a Thermally Modified Poplar blank on the small bandsaw.
One change was the aformentioned pattern and another was to use a bandsaw with a smaller blade that let me follow the curved lines a bit easier. In this shot I'm cutting out a Thermally Modified Poplar blank on the small bandsaw.
Bowl bottom shaping
I also did all the bowl-bottom shaping using the belt sander (instead of shaping with the spokeshave first). In this photo I'm shaping the first Aromatic Cedar spoon bowl.
And just like it says on the box, the wood smelled very cedar-y.
And just like it says on the box, the wood smelled very cedar-y.
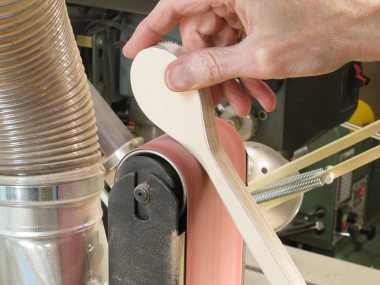
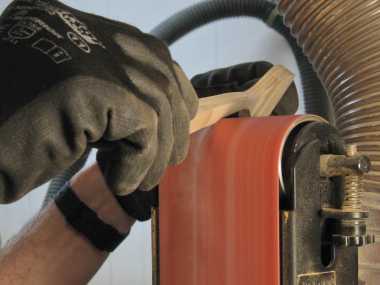
Handle shaping
Similarly, I used the belt sander roller to shape the handle as seen in this shot.
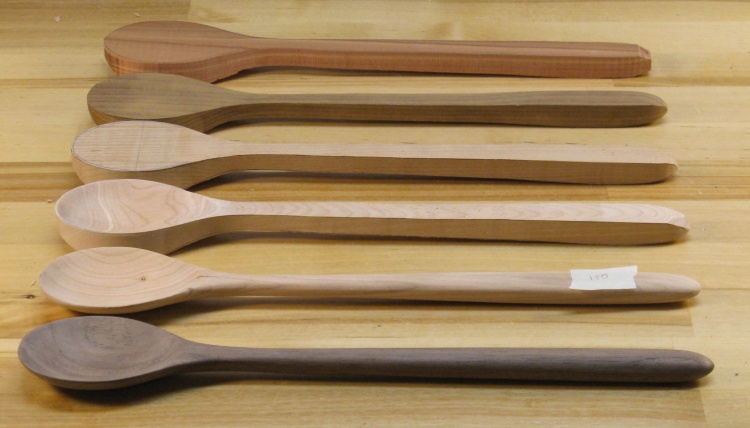
Six in various states of completion
At this point I had a number of spoons in various stages of doneness. Top to bottom is least-done to most-done and the corresponding species breakdown is:
Aromatic Cedar
Thermally Modified Poplar
Maple
Birch
Cherry
Walnut
Aromatic Cedar
Thermally Modified Poplar
Maple
Birch
Cherry
Walnut
I thought I'd try some local wood so I dug out a branch that I had somehow failed to label when I stored it away. But my educated guess is that it's Ornamental Crabapple from the back yard. I cut a suitable slice out of that as seen below.
A piece of Ornamental Crab from back yard
Cutting out a spoon-sided slice
Oak, Figured Maple and Ornamental Crab
Here it is lined it up with a couple of others in progress (from top to bottom: Oak, Figured Maple and the Crab). The crab had some pretty funky grain so I thought it might make an interesting-looking spoon.
Ornamental crab wasn't quite strong enough
Alas, some of the wood in the Ornamental Crab was rather spongy and turned out to have inadequate strength as testified by the broken-out pieces visible in this photo.
This was just the due to the pressure used for sanding, so I had to abandon this interesting specimen.
This was just the due to the pressure used for sanding, so I had to abandon this interesting specimen.
Using grinder on figured maple
I found that the Figured Maple was very difficult to carve (too soft) but "there's more than one way to excavate a spoon bowl" (cat lovers and the squeemish should feel free to use this new idiom rather than the usual one). So I resorted to grinding out the bowl; it was then just sanded smooth using the normal method.
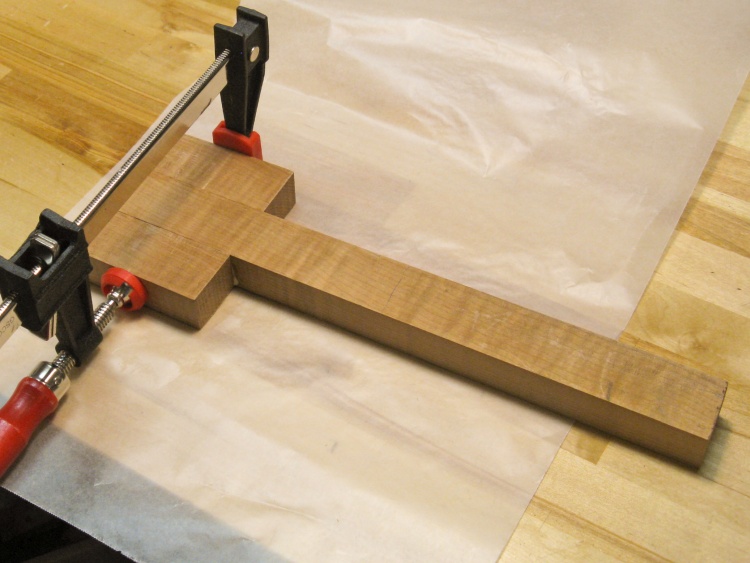
Gluing Roasted Curly Maple to get enough width
I had only a narrow piece of Roasted Curly Maple but it was pretty long so I cut a couple pieces off and glued those to one end to achieve enough width for the spoon bowl.

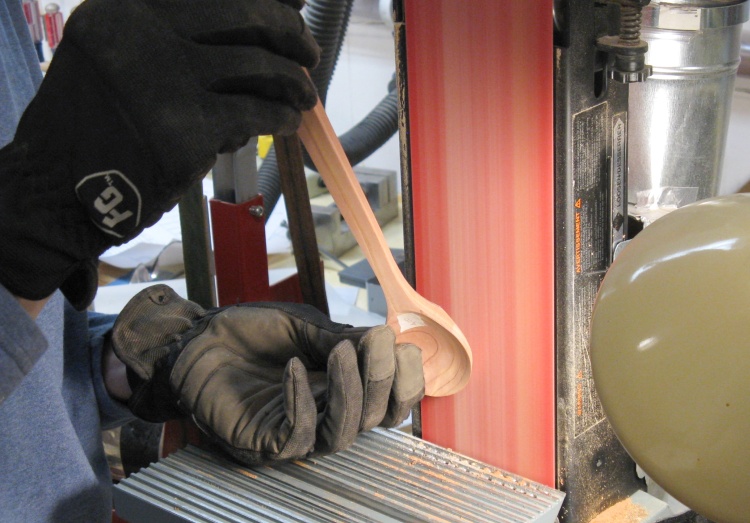
Scraping maple spoon instead of sanding
I decided that I would do one spoon without sanding (except for inside the bowl). In the maple spoon, I used spokeshaves and scrapers to do the final shaping. In this shot, I'm cleaning up the bottom with a small cabinet scraper.
Updated Procedure
This was the procedure I ultimately used for most of the spoons. It relies heavily on the belt sander in preference to the spokeshave or scraper and is much easier and faster. Of course it's also more dusty and noisy but I can live with that tradeoff.
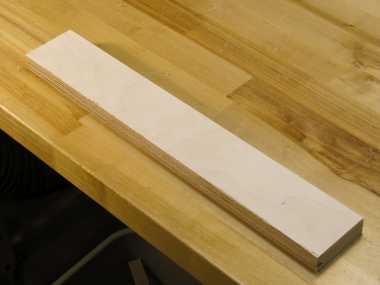
A suitable piece of wood (Birch plywood for this spoon)
Top shape marked using a cardboard pattern
Cutting out to the top profile
Sanding spoon bowl to the lines
Some inside-curve sanding
Using belt edge to sand to handle outlines

Manually sanding sides until smooth to the touch
Marking side profile
Cutting to side profile
Sanding to the side profile
Manually sanding top & bottom until smooth to the touch
Marking the shape of the spoon bowl using another pattern
Carving out the bowl
Mostly carved - still pretty rough
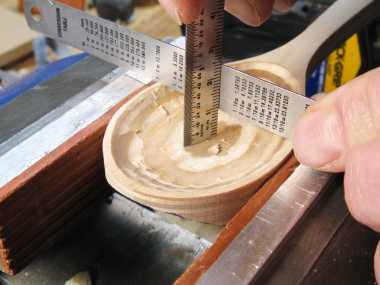
Measuring the depth (10-11 mm is target)
Sanding the bowl with a curved sanding form
Bowl sanded to 400 grit
Shaping the bottom of the bowl
Measuring wood thickness (0.17" to 0.19" is target)
Rounding the handle
And finally: hand sanding
Done
After all the sanding, the Birch plywood spoon looks pretty decent.
The sandpaper husks
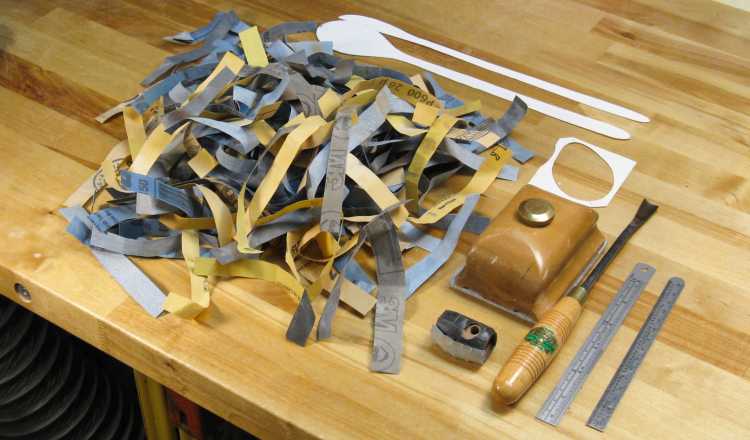
Each spoon took about 5 strips of sandpaper for the sanding. This is the worn-paper pile for the 14 spoons I made, along with a few critical spoon-making items.
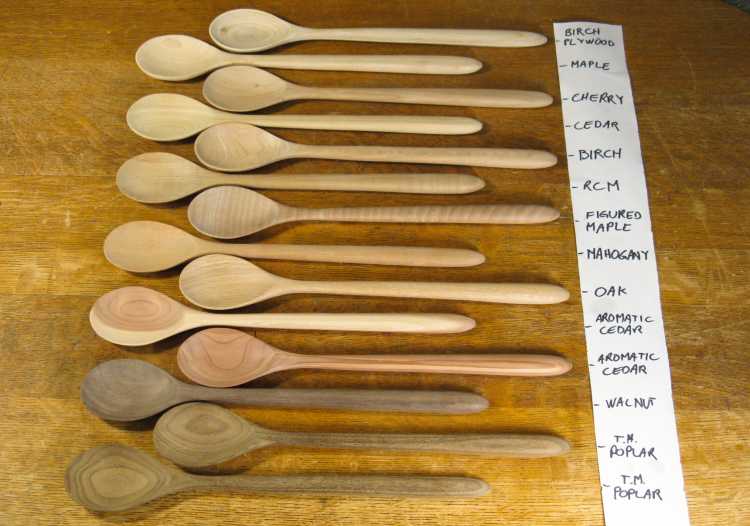
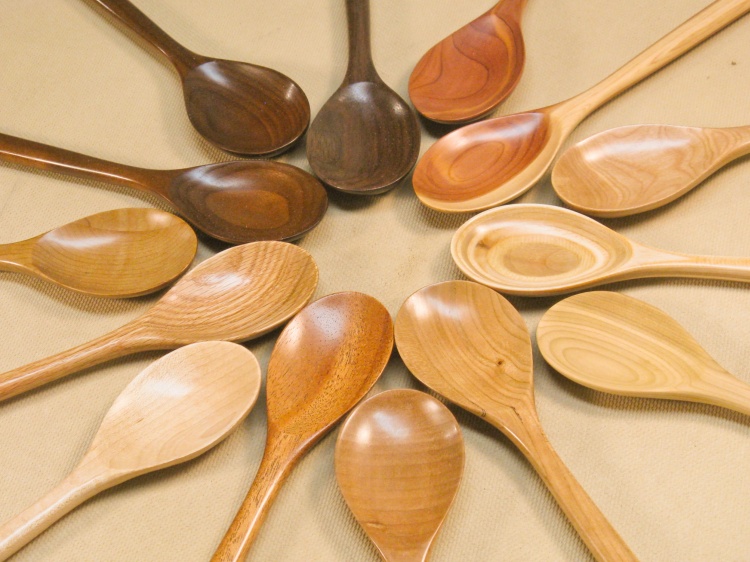
The full suite of spoons
This photo shows the complete set of 14 spoons (from 12 different types of wood). They have all been sanded to 600 grit (except for the Maple) and are ready for finish.
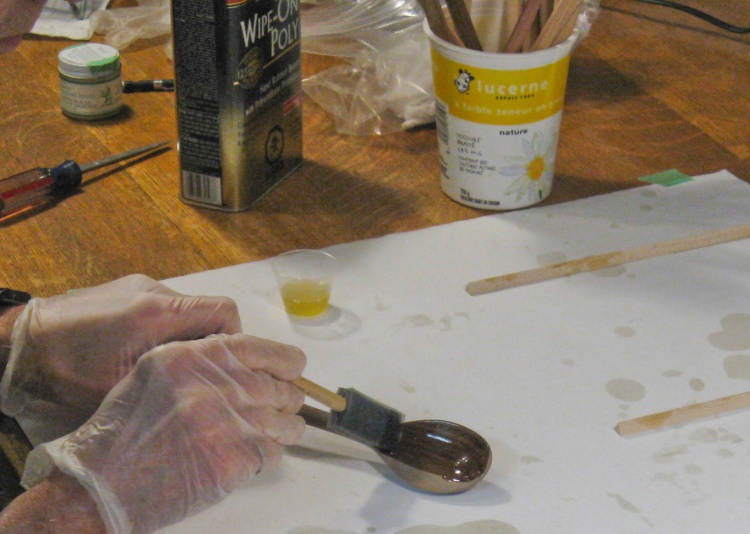
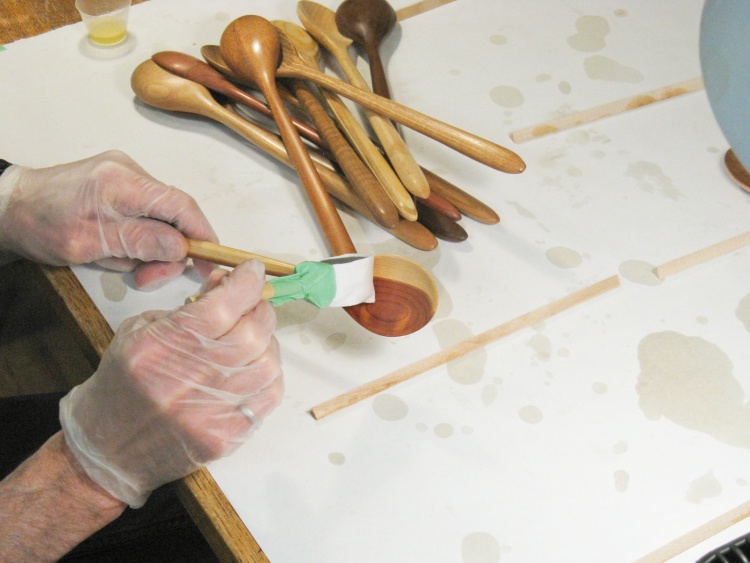
Let the varnishing begin!
After having nailed down the best finish, the time had come to do the finishing and this photo shows me starting with the first spoon.
As described about 36 photos ago, I selected the Minwax Wipe-On Poly which is hanging out in the background of this shot. This would be the first of three coats, with light sanding using #0000 steel wool between coats.
As described about 36 photos ago, I selected the Minwax Wipe-On Poly which is hanging out in the background of this shot. This would be the first of three coats, with light sanding using #0000 steel wool between coats.

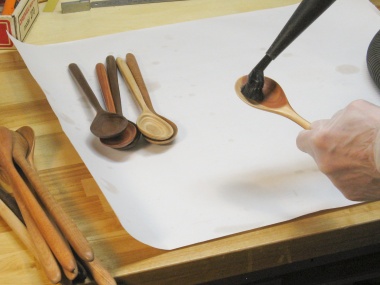
First coat on all the spoons
This photo shows the first coat of varnish on all the spoons.
And then as usual with polyurethane varnish, the dried coat is roughed up with steel wool and then cleaned off in preparation for the next coat;

Steel-wooling the spoons (#0000 very fine)
Vacuuming off the steel wool residue
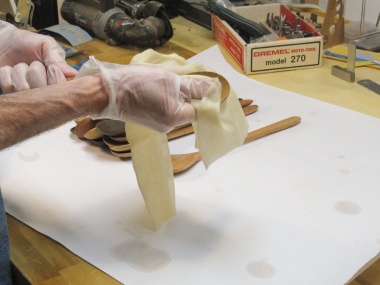
Using a tack cloth for further cleaning
I managed to fumble the Cedar spoon while steel-wooling it and it hit the floor right on the tip, breaking out a chip from this not-especially-strong wood. Sue convinced me to try sanding it out, so I did and that worked not too badly. Then it got back into the "refinish" line.
D'oh!
A bit shorter but less D'oh!y
And then another coat of varnish goes on
Done
Done.


