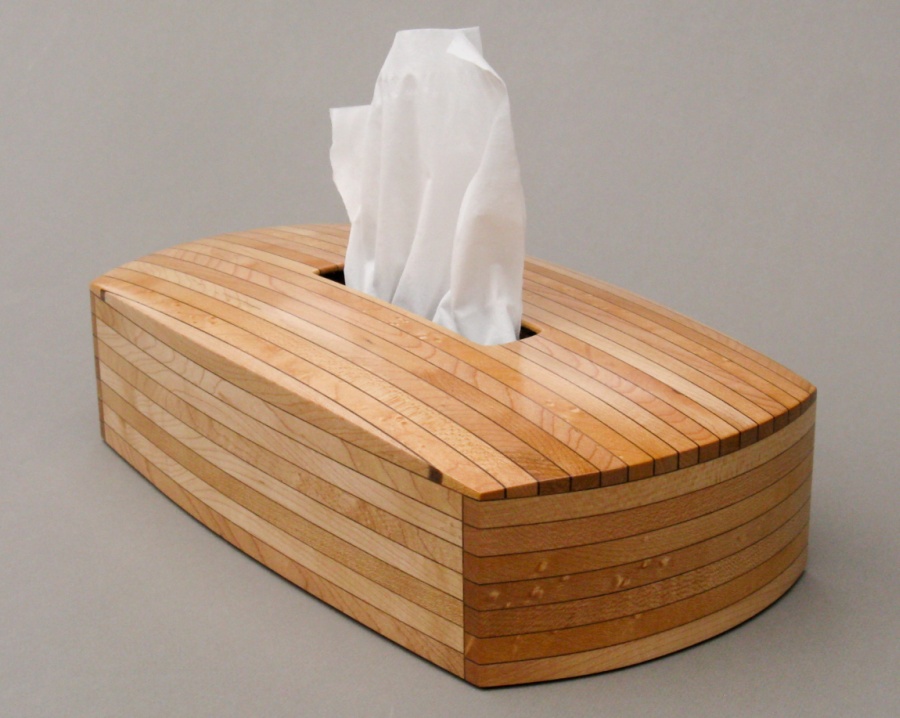
While I'm mostly not a huge fan of laminated pieces, a few designs appeal to me. One of those was the maple + walnut piece I had done a few years ago. I liked the (surprisingly wide) variety of grains that showed up in the laminations. Since I still had some of the wood left, I thought I'd make the new tissue box cover using the same construction.
The pieces I had available were only about 2" wide, which precluded just laminating them together for a full-height cover. So instead, I constructed it from separately-laminated sides and top.
The pieces I had available were only about 2" wide, which precluded just laminating them together for a full-height cover. So instead, I constructed it from separately-laminated sides and top.
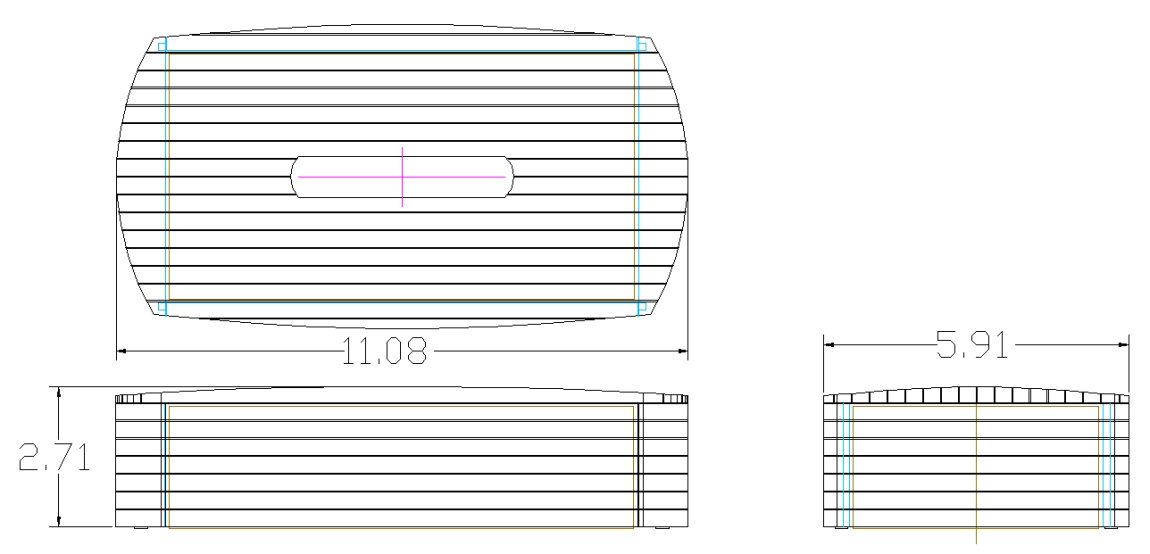
The plan
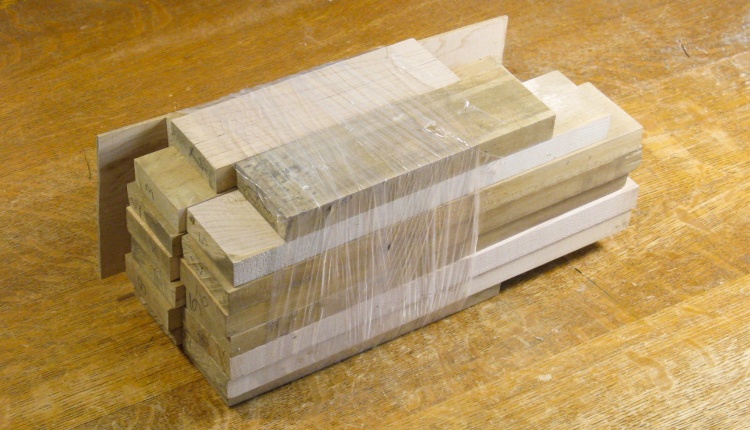
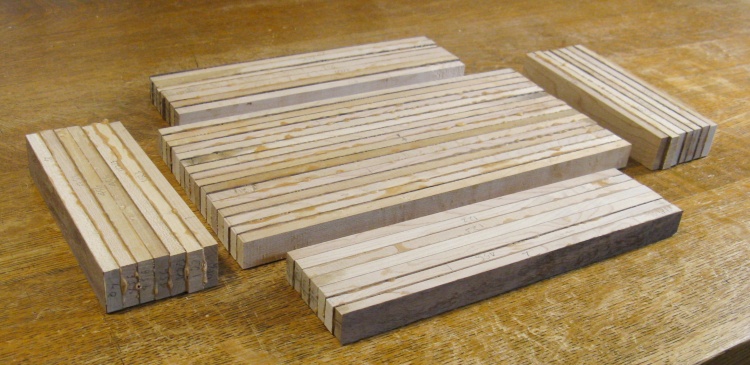
Pile 'o pieces
I pulled out my saved pile of western maple pieces. These had been cut up from wider pieces with another project in mind, but I decided the tissue box cover was a better use for them. This project used up all the remaining wood except for a couple pieces.
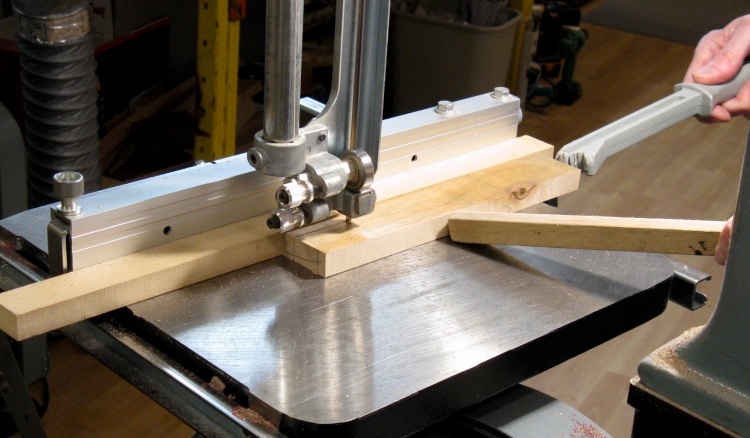
Slicing plys for the sides
I started by cutting plys for the two long sides. They were cut a bit fatter than needed to let me plane them down to the exact thickness I wanted.
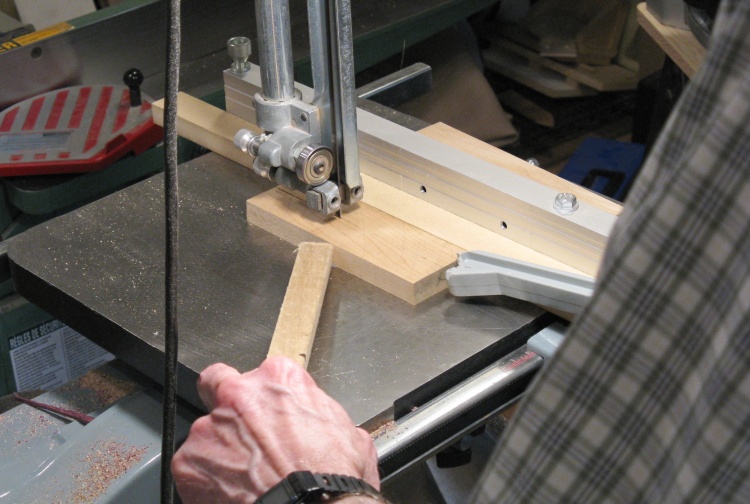
Slicing some wider plys for the ends
The plys for the ends needed to be wider to accommodate the deeper curve. Here I'm cutting a plank into two of the proper width for the ends. Unfortunately, they weren't quite thick enough to get more than a single ply out of the available thickness.
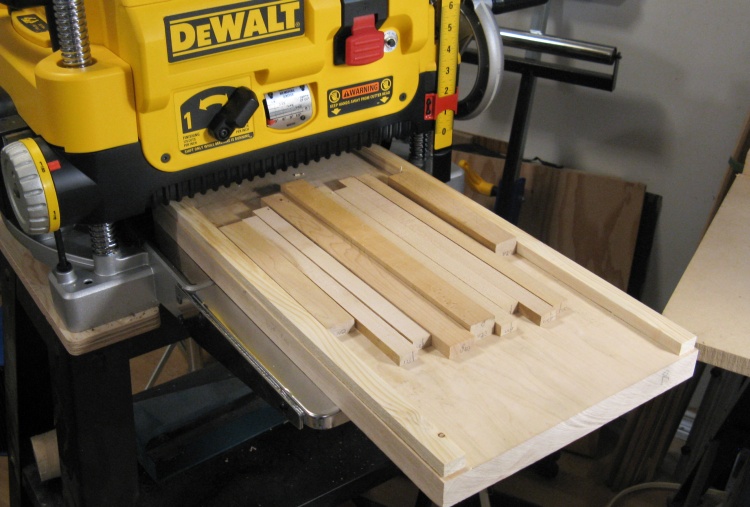
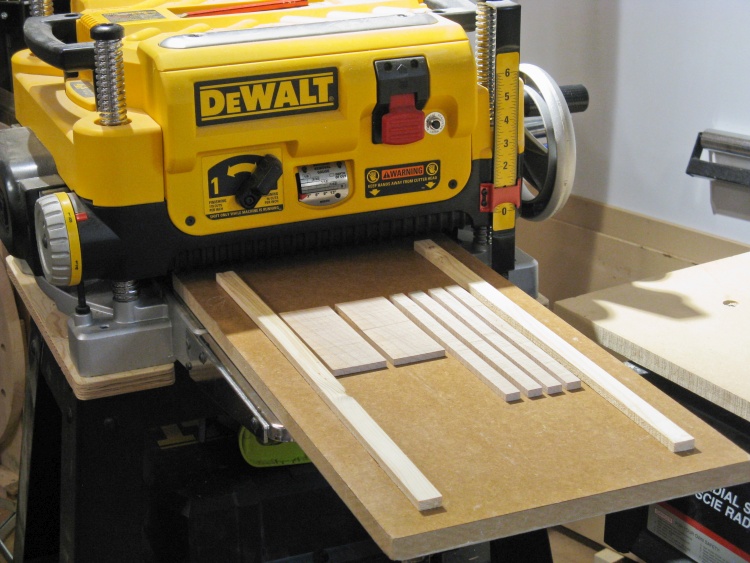
Assorted pieces on the planer anti-snipe sled
I used the maple sled with side rails to avoid the snipe from the planer, and here a selection of side and end pieces are taped down and ready to go through the planer to bring them all (via multiple passes) to 0.325" thickness.
A couple months ago I decided I needed a new planer and the bright yellow Dewalt in the photo is the replacement. The old one had developed a sloped cut across the wood with the slope depending on the height. As a result, it had to be shimmed for each new cut, which became too much of a pain. It might be fine for many applications, but I had been doing laminated pieces and the slope would have been a big issue.
A couple months ago I decided I needed a new planer and the bright yellow Dewalt in the photo is the replacement. The old one had developed a sloped cut across the wood with the slope depending on the height. As a result, it had to be shimmed for each new cut, which became too much of a pain. It might be fine for many applications, but I had been doing laminated pieces and the slope would have been a big issue.
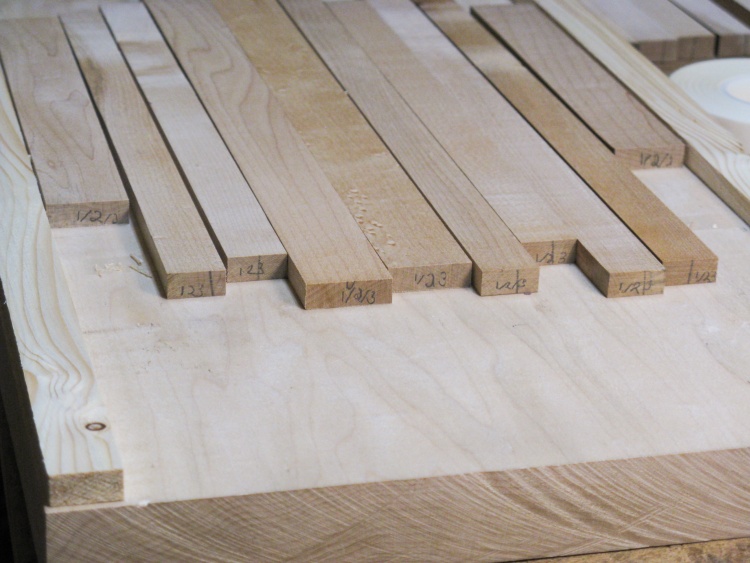
Post-planing pieces with layer numbers
After planing, the pieces are all at the desired thickness.
I was concerned about the layers on adjacent sides being slightly different in thickness and having a visible misalignment where the layers stacked up side-by-side. I hoped to help by planing a group including pieces from each of the sides and ends (which would theoretically all be the same thickness) and using them in common layers. The plys are designated for layers 1, 2 or 3 as can be seen from the end markings.
I also did groups for layers 4, 5 & 6, for layer 7 alone and for the top alone. Ultimately there must have been other factors contributing to the overall layer thickness since the alignment was still imperfect (amount of glue, force of clamping, thickness of walnut layer?). My spouse assures me that I'm the only one that will notice. However to help ensure that, I didn't take any close-ups of the corners where the layers adjoin.
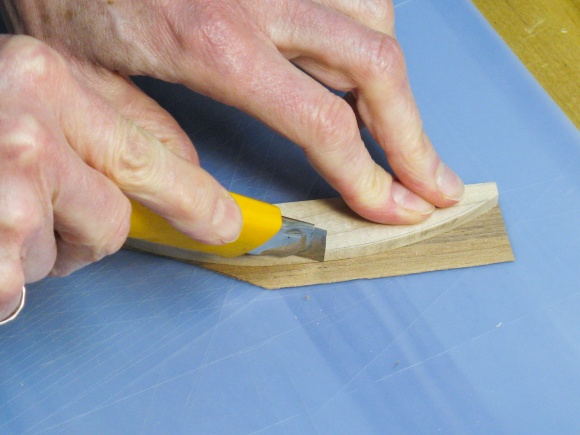
Chopping up walnut veneer for between the plys
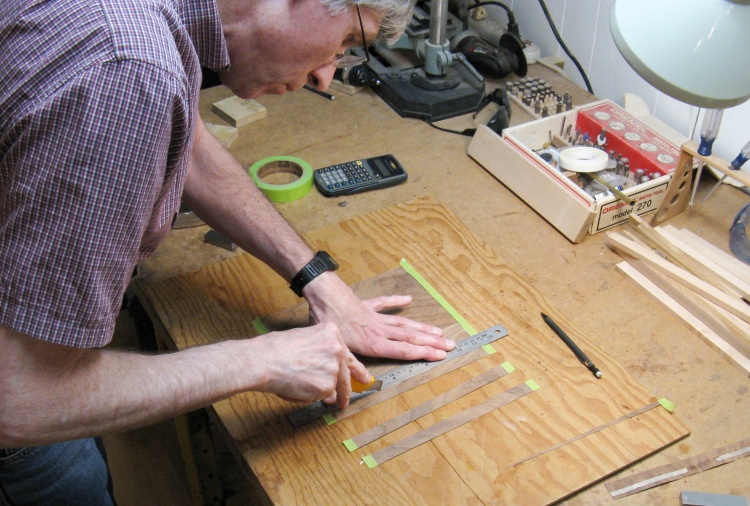
The walnut veneer is about 0.018" thick and I just cut the pieces from a larger sheet using a snap-off blade utility knife and a metal ruler.
I had bought something called a "pizza box of veneers" many years ago, which was in fact a pizza box full of veneers. That's where the pieces of walnut veneer for this project came from. There's a huge variety, but I've used so few of the veneers that the box is still slightly over-full and hard to close.
I had bought something called a "pizza box of veneers" many years ago, which was in fact a pizza box full of veneers. That's where the pieces of walnut veneer for this project came from. There's a huge variety, but I've used so few of the veneers that the box is still slightly over-full and hard to close.
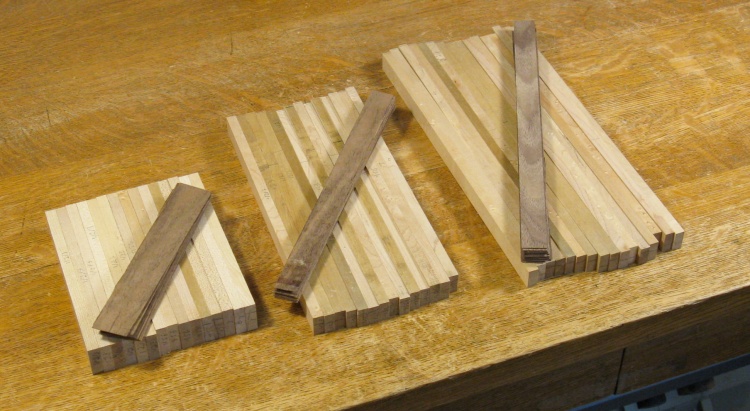
Left to right, all the pieces needed for ends, sides and top
And this photo shows the complete tissue box cover kit - just add glue.

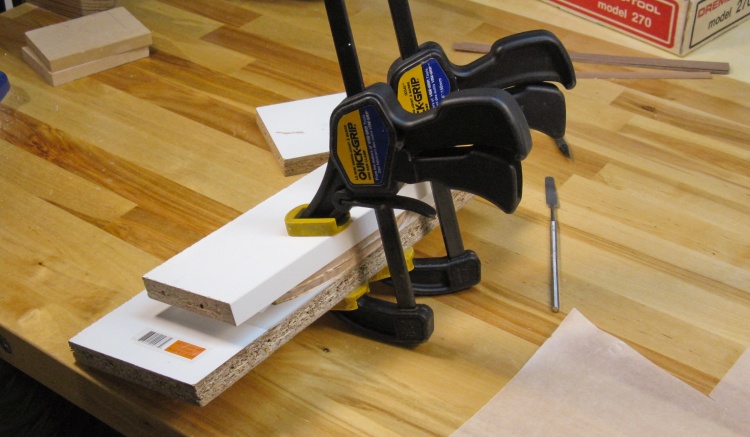
Starting to laminate the ends
And here I'm adding glue. I mostly made short stacks of pieces (alternating maple and walnut of course) and then joined the short stacks.
Laminations for all five sides done
Eventually the sides, ends and the top were laminated (and nicely arranged for the photo).
After this, I sanded smooth the inside of the four walls for a consistent box interior.
After this, I sanded smooth the inside of the four walls for a consistent box interior.
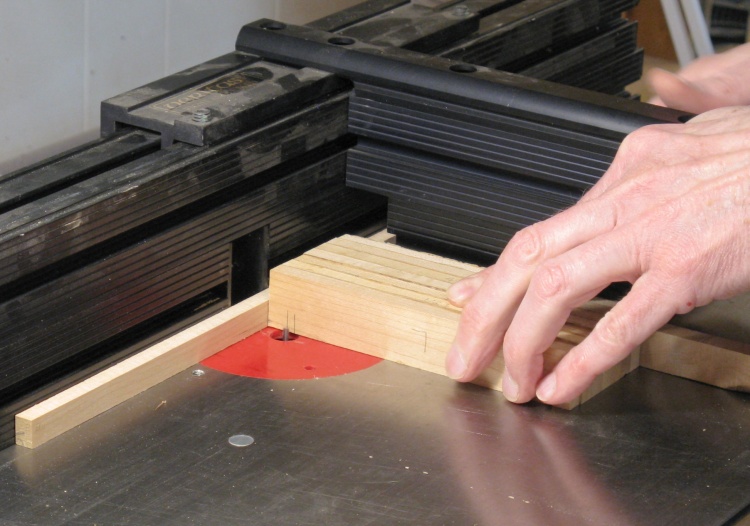
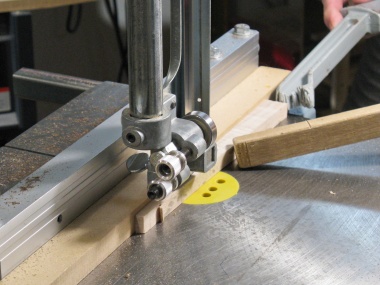
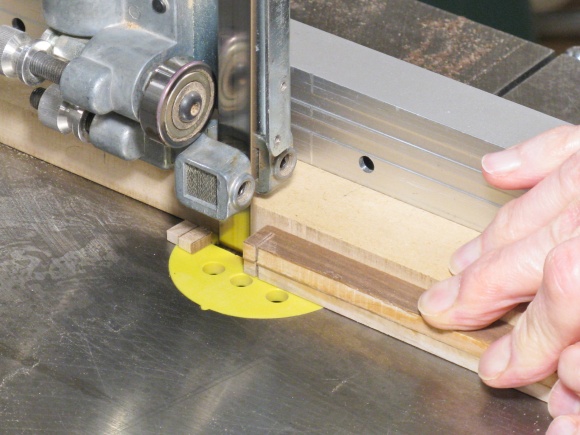
Routing ends
In the joint between the sides and ends, the glue would touch only the end grain of the sides, which would give a much weaker than normal joint. To improve that, I made a small (1/8") rabbet joint where the side protrudes into a notch in the end as illustrated in the sketch.

This gives a larger glue joint area, including some side-grain parts to help strengthen the joint.
In this shot the notch of the rabbet is about to be routed in one of the end pieces.
This gives a larger glue joint area, including some side-grain parts to help strengthen the joint.
In this shot the notch of the rabbet is about to be routed in one of the end pieces.
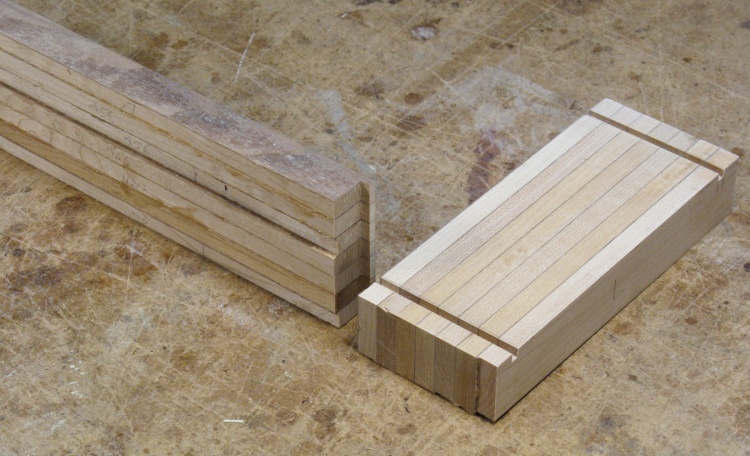
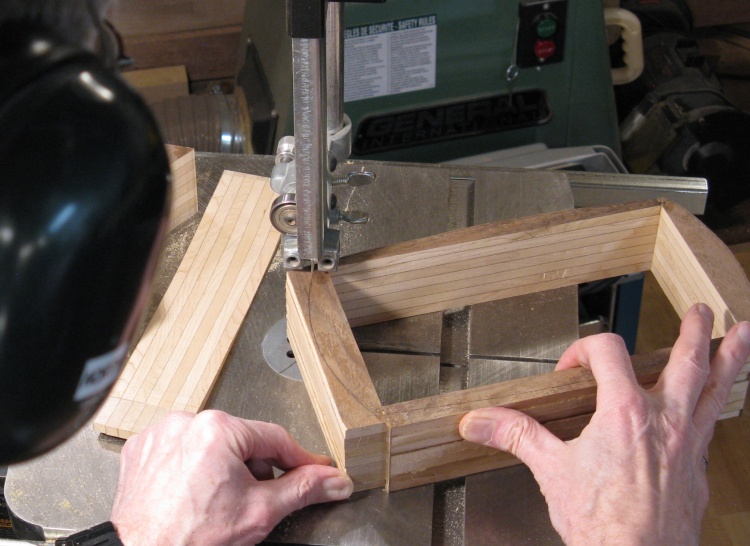
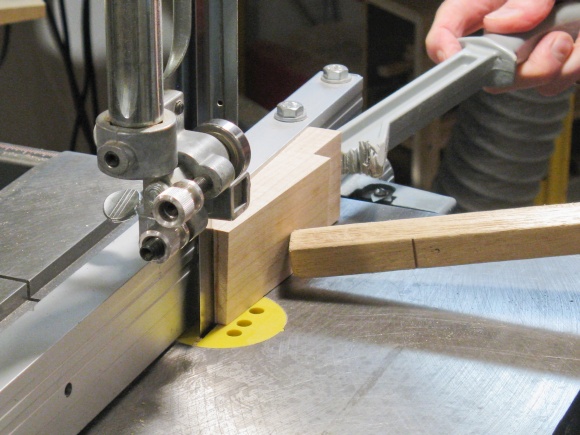
Simple rabbet joints were used at the corners
This shows the side-to-end joint before assembly.
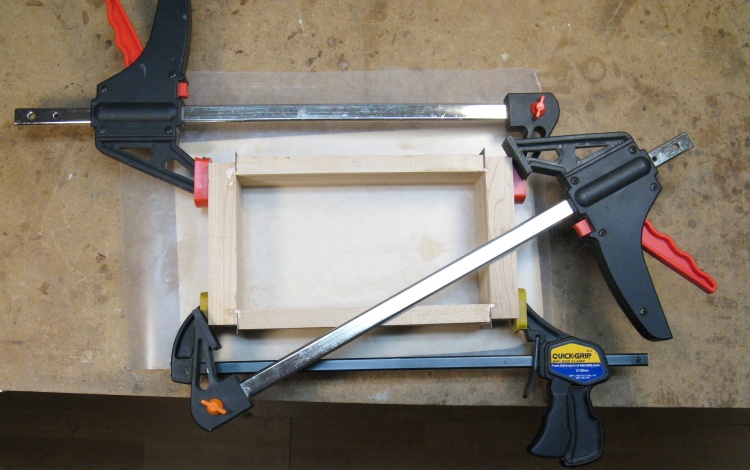
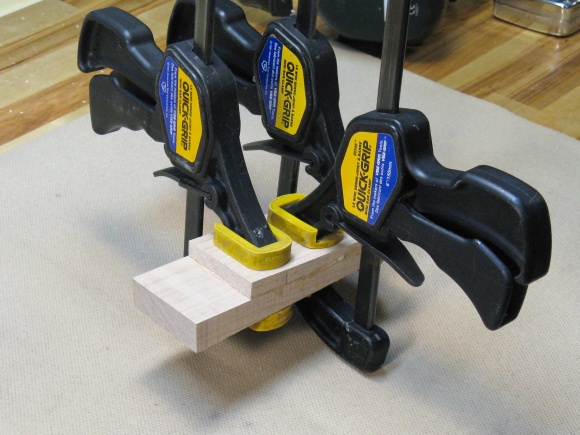
Gluing together the box sides
Next step was to glue the four box sides together. The diagonal clamp is holding the box square since it wanted to go together a bit skewed with only the horizontal clamps.

Sides marked and ready to be cut to shape
Once the glue was dry, the outside shape was traced on to the top walnut layer using a full-sized pattern and carbon paper.
Cutting the curves in the sides
Then it was back to the bandsaw to remove the excess wood. I left about 1 mm of wood outside the line to give some margin for sawing error. That will later be sanded off to produce smooth curves.

Coarsely-shaped box ready for the cover
This is the shaped box just off the bandsaw. I would defer the sanding until after the top was added so they could be done in the same step.
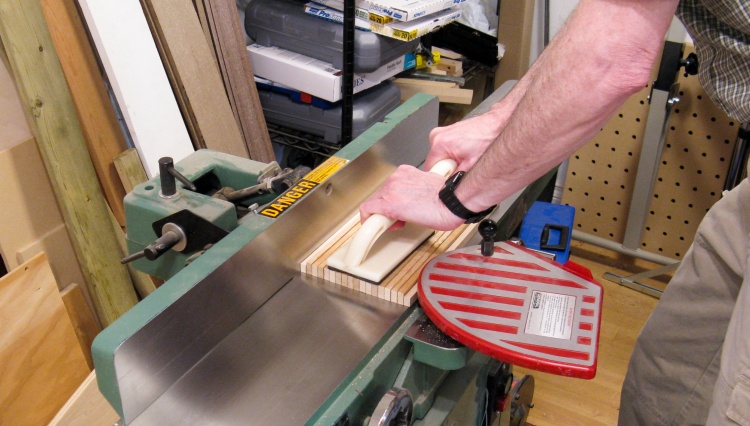
Flattening the bottom of the cover
To ensure that the top sat on the walls without any gaps, the underside was flattened using the jointer.
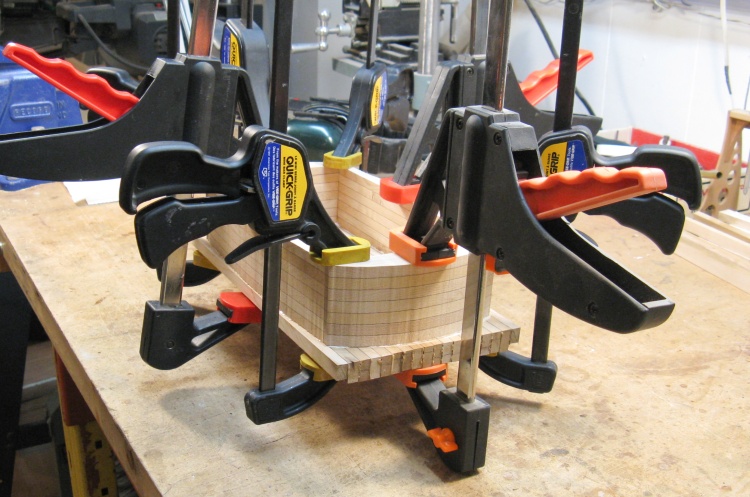
Gluing on the cover
And then the top was glued to the sides with plenty of clamps to make sure there were no gaps.
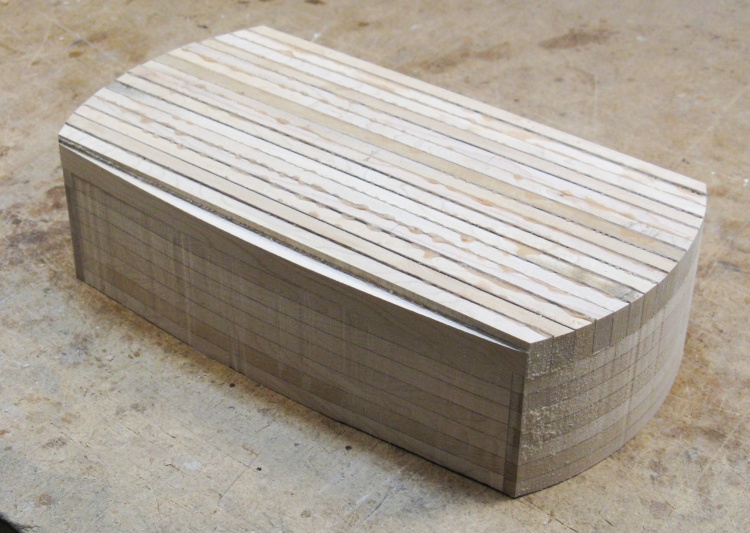
The basic box done after trimming off the cover overhang
The top was made slightly oversized as is evident in the photo above. Here it has been trimmed off flush with the walls in preparation for sanding.
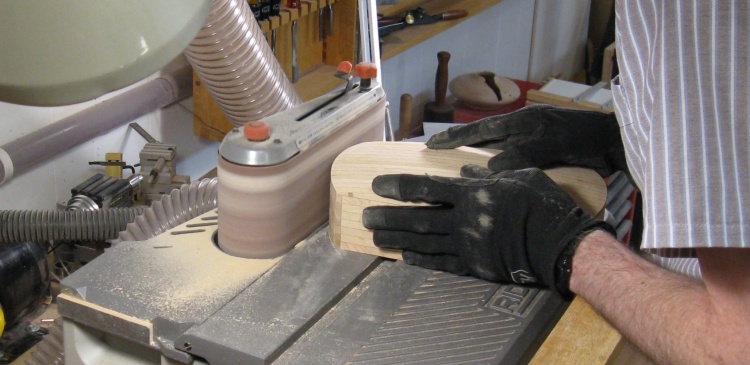
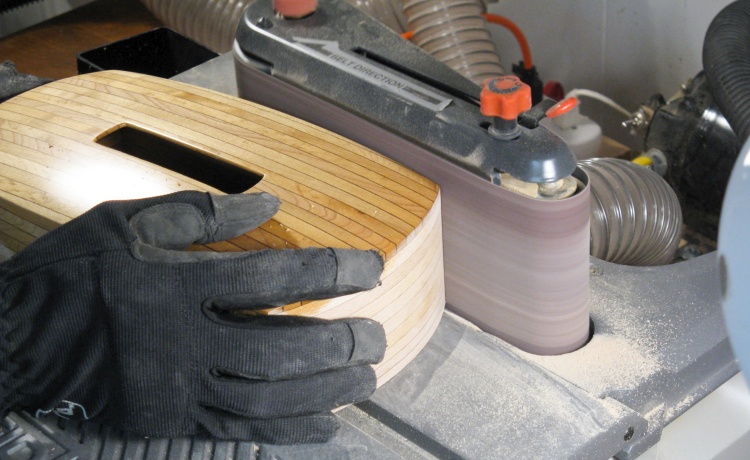
Shaping the cover into a curved profile
The top first had the ends tapered a bit using the bandsaw, and then it was rounded off using the belt sander as shown here.
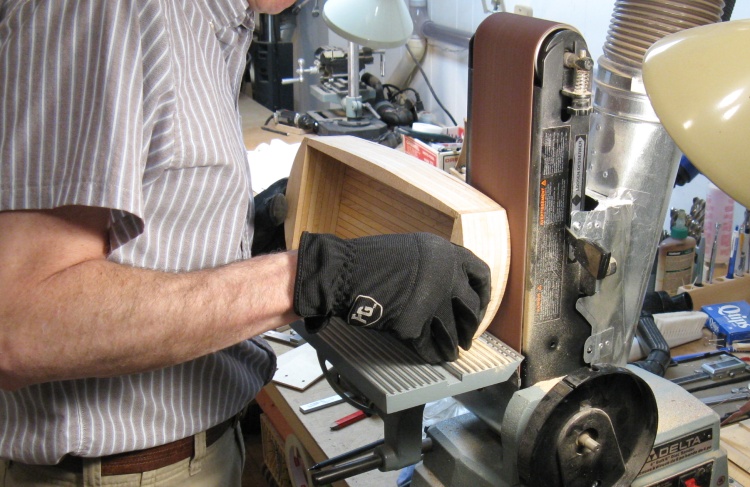
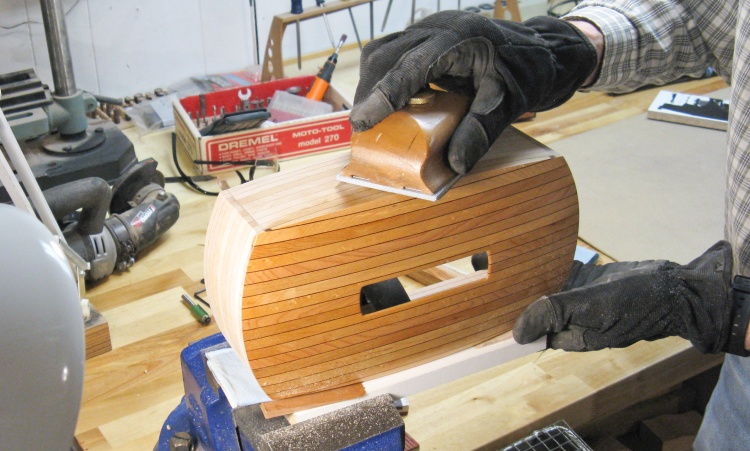
And also some smoothing of the sides and ends
Then I switched over to the horizontal belt sander to do the sides and the ends. This was pretty easy since they were just convex curves to sand smooth.
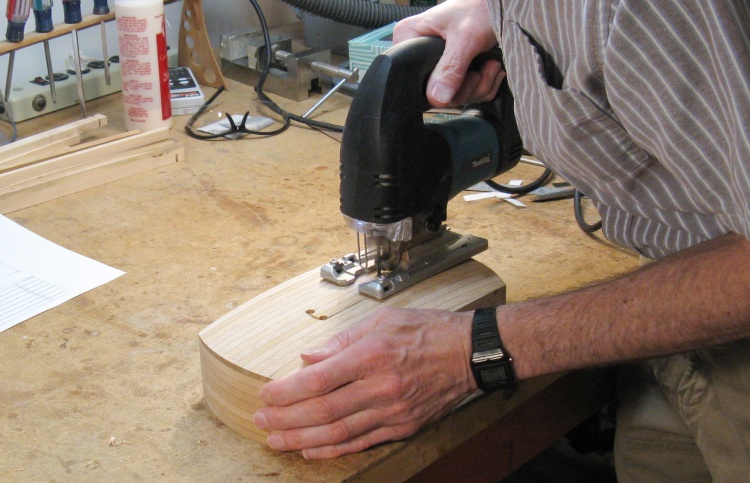
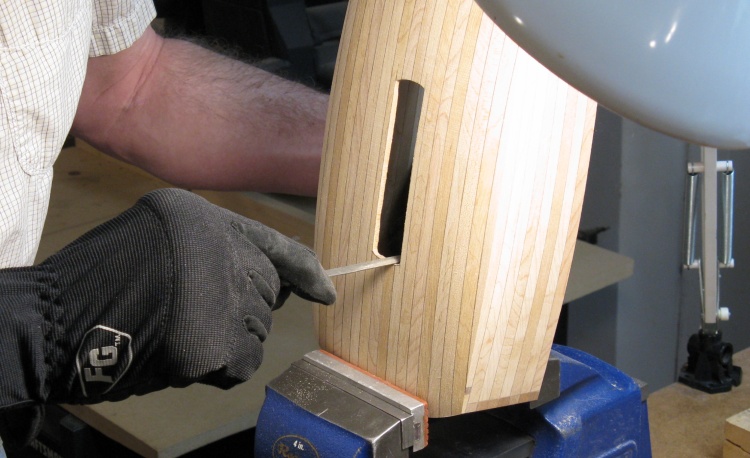
Cutting out the tissue opening
I used a jigsaw to cut out the tissue opening. The rough edges of the hole would be cleaned up with files a bit later on.
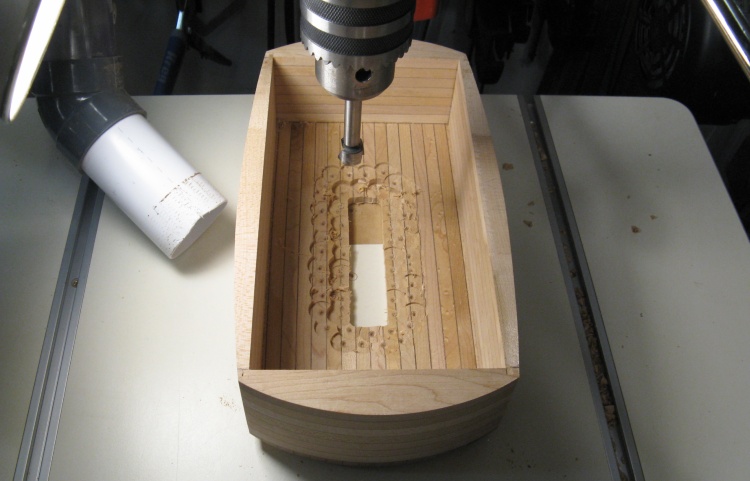
Using a drill to thin the center section
I wanted a thinner section visible where the tissues came out, so I needed to remove wood around the hole on the underside of the cover. With the walls in place it was a bit tough to access, so I used a forstner bit in the drill press to rather crudely remove the bulk of the wood.
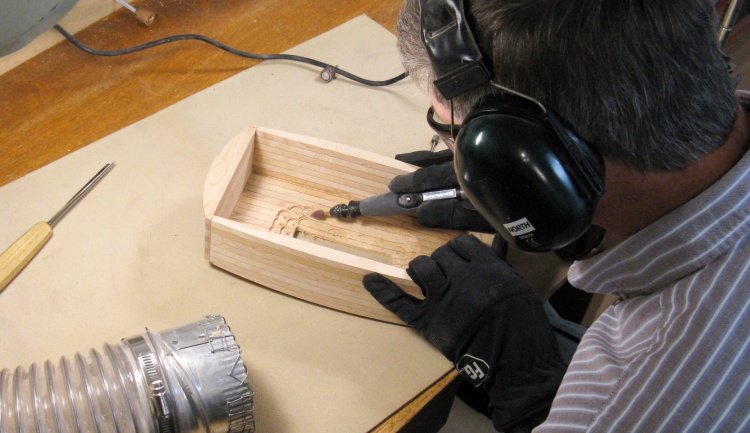
Smoothing of the center section
Then that section was smoothed out using a Dremel tool and abrasive bits.
Shaping of the opening
Once the center section was thinned consistently, the hole was cleaned up using files.

And finally some hand sanding of all surfaces
The last woodworking steps were to round off the opening and then sand the sides and top of the box, starting at 150 grit and ending at 320.
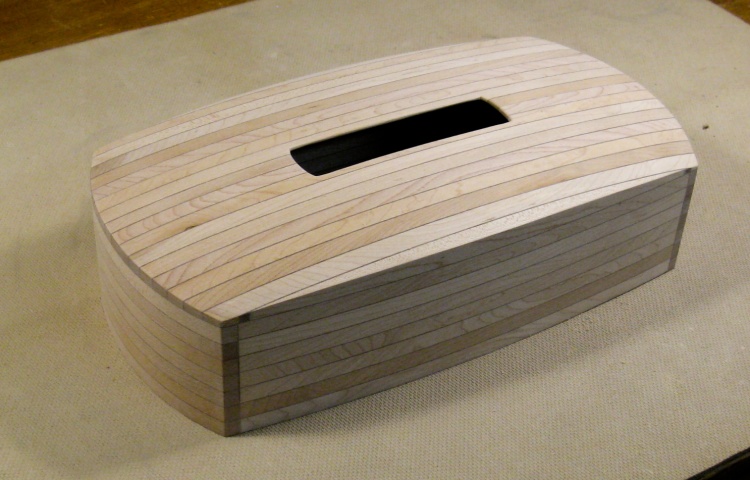
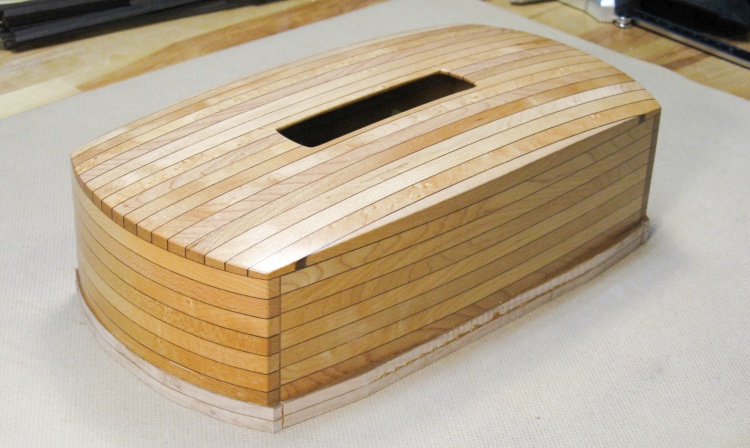
That's all the woodworking done
And here it is complete and ready for finishing.
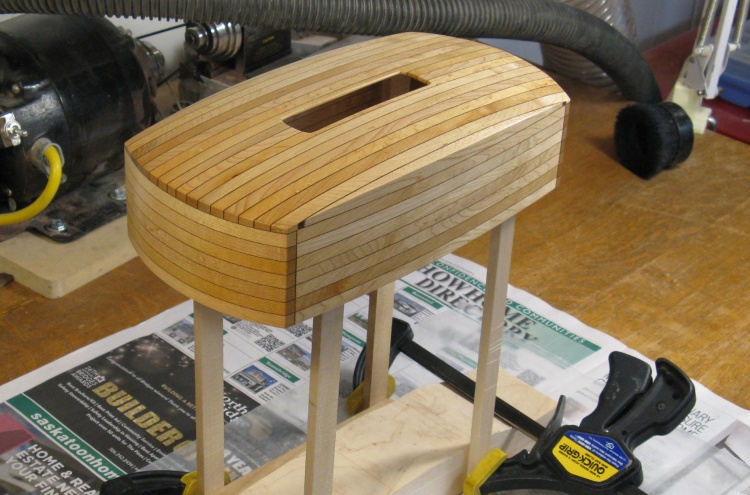
The cover on a makeshift stand with the first coat of varnish
I used my normal Fast-Drying Polyurethane varnish, applying three coats with steel wool sanding between the coats. I slapped together a little stand to hold up the cover for varnishing and here it is seen after the first coat.
Done
Complete.
2021
This cover was made for the shortest Kleenex-brand box which held 85 tissues. However just a few months after I finished this cover, the box size it was made to fit became increasingly hard to find until it disappeared completely. The 85-tissue product then appeared in the 100-tissue box, which was about 1/2" taller. With 1/2" of space above the tissues. Yah, thanks for that "improvement", Kimberly-Clark.
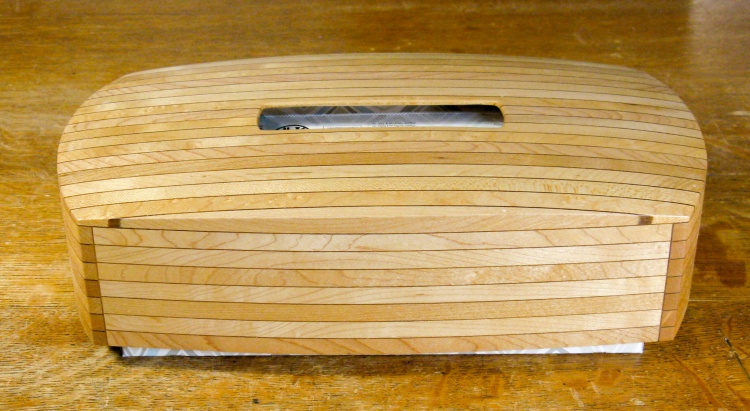
The "flood pants" look. Grrrrr....
Well, we put up with the goofy look for a few years but in 2021 I made another two tissue box covers, this time tall enough to fit the larger box. When those were done I decided to go back and modify this one by adding a couple more layers to the bottom.
This is the look of the original cover with a new box.
This is the look of the original cover with a new box.
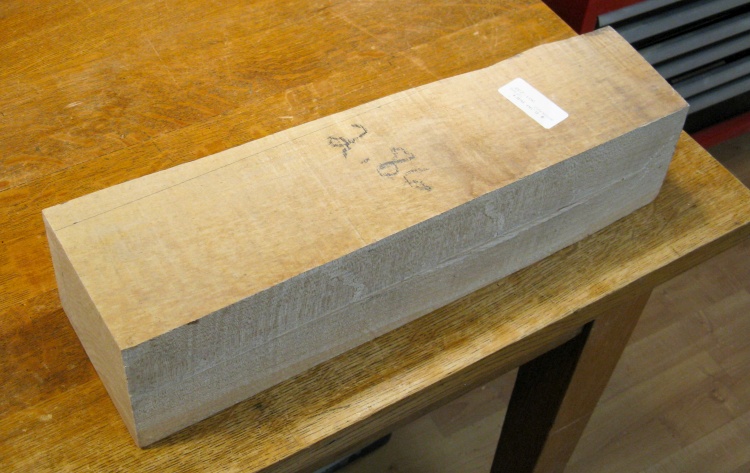
Slightly more Western Maple than I should need
There was originally some question as to the specific wood species used for the laminated cover (since it was made from scraps donated by a neighbour). But when I later bought this large turning blank of Western maple, I could see in it most of the grain patterns from the tissue box cover wood and decided that's what it likely was.

This little wedge should be just enough
I was able to cut off this wedge without affecting the size of a turning I could get from the blank, and that gave me enough to modify the cover.
And then it was the standard process of flattening one side as a reference and cutting out the pieces I needed. My plan was to add two additional layers to the box and I started by cutting out the two maple layers needed for each of the long sides;
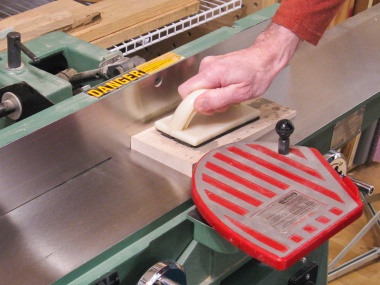
Doing a bit of flattening...

...then cutting to correct height...
...and finally cutting to width
And then there was enough wood volume left but not quite the thickness I needed for the wider end pieces, so I glued two layers of the remaining part of the wedge together and used that to make the two layers;
Needed some lamination for the end pieces
Cutting end pieces to correct width
All the new skirt pieces about to be thickness planed
The pieces were cut slightly thick to have some margin to remove the saw marks. Here all the pieces are taped to the planer sled to go through for final thicknessing.
Between the maple layers are of course the thin layers of walnut, cut from veneer. I had a couple small pieces of veneer that would be enough for this little application. These shots show the veneer being cut for the sides and ends;

Cutting veneer for the sides...
...and the ends
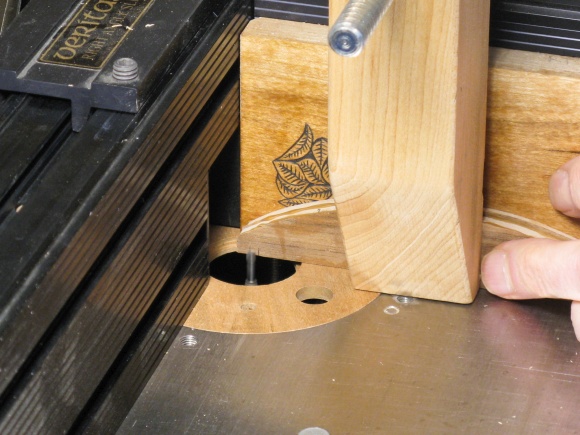
Gluing the stack-up for one of the ends
Then as in the original build, the maple and walnut were laminated to form each of the sides.
In this shot, the four layers (two each of maple and walnut) forming one of the ends is being glued and clamped between some nice flat pieces of melamine.
In this shot, the four layers (two each of maple and walnut) forming one of the ends is being glued and clamped between some nice flat pieces of melamine.
And continuing to follow the process of the original part of the cover; I added a small rabbet joint to each corner, formed with the bandsaw or router as appropriate;
Cutting the rabbet in a side piece...
...and an end piece

Flattening the bottom
The bottom needed to be nice and flat to make a good joint with the new layers, so I used a sheet of 150 grit sandpaper on a piece of MDF with generous lashings of elbow grease to produce a uniformly flat bottom.

A rather crudely-made form to fit the top contours
The top of the cover is curved so clamps couldn't grip it well enough to hold the new pieces on to the bottom when they were glued.
To get a flat surface to accommodate the clamps, I cut out a contour that matched the top in this old scrap of plywood. It would fit over the top with some padding and provide a suitable clamping surface.
To get a flat surface to accommodate the clamps, I cut out a contour that matched the top in this old scrap of plywood. It would fit over the top with some padding and provide a suitable clamping surface.

Gluing the new skirt pieces
This shot shows the new skirt pieces (visible at the top of the previous photo) being glued on to the original cover.
You can hardly tell it was modified!
The extra layers are now on the cover. I needed 1/2" of height increase which unfortunately wasn't an even multiple of my original layer thicknesses, so instead I used two slightly thinner layers.
Sanding the new parts flush
Then it was a matter of sanding the new layers flush with the old sides. To ensure a consistent look, I also sanded off the old varnish from the sides.
And of course a bit of hand sanding
The belt sander was followed by hand sanding to eliminate any visible sanding scratches.
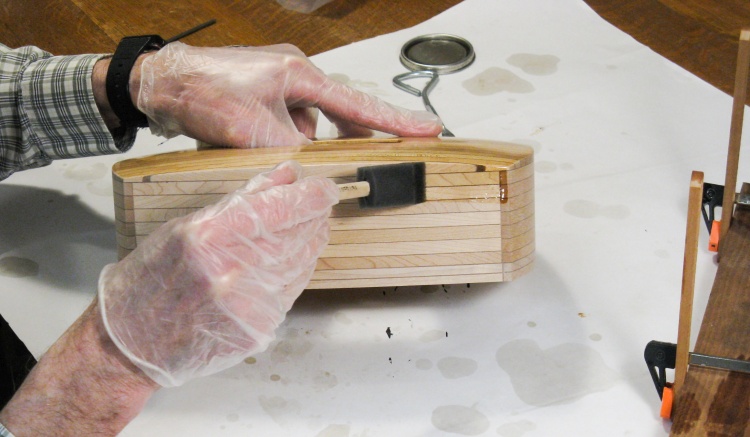
Re-varnishing
And finally varnish was re-applied to the sides.
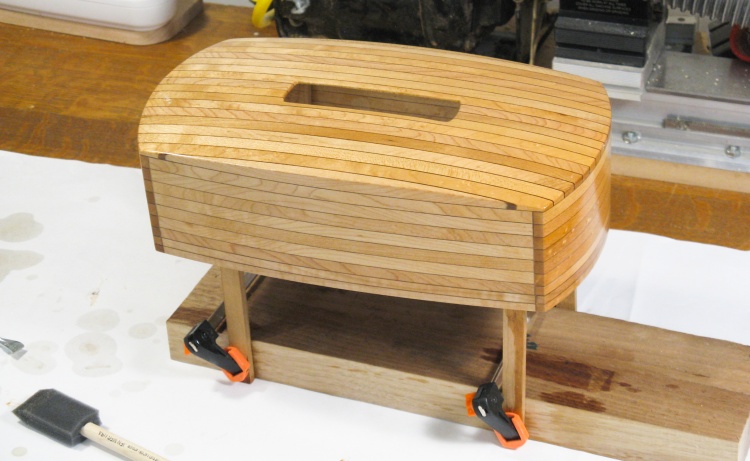
Perched on a drying stand
In this shot, the cover has the first of three coats of varnish applied to the sides. I also ended up adding two coats to the top as well.
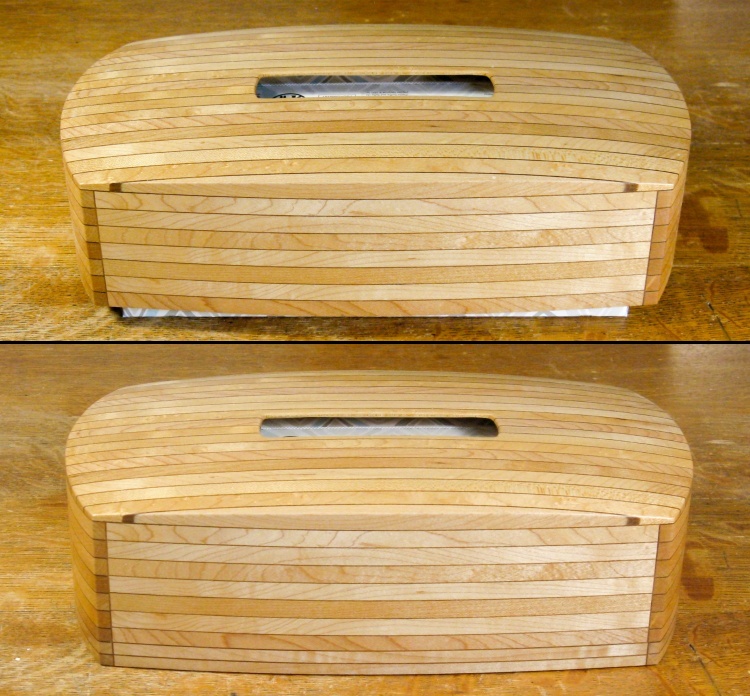
Before and after views
And that was it! Again.
This shot shows the height difference with the new cover reaching all the way down to the table.
This shot shows the height difference with the new cover reaching all the way down to the table.


