The construction of the tissue box cover is pretty simple since it's just a 5-sided box with slightly rounded faces. I wanted to keep it simple so that the focus remained on the incised design rather than the actual shape. That being said, the construction technique needed a bit of thought to prevent seasonal expansion from weakening the joints and also to minimize exposed end grain since those areas would produce a much darker background.
I started the box construction before finalizing the carving details, which was possible since they are mostly independent processes. I eventually settled on a Saskatchewan-animal-silhouette motif that I had developed earlier for a trivet that didn't quite make it into the physical realm (it was left languishing at the plan stage). And a background design based on a matrix of stylized leaf shapes seemed appropriate for the subject matter.
I started the box construction before finalizing the carving details, which was possible since they are mostly independent processes. I eventually settled on a Saskatchewan-animal-silhouette motif that I had developed earlier for a trivet that didn't quite make it into the physical realm (it was left languishing at the plan stage). And a background design based on a matrix of stylized leaf shapes seemed appropriate for the subject matter.
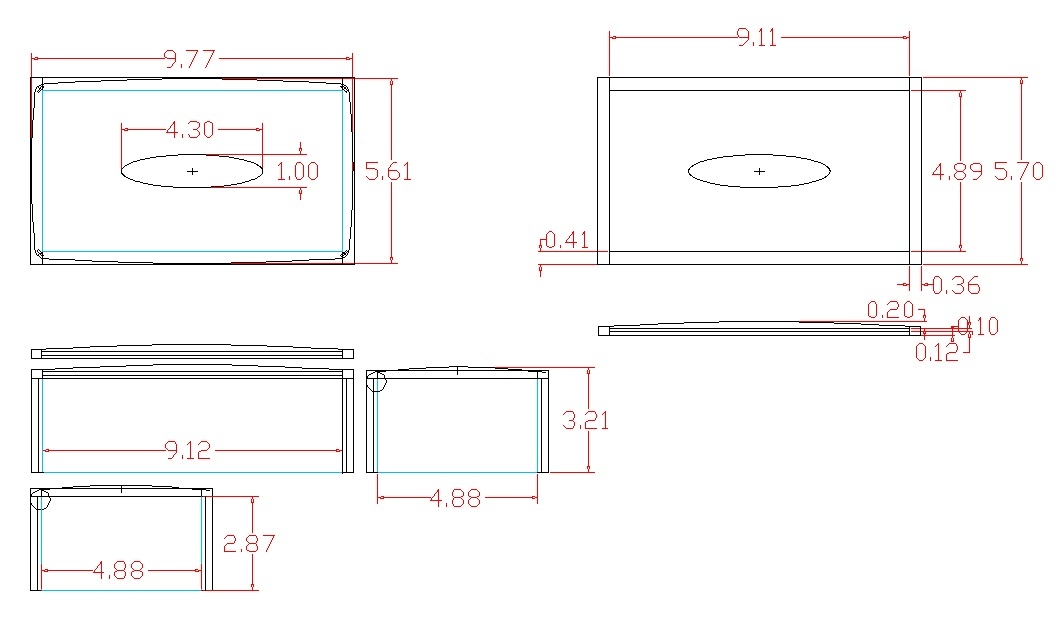
The basic box plan
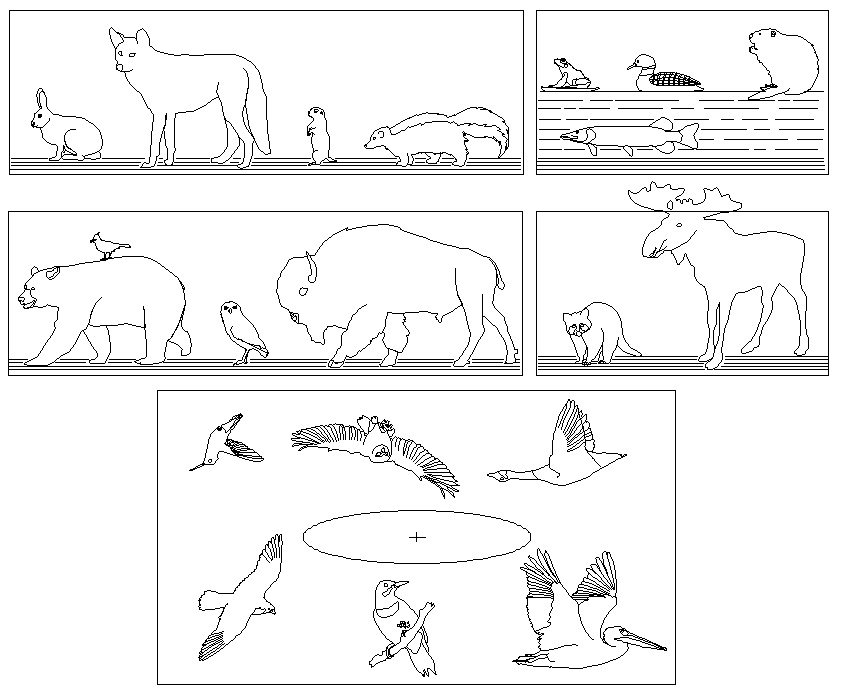
The menagerie, with some artistic license employed in choosing scale
A couple test boards
I thought I'd better check the varnish-carve-paint technique before diving into the actual construction.
I started by using three small cherry planks on which to try things out. These first two will have a few different finish options applied to them.
I started by using three small cherry planks on which to try things out. These first two will have a few different finish options applied to them.
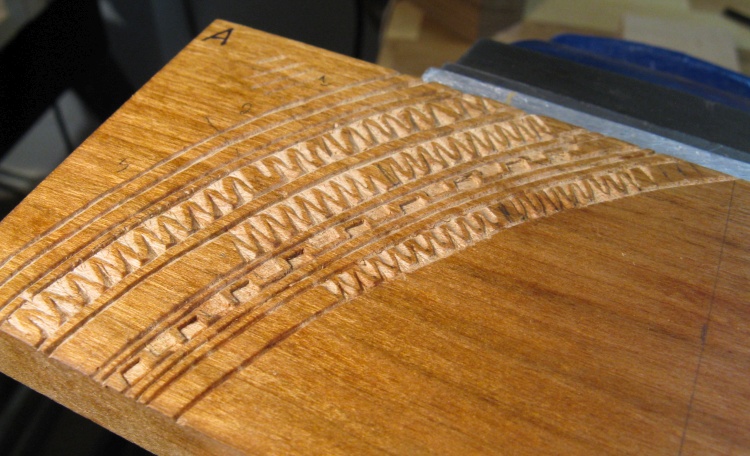
Some sample patterns
Then I did some exploratory pattern carving, varying spacing and tool use to see what looked best. Later patterns looked a little better than these rather inconsistent ones but I still wasn't particularly happy with them.
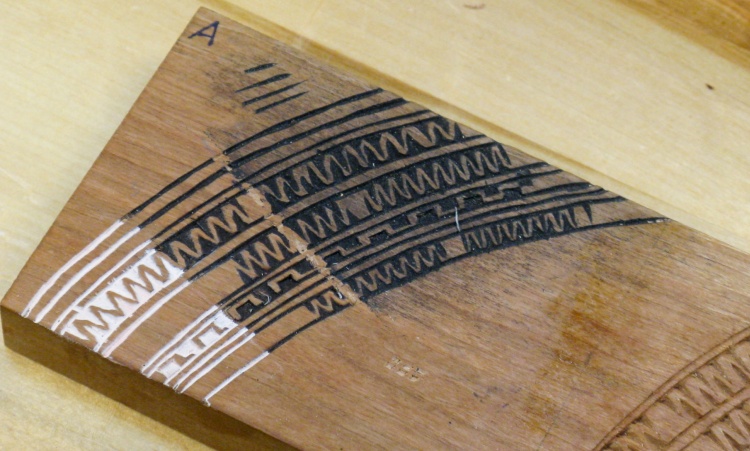
Some paint applied
I also did some gesso application to see what would work. Obviously the top section has some issues (cloth wiping off gesso not damp enough) but the middle section looks decent.
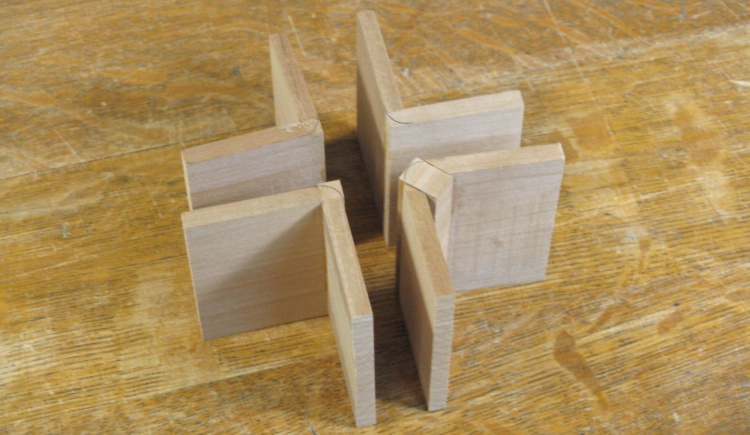
Four options for corners (before rounding)
I also wanted to minimize the visibility of the corner joints. Most joint types expose some end grain which ends up darker than the side grain due to being more porous. So I tried out a few options for building the corners.
These four different joint arrangements have been glued together and need to be rounded off and have finish applied.
These four different joint arrangements have been glued together and need to be rounded off and have finish applied.
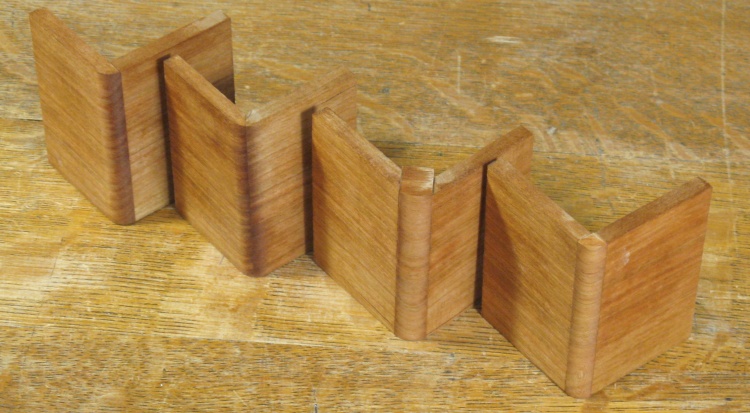
The finished corners - second from left chosen
Then after rounding and finishing with Danish Oil, I compared the four.
I decided to go with the second from the left. It's not necessarily the least visible but it doesn't have the "I'm a special piece forming a joint" look which I think we can all agree is a good thing to avoid.
I decided to go with the second from the left. It's not necessarily the least visible but it doesn't have the "I'm a special piece forming a joint" look which I think we can all agree is a good thing to avoid.

Enough wood for a couple covers
OK - enough prep. Time to start on the real thing.
I decided to make two covers since it takes little more time to make two as compared to one. This is a leftover piece of cherry from a chair I made back in '09 and will be enough for both tissue box covers.
I decided to make two covers since it takes little more time to make two as compared to one. This is a leftover piece of cherry from a chair I made back in '09 and will be enough for both tissue box covers.
Cut into proper thickness
I started by slicing the wood into four thinner pieces to form the walls. Each of these is long enough for either two long or two short walls.
The walls were processed a bit, first by flattening one side on the jointer and then by thickness-planing them to 0.36".

Flattening a face on the jointer
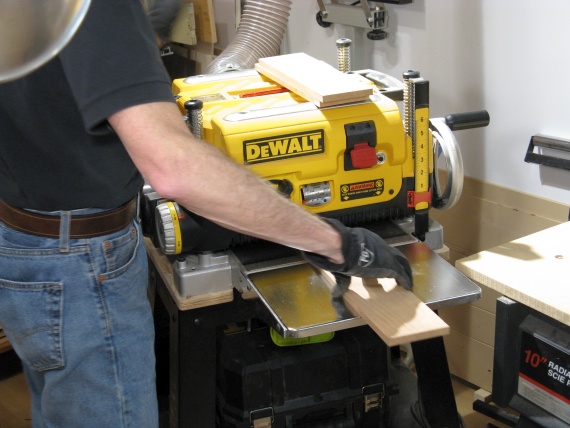
Thickness planing the sides
Wood expands much more across the grain than along the grain so it's usually a risk to directly glue together pieces with opposite grain; the difference in expansion and contraction caused by seasonal humidity fluctuations can eventually break the glue joint. One solution to this is to use plywood since it has plies of alternating grain direction which reduce seasonal dimension changes.
That was the approach I took with the top of the tissue box cover, making a three-ply plywood using cherry for all the layers. The outside plies would have the grain aligned with the long dimension of the cover while the inside ply would be at right angles to help reduce the dimensional changes. These photos show some work done making the plies.
That was the approach I took with the top of the tissue box cover, making a three-ply plywood using cherry for all the layers. The outside plies would have the grain aligned with the long dimension of the cover while the inside ply would be at right angles to help reduce the dimensional changes. These photos show some work done making the plies.
Cutting a thin ply for the cover
Setting up to plane plies to proper thickness
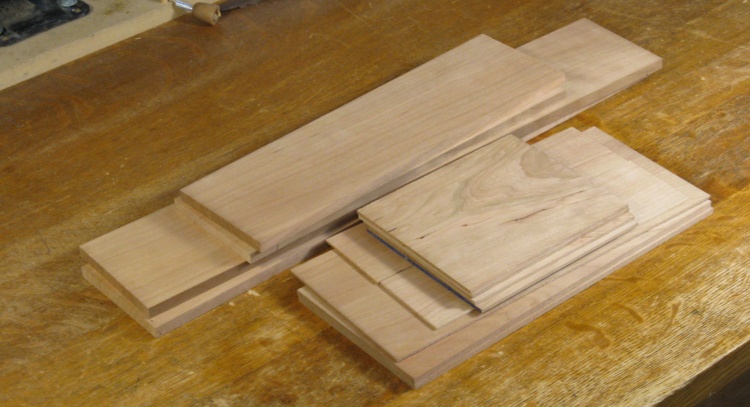
The complete set of pieces
This revised pile 'o wood photo includes the pieces to be used for the tops of the covers.
The upper layer for the plywood tops needed to be a single piece to keep the grain continuous, but the middle and lower plies could be made from more than one piece since their woodgrain wouldn't be visible.
That let me use some smaller pieces of wood for those lower layers which is why some of the pieces here are narrower or shorter than the cover dimensions.
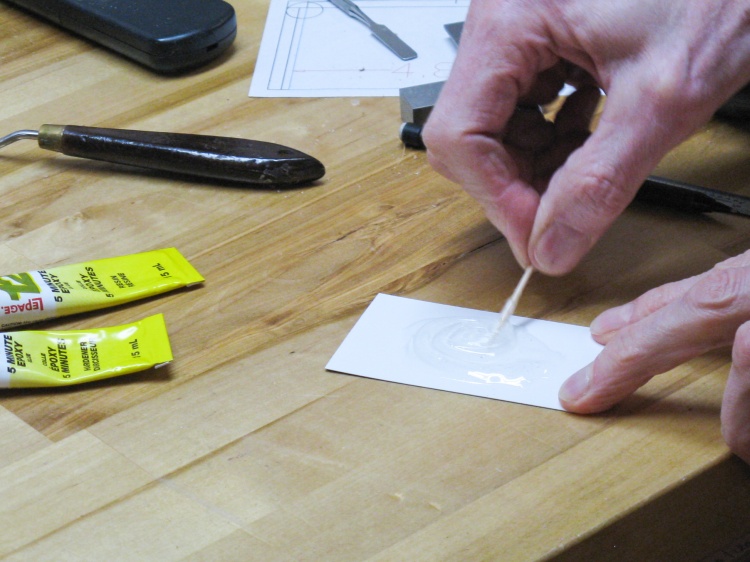
Mixing up epoxy to make plywood for the top
I used epoxy to glue the plies together for the top. Here I'm mixing up a batch or one of them, aided by a business card and a toothpick.
I worked at Wavecom/Vcom/Vecima for 27 years and received various (usually timepiece-based) gifts on 5 year intervals and on retirement. None of them were remotely as usefull as the box of leftover business cards. Mixing epoxy, shimming jigs, cutting patterns - I use several each project.
I worked at Wavecom/Vcom/Vecima for 27 years and received various (usually timepiece-based) gifts on 5 year intervals and on retirement. None of them were remotely as usefull as the box of leftover business cards. Mixing epoxy, shimming jigs, cutting patterns - I use several each project.
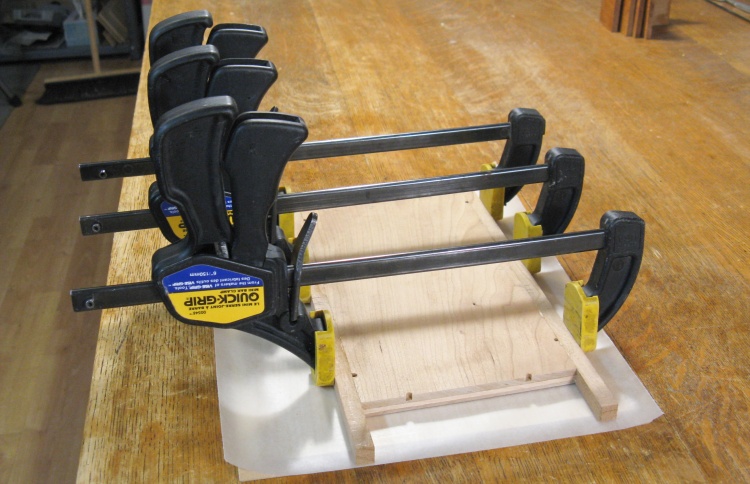
Clamping glued-up plies
The three plies for the top were glued, stacked and then clamped between flat pieces of wood to cure.
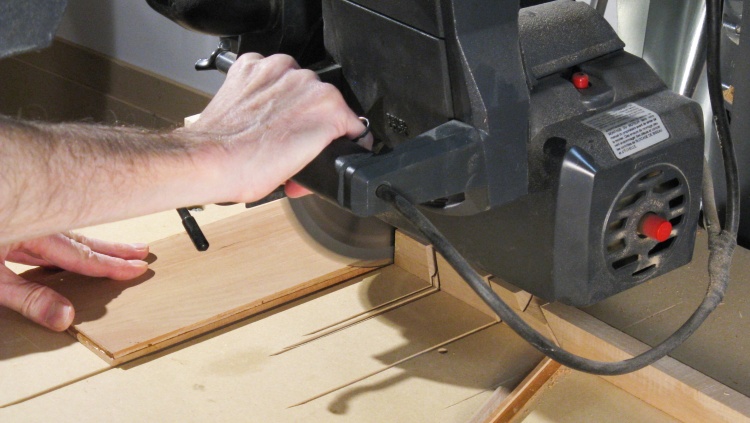
Trimming the top piece
Here one of the tops is being trimmed to size. The radial arm saw produces a nice smooth and straight edge on the cut piece, which can't be said of the bandsaw.
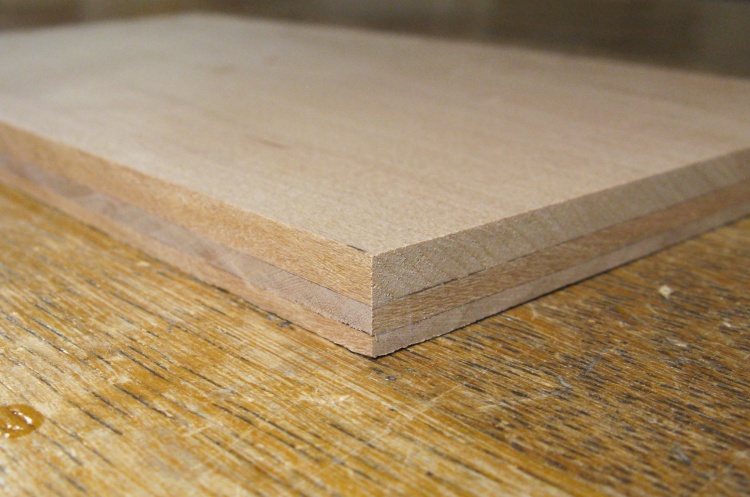
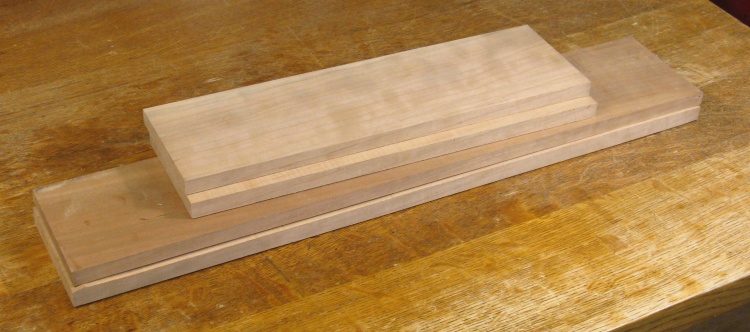
Top plywood cross-section
This photo shows the cross-section of the plywood top, showing the different ply thicknesses of (bottom to top) 0.10", 0.12" and 0.20".
I needed the top ply to be thick enough so it could be shaped it into a shallow curve without hitting the next ply down.
I needed the top ply to be thick enough so it could be shaped it into a shallow curve without hitting the next ply down.
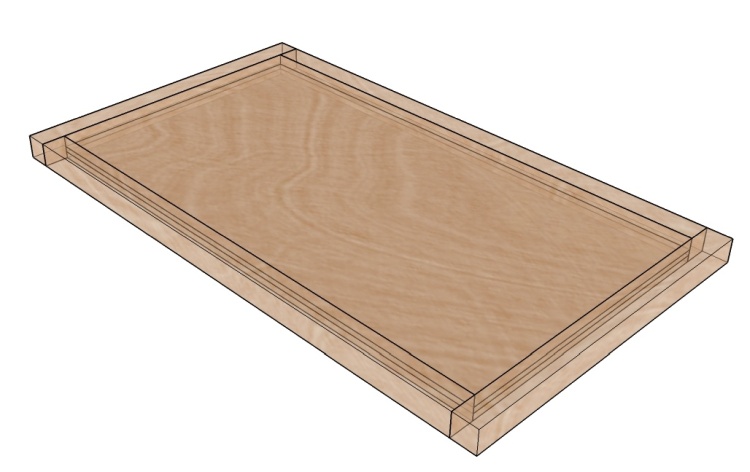
Top assembly, if it was made from maple jello
I could have just fit the top down inside the four walls of the cover but it would have been difficult to get tight joints on all sides. Instead the plan was to add solid edging all around and place that assembly on top of the walls. That would allow for a good fit and permit the corners to be rounded without exposing the inner plies.
This sketch shows the assembly of the top.
This sketch shows the assembly of the top.
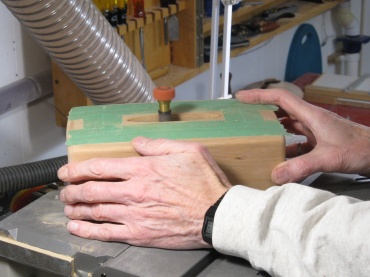
Routing some depth marks on the edges
The plan was to shape the top into a curve after the edging was added, but with the edging in place I wouldn't be able to see how much of the top ply was remaining as it was shaped.
To prevent the woodworking tragedy of sanding through the top ply, I routed some depth guides around the outside edge to show how much wood should be taken off.
To prevent the woodworking tragedy of sanding through the top ply, I routed some depth guides around the outside edge to show how much wood should be taken off.
Trimming sides to the proper height
I wanted the top corners to blend nicely with the sides, and since the sides were made taller than they needed to be, I cut off the excess and used those pieces for the corners.

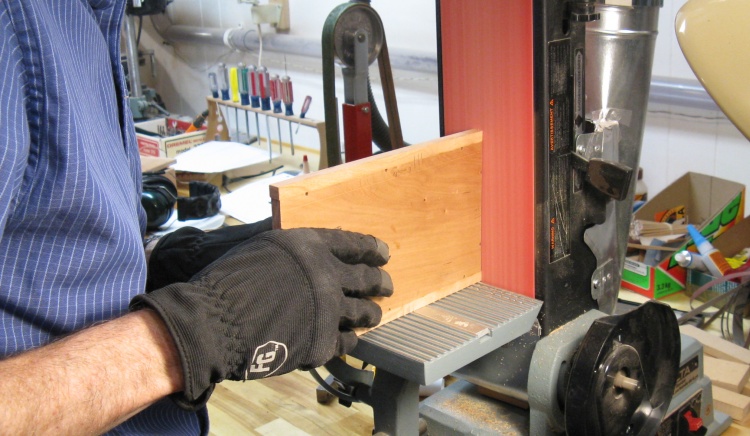
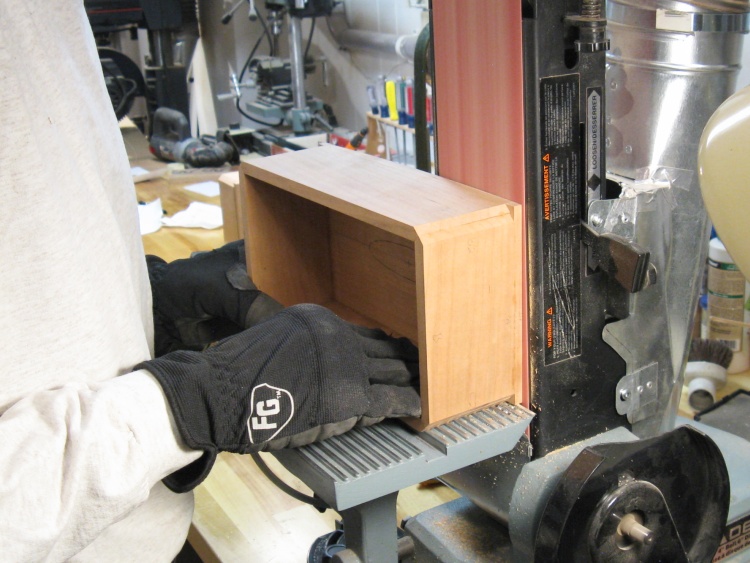
Removing outside corners with the belt sander
To make the corner joints, I first sanded off the outside corners since those weren't needed due to the eventual curving of the sides.
That also had the advantage of reducing the length of the corner bevel by half, making it easier to get a tight joint.
That also had the advantage of reducing the length of the corner bevel by half, making it easier to get a tight joint.
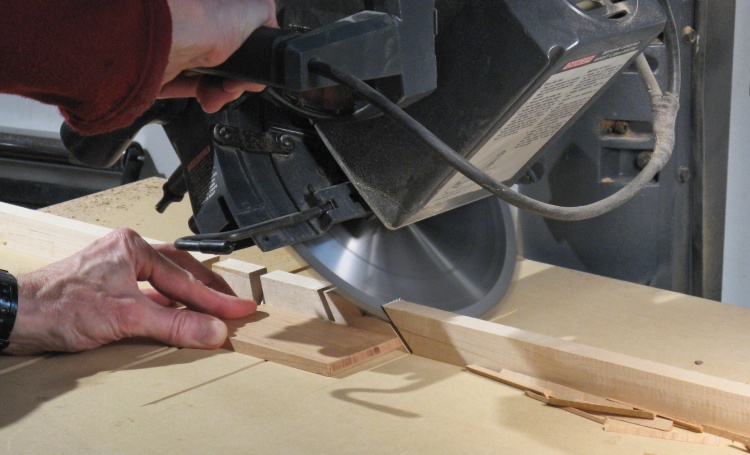
Bevelling corners on radial arm saw
Then the ends of the four sides were bevelled at 45° using the radial arm saw.
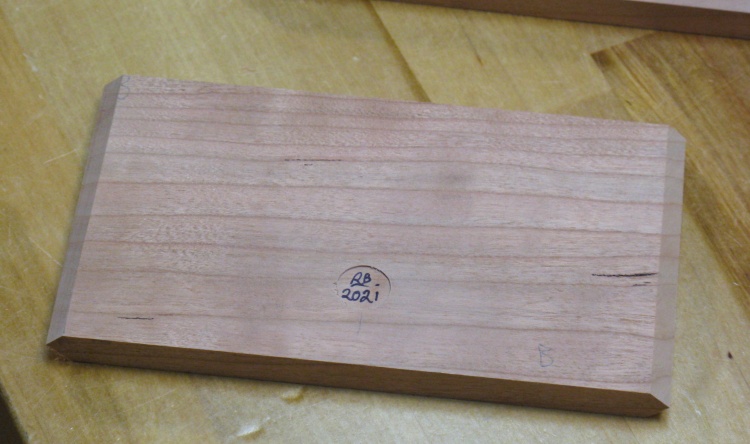
One of the short sides, complete with initials
Here is one of the short sides with the ends bevelled.
I also took the opportunity to put my initials in place on the inside of one end wall of each cover since it was much easier to do before the cover was assembled.
I also took the opportunity to put my initials in place on the inside of one end wall of each cover since it was much easier to do before the cover was assembled.

Gluing together the sides
Then both covers were glued together. I just used masking tape to apply pressure on the joints as they dried. Here a square has also been clamped into one corner to ensure the cover walls are nice and square.
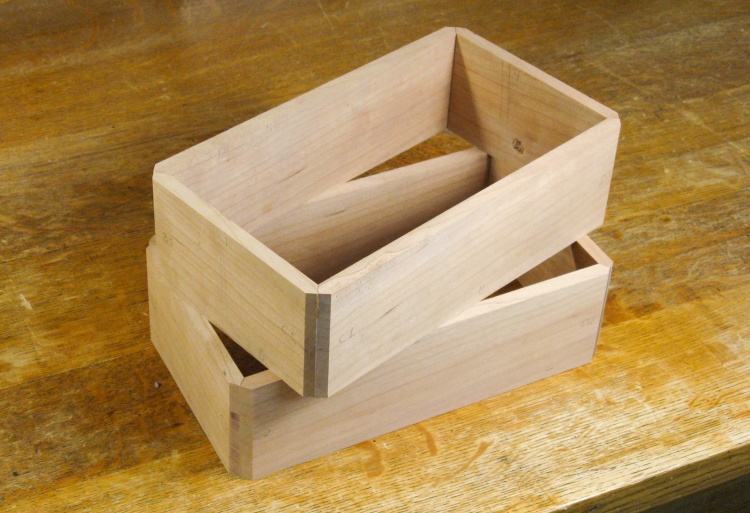
The two topless covers
At this stage, both covers have their walls glued together and now need tops added.
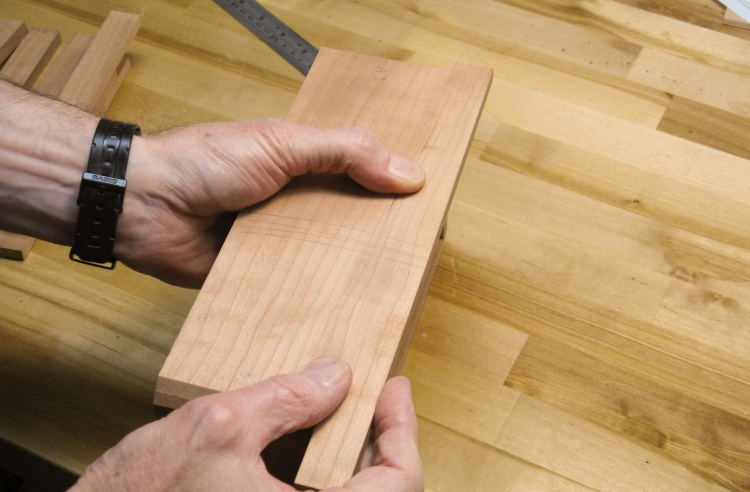
Checking corner alignment with side piece
For a good grain match between the top corners and the sides, I used the extra bits of the sides that I had cut off as the corners. In this shot I'm just checking the alignment marks I had made before cutting the sides shorter.
Gluing the long corner pieces to the top
The cut-offs were wider than they needed to be for corner trim so I first cut them to a square cross-section.
In this shot, the two longer corner trim pieces are being glued to the top. I left the extra length on them to be cut off later.
In this shot, the two longer corner trim pieces are being glued to the top. I left the extra length on them to be cut off later.
Evening-up the end after trimming
That extra corner-piece length was cut off and then the ends of the top were flattened using the belt sander.

Gluing on the top (less end corner pieces)
Then the not-quite-complete top was glued to the sides.
End corner pieces glued on now too
And finally the two shorter corner pieces were cut approximately to length and glued into place.
Doing these last ensured tight gaps even if the cover walls were not all exactly the same height.
Doing these last ensured tight gaps even if the cover walls were not all exactly the same height.
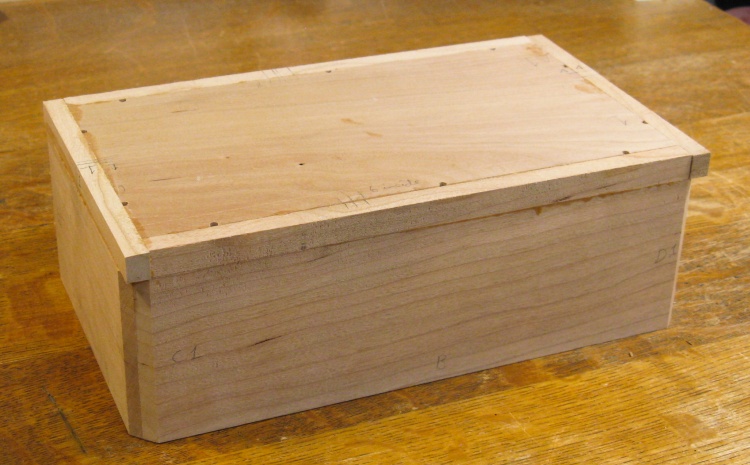
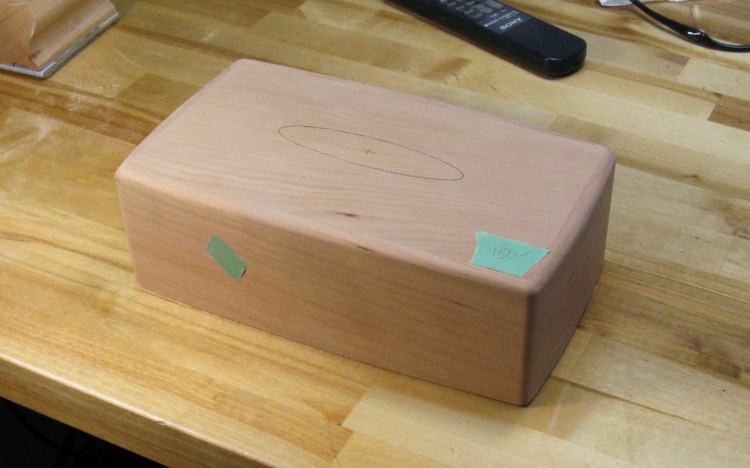
A rather un-glamourous cover, ready for some shaping
And here is one of the covers completely assembled.
It's rather...unassuming at this stage, but it gets better.
It's rather...unassuming at this stage, but it gets better.
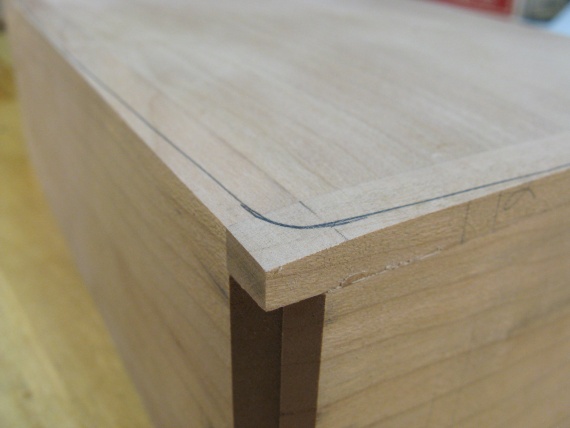
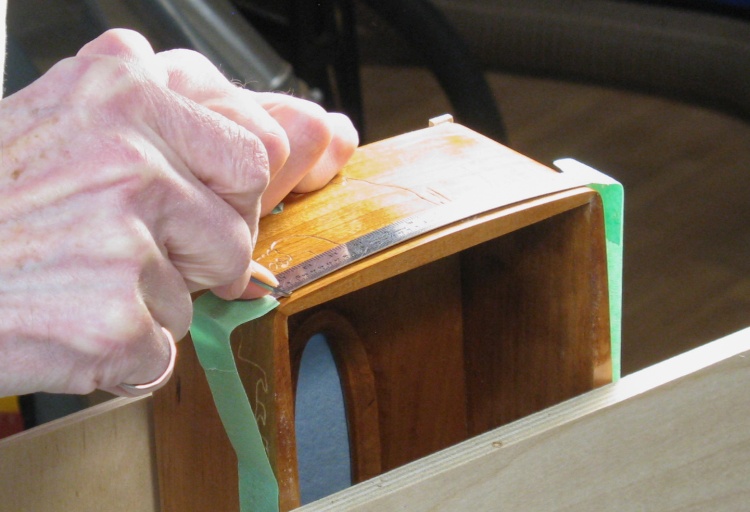
Tracing on a curve for the top
I started the shaping by putting the curve into the top. In this shot I'm tracing the curve onto one of the sides.
You can see in this shot the long sleeves of the shirt I put on that day. I had been feeling chilled (which often happens to me even in a well-heated house in winter*) and the long-sleeved knitted shirt seemed to fix that. I wore long-sleeved shirts almost every day after that - I had to order a few more since I didn't really have enough for every-day wear.
* Since the house is not drafty or particularly unevenly-heated, my pet theory involves an emitted-vs-absorbed radiation imbalance due to colder walls and windows but who's to say?
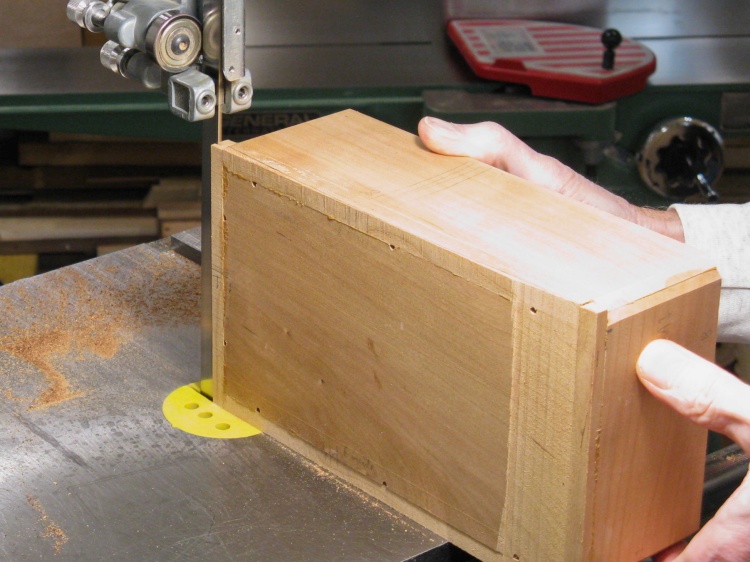
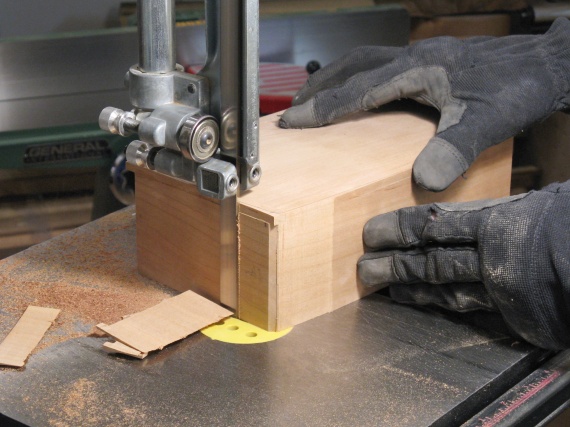
Removing the ends of the curve with the bandsaw
It was a pretty shallow curve so there wasn't a lot to cut off at the corners, but it was easier to cut it off than to sand it all off.
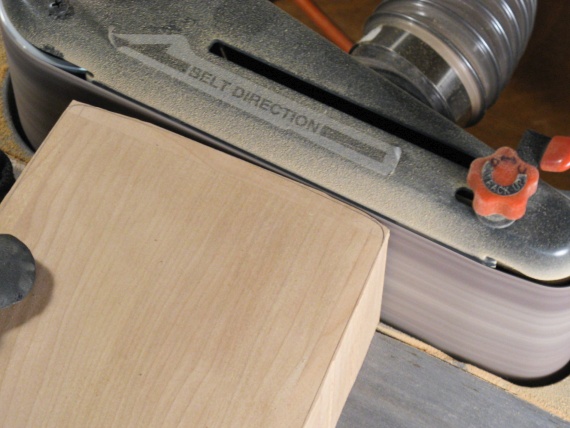
Smoothing the curve
And then I used the belt sander to shape the top to the traced-on lines.
This was done both in the horizontal orientation as shown here, and in the vertical orientation as well to give the top a domed shape.
This was done both in the horizontal orientation as shown here, and in the vertical orientation as well to give the top a domed shape.
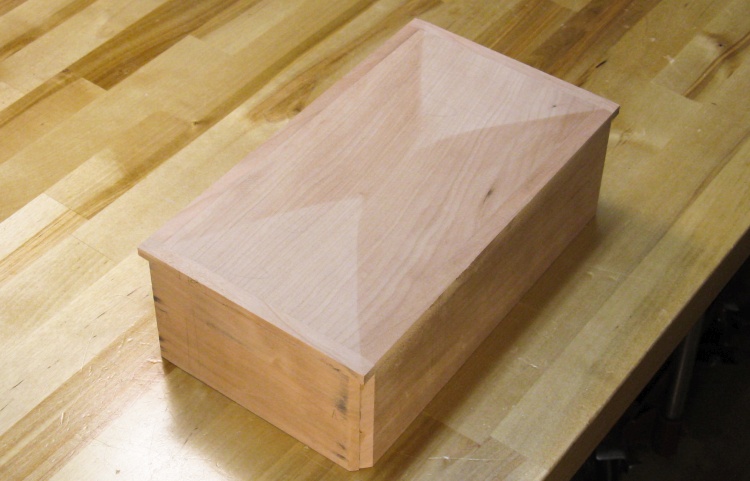
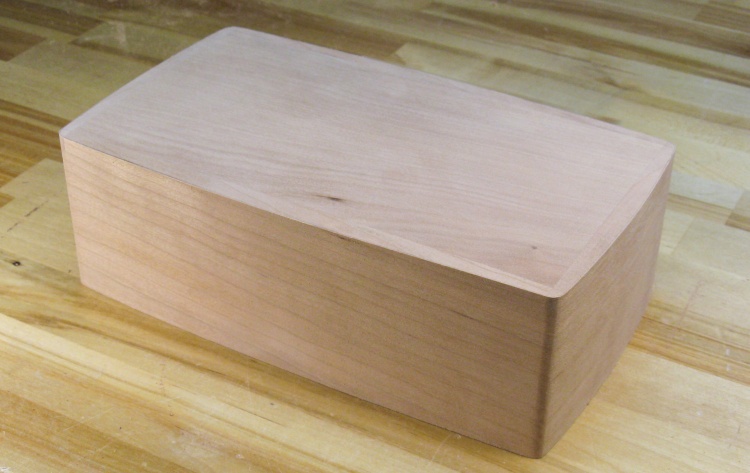
The rather crudely-curved top
This shows the result of the belt sanding, which is a smooth-ish curve over both the length and the width with slightly angular corners between them.
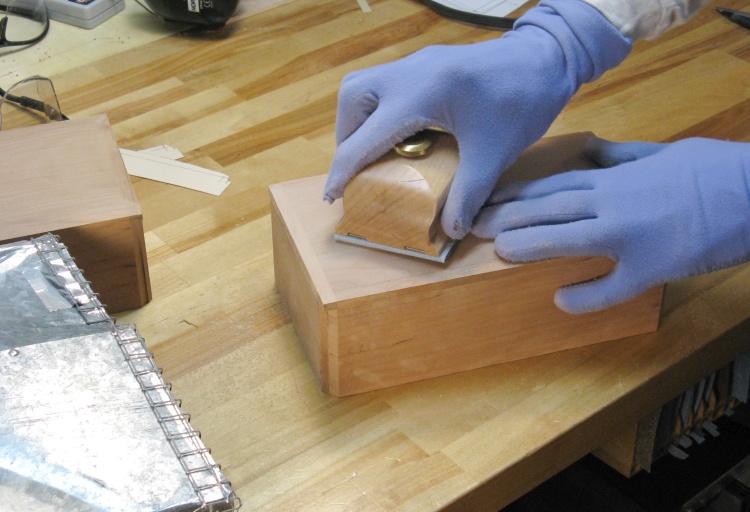
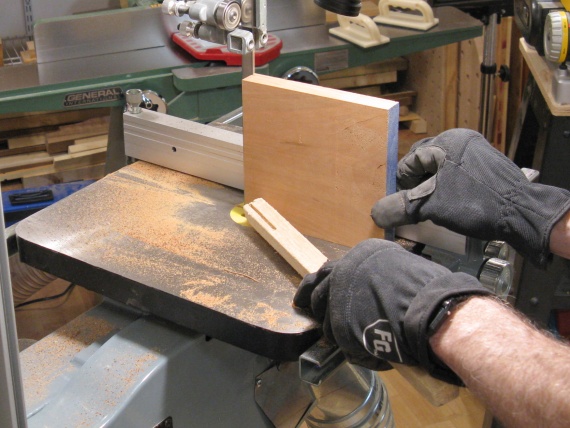
Blending the top curves with a sanding block
I did a bit of hand sanding to smooth off the corners and blend them with the rest of the curves.
Our model here is wearing the short-length Foxgloves in the lovely Periwinkle colour, which "deliver near-barehanded sensitivity while protecting hands from sun, soil and abrasion". Yah, and sawdust too. Fortunately purchasing these at Lee valley Tools is done with an order form so one doesn't need to actually ask for periwinkle-coloured gloves. I suppose I could always try the "moss"...
A sharp eye will notice the right forefinger is a bit ragged, which is the failure mode of almost every work glove I have ever owned.
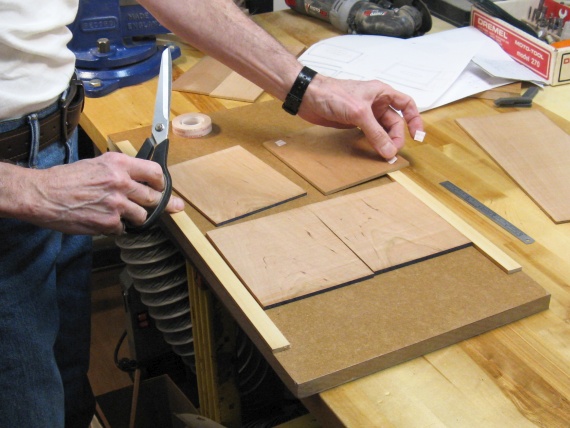
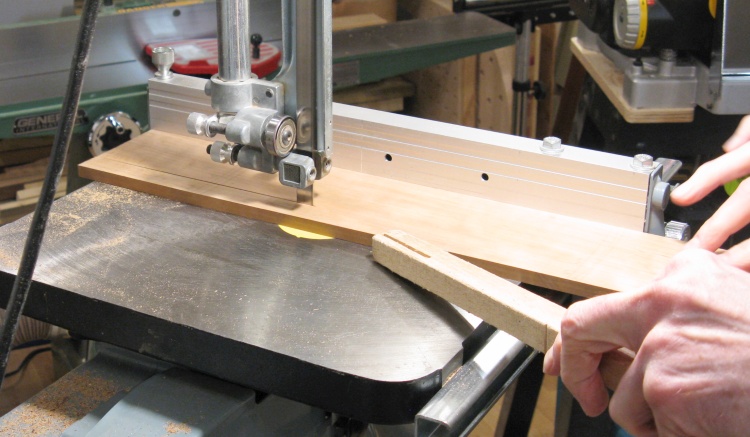
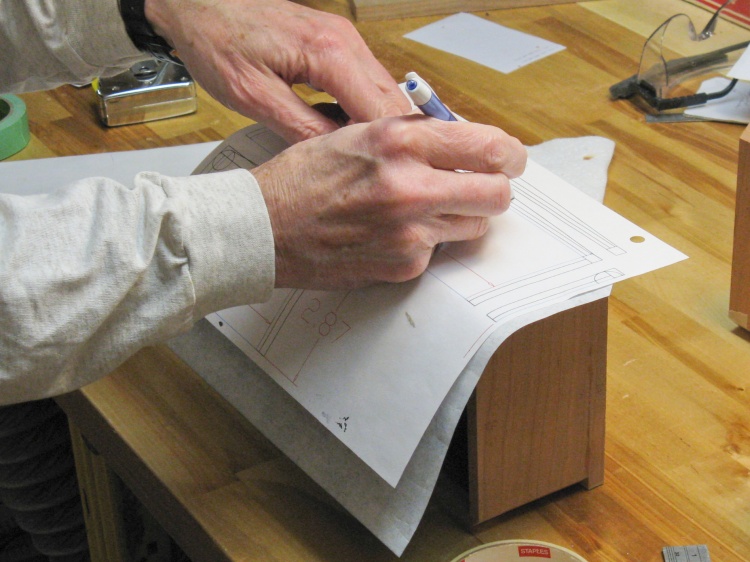
Then with the top done, it was time to shape the sides. I cut a couple patterns from thin cardboard that allowed me to trace the shallow curves of sides and ends onto the cover top.
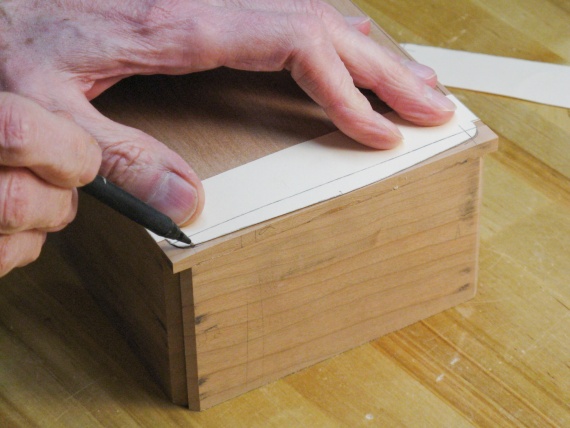
Marking the outside contour
Contour marked
And once again I trimmed the corners on the bandsaw and used the belt sander (the horizontal one this time) to shape the sides to the outline.
These gloves have also succumbed to the right-forefinger-failure-itis but fortunately the failure was along a seam and I was able to sew it back together to give them a new lease on life (and as a bonus avoiding an unnecessary trip out into the COVID-19-infested world).
These gloves have also succumbed to the right-forefinger-failure-itis but fortunately the failure was along a seam and I was able to sew it back together to give them a new lease on life (and as a bonus avoiding an unnecessary trip out into the COVID-19-infested world).
Cutting off corners
Shaping to the line on horizontal belt sander
Overall shape done except for top corners
Here the cover shaping is done except for rounding the top corners.
Hand-sanding of corners and surfaces
A bit of work with the belt sander was done to bevel to top corners, followed by hand-sanding to round things off.
Outside shape done and hole marked
After the rounding was done, I traced on the shape of the tissue hole.
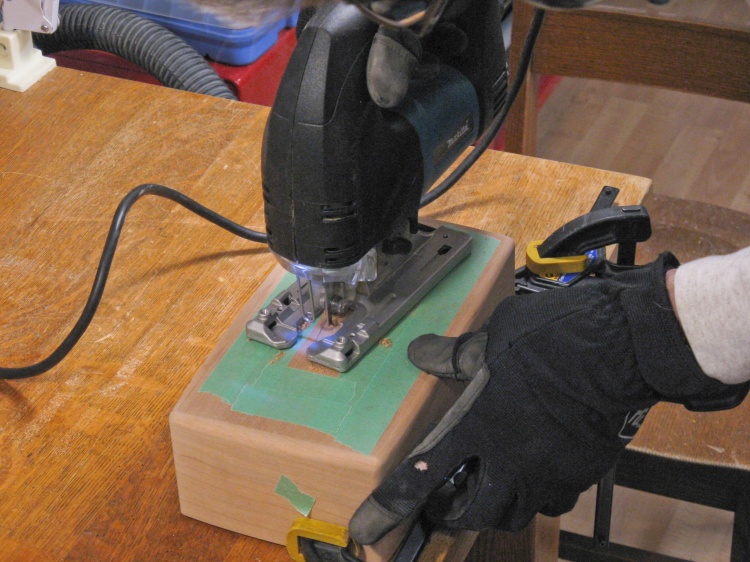
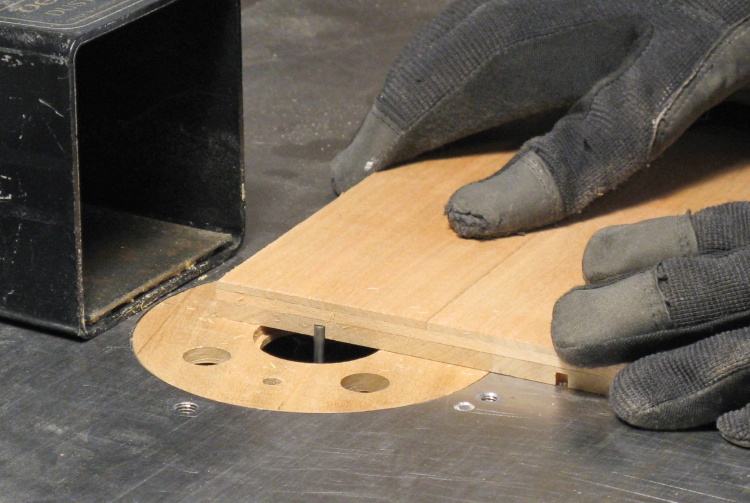
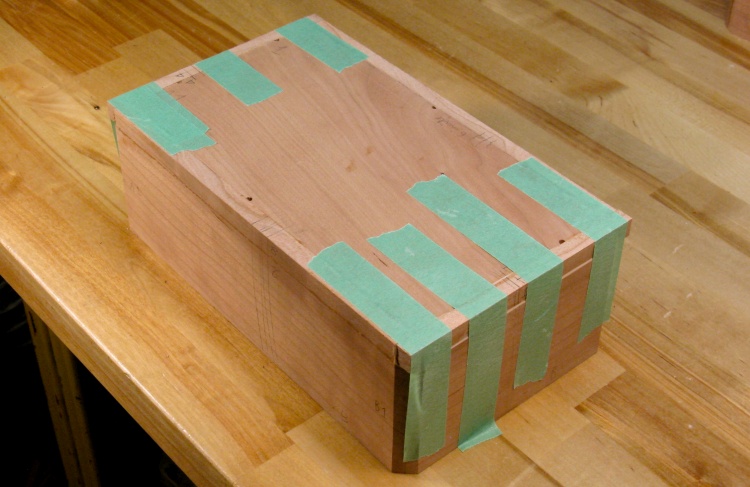
Cutting the tissue hole with jigsaw
The jigsaw was used to cut out the tissue hole.
That layer of masking tape on the cover was added to protect the wood from scratches.
That layer of masking tape on the cover was added to protect the wood from scratches.
The hole shape was refined with the spindle sander and then the thickness of the wood was reduced by removing some from the bottom to make the edge of the opening thinner for that critical tissue box svelt look. The main thinning was done on the drill press using a carbide abrasive bit and then those rough cuts smoothed with a flap-wheel sander on a flex shaft.
Smoothing hole edges
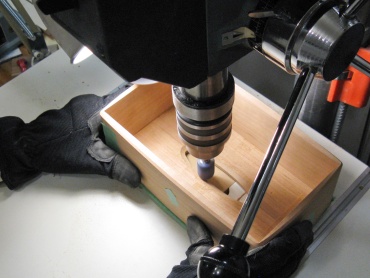
Thinning material next to hole
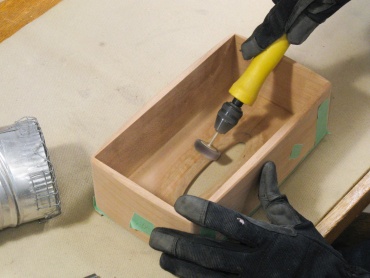
Smoothing the inside
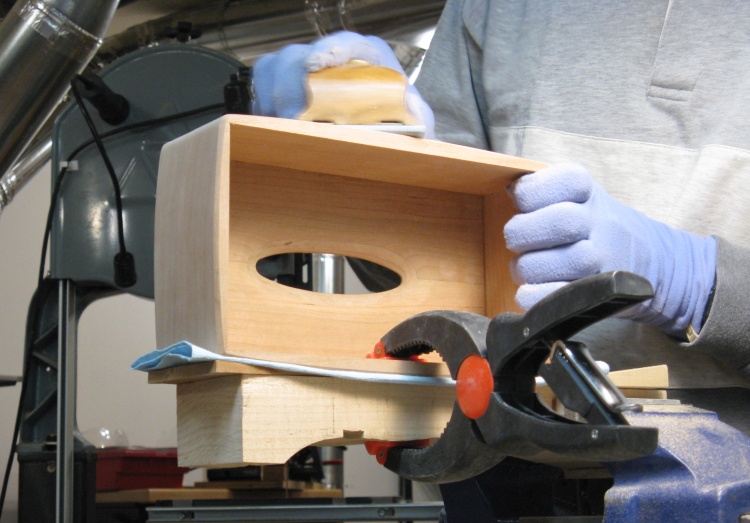
Final hand sanding
Then the cover was sanded down to 400 grit to produce a finish-ready surface.
The twin covers, ready for finishing
This shows the two covers ready for finishing.
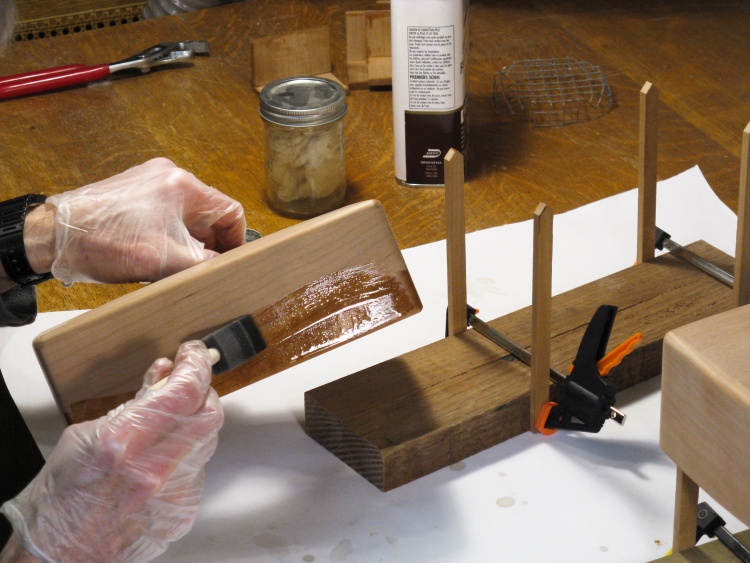
Applying the first coat of finish
The next step was to finish the covers. I used Danish Oil, which is an oil-varnish blend. It is applied heavily and left on for 1/2 hour to soak into the wood and then wiped off and allowed to dry.
It is not a particularly hard finish but one nice feature is that it doesn't require sanding between coats like the varnish I regularly use.
It is not a particularly hard finish but one nice feature is that it doesn't require sanding between coats like the varnish I regularly use.
The (initial) finishing done; 3 coats of Danish Oil
Here the covers have had three coats of Danish Oil applied. Normally that would be the end of the work, but it was only halfway through in this case.
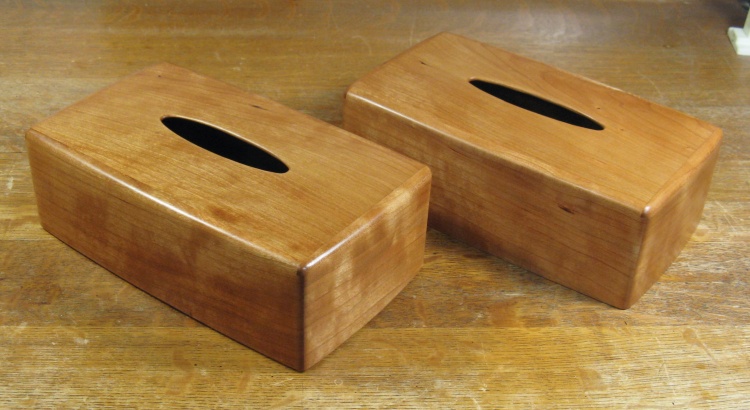
Actually, Sue saw the look of these and decided she liked the unadorned cherry box just as it was. So the leftmost was immediately pressed into service while the right took the "adornment" track.
Actually, Sue saw the look of these and decided she liked the unadorned cherry box just as it was. So the leftmost was immediately pressed into service while the right took the "adornment" track.

The animals again
The theme of the foreground pattern was chosen to be "Saskatchewan animals". I think most Saskatchewanians (even city slickers like myself) could identify most of these beasts. But in the interests of completeness they include by panel:
- Rabbit, wolf, gopher & skunk
- Frog, loon, beaver & pike
- Bear, bluejay, owl & bison
- Raccoon & moose
- Hummingbird, owl, goose,
falcon, northern flicker & pelican.
- Rabbit, wolf, gopher & skunk
- Frog, loon, beaver & pike
- Bear, bluejay, owl & bison
- Raccoon & moose
- Hummingbird, owl, goose,
falcon, northern flicker & pelican.
Tracing the pattern to the cover
I used my standard technique of transferring the pattern using carbon paper.
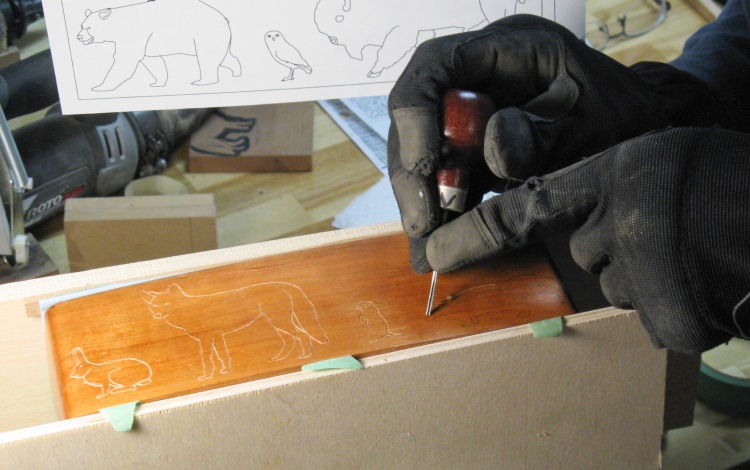
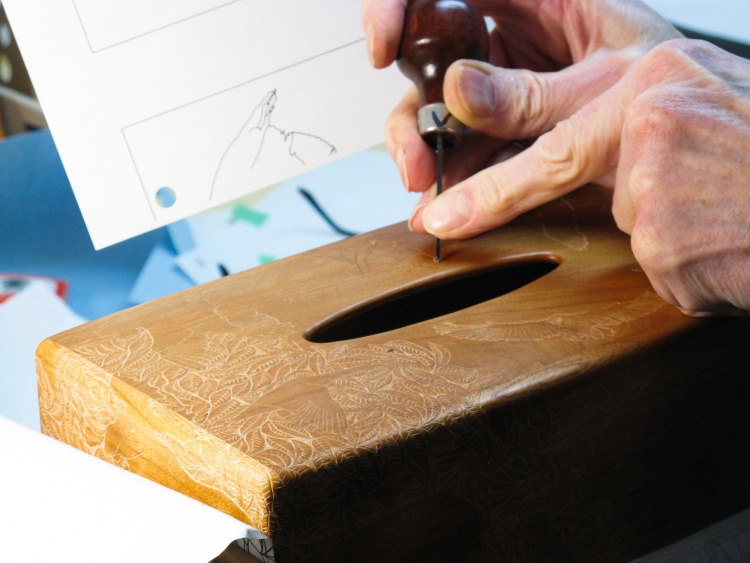
Outlining the images with tiny V-tool
The traced lines were followed with a tiny 60° V-tool to cut lines through the finish into the wood.
Here I'm doing the nose of the skunk.
Here I'm doing the nose of the skunk.
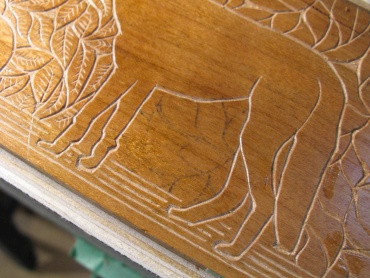
Carving the ground lines
Once the animal outlines on the four sides were completed, I worked on the lines representing the ground. Those were carved with the aid of a ruler to help keep them straight.
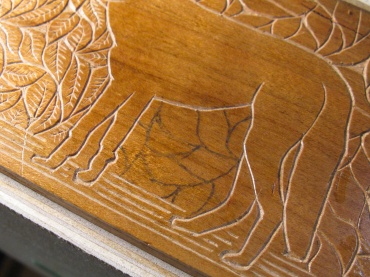
Then it was time to start the background
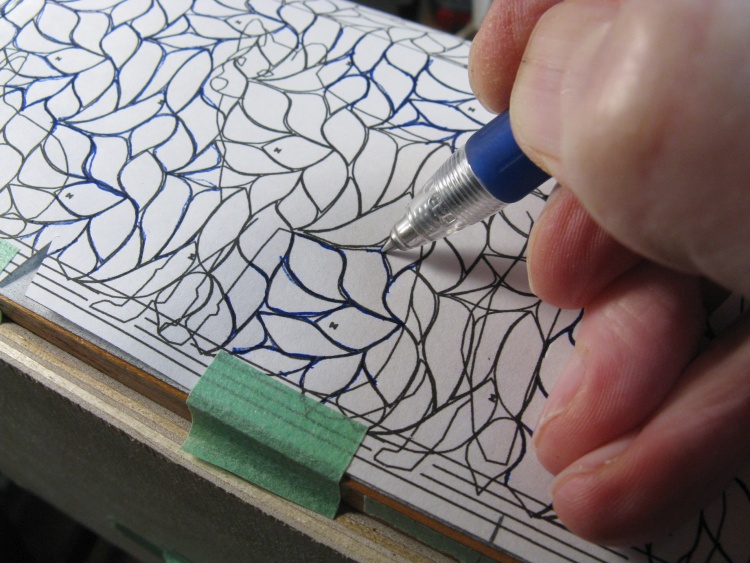
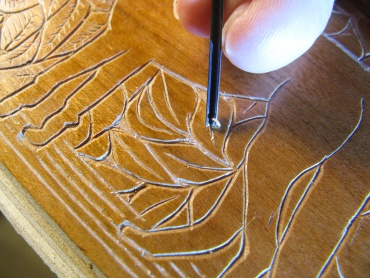
Then it was time to start on the leafy background, using the same technique of trace and carve.
Unfortunately the finish was smooth enough that the carbon paper often didn't transfer well, so in most cases I needed to re-trace the faint lines with a pencil to make them a bit more visible. Then I started by lightly cutting the leaf outlines.
Lousy contrast on traced leaves
Lines darkened with pencil
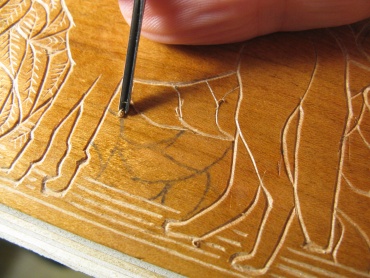
Starting leaf outlines
Then when all the outlines were done, I cut them a bit more heavily and removed the wood in any gaps between the leaves. The next step was to add the main veins, and then cut in the finer side veins.

Outlines and cutouts done
Adding main leaf veins...
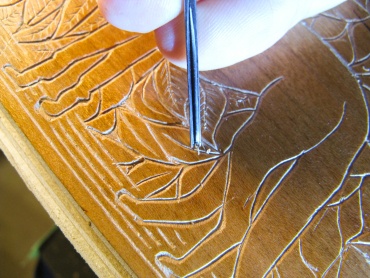
...and then the minor leaf veins
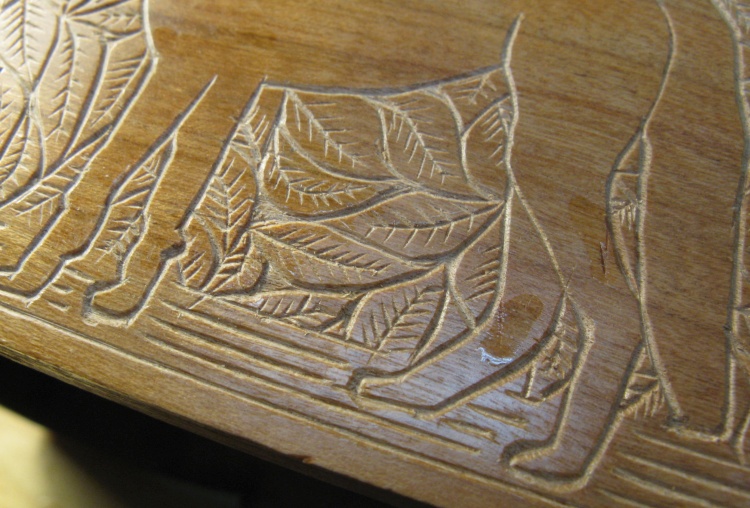
That little section done
Here is the little section I was working on above. It took a bit less than an hour to do the carving for this area.
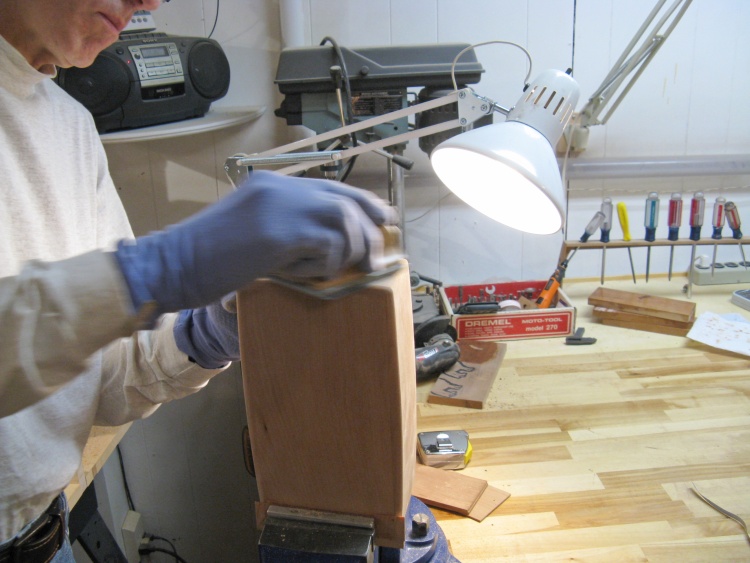
I have a carving table that lets me sit at a bench to carve but that works better for a flat piece than for a box like this one. So I ended up doing all the carving with the cover held in the vise of my large workbench. That put the work at a reasonable height and allowed me to move around the cover to get a comfortable angle to carve the leaf veins, which were at all orientations.
Behind,
Beside,
and in front for carving

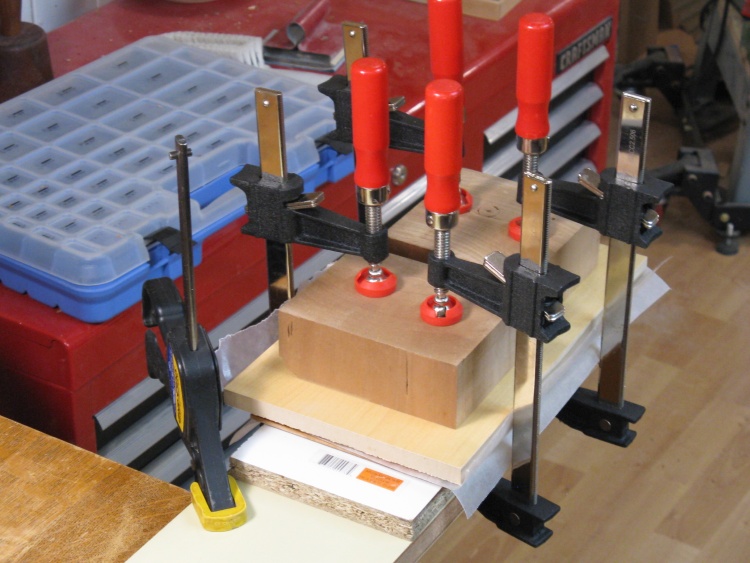
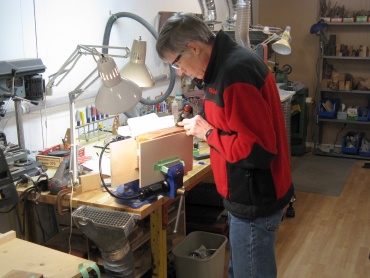
Clamping changed to be able to access the top
The above photos show the cover clamped between two flat pieces. Those held the flat bottom on one side and the rounded top (via a padded frame made from wood strips) on the other side. That allowed me to access the each side of the cover in turn for carving.
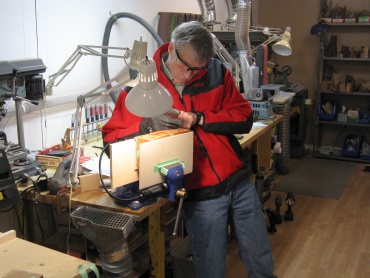
When it came time to do the top, the clamping arrangement was changed to this jury-rigged setup involving the main vise, a clamp-on vise and two sizes of wooden "hand-screw" clamps with some padding.
When it came time to do the top, the clamping arrangement was changed to this jury-rigged setup involving the main vise, a clamp-on vise and two sizes of wooden "hand-screw" clamps with some padding.
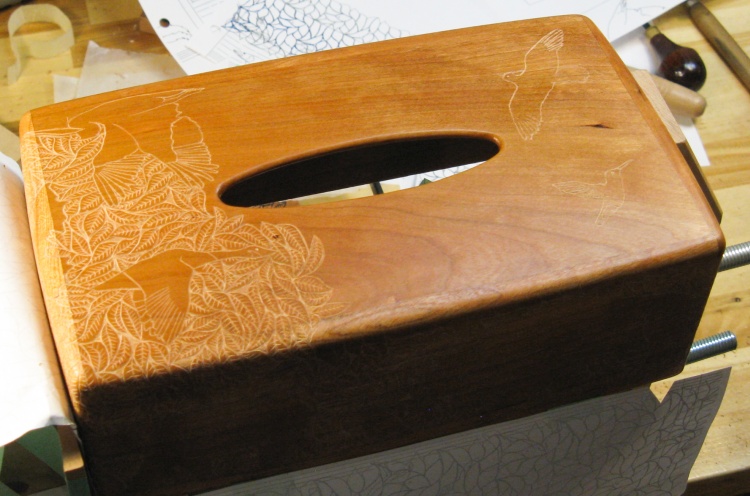
Top started, but maybe four figures are not enough?
Like was done with the sides, I started by doing the animal figures first and then proceeded with the background carving.
I originally had only four birds for the top but at this point it became obvious that there was going to be a big stretch of background leaves in the middle of the long sides and it might look better with a couple more animals.
I originally had only four birds for the top but at this point it became obvious that there was going to be a big stretch of background leaves in the middle of the long sides and it might look better with a couple more animals.
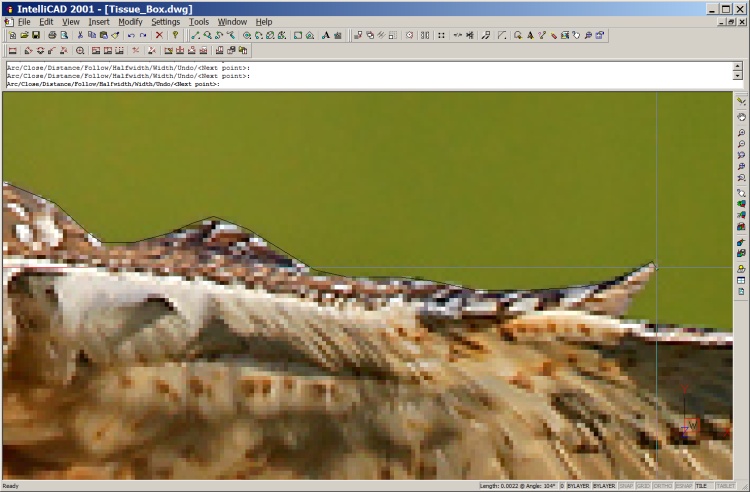
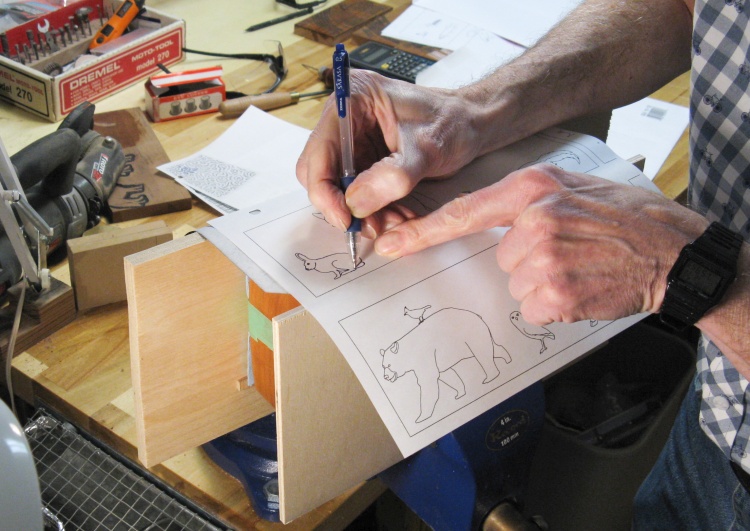
Tracing out an owl photo to get a line drawing
I selected a couple more birds to fill the gaps; an owl in flight and a perching Northern Flicker.
Like most of the other animal figures, they were derived from photos which I traced to make line drawings. This shot shows a zoomed-in view of the owl's wing being manually traced with a thin black line in the IntelliCAD drawing program I use.
Like most of the other animal figures, they were derived from photos which I traced to make line drawings. This shot shows a zoomed-in view of the owl's wing being manually traced with a thin black line in the IntelliCAD drawing program I use.
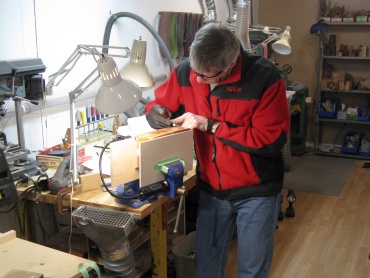
Carving one of the two new figures
In this photo the owl has already been carved (under my left pinky knuckle) and I'm working on the flicker.
In the background is the plan for the section being carved. It's taped to a Luxo lamp and moved close so I can refer to it while carving (mostly due to the poor visibility of the traced-on lines).
In the background is the plan for the section being carved. It's taped to a Luxo lamp and moved close so I can refer to it while carving (mostly due to the poor visibility of the traced-on lines).
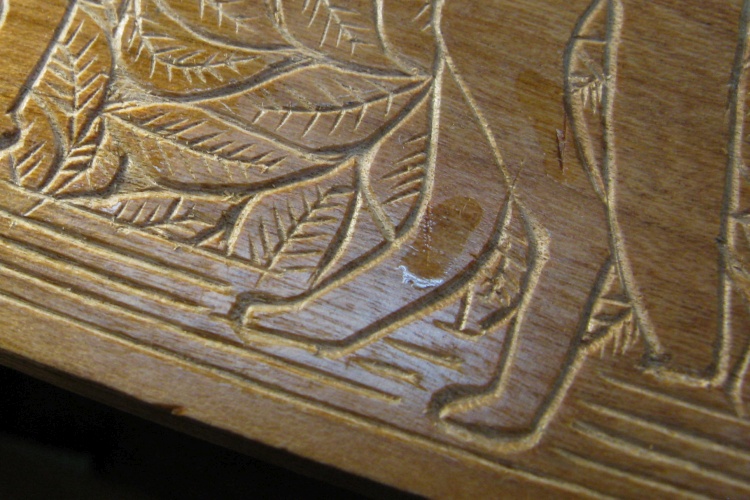
Touching up scratches
There were inevitably some carving goofs that created scratches. To avoid these being highlighted with the paint that would eventually be applied, I touched them up with more Danish Oil to re-seal the surface. In this photo there are couple goofs on the hind legs of the wolf which have been dealt with.
The touch-up finish had been put on heavily but not wiped off like the original finish, which is why those sections look different.
The touch-up finish had been put on heavily but not wiped off like the original finish, which is why those sections look different.
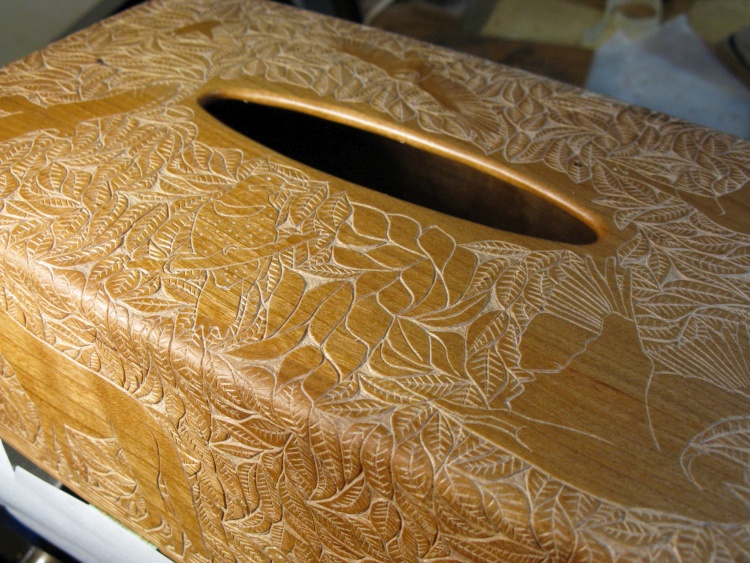
Almost done
In this photo, the carving is almost done - those last leaves just need veins added.
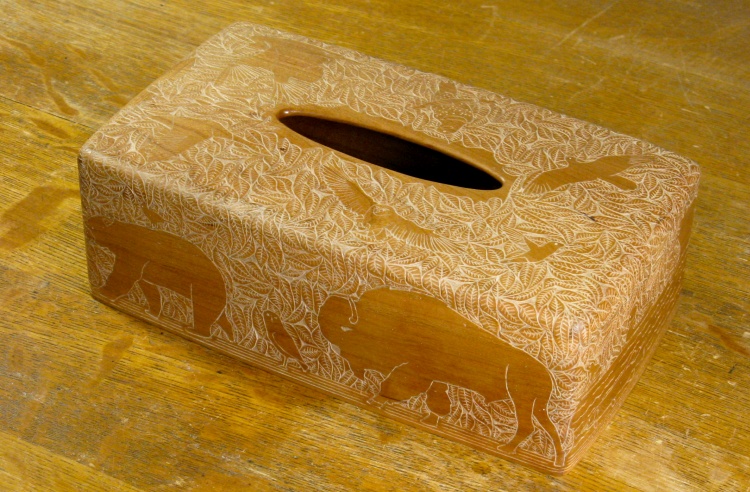
Done the carving
And finally the carving was complete. It took a bit more than three weeks which was perhaps in the range of 50 hours of carving. In addition to the 20 animals, there were maybe 800-900 leaves.
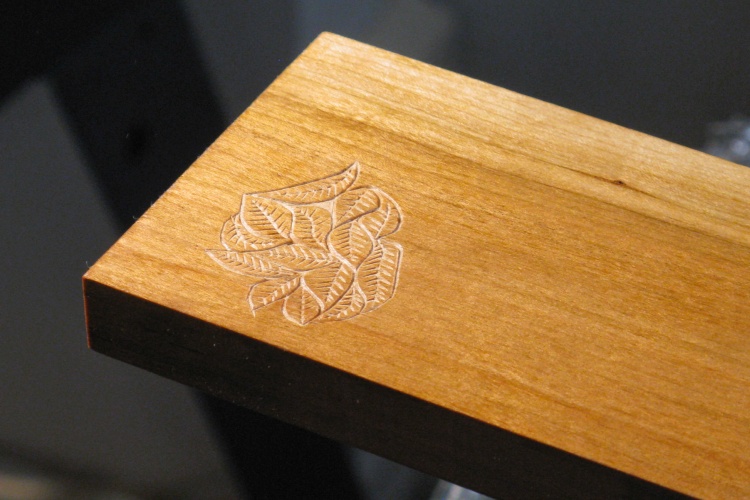
Another test board with a few leaves
By this time it was actually a couple months in the past that I had tried out the paint application so I wanted to confirm that I had it right without risking the carved cover.
I applied three coats of Danish Oil to the back side of a couple of my original test boards and carved a small area of leaves into one of them.
I applied three coats of Danish Oil to the back side of a couple of my original test boards and carved a small area of leaves into one of them.
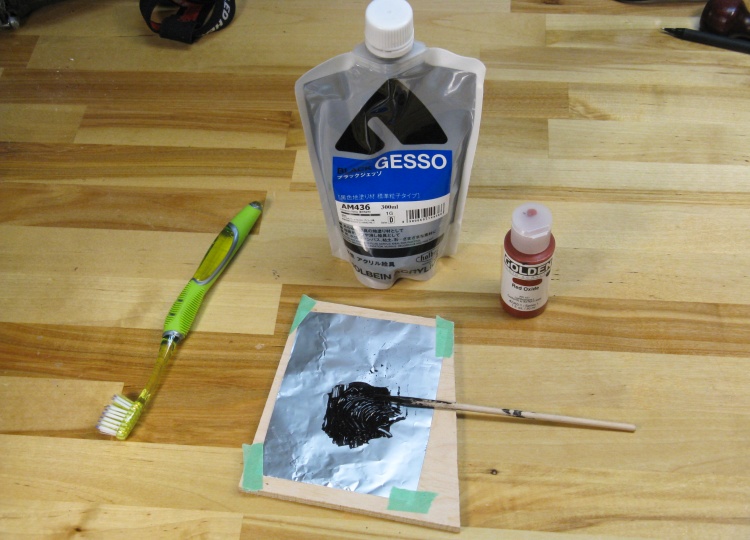
Getting the paint ready
This shows a little pallete with the paint on it. In the bag is black gesso which is a thinner version of acrylic paint usually used as a background to treat a surface before doing the real painting.
Traditionally gesso is white but other colors including black are also available. Beside it is a small container of acrylic color ("red oxide") that I mixed in to make the black a bit less black.
The toothbrush will be used to apply the paint.
Traditionally gesso is white but other colors including black are also available. Beside it is a small container of acrylic color ("red oxide") that I mixed in to make the black a bit less black.
The toothbrush will be used to apply the paint.
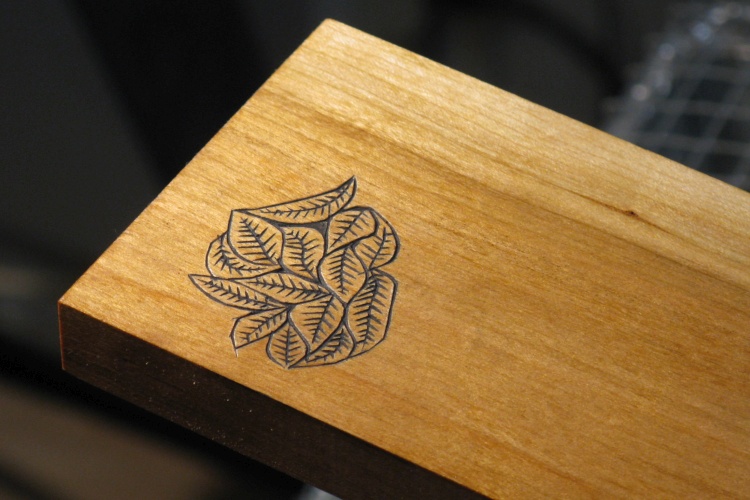
Paint applied & wiped off
So then after brushing the gesso in and wiping the excess off with a damp cloth this was the result, which is pretty much what I was looking for.
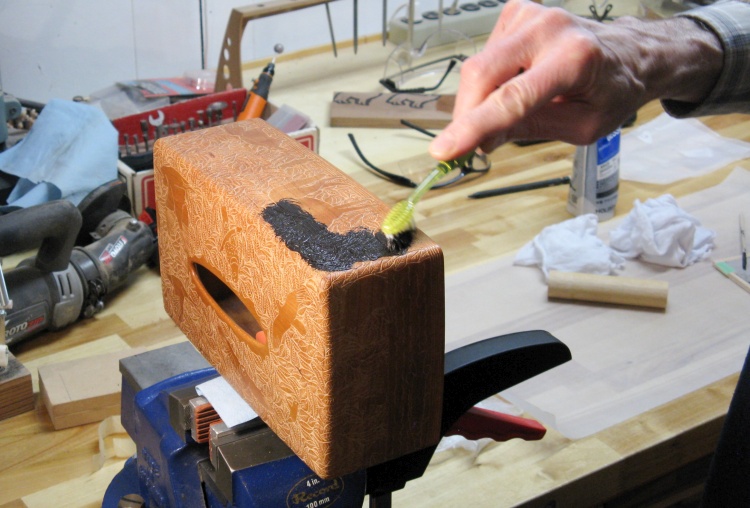
Applying paint for real
So then it was onto the actual cover. I started on the sides, doing a section at a time.
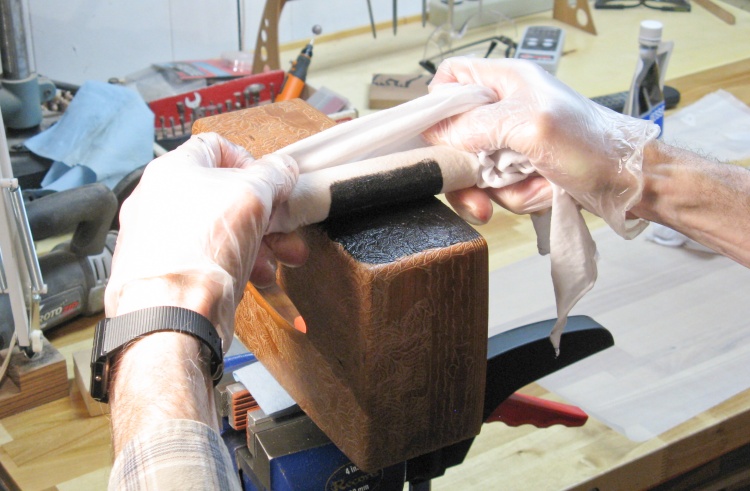
Wiping off the bulk of the paint
To remove the surface paint I used a cloth around a wood dowel to give a fairly firm surface so it was less likely to scoop paint out of the carved areas.
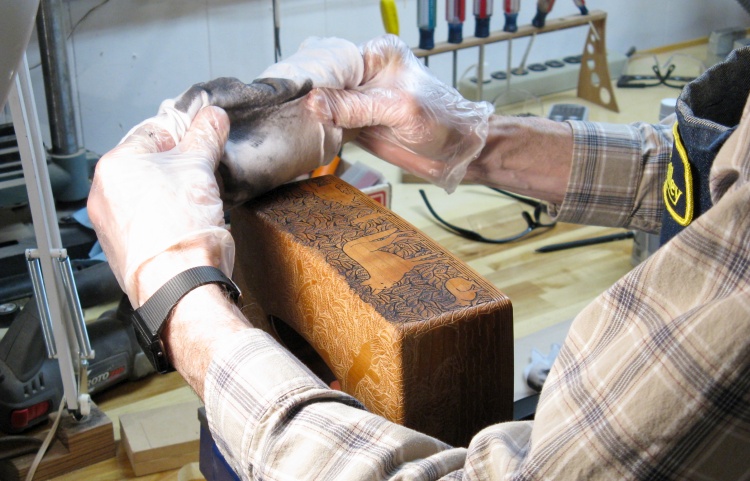
Cleaning up the surface
And then I went over it again with another cloth to remove any residual paint.
Starting on the top
Once the sides were done, I switched to doing the top.
All painted
And here is the cover with the paint application completed.
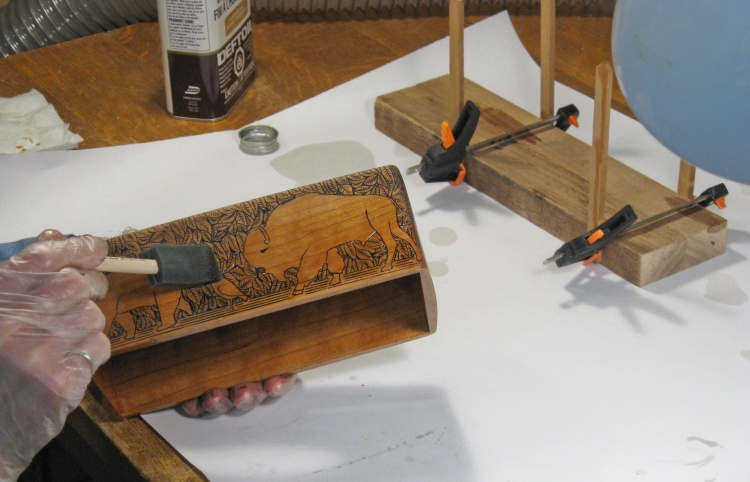
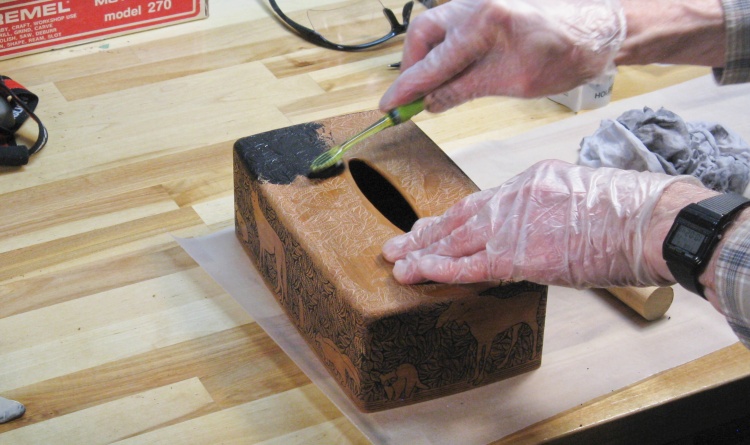
Adding one of the finishing coats
I gave the paint a couple days to dry and then added two more coats of Danish Oil over the whole surface inside and out.
As before, the finish was applied heavily, left to sit for 30 minutes and then wiped off and allowed to dry.
As before, the finish was applied heavily, left to sit for 30 minutes and then wiped off and allowed to dry.
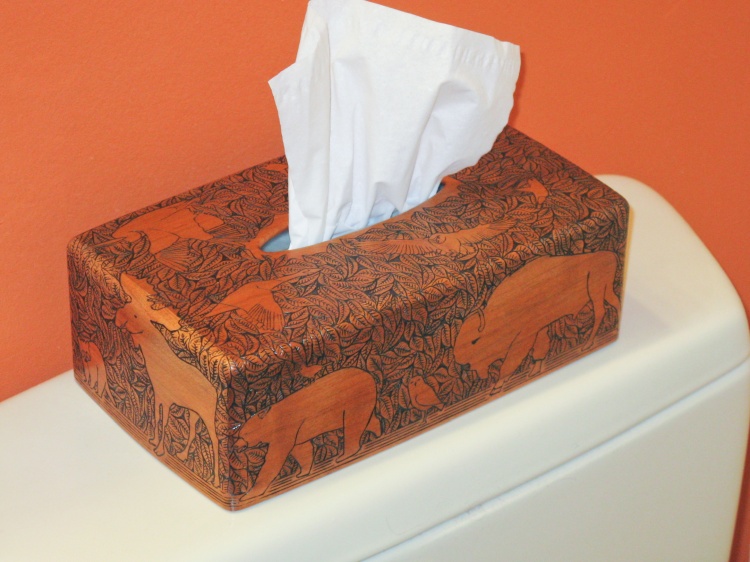
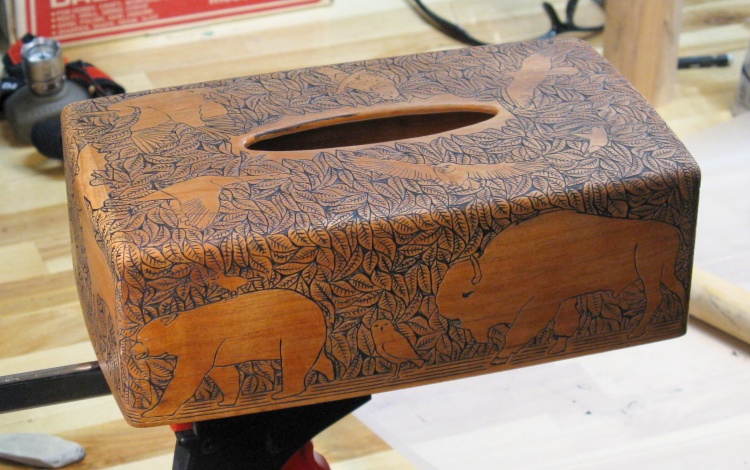
Done
Complete


