This tissue box is pretty simple since it's just four flat sides and a slightly domed top. However I was concerned about joint breakage due to seasonal wood expansion so I made the five sides out of 3-layer shop-made maple plywood.
The design was based on a tissue box cover photo I had run across and like that one it includes dark trim at the top and bottom of the sides. In my case, I used thin strips of African Blackwood for the trim.
The design was based on a tissue box cover photo I had run across and like that one it includes dark trim at the top and bottom of the sides. In my case, I used thin strips of African Blackwood for the trim.
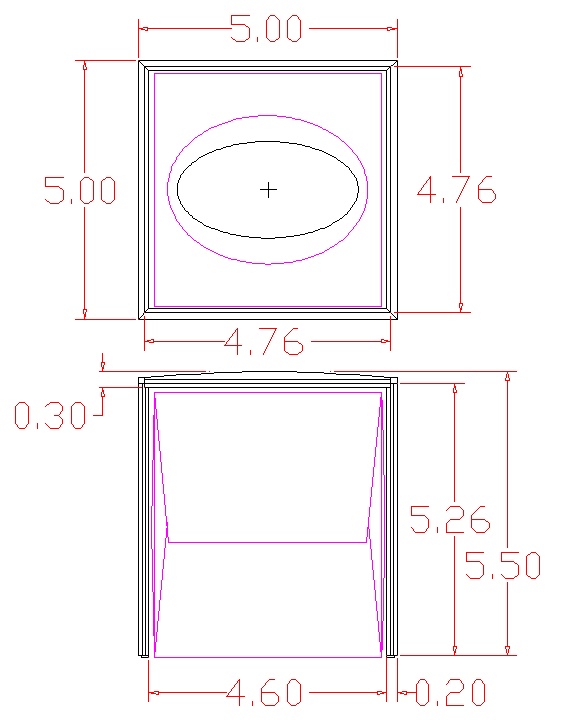
The original plan
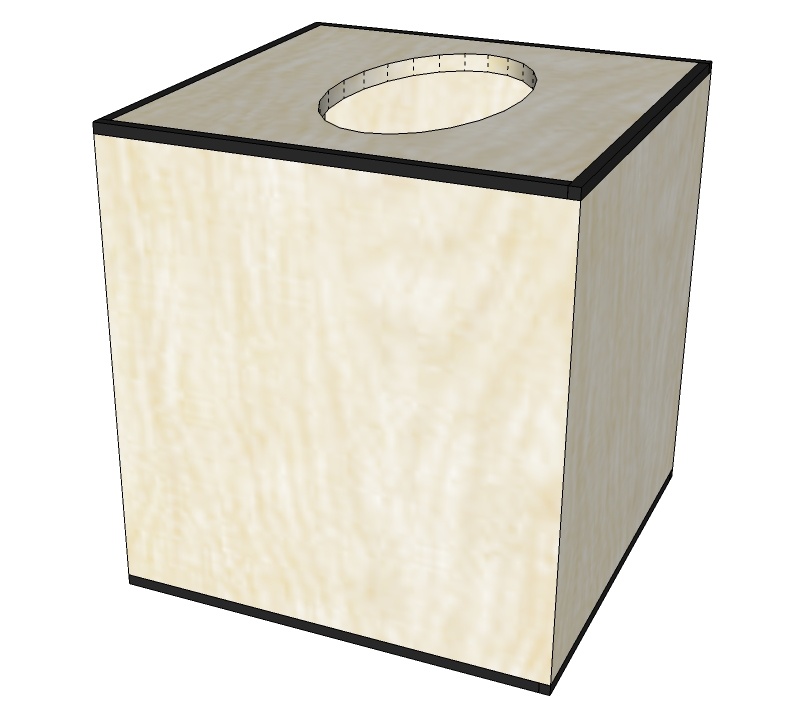
The plan, rendered in woodier pixels
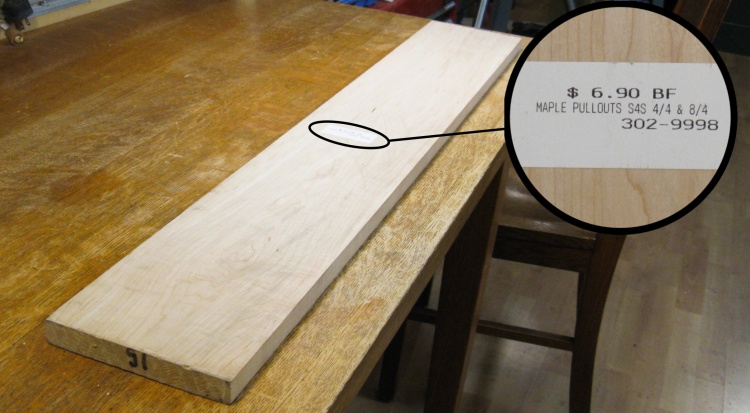
A suitable plank of sanded maple
I had a few planks of sanded maple, one of which was more than enough for this little box.
I have to confess that I don't know what "pullouts" means in this context but the price is about half what regular maple goes for so I suppose I can live with the mystery.
I have to confess that I don't know what "pullouts" means in this context but the price is about half what regular maple goes for so I suppose I can live with the mystery.
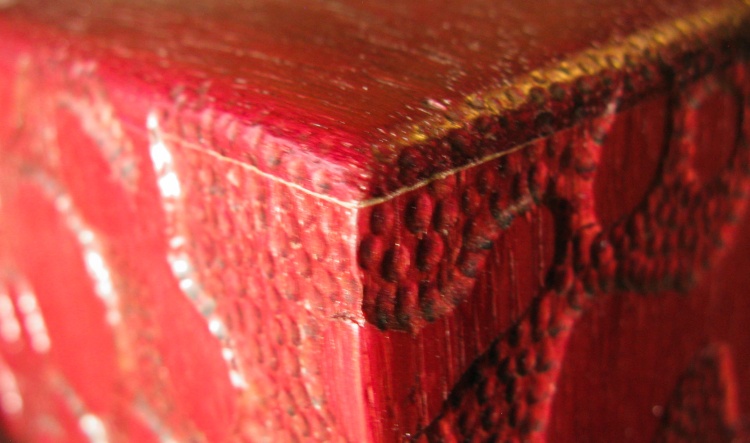
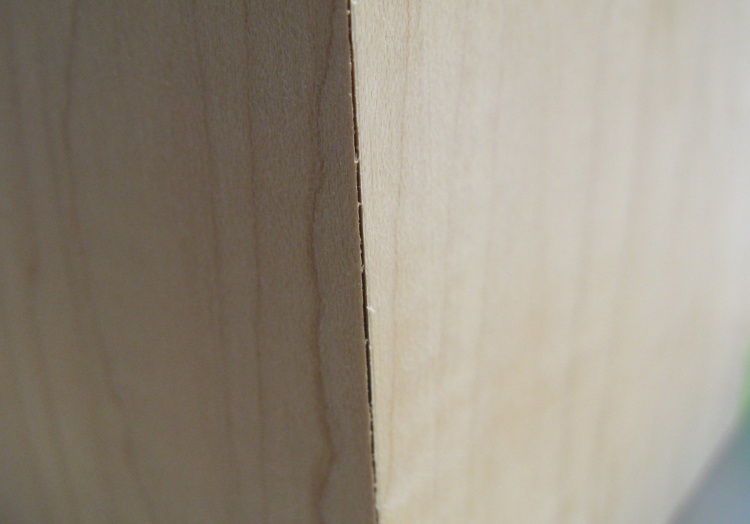
Slightly offset joints on Tissue Box #1
This is a close-up of a corner on the 3-year-old cover made from purpleheart. I didn't worry on that one about wood movement and the joint can be seen to be slightly offset now, presumably due to seasonal size changes. Not a huge issue but one to avoid if possible.
After the first tissue box cover, I've been making them more resistant to joint movement with proper grain alignment or plywood techniques.
After the first tissue box cover, I've been making them more resistant to joint movement with proper grain alignment or plywood techniques.
I started out by making the top. It was simplified a bit since the maple plank S4S ("Sanded 4 Sides" for those that don't hang around lumber yards enough) so all the faces started out smooth and flat. Then I got into performing basic operations on the plank including chopping off a suitable length, resawing that into thinner pieces and then running those pieces through the planer to remove saw marks and get them down to the correct thickness for a three-ply plywood;
Chopping off a piece
Resawing into thinner pieces
Planing down to desired thickness

Starting on wood for the sides
The top varied a bit from the other walls in that the layers were different thicknesses to accommodate the subtle dome I planned to include.
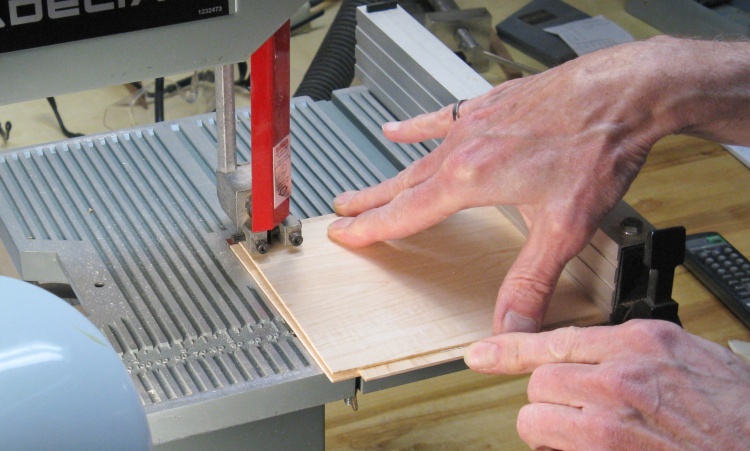
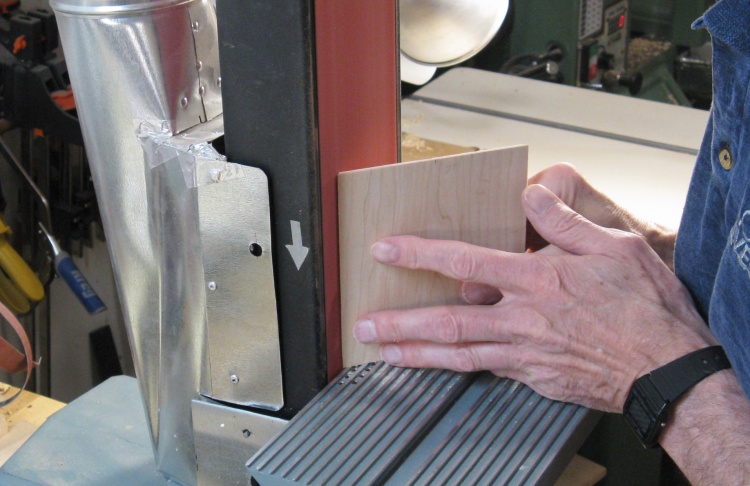
Then it was on to the walls. They were to consist of three-ply maple as well - each ply 0.07" thick for a total thickness of 0.21" - and here I've got a small piece teed up on the bandsaw to cut into thinner sections. I was able to get four plies out of this piece.
Then it was on to the walls. They were to consist of three-ply maple as well - each ply 0.07" thick for a total thickness of 0.21" - and here I've got a small piece teed up on the bandsaw to cut into thinner sections. I was able to get four plies out of this piece.
Using the sander for thinning
I had used the planer to thin out the plies for the top, but it was giving me grief when I tried to do the sides (dislodging my taped-down pieces somehow).
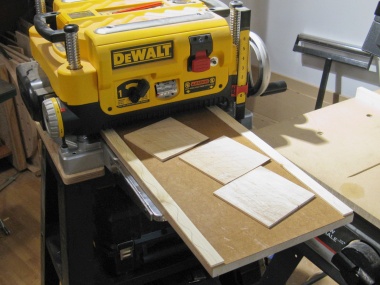
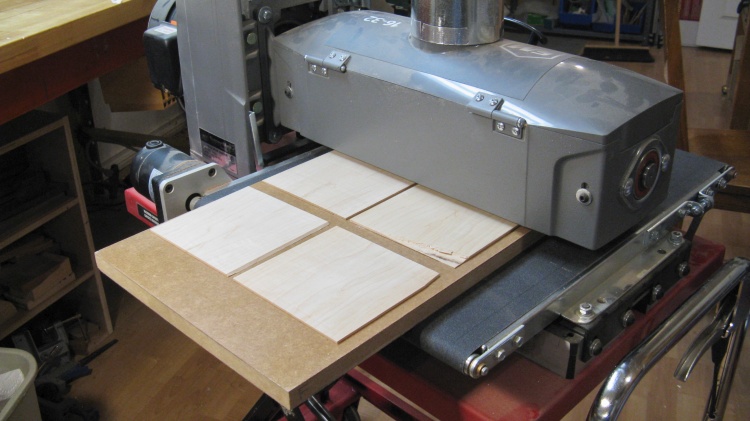
I finally gave up fighting with it and turned to the slower-but-less-destructive drum sander. In this shot I've used the planer sled minus the side rails and loaded it up with six taped-down plies.
You can see the effects of the unprovoked viscousness of the planer in the torn-up corner of one of the pieces.
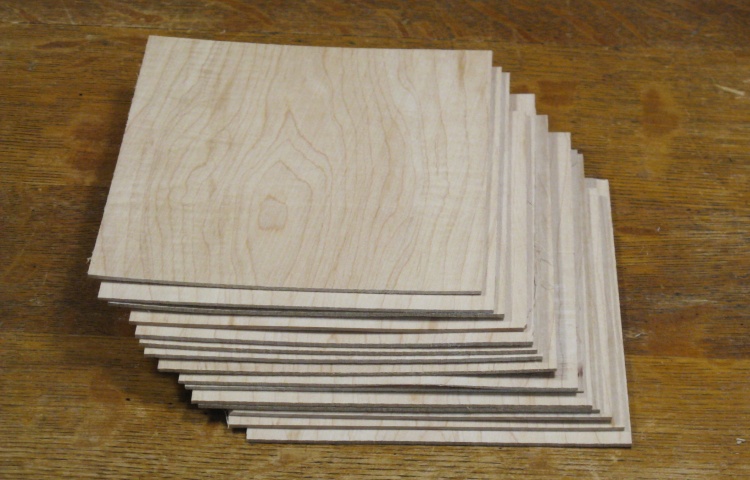
A pile of plies for the sides
This is the little pile of plies that will be used for the sides. I'd need an even dozen but I made a few spares in case of problems.
So a dozen is certainly an even number but could you say "an even baker's dozen"? Just askin'...
So a dozen is certainly an even number but could you say "an even baker's dozen"? Just askin'...
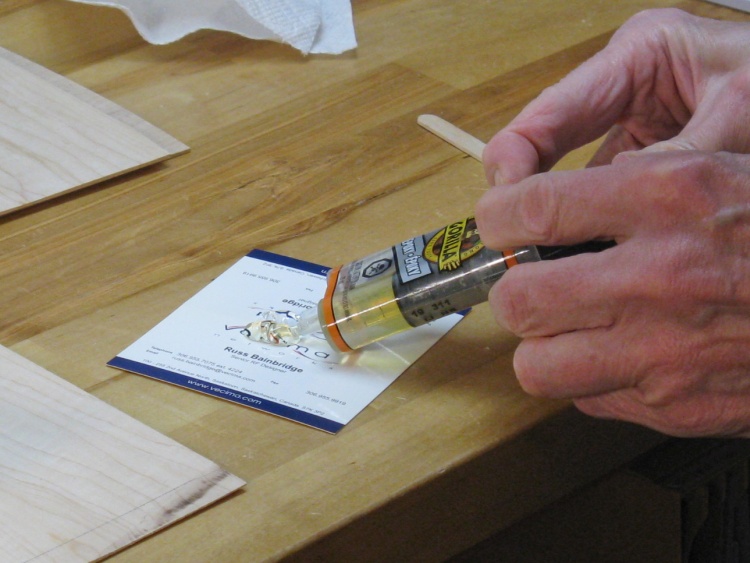
Squeezing out some 5-minute epoxy
I usually use epoxy to make plywood. Here I'm squeezing some out of the double-barreled syringe - a great glue-technology innovation.
Regular wood glue tends to warp the wood with moisture. I used it for plywood once and my piece warped significantly when it was unclamped. Fortunately it then slowly relaxed to almost flat over the course of 3 or 4 days. So I'll maybe just stick with epoxy (see what I did there?).
Regular wood glue tends to warp the wood with moisture. I used it for plywood once and my piece warped significantly when it was unclamped. Fortunately it then slowly relaxed to almost flat over the course of 3 or 4 days. So I'll maybe just stick with epoxy (see what I did there?).
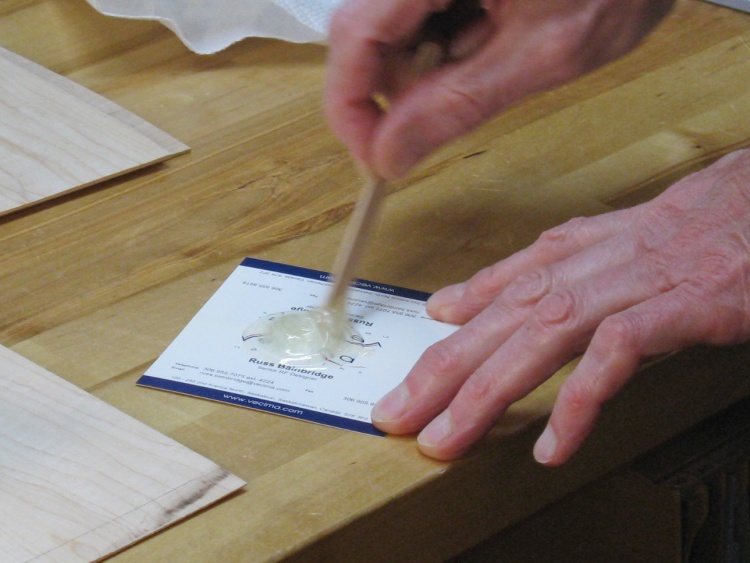
Mixing blurrily
A popsicle stick was used to mix the epoxy, which I like to do for upwards of a minute to ensure the parts are well-combined.
I usually use an old business card for mixing but I had more epoxy than usual, so I taped two cards together to double the floor space.
Lemme tell ya - I've gotten way more use out of those business cards in the shop than I ever did at work, where I might have given out 5 or 10 a year. But in the shop; mixing surfaces, shims, small patterns. If I ever run out I may have to get another job for a while.
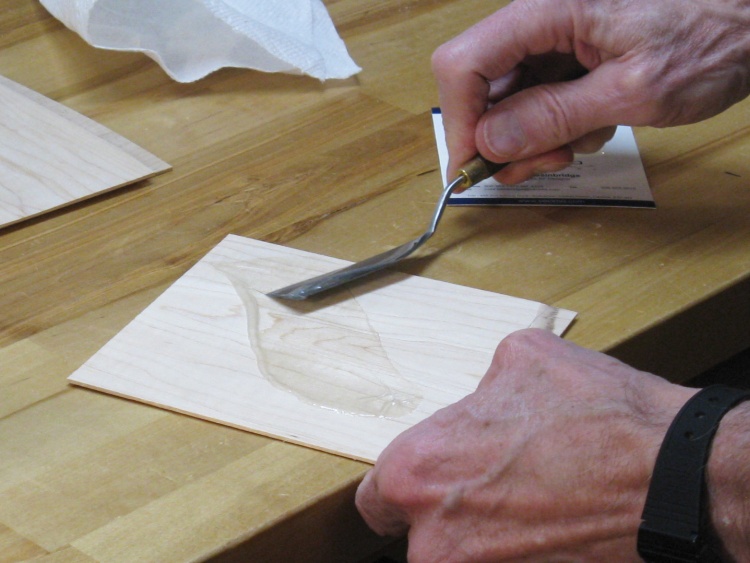
Spreading half on inside ply
It was a bit of a question as to how much epoxy to make. Is the glue layer going to be 0.001" (1 mil) thick? 3 or 5 mil maybe? I ended up using about 4 milliliters for each piece, which (oddly enough) translated to about a 4 mil (0.004") glue thickness. There was a bit of squeeze-out but I'd say the quantity was about right.
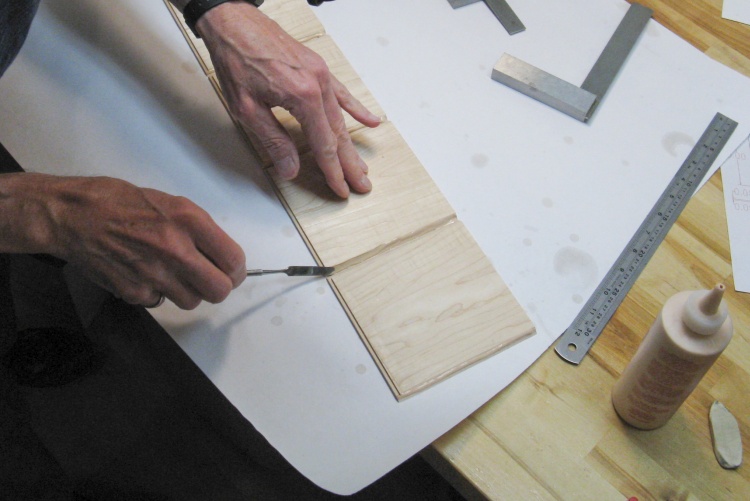
In this photo I'm using a thin spatula to spread half the glue onto the first ply.
In this photo I'm using a thin spatula to spread half the glue onto the first ply.
Other half goes onto middle ply
Then the second (middle) ply was placed on top with the grain at 90 degrees to the first piece ("orthogonal" in engineering-speak), and then as seen here the second half of the glue was spread on top.

Clamping the three plies with flat boards
Finally the third ply was added to the pile with the same grain orientation as the first ("parallel" in engineering-speak. OK, can't have weird words for everything). I lined the piece with wax paper and clamped it between two flat sheets to set.
Trimming one of the side pieces
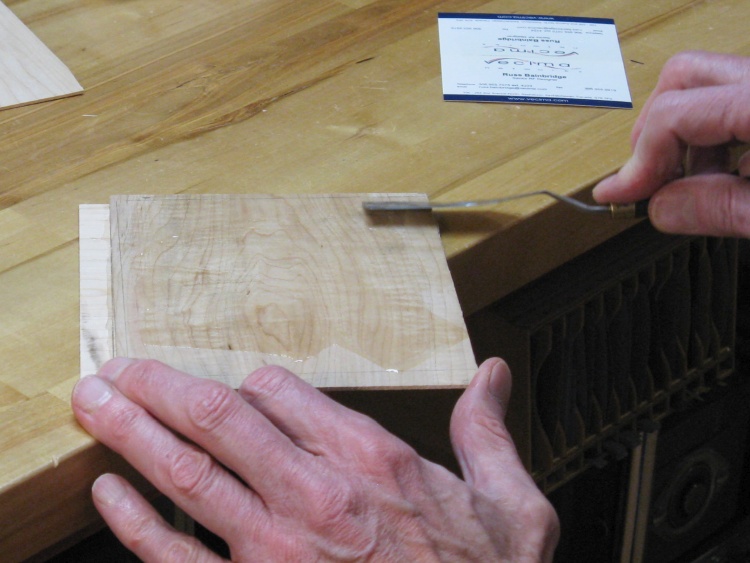
After the epoxy had hardened, I determined the best grain orientation for each piece and flattened the side that would become the bottom using the jointer.
Then using the straight bottom sides as a reference I cut each piece to size on the small bandsaw as seen here.
The cover top got a similar treatment.
Then using the straight bottom sides as a reference I cut each piece to size on the small bandsaw as seen here.
The cover top got a similar treatment.
Routing a notch for the top to fit into
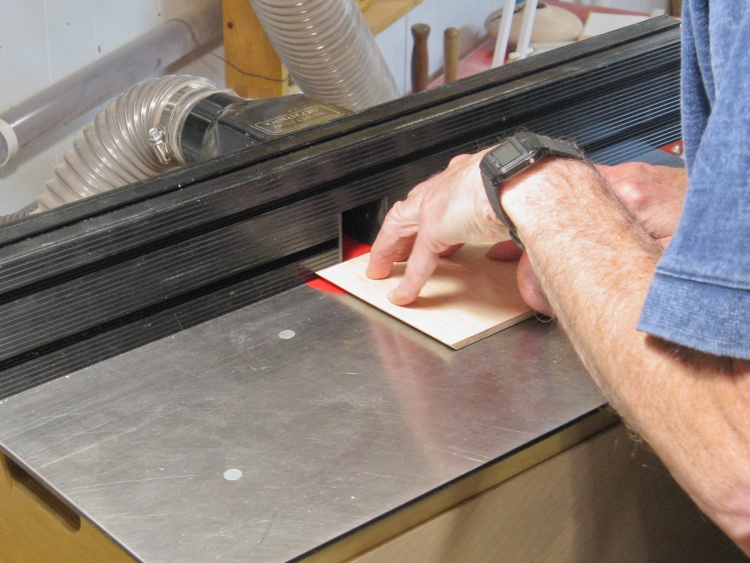
My plan called for the cover to be inset into the sides so I routed a notch on the inside of the top edges using the router table (using the classic ouija-board hand positioning).
With the four sides and the top cut to size, it was time to set up the radial arm saw to cut the miters on the edges. It is my fate for miters to be uncooperative with me, and this time was no exception. But ya gotta try. I set up the saw for a 45° and cut four test sides from a small piece of wood. Those were then taped together to see how the joints looked; not great. So I tweaked the saw angle approximately 2.5 hairs and redid the cuts. That one looked reasonable, so the angle was good.
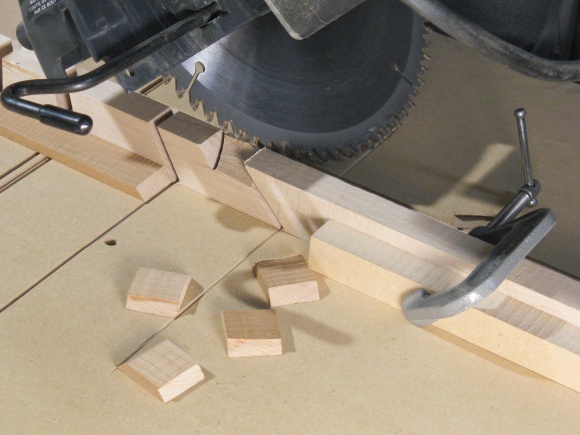
Checking 45° angle on saw
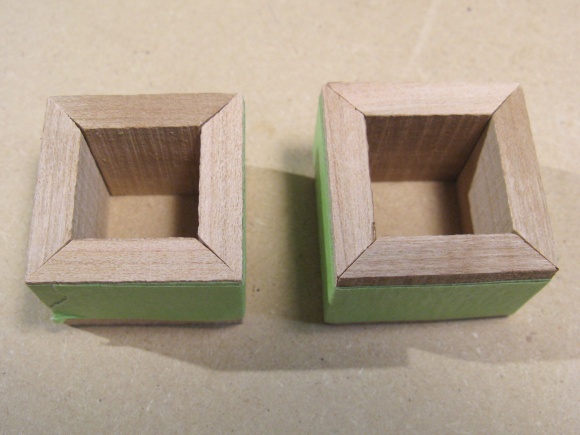
Decent on second try
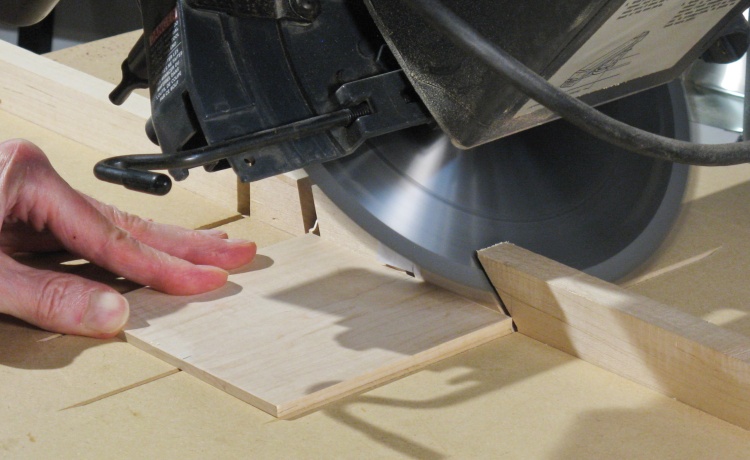
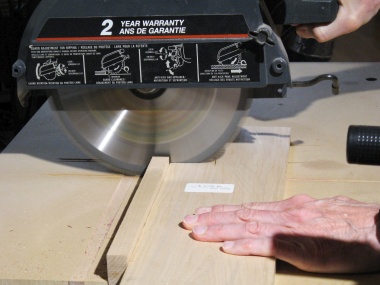
Doing a test cut
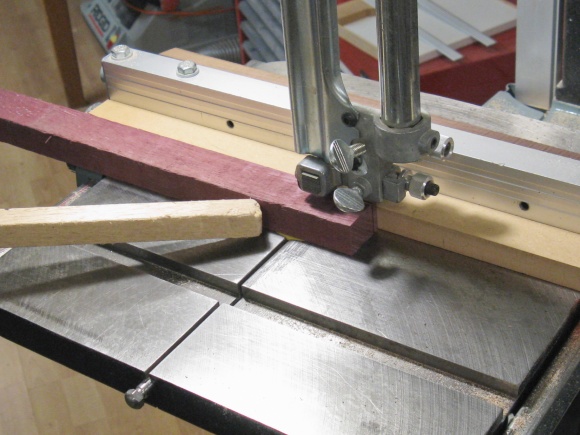
Next was to do a test cut with a realistically-sized piece of maple.
The first problem was that it was tough to hold the short piece of wood firmly since there seemed to be some effect that pulled the wood towards the blade as it cut. I made a little screw-down clamp to hold it firmly whilst keeping my valuable digits far away.
The second problem was that last 5mm or so of the wood was torn off due to the geometry of the cut, messing up the corner of the mitered joint.
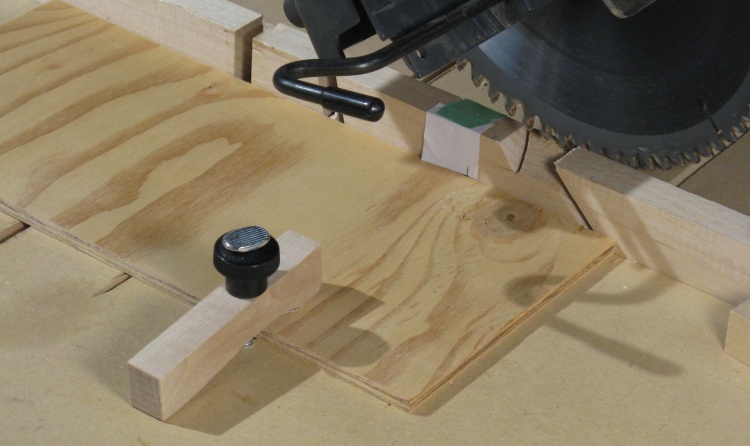
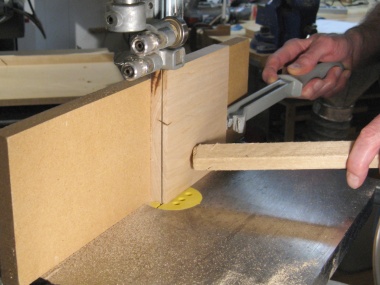
Clamp and solid base
This shows the hold-down clamp in place and I tried a number of things to prevent the tear-off effect I was seeing, including as seen here, a solid piece under the one I was cutting. Unfortunately neither this technique no any other that I tried helped with the problem.
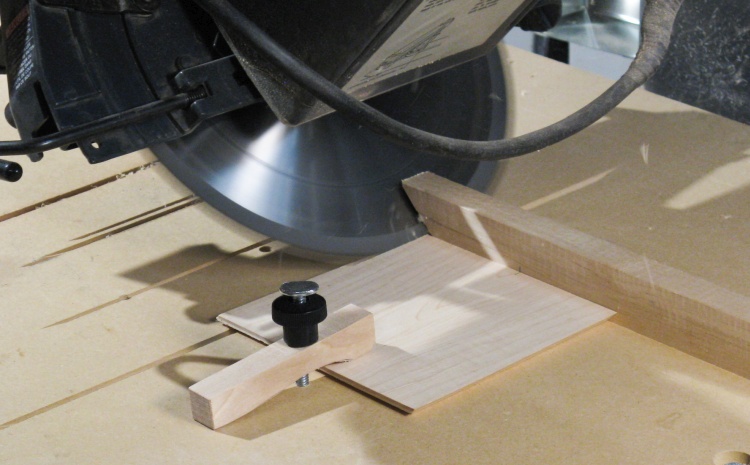
Other side of the blade works better
I eventually just tried the other side of the saw blade since the cut geometry would be different. I moved the wood and the hold-down clamp to the right side of the blade and that ended up producing a clean cut.
Rather imperfect mitre
Unfortunately my near-perfect angle on the left side of the blade somehow wasn't quite as perfect on the right side. Sigh. You see, this is why I don't like miters. I was left with this unsightly gap at the corners.
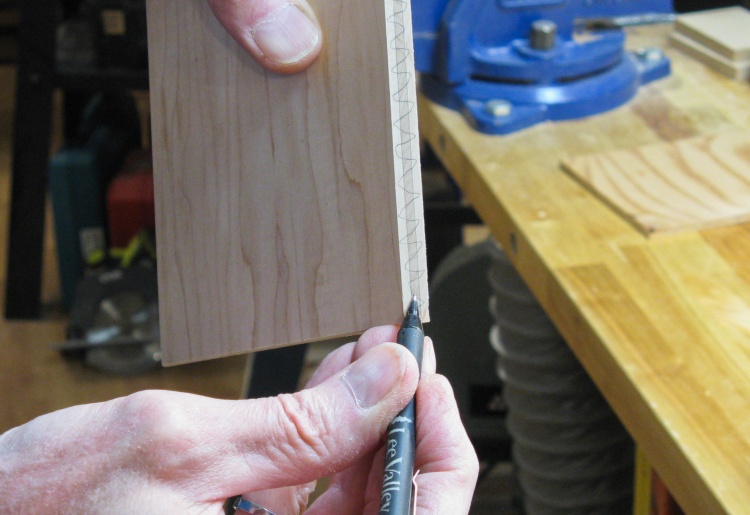
Marking up an edge
Yah, so it's not like I've never had to fix an imperfect miter. I considered a few techniques before turning to my go-to tool - the belt sander. I started by pencilling in a wiggly line on the 45° face so I could tell where I was sanding.
Tweaking the mitre angle on belt sander
Then I just hand-held the wood against the belt and took a bit off the inside edge. That seemed to finally be enough dicking around craftsmanship to satisfy the mitre gods, and they finally let the corners match.
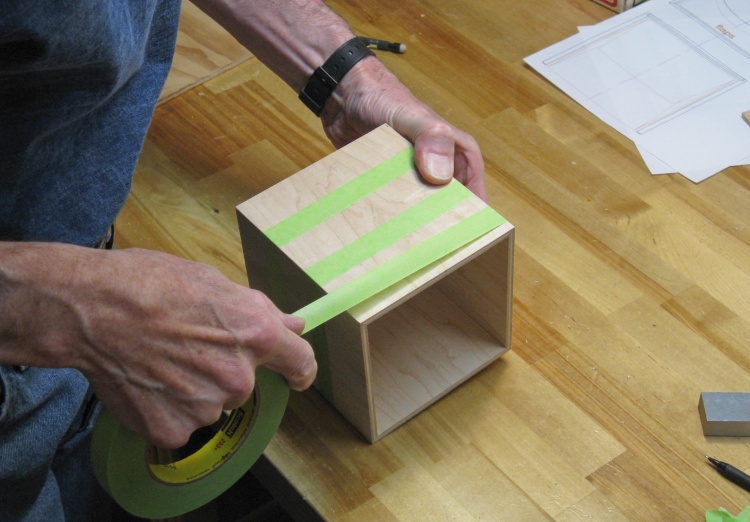
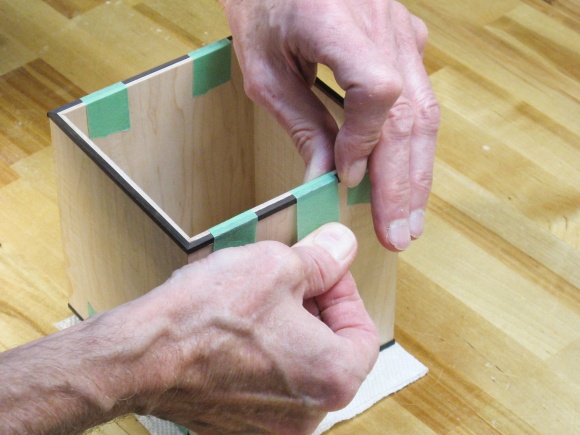
Taping up the walls prior to gluing
The plan was to use tape to hold the sides together for gluing rather than conventional clamps, which often irritate the mitre gods who then make the joints misalign to show their displeasure. It was my hope that this tape was fully sanctified and would be looked upon with approval.
This is actually a roll of specialized 3M Scotch 233+ "binding tape" with supposedly superior elasticity and adhesion to garden-variety masking tape.
Although if the truth were known, I really just wanted to buy normal green masking tape except I didn't want to make an additional stop during the pandemic so I just bought whatever Lee Valley Tools had since I was there already; special $12/roll masking tape.
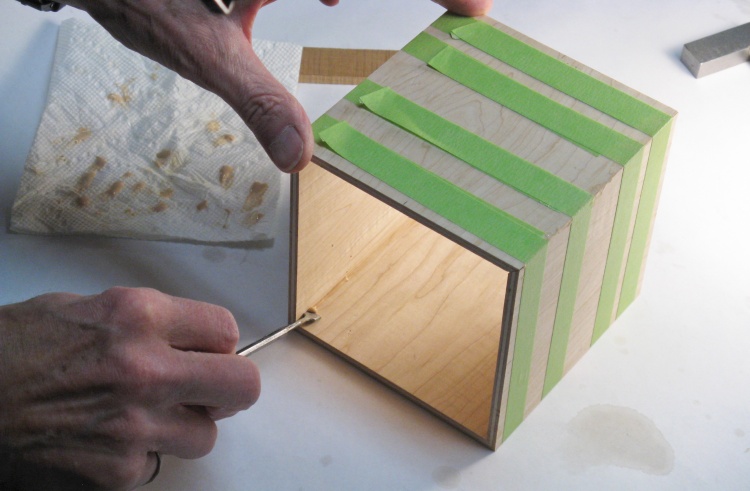
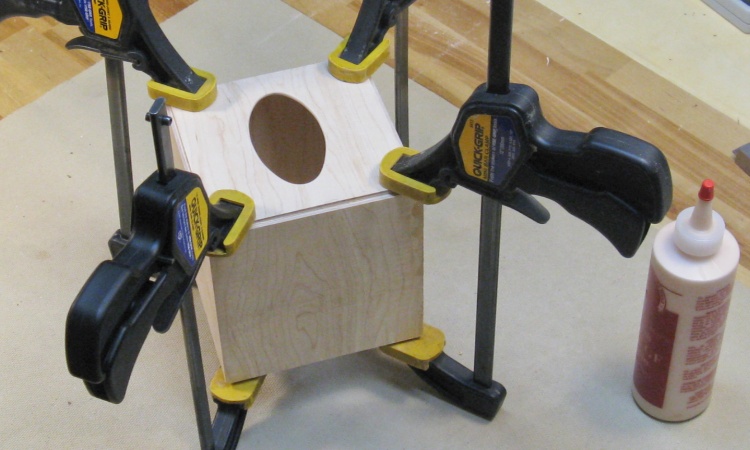
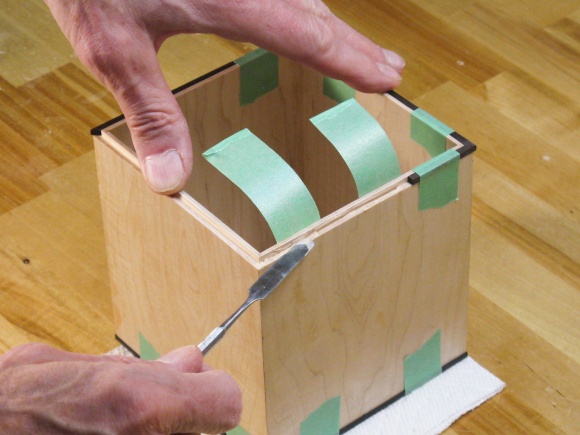
Applying glue to joints
Once the box sides were properly positioned and taped up, I unrolled them again to open up the corner joints and applied glue. The box was then rolled back up and the tape held everything in place with a bit of pressure on all the joints.
The large "engineer's square" in the background was used to help ensure the sides glued up square.
The large "engineer's square" in the background was used to help ensure the sides glued up square.
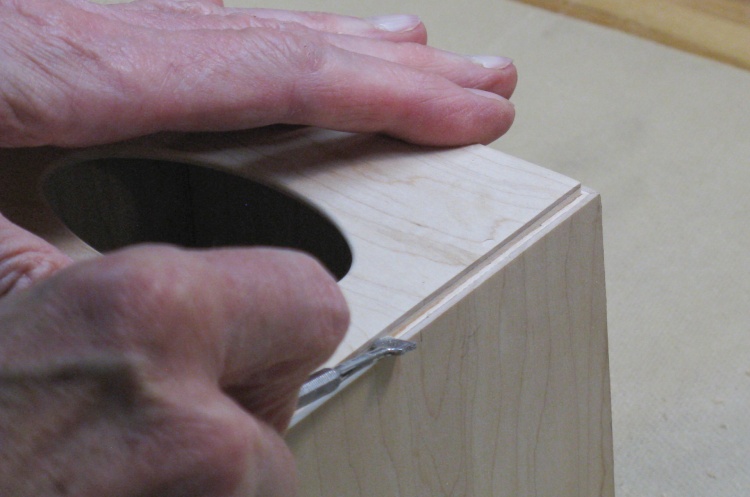
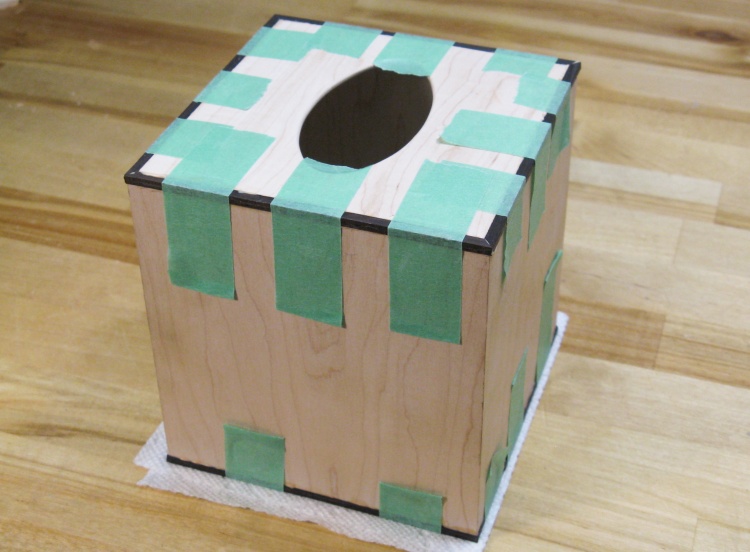
Scraping off glue squeeze-out
When the glue was partially dried, I scraped off the squeeze-out from the inside corners and then removed the tape.
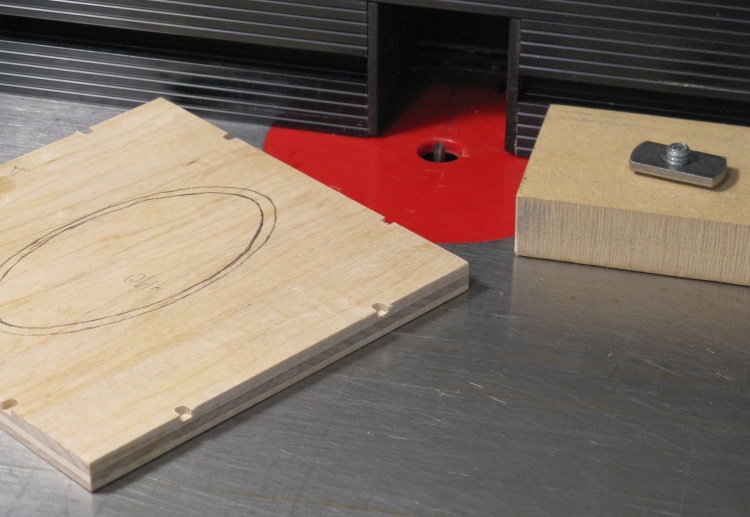
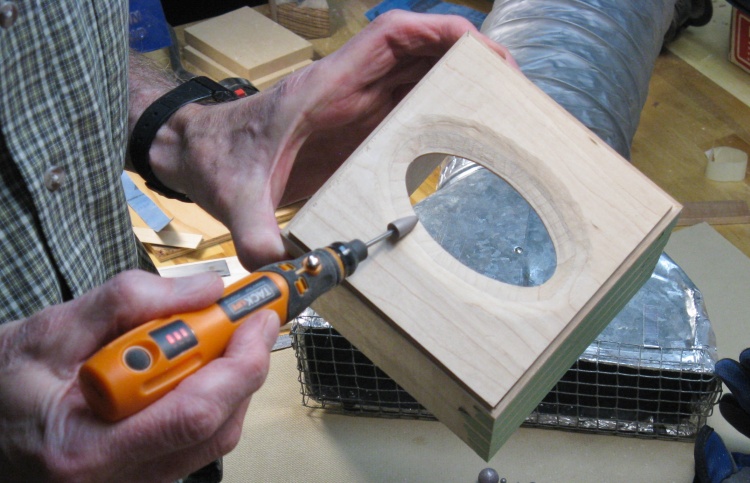
Top with hole marked and depth-guide notches cut
Meanwhile, back at the cover top;
The uppermost ply of the top piece was thicker so I could shape a bit of a curve into it without hitting the next ply down. As an aid to the shaping, I routed small notches around that ply to show the proper shaping depth at the edges.
Here the notched top sits by the cutting bit after the routing operation. I've also marked the hole onto the top (twice actually, since I decided I wanted it a bit smaller than the original traced-on shape from the plan).
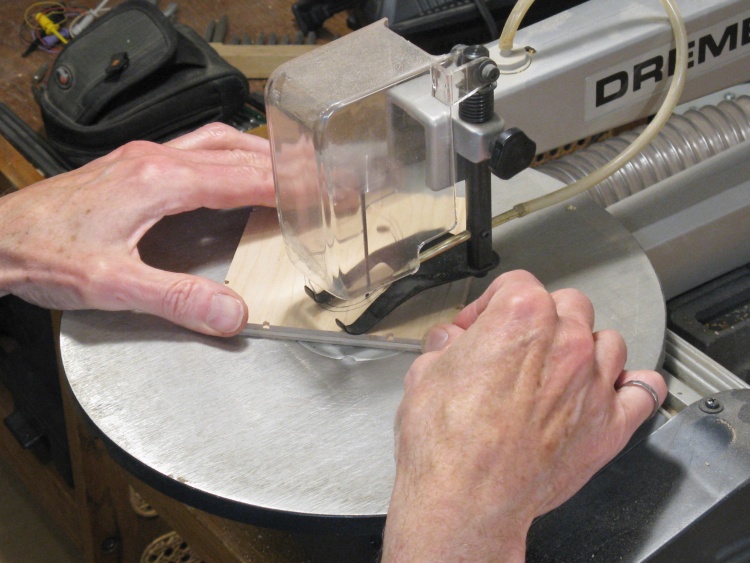
Jig-sawing the tissue opening
Since I marked the top side of the top piece, I needed to cut out the hole with a saw that cut on the downstroke to prevent splinters that would mess up the top surface.
The handheld jig saw cut on the upstroke (bad), so instead I used the bench-top jig saw with the blade oriented to cut on the downstroke (good).
The handheld jig saw cut on the upstroke (bad), so instead I used the bench-top jig saw with the blade oriented to cut on the downstroke (good).
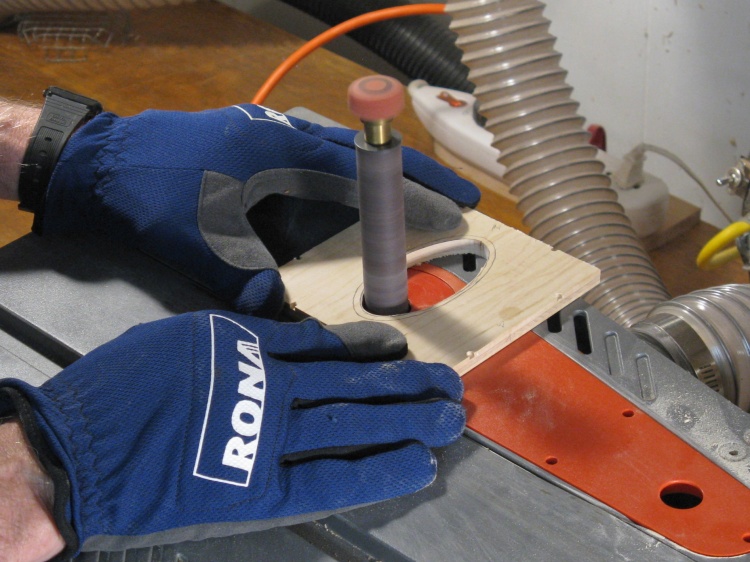
Cleaning up the opening
The inside of the hole was cleaned up with the spindle sander.
That was followed by some hand sanding to get rid of any residual dips and bumps, guided by the feel of the edge (fingers are often a more sensitive indication of smoothness than just looking at an edge).
That was followed by some hand sanding to get rid of any residual dips and bumps, guided by the feel of the edge (fingers are often a more sensitive indication of smoothness than just looking at an edge).
Top put in place for shaping
The next step was to round off the top, which I planned to do with (you guessed it) the belt sander. But it's tough to hold a thin piece of wood for sanding so I just stuck it into the notch in the top of the walls where it will eventually be glued. It was a fairly tight fit but I taped it to the walls on the underside for an even firmer hold.
Rounding the top on belt sander
Then the top was shaped to curve down from the center to each side. I rounded the top, sanding until the routed-in notches were almost gone.
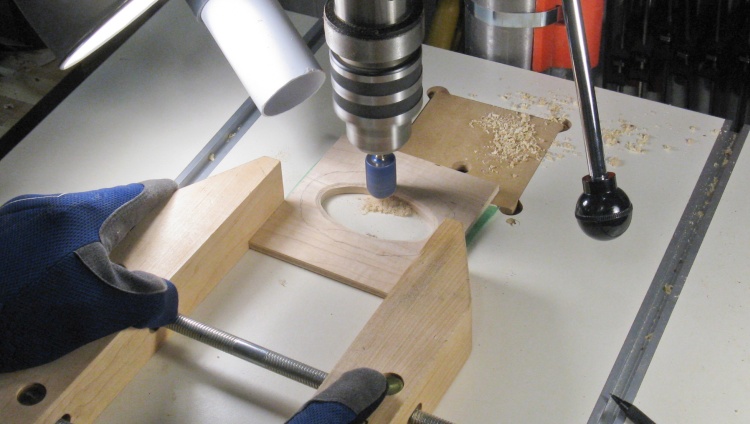
Thinning out the underside around the hole
I wanted a thinner section visible where the tissues came out, so I needed to remove wood around the hole on the underside of the top. It's telling how many of these I've done in that I now have an established procedure for that operation.
The thinning is done on the drill press with an abrasive bit and hand-directing a clamp holding the workpiece. In retrospect I should have done this before rounding the top so I'll try to remember that if there is ever a Tissue Box #7.
The thinning is done on the drill press with an abrasive bit and hand-directing a clamp holding the workpiece. In retrospect I should have done this before rounding the top so I'll try to remember that if there is ever a Tissue Box #7.
Top in upside-down to hold while smoothing
The rather coarse bit used for the shaping leaves fairly deep gouges, so they were smoothed off with a finer abrasive in this hand-held tool, followed by a flap sander.
This time to hold the top, I put it upside-down into it's notch.
This time to hold the top, I put it upside-down into it's notch.
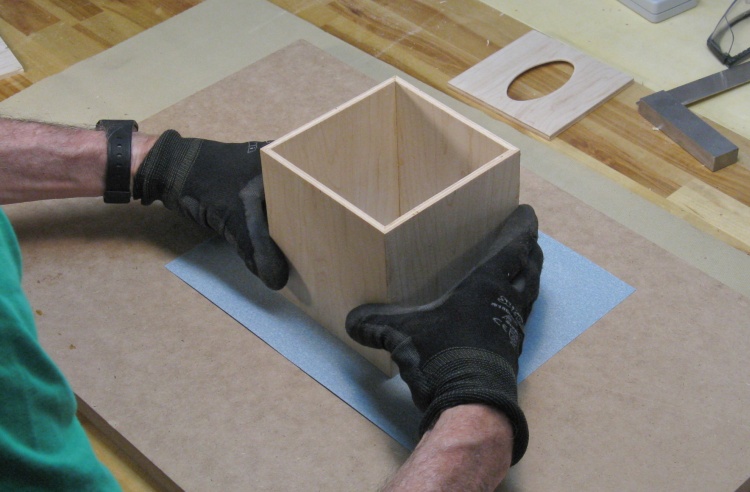
Flattening the edges
I flattened both the top and bottom edges using 150-grit sandpaper taped to a nice flat piece of MDF.
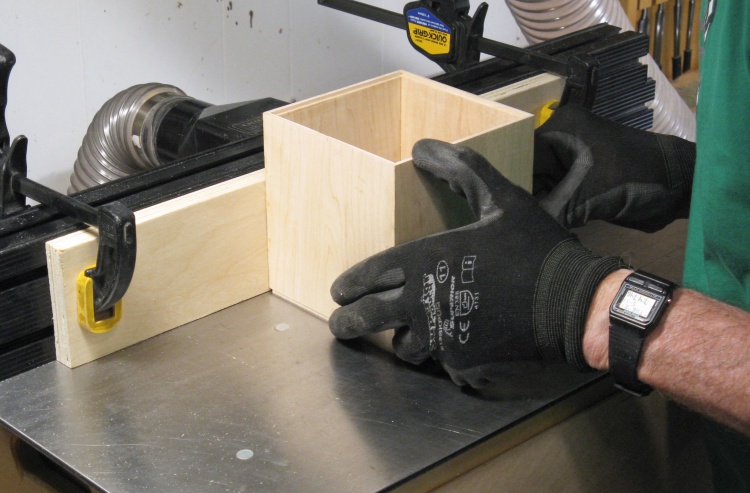
Routing a notch on the bottom to accept trim
Originally I just planned for trim around the top of the cover but belatedly decided to add it to the bottom as well. That required an appropriate notch, so here I'm routing out a 0.120"-square notch at the bottom.
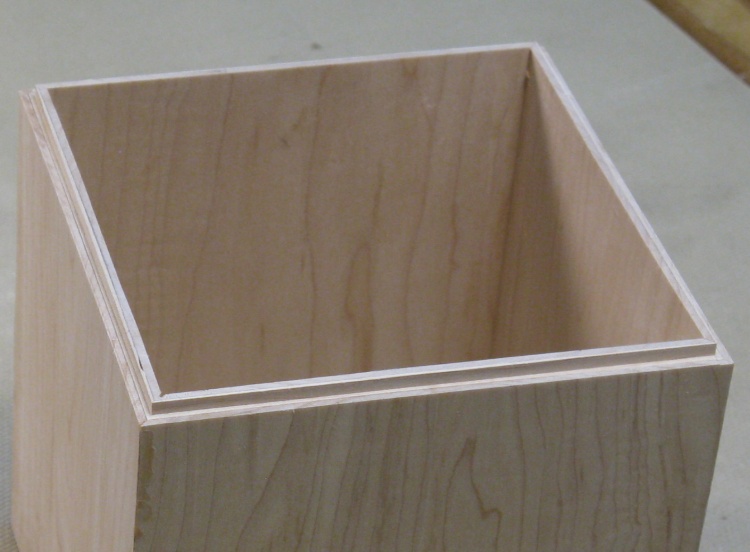
Bottoms up!
This is just a closeup shot of the notch in the bottom which will eventually house trim.
Finally gluing in the top
Then it was finally time to glue the top into place.
Scraping out glue squeeze-out from the notch
The little notch formed between the top and the walls would be filled with square-sectioned trim, so I made sure to scrape off any squeezed-out glue in that area.
I had originally thought to use thermally modified poplar for the trim but when I looked at it again, it wasn't as dark as I'd wanted. I hemmed and hawed a bit about what to use and then I thought I'd try a few different trim woods and see which one looked the best. I grabbed some darker woods off the shelf and proceeded to make some 1/8"-square strips to try out. I ended up cutting pieces large enough to do the whole box, since it wouldn't take a lot of wood and would save time after I chose which to use.
Bloodwood (w/serious warpage)
Walnut
Purpleheart

Thermally Modified Poplar
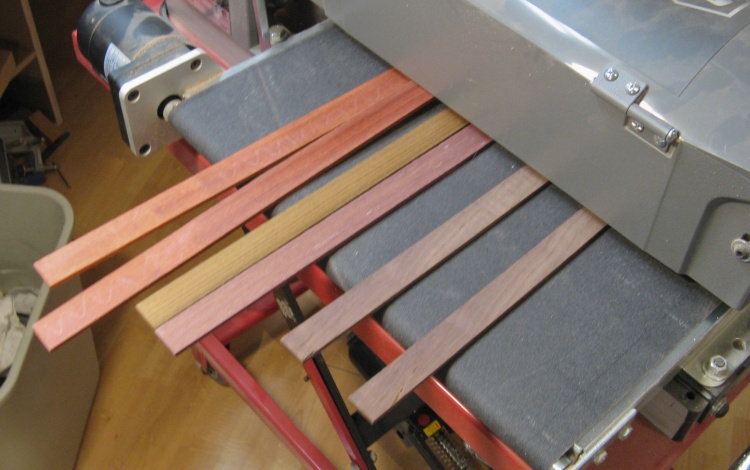
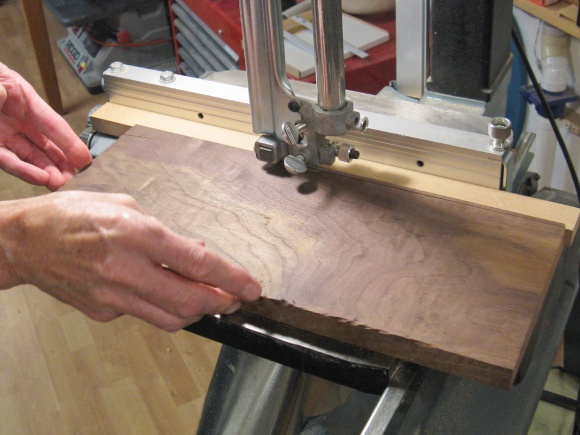
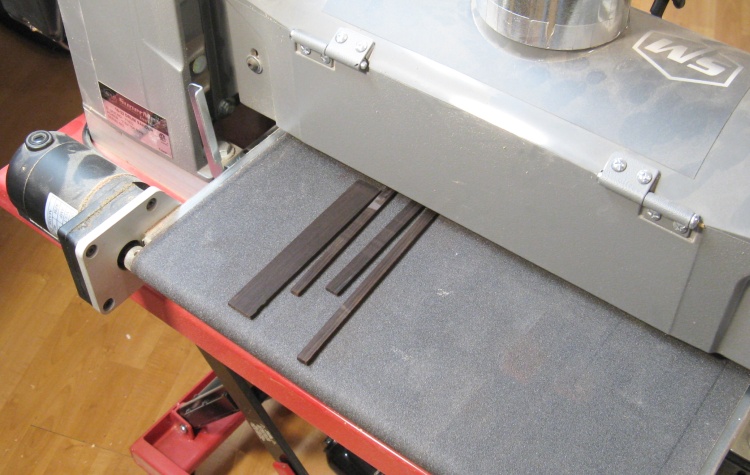
Thinning the trim slices
I was still mad at the planer for trying to screw up my box-wall plies, so again I used the drum sander to smooth and thickness the strips of wood.
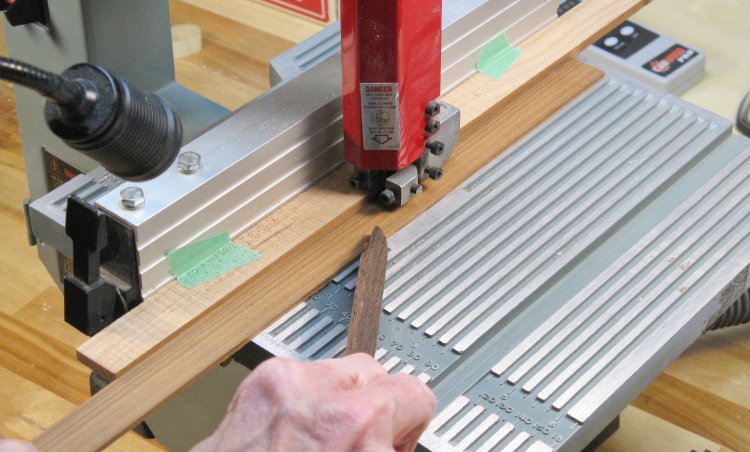
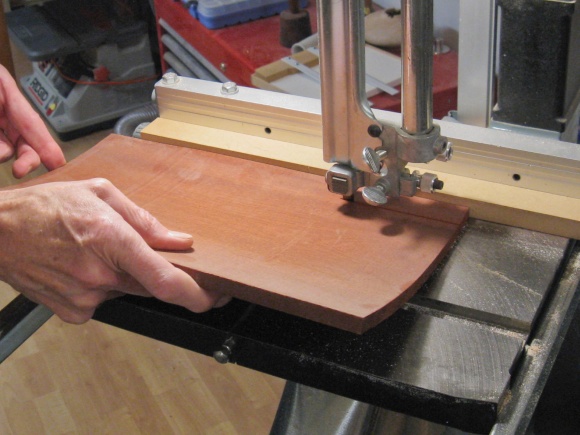
Cutting to about 1/8" width
The small bandsaw was used to cut off an 1/8"-wide strip from each type of wood to form a suitably-sized piece of trim.
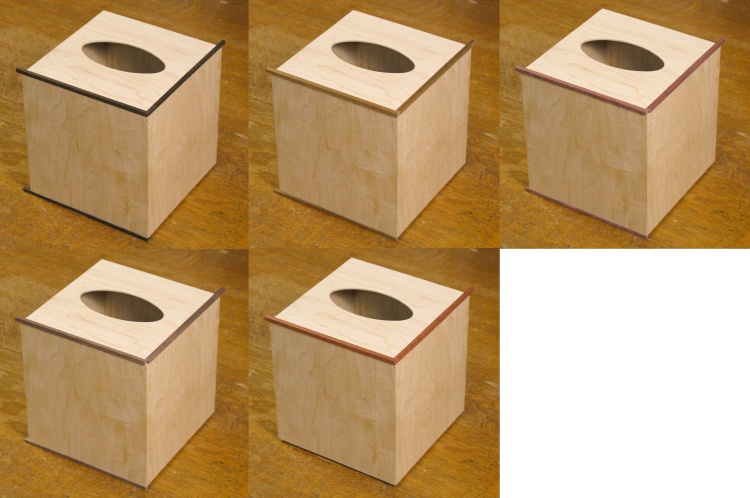
Cover with five varieties of trim to choose from
Then for each type of trim wood I placed two or three pieces on the cover and took a photo. There were the four woods shown above plus African blackwood, of which I already had some suitably-sized strips saved from Tissue Box Cover #3.
Those photos were combined into the one shown here to make it easier to compare. Types: African Blackwood, Thermally Modified Poplar, Purpleheart, Walnut & Bloodwood.
Ultimately we liked the upper-left option best due to the good contrast and that turned out to be the African blackwood.
Those photos were combined into the one shown here to make it easier to compare. Types: African Blackwood, Thermally Modified Poplar, Purpleheart, Walnut & Bloodwood.
Ultimately we liked the upper-left option best due to the good contrast and that turned out to be the African blackwood.
Thinning down some African Blackwood pieces
I didn't have enough of the exact-size trim I needed so I thinned down some additional pieces of appropriate size. Here they are emerging from the sander.
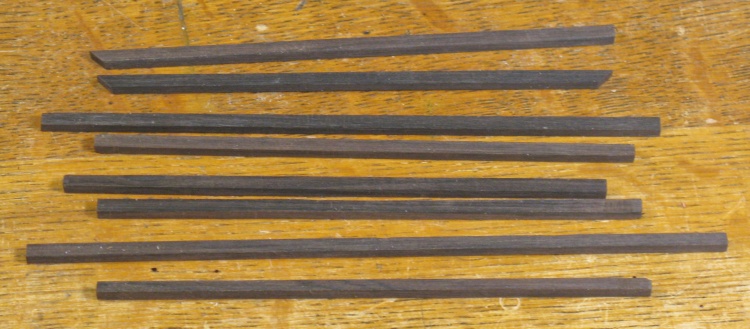
Enough trim pieces for the cover
The wider pieces were cut into thin strips and I was left with these eight trim sections.
Each one has three good surfaces (two of which go against the walls of the notch) and one rougher surface that will be oriented outwards and later sanded smooth.
Each one has three good surfaces (two of which go against the walls of the notch) and one rougher surface that will be oriented outwards and later sanded smooth.
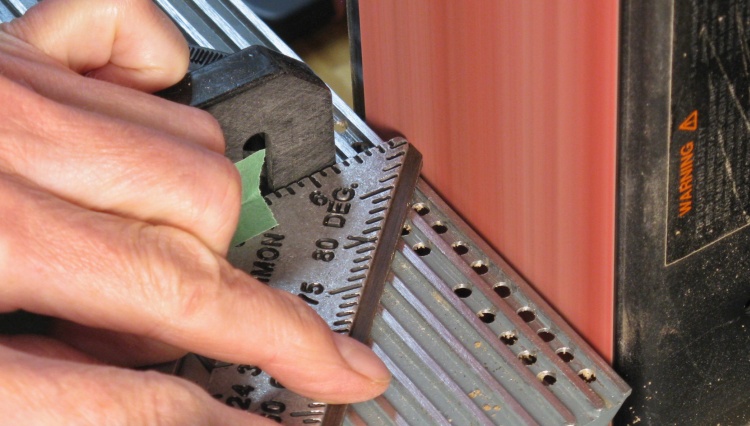
Sanding end to 45°
The trim pieces were each fit to a specific location on the cover. They were small enough that I could just sand miters into the corners as seen here.
This was the innagural use of a new "speed square" which has a nice 45° angle on it, perfect for this application (thanks Heather!).
This was the innagural use of a new "speed square" which has a nice 45° angle on it, perfect for this application (thanks Heather!).
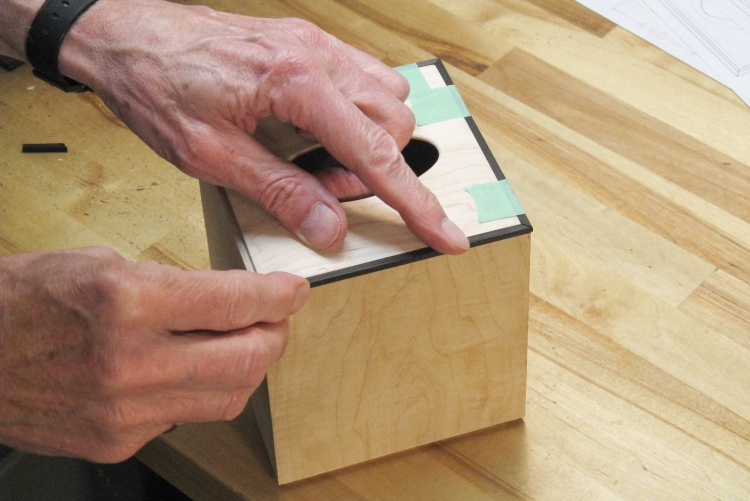
Fitting the top trim pieces
In this photo, there are a couple of trim pieces already fit and taped down and I'm checking the third piece.
Gluing was pretty straightforward. I released the tape on each piece in sequence, added glue to the notch and taped the piece back down. These shots show installation of the bottom trim.
Applying glue to bottom notch
Taping on a trim piece
Top & bottom trim glued on
Both top and bottom trims have been glued and taped down (conventional green masking tape this time, found on a later trip).

Glue dry but some cleanup needed
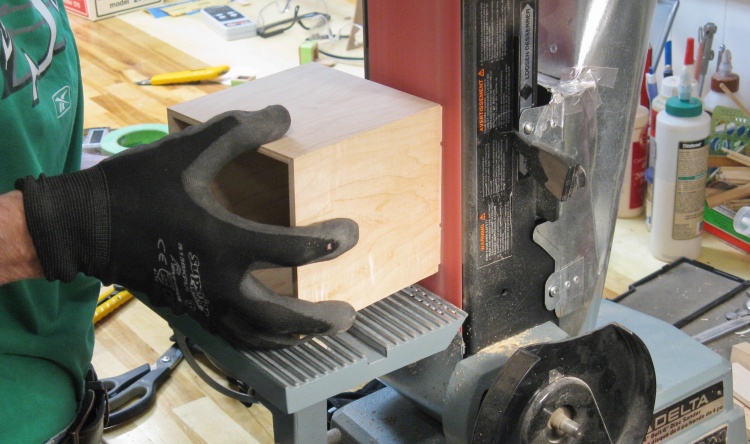
After the bandages were removed, it was evident that there is still some healing to do, with the theraputic instrument once again being the belt sander.
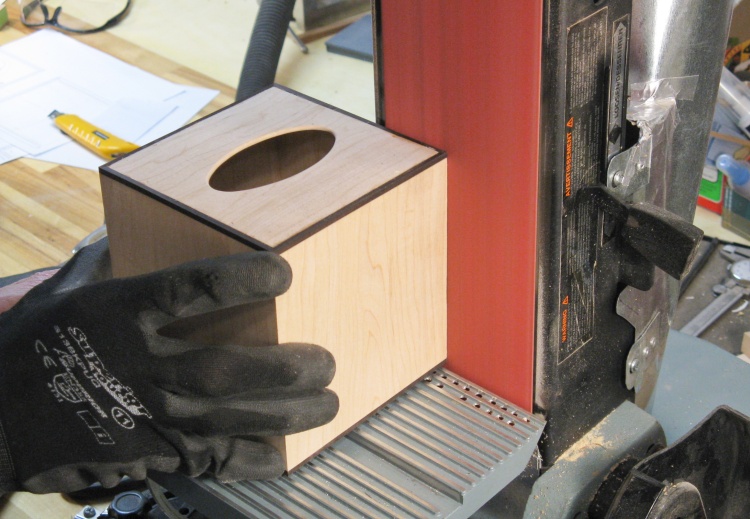
Sanding faces flush
The trim pieces had intentionally been made slightly oversized and at this point were sanded flush with the five maple cover faces, with a bit more to remove any residual dried glue.

...and cleaning up with hand sanding
And of course the outside of the cover was hand-sanded with grits up to 400 for a nice finish.
There was a bit of an issue with dark blackwood sawdust getting on the maple, but the maple is pretty close-pored so vacuuming seemed to solve most of those issues.
There was a bit of an issue with dark blackwood sawdust getting on the maple, but the maple is pretty close-pored so vacuuming seemed to solve most of those issues.
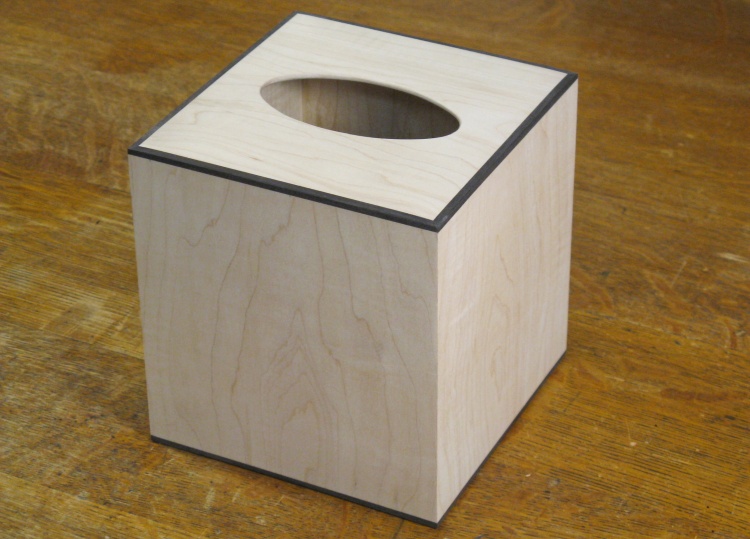
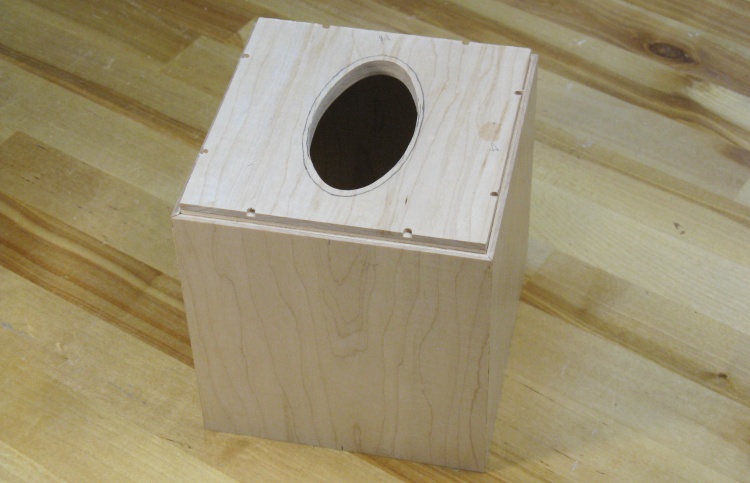
Woodworking done
And here's the cover with all the woodworking done.
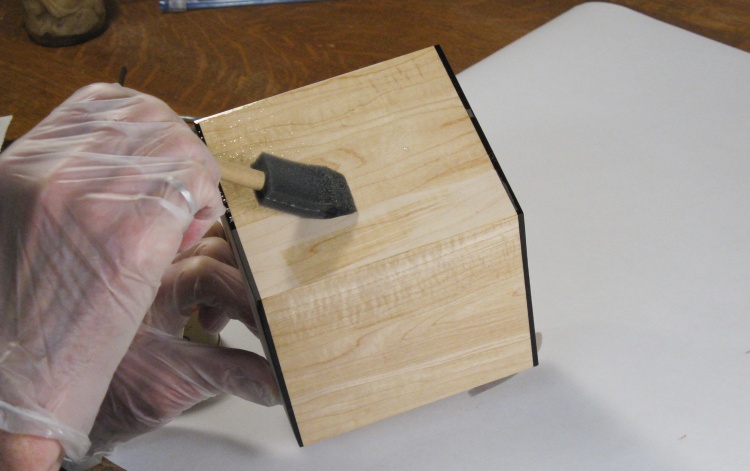
Adding the first coat of varnish
I used my standard Miniwax Fast-Dry Poly as a varnish and in this shot I'm adding the first coat.
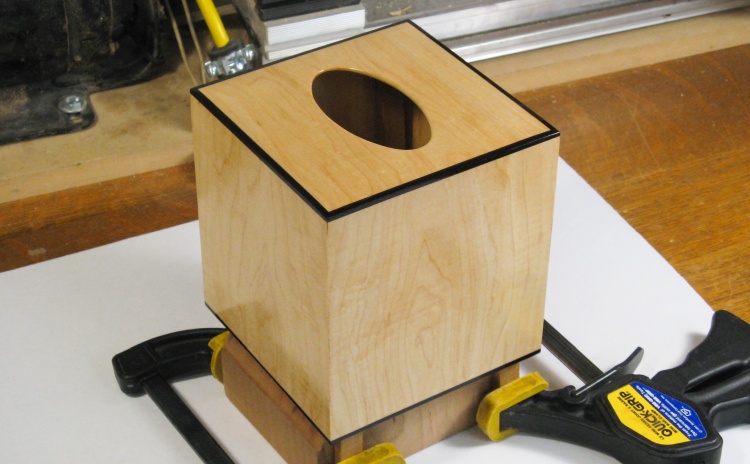
First coat of varnish on
This shows the first coat of varnish, still wet.
For this I now also have a standard procedure and rebuilt a little stand that supports the cover from the inside while it dries.
For this I now also have a standard procedure and rebuilt a little stand that supports the cover from the inside while it dries.
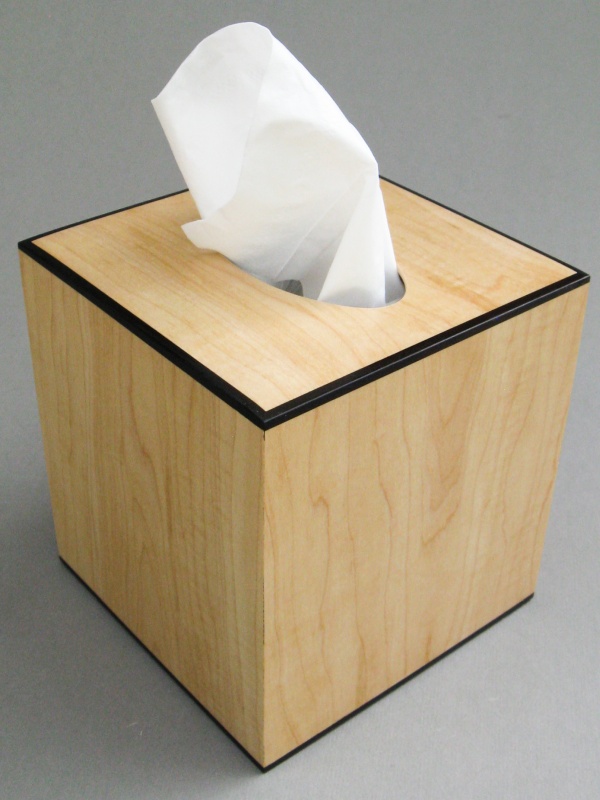
Done


