Tissue boxes - especially the cube-shaped ones for some reason - are made to be decorative, usually with colorful images of flowers. That's fine if they are "naked", but then they require two hands to extract a tissue if they are much less than completely full. And here I don't count tissue boxes where the next tissue doesn't pop up - those are about as useful as a toaster that doesn't pop up. And besides, it flies in the face of all technological and innovative development for the last hundred years. Disregard these throwbacks - they are unworthy of consideration.
So then the price for the pop-up tissue (besides all the tissue fuzz and the inevitable mis-feed frustration) is having to anchor it down against the next-tissue-feed forces. This is a price well worth paying and making covers no doubt employs thousands of people the world over. However I must have a callous, uncaring soul since I decided to make my own, thus depriving all these people of their livlihood.
So then the price for the pop-up tissue (besides all the tissue fuzz and the inevitable mis-feed frustration) is having to anchor it down against the next-tissue-feed forces. This is a price well worth paying and making covers no doubt employs thousands of people the world over. However I must have a callous, uncaring soul since I decided to make my own, thus depriving all these people of their livlihood.
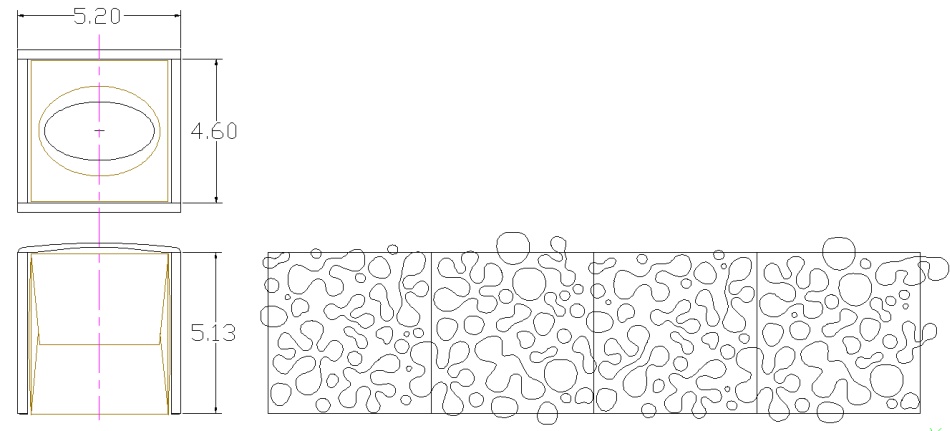
The plan
Checking techniques for pattern & texture
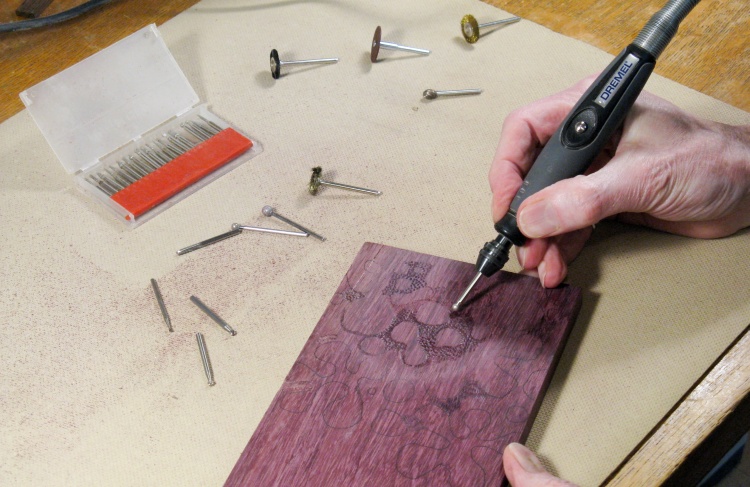
Before I even started, I wanted to make sure it was possible to create the effect I had in my mind's eye.
I used a small plank of purpleheart that was in my shop and tried to create the pattern and the background texture with various Dremel bits. I eventually arrived at an approach that I liked involving a spherical bit and a brass brush, so I was more comfortable moving ahead.
I used a small plank of purpleheart that was in my shop and tried to create the pattern and the background texture with various Dremel bits. I eventually arrived at an approach that I liked involving a spherical bit and a brass brush, so I was more comfortable moving ahead.
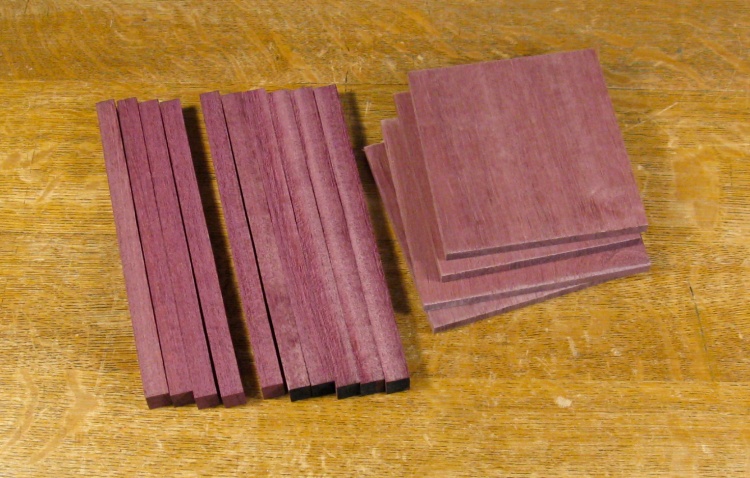
A knotty plank of purpleheart
I had a bit of purpleheart in the shop, but not quite enough for this project. I didn't need a great deal of wood, so I just bought the 18" length shown here and used only part of it.
So why is it that when you use debit, they always want to staple the debit receipt to the bill? It seems to be universal among vendors and if like me you don't find that useful, it is difficult prevent. You need to remember to tell the cashier early in on the process because if it occurs to you only when they go for the stapler, it's way too late. "I don't need the receipt (Kerchunk) stapled to...ah forget it".
Historical note: Bought after my last day of work before retiring.
All the pieces cut out and ready to assemble
Using bandsaw and planer, about half of my plank was transformed into the four sides plus a pile of pieces to make a laminated top.
I thought that the laminated top might have a bit more interesting grain that a solid piece since purpleheart grain is not very obvious.
I thought that the laminated top might have a bit more interesting grain that a solid piece since purpleheart grain is not very obvious.
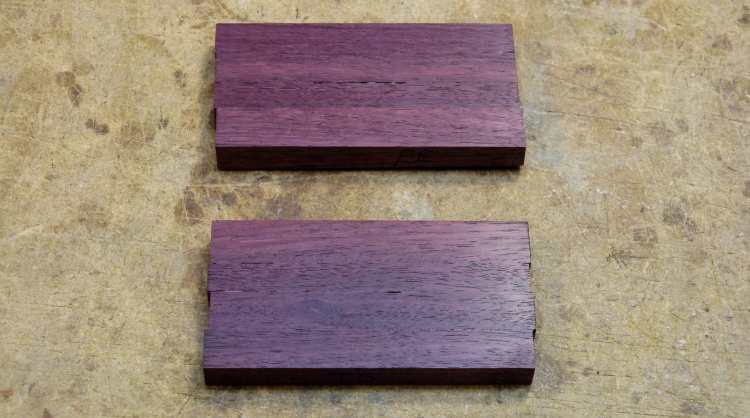
Checking laminated top grains
I made a couple of test assemblies to check options for the arrangement of the laminations on the top. These are small sections glued together, sanded and varnished.
I tried flipping alternate pieces end-for-end (bottom) but that didn't help much. I also tried flipping pieces end-for-end and upside-down (top). The latter seemed to give a bit more contrast, so I went with that.
I tried flipping alternate pieces end-for-end (bottom) but that didn't help much. I also tried flipping pieces end-for-end and upside-down (top). The latter seemed to give a bit more contrast, so I went with that.
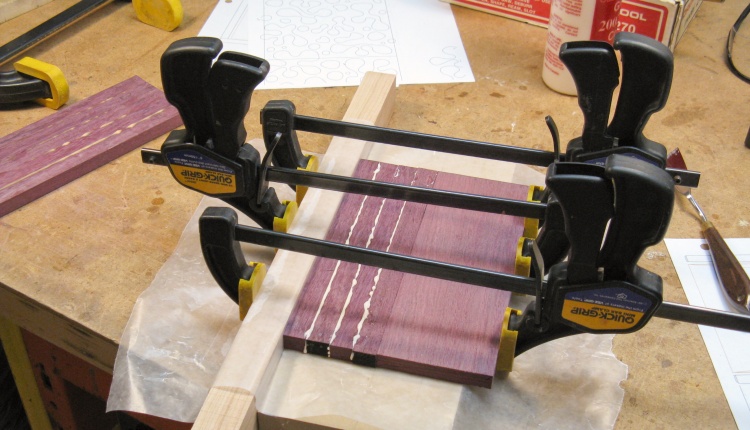
Gluing up half of the top
With the appropriate flips of alternating pieces, the top was glued together in two sections. The first section is done on the left and the second is being clamped (with a wider pieces of wood to distribute the clamping forces).
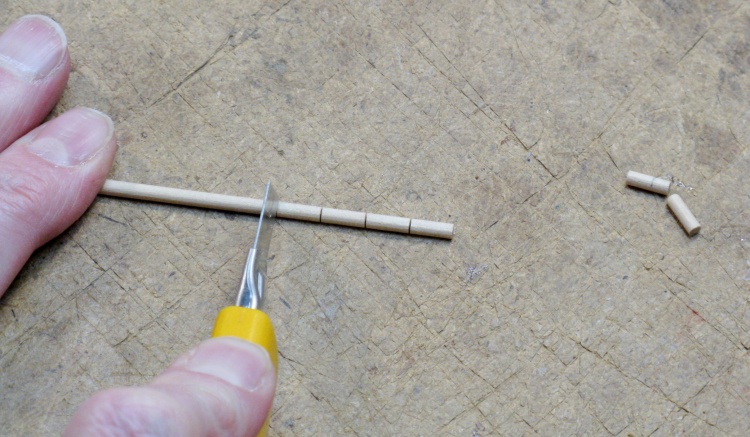
Chopping up 1/8" dowel for assembly pegs
I didn't want the side joints to be obvious but purpleheart has similar grain from the face or edge, so I could just use simple butt joints. To provide a bit more strength, I added two short 1/8"-diameter pins at each corner. Here I'm using a utility knife to cut appropriate-length pins from a longer dowel.
Gluing-up the four sides
After drilling the dowel holes in all the sides, dowels were inserted and the sides were glued together and clamped.
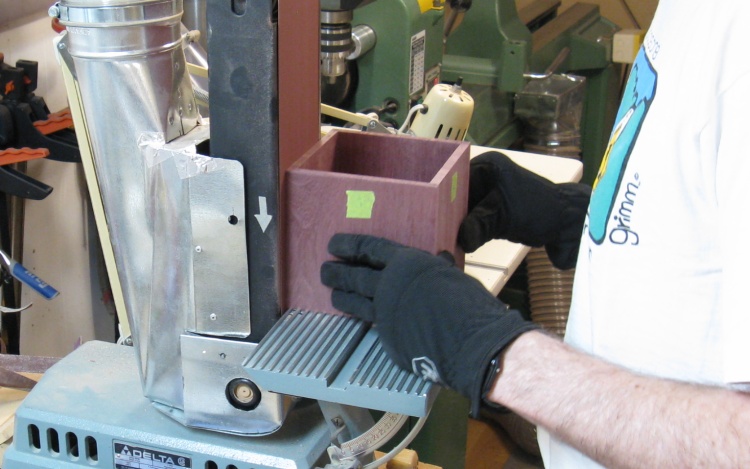
Using the belt sander to even up the joints
Of course the positioning of the sides relative to each other wasn't perfect, so the belt sander was used to even up any differences.
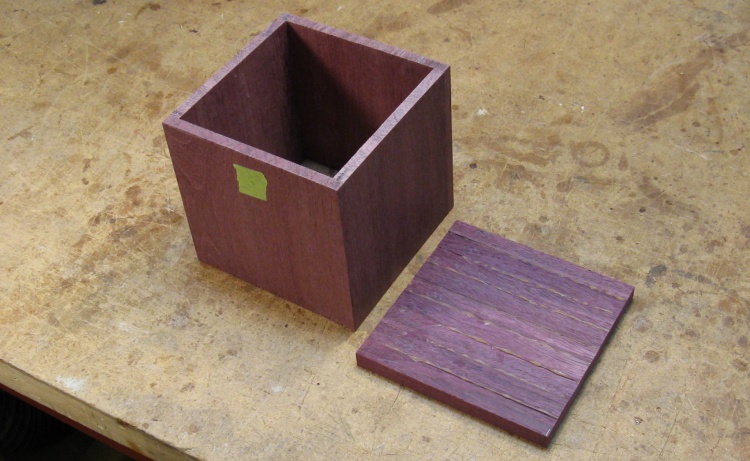
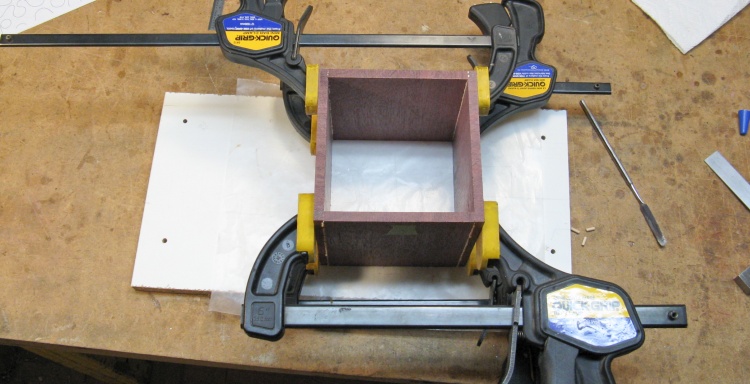
Box and yet-to-be-shaped top cover
Here is the box alongside the glued-together cover. As I had hoped, the joints between the sides are pretty much unnoticable.
The next step is to do the shaping of the cover.
The next step is to do the shaping of the cover.
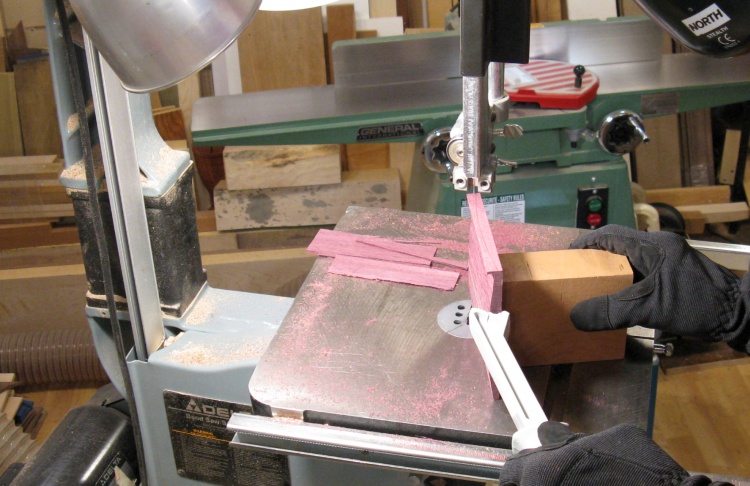
Cutting curve in top cover
The cover was to be curved both directions, so I marked the profile on one side and cut to that line with the bandsaw. I didn't cut quite all the way to the edge, stopping a bit short to leave a lip on which to draw the curved profile for the other dimension.
This shot shows the lip on the top side as the second curved cut is being started. The brown piece of wood I'm holding is taped to the purpleheart cover and provides a safe away-from-the-blade handle while keeping it vertical for the sawing operation.
This shot shows the lip on the top side as the second curved cut is being started. The brown piece of wood I'm holding is taped to the purpleheart cover and provides a safe away-from-the-blade handle while keeping it vertical for the sawing operation.

Shaping top cover
And then it was back to the belt sander (Equipment of The Month winner) to smooth off the curves on the top.

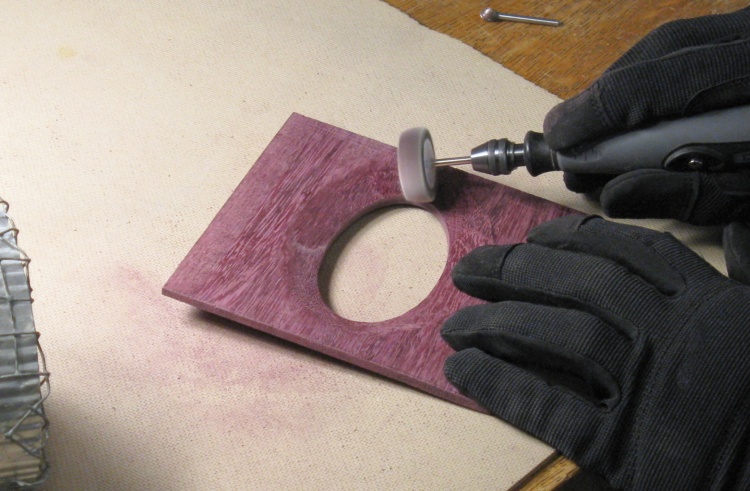
Using the scroll saw to cut out the tissue opening
Next step was to cut out the tissue hole egress portal. After drilling a small pilot hole through which to insert the blade, the TEP was cut using the jigsaw.
The inside edge was then cleaned up using the drum sander to get a nice smooth curve.
The inside edge was then cleaned up using the drum sander to get a nice smooth curve.
Shaping the underside of the top to thin the hole area
The middle section where the tissues come through was the thickest part of the cover, but I thought it would look (and work) better if the edges were thinner. To get there I used a cutting bit on the Dremel to remove material on the underside of the cover and this shot shows a subsequent sanding process using a flap-wheel sander.
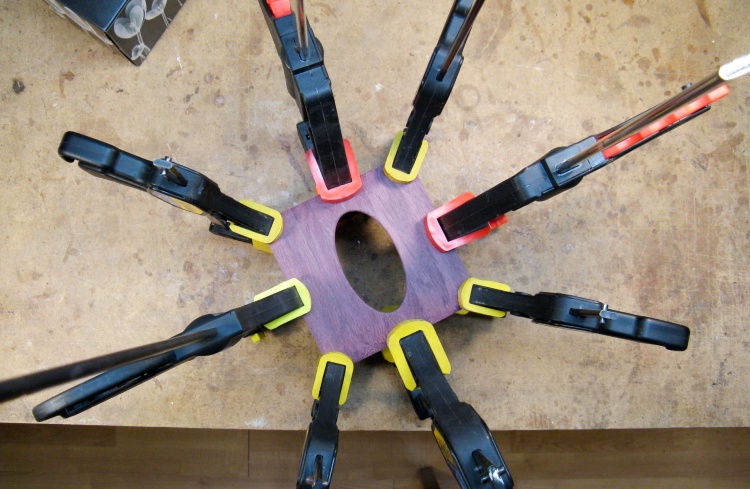
Clamping on the top cover
That pretty much finished off the cover and this colourful drone's-eye photo shows it being glued onto the box walls.
Plain Jane box ready for some bling
The cover was made a bit oversized, so then it was back to, yes, the belt sander to make the edges of the cover flush with the sides of the box.
This shows the completed box, now ready for the patterns on the sides to be added.
This shows the completed box, now ready for the patterns on the sides to be added.
Pattern marked onto sides
I used my usual technique of tracing the pattern onto the wood using carbon paper. Despite being a fairly dark wood, the contrast is pretty good so that made it easy to follow the lines.

Outlining the pattern with a circular cutting bit
I started by defining the raised parts of the pattern with a small spherical cutting bit.
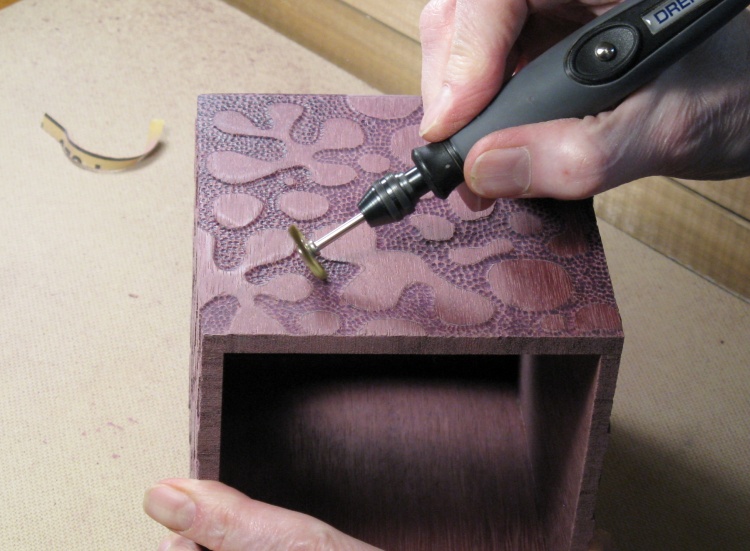
Lowering the "ground" area between the shapes of the pattern
When all the patterns on the first side had been outlined, I moved over to the drill press where another Dremel bit - this time flat-bottomed - was used to cut away the areas between the raised portions. The depth of cut was around 0.02".
In a surface carving, the lowered portion is called the "ground" area. The ground wasn't perfectly smooth, but that didn't matter since it was going to get textured next.
In a surface carving, the lowered portion is called the "ground" area. The ground wasn't perfectly smooth, but that didn't matter since it was going to get textured next.

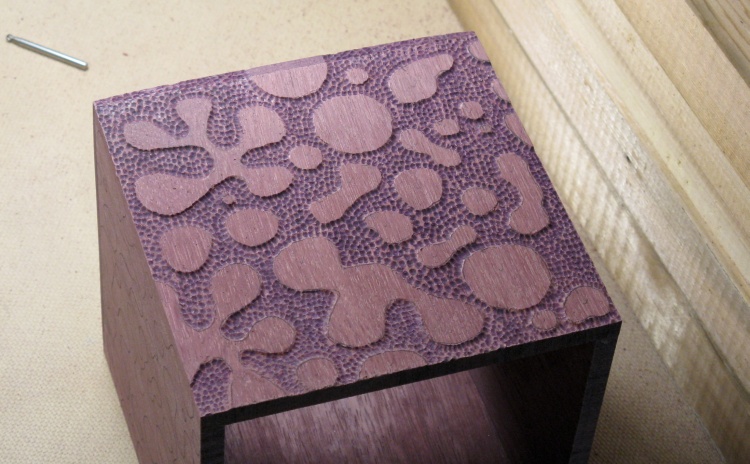
And finally adding the texture to the ground areas
And then finally the texturing. I used a little spherical grinding bit to make small divots in the ground areas. The bit burnt the wood slightly, darkening it up (despite dwelling less than a second on each divot). The darker divots provided some contrast with the lighter in-between sections.
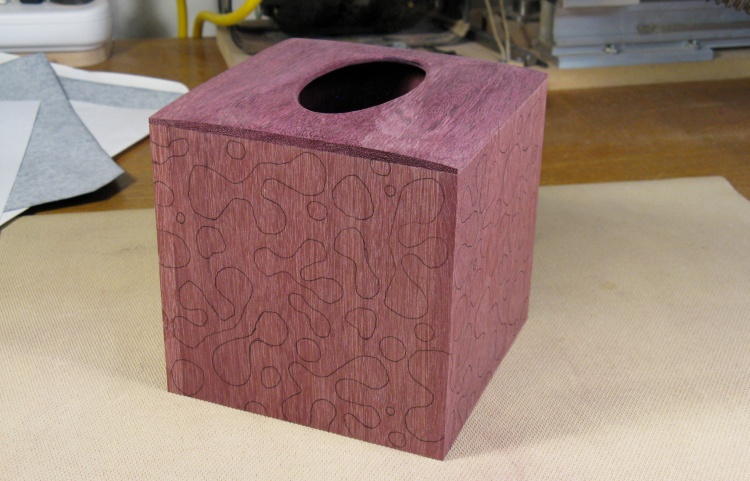
First side completed
It didn't take too terribly long to make the divots on this side - maybe an hour or so. This photo shows the completed side. There are still some lines from the carbon paper visible on the flat areas, but they'll get removed with sanding later on.
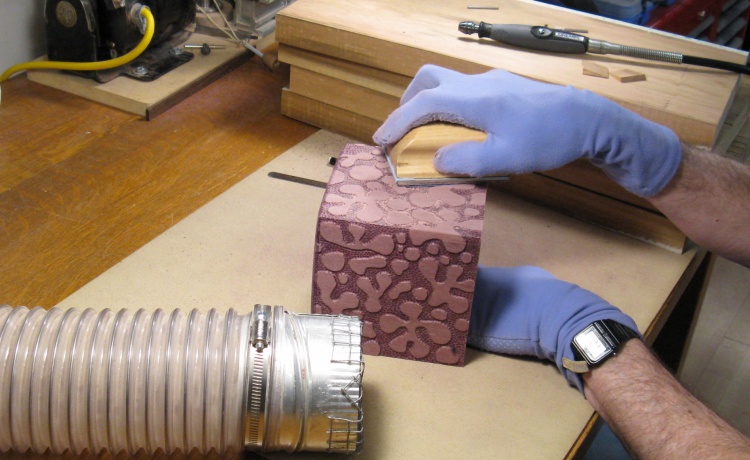
Brushing the texture
The divot-filled areas were treated with a brass brush. This smoothed the surface out a bit, removed any residual burrs and gave the surface a more reflective look.
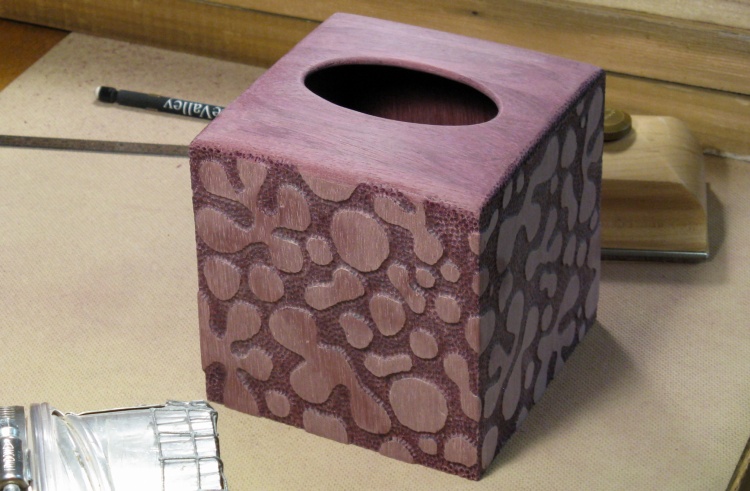
Sanding the raised pattern
The final step was to sand the sides and top smooth, which was done by hand using a sanding block.
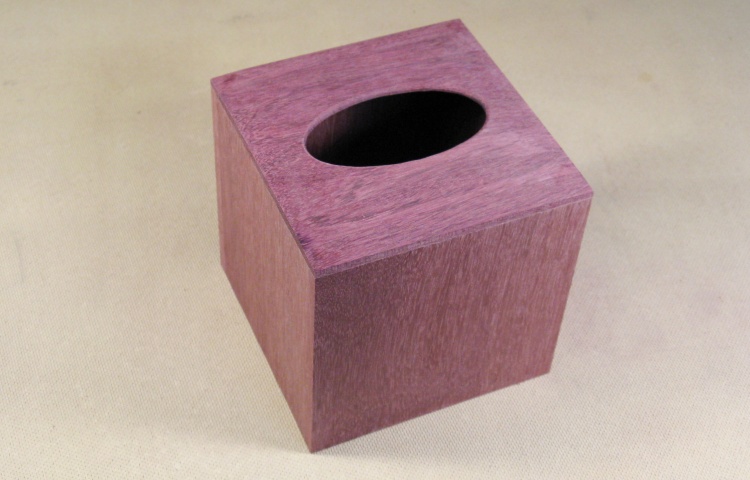
Woodworking complete!
And here it is complete and ready for finishing.
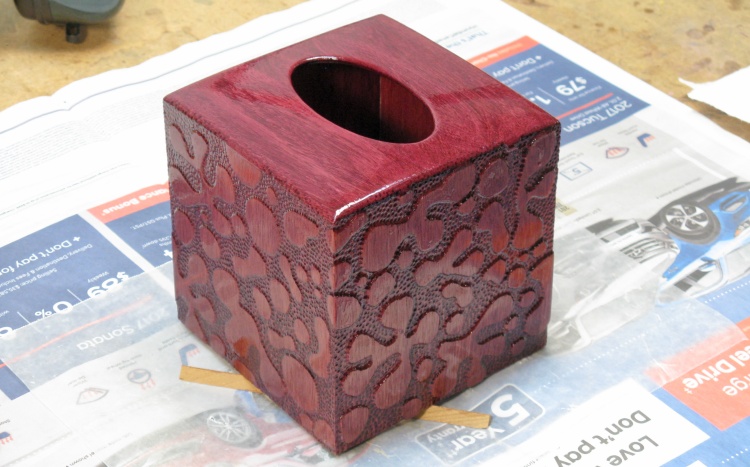
The first coat of varnish, still wet
I used my normal Fast-Drying Polyurethane finish, applied on the inside and outside using a foam brush. This shot shows the first coat of varnsh.
The final (3rd) coat was applied using a cloth for a bit smoother finish.
The final (3rd) coat was applied using a cloth for a bit smoother finish.
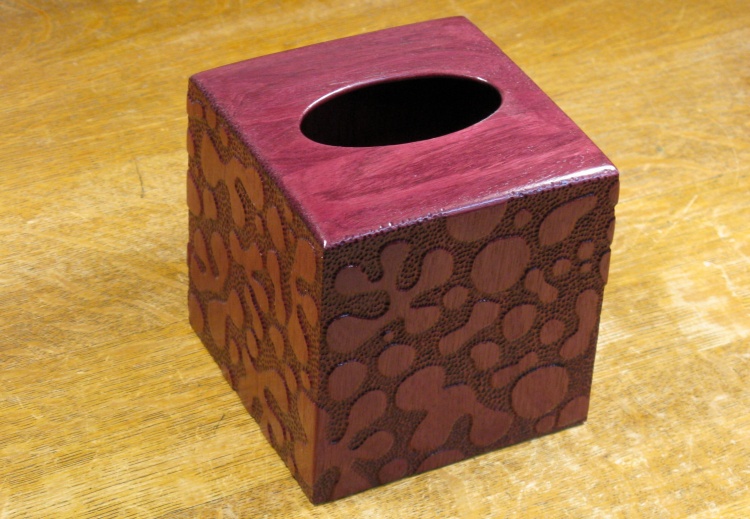
Complete after the third coat of varnish
Complete.


