I spent some time browsing wooden trivets designs on-line to see if any of them piqued my interest. I thought a trivet made from log and branch ends looked interesting, and since I had some suitable raw materials cluttering up the basement, it seemed like a good fit.
The example I ran across had a visible plywood base which while no doubt functional was a bit crude looking, so that would need to be fixed. Otherwise the fabrication seemed pretty straightforward.
The example I ran across had a visible plywood base which while no doubt functional was a bit crude looking, so that would need to be fixed. Otherwise the fabrication seemed pretty straightforward.
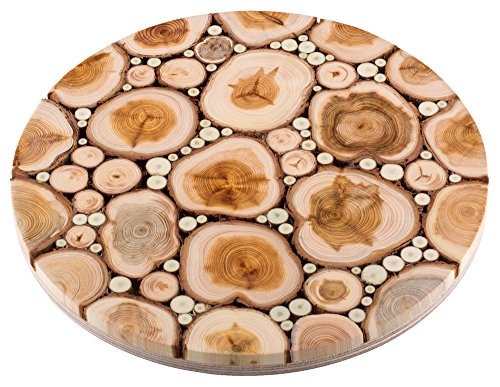
Hey - someone on the Internet made a photorealistic plan for me!
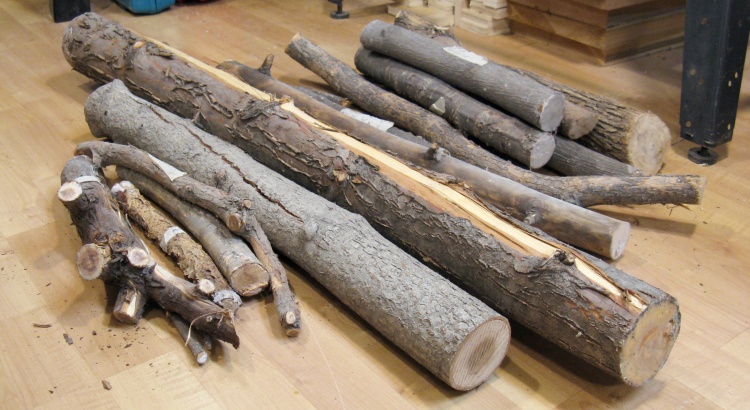
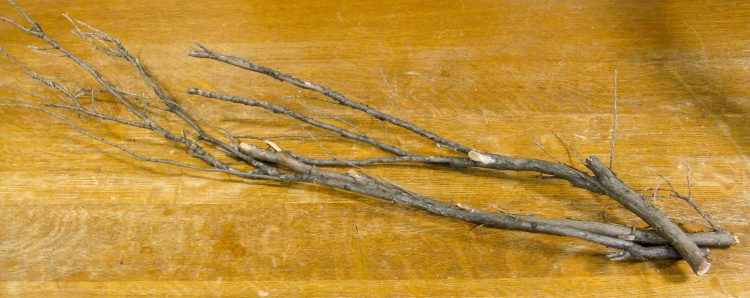
An unruly pile of irregular logs
I have a corner of the basement between some cabinets where I store ex-trees that I have come across in my various arboristic ventures over the years. We've planted dozens of trees, but have pruned or removed a dozen or more as well and I'll often keep a branch or a small trunk if I think it might have woodworking potential.
This pile is composed of all the smaller-diameter pieces from the collection.
This pile is composed of all the smaller-diameter pieces from the collection.
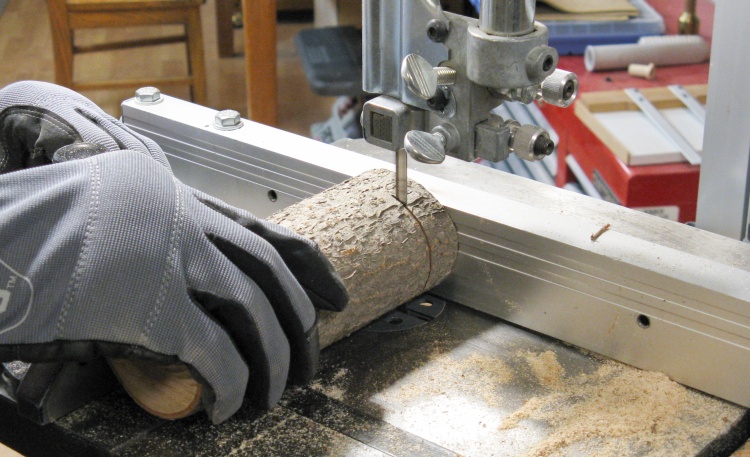
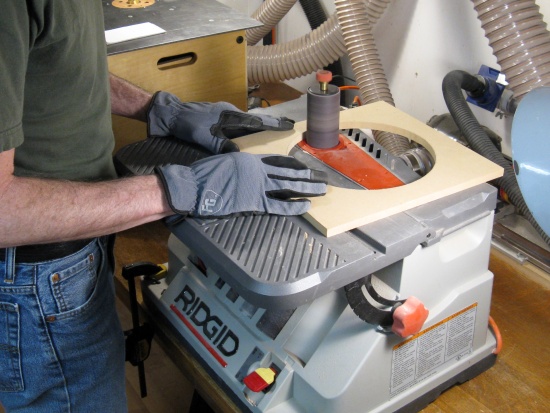
Slicing crab branch for outside
The trivet will be outlined by some larger-diameter logs and here I'm using the bandsaw to cut off 3/4"-thick sections.
I've selected what I believe is a piece of Ornamental Crab tree from the back yard, but that's just a guess since I failed to add the relevant what/when info-label when I stored it.
I've selected what I believe is a piece of Ornamental Crab tree from the back yard, but that's just a guess since I failed to add the relevant what/when info-label when I stored it.
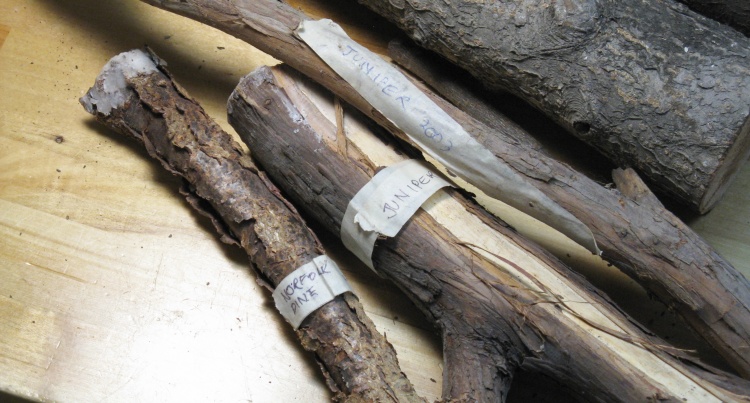
Those two Juniper branches in the middle were used
For the inner logs, I wanted to use Juniper since it has a nice reddish core. The only ones of suitable size were these two pieces in the middle.
These branches are from some front-yard Juniper bushes that needed to be removed when we moved the front door during renovations back in '04. They should be well-seasoned by now...
These branches are from some front-yard Juniper bushes that needed to be removed when we moved the front door during renovations back in '04. They should be well-seasoned by now...
Some smaller "fresh" juniper branches
Of course I hadn't saved any tiny Juniper branches since they wouldn't normally be very useful. Fortunately we still had some Junipers out the back door so I grabbed the pruners, brushed away the snow and cut off a few dead branches. Being an evergreen, it was still possible identify the dead branches in winter as those with no foliage.
I ended up harvesting another two or three branches later as these two didn't provide quite enough material.
I ended up harvesting another two or three branches later as these two didn't provide quite enough material.
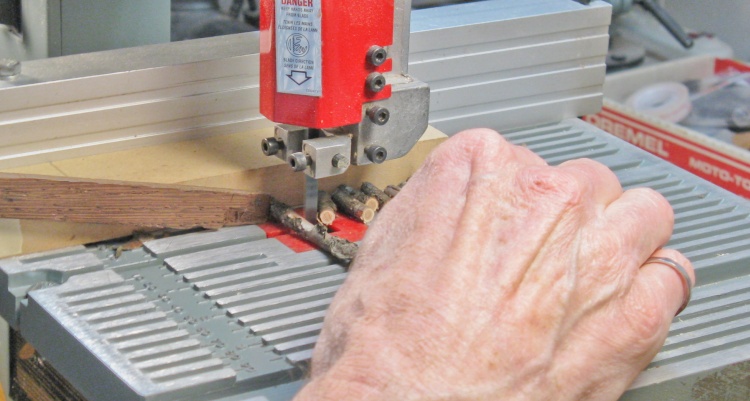
Chopping up some of the smaller branches
I chopped all the wood into lengths of about 3/4" and this photo shows some of the smaller ones being cut using my small bandsaw.
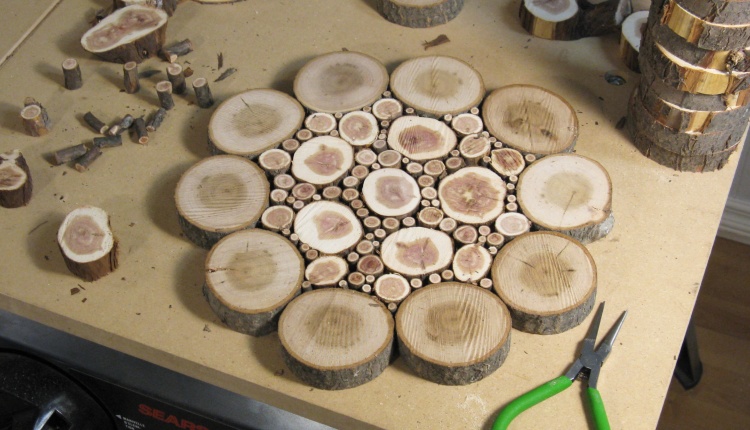
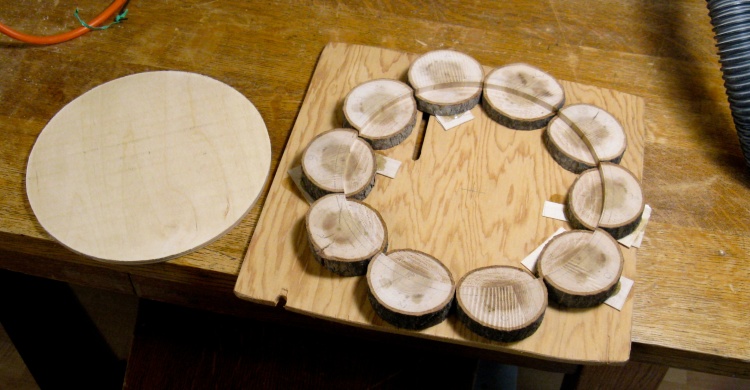
A test arrangement
When I had a decent collection of miniature logs, I tried out the pattern and it seemed to be easy enough to get something that looked OK.
I didn't think having the logs go all the way through would necessarily result in a very strong trivet so the plan was to add a stiff piece of plywood over most of the bottom. And that would require a bit more-involved construction procedure.
I didn't think having the logs go all the way through would necessarily result in a very strong trivet so the plan was to add a stiff piece of plywood over most of the bottom. And that would require a bit more-involved construction procedure.
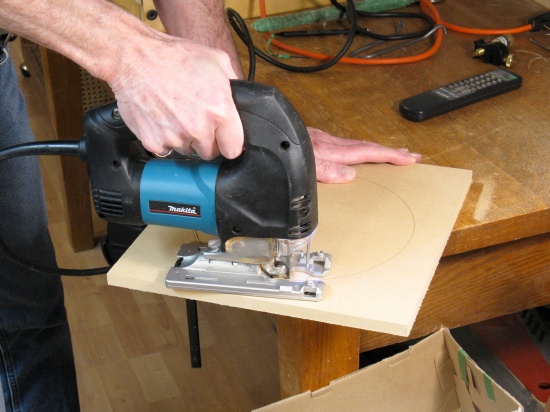
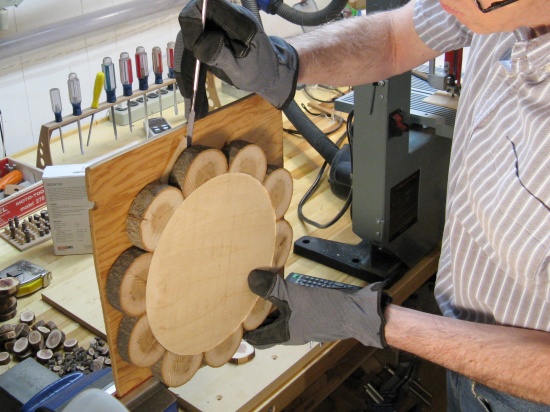
Cutting out a round pattern for the bottom
Smoothing out sawing imperfections
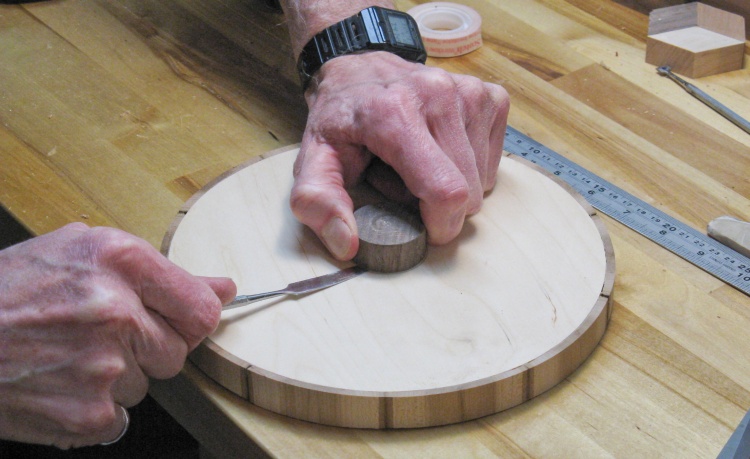
I wanted the "outline" logs to be full height on the outside, but they needed to be shorter in the center to acommodate the circular plywood stiffener. The plan was to temporarily glue the outline to a board and then route a circular cavity from the bottom.
I used a pattern for doing the routing and the above photos show the MDF pattern being made.
I used a pattern for doing the routing and the above photos show the MDF pattern being made.
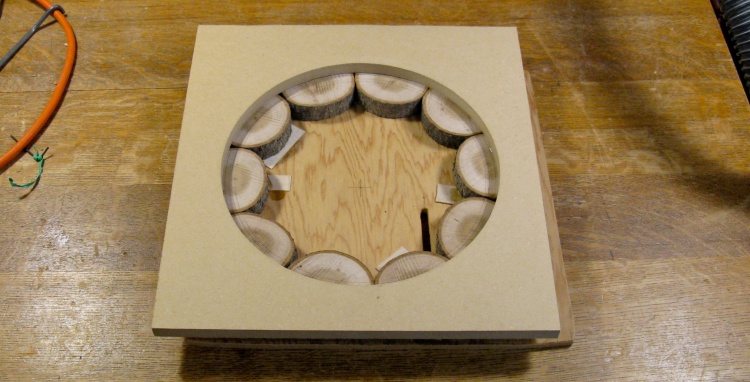
"Outline" logs temporarily glued to a board and pattern taped to them
In this photo (with the logs upside-down) the outline log tops have been temporarily glued to a scrap of plywood (with various shims to make sure the bottoms are all even) and then the routing pattern was taped to the log bottoms.
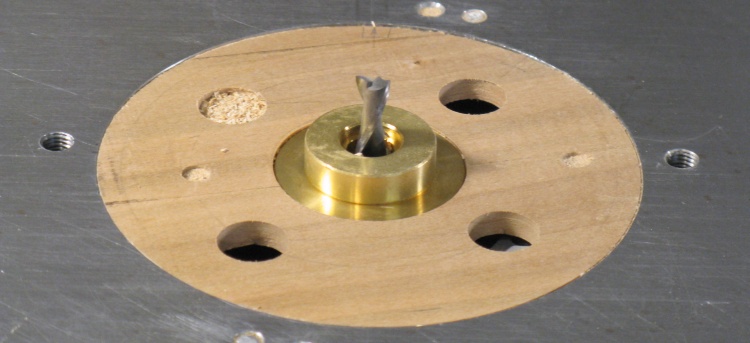
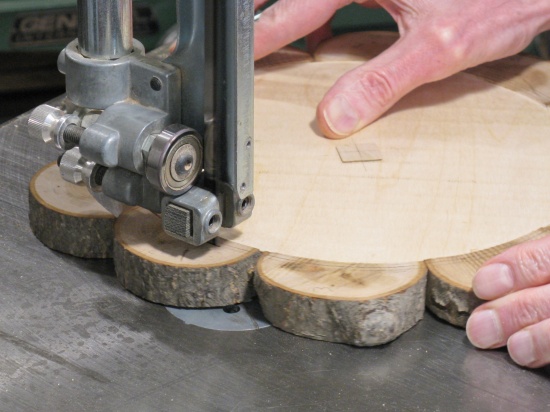
The jig to route inside the pattern
This is the pattern routing jig. The pattern sits against the brass ring and the bit cuts a slot a fixed distance from the pattern (11/32" or 0.34375" should the question come up in a Trivial Pursuit game).
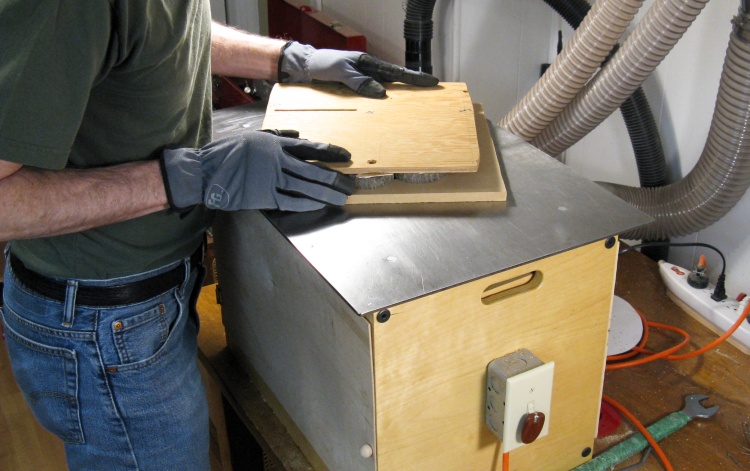
Routing the bottom of the logs inside the pattern circle
Then I just set the assembly pattern-down and moved it around to route the circular edge and the bits of the logs inside that circle.
The inset logs and the base that will go in the notch
I made a round plywood base from 6 mm Finnish Birch plywood, seen here to the left of the trivet. It will of course fit into the round cavity formed in the logs.
Prying the trivet off it's temporary board
Cutting off the scalloped edges
Then after the base had been glued to the outline logs, I pried that assembly off the temporary square plywood scrap. The edge of the trivet was to be circular, passing approximately through the centers of the outline logs so as the right photo shows, the outer halves of the logs were cut off.
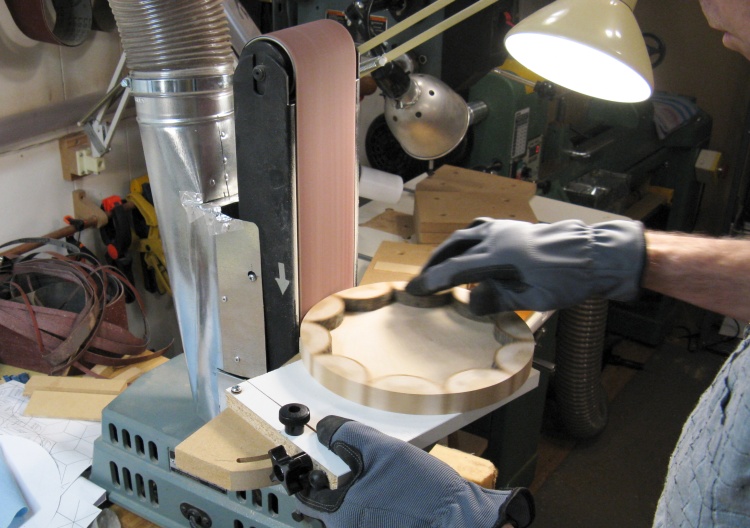
Sanding the outline with the sander circle jig
As usual, most saw cuts made freehand need to be cleaned up so this photo shows the outside of the trivet being circularized using the belt sander and aided by a circle jig that I whipped up.
The jig angle controls the diameter of the piece and a fine adjustment is provided to progressively reduce the diameter as material is sanded away. The piece being sanded is just spun by hand.
The jig angle controls the diameter of the piece and a fine adjustment is provided to progressively reduce the diameter as material is sanded away. The piece being sanded is just spun by hand.
Removing the axle added for the circle jig
To use the sander circle jig, an axle must be attached to the piece to act as a pivot. Here the taped-on walnut axle is being pried off after the sanding was done.
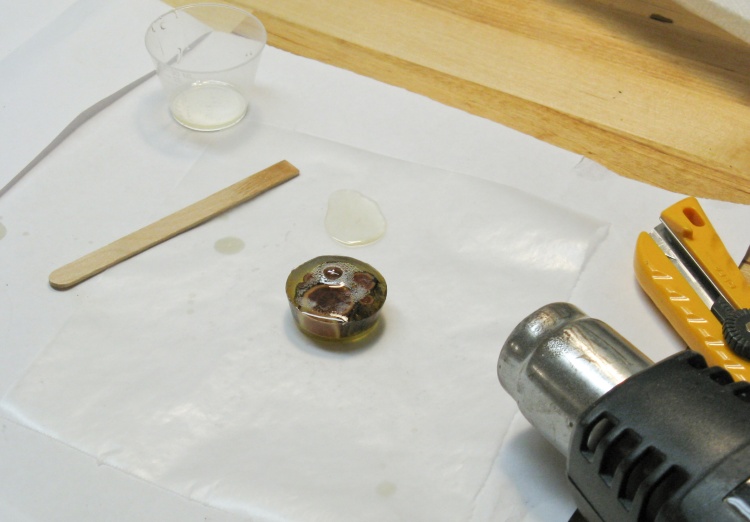
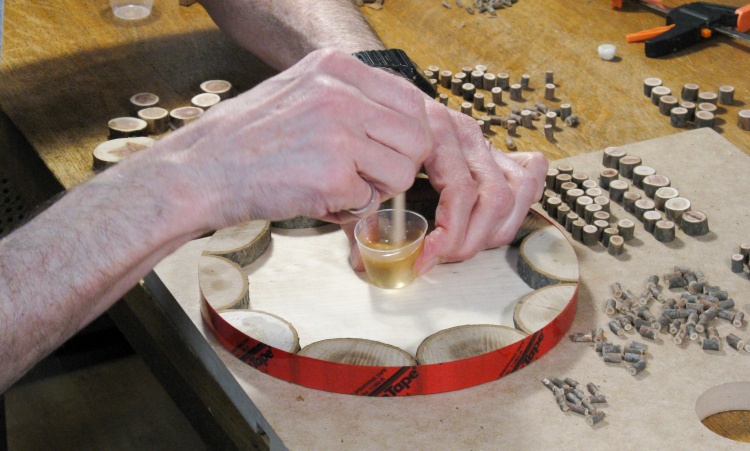
Epoxy test pour in a little plastic cup
So with the trivet outline done, I thought I'd better do a test pour of the epoxy to make sure everything was going to work out.
I started with a little plastic measuring cup like the one in the upper left and cut it down to about 1/2" high and then glued a few logs onto the bottom. When that dried I mixed up a small batch of epoxy and dumped that in. Here the epoxy has just been poured.
The heat gun was used to help drive any bubbles to the surface (mostly by thinning the epoxy with the heat).
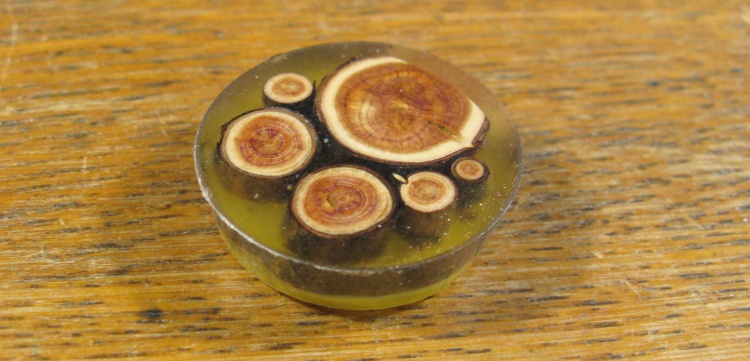
Test pour after sanding and varnishing
After the epoxy had hardened, I sanded off the surface down to the wood and then gave it a coat of varnish, producing this micro-trivet. That all seemed to work fine, so I proceeded to the actual trivet.
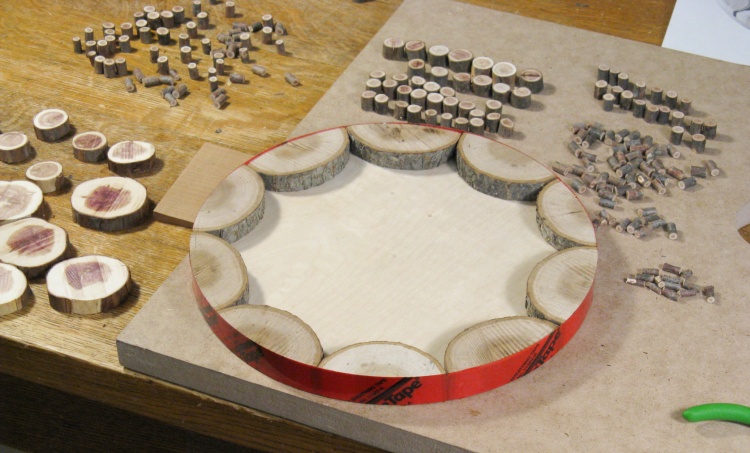
Base with tape added to prevent leakage
The outline logs didn't tightly touch one another so those joints would leak epoxy. To prevent that I added a layer of Tuck tape (as one would use to tape vapor barrier) which sealed the joints.
Here the outline is ready to go with various sizes of logs arrayed around it.
Here the outline is ready to go with various sizes of logs arrayed around it.
Mixing up epoxy to glue pieces in place
If one were to just put the logs in place and pour in the epoxy, the logs would float unless they were somehow held down. I didn't see a good way to hold them down so instead I glued the logs to the base.
To do that I just used a smaller amount of epoxy - about enough for a 1 mm-thick layer with all the logs in place. Here I'm mixing up 20 ml or so of epoxy to coat the base.
To do that I just used a smaller amount of epoxy - about enough for a 1 mm-thick layer with all the logs in place. Here I'm mixing up 20 ml or so of epoxy to coat the base.
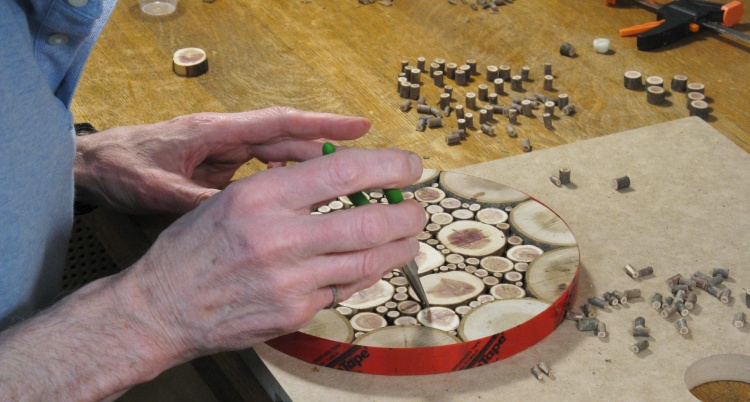
Finishing up inserting "logs" into shallow layer of epoxy
The epoxy was spread around on the base and then the logs were put in place. In this photo it's almost done and I'm just adding some smaller logs using a pair of pliers.
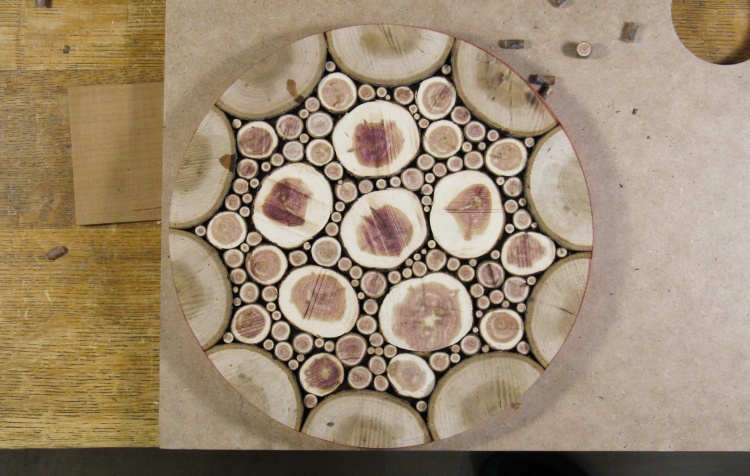
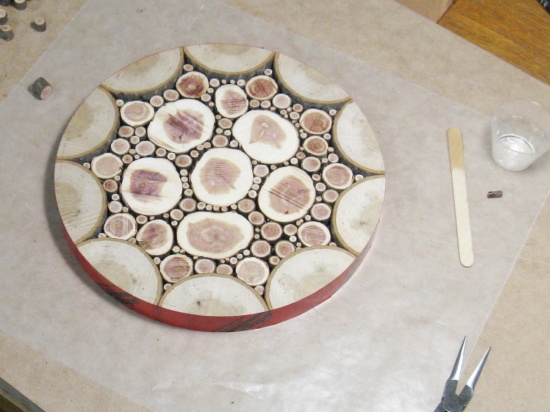
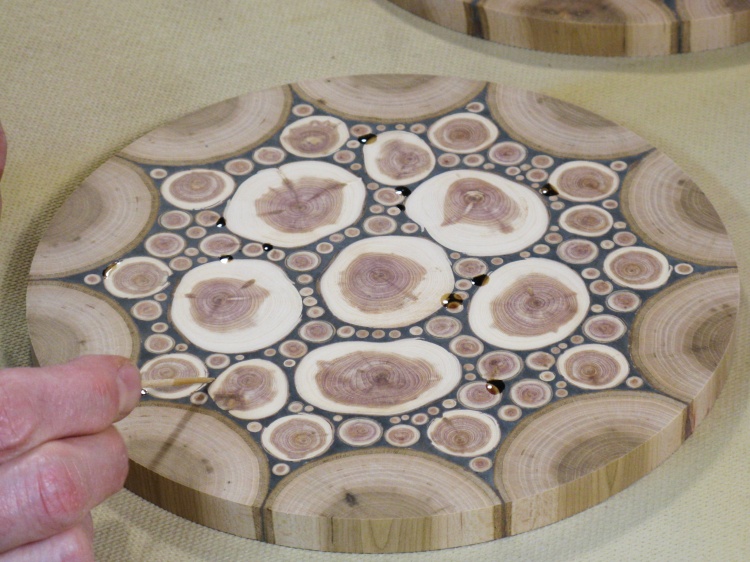
The completed pattern
Here's an aerial photo of the trivet with all the logs in place.
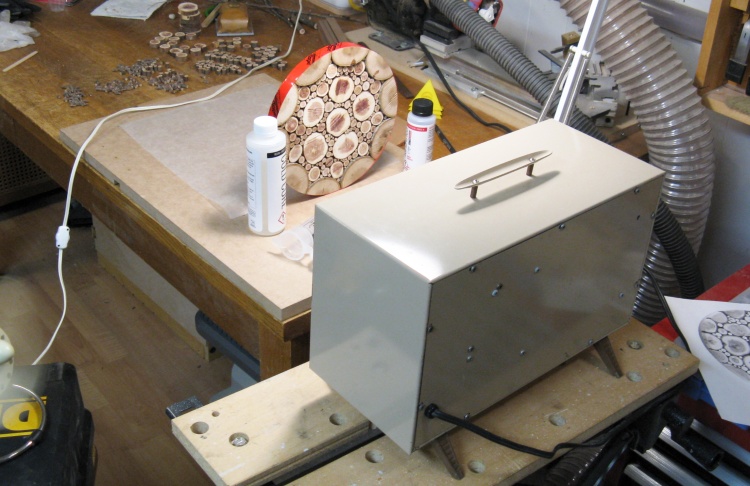
Warming things up with antique heater
The basement is fairly chilly so I thought I'd warm things up before doing the pour. The epoxy I used is already thinner than most but being warmer will help bubbles rise out of the trivet.
Here I'm using an ancient space heater to warm the two epoxy bottles and the trivet.
Here I'm using an ancient space heater to warm the two epoxy bottles and the trivet.

Mixing epoxy in a disposable container
I used an old plastic bottle to mix the epoxy which had been enhanced with with some inked-on volume marks to help guide the quantities. Here the resin is already in the mix bottle and I'm pouring in the brown hardener.
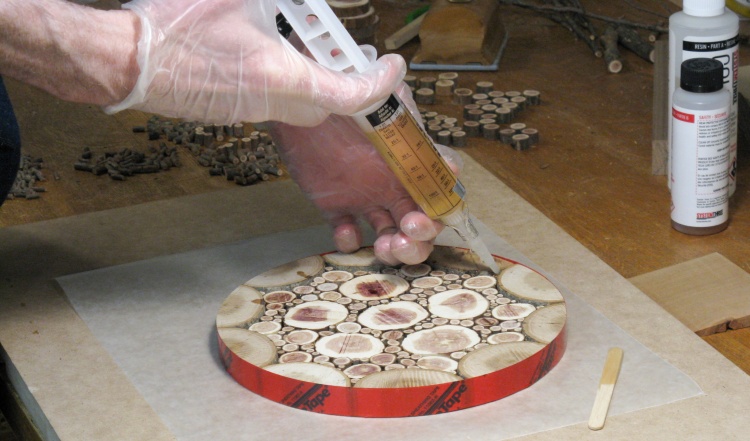
Injecting epoxy into all the little gaps...
The logs were pretty close together so I couldn't depend on the epoxy to flow into every cavity. Instead I used a biggish syringe to inject a bit into each cavity between logs.
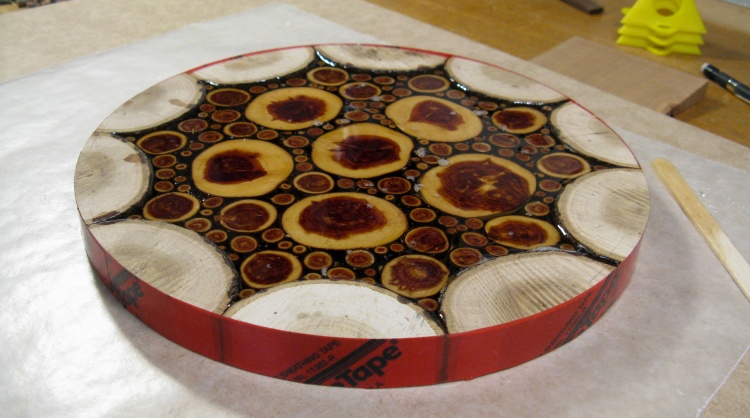
...until it covers all the inner logs
When it was all done (about 60 ml worth), all cavities were filled and the logs had a thin layer of epoxy on top of them. The outline logs were a couple millimeters taller than the center ones so they didn't get covered.
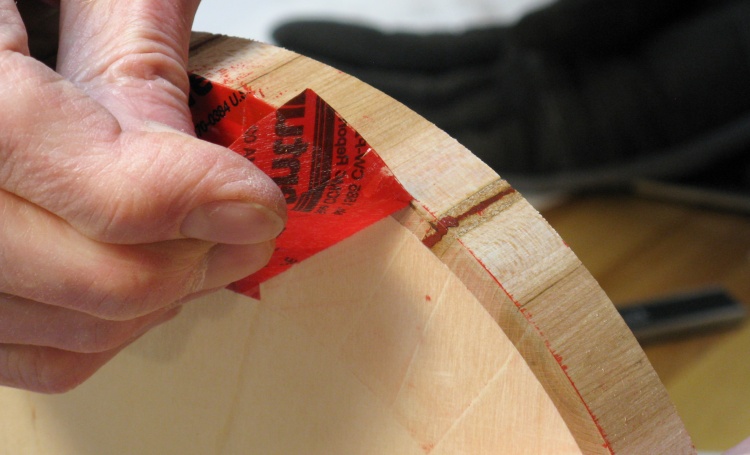
Pulling off the Tuck tape, which left a red goo.
I pulled off the tape but as is evident here, it left a bit of color and some adhesive residue (AKA goo) as well. I'm not sure whether this is a characteristic of the tape or a result of being warmed up, but some fairly vigorous sanding eventually eliminated it.
Barney with logs glued in

Barney after adding epoxy
The decision to add the base plywood meant that the logs didn't need to be as long. In fact, I was able to just cut all the 3/4" pieces in half to produce twice as many 3/8" pieces (except for outline logs of course). So I had lots of spares - enough to make a second trivet. So that's what I did.
Then with two almost-identical trivets, I could have called them #1 and #2 but instead I dubbed them Fred and Barney to keep with the log scheme. Fred was the first one I made and Barney was the slightly smaller second trivet, consistent with their "true" relative sizes.
Then with two almost-identical trivets, I could have called them #1 and #2 but instead I dubbed them Fred and Barney to keep with the log scheme. Fred was the first one I made and Barney was the slightly smaller second trivet, consistent with their "true" relative sizes.
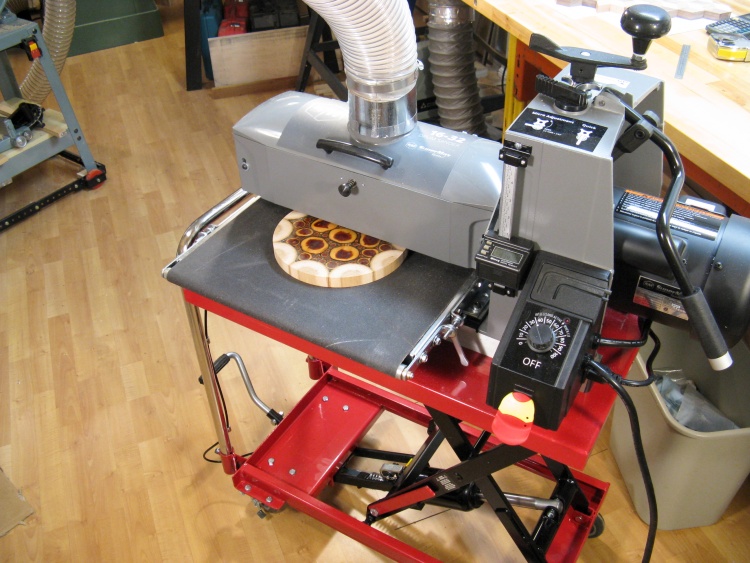
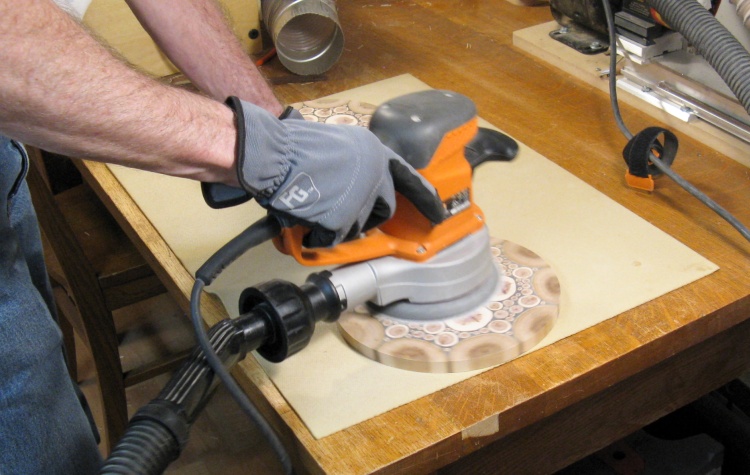
Running trivet through shiny new drum sander

F & B
The next stage was to sand the top down through the epoxy to the wood in the central portion of the trivet.
With this trivet and a few others coming up behind, that seemed like enough impetus for a new tool that I have wanted for a while. This is a drum sander which is useful for sanding and thinning flat items that could not go through the planer.
With this trivet and a few others coming up behind, that seemed like enough impetus for a new tool that I have wanted for a while. This is a drum sander which is useful for sanding and thinning flat items that could not go through the planer.

Bolting sander to lift cart
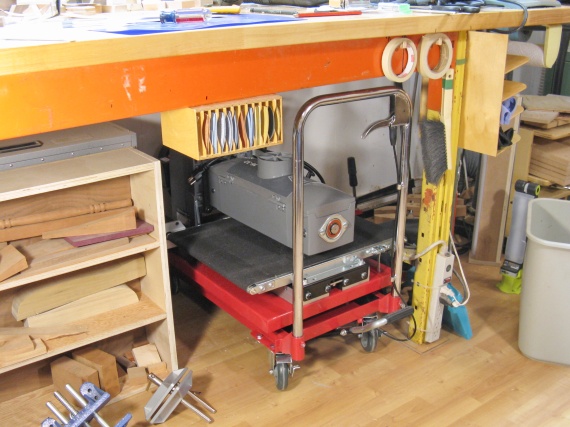
Sander stowed under main bench
Unfortunately I didn't really have room in the shop for another free-standing tool so I ended up using an hydraulic lift cart. The sander sleeps under the main bench with the table collapsed and for use is wheeled out and the cart pumped up to working height. A long dust collection hose already existing on the other wall of the room reaches over to connect to the dust port.
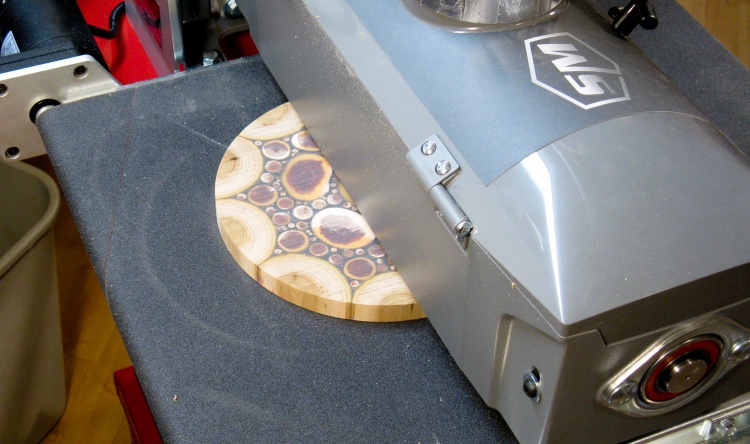
Partway sanded through the epoxy
The sander has a large drum covered in sandpaper under the hood seen here. As the drum spins, the moving belt carried the wood under it. The drum height adjustment sets how much wood is removed with each pass and I kept that to 5 or 10 mil for this operation.
This photo shows Barney emerging from under the drum after a number of passes. The epoxy is mostly removed and some of the logs are starting to be exposed.
This photo shows Barney emerging from under the drum after a number of passes. The epoxy is mostly removed and some of the logs are starting to be exposed.
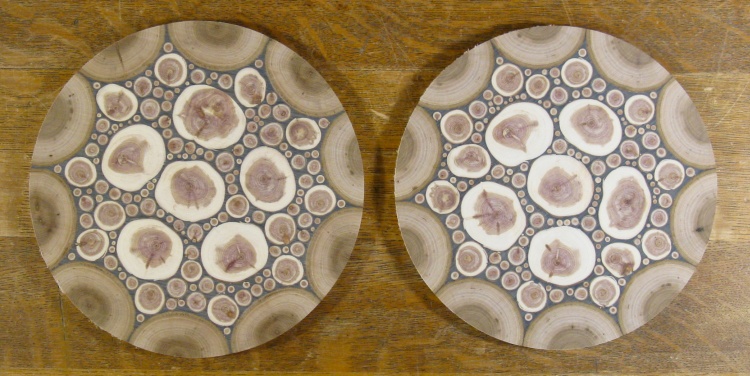
Fred & Barney after drum sanding
I did most of the sanding with an 80 grit sandpaper, followed up with a few passes with 120 to remove scratches. This photo shows the two trivets after being sanded. Barney especially is rather cloudy-looking due to visible scratches in both the wood and the epoxy.
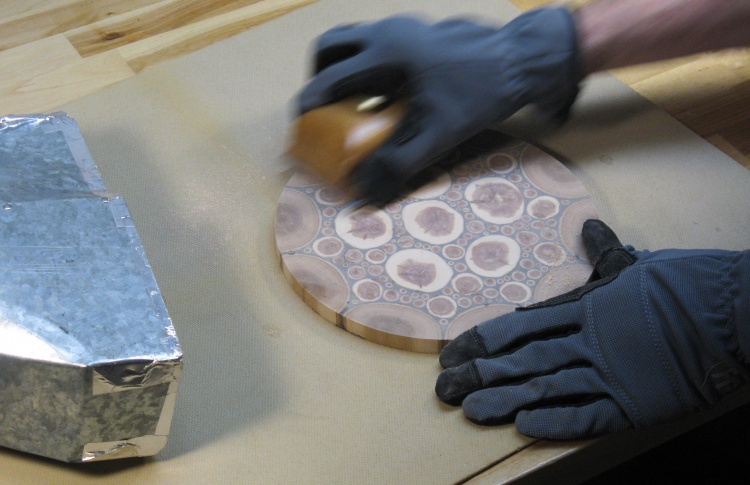
Using the finish sander to clean up scratches
To improve the surface I used a finishing sander with 150 grit to remove the worst of the sanding marks. However when the surface was cleaned up a bit, some small voids became visible - mostly bubbles that had been sanded part-way through.
Filling any voids that appeared after sanding
I mixed up another small batch of epoxy and filled any voids I could find on both trivets.
Final sanding of top
After the epoxy patches had hardened, it was back to finish sanding. First with the random orbital sander again and then by hand with a sanding block. By hand I went through 220, 320, 400 and 600 grit which produced a nice surface devoid of visible marks.
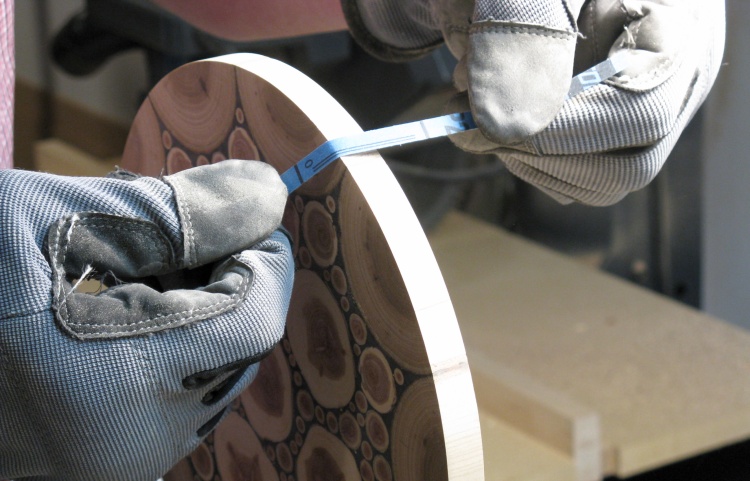
Rounding the corners
The last bit of sanding was to round the sharp corners using strips of 220 grit sandpaper.

And that's the woodworking done
After adding my initials on the bottom, the woodworking was done. Here Fred is complete and just chilling out next to the sanding block.
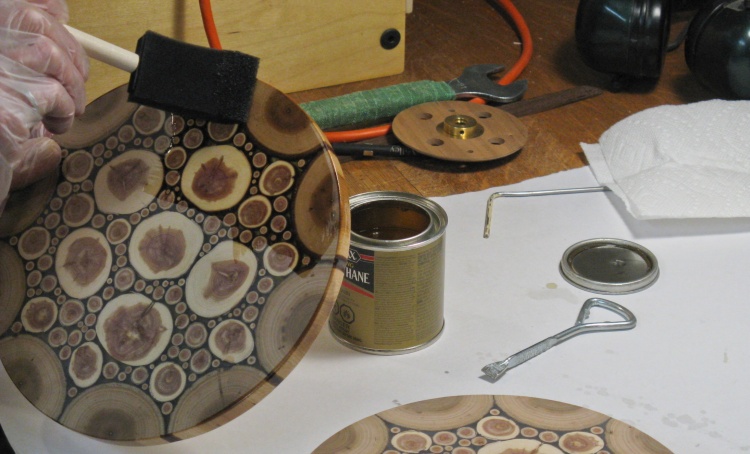
Putting on the first coat of varnish
And finally: finishing. Here I'm starting to coat the first trivet with my usual Mini-Wax Fast-Drying Polyurethane.
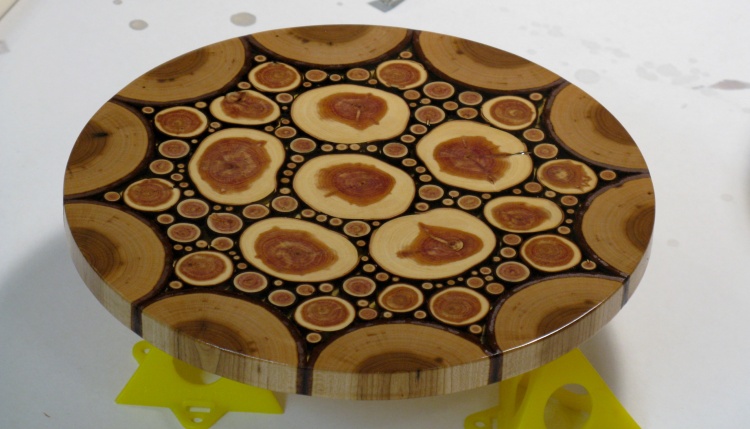
First coat of varnish, still wet
This shot shows Barney with the first coat of varnish just applied. The color certainly improved with the application of the finish.
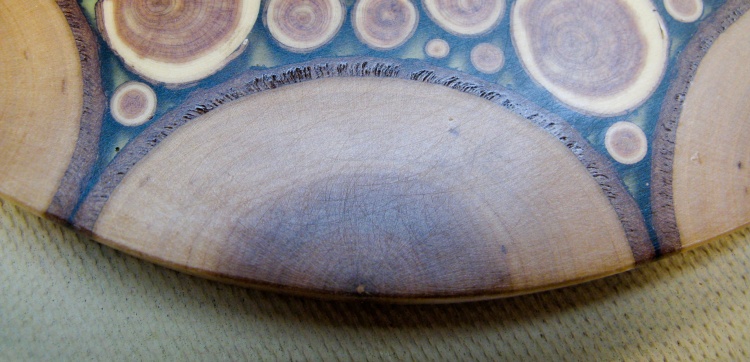
Voids in the varnish in bark area
Oddly, even after three coats of varnish there were some voids in the bark areas of the outline logs. I ended up applying a heavy coat of varnish to those areas to seal them up.
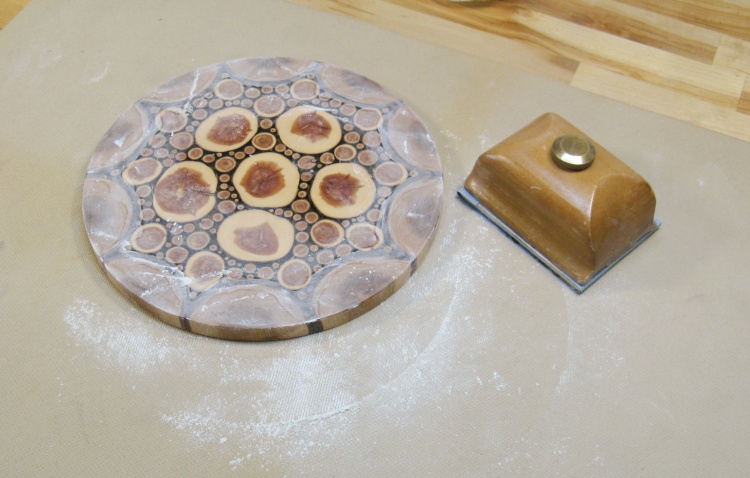
Sanding smooth again after heavy varnish applied to voids
Here I sanding smooth the extra varnish after it had dried. Then the trivets received another normal coat of varnish to finishe them off.
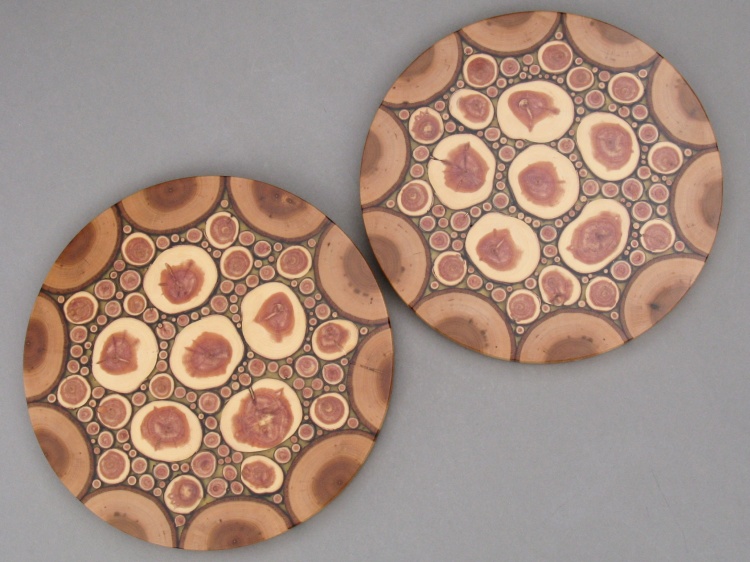
Done
Here are Fred and Barney (respectively) after completion.


