I had in mind to make a pierced and turned vessel. I wasn't too sure how feasible it would be to turn a deep and narrow vessel with the tools I had so this one was a bit of an experiment. As it turned out, the answer was something like "two inches shorter than what I started with".
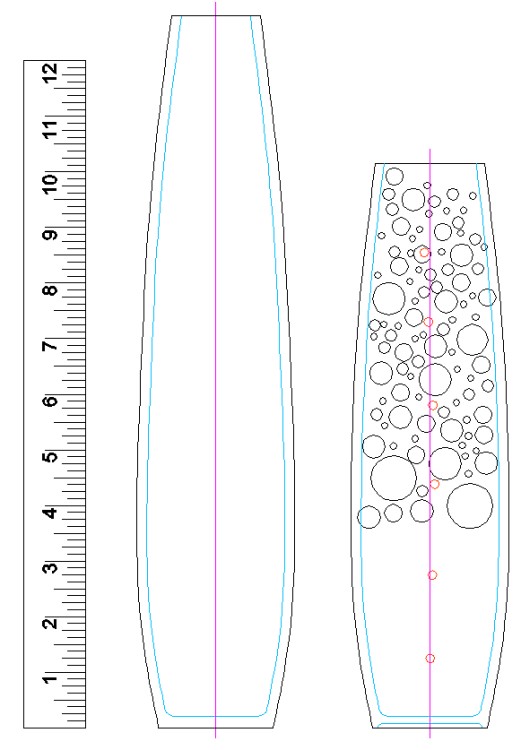
The original plan and "plan B" beside it
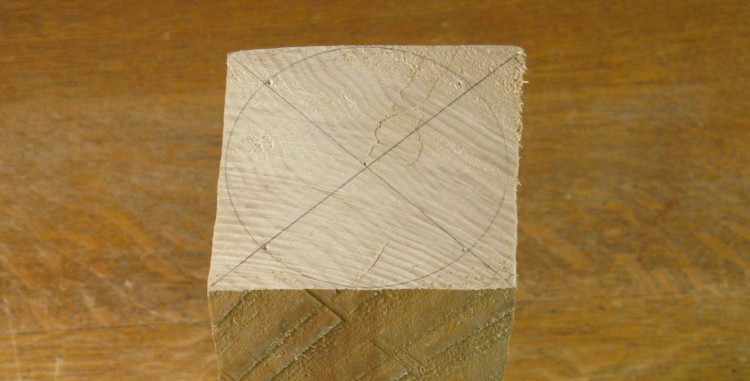
Maple blank
I had a few 3-inch-square blocks of maple that I had picked up on spec a few years ago (they were just a buck a block which seemed like too good a deal to pass up). I selected one of the longer ones which gave me about an inch on the bottom for mounting screws and 13" for the main vessel. I planned the design based on that length, like the left shape in the plan above.
End marked for faceplate
After finding the center, the screw hole positions for mounting the faceplate have been marked.
There was a bit of cracking on this end but since it was going to be cut off eventually, I didn't worry about it too much.
There was a bit of cracking on this end but since it was going to be cut off eventually, I didn't worry about it too much.
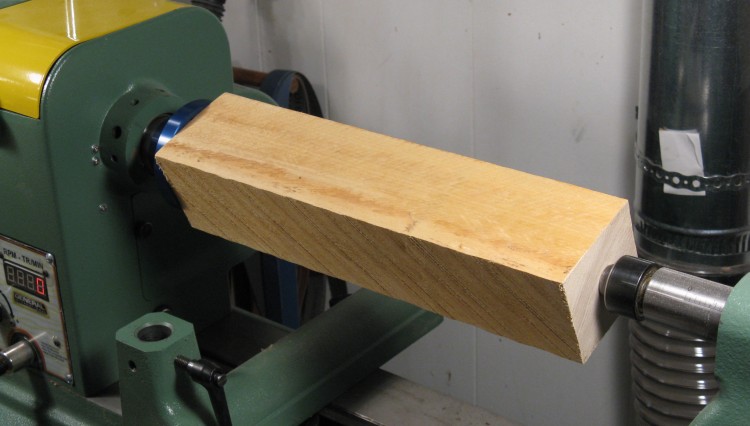
Blank mounted on lathe
After the faceplate was screwed on, the blank was mounted to the lathe. Here, it is also supported at the other end to provide some additional strength when shaping the outside.
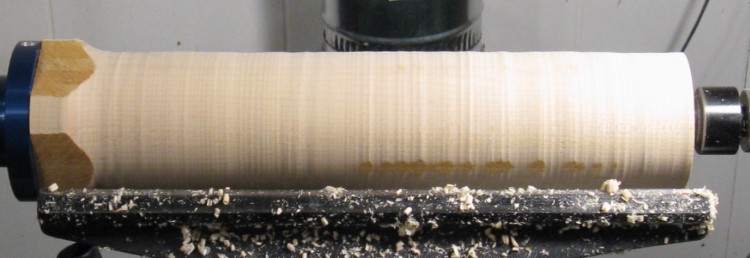
Rounded
This sequence of shots shows the progression of the outside turning, starting here where the corners have been removed.
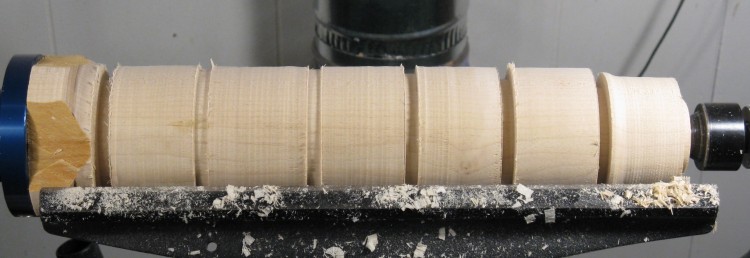
Depth slots cut
After doing a bit of narrowing at the end, I decided I needed to cut slots to provide depth guides along the length. This was done using a parting tool and measuring the resulting diameter.
Shaping from the narrow end
Here the bulk of the material from the end has been removed as I worked back toward the faceplate end.
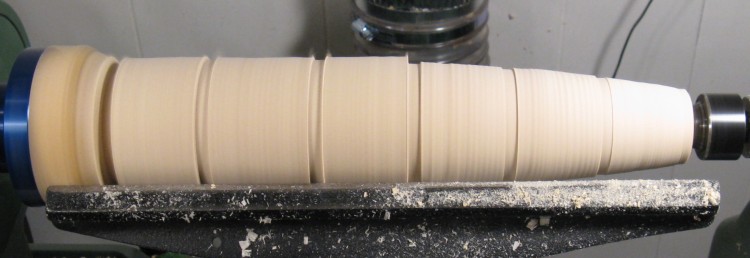
Top part done
And here the shaping of the top half has been completed.

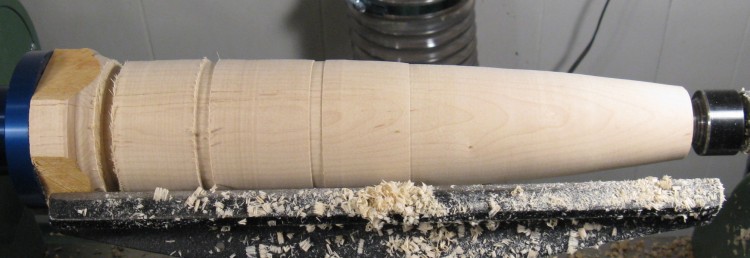
Outside shaping done
This shows the finished outside shape. Most of the shaping was done with a slightly curved scraper, which produces a nice finish on the side grain.
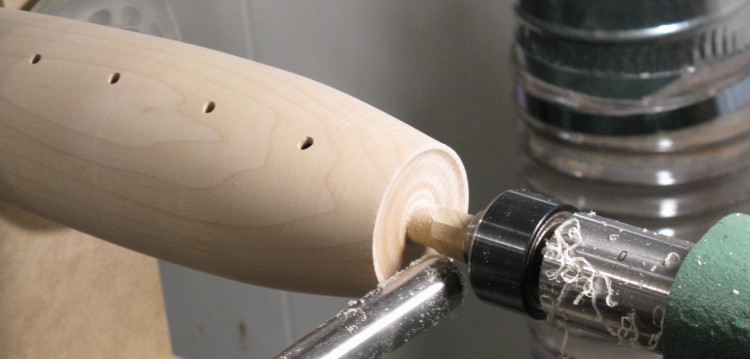
Preparing to drill the center
So next up was the inside. It's easier and faster to start with a hole rather than try to cut out all of the material (the wood right in the middle is moving very slowly, making it difficult to cut out). Here, a biggish drill bit has been mounted to the tailstock.
Obviously this drill bit isn't going to make it to the floor of the vessel, 13" away. So after drilling the 5 or so inches this one afforded, I used a cordless drill with some very kludgy extended bits to get far enough in - I really gotta get a longer bit.
Obviously this drill bit isn't going to make it to the floor of the vessel, 13" away. So after drilling the 5 or so inches this one afforded, I used a cordless drill with some very kludgy extended bits to get far enough in - I really gotta get a longer bit.
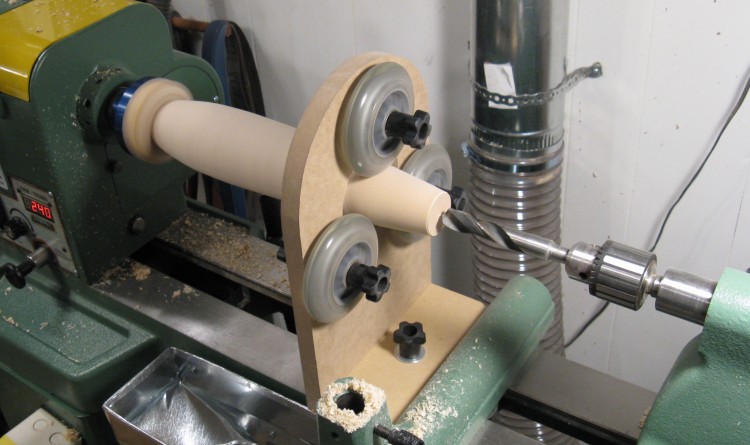
The above photo also shows the shop-made "steady rest" used to keep the wood axis steady. With the long length and narrow base of the vessel I was making, it probably would have been risky to try turning without it. The roller-blade wheels are simply adjusted to touch the wood lightly to prevent too much movement. You can see them zinging around in this photo. They compressed the wood a bit where they touched, but that was easily sanded out.
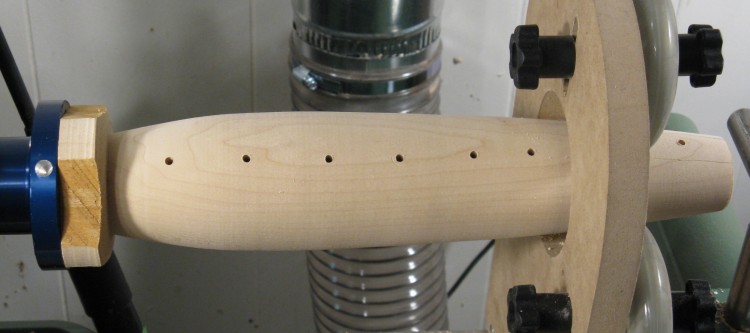
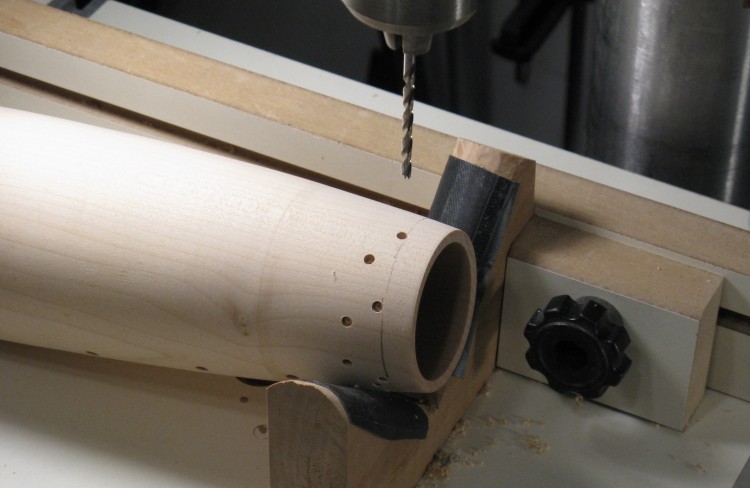
Depth checking holes
The serious turner has a laser-marked hollowing setup which can indicate the wall thickness at the end of the tool. I'm more of a casual turner, so I just drilled some holes and saved myself $600 or so (but yes, I'm still tempted...). With the economical hole approach, shining a bright light into the end lets the wall thickness be evaluated. Of course, your design needs to be OK with a bunch of holes up the side, and fortunately, mine was.
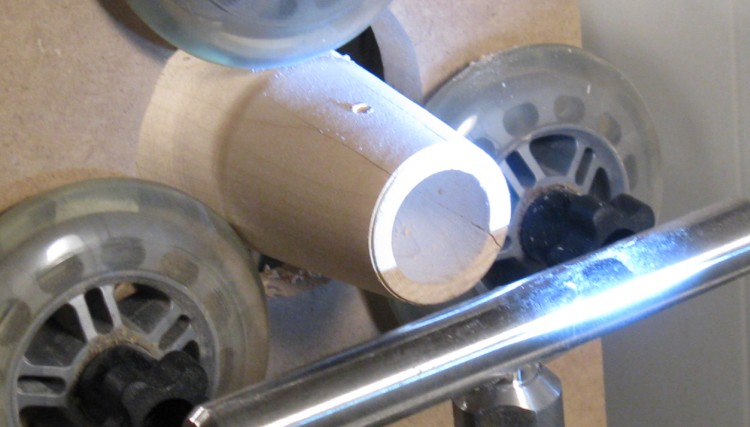
Cracked end
I was trying out a different tool and unfortunately I managed to have a "catch" while hollowing and the tool banged around inside the vessel, with the result that the opening ended up cracked. These are the darker lines on the lower right and upper left.
Part of the problem is that the cutting action deep in the vessel has lots of leverage on the tool since it is far from the rest. Also, sometimes certain combinations of wood/grain/tools just don't get along (resulting in frequent catches or tearout) so I ceased using this particular tool.
Part of the problem is that the cutting action deep in the vessel has lots of leverage on the tool since it is far from the rest. Also, sometimes certain combinations of wood/grain/tools just don't get along (resulting in frequent catches or tearout) so I ceased using this particular tool.
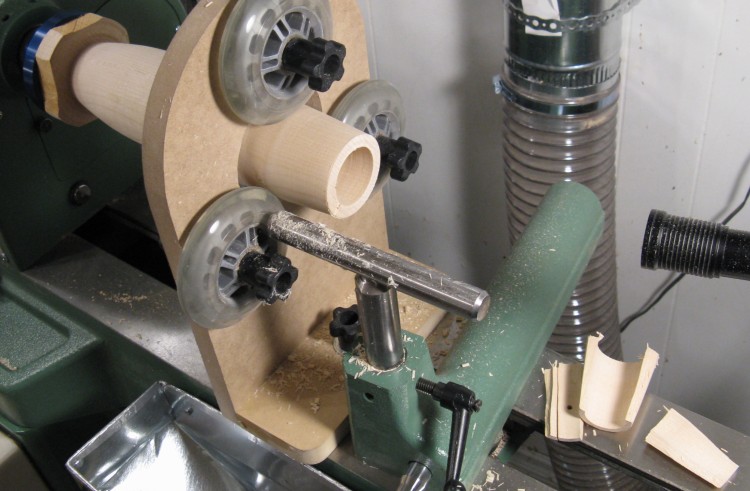
Eliminating the problem
Since the vessel was pretty long anyway and it was looking like I was reaching the limit of how deep I could hollow, I decided to just remove the two or three inches that were cracked. I moved the steady rest back and used a parting tool, resulting in the pieces shown here.
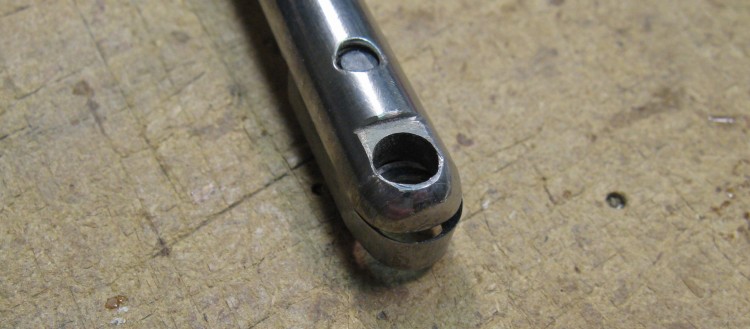
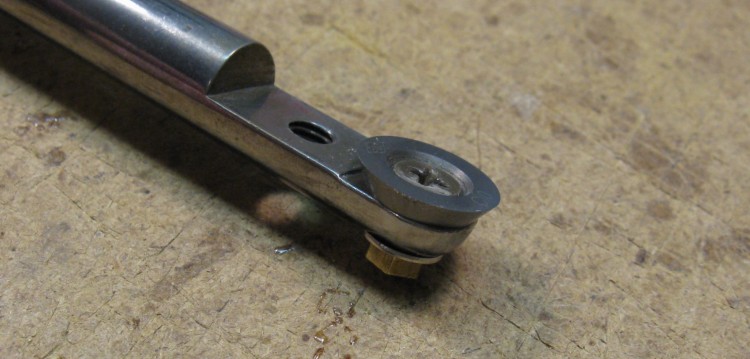
Shielded ring tool
This is the end of the main tool I used for hollowing. It has a ring-shaped cutter with a metal guard. The cutter can be adjusted to protrude the desired distance from the guard, which controls how much material is removed.
Unfortunately the narrow vessel opening meant that the the cutter was at a very low angle to the walls, and it consequently wasn't very effective at cutting. I decided I needed to try a different type of cutter. One family of tools uses carbide tips in a scraping action. Rather than purchase the full tool (which wasn't long enough anyway) I just bought a replacement tip and fashioned the appropriate hardware to mount it to my existing tool. The tool store guy said "that's a pretty expensive washer", though I'm pretty sure he knew it was a precision carbide cutting bit...
Carbide cutter modification
This shows the same tool with a circular carbide cutter mounted on the end
This worked pretty well and allowed me to finish the hollowing. The tool would have benefited from a thicker shaft - the current one is 0.5" diameter, but deeper hollowing tools usually have 3/4" or even 1" diameter shafts for additional rigidity.
This worked pretty well and allowed me to finish the hollowing. The tool would have benefited from a thicker shaft - the current one is 0.5" diameter, but deeper hollowing tools usually have 3/4" or even 1" diameter shafts for additional rigidity.
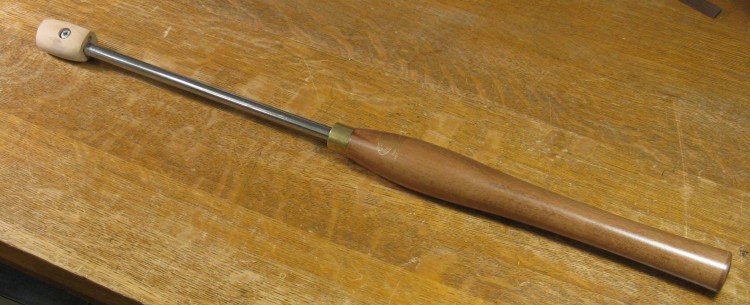
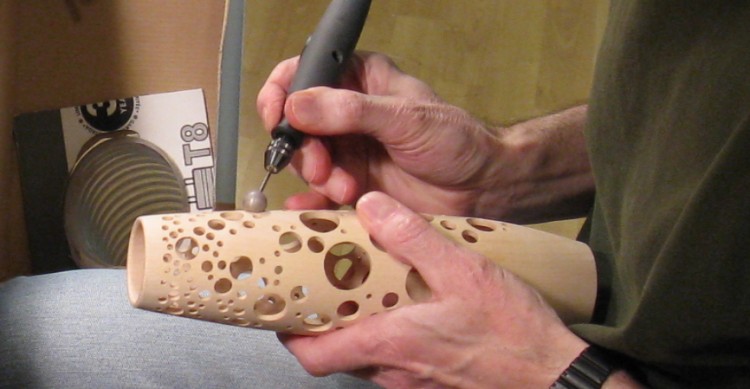
The Universal Tool, now with sanding attachment
Small cutters don't usually leave a smooth surface, so the inside needed to be sanded. To help with sanding, I fashioned a curvy maple form to fit the same hollowing tool. Double-sided tape was used to mount sandpaper to the form, which permitted sanding of the curved inner surface.
Turning done, still on lathe
Here the hollowing is completed.
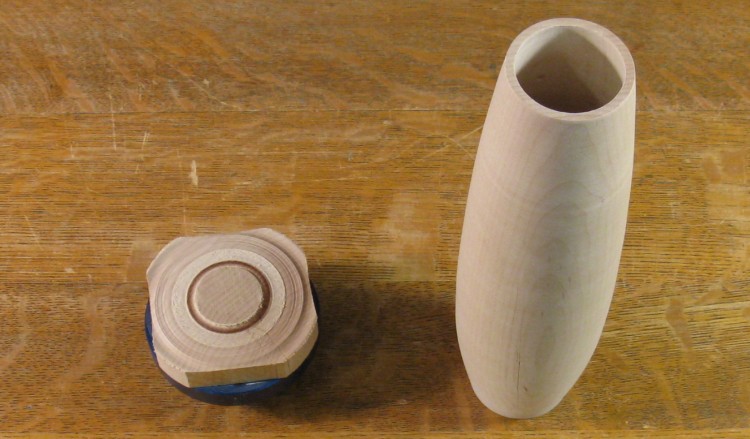
Bottom section cut off (too soon!)
The still-almost-square part of the wood screwed to the faceplate was cut off the vessel as shown here. After sanding the bottom smooth, I belatedly decided that it should probably have a ridge instead.
Unfortunately, the best way to do that with this shape of vessel required extra wood on the bottom. Yes, like what I just cut off. But that was simply remedied by gluing on a small piece so it could go back on the lathe.
Unfortunately, the best way to do that with this shape of vessel required extra wood on the bottom. Yes, like what I just cut off. But that was simply remedied by gluing on a small piece so it could go back on the lathe.
Recessing the bottom
Here the bottom is being recessed to leave a ridge around the outside. When that was done, the extra piece of wood was cut off and the bottom smoothed using a dremel and sandpaper.
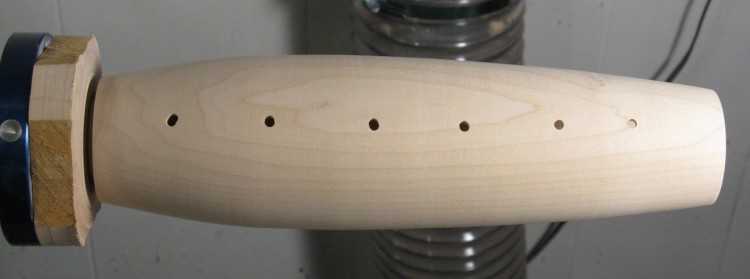
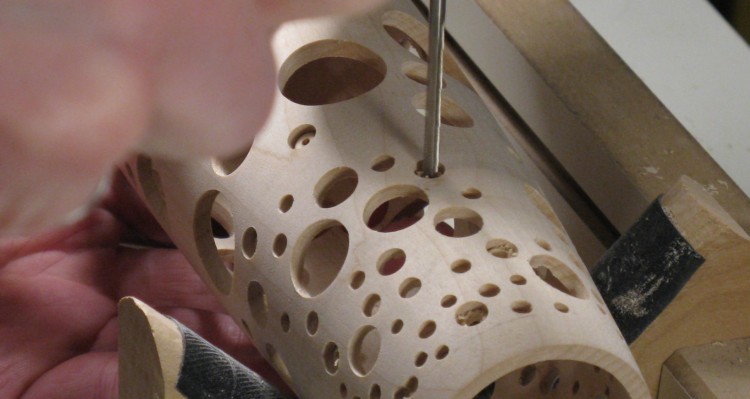
Starting on the finer bubbles
I made a little jig to center the vessel on the drill bit, and then started drilling the smallest holes. While it isn't obvious in this photo, the holes do not go all the way through. Doing so usually resulted in splintering of the wood on the inside. The usual solution to prevent that is to use a backing board tight against the bottom of the wood being drilled. However, with a variable curved inside surface I couldn't think of any good way to do that.
Drilling out the center
The approach I took was to drill only part way through and then use a smaller bit to drill out only the center. Smaller bits produce less splintering and it is usually contained within the larger hole. Then each hole was reamed out to the finished size.
Reaming out holes
A bench-mounted dremel with various cutter bits (depending on hole size) were used to ream out the hole from the smaller pilot hole to the finished size. This gave a clean inner surface.
Some larger bubbles
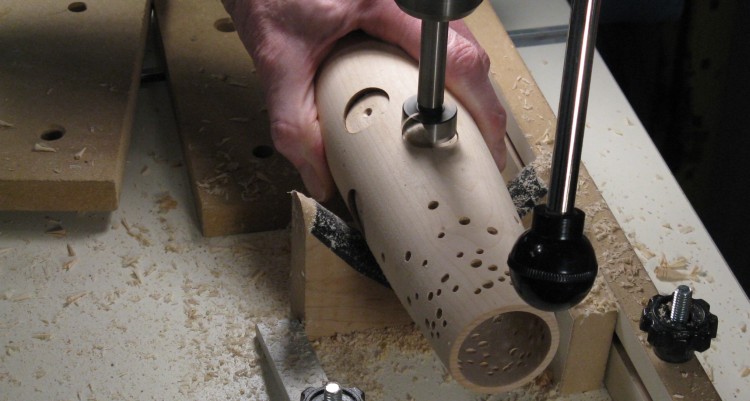
The larger holes were drilled with Forstner bits as shown here. For the smaller holes I used brad-point bits where possible, since conventional twist drill bits tend to wander on the curved surface and didn't necessarily make a clean hole.

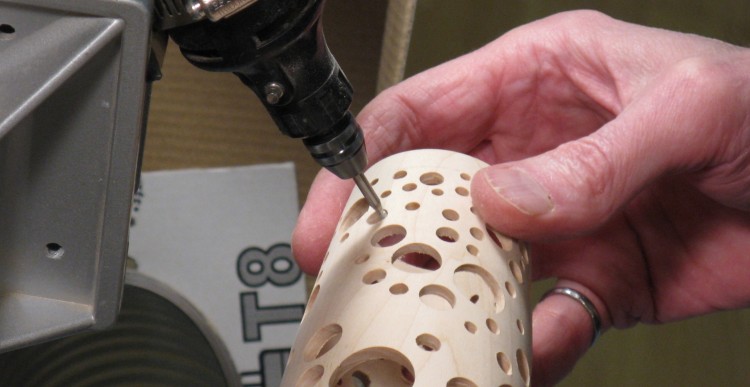
Sanding holes
The edges of the holes were cleaned up by sanding, either with a drum like this photo or a smaller diamond-grit bit.
Sanding edges
Finally, the edges of the holes were touched up so they weren't quite as sharp. I used variously-sized spherical abrasive bits, oversized to do the outside of the holes as shown here, and undersized to reach in and do the interior edges.

The crack
Oh, and that crack on the end? It extended rather further than I expected. Here the two lines of the crack can be seen. To stabilize them, before starting to drill the holes I connected a vaccuum to the vessel opening and added glue to the crack so that it would get sucked into the cracks wherever they went all the way through. They seemed fairly strong after that.
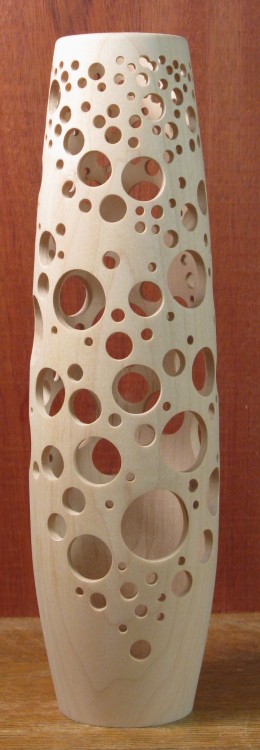
Completed, before finish applied
This is the completed vessel before applying the finish.

Top profile comparison
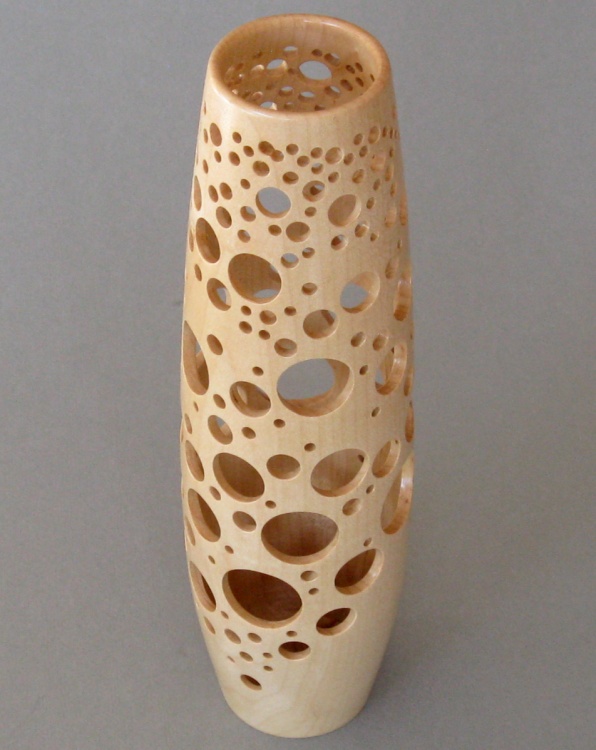
And here the first coat of varnish has been applied. I made a little sponge-wrapped toothpick for coating the smaller holes and used a Q-tip for mid-sized ones (which was a bad idea - it left cotton fibers behind). I also made an extended foam brush for the inside. I didn't happen to have any smaller brushes, so I used a 2" brush cut in half to fit into the vessel - hence the odd offset look.
Done


