I started this vessel the previous February and didn't get very far before the winter work-in-the-basement woodworking season timed out for me. However, due to some lousy spring weather and a yard that didn't need as much effort as in previous years, I was able to get a bit done over the summer, and finish up the following fall. I envisioned a classic iron cauldron which I could clearly see in my mind's eye. However, after checking out pictures of cauldrons for some solid examples, there turned out to be a wide variety of shapes - who knew? So I mostly had to ignore those "non-standard" shapes and stick with the classic, which I drew up as in the plan below.
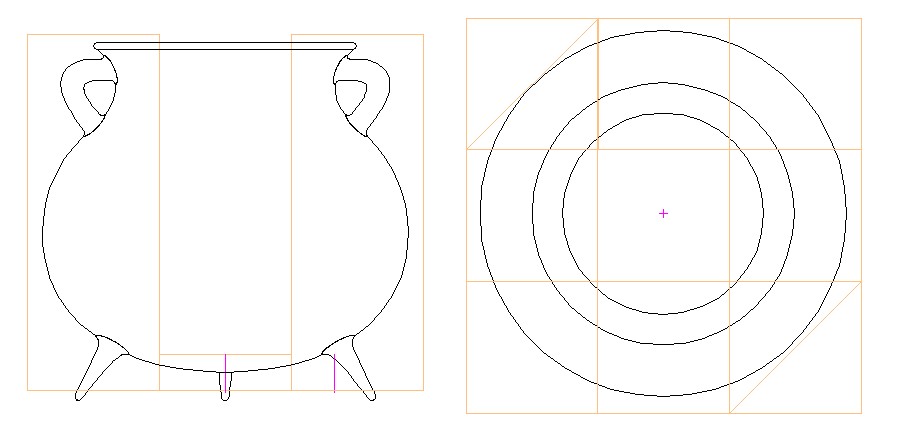
Cauldron Plan
Wood
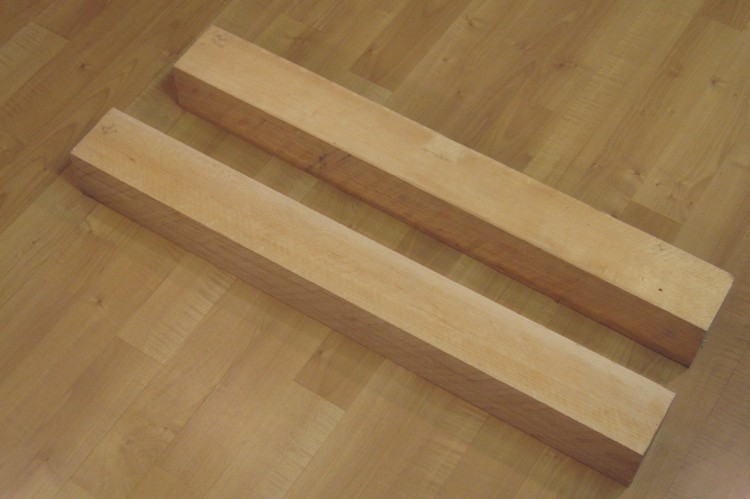
Starting wood pieces
For a nice wood vessel of this size, you'd usually need to embark on a challenging quest for the elusive perfect Big Turning Blank, with the right size, shape and wood type. But that's a pretty hit-and-miss affair, since finding the right one is dependent on the size of your piece and the available blanks.
But since I was planning to use an opaque iron-like finish, the grain doesn't show, which gave me a bit more freedom in how it was constructed. With that in mind, I went for a segmented blank. I used Maple since it turns decently, and I had a couple pieces of adequate size - about 3" square.
But since I was planning to use an opaque iron-like finish, the grain doesn't show, which gave me a bit more freedom in how it was constructed. With that in mind, I went for a segmented blank. I used Maple since it turns decently, and I had a couple pieces of adequate size - about 3" square.
Blank
The two nice chunks 'a wood above are the pieces that I started with. Given that the vessel was hollow, I tweaked dimensions so that I could use a 3x3 arrangement with the center cell being just a short piece for the floor. The wood-coloured
lines in the plan above show the placement of the wood blank over the cauldron shape.
Diagonally cutting corner pieces
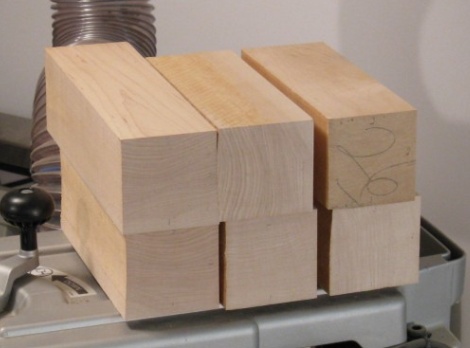
Pieces cut to length
Cutting up the two pieces of wood resulted in the six short pieces shown here. However, since I needed nine pieces to make the blank, I cut two of the pieces in half diagonally to go in the corner positions. This actually reduced by a bit the available diameter that could be turned from the blank, but it was still large enough.
Three partial sections
Test fit of the pieces
This shot shows a test fit of the eight wall pieces and the one short floor piece. For a more manageable glue-up, I made three 3-piece sections separately. Trying to clamp a form with 45 degree angles turns out to be surprisingly difficult. Since building some kind of custom clamping jig wasn't in the cards, I just used masking tape pulled tight. The rectangular group on the end with the actual clamp has an extra spacer where the opening for the cauldron will be. This wasn't glued in - it was used only to keep the pieces square.
Blank finished and mounted to plate
Getting ready to glue full blank
The left photo shows how the three sections fit together just prior to gluing, while on the right we have the completed blank ready for mounting on the lathe.
Blank mounted on Lathe
I glued a plywood spacer to the bottom of the blank to provide a means to screw on the 6" mounting plate. That way, the screws don't extend into the blank, and its full length can be used for the piece. It turned out that the length was more than I needed, so the spacer was completely superfluous, but at least it gave me the opportunity to use "superfluous" in a sentence.
Turning
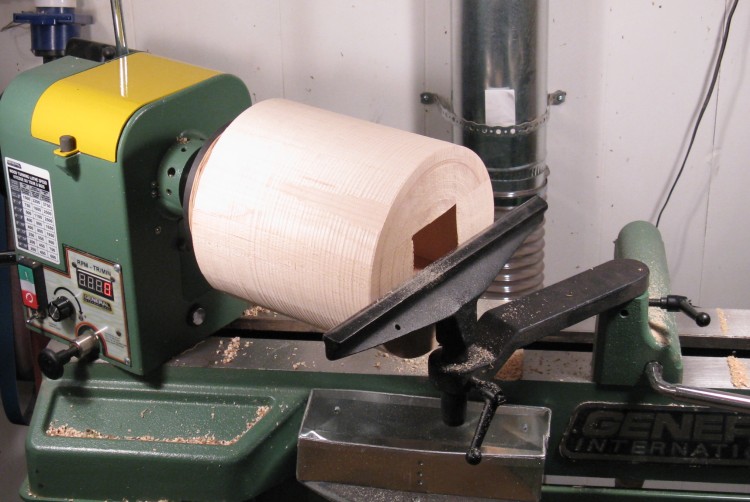
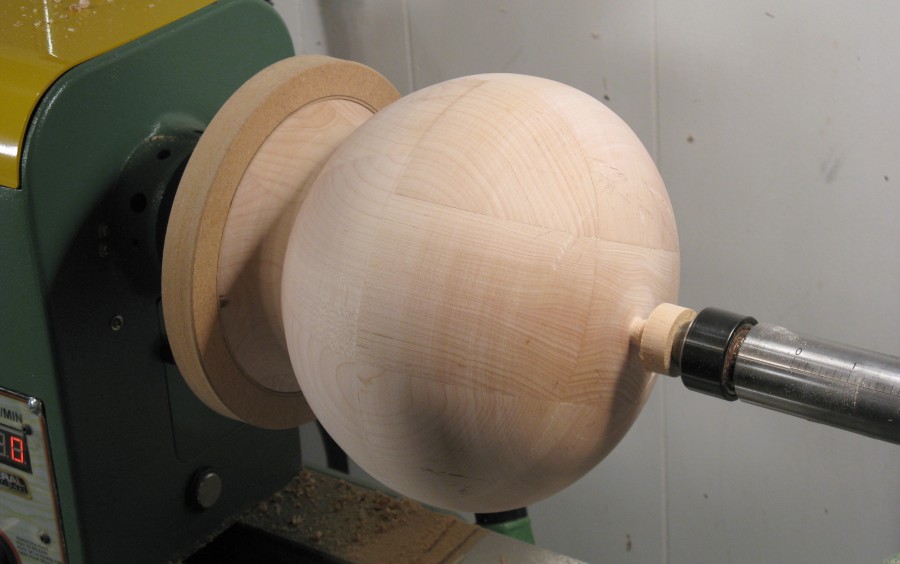
Rounding the outside
The first step was to round the blank to a cylinder, which gave a good starting point for getting to the final shape, but also helped with the balance (since if the blank is not perfectly centered and symmetrical - and it wasn't - then it can create a lot of vibration as it spins). The shot here shows the roughing-down about half done.
As you can see, this is pretty messy process with lots of chips flying off. So when turning, in addition to a face shield, I wear a turner's smock, which covers torso and arms and has a Velcro neck closure. Granted anything named "smock" has a certain dorkiness factor associated with it, but at least it keeps wood chips from infiltrating one's shirt front.
As you can see, this is pretty messy process with lots of chips flying off. So when turning, in addition to a face shield, I wear a turner's smock, which covers torso and arms and has a Velcro neck closure. Granted anything named "smock" has a certain dorkiness factor associated with it, but at least it keeps wood chips from infiltrating one's shirt front.
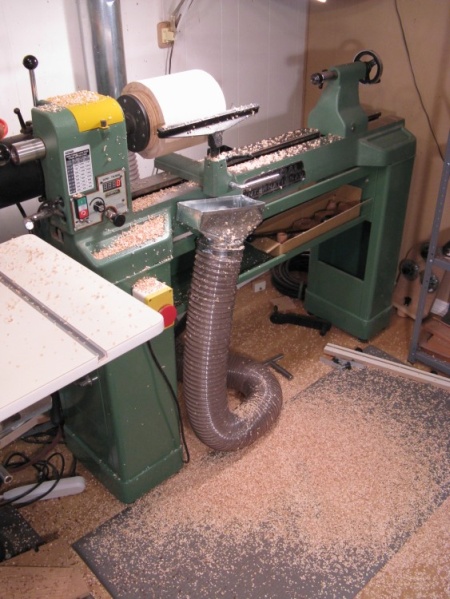
Wood chips flung far and wide
The dust collection system (connected to the big flexible hose and metal opening) should pull out most of the fine dust generated by the turning, but doesn't do much for larger chips shooting up from the lathe. I suppose that if I wanted to try to collect all the chips, it would probably take a complete hood covering the workpiece. Instead, I just shake the wood chips out of my hair and vacuum up after messy operations.
Blank roughing completed
The picture immediately right shows the blank after the roughing-down is completed, and to the far right is a shot of the sawdust in the aftermath.
Lathe set up to start hollowing
To finish balancing the blank, some hollowing was required. Fortunately the blank design allowed for the big square hole, meaning there was a couple dozen fewer cubic inches of wood to remove. This is good since hollowing tends to be physically demanding due to the wood having lots of leverage on the tool when you are cutting anywhere but right at the opening. My hollowing tools are a mere 2 feet or so long, and require a pretty firm grip to maintain the proper angle and depth. As a result, my hollowing sessions tend to be on the shorter side and typically end with a loud groan.
Having the lathe head rotate as shown here to a more convenient angle is a handy feature since it eliminates the need to lean over the lathe bed and it allows a better view into the workpiece.
Having the lathe head rotate as shown here to a more convenient angle is a handy feature since it eliminates the need to lean over the lathe bed and it allows a better view into the workpiece.
Shaping started
Most of the hollowing and some of the basic shaping has been done here. I didn't want to risk just going by eye to get the correct curves, so I used the "digital" technique below to help guide the shape.
Form cut to desired diameters at regular intervals
I used a 1:1 paper pattern of the shape to do the cuts shown here. I taped the pattern to a long tool rest and then used a parting tool to cut to a constant distance from the pattern into the piece. Then I just kinda smoothed it out.
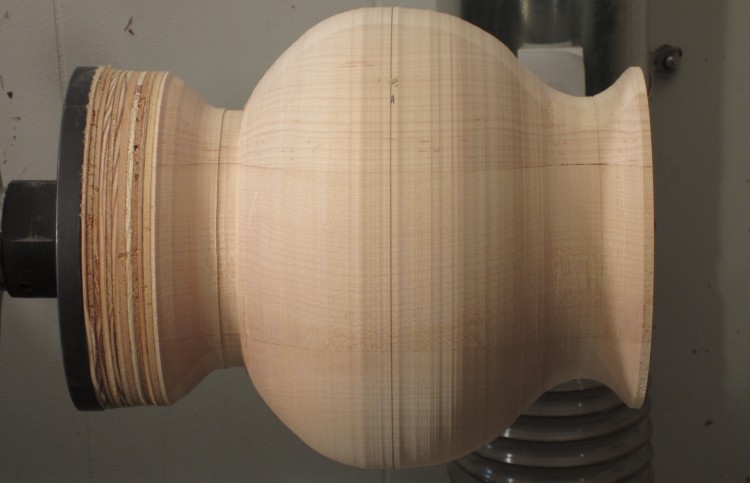
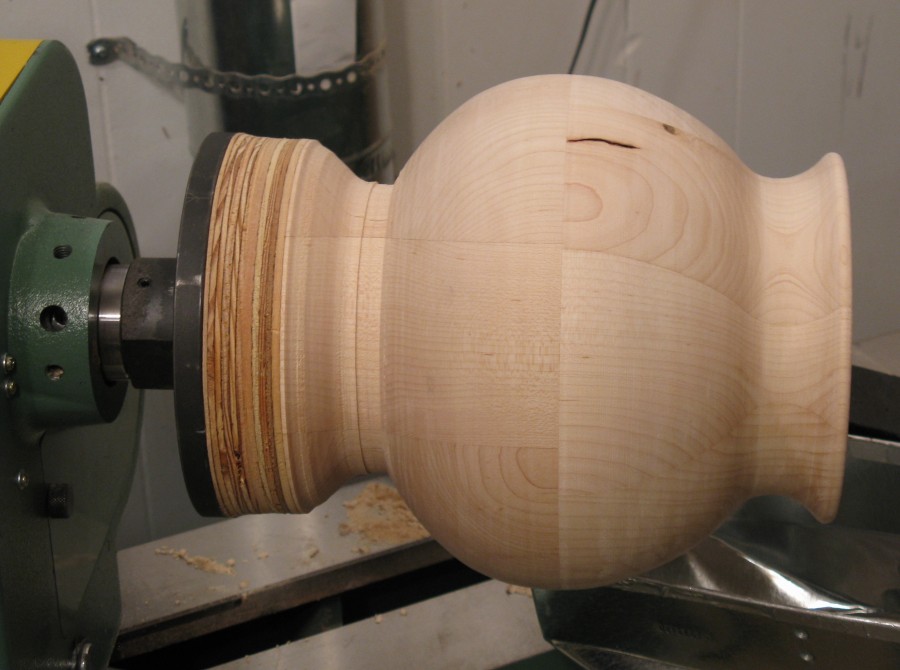
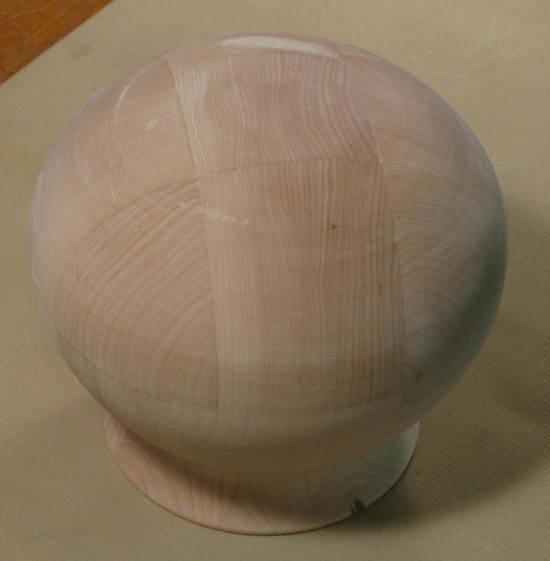
Completed shape prior to sanding
This shot shows the profile of the cauldron after shaping was complete. Unfortunately, I made a bit of a gouge in the wood when shaping the middle-to-neck portion, and I had to cut away more material than I wanted in order to smooth it out. The end result was this shape.
Unfortunately, this didn't say "cauldron" to me. Maybe "vase" or "bowl". I wasn't really satisfied with it, and it seemed silly to continue with a shape I didn't like, so I decided I had to fix it.
I considered a few options like filling or adding solid material to the neck, but the best choice seemed to be to just redo the top of the vessel.
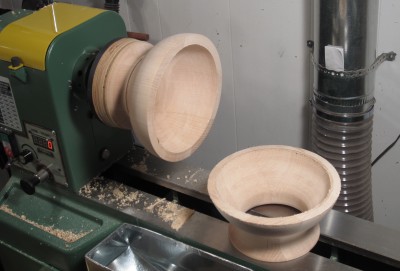
Top half cut off
Step one was to cut off the offending portion. The shot to the right shows the top half of the cauldron removed. This was done just using a parting tool, which gave a nice even edge for good mating with the replacement portion.
Top blank after roughing and facing
Top blank mounted to lathe
Step 2 was to make a new blank for the top portion. This was built much like the original blank, except that it was a bit shorter. On the left here the assembled blank is shown mounted on the lathe in an adjustable chuck. In the right photo, it has been roughed to a cylinder and the face of it has been cut in from the edge to make a flat mating surface.
Gluing original bottom to new top blank
Here the original bottom is being glued to the new top blank.
Completed outside shape
...and after a bit of more-careful turning, this shape was completed. It isn't hugely different than the first attempt, but the subtle curvature difference moves it solidly into "cauldron shape" territory.
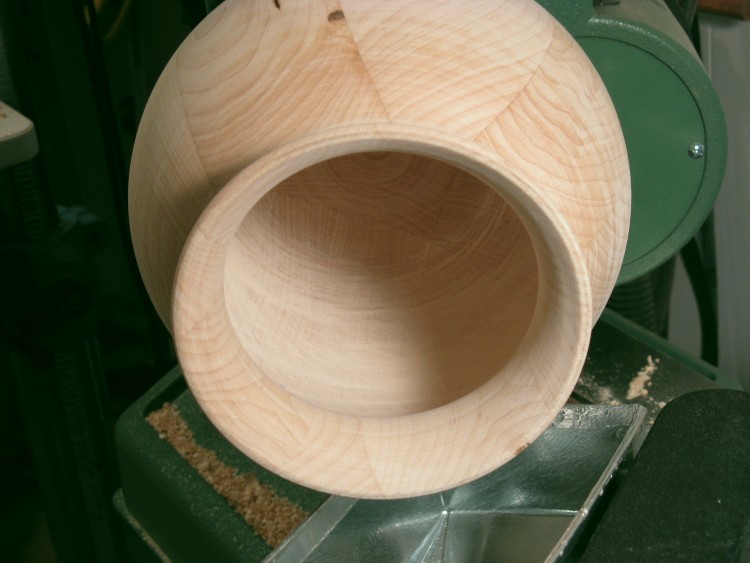
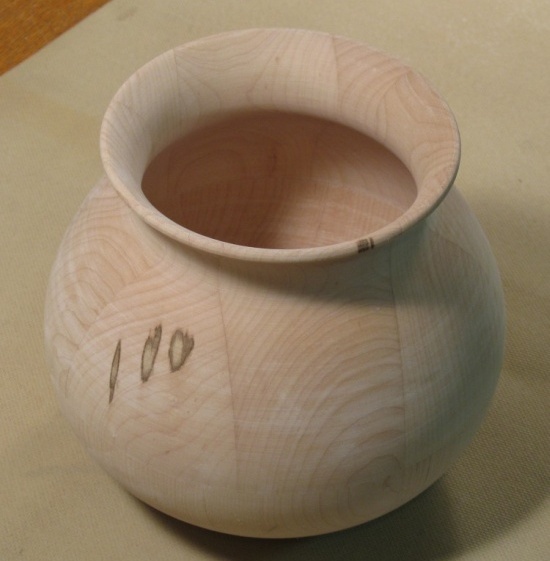
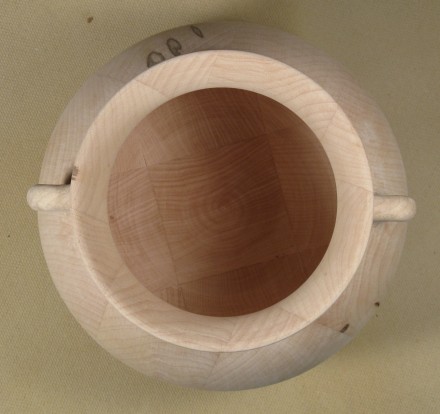
Inside shot
The inside hollowing was completed as well, with a wall thickness of around 0.2". Inside and outside were already sanded in these photos.
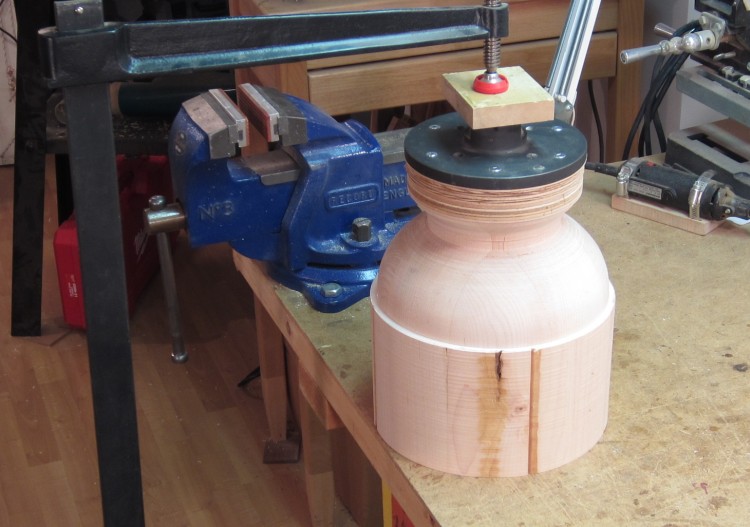
Vessel detached from spacer
Next up was to complete the bottom of the vessel. Since it was still attached to the plywood spacer, I pried it off as shown here. Also visible is a bit of a gouge I accidentally made in the bottom. Having learned my lesson about trying to get rid of gouges, I let it be and made plans to fill it later.
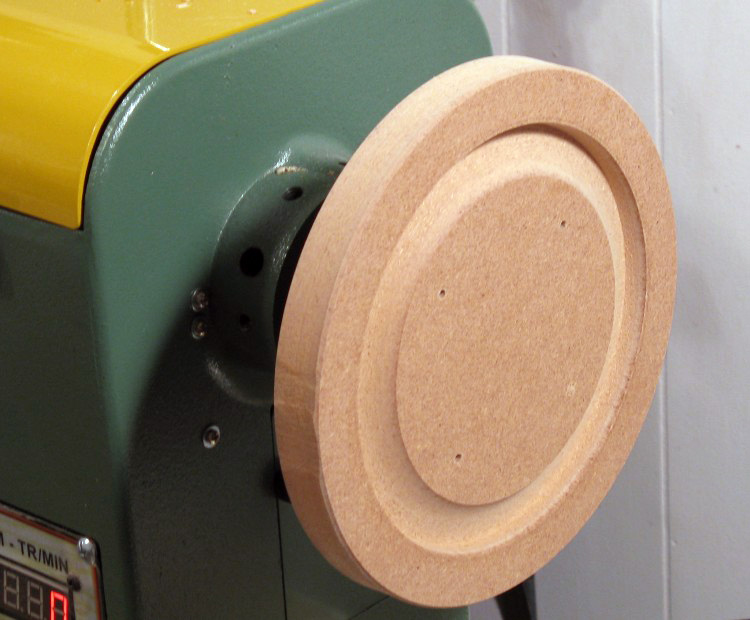
Jam chuck to hold neck of cauldron
To hold the neck of the cauldron, I modified a previously-used MDF disc to make the jam chuck shown here. The cauldron was then held between that chuck and a live center as can be seen below.
Bottom shaped and sanded
Here, the bottom turning and the sanding is already completed, and just a small knob left on the bottom to be cut off and sanded smooth.
Bottom completed
Main body completed
The above photo shows the bottom after the "turning knob" was removed. Also visible on the far side as a lighter-coloured patch is the gouge mentioned earlier. Here it has been filled with a mixture of glue and sawdust from the turning, and then sanded to the same contour as the body. After painting, this should be invisible. The same goes for the darker spots apparent on the main body photo. There's certainly something to be said for being able to paint over defects, blemishes and goofs. Making the blanks and the turning took around 17 hours - less than half the total time.
Legs & Handles
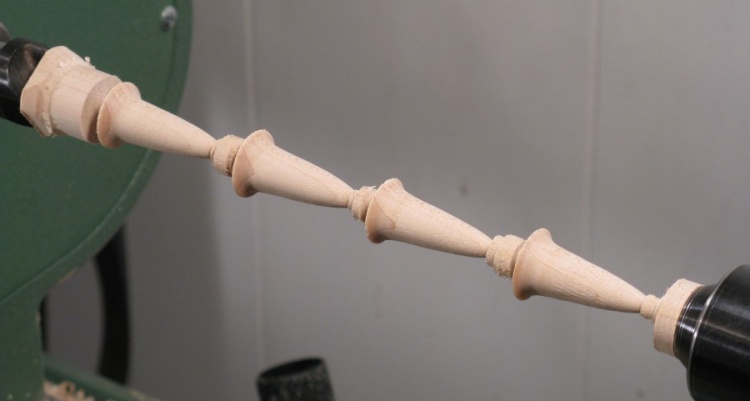
Legs after turning
Since the legs were pretty long, it wasn't practical to make them part of the turning, so they were added as separate pieces.
Here the legs have been turned, and need to be sanded and cut apart.
It goes without saying that the cauldron has to be three-legged, but I made a spare in case one didn't work out that well.
Here the legs have been turned, and need to be sanded and cut apart.
It goes without saying that the cauldron has to be three-legged, but I made a spare in case one didn't work out that well.
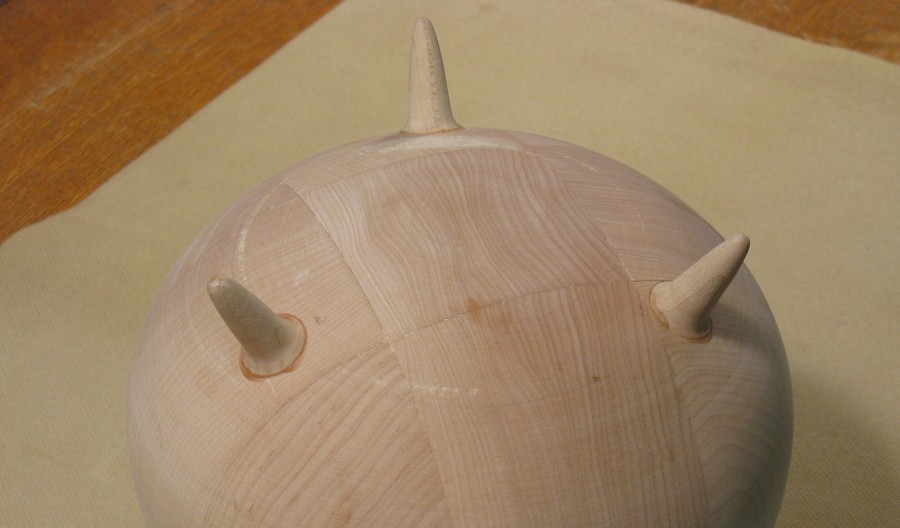
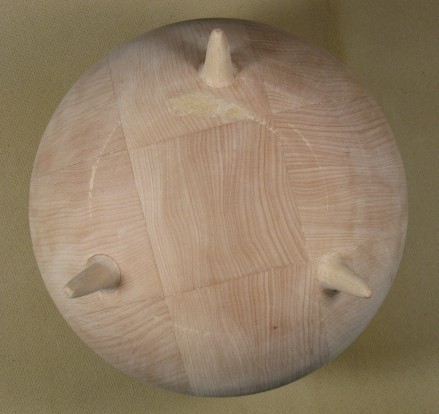
Bottom with legs attached
For extra strength, the legs were turned with a short rod that extended partway through the wall of the vessel. In addition, the vessel bottom was counter-bored slightly to provide a flat mating surface to the flanges of the legs.
The curvature of the legs was later smoothly blended into the vessel by sanding (which also got rid of the extra glue).
The curvature of the legs was later smoothly blended into the vessel by sanding (which also got rid of the extra glue).
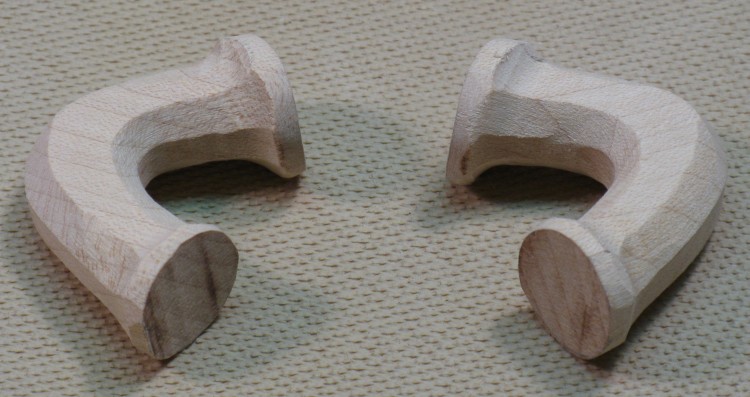
Handle blanks
The handles turned out to be more work than I expected. Since I wanted them to blend into the body with small radiuses, the best way seemed to be to to fabricate them with those radiuses at the ends. However, this meant rather a lot of material removal on everywhere except the ends.
Here are the oversized blanks that I started with, one just cut to shape, and the other where I started the rounding process.
Here are the oversized blanks that I started with, one just cut to shape, and the other where I started the rounding process.
Handles ready for mounting
Here the bodies have been reduced in diameter and are ready for final rounding. The flanges at the ends will eventually be sanded to blend into the vessel body.
Another challenging part of the handles was that the two ends were at odd angles to each other (which depended on the exact positioning of the handle up the side of the vessel wall), so getting those right took a bit of trial and error.
And to make it more interesting, the mating surfaces at both ends of the handles have complex curves - one doubly convex with different radiuses and the other convex/concave. I wanted the handles to match the curvature as closely as possible, so the ends received a fair amount of attention.
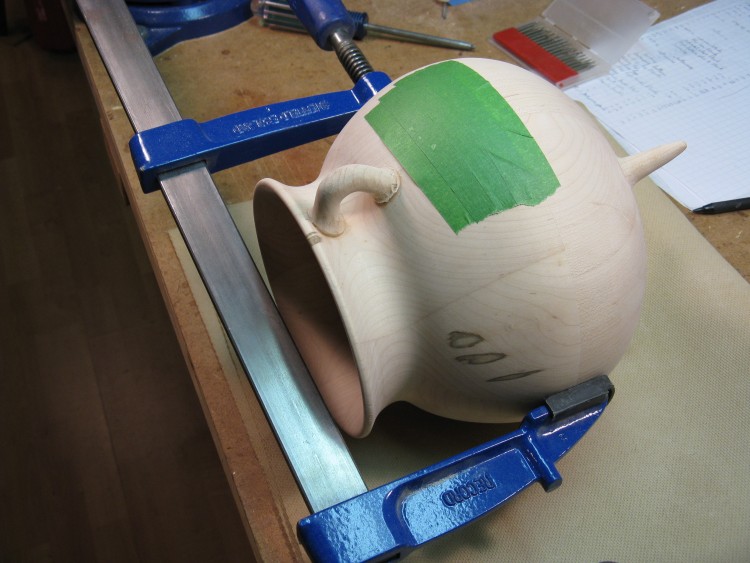
Setup for sanding handles
In this shot, the handles have been glued on, rounded, and now the flanges on the end need to be blended into the body.
This shows the makeshift clamping arrangement used to hold the vessel in place for sanding the handle flanges. The green masking tape is a bit of a shield for the side of the vessel to reduce damage from any errant filing.
I used a combination of needle files, sandpaper on small dowels and an abrasive sphere on a rotary tool to complete the blending.
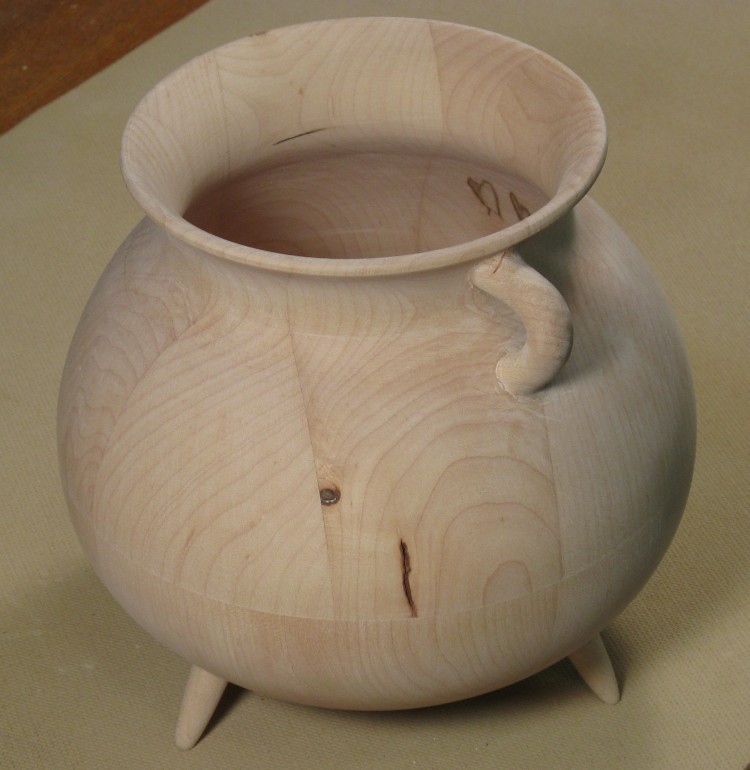
Completed handle installation
This shows one of the handles after the sanding was complete.
Making and sanding the handles took about 7 hours (compared to about 2 hours for the legs).
Making and sanding the handles took about 7 hours (compared to about 2 hours for the legs).
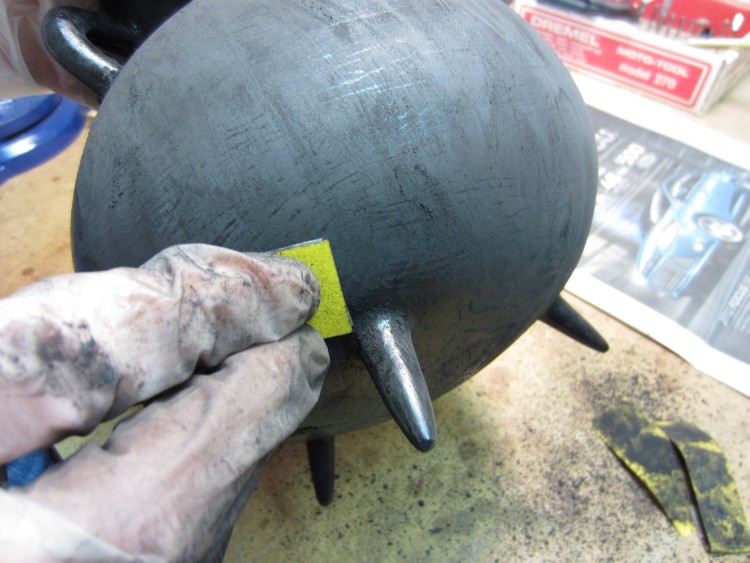
Sanding brushmarks smooth
I spent a fair amount of time considering and testing different finishes. I wanted a slightly textured surface reminiscent of what (I imagined) a crudely sand-cast iron cauldron might look like. I tried texturing the wood in various means but eventually decided on a textured finish.
One test was to use a black enamel and apply texture with a foam brush while it was still tacky. Oddly, this worked very poorly - the paint just smoothed itself out before it dried. Apparently being liquid enough to take a texture means it was liquid enough to level out. This is of course the opposite of what happens when you paint normally - you get plenty of texture in the form of brush marks.
At any rate I decided to start by putting a couple coats on the cauldron with a brush. And lo and behold, that created lots of huge great brushmark texture. I didn't see any way to hide that texture, so I ended up sanding the paint smooth which is (finally) what the picture shows.

Still sanding
And here's a (rare) picture of Yours Truly, still sanding the paint. I'll just say here that I hope my head does not have that weird oblong shape in real life.
So after the brushmark experience, I thought I'd retry the dab-with-a-foam-brush technique to see if that had mysteriously begun to work. And sure enough, it did. I put on 2 or 3 more coats, which gave it a slightly pebbly look and which was pretty much what I was looking for.
The odd thing was that I retried the same technique (again) on a test piece I had been using, and it didn't work the same. Even the inside of the vessel has a slightly different (smoother) texture, so it seems the technique is perhaps sensitive to some condition present on the outside of the vessel. Go figure.
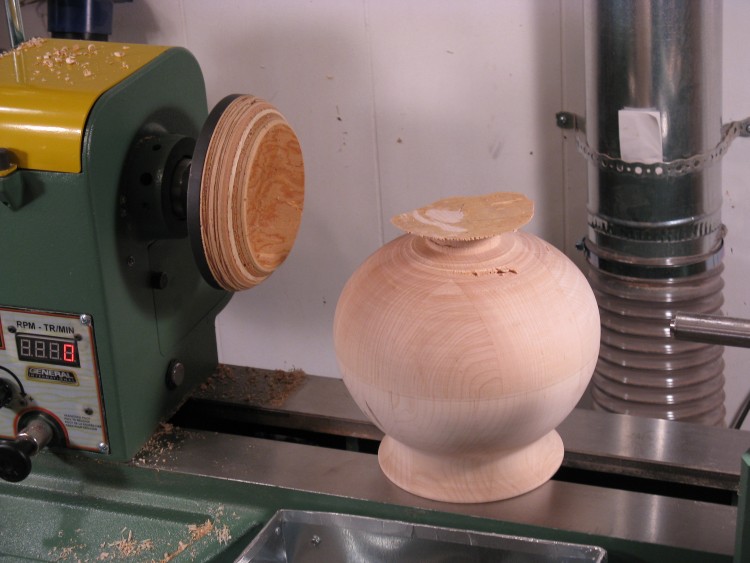
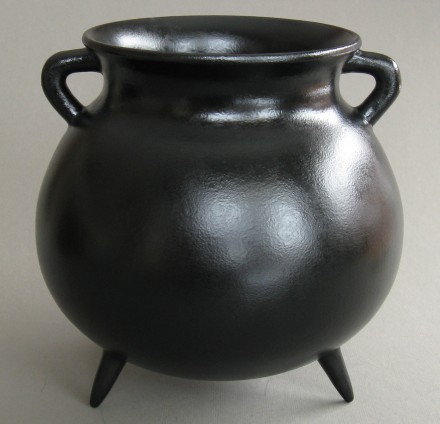
And that's pretty much it. The completed cauldron before and after painting are below;
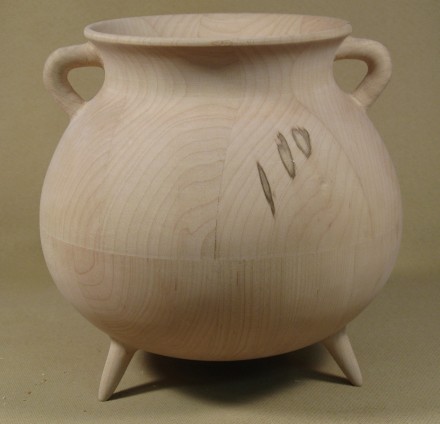
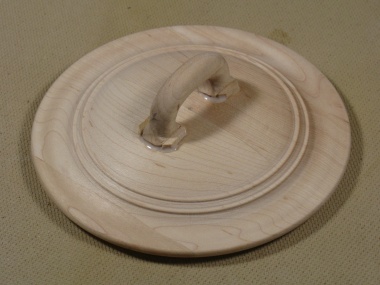
...except that after I had taken the photos of the completed cauldron, it really looked uncompleted without a lid. I had contemplated a lid initially, but decided that it probably wasn't needed. Wrong. So it was back down into the basement. I've included a few photos of the lid fabrication below, with only limited verbiage since the photos are pretty self-explanatory. The lid took around 5 hours.
Raw material
Blank taped to a mount
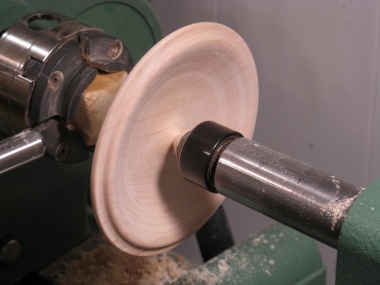
Mounted on expanding chuck
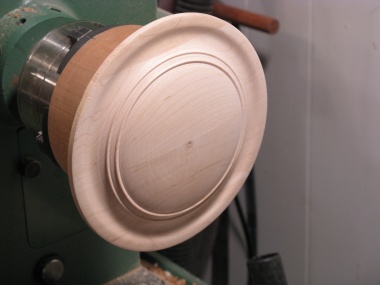
Outside complete
Flipped around to do the inside
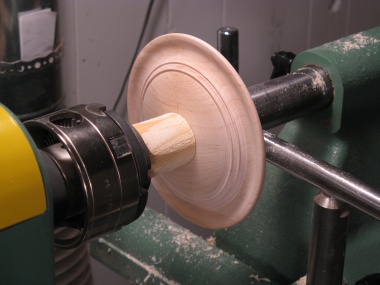
"Squeeze chuck" to hold outside
Handle roughed out
Handle glued on
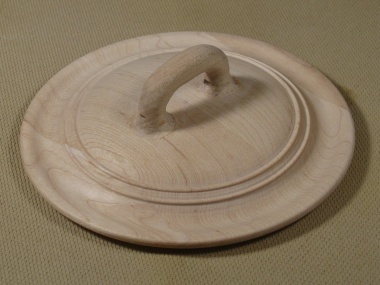
Handle sanding complete
And of course, there was the question of how to get the same finish as the cauldron body. It seemed unlikely that the sanded-paint layer had made much of a contribution, but was it worth leaving out? Just to be safe, I used the exact procedure as on the body - a couple coats brushed on, sanded smooth and then 2 or 3 coats applied by dabbing with a sponge brush. Fortunately, it matched the body finish about as well as I could hope - luck, or skill? So, you can can consider the procedure as either a systematically and meticulously replicated procedure following the best scientific practices, or a meaningless superstitious ritual akin to wearing your lucky underwear to the big game. I'm going with the science one, myself.
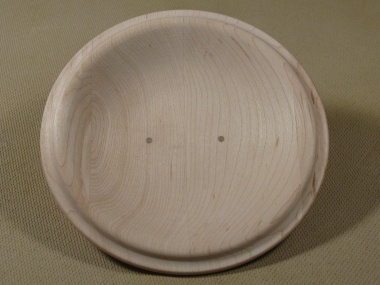
Inside showing pins reinforcing handle

After brushed coat + sanding
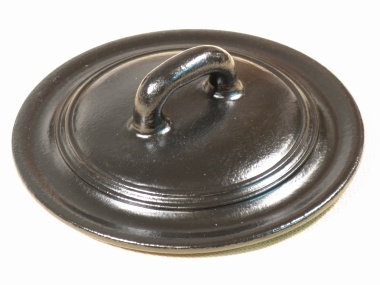
Final painting done

Completed cauldron


