I'd had in mind for a while to make a vessel that wasn't turned on the lathe. Lathe-made vessels are of course round in cross-section, but making a non-turned one means that it could have a rather wider range of possible shapes. I went with a symmetrical design, although that wasn't really necessary. My original plan was for the "normal" vessel shown in the plan, but I decided early on that it could twist on it's way up and might look a bit more interesting. I followed the same general plan as the Kerry Vesper designs of having a solid wood layer on the top and bottom for contrast and choose the dark red Bloodwood for the caps.
I also had some oddly-shaped scraps of Baltic Birch plywood cluttering up the shop for several years so it was serendipitous that the magazine article came along at about the right time to give me something to use them for.
I also had some oddly-shaped scraps of Baltic Birch plywood cluttering up the shop for several years so it was serendipitous that the magazine article came along at about the right time to give me something to use them for.
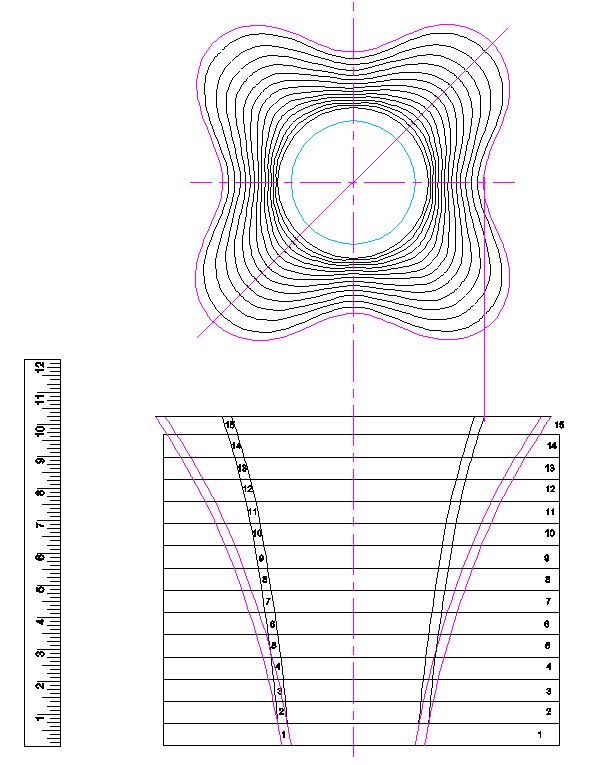
The plan

Plywood scraps
These are the oddly-shaped scraps I started with, left over from a headboard made back in '08.
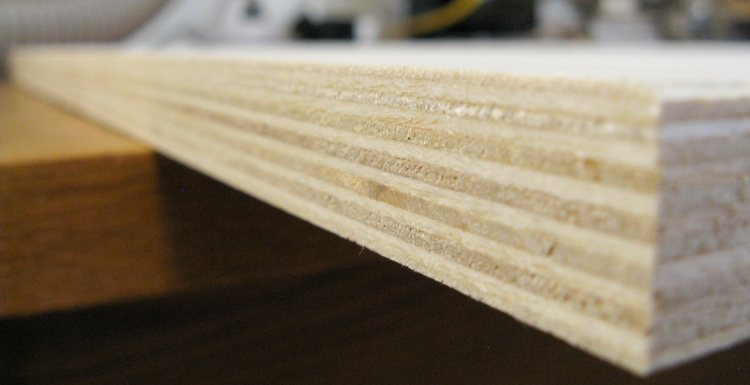
13 laminations, 18mm (0.7") thick overall
This shows the profile of the Baltic Birch plywood. This thickness has 13 layers, each around 1/20" thick.
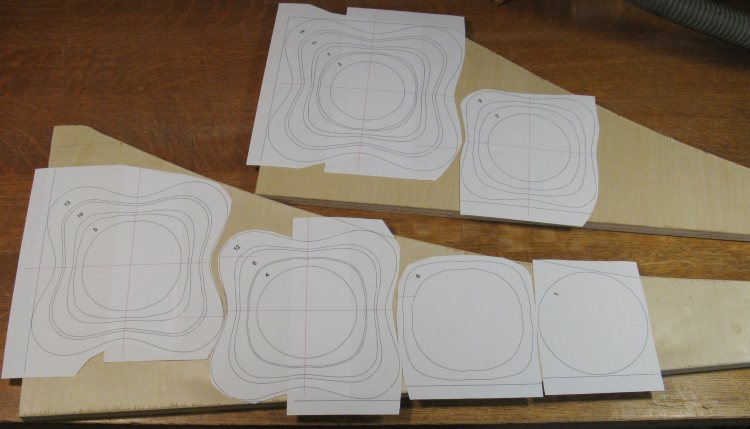
Strategically arranged piece positioning
Due to the odd shapes of the wood and the fact that there wasn't much of it, I needed to be careful in how it was used. To that end the wood shapes were reproduced in the computer, which let me play around and find the best layout for the pieces. I was also able to do concentric pieces, which saved a lot of space.
Unfortunately, there are no photos of me sitting at the computer trying to be being creative so you will have to use your imagination. However, the fruits of the mouse-manipulation are evident here in the plans that have been printed out full-sized and positioned on the wood.
Unfortunately, there are no photos of me sitting at the computer trying to be being creative so you will have to use your imagination. However, the fruits of the mouse-manipulation are evident here in the plans that have been printed out full-sized and positioned on the wood.
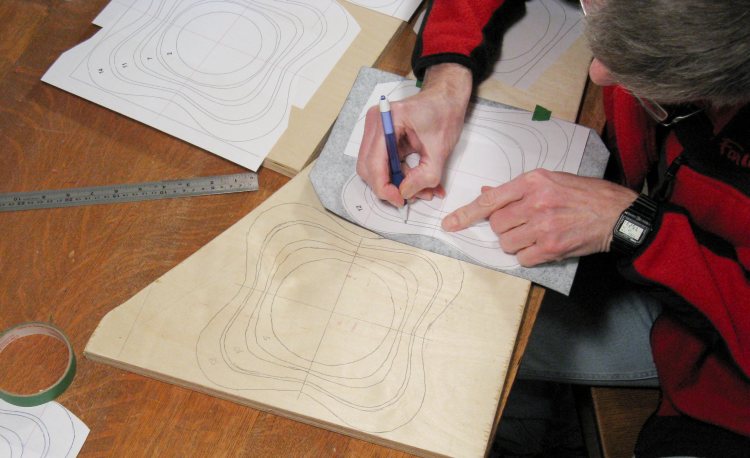
Tracing out the patterns
Using my usual technique, the patterns were traced onto the wood using the old-school technique of a ball-point pen and carbon paper.
Each was identified with a number and had center lines drawn in that could be used for alignment later on.
In the winter, the shop in the basement is pretty chilly - about 16 C. I must have been feeling it that day since I was wearing a fleece.
Each was identified with a number and had center lines drawn in that could be used for alignment later on.
In the winter, the shop in the basement is pretty chilly - about 16 C. I must have been feeling it that day since I was wearing a fleece.
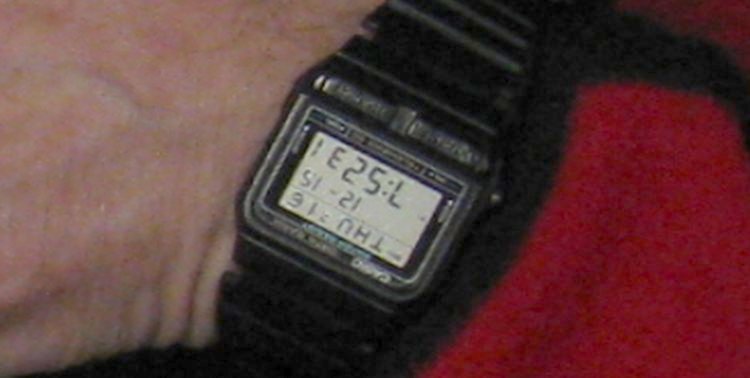
The time
And apparently that tracing ocurred on Thursday, December 15 at 7:52 PM. Yah, I could have just checked the EXIF info on the photo to get the time, but super-zoom is more fun.

Using a little bandsaw to cut the outsides of the pieces
Each of the pieces was cut out to the proper contour using a little 8" bandsaw. This is the one I used before I got my "real" 14" bandsaw. It's small enough to just lift up and onto the bench and while it isn't very accurate, it was fine for this job.
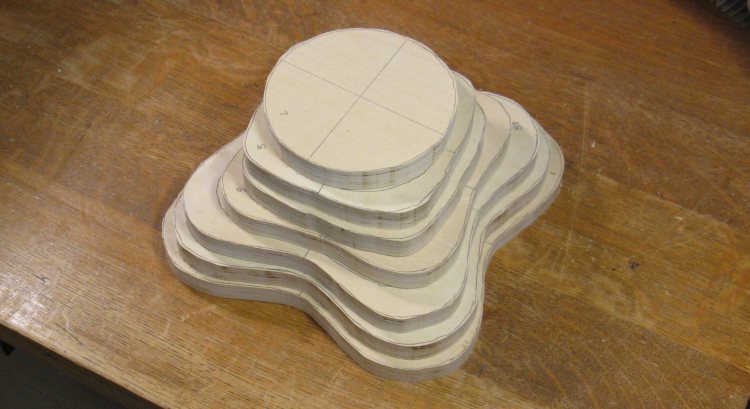
The composite pieces stacked & ready to be separated
That got me to a short pile of pieces, most of which needed the centers cut out.
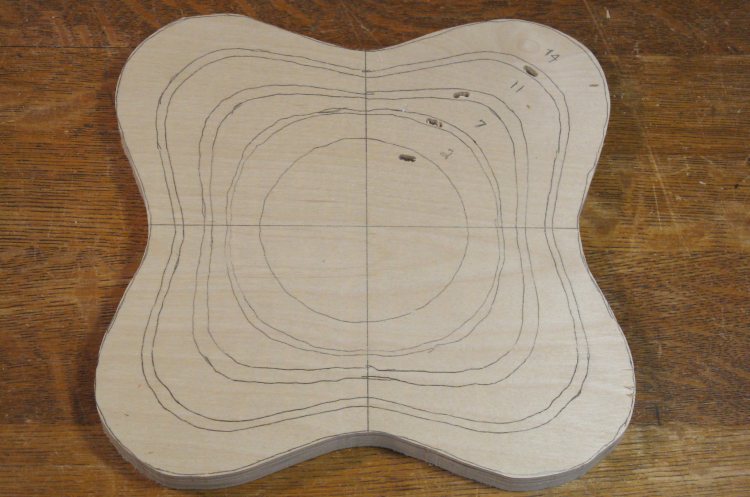
Holes to insert the saw blade between pieces
This is the largest composite piece, out of which I was going to get four layers for the vessel. To facilitate cutting them out, I drilled holes between the lines to be able to insert a saw blade.
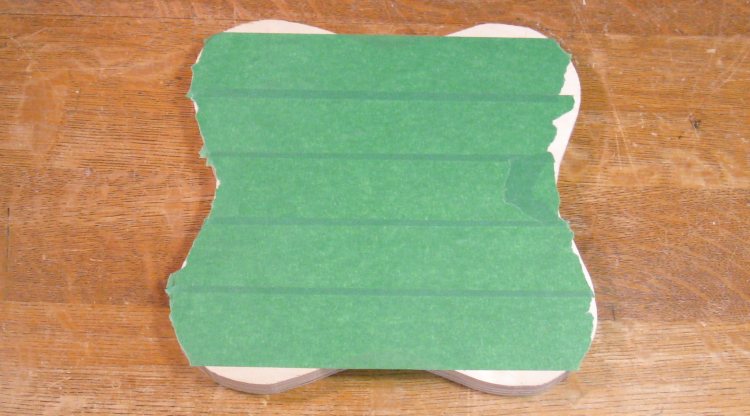
Masking tape on the back to reduce chipping by the saw blade
When sawing anything, the side toward which the teeth of the saw blade moves tends to chip when not cutting exactly with the grain. Some cuts with the bandsaw showed that 1/4"-long chips on both sides of the cut on the bottom were not unusual. To keep that face clean, I added masking tape to the bottom and rubbed it down so it stuck firmly. That was strong enough to limit the chipping to 1/16" or so.
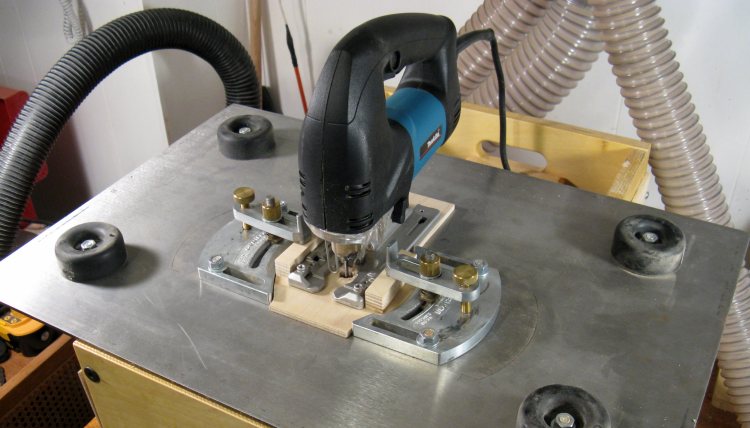
Jigsaw mounted on router table
The plywood was pretty tough so I needed a relatively tough saw to cut it, and one that could be stuck through a hole to cut out a center portion. I have a scroll saw that would almost fit the bill but it is somewhat on the wimpy side, so I thought I'd try out using a jigsaw mounted to my router table.
Here I've made a little wooden mount for it and clamped it to the bottom of the (upside-down in this shot) router table.
Here I've made a little wooden mount for it and clamped it to the bottom of the (upside-down in this shot) router table.
Separating pieces with the Danger Saw
Here is a shot of separating a couple concentric pieces with the jigsaw setup.
Yes, I knew the setup was going to be a bit scary - note blurry Blade Of Dismemberment sticking up - but I found that it was actually difficult to follow the curves accurately. I'm thinking that this was because I was operating near the end of the blade due to the thickness of the jigsaw mount and router table, and that resulted in a fair amount of flexure.
Yes, I knew the setup was going to be a bit scary - note blurry Blade Of Dismemberment sticking up - but I found that it was actually difficult to follow the curves accurately. I'm thinking that this was because I was operating near the end of the blade due to the thickness of the jigsaw mount and router table, and that resulted in a fair amount of flexure.
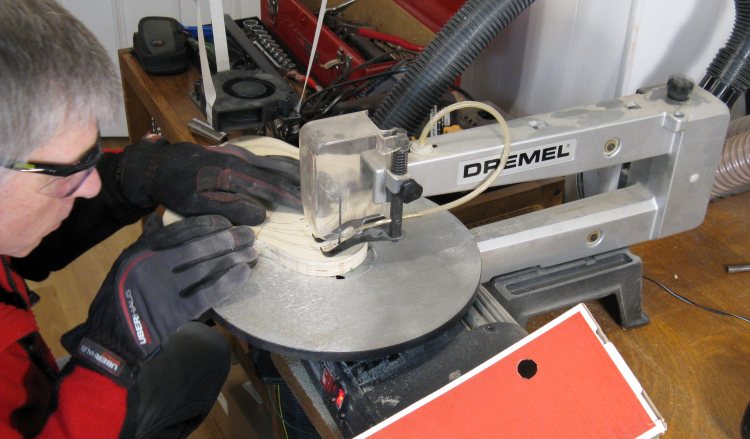
Using the scroll saw to cut out concentric pieces
So it was time for Plan B. I hauled the scroll saw up and tried it out. It was a bit slower than the jigsaw but easier to control, so I finished up with this setup.
For dust collection, you can see on my left a little black blower fan. This is hanging from a lamp with masking tape and blowing sawdust to my right into the dust collector system with a cleverly-crafted orange shoebox-duct on it.
For dust collection, you can see on my left a little black blower fan. This is hanging from a lamp with masking tape and blowing sawdust to my right into the dust collector system with a cleverly-crafted orange shoebox-duct on it.
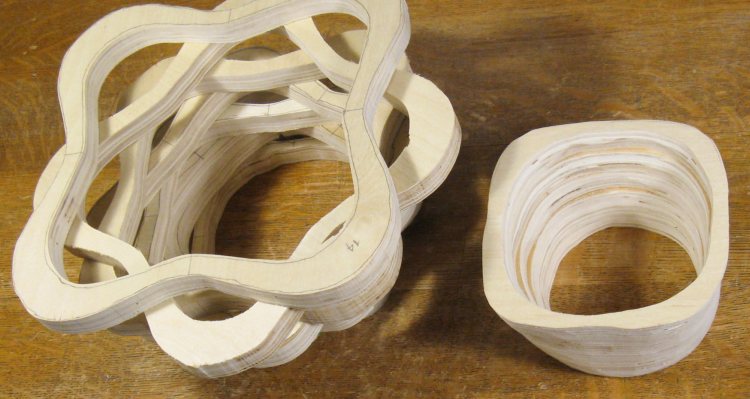
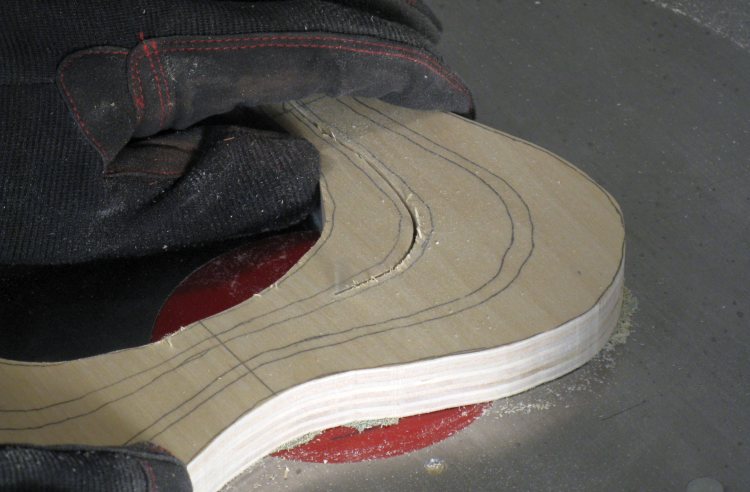
After a bit of gluing & shaping, the walls looked mighty thin
Once all the pieces were cut out I started gluing together the smaller pieces, seen on the right. But due to the angle of the sides, I was getting worried about how much wood I had to form the wall thickness.
I did a bit of sanding to get rid of some edges and get a better idea, and decided that the walls weren't beefy enough - they might have worked but a minor misalignment in gluing would make the wall too thin. I could hope it was going to be OK, but given the effort the vessel would take I decided it was too risky. Nothing to do but start over.
I did a bit of sanding to get rid of some edges and get a better idea, and decided that the walls weren't beefy enough - they might have worked but a minor misalignment in gluing would make the wall too thin. I could hope it was going to be OK, but given the effort the vessel would take I decided it was too risky. Nothing to do but start over.
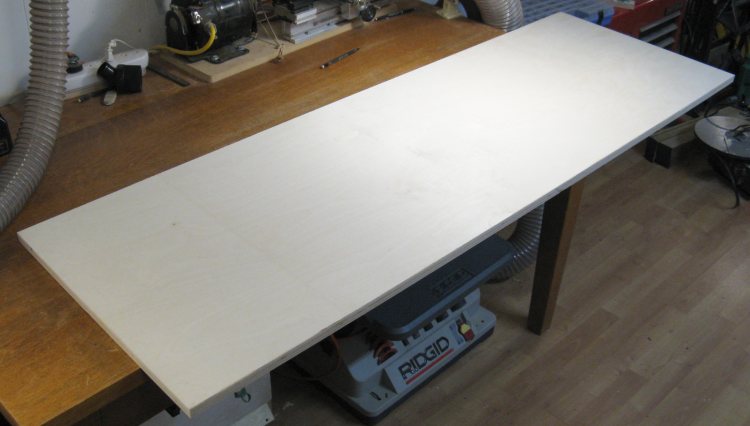
A nice new piece of plywood
So here we are post-screwup; a little older, hopefully a little wiser. And with a decidedly un-scrap-like piece of plywood, freshly purchased from Windsor Plywood.
So those last 9 photos? Yah, just did that all again. Except I skipped the Jigsaw of Death stage.
So those last 9 photos? Yah, just did that all again. Except I skipped the Jigsaw of Death stage.
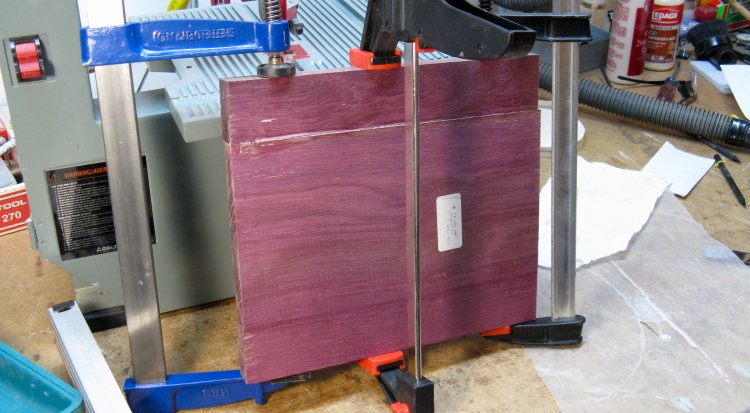
Gluing up a couple pieces of Bloodwood for the top
OK, so we're back on track here. I needed the largest piece ("the 15th storey") to be the Bloodwood. I had a 10"-wide plank but that wasn't wide enough by itself so it was laminated with an extra piece as shown here with the glued pieces being clamped.
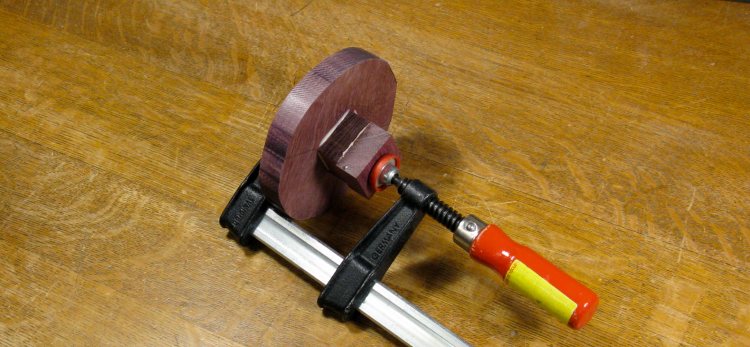
Gluing a sacrificial boss for turning onto the bottom
And the "ground floor" was also Bloodwood. The plank was plenty wide, but I needed a piece added on to be able to mount it on the lathe.
Yes, I know this wasn't going to be a lathe vessel, but I needed it for some pre-shaping.
Yes, I know this wasn't going to be a lathe vessel, but I needed it for some pre-shaping.
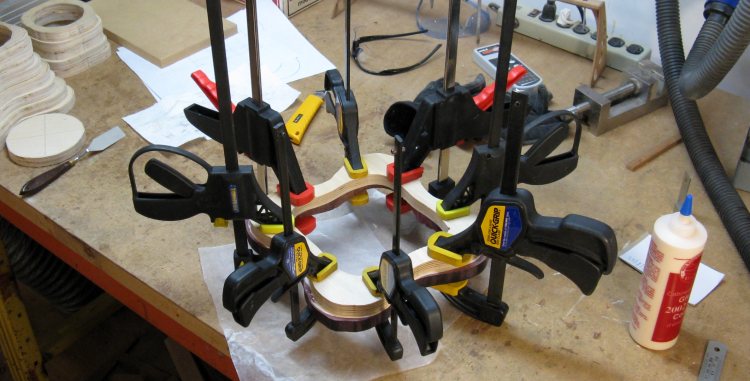
Starting the stack-up with the top two layers and a mélange 'O clamps.
This was the first bit of gluing with the top Bloodwood layer added to the highest plywood layer. I've had problems gluing Bloodwood previously so I made sure I had enough clamps.
Gluing a stack of bottom layers
And at the other end, this is a stack of 9 of the bottom layers. I actually made glue-ups of three layers at a time, and this is three of those short stacks being put together.
You can see the twist that was added from the angled positions of the center lines.
You can see the twist that was added from the angled positions of the center lines.
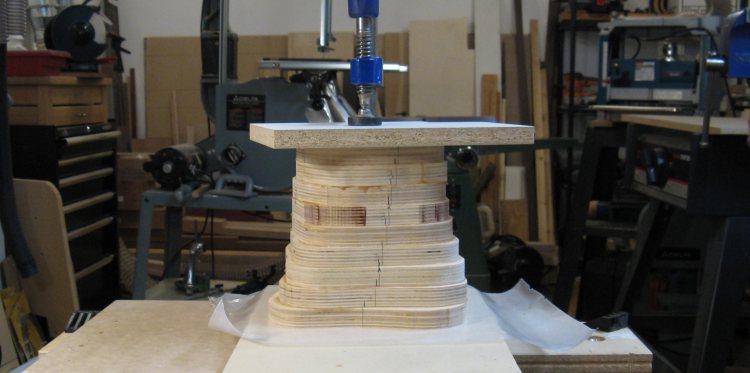
Finally sticking all layers together
This is the final gluing with all the layers plus the bottom together.
I used a latex adhesive for a non-permanent bond to the bottom since I wanted to be able to remove the bottom for ease of shaping.
You can also see a regular piece of plywood at the bottom, also attached with latex adhesive. That was added to permit mounting on the lathe.
I used a latex adhesive for a non-permanent bond to the bottom since I wanted to be able to remove the bottom for ease of shaping.
You can also see a regular piece of plywood at the bottom, also attached with latex adhesive. That was added to permit mounting on the lathe.
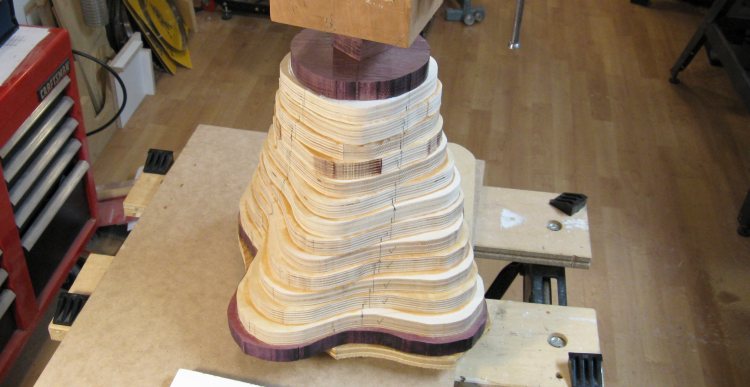
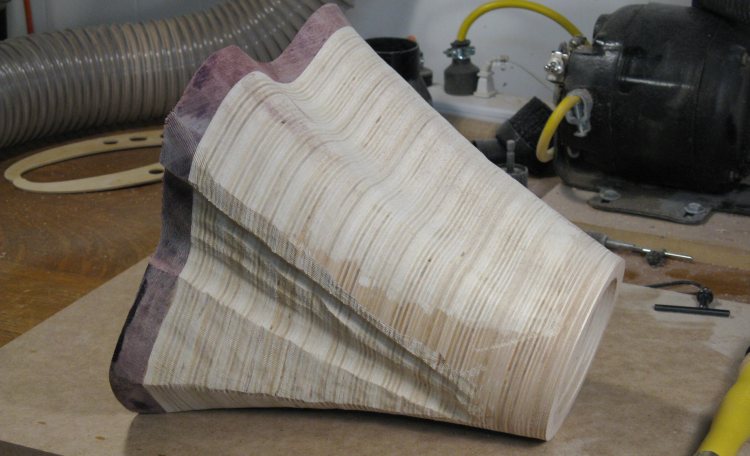
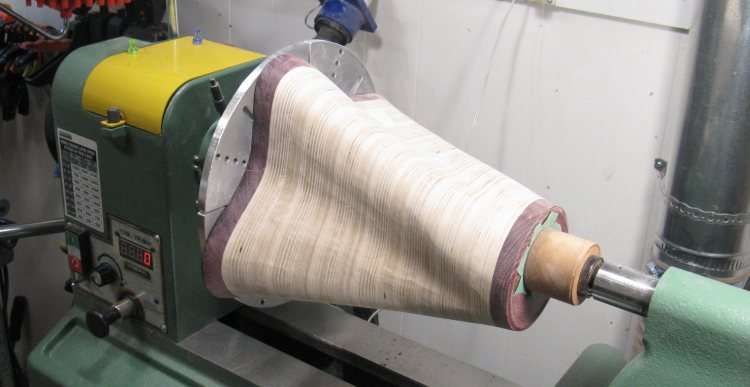
Mounted to the lathe to even off corners
And as confusingly promised, this is the unit mounted on the lathe.
There was a fair amount of wood to be removed and there wasn't really any reference points or means to make the four sides or corners similar.
My solution was to mount it on the lathe and turn a profile on just the outermost corners.
There was a fair amount of wood to be removed and there wasn't really any reference points or means to make the four sides or corners similar.
My solution was to mount it on the lathe and turn a profile on just the outermost corners.
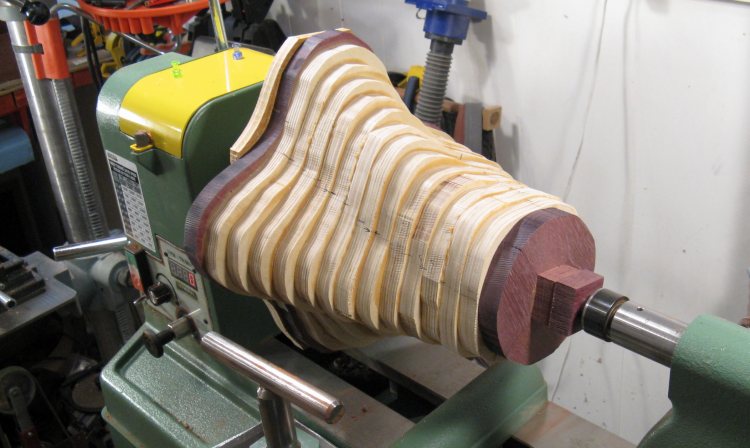
Outside corners getting contoured
Here it is partially shaped. This ensured the outside of all four corners were the same and were also the desired profile.
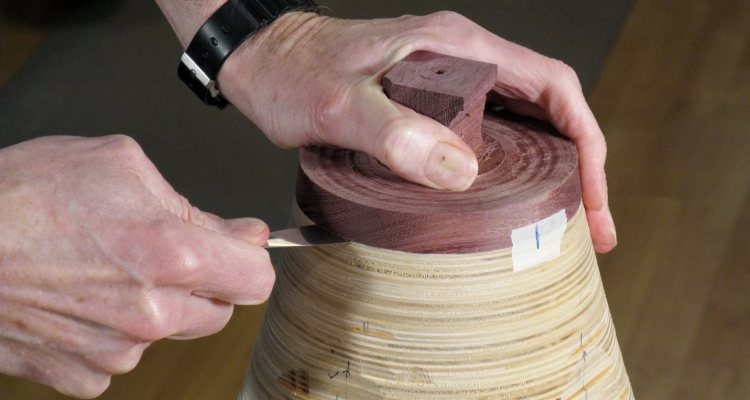
Prying off the bottom
After the contour shaping was done and the bottom rounded off, it was pulled off the lathe.
The bottom is being removed here using a thin spatula to poke through the rubbery adhesive. The idea was to allow access to the inside of the vessel through the bottom for easier shaping.
The bottom is being removed here using a thin spatula to poke through the rubbery adhesive. The idea was to allow access to the inside of the vessel through the bottom for easier shaping.
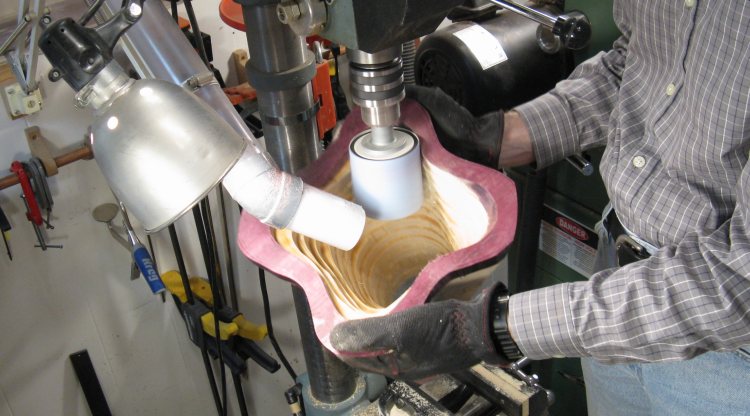
Trying some sanding on the drill press
I actually wasn't too sure at this point how I was going to do the shaping. The "proper" tools consisted of a odd mini-grinder, a die grinder and a selection of cutters, burrs and sanding bits. I figured I could get all those for maybe six or eight hundred dollars but I may never use them again. So that didn't seem too prudent, economically speaking.
So my "try with the tools I have" attempt was to use a large sanding drum on the drill press. That worked sort of OK for the top, but it couldn't go very deep.
So my "try with the tools I have" attempt was to use a large sanding drum on the drill press. That worked sort of OK for the top, but it couldn't go very deep.
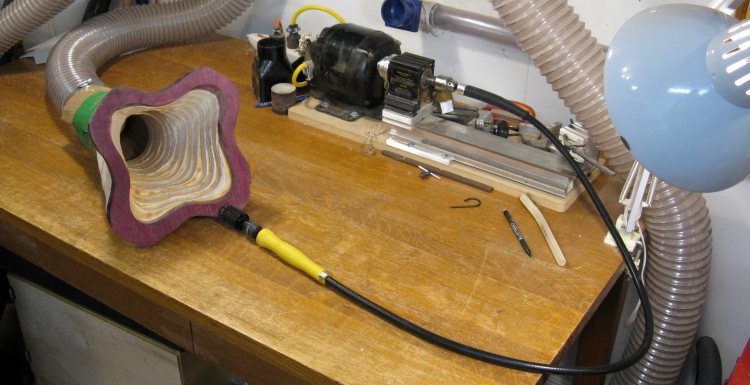
Sanding setup with flex shaft
I eventually settled on buying a large flex-shaft which was driven from the tiny little metal lathe with the not-so-tiny motor. This was the one I used before I got my "real" 16-inch lathe.
I bought some drum rasps like the black one shown on the flex shaft here, but they weren't really up to the task, especially the Bloodwood.
I bought some drum rasps like the black one shown on the flex shaft here, but they weren't really up to the task, especially the Bloodwood.
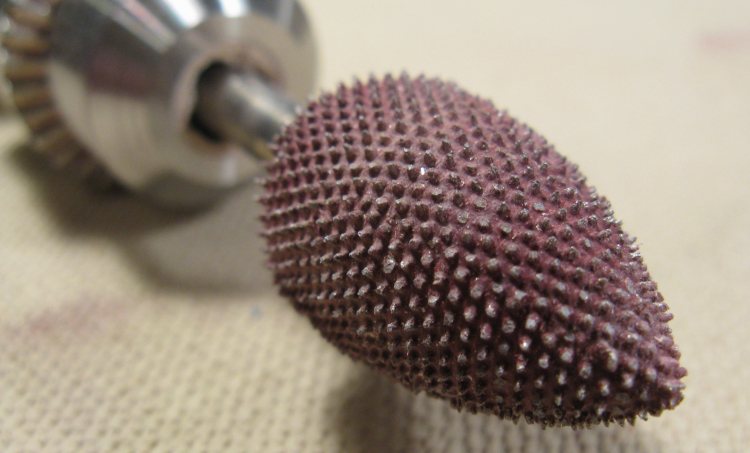
The main shaping bit (kind of dull in this picture)
What I found more effective was this rotary rasp or burr. It is a Typhoon brand 7/8"-diameter flame-shaped tungsten carbide-toothed burr. This photo is after it did the whole vessel so it isn't quite as sharp as at the start, but it was very aggressive and stood up incredibly well, considering the wood.
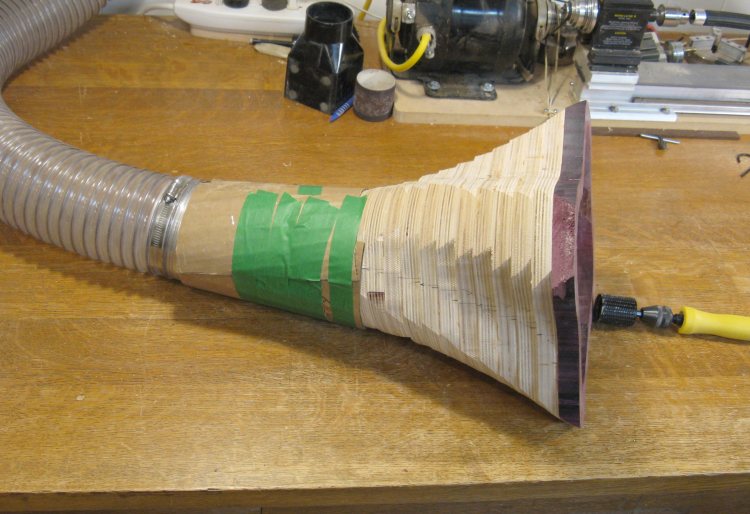
Vacuum pickup for sanding inside
This is the inside-carving setup. I crafted a custom cardboard/masking tape adapter and attached the open bottom of the vessel to the dust collection system. This was highly effective at removing dust and I didn't need to wear a mask.
I'll just mention at this point that the Bloodwood is one of the hardest woods I have used, as well as one of the heaviest. It is also known for dulling tools and has tendancy to chip. I have (unsuccessfully) tried to use it in a couple other projects and I largely chose for this one just to get rid of it - plus it's supposed to look very nice in the finished piece. But after this project, it is definitely off my list.
I'll just mention at this point that the Bloodwood is one of the hardest woods I have used, as well as one of the heaviest. It is also known for dulling tools and has tendancy to chip. I have (unsuccessfully) tried to use it in a couple other projects and I largely chose for this one just to get rid of it - plus it's supposed to look very nice in the finished piece. But after this project, it is definitely off my list.
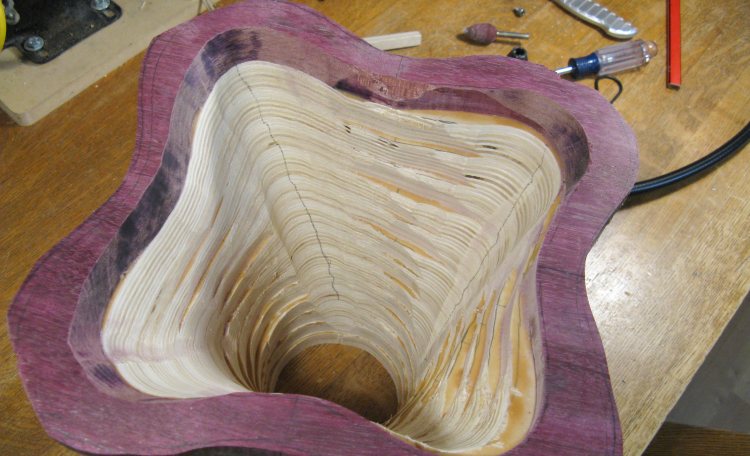
Some guide lines to inside shaping
The inside has some shaping done, mostly in the corners. Since the outside corners were the desired shape, the approach was to sand the inside corners to get the wood to the appropriate thickness of about 0.3".
In this photo there are some pencil lines visible on the inside. I occasionally drew these in reflecting the centers of the corner based on the outside profile. This was to keep me shaping along the proper line.
In this photo there are some pencil lines visible on the inside. I occasionally drew these in reflecting the centers of the corner based on the outside profile. This was to keep me shaping along the proper line.
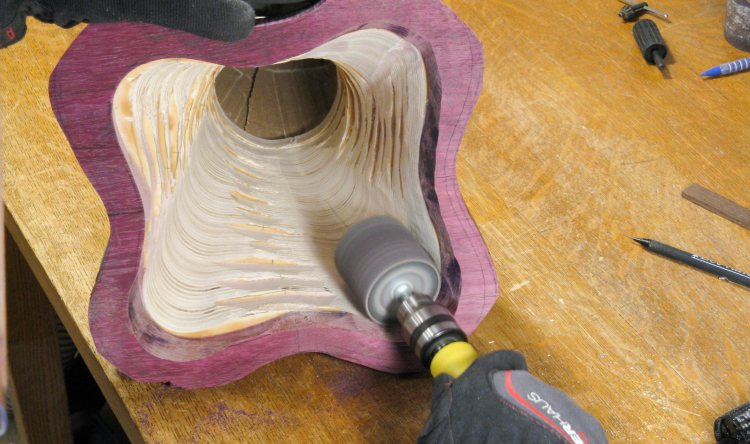
Using the sanding drum
I mostly alternated between the burr and the sanding drum with an aggressive 50-grit sleeve. Here it's the sanding drum's turn.
The burr could dig a small trough in the plywood at maybe 3 to 5 seconds to go 0.1" deep. However, that same 0.1" depth through the Bloodwood took maybe a minute. It probably took almost as long to shape the one layer of bloodwood as the rest of the inside of the vessel.
The burr could dig a small trough in the plywood at maybe 3 to 5 seconds to go 0.1" deep. However, that same 0.1" depth through the Bloodwood took maybe a minute. It probably took almost as long to shape the one layer of bloodwood as the rest of the inside of the vessel.
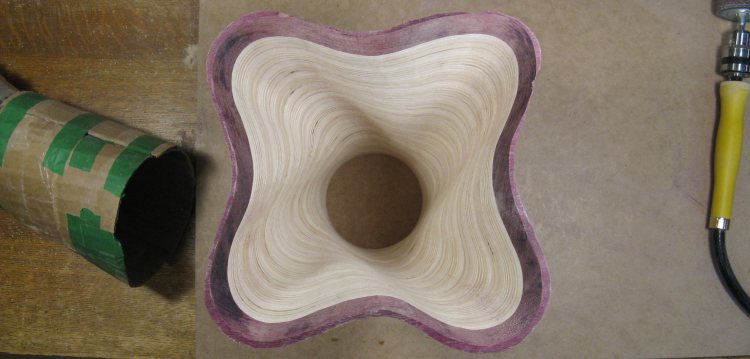
Inside mostly shaped
So after many hours of grinding and sanding, the inside was shaped and mostly sanded. In this picture, a finer 150-grit sanding sleeve has been used to remove the worst of the sanding marks.

Starting on the outside
So then it was on to the outside shaping. Here I'm using the burr on a corner.
Doing the outside, the dust collection isn't as effective so I've got the dust mask as well as the face shield.
Doing the outside, the dust collection isn't as effective so I've got the dust mask as well as the face shield.
One side with some first-stage shaping done
Here the top side has been mostly shaped and the near side has some preliminary grinding-to-thickness done and awaits the sanding drum to smooth things out.
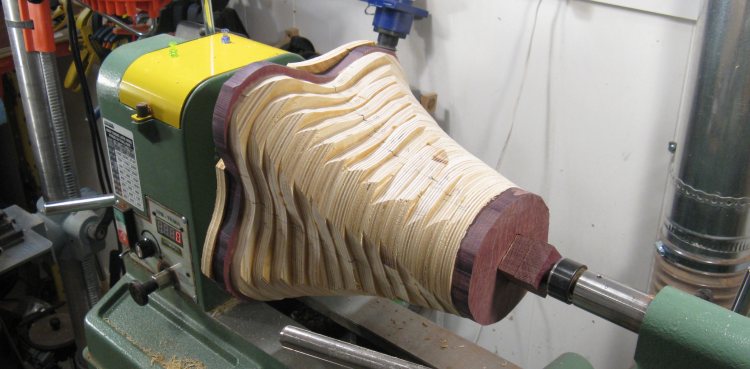
Outside mostly shaped now too
Here the outside is shaped. It isn't very smooth yet, but that will be fixed in the sanding stage.
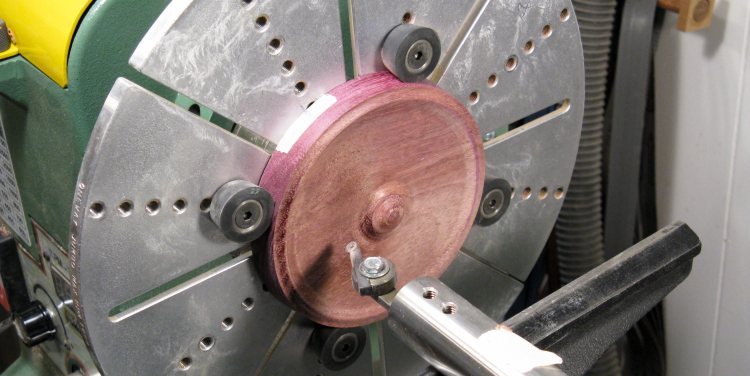
Shaping the bottom layer
Meanwhile, the lowest layer is still off and it needed to have a foot put on the bottom side and a rounded cavity on the top side.
Here it's on the lathe and is getting the attention of the hollowing tool. The foot has been formed and there is just the center bump left to clear out.
Here it's on the lathe and is getting the attention of the hollowing tool. The foot has been formed and there is just the center bump left to clear out.
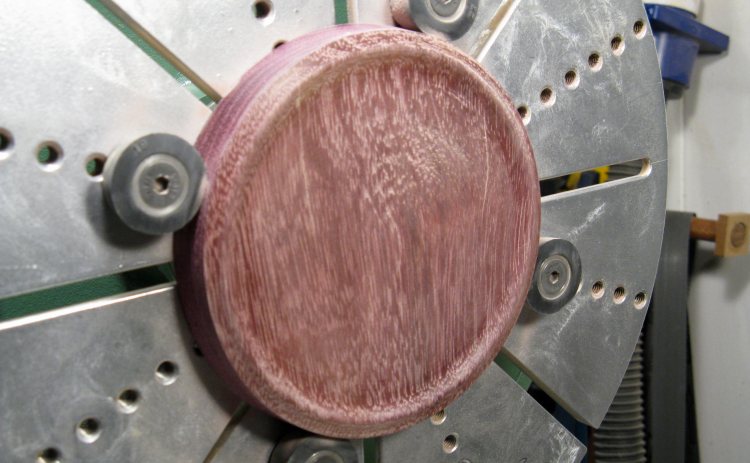
Bottom foot done
There is the bottom side complete. The piece will be flipped to have the top-side cavity formed.
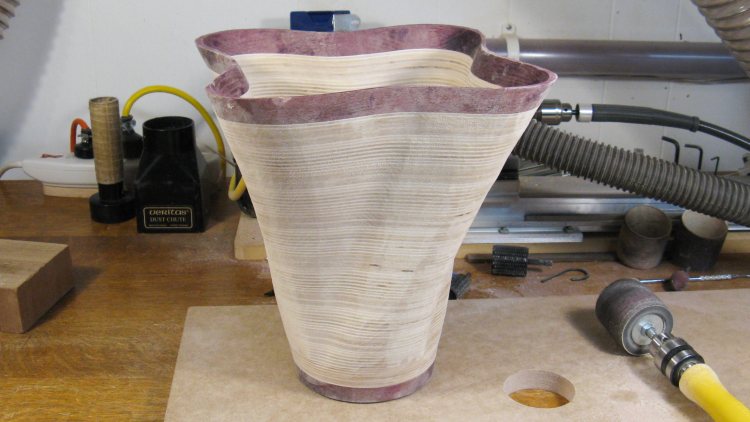
The vessel with the bottom re-glued on
This is pretty much the same ready-to-be-sanded shot as before, except now the bottom layer has been glued on.

Some unsightly chips in the top layer
...except it's not quite ready. Remember the comment about Bloodwood readily chipping? Yah. There's a couple unsightly parts on the rim here that I hoped would get sanded out, but no such luck.
I couldn't see any good way to fix this other than chopping out the corner and replacing it.
I couldn't see any good way to fix this other than chopping out the corner and replacing it.
Cleaning up edges after cutting out offending top bits
Here the corner has been carefuly chopped out and the edges are being prepared to exactly match the replacement piece.
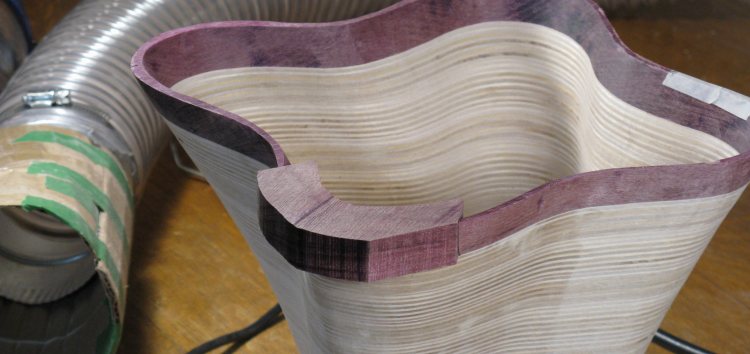
The replacement piece installed. A bit more sanding needed
The replacement piece with the proper grain direction has been glued in. The edges all lined up decently, so it just needed to be reshaped to match up with the rest of the vessel.
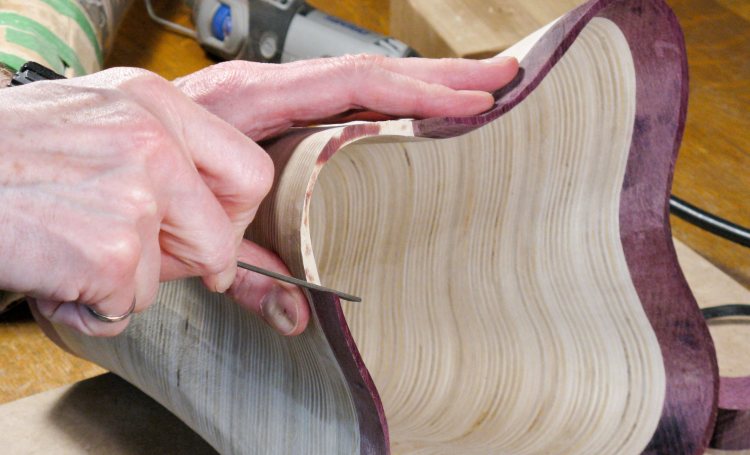
Sanding the inside
Here the corner has been shaped. It's the one by my left hand and you can see a faint line where it joins with the original piece.
So on to the next phase - which was sanding - starting with the inside. Most of the effort was the initial go-over with 120 grit sandpaper that did final shaping and removing any remainning tool marks. This was done mostly by hand with folded pieces of sandpaper as shown here.
Once the entire inside had been gone over, I was able to switch to 180 and then 220 grit to remove most remaining sanding marks.
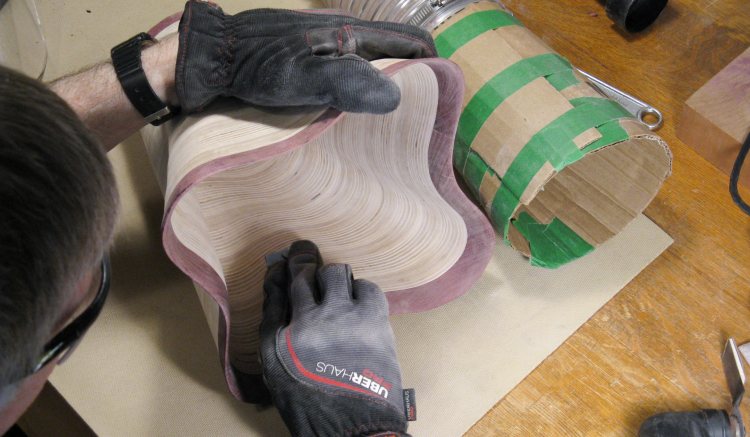
Using the lathe as a mount to sand the outside
The last stage was sanding the outside. It was a bit tricky to hold, so I used the lathe as a big clamp as shown here.
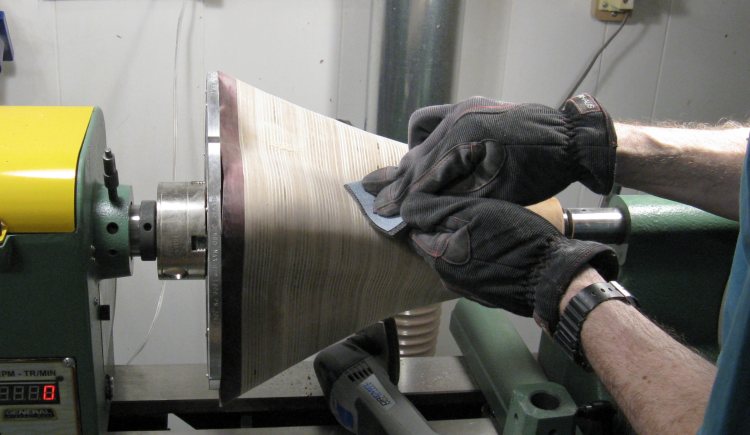
Hand-sanding the outside
The outside was done with the same sequence as the inside, starting with 120 grit and working up. I went to 320 grit on the outside for an even smoother surface.
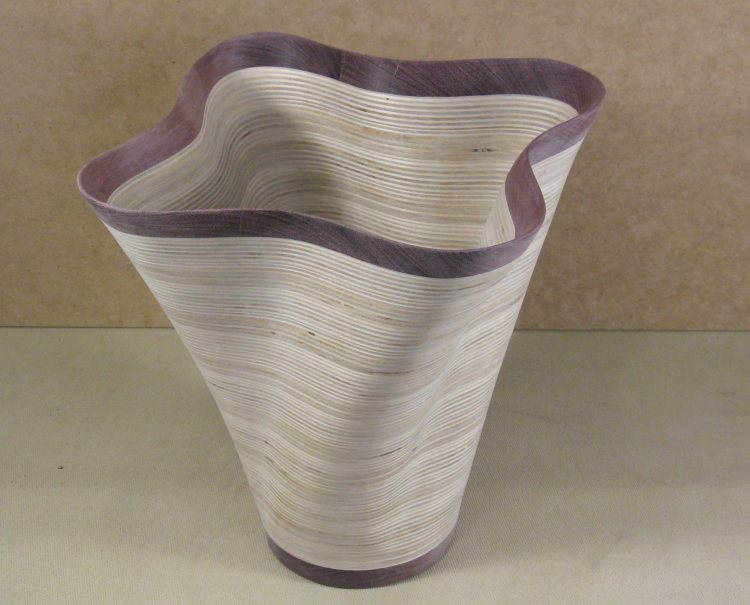
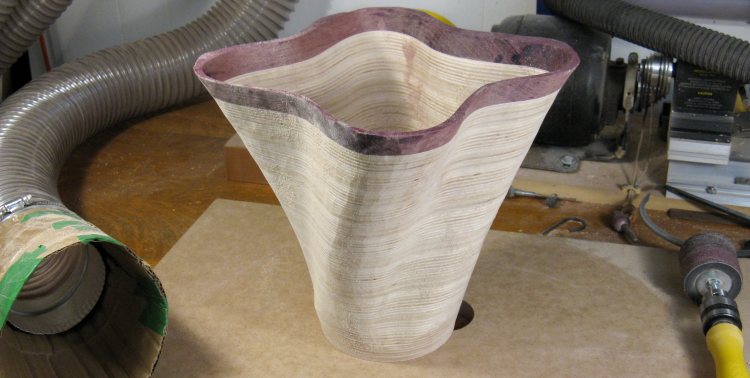
Yay! Sanding done
Except for adding the finish, it is complete.
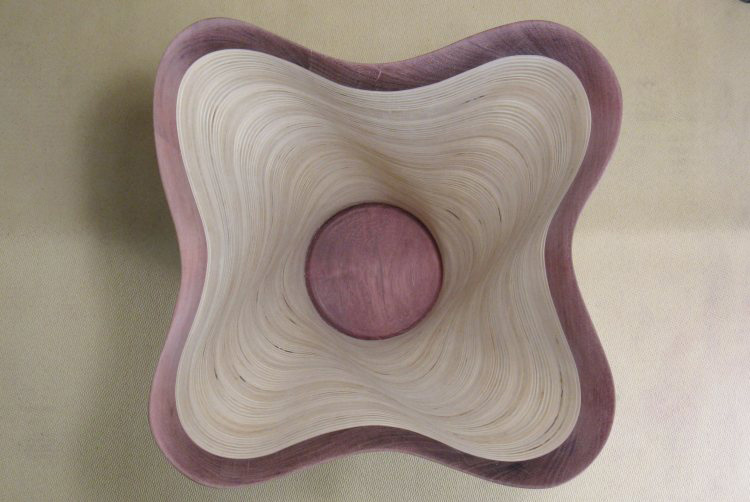
And a view from the top
A shot from the top.
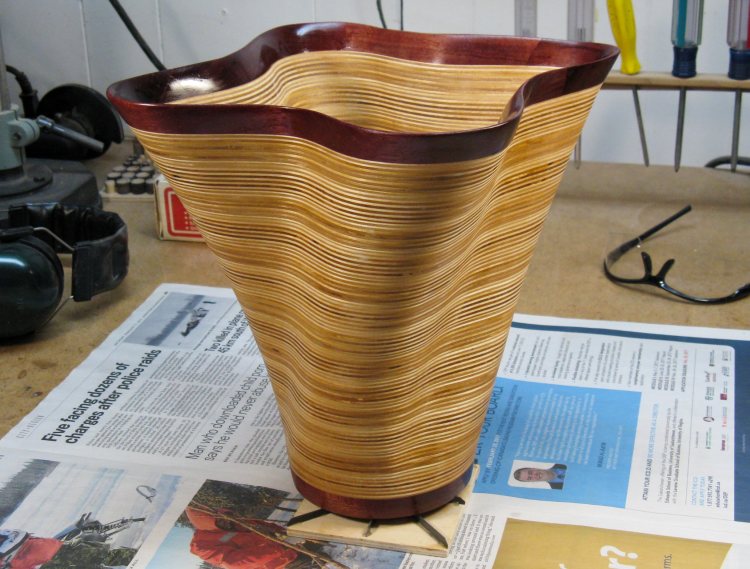
The first coat of varnish still wet
This was finished using my standard three coats of wipe-on poly with steel-wool between coats.
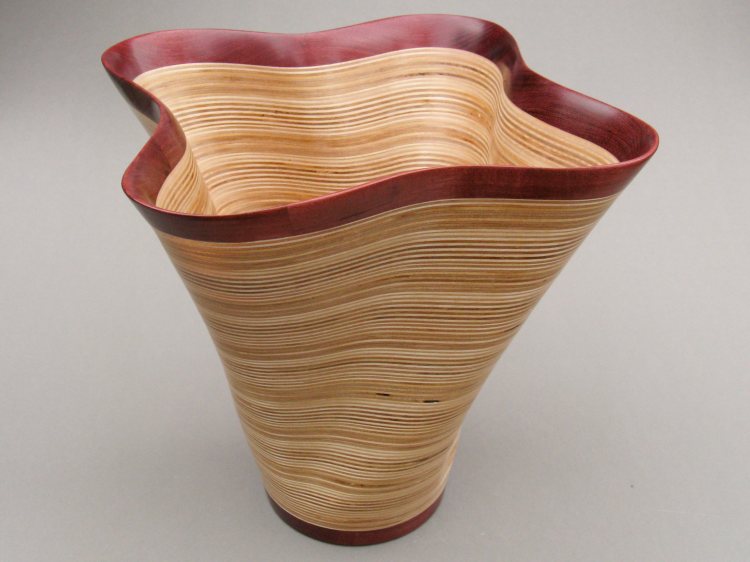
Done
Done.


