A while ago I noticed a test piece that was still sitting around on the floor of the shop. It had been used for checking carving techniques on a previous project. It was just from an old cracked log so I was going to toss it out but I was turning a number of laminated spheres at the time and thought I'd just see how large a sphere I could get out of it; around 5.5" diameter as it turned out.
When it was done I set it aside again ('cause then it was too nice to throw out) but later decided I could try to make a spherical vessel by hollowing it, which brings us to this point...
When it was done I set it aside again ('cause then it was too nice to throw out) but later decided I could try to make a spherical vessel by hollowing it, which brings us to this point...
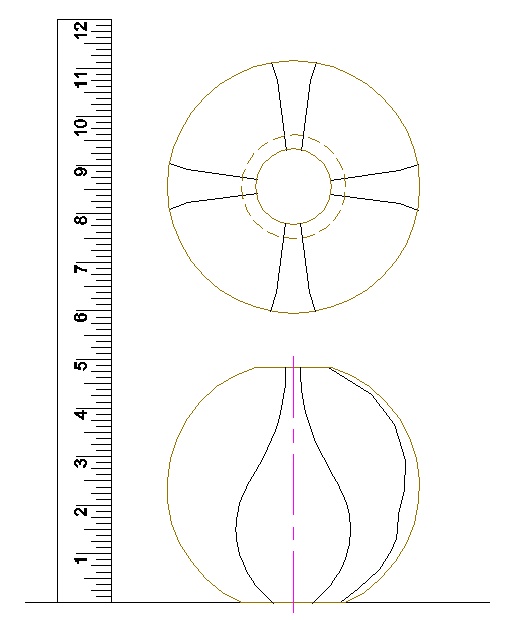
The plan, based on the wooden sphere
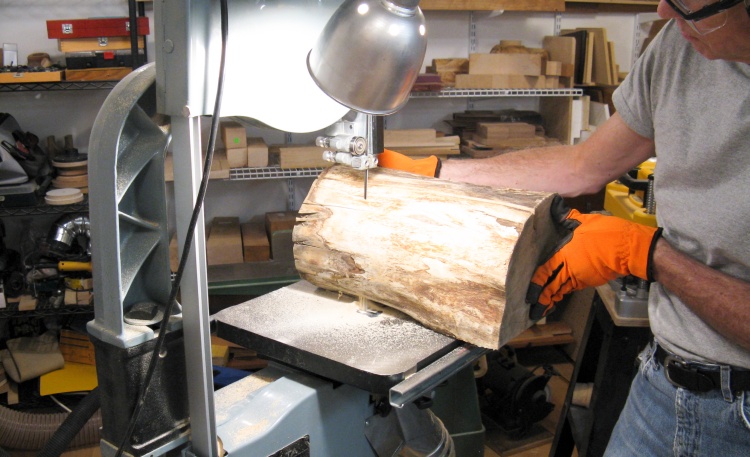
The original log
But first, a little history;
This is the log I used for the carving test piece. It's just an old cracked thing from a wood pile in a back yard and I'm guessing that it's probably Spruce.
This is about 2/3 of the original log and in the photo it is being cut a bit smaller on the bandsaw to make a turning blank for the lathe.
This is the log I used for the carving test piece. It's just an old cracked thing from a wood pile in a back yard and I'm guessing that it's probably Spruce.
This is about 2/3 of the original log and in the photo it is being cut a bit smaller on the bandsaw to make a turning blank for the lathe.
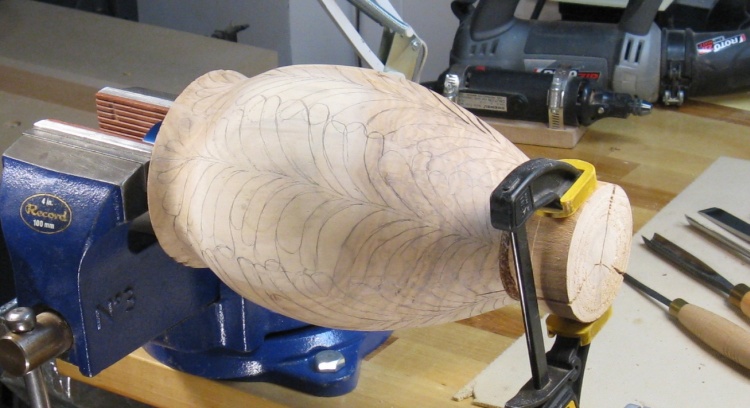
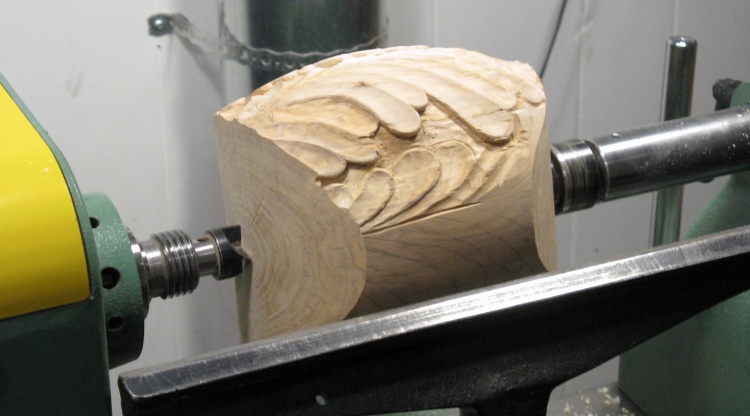
The test piece
The log was turned to the desired shape and then the carving pattern was marked onto it. This is the test piece before I did much carving.
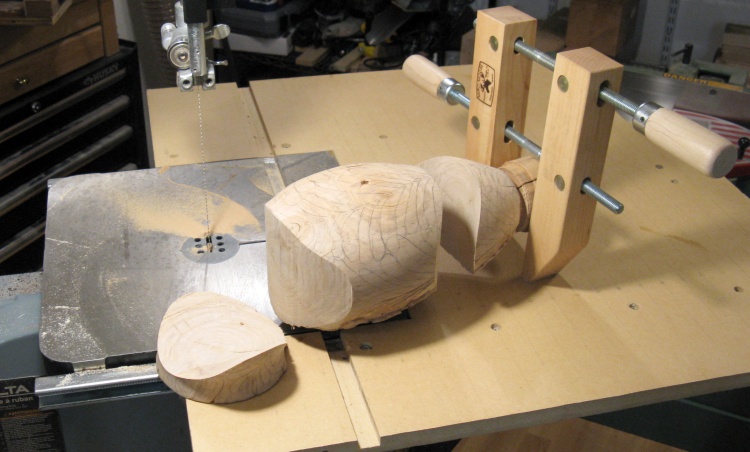
Longer ends chopped off
Here it is after it had served its purpose. In preparation for turning it into a sphere, I cut off the ends with rounded cuts to make it a bit less unwieldy on the lathe.
The big old-style wooden clamp called a hand-screw clamp was used to hold and stabilize the round-sectioned piece as it went through the saw.
Only about one-quarter of it had been carved and those bits are on the bottom side in this photo.
The big old-style wooden clamp called a hand-screw clamp was used to hold and stabilize the round-sectioned piece as it went through the saw.
Only about one-quarter of it had been carved and those bits are on the bottom side in this photo.
Mounted between centers on the lathe
Here it is mounted on the lathe between the spur center on the left and the live center on the right. The carved bits are on the top in this shot, and will all need to be removed as part of it's new transformation to sphere-ness.
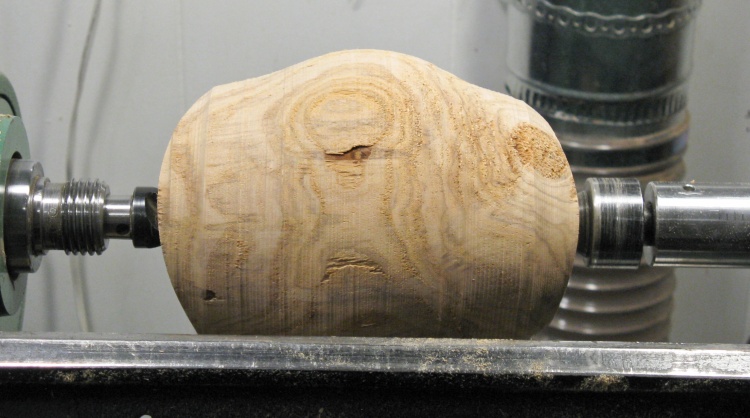
Rounded along the first axis
In this photo the turning on the first axis is complete and it is round in the one dimension.
The other dimension is obviously far from sphere-like but the next stage will take care of that.
The other dimension is obviously far from sphere-like but the next stage will take care of that.

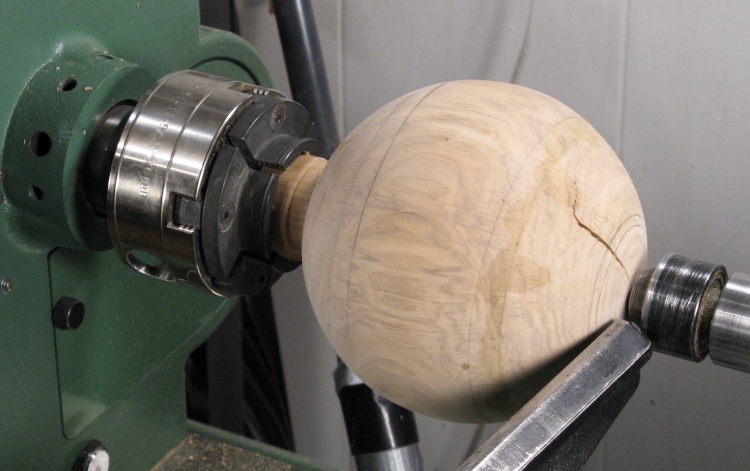
Axis changed and mounted using cup chucks
Here the lathe has been switched over to use the wooden cup chucks and the piece has been rotated 90° and squeezed between the chucks. Now it will spin so the second axis can be rounded.
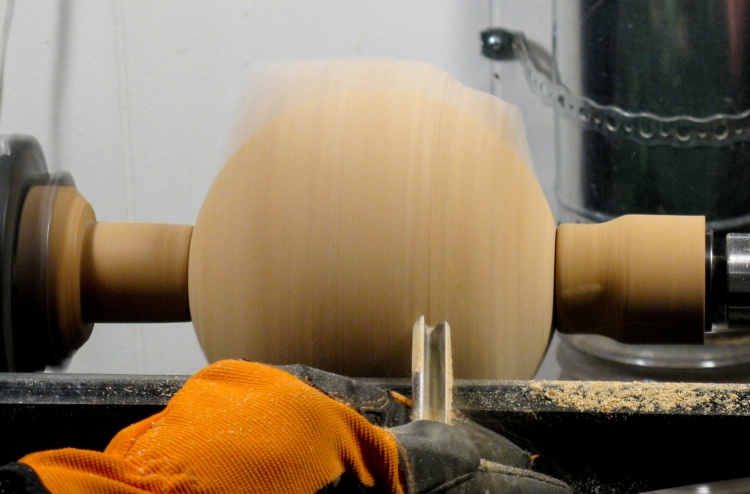
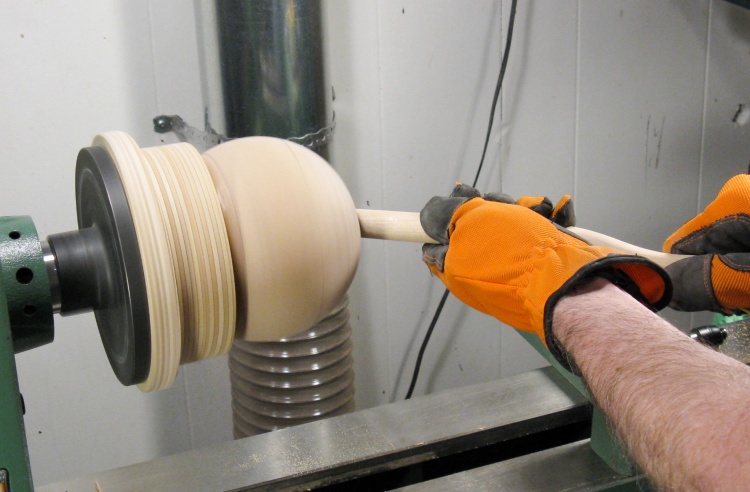
Rounding off the second axis
Like this.
You can see the ghostly outline of the round ball as the edge spins by the rounded portions of the opposite axis. When the wood is removed down to that outline then it will be round in this dimension as well.
You can see the ghostly outline of the round ball as the edge spins by the rounded portions of the opposite axis. When the wood is removed down to that outline then it will be round in this dimension as well.
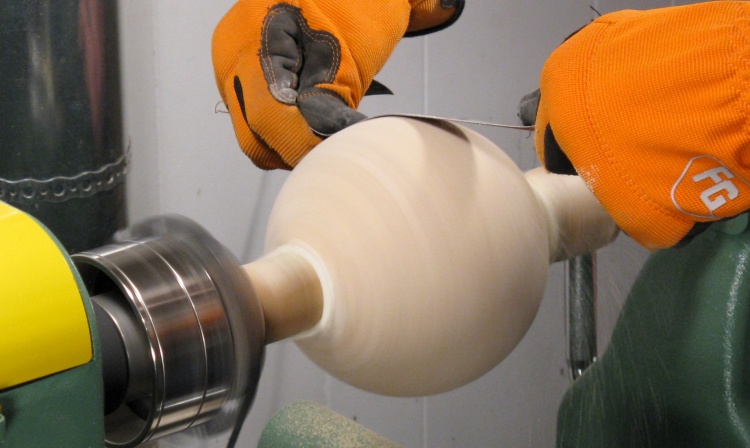
Sanding the resulting sphere
And sure enough, it's now round(ish). At least close enough to do some sanding to remove the tool marks.
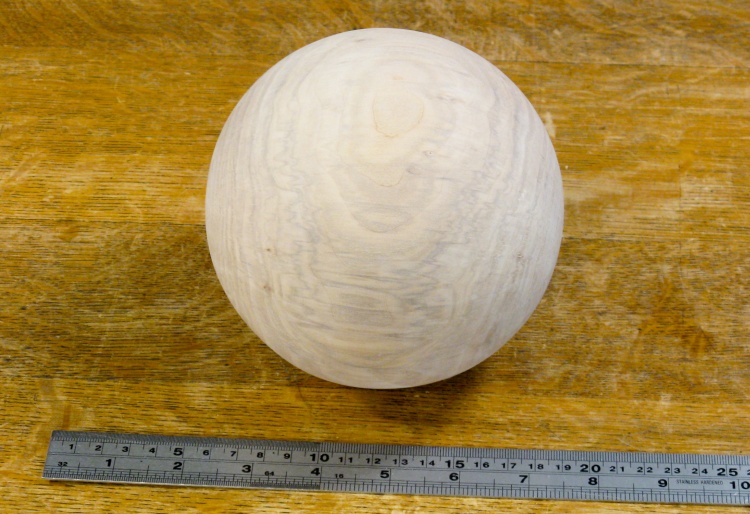
Spruce sphere, 5 or 6" diameter
And there it is in repose next to a ruler. At this point I said "Hmm. Neat" and set it aside on my bench.
A bit later I was thinking that I had to do something with this sphere since it was now too neat to throw out but I didn't want it just sitting around taking up valuable space that other odd scraps of wood could be using.
A bit later I was thinking that I had to do something with this sphere since it was now too neat to throw out but I didn't want it just sitting around taking up valuable space that other odd scraps of wood could be using.
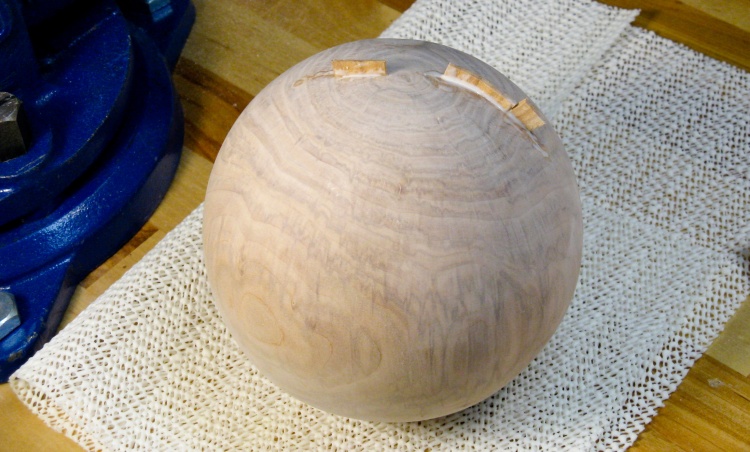
Filling cracks at the "top"
I had wanted to make a spherical vessel some day and this seemed like a bit of a jump-start to that, even if it wasn't really the wood I'd normally choose. But I pushed ahead with that, starting by filling the cracks on the arbitrarily-selected "top" using chips literally off the old block.
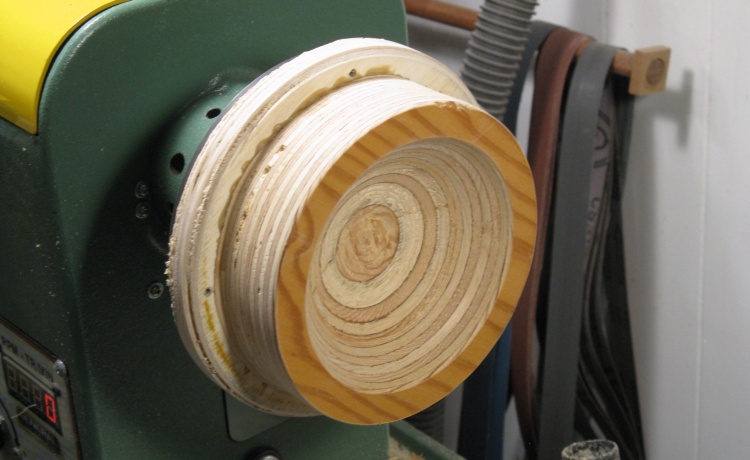
The custom mount for the sphere
Holding a spherical shape for turning presented something of a problem so I ended up stacking enough plywood on a faceplate so I could turn a spherical(ish) concavity in which to mount it.
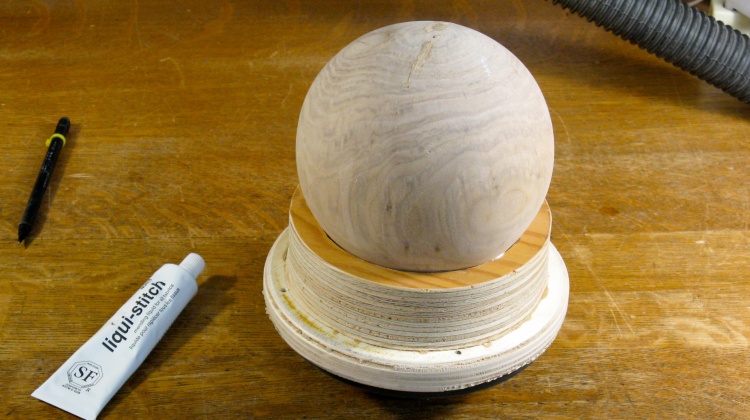
Gluing the sphere into the mount
And then I attached the sphere to the holder using a rubbery latex glue which I'll be able to remove when I'm done. This worked pretty well but later I had to add a bit more glue than is visible in this shot for a solid mount.
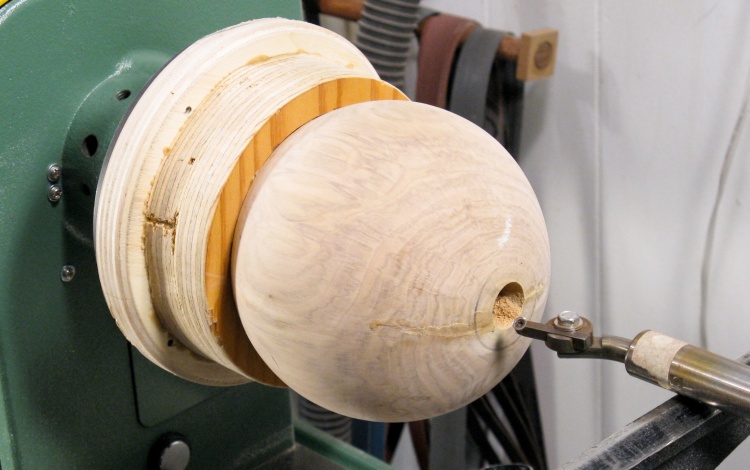
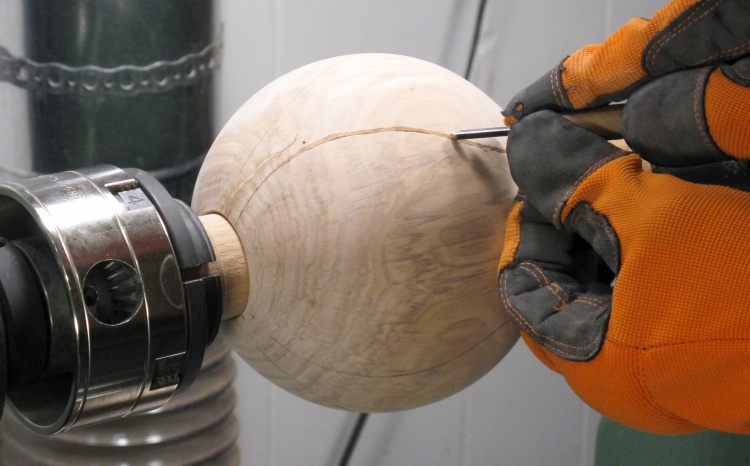
Starting hollowing on the lathe
Here the ball is mounted on the lathe and the central hole has already been drilled in preparation for hollowing. I used my normal hollowing rig that can be seen here, with various extensions to help reach into the sides.
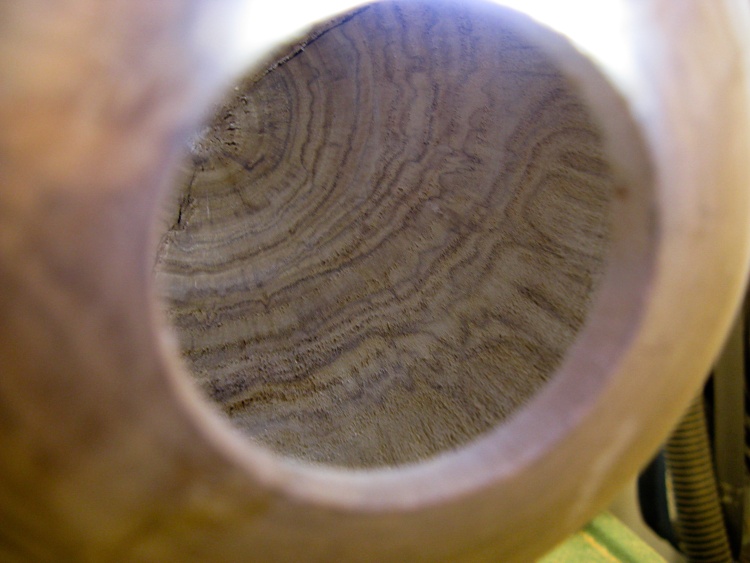
Peeking inside after hollowing is done
Here's a shot of the inside with the hollowing done.
And then some inside sanding
The inside got a bit of attention with a curvey sanding jig to smooth things out.
A small flat section turned on the bottom
Then the vessel was taken off the lathe and the glue removed using a fine pair of pliers to pull it off. You can see the minor stains it left on the wood but those will sand out. Then it was flipped around and remounted to the lathe using a dowel to go in the opening and squeeze the bottom against the live center.
It's tough to tell but the bottom has already been flattened off in this photo. It's more obvious in the next shot.
It's tough to tell but the bottom has already been flattened off in this photo. It's more obvious in the next shot.
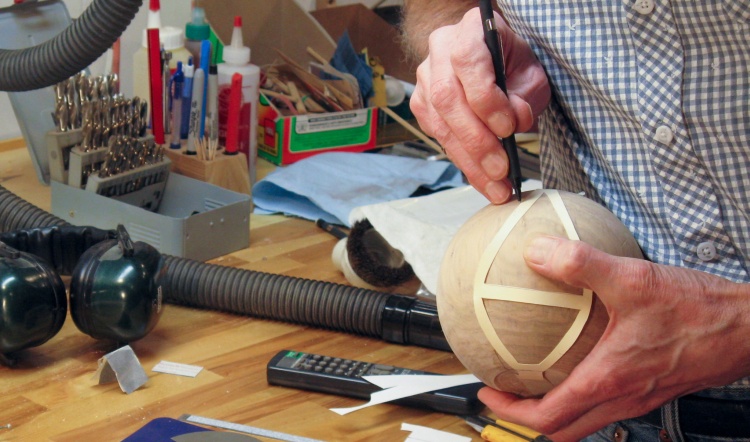
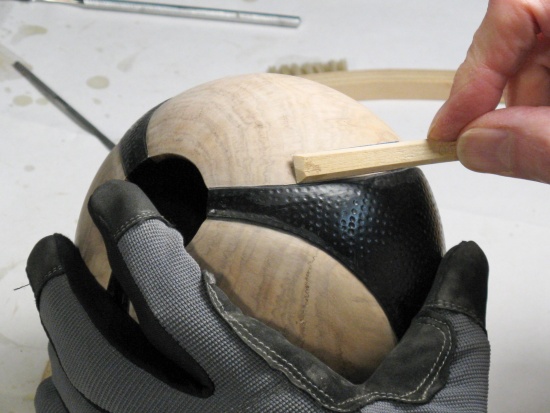
Marking the detail areas using a cardboard pattern
So the spherical wooden vessel was sort of done, except it looked pretty plain.
It sat around for a few days (managing to avoid the photographer) and I filled the bottom-side cracks with glue and then it sat around a bit more. I eventually decided to add something to jazz it up a bit, settling on a black teardrop motif.
To start, I made a thin cardboard pattern that was used to trace on the shape in three places around the circumference.
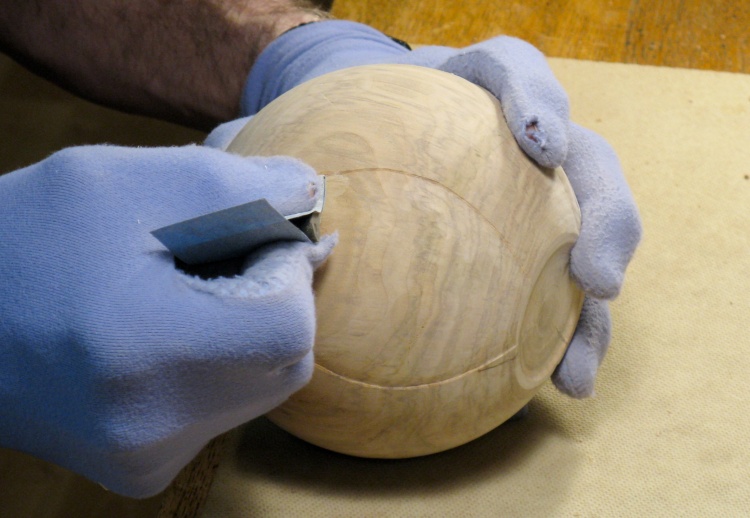
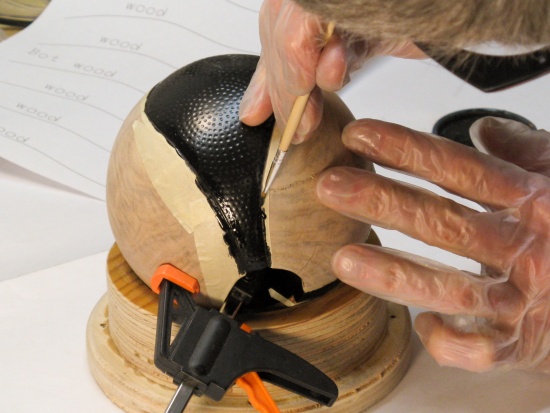
Carving edges of detail areas
To better delineate the feature areas, the edges were lowered to form a small wall. The first step was to carve a groove along the edge as seen here.
Sanding detail areas
The teardrop areas were sloped at the edges with a small chisel and then sanded smooth.
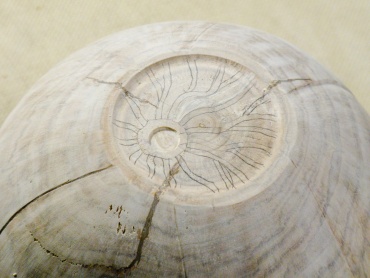
But before adding the details to the sides I decided to complete the bottom. It needed the circle for my initials and I embellished it with a pattern that wasn't particularly meant to mean anything but it looks vaguely sun-bursty or perhaps rooty.
But before adding the details to the sides I decided to complete the bottom. It needed the circle for my initials and I embellished it with a pattern that wasn't particularly meant to mean anything but it looks vaguely sun-bursty or perhaps rooty.
Bottom marked
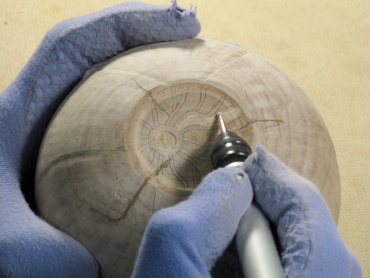
Starting grinding
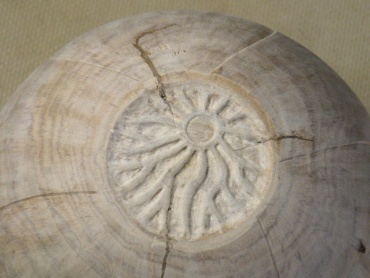
Odd bottom design done
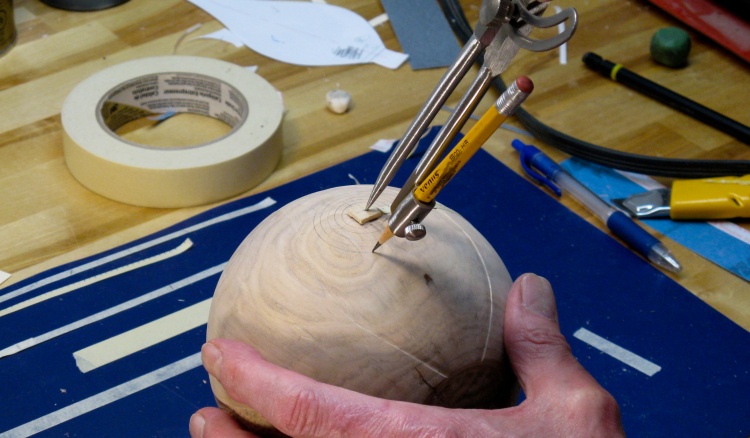
Marking concentric circles
The above photos show the process of completing the bottom.
And then it was back on track with the sides. I decided on a concentric pattern of divots and this photo shows guide circles being drawn in one of the areas using a compass.
And then it was back on track with the sides. I decided on a concentric pattern of divots and this photo shows guide circles being drawn in one of the areas using a compass.
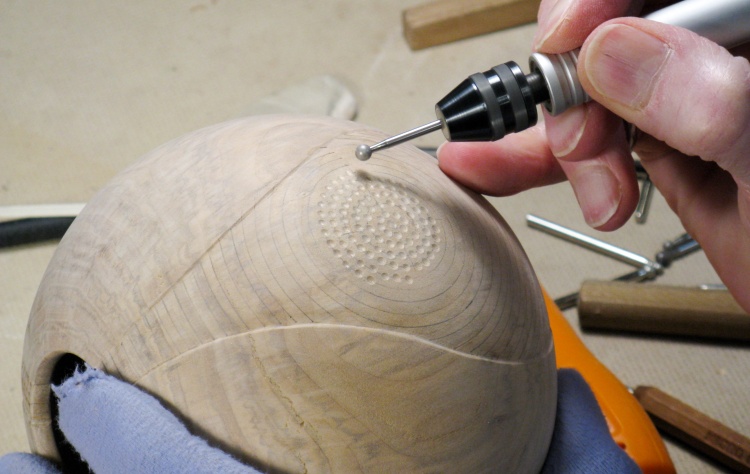
Grinding divots in detail areas
Then it was just a matter of making a whole lotta little divots in the circular pattern using an abrasive bit.
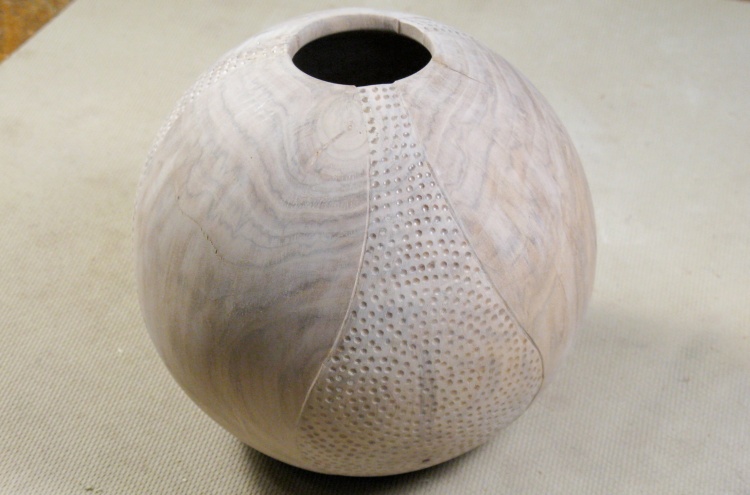
All grinding done
This shows the vessel with the detailing complete.
Staining detail areas
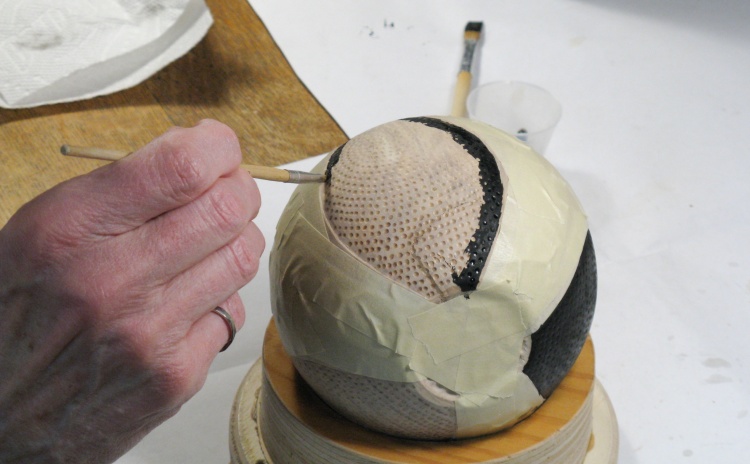
The next step was to stain the teardrop areas black. I used india ink since it does a very good job of making nice deep black surface.
I've added masking tape but not for masking the edges. It's just there to keep ink off the bulk of the in-between portions.
I've added masking tape but not for masking the edges. It's just there to keep ink off the bulk of the in-between portions.
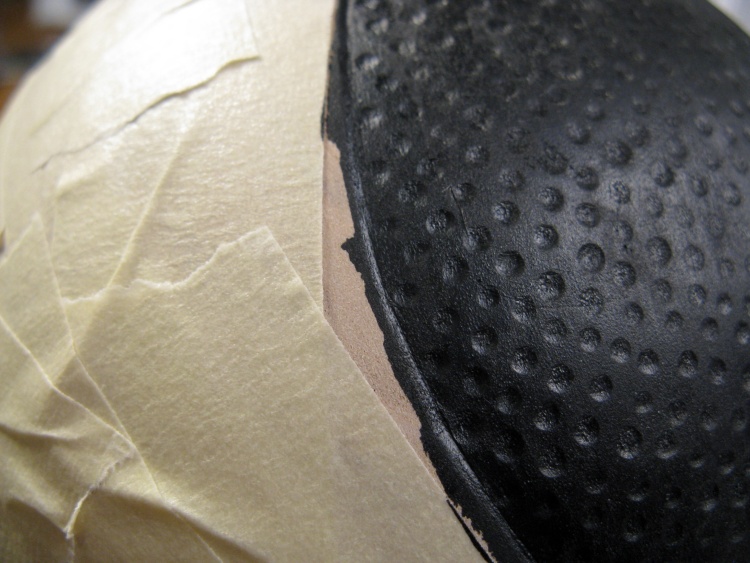
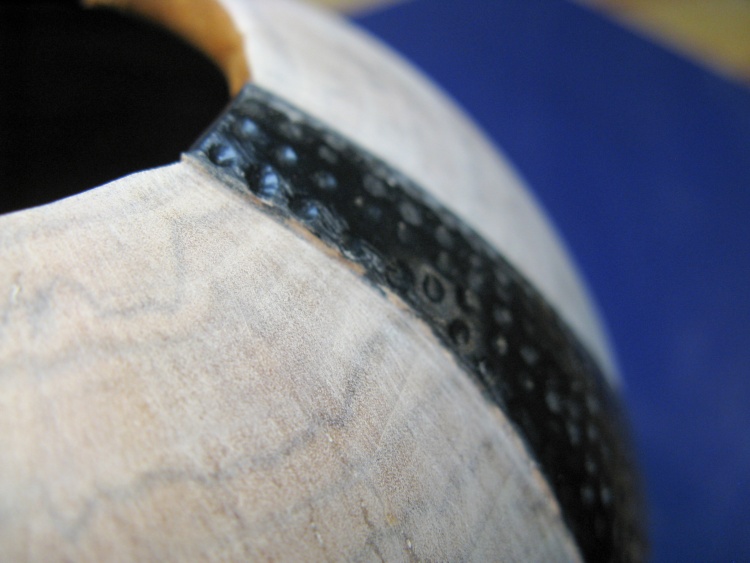
Rather imperfect edges
I had hoped to be able to paint up to the edge of the tiny wooden "wall" to have a nice sharp edge for the black, but that didn't pan out.
Then I thought I'd just paint just to the top of the wall, but that didn't really work out well either.
So in the end I slopped ink over the edge of the wall as can be seen here with plans to remove it later.
Then I thought I'd just paint just to the top of the wall, but that didn't really work out well either.
So in the end I slopped ink over the edge of the wall as can be seen here with plans to remove it later.
Removing stain outside the lines
After the ink dried I sanded off the in-between section edges to remove the stained wood. This didn't work quite as well as I'd hoped since the ink had penetrated the wood a fair amount due to it being rather porous.

Ready for varnish
I carried on with the sanding until I thought I had enough of the excess ink removed. That brought us to the state shown here where the inked edges don't look too bad.
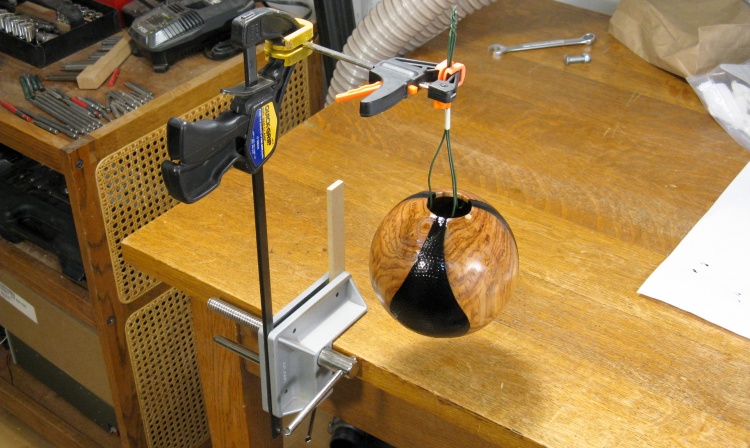
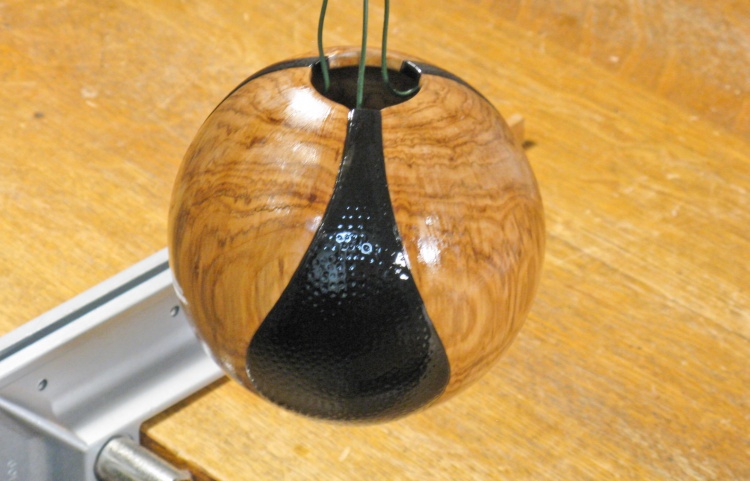
Varnished and hanging to dry
So then it was varnished inside and out. Rather than use my normal drying Jig, I made up a little 3-wire hanger that contacted inside so the bottom could dry unblemished.
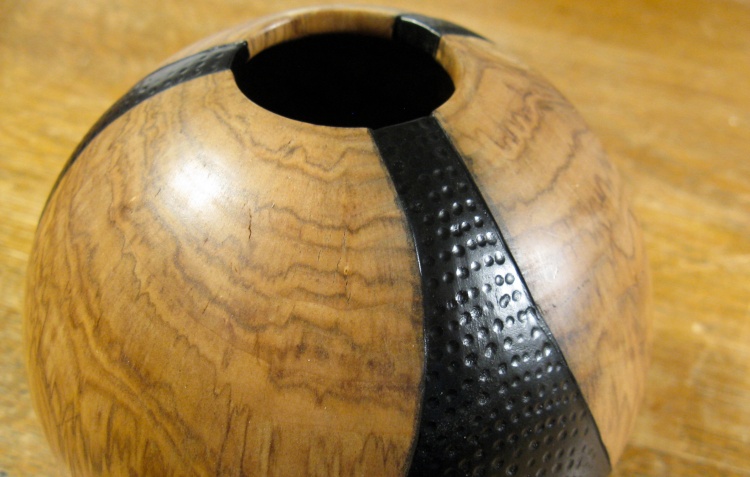
Edges seem to have gotten worse with varnish
Unfortunately the varnish seemed to bring out the stain and for example you can see an ugly "shadow" beside the teardrop area here.
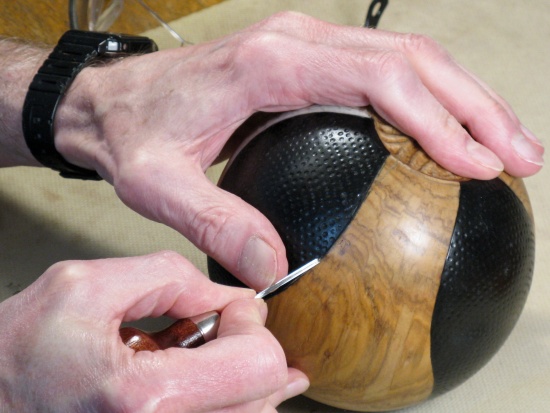
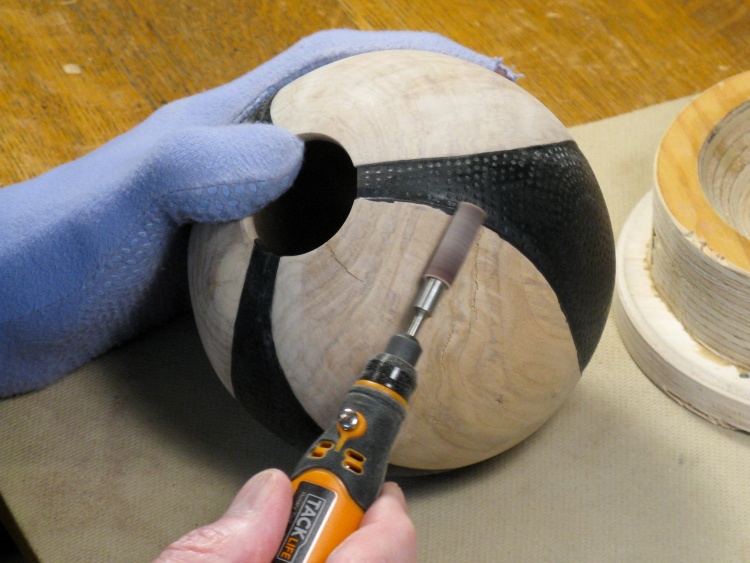
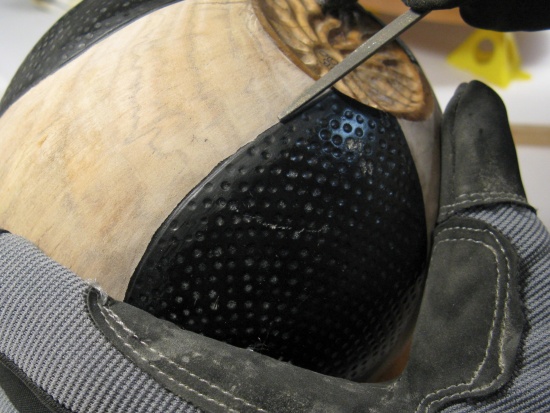
Plan B: Re-carve edges

...and re-sand them
OK, ready for re-varnishing
My solution was to carve away the wood beside the teardrop areas to remove any stained wood. That was done by first re-cutting the edge with a chisel and then shaping and sanding the edge, this time on the wood-grain side.
This was the result after the sanding. I didn't remove any extra varnish since the new coat should blend in with the old.
This was the result after the sanding. I didn't remove any extra varnish since the new coat should blend in with the old.

Yah - those edges aren't going to do it for me either
So then it was re-varnished. Unfortunately my sanding or the hoped-for blending of the varnish didn't really work out and the edges again looked ugly (although admittedly in a different way than before).
Very inconsistent edges after re-sanding wood portion
So to solve potential varnish-blending issues, I sanded off all the varnish from the wood-grain areas and re-cut the edges.
A close-up of the edge unfortunately shows very inconsistent coloring; that had to be fixed.
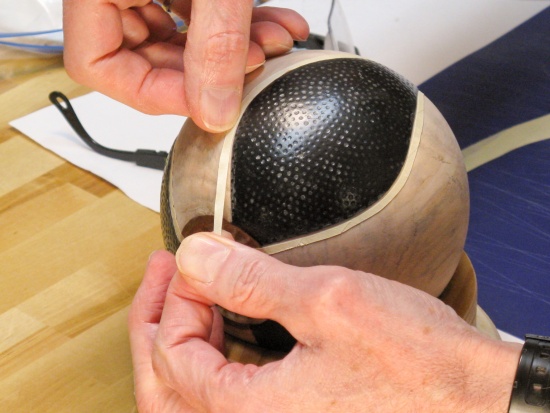
I decided to try masking in an effort to get a clean edge. Unfortunately masking a curved line on a curved surface is a bit tricky to achieve. I eventually developed a technique by cutting a thin curved piece of masking tape. The shape was such that it always curved slightly too far toward the teardrop shape so bending it to the proper curve tightened the edge next to the teardrop. This eliminated any folds on the edge that needed to be masked.
A close-up of the edge unfortunately shows very inconsistent coloring; that had to be fixed.
I decided to try masking in an effort to get a clean edge. Unfortunately masking a curved line on a curved surface is a bit tricky to achieve. I eventually developed a technique by cutting a thin curved piece of masking tape. The shape was such that it always curved slightly too far toward the teardrop shape so bending it to the proper curve tightened the edge next to the teardrop. This eliminated any folds on the edge that needed to be masked.
Plan C: Masking edges
...Then re-staining
Imperfect edges smoothed with file
...and then edges re-sanded
And hopefully this one will work out
The sequence above shows the "third time lucky" process. I used black paint rather than ink for the re-staining so there would be less absorption into the wood.
The resulting edges were still imperfect so I ended up using a fine triangular needle file to smooth the edges and then re-sanded. This finally gave decent-looking edges, and then once again the varnish went on.
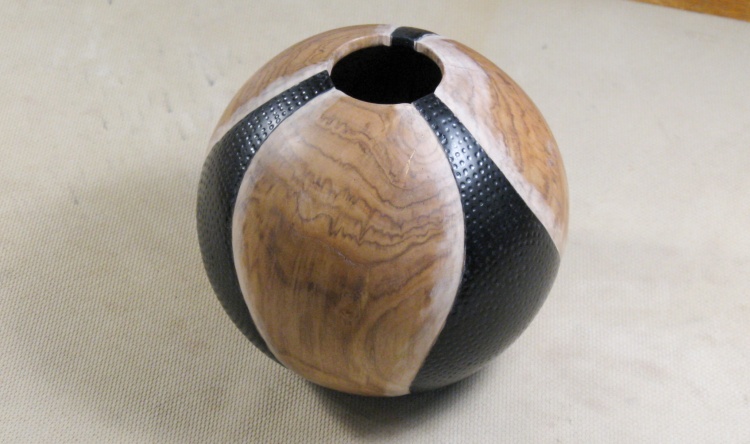
Success at last!
The resulting edges were still imperfect so I ended up using a fine triangular needle file to smooth the edges and then re-sanded. This finally gave decent-looking edges, and then once again the varnish went on.
Success at last!
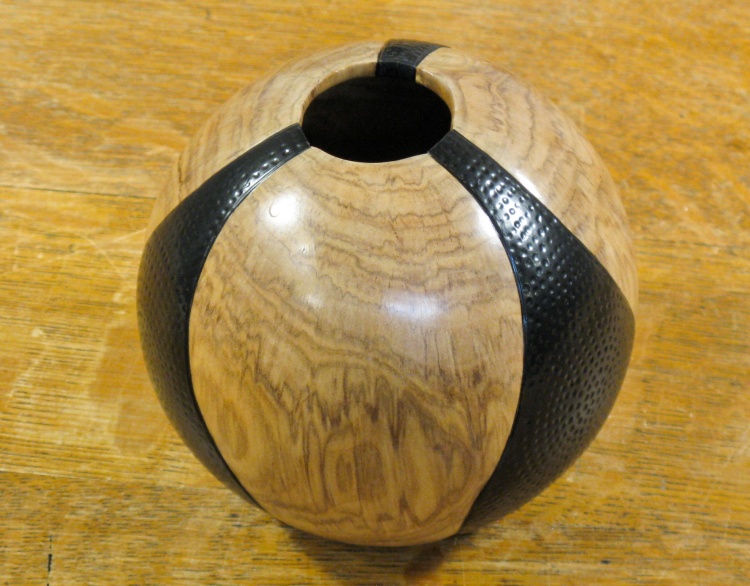
Done
And as a reward for reaching the bottom, here's some bonus content; a very brief "The Making Of":
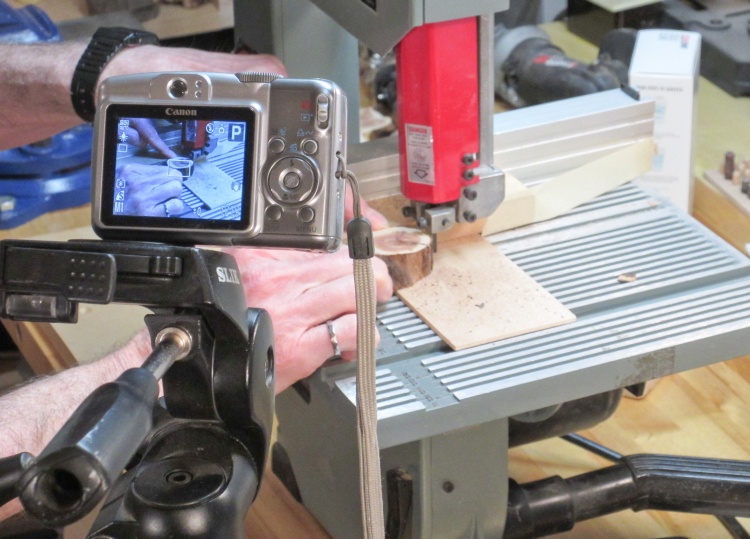
Tripod for "action" shots
A number of photos are taken hand-held but any "action" photos are taken with a tripod. I usually use a 10-second self timer to give me time to get from behind the camera back to the wood.
Adequate light is often an issue for photos and while I have six ceiling lights and nine separate (Luxo-style) task lights, there are often dark areas. In those cases a bit of post-processing works wonders to help show detail, although often at the expense of overall contrast (for example this photo had the darks lightened so the black tripod was more visible).
The camera has a pretty good auto-focus so most pictures are sharp. That's good since you can't fix an out-of-focus shot.
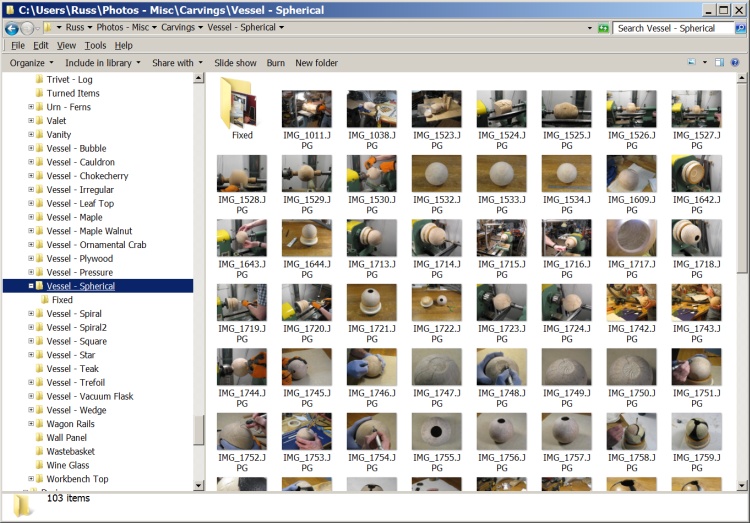
Directory with all the project photos
I start by going through my (digital) shoebox and gathering all the photos I've taken. That will vary from maybe 50 to over 200 for complex projects. I use a separate subdirectory for each project. Any sketches or figures go in there as well.
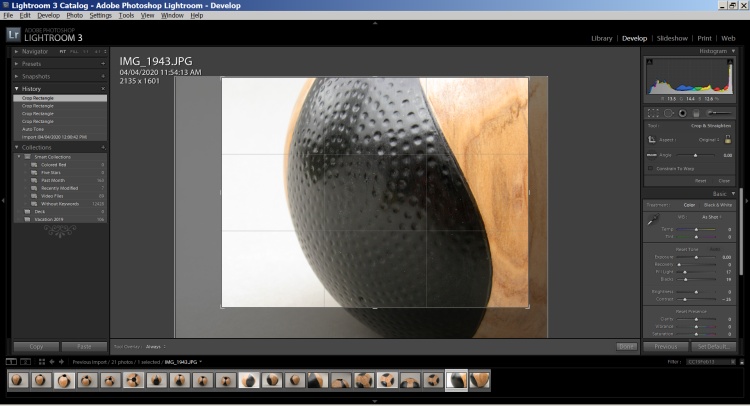
Fixing up the photos
The next step is to load all the project photos into a photo editor. I use Lightroom for this and in there I mark the photos I'm going to use and then fix any issues I can with color, composition, exposure etc.
Once the photos are ready to go, I export them to a "Fixed" subdirectory for that project and then use a simple photo editor program to set them to the resolution I use in the web pages and save them in the project HTML directory with a decriptive name.
Once the photos are ready to go, I export them to a "Fixed" subdirectory for that project and then use a simple photo editor program to set them to the resolution I use in the web pages and save them in the project HTML directory with a decriptive name.
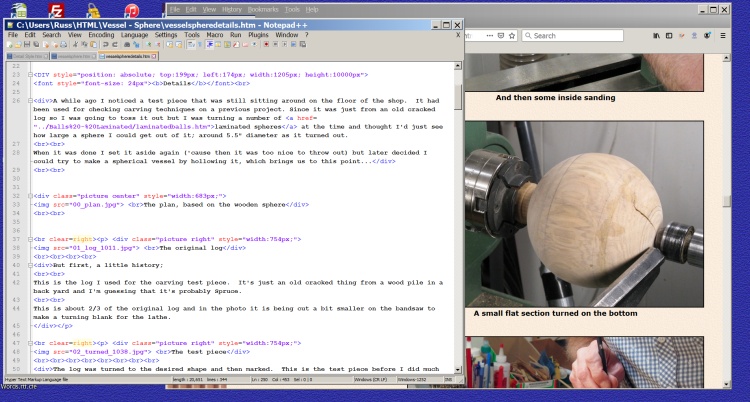
Sticking it all together with a text editor
At this point the photos are ready to go into the web page. These days I start with a similar previous web page and use a text/code editor (Notepad++) to modify the HTML to include the photos and add text. I'll often click back and forth between the editor and a browser to make sure things look OK as I go along.
I make a list of things to change so I can keep track of which page links to which and that the "Home" and "Stuff" pages are updated. So for a single web page, I usually need to modify three others.
I make a list of things to change so I can keep track of which page links to which and that the "Home" and "Stuff" pages are updated. So for a single web page, I usually need to modify three others.
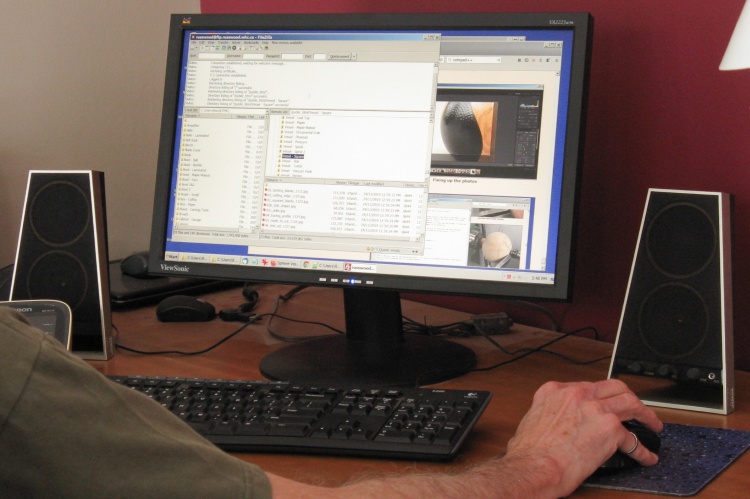
Uploading the new web pages
Finally after everything looks good, I'll upload the new web pages (and any other that needed to be changed) to my web site. I use Filezilla for that, which works pretty well.


