I was looking for a lathe project that also involved carving (which I actually prefer), and came up with this vessel which was based on some deeply-carved pieces I'd seen in a woodturning book. As mentioned on the main page, I started with a piece of Birch from the back yard that I had preserved several years previously.
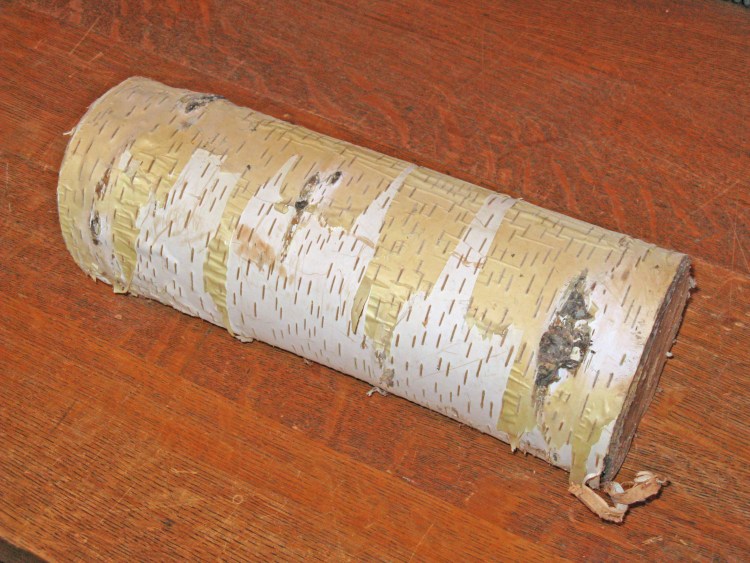
Birch log
This is the original piece I started with.
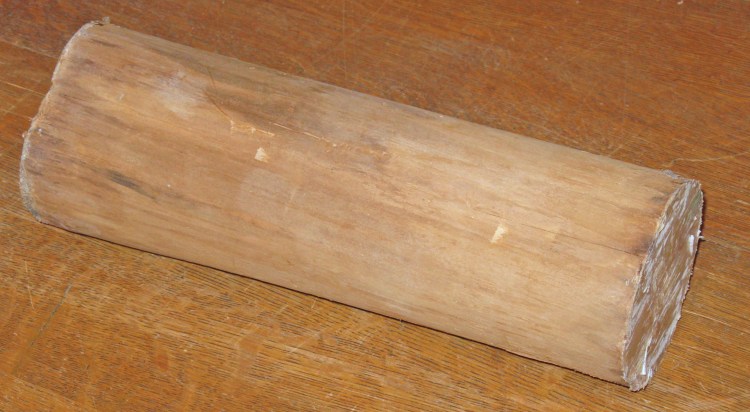
De-barked birch blank
...which stripped of the bark looked like this.

Basic shaping done
The blank was mounted to a 6" faceplate with screws that went into the larger section at the end. This lovely soft-focus photo shows the piece having been shaped to the desired contour on the outside.
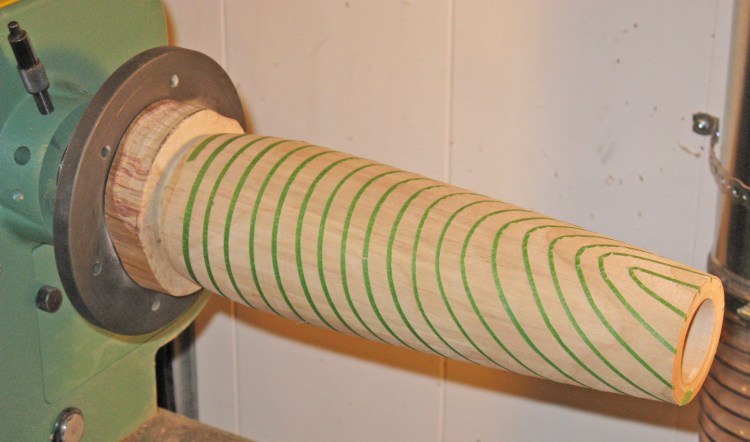
Marked for carving
Here the vessel has been hollowed, and marked for carving. The pattern is a spiral which starts horizontal at the bottom and has has an increasing tilt toward the top.
In order to get a smooth-ish spiral of increasing tilt, I marked the body on one side with evenly-spaced lines and on the opposite side with lines spaced evenly, but further apart. I then used a thin strip of masking tape to make the spiral, connecting the lines on each side.
In order to get a smooth-ish spiral of increasing tilt, I marked the body on one side with evenly-spaced lines and on the opposite side with lines spaced evenly, but further apart. I then used a thin strip of masking tape to make the spiral, connecting the lines on each side.
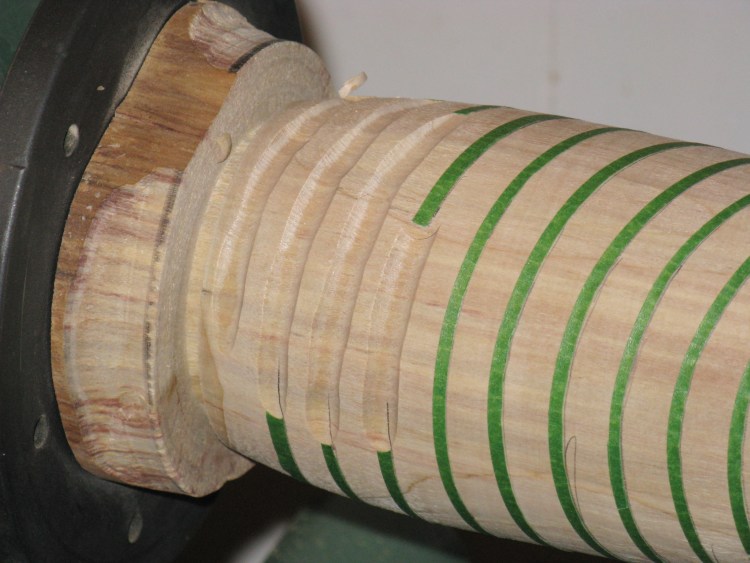
Carving started
This shows the start of the carving, with only a few shallow cuts made. Here the tape still in place, although I eventually just traced the edge of the tape with a pencil and then removed it.
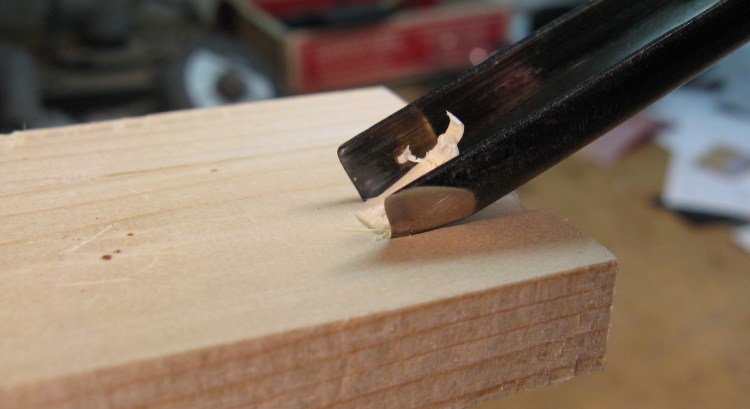
Gouge cutting
Without thinking about it too much, I sort of assumed that I'd just use an appropriately-sized circular gouge to form the spiral, and they would have a nice cross-sectional shape determined by the gouge. Nope. The fairly shallow cut shown here are about as deep as it is feasible to make without widening the cut. The cutting edge of a conventional curved gouge is the diameter of the inside of the gouge, and of course the outside is larger, so if you try to go deeper, the larger outside of the tool interferes with the edges of the cut. A shallow cut works since the tool is at an angle and the sides of the shallow cut don't interfere with the tool much. So for any given gouge, a deep cut needs to be wider than the tool edge.
Technically, this conventional gouge is called an "outcannel" design, meaning the bevel is on the outside. You can also get "incannel" gouges with the bevel on the inside. An incannel gouge would be able to cut as deeply as desired since the outside is cylindrical. However, they are rather obscure tools for special uses, and are tough to use for most things and are also much harder to sharpen.
Consequently the shapes were carved in using a gouge with a smaller diameter than the size of cut I wanted, and then the cut was widened by trimming the sides to get to the desired shape.
Consequently the shapes were carved in using a gouge with a smaller diameter than the size of cut I wanted, and then the cut was widened by trimming the sides to get to the desired shape.
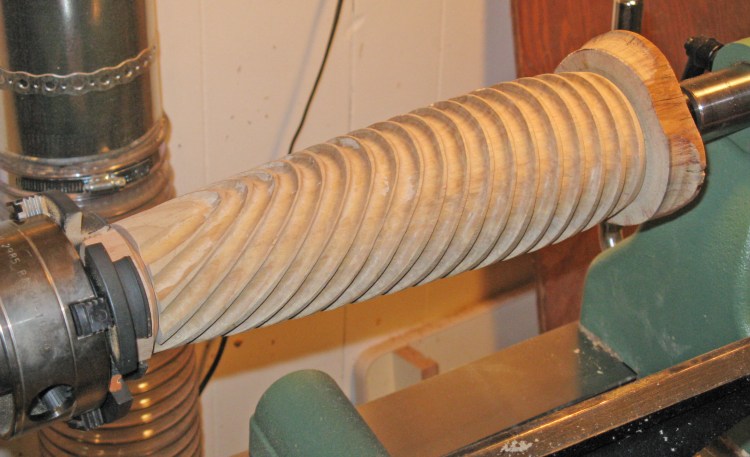
Carving done
For a stable hold on the wood while carving, I locked the spindle of the lathe to keep it from turning (with the largish black pin visible a few photos up) and also made a plug to fit in the end of the vessel.
Here the piece has been reversed on the lathe and is ready to have the mounting base removed and the bottom formed.
Unlike many of my carvings, this one was left with a "tool finish" for a somewhat more rugged look, so no sanding of the main spiral was done.
Here the piece has been reversed on the lathe and is ready to have the mounting base removed and the bottom formed.
Unlike many of my carvings, this one was left with a "tool finish" for a somewhat more rugged look, so no sanding of the main spiral was done.
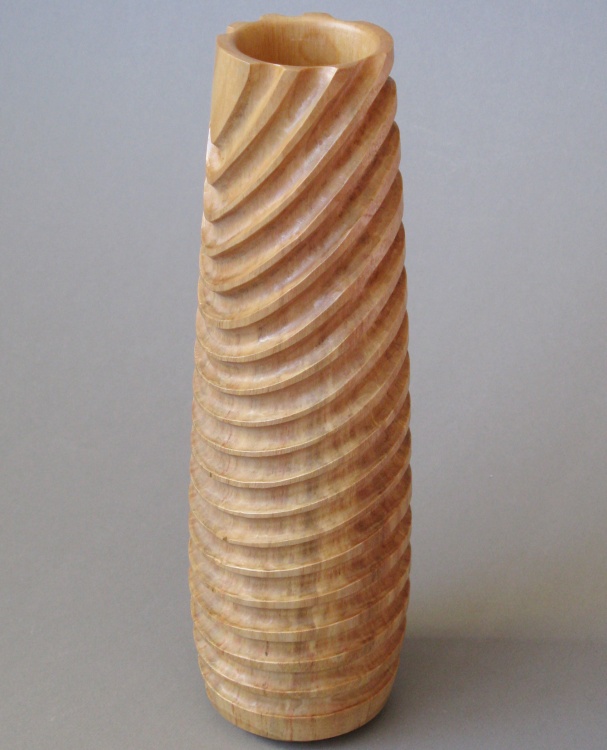
Completed and varnish applied


