The plan was to make something with a carved surface so I had that in mind when considering the design of the spoon holder. As usual I looked at a bunch of options for the shape and ended up with the belled shape shown below, largly derived from the Maple vessel I had made a few years ago. I planned the holder with enough room to handle our current bunch of spoons and sized the top to support the spoons at a "nice" angle (the yogurt container resulted in them being rather splayed out).
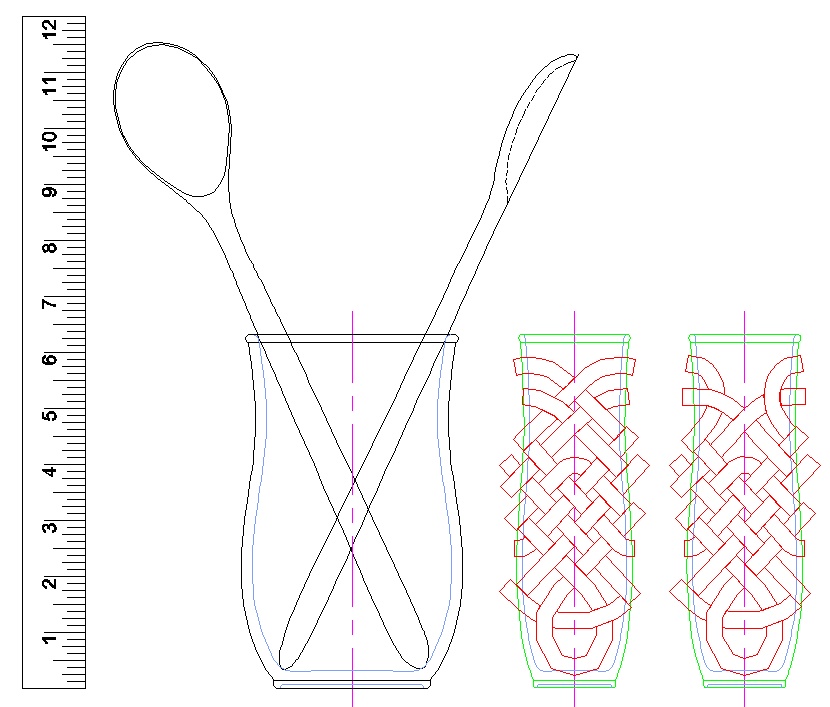
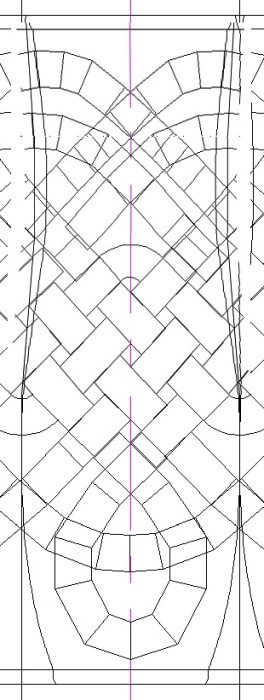
The profile, along with pattern segments
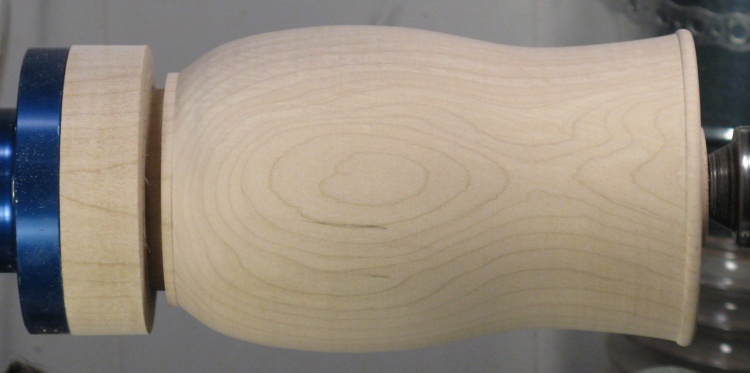
Basic Vessel
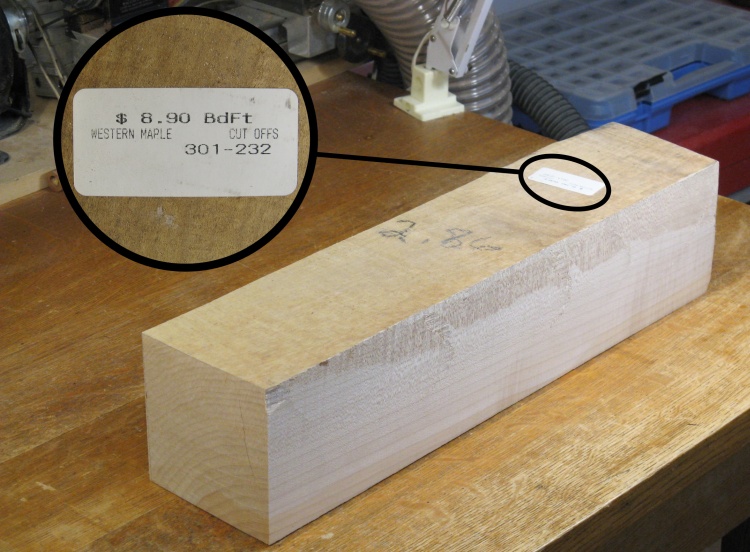
More than enough Western Maple
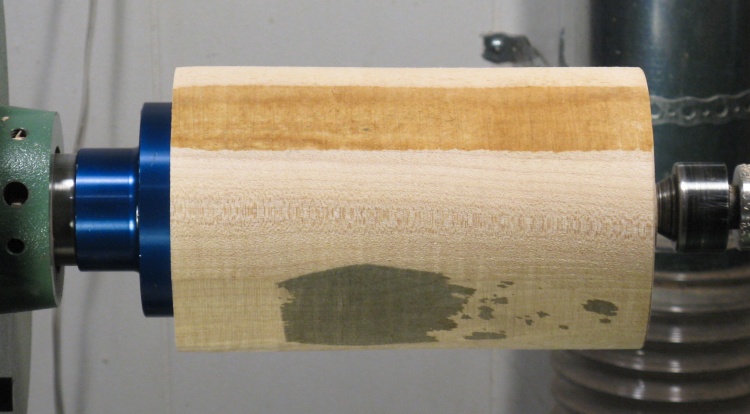
I had a large piece of Western Maple and this seemed like a good application for it.
The piece was pretty long so even after using some of it for this project, there will still be enough to make some future tall vessel from the leftovers.
The piece was pretty long so even after using some of it for this project, there will still be enough to make some future tall vessel from the leftovers.
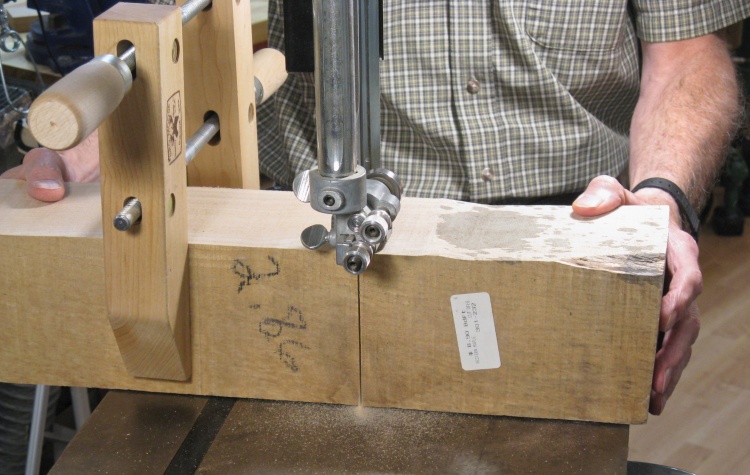
Chopping off a spoon-holder-sized length
A simple cut on the bandsaw gave me the length that was needed (plus an extra inch for mounting screws).
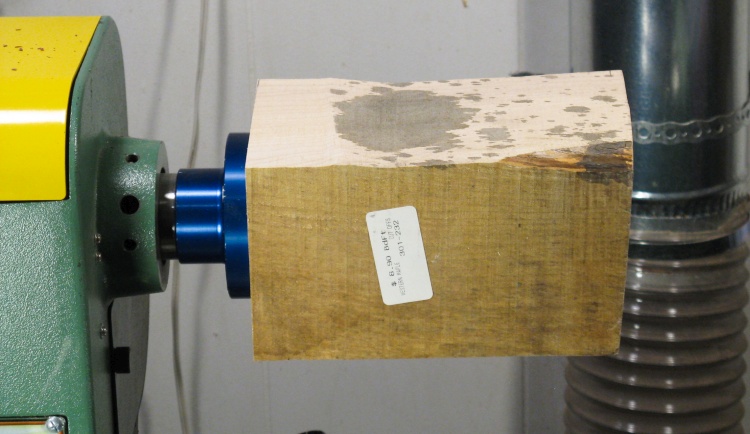
Mounted on the lathe
The cut was decently straight and square so I was able to mount the faceplate directly to the cut surface. Here it is mounted to the lathe.
Partially rounded
I was planning to do some test carvings and what better wood to use than the actual stuff?
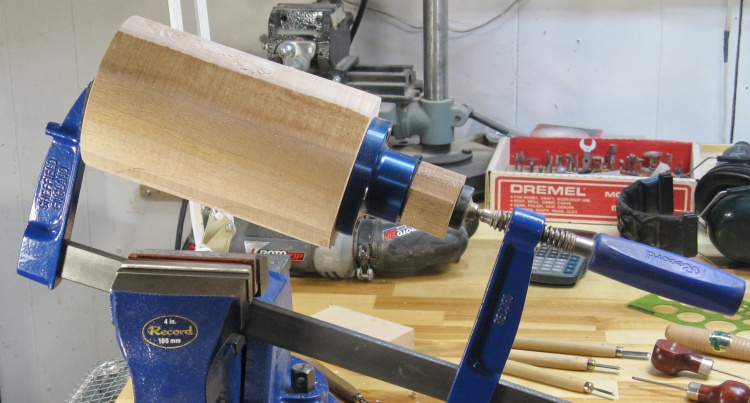
I just did a partial rounding so each corner provided a curved surface upwards of 2" wide.
I just did a partial rounding so each corner provided a curved surface upwards of 2" wide.
Mounted for some test carving
The wood was pulled off the lathe and clamped - faceplate and all - to my bench vise with the help of a large bar clamp.
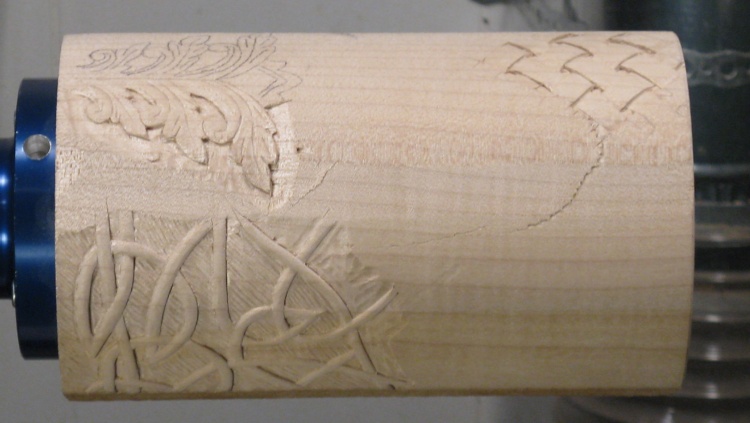
Then it was a question of what to carve. An early thought was just to have it crowded with simple blossoms. I tried out carving a few but they didn't really do it for me.
Another possibility was a more antique-y looking design with several rings of carving, the first being a splay of Acanthus leaves. That didn't look too bad but turned out to be quite a bit of work [1-month-in-the-future-Russ: "Yah - no worse than what I ended up with"]. There was also a bit too much relief and the wood turned out to be a bit brittle so there were a couple broken pieces even in the small section I had done.
I then considered a weave motif. I liked the look of that one and it was less fragile the the previous design.
Finally I tried a Celtic knot pattern. This particular one I tried had pointed loops which didn't look as good in wood as on paper. But even disregarding those it looked like it would be difficult to get the pattern looking neat.

Maybe blossoms? Nah.
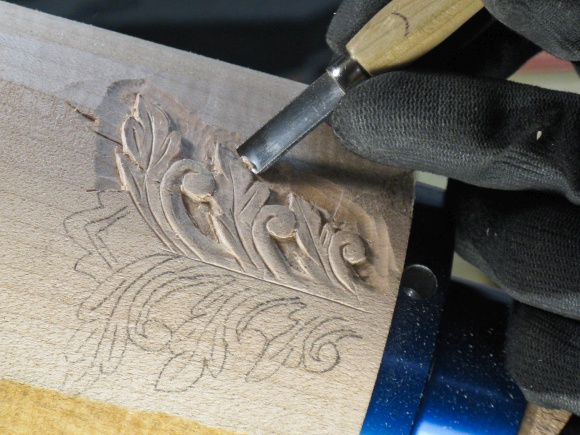
Some fancy Acanthus leaves? Too much work.

Weave looks not bad
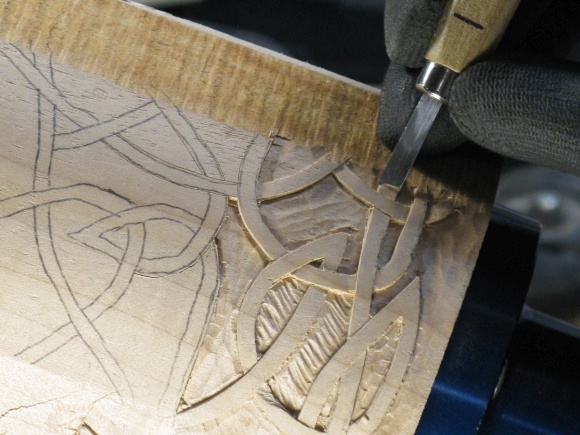
Or perhaps a big Celtic knot design?
Back on the lathe
After discussing with Sue, I decided on a hybrid of the weave and the knot designs. I'd make a weave in the center with knotted sections on top and bottom, sticking with a wider "fiber" which I should be able to get looking OK. Oh, and get rid of the pointy loops.
So then it was back onto the lathe for the real turning.
So then it was back onto the lathe for the real turning.
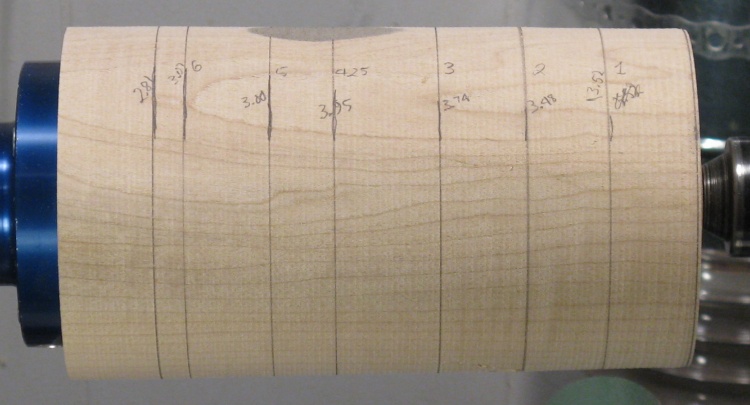
Fully rounded, with guide lines added
Step one was to finish the rounding which turned all my nice test carvings into sawdust. I then pencilled reference lines onto the wood (along with the appropriate diameters) to aid in shaping the vessel.
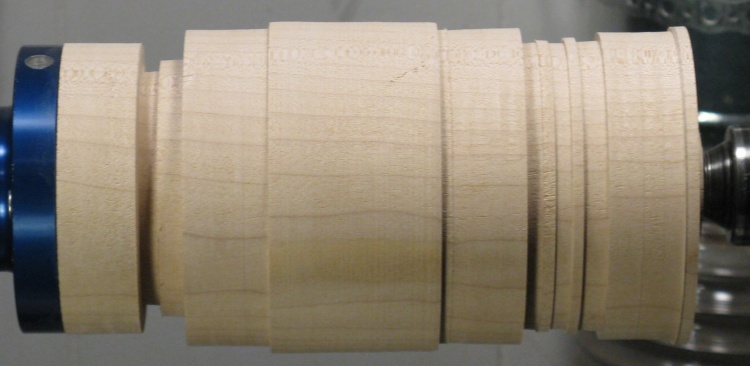
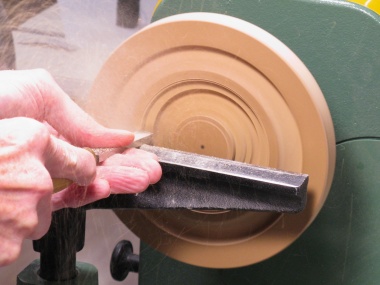
Reference diameters cut
A parting tool and wide chisel were used to reduce the diameters to the proper sizes.
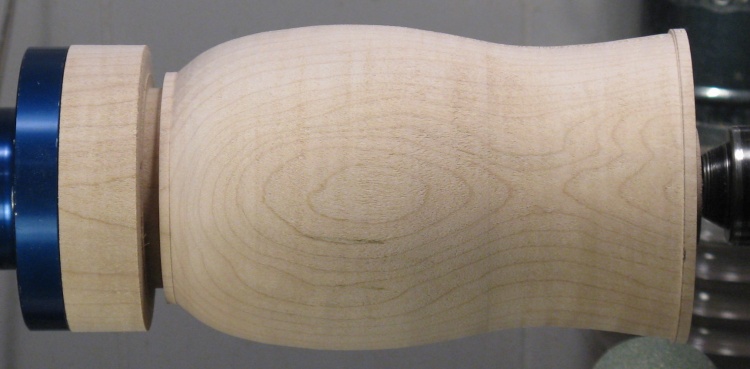
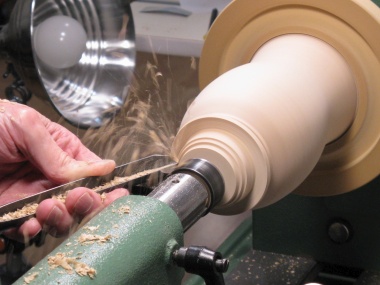
Shaping done
And then a bowl gouge followed by scrapers got the outside to the final shape.
...and outside sanding
And finally a bit of sanding got the outside looking respectable.
Hollowing
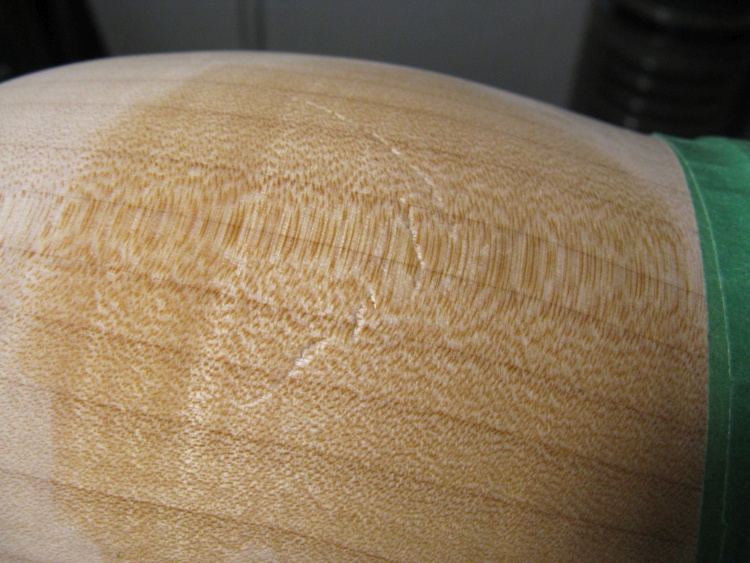
That shallow crack gets some glue
Before starting on the hollowing I thought it prudent to stabilize a crack on one side that was at a shallow angle to the surface. It was fairly tight so I used a thin sliver of brass to push glue into it as far as it would go.
The surface was wiped with a moistened cloth to remove excess glue and the wood is still damp in this photo (hence the more-obvious woodgrain).
The surface was wiped with a moistened cloth to remove excess glue and the wood is still damp in this photo (hence the more-obvious woodgrain).
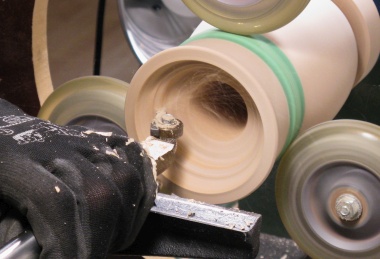
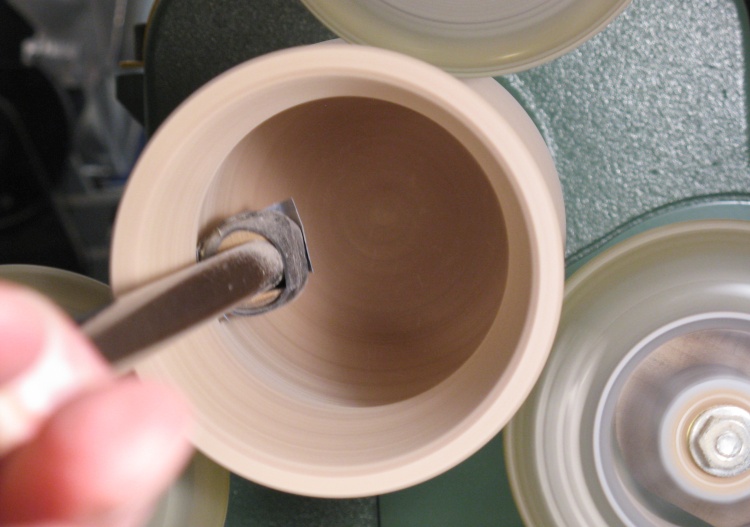
Then the steady rest was deployed along with a taped-on ring of hard plastic to prevent the wheels marring the wood and I employed my Standard Operating Procedure for the hollowing; The center was drilled out and the hollowing tool was used to clear out the inside. The walls were left fairly thick at around 1/4". I prefer thin-walled vessels but I prefer even more to avoid punching through the walls while carving.

Initial drilling
Hollowing
...and done
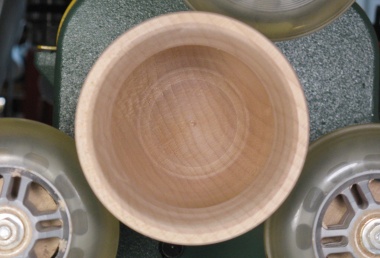
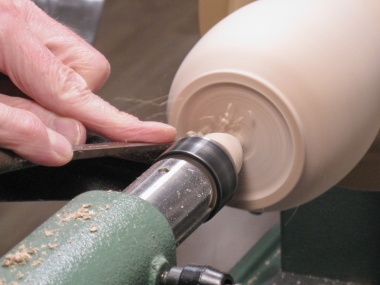
Sanding the inside
And then of course the inside was sanded.
Hollowing this rather simple vessel took maybe an hour, but it was actually several hours of sanding before the inside looked decent.
Hollowing this rather simple vessel took maybe an hour, but it was actually several hours of sanding before the inside looked decent.
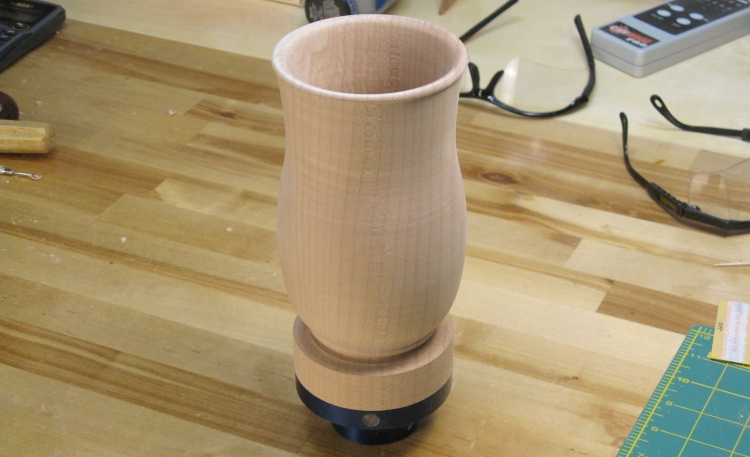
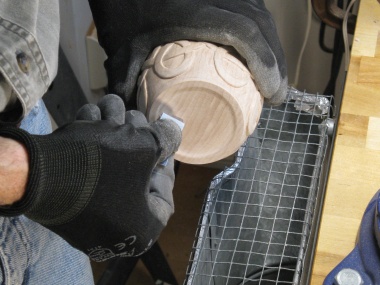
Off the lathe for a turning break
The next step was to remove the extra wood at the bottom - the part holding the faceplate screws.
The wood took a break on the workbench while the lathe was set up to do the bottom.
The wood took a break on the workbench while the lathe was set up to do the bottom.
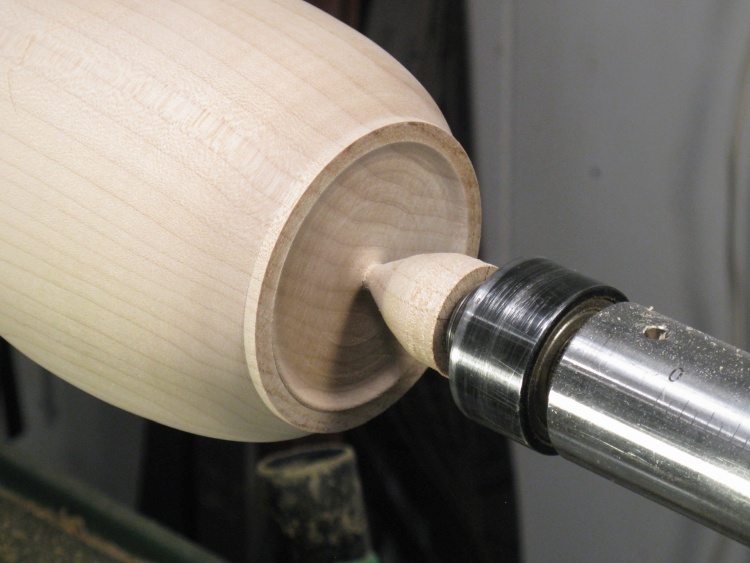
Lathe set-up consisted of making a jam chuck to hold the top. The particular MDF disc seen here has been used several times before but there was enough wood in the right spot to cut a slot to hold this vessel too. Then with the vessel held to the jam chuck using pressure from the tailstock, I removed the extra wood and then cut a concave area in the bottom to form a circular foot.
Cutting a jam chuck
Removing extra bottom wood
Forming a foot
Bottom shaping done
This is the completed bottom. After this shot I cut off the big nub that was left over and then sanded the center smooth.
I wasn't particularly scrupulous about centering the bottom of the vessel and the extra little lip on the lower-left is the result. But that should essentially disappear with a bit of bottom sanding.
I wasn't particularly scrupulous about centering the bottom of the vessel and the extra little lip on the lower-left is the result. But that should essentially disappear with a bit of bottom sanding.
Carving
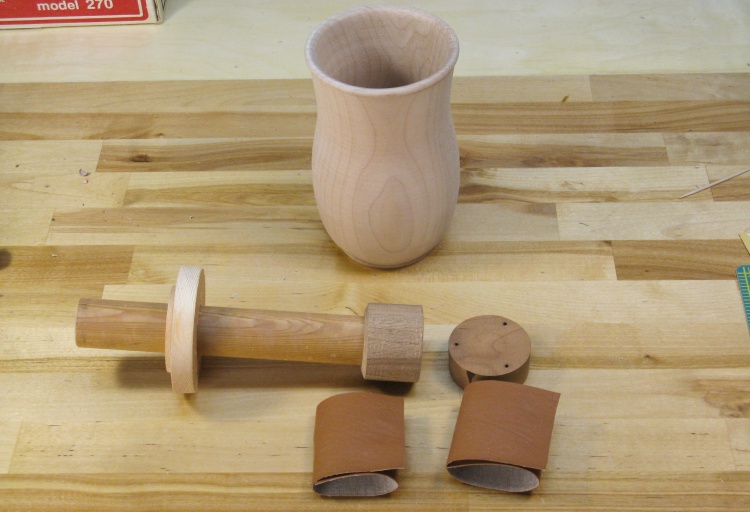
The vessel along with clamping jig pieces
This photo shows the ready-for-carving vessel along with some extra bits that will be used to hold it in place for carving.
The dowel/disc/cyllinder assembly will fit inside with a piece of material to pad the bottom. The disc provides support at the top of the vessel. Another thinner disc and pad will be used on the outside of the bottom.
The dowel/disc/cyllinder assembly will fit inside with a piece of material to pad the bottom. The disc provides support at the top of the vessel. Another thinner disc and pad will be used on the outside of the bottom.
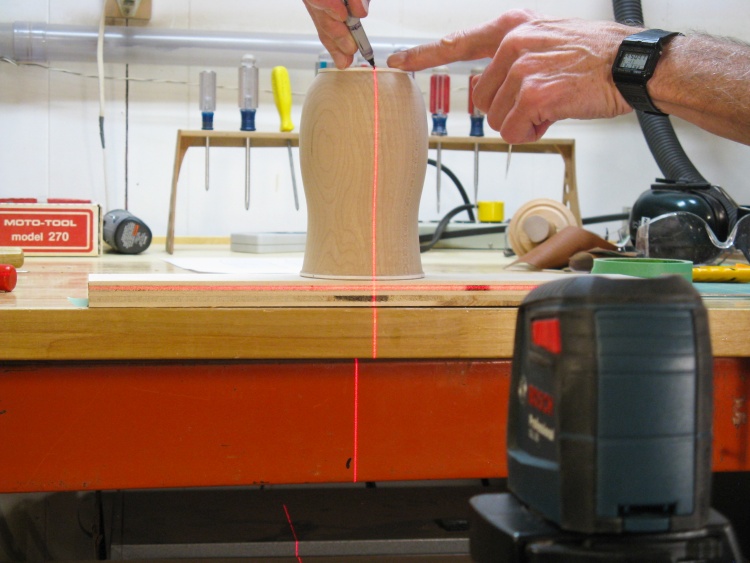
Marking the bottom to match the top
Before starting I needed to divide the vessel into six radial areas and mark the location of the...well obviously not quadrants...maybe hexants? I know - sectors! That sounds science-fictiony, like "Check sector 3 for alien incursions". Yah.
But meanwhile back here on Earth I added some white tape for contrast and marked the six sectors on the top using a paper plan, then deployed the levelling laser (out-of-focus foreground thingy in this shot) to help transfer those marks to the bottom.
But meanwhile back here on Earth I added some white tape for contrast and marked the six sectors on the top using a paper plan, then deployed the levelling laser (out-of-focus foreground thingy in this shot) to help transfer those marks to the bottom.
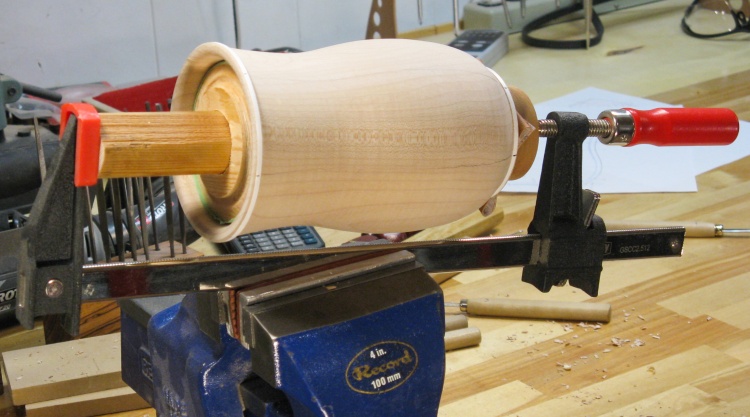
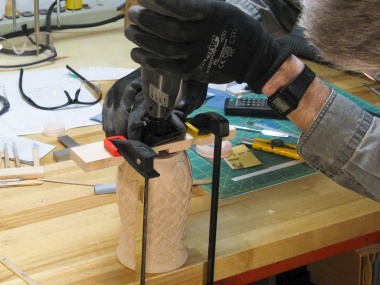
Mounted in the vise and ready for carving
The vessel blank was assembled with the mounting jig and that in concert with a screw clamp squeezed the bottom to hold it in place. The clamp was mounted in the bench vise to hold it at a good height for carving.
Several years ago I'd made a table-top carving jig that lets me sit down and carve but I actually prefer to stand since I can more-easily move around to carve at different angles.
Several years ago I'd made a table-top carving jig that lets me sit down and carve but I actually prefer to stand since I can more-easily move around to carve at different angles.
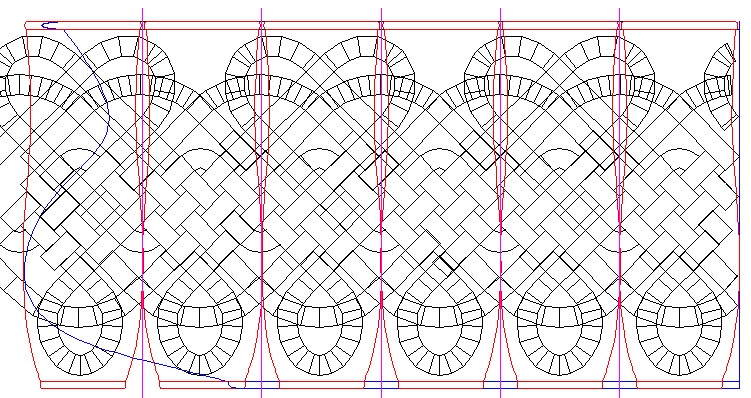
The flat version of the pattern
This is the planned carving pattern and if the vessel was a nice cyllinder, I could just wrap it around and trace it on.
However the sides of the vessel are curved which means the diameter varies from top to bottom so I was going to have to distort the plan so it would wrap exactly around the vessel everywhere.
I needed the pattern section between adjacent purple lines to squeeze into the red-outlined shape. I'd keep the widest part unchanged and modify other parts to be narrower.
Black - Pattern
Blue - Total vessel circumference
Red - 1/6 of vessel circumference
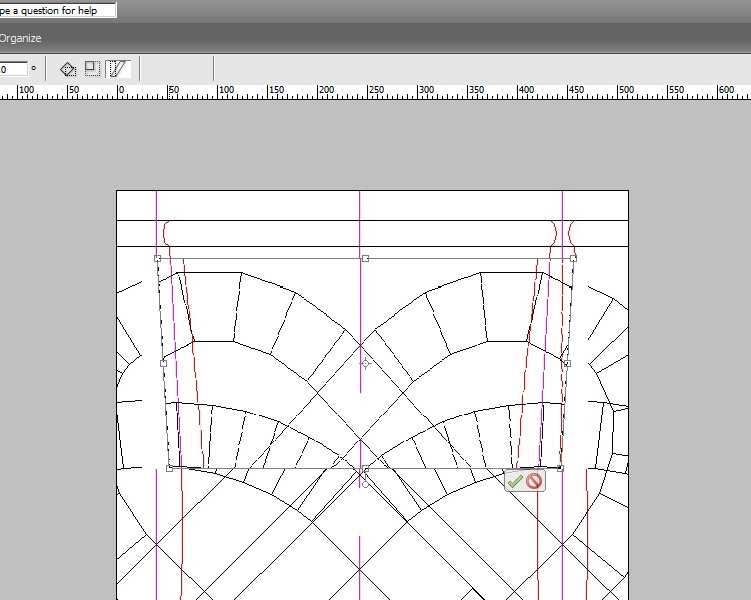
Distorting the pattern to fit the vessel's variable diameter
My CAD program had no means to do the distortion so I used a photo editing program (a 15-year old version of Photoshop Elements that came with a camera or scanner or some such thing). I grabbed a screenshot of a portion of the pattern, distorted it with the Elements program and then pasted it back into the CAD program so I could trace over it for the new pattern.
This photo shows one section of the pattern being adjusted so the originally-straight purple lines are skewed to roughly match the red 1/6-circumference curved shape.
The adjustment shown affects only the top part of the pattern so this was followed by appropriate adjustments to other parts.
This photo shows one section of the pattern being adjusted so the originally-straight purple lines are skewed to roughly match the red 1/6-circumference curved shape.
The adjustment shown affects only the top part of the pattern so this was followed by appropriate adjustments to other parts.
This image shows the before and after-distortion pattern, toggled by clicking "Flip".
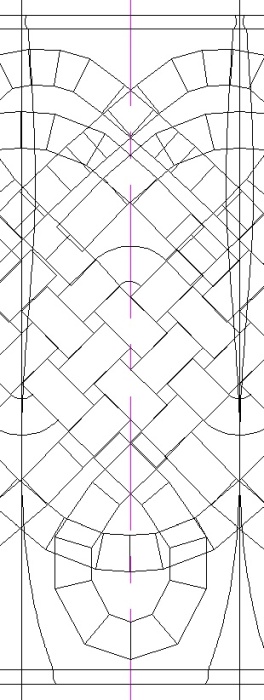
I didn't bother distorting the bottom since there was enough room for the undistorted loops.
I didn't bother distorting the bottom since there was enough room for the undistorted loops.
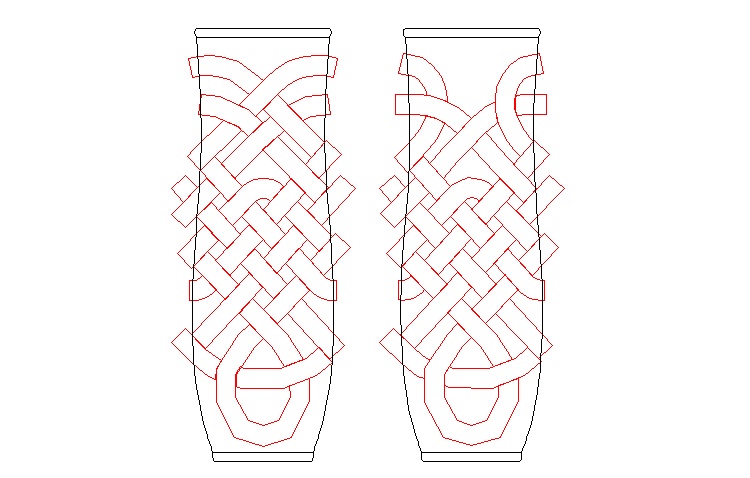
The properly distorted patterns
And then after tracing over the distorted photos of the pattern to get consistent line widths and define the over/under crossings, the result was these two corrected patterns.
The overall design repeats so alternating these two patterns three times each will exactly cover the vessel.
The overall design repeats so alternating these two patterns three times each will exactly cover the vessel.

Cutting out the patterns
The two patterns above were printed and then cut out as seen in this photo.
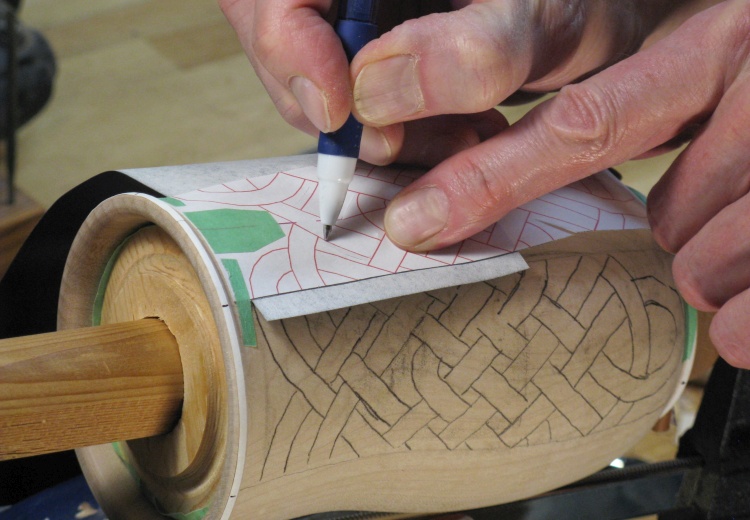
...and tracing them on
Then each pattern was taped in position using the sector marks and the design was traced onto the wood using carbon paper.
For patterns that I need to trace multiple times, I use this ball-point pen that is out of ink so I don't end up obscuring the lines. I just need to try to remember which parts I've already traced.
For patterns that I need to trace multiple times, I use this ball-point pen that is out of ink so I don't end up obscuring the lines. I just need to try to remember which parts I've already traced.
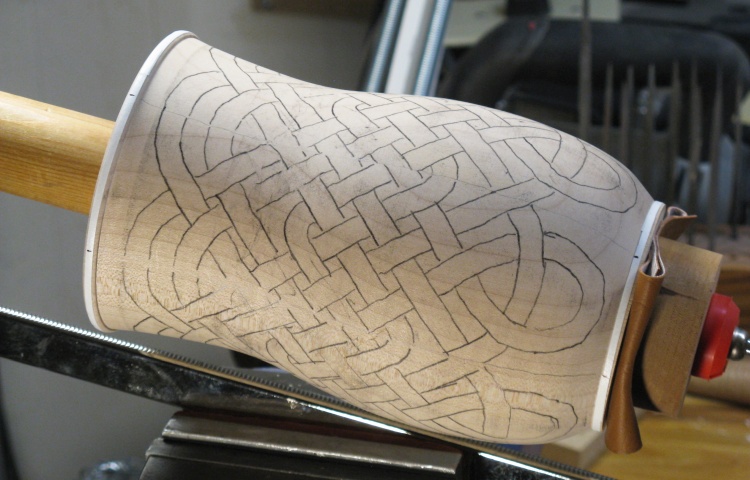
Fully marked
This shows the vessel with the patterns traced on all around. There are some gaps due to the edges of the patterns but I'll just pencil the missing lines in.

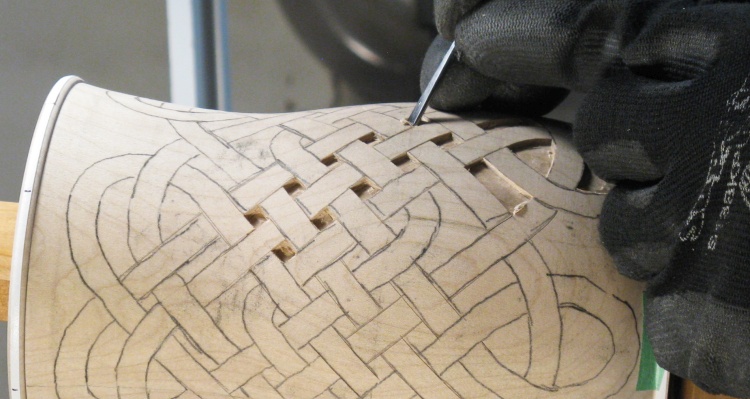
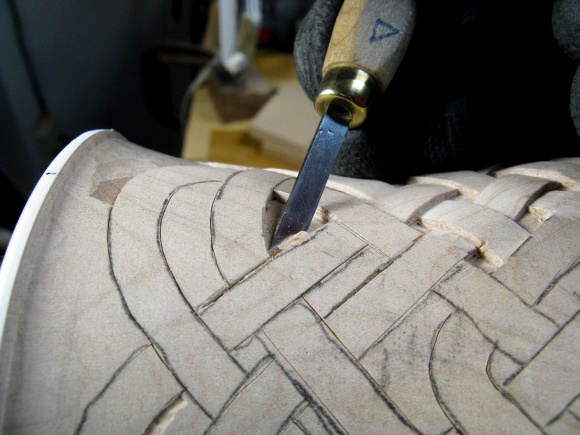
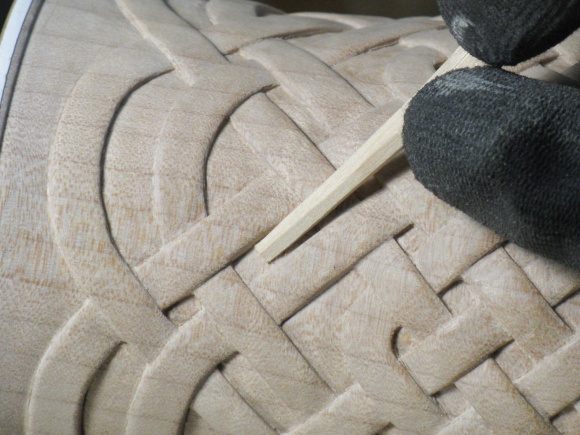
Slicing along an edge
I did the carving one sector at a time with the first step being to cut along the pattern edges.
I made a straightedge from a flexible piece of brass and where possible I used that to keep the cuts straight as in this shot.
I made a straightedge from a flexible piece of brass and where possible I used that to keep the cuts straight as in this shot.
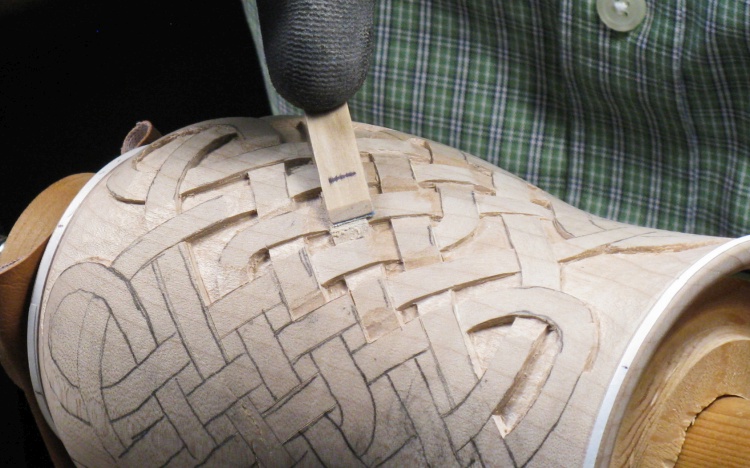
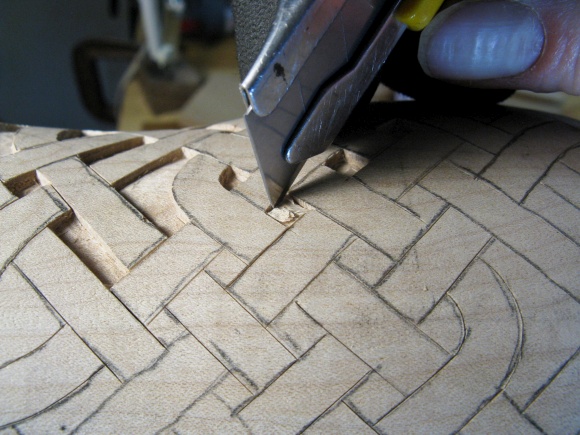
Excavating between fibers
Once the pattern outlines were cut I started excavating the between-fiber areas with small chisels.
I used the knife to re-cut the edges of each opening one or two more times in the excavation process to help keep the edges straight.
I used the knife to re-cut the edges of each opening one or two more times in the excavation process to help keep the edges straight.
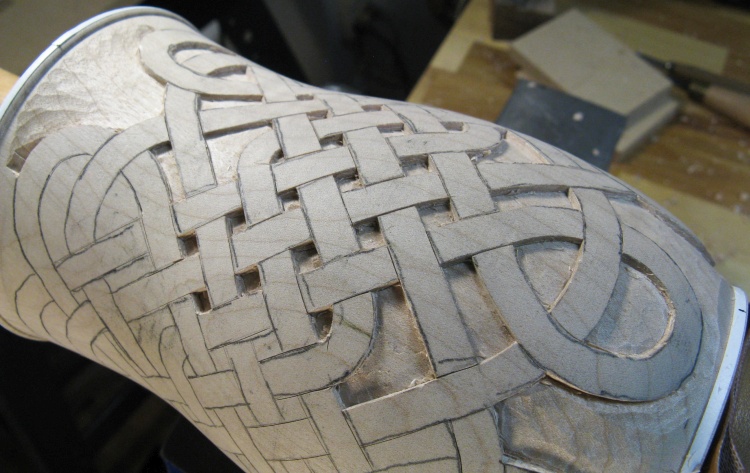
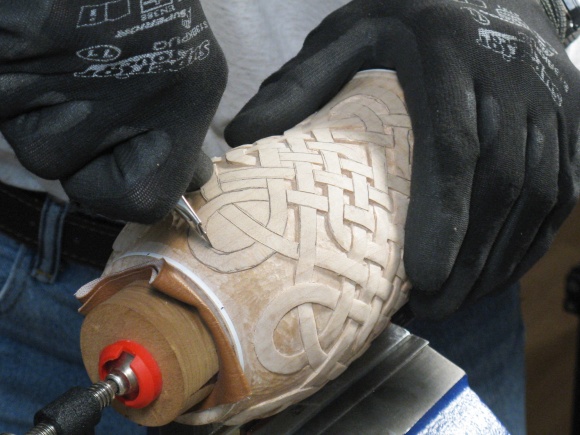
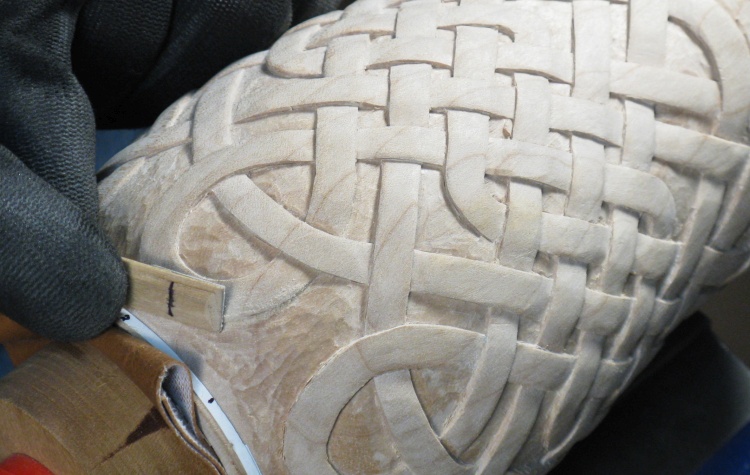
One sector completely excavated
This shows the first sector with all the excavating done.
The holes are about 0.08" deep and the smallest are maybe 0.1" on a side.
The holes are about 0.08" deep and the smallest are maybe 0.1" on a side.

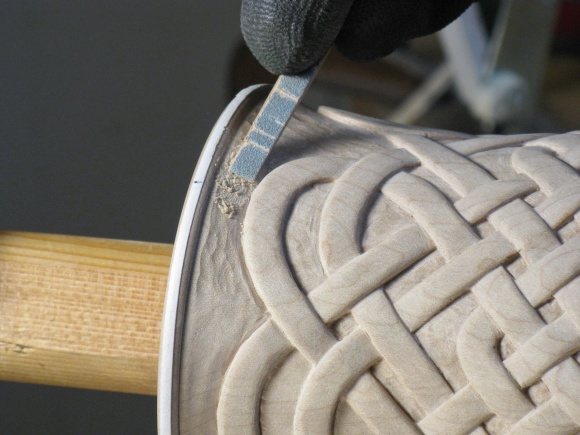
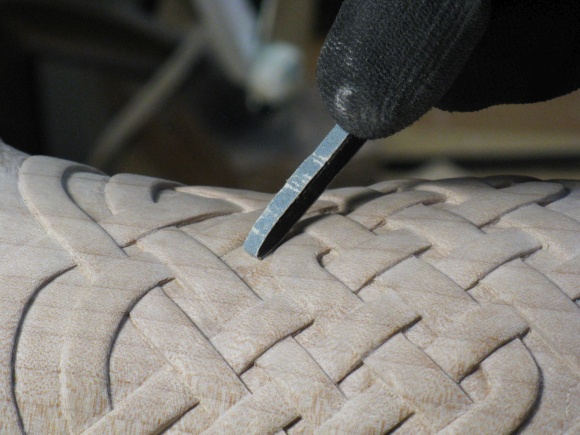
Bevelling for the "under" fiber crossings
The next step was to bevel the edges of the fibers for the "under" parts, done with a small straight chisel as shown here.
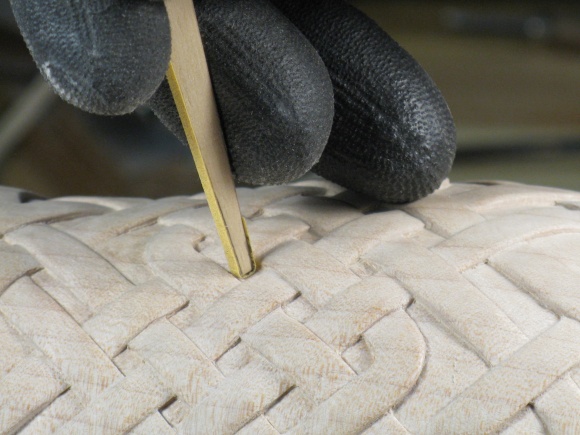
Sanding smooth the carved ends
After the chisel work was done the ends were smoothed by sanding.
I used this popsicle-stick based sanding jig on the weave pattern. It has a flat face with a strip of sandpaper held on with double-sided tape.
I used this popsicle-stick based sanding jig on the weave pattern. It has a flat face with a strip of sandpaper held on with double-sided tape.
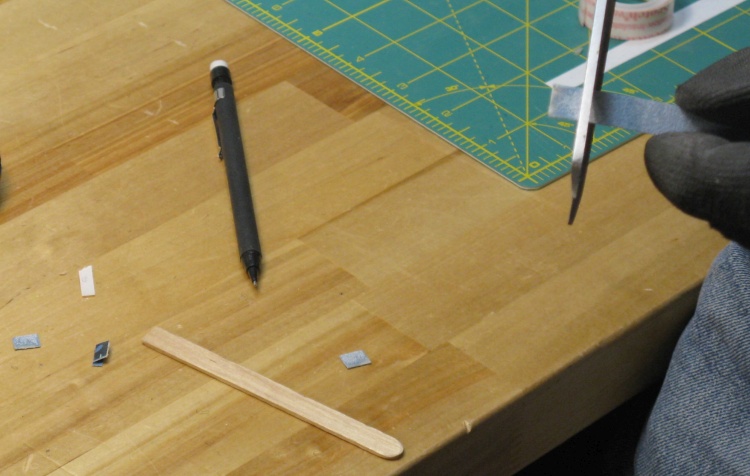
Cutting off a worn section of sandpaper
Most of the wear on the sandpaper was at the end so every few weave sections I pulled it off the stick, cut off the worn section and stuck it back on.
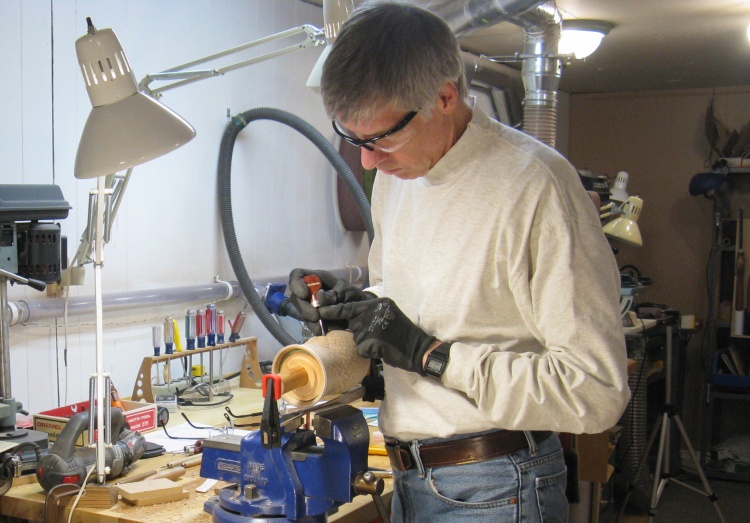
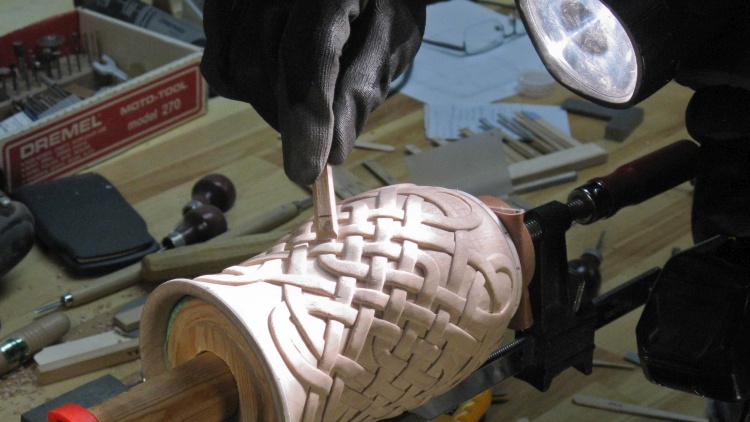
The standing carving position
This is Yours Truly wielding a small chisel while excavating a hole. The white Luxo-style lamp gets moved around every several seconds to get light at the best angle to the piece I'm working on.
In a wide-ranging interview with the Chief Project Statistician, it was revealed that he prefers a darker beer and paperbacks to e-books. Of course the project statistics were also covered which revealed that there were 294 little "under" bevels to be carved and approximately 138 little between-fiber holes to be excavated. The total length of the woven "fiber" was approximately 193" or 16'.
When questioned on the uncharacteristic "approximate" quantity of the holes, it was revealed that this was due to the slightly ambiguous definition of a hole - do the single top and bottom "holes" constitute only 2 or would they be closer to the 12 sections they were carved in? Such are the issues that keep statisticians up at night. While he ponders that, here are a few more in-progress shots;
When questioned on the uncharacteristic "approximate" quantity of the holes, it was revealed that this was due to the slightly ambiguous definition of a hole - do the single top and bottom "holes" constitute only 2 or would they be closer to the 12 sections they were carved in? Such are the issues that keep statisticians up at night. While he ponders that, here are a few more in-progress shots;
Excavating a triangular hole
Re-cutting hole edges
Cutting inside a loop

Excavating the loop
Sanding
The carving activities were complete after a bit less than 2 weeks at my not-very-intense rate and then it was time for the sanding. Of course I had already done some sanding to smooth out the over/under sections of the lattice, but those few hundred spots were just an amuse-bouche to the upcoming multi-course sanding feast.
Starting on the fiber-shaping sanding
So on to the first course;
The corners of the pattern were square and somewhat imperfectly straight so I set about cleaning them up by smoothing and rounding the edges and corners. I did the shaping with 180 grit and then smoothed things out with 220 grit.
For this process the sandpaper wore out pretty quickly so unfortunately I ended up needing to trim off the worn end of the sandpaper on both popsicle-stick jigs for every section that I did. It took around 4 or 5 minutes per section for the 147 sections.
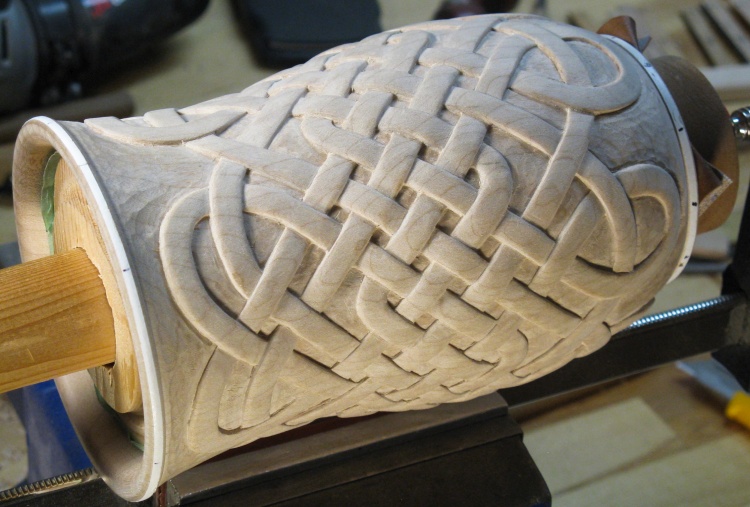
Shaping all done
A week or so worth of shaping got through all the little pieces on the vessel and this shot shows the more-regular pattern that emerged.
In a relief woodcarving like this one, the areas between the carved bits are called the "ground". My ground was pretty bumpy from the chisel marks and looked rather unfinished.
So the next course in the sanding feast was to smooth out the ground. That was relatively straightforward for the top and bottom areas but the little holes between the fibers needed to be done as well and those ranged in size down to about 1/10" square. I started by re-chiseling any hole bottoms that were too bumpy to sand and then I used a bunch of previously-made sanding jigs and also made a few more to get into the various corners. There are a few ground-sanding shots here;
So the next course in the sanding feast was to smooth out the ground. That was relatively straightforward for the top and bottom areas but the little holes between the fibers needed to be done as well and those ranged in size down to about 1/10" square. I started by re-chiseling any hole bottoms that were too bumpy to sand and then I used a bunch of previously-made sanding jigs and also made a few more to get into the various corners. There are a few ground-sanding shots here;
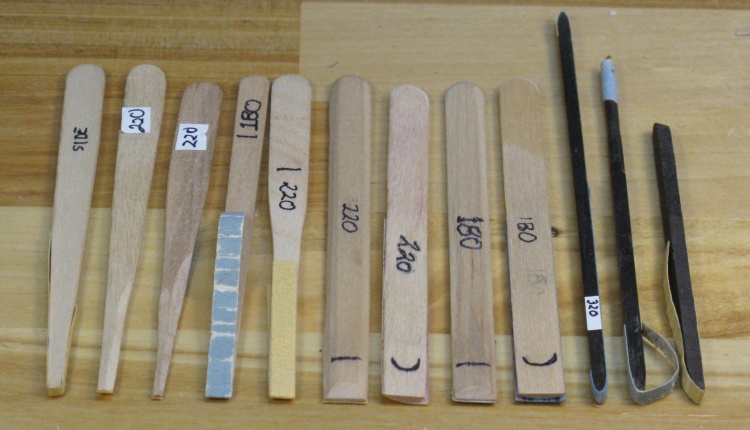
Sanding jigs
This nice neat groupling includes most of the sanding jigs that were used. They all have strips of sandpaper stuck on with thin double-sided tape (my favorite 3M window film tape).
Final sanding pass
The last sanding course was just to go over and fix anything that wasn't good enough.
I used a raking light from different angles to make it easier to spot imperfections and then ruthlessly sanded them into oblivion.
I used a raking light from different angles to make it easier to spot imperfections and then ruthlessly sanded them into oblivion.
With the inside and outsides done, that left only the bottom to address. I started by sanding the bottom a bit smoother, then cut the little inset circle for initials and finally added some decoration to the rather flat and boring bottom in the form of a lovely arrangement of divots.
Overall finish sanding
Cutting initial circle

Doing some bottom decoration
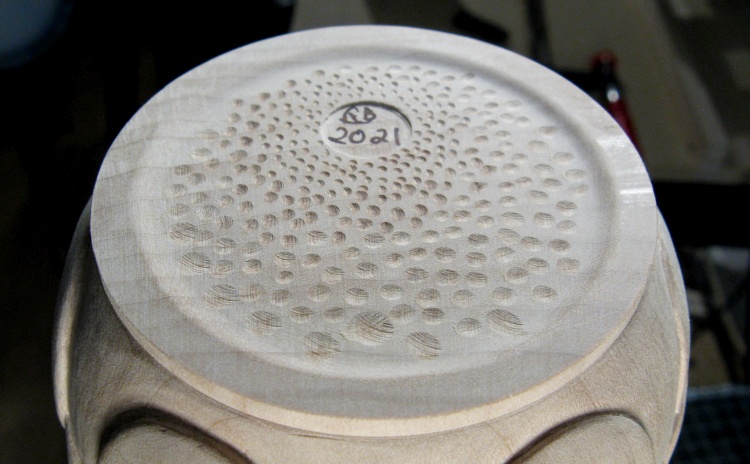
The completed bottom
The slightly-less-boring bottom.
Woodworking complete
And that was it for the woodworking.
Finishing
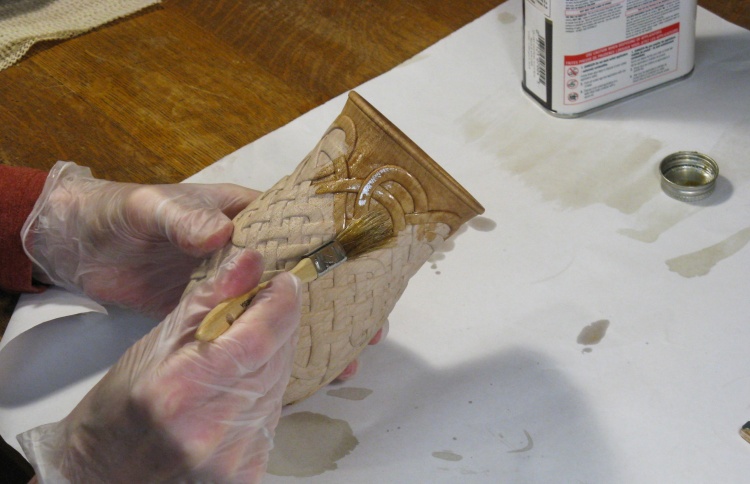
Applying the first coat of Danish Oil
For the finish I was bit leery about my standard varnish since it needs to be sanded between coats which would mean sanding the bottom of lotsa little holes.
I decided instead to use Danish Oil which doesn't require sanding. This photo shows the start of the first coat.
I decided instead to use Danish Oil which doesn't require sanding. This photo shows the start of the first coat.
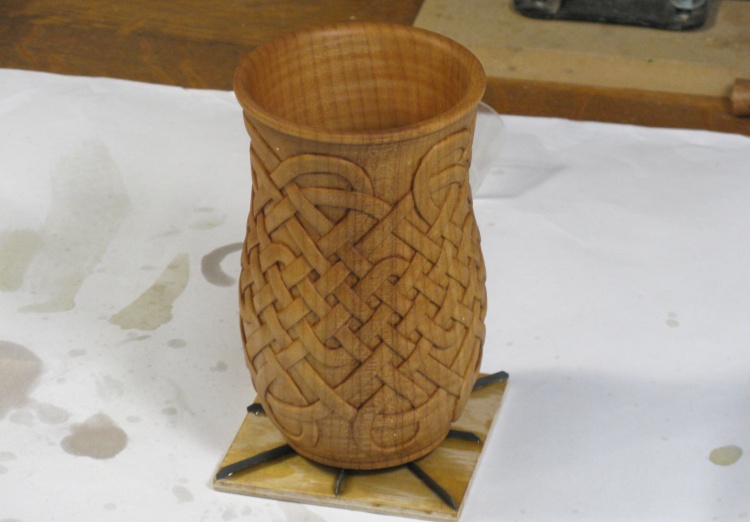
First coat of oil on (or "in" as they like to claim)
Danish Oil is a wipe-on/wipe-off finish which sounds simple. But the procedure calls for the wood to be kept wet with the oil for 30 minutes, repeatedly recoating any places it has soaked in. Then of course it must be wiped off including from the inside of all the little holes. That actually took longer than it would have to sand the holes, but I was interested in how it would look on this type of vessel anyway.
This photo shows the first coat drying after the wiping stage.
This photo shows the first coat drying after the wiping stage.
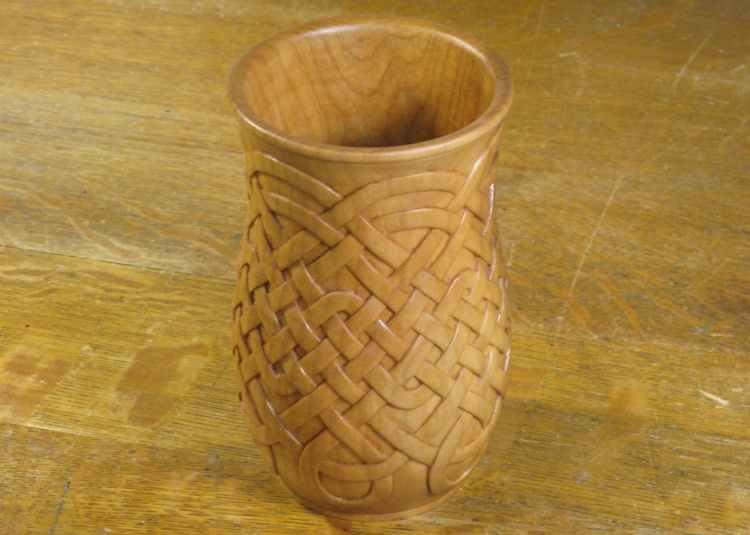
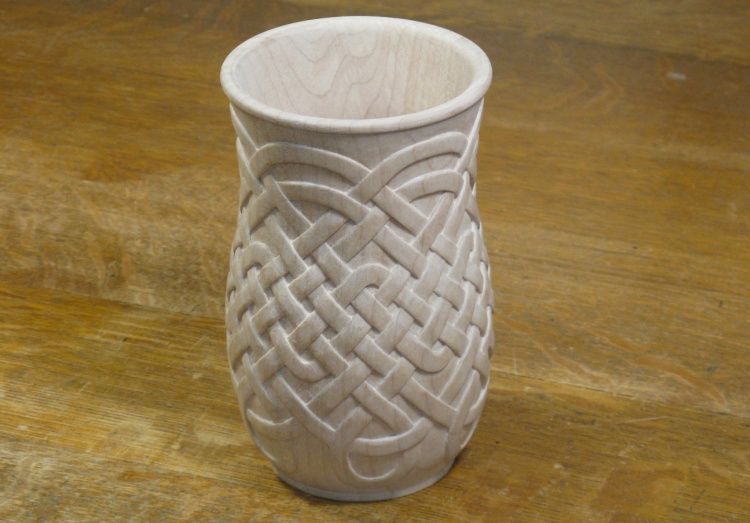
Done
This is the final result.


