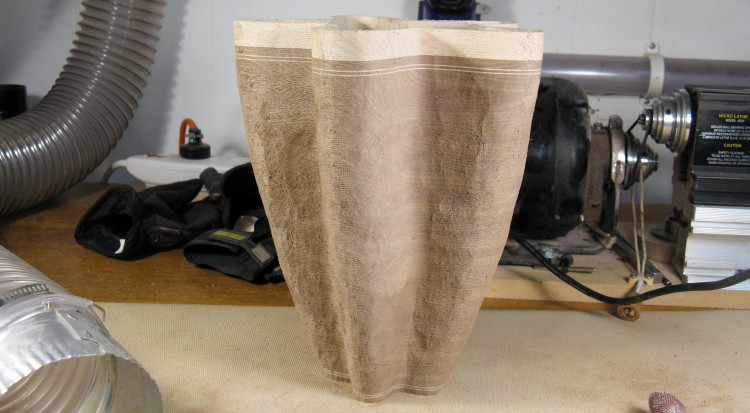
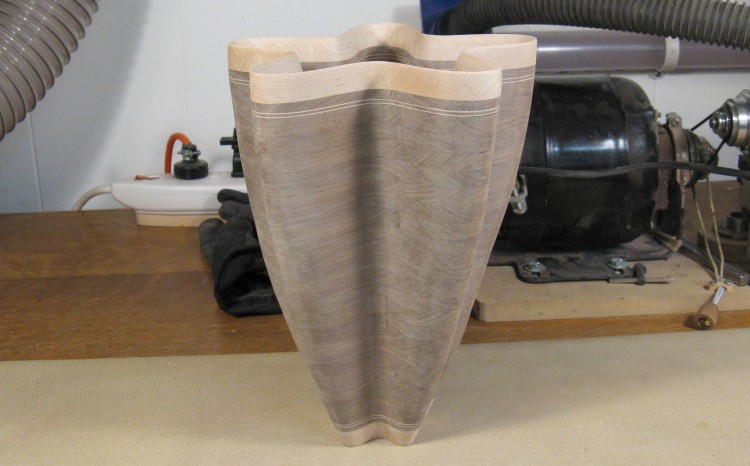
I liked the more-interesting curvature possible with a carved vessel like the previous "irregular vessel" I'd made, and thought to try another with a few different features. One of the goals was to make sure it was sufficiently different from the previous one. I wanted deeper curves so I went with a 5-sided (or perhaps 5-lobed) shape to squeeze in more curves. The visible plies were a big feature of the previous vessel and I didn't want to replicate that so I opted for solid wood. That would give either more-subtle visible plies or perhaps look like solid wood - either outcome was fine with me. I did keep the contrasting base and cap and it gained some accent lines at top and bottom. So this vessel isn't directly related to the earlier one, but is probably the same genus (stackus contrastus) if not species.
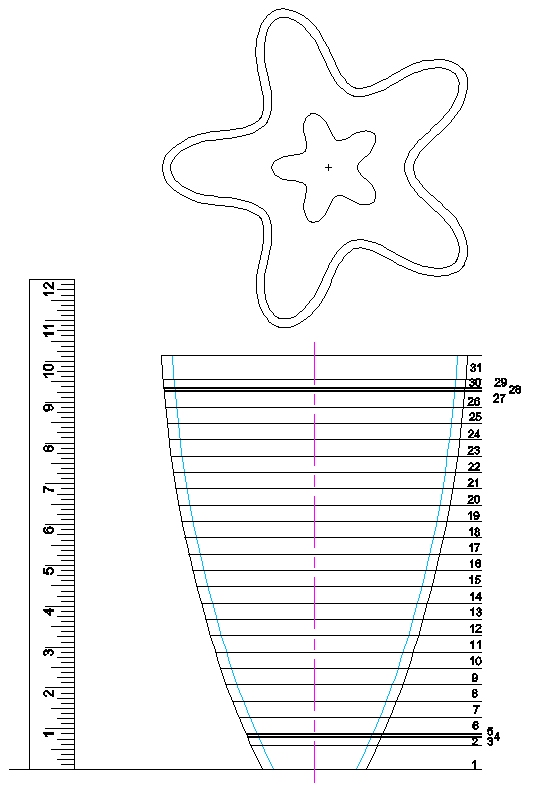
The plan
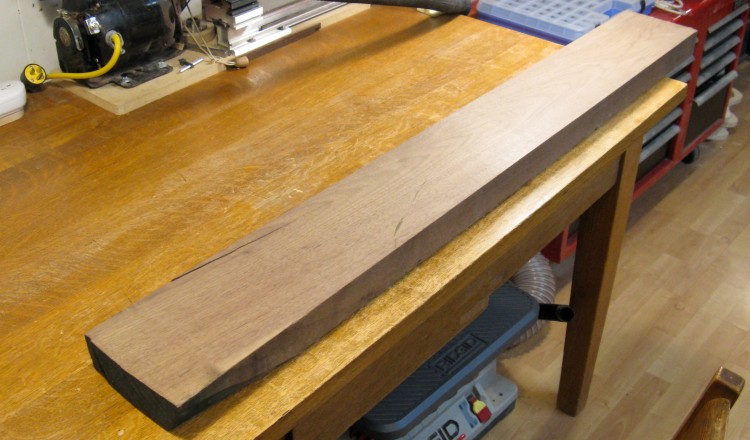
Nice 8/4 piece of walnut
I started out with a single piece of wood so all the layers would have similar colouring and grain.
Available board widths are usually limited to 6 or 8 inches, so to have enough wood I bought a 2"-thick piece (known as 8 quarters or 8/4 in woodworking parlance). As in:
"Ah need six board-foot of that eight-quarters plain-sawn walnut".
"That'll be $84 please"
"Holy Sh*#! How much's the pine?"
Available board widths are usually limited to 6 or 8 inches, so to have enough wood I bought a 2"-thick piece (known as 8 quarters or 8/4 in woodworking parlance). As in:
"Ah need six board-foot of that eight-quarters plain-sawn walnut".
"That'll be $84 please"
"Holy Sh*#! How much's the pine?"
Making 4/4 pieces
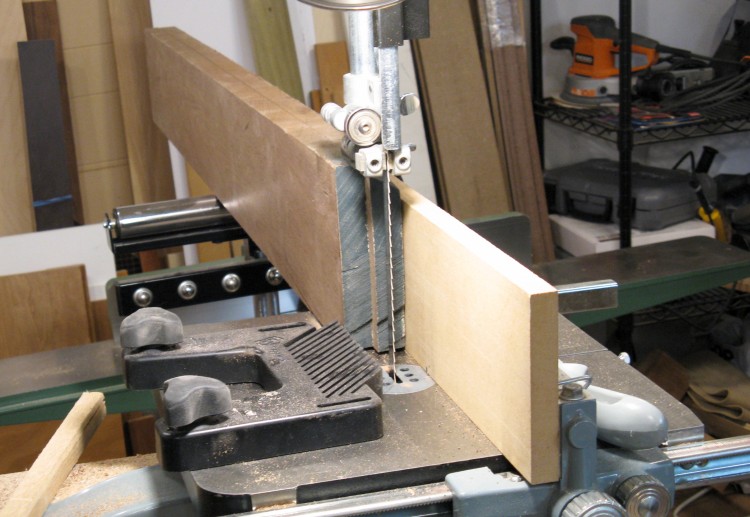
The first step was to resaw it into thinner sections to get to the 0.4" that I had planned for the main layers. This shot shows the first cut, which produced two 1"-thick planks.
...and finally 1/2"-thick pieces
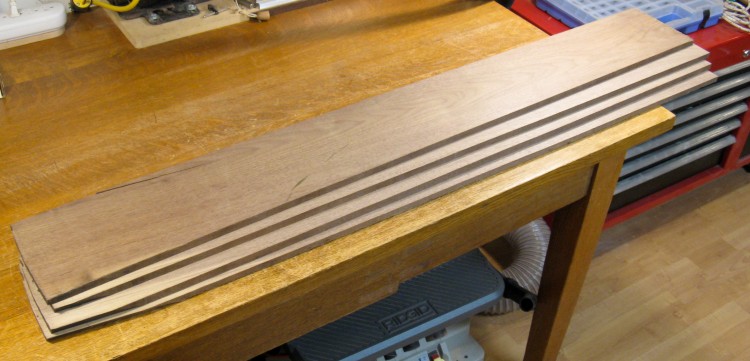
A couple more cuts resulted in four planks just under 1/2" each.
Unfortunately, most of the vessel layers were larger than the width of one of these planks, so I needed to combine them to get the necessary width.
Unfortunately, most of the vessel layers were larger than the width of one of these planks, so I needed to combine them to get the necessary width.
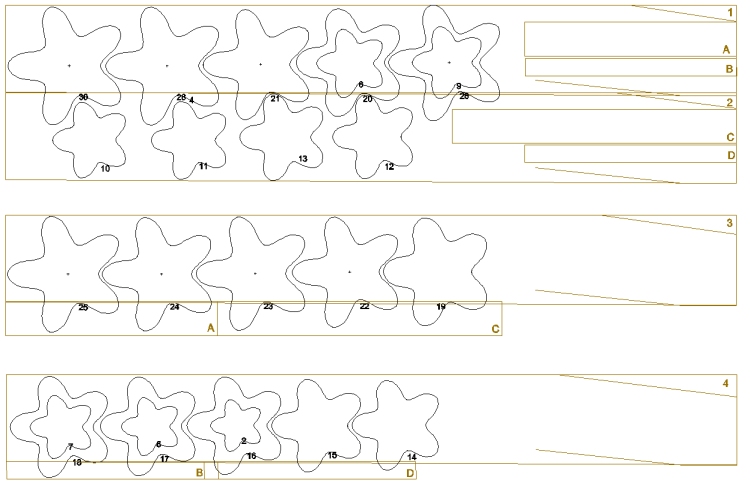
The plan to fit everything on (avoiding the cracks, etc.)
The area was a bit tight so I measured each board (cracks and all) and tried out some joining/layout possibilities to make sure there was going to be enough wood. This is the plan I ended up using.
I wasn't too concerned about a layer spanning a joint between two pieces of wood since I didn't think they'd be very visible.
I wasn't too concerned about a layer spanning a joint between two pieces of wood since I didn't think they'd be very visible.
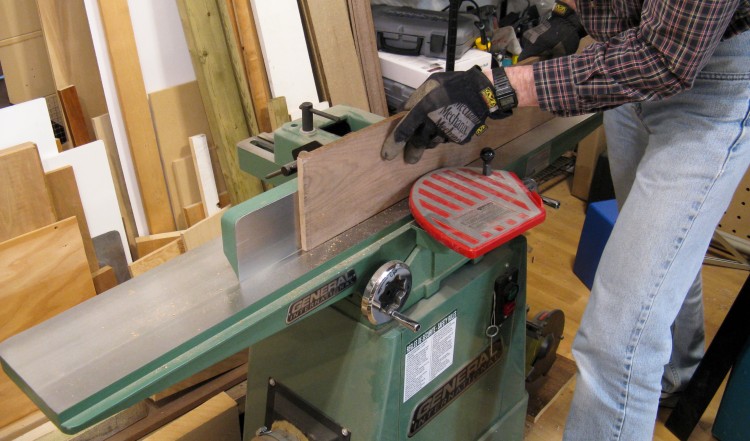
Jointing the edge
The edges to be connected were run through the jointer to make sure they were straight as well as square to the faces.
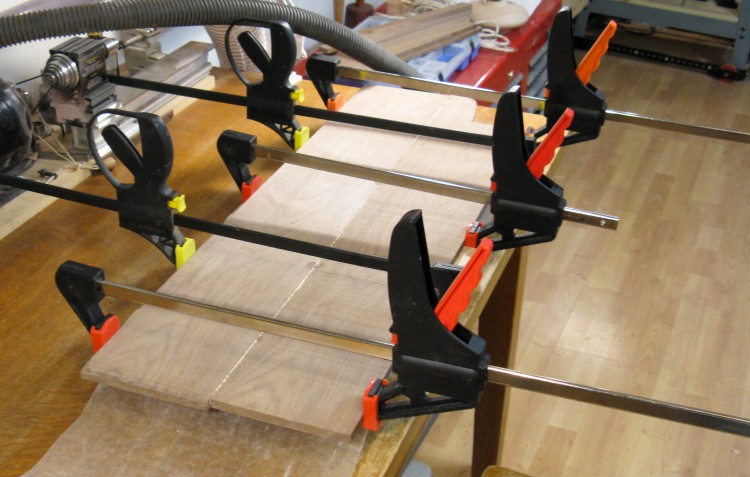
Gluing into more useful-sized pieces
This is the largest piece getting clamped while the glue sets.
The resulting three Frankensteined-together pieces
And after a bit more of the same, I ended up with the three pieces shown.

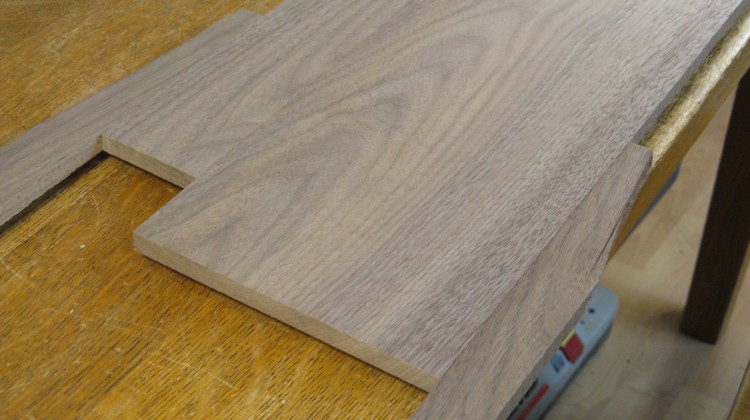
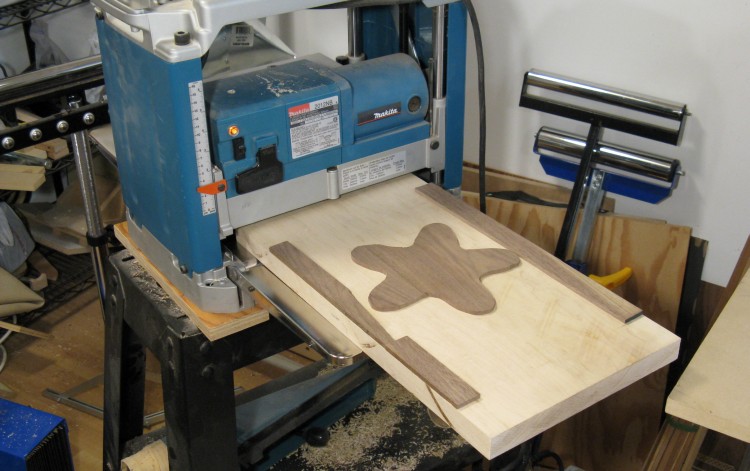
Anti-snipe legs added before planing
The next step was to run them through the planer to improve the surface and get to the final thickness.
Of course I've mentioned snipe before where the planer makes the ends slightly thinner, and that's a big problem when laminating pieces since you want the seam to be very tight.
So to avoid that I added some anti-snipe protrusions to the wood. They just extend the length of the piece so the snipe is on throw-away sections. In this case, I used temporary glue to hold on the extension pieces.
Post-planing surface
This shows the end of one of the other pieces after going through the planer. The surface is much smoother than in the shot above.
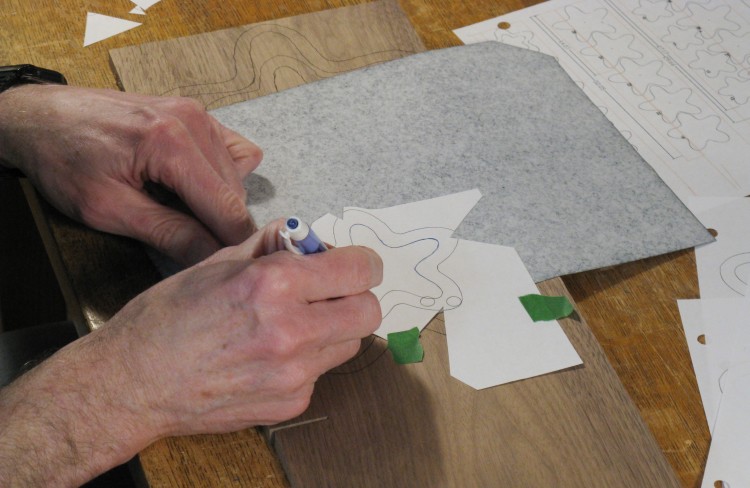
Tracing out the patterns
Then with the planks smoothed and at the correct thickness, it was time to start tracing the patterns onto the wood. As usual, I used my standard full-sized-plan-with-carbon-paper technique as shown here.

Saving wood with some concentric patterns
Here's plank #4 (the narrowest one) with the shapes traced out. I was able to use some concentric patterns to be a bit more efficient with wood use.

All the patterns drawn out
And eventually all the patterns (for the walnut anyway) were done.
Separating the individual pieces
The next step was to separate the individual patterns to make them more convenient to cut out.
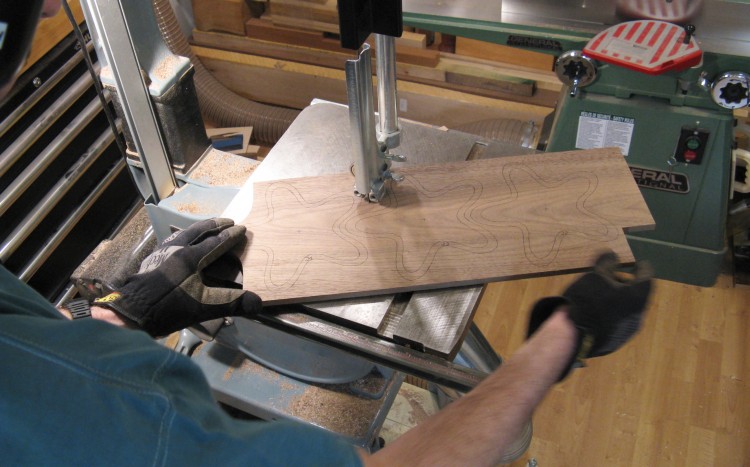
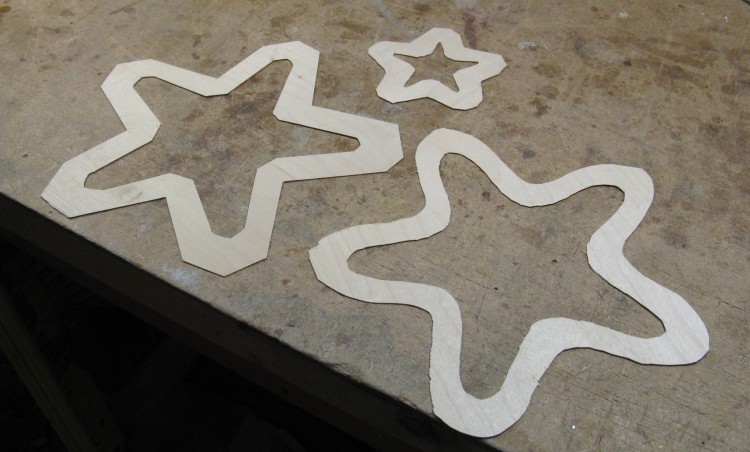
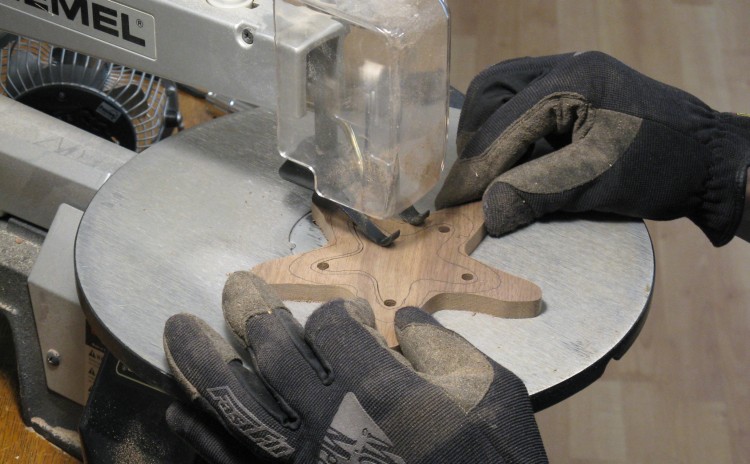
Cutting one of the larger pieces to shape
And then the individual pieces were cut out close to the lines. The shapes didn't need to be perfect, so this was just done on the bandsaw with a 1/4" blade. It was a fairly quick process since I was just trying to cut them 1 to 3mm outside the lines.
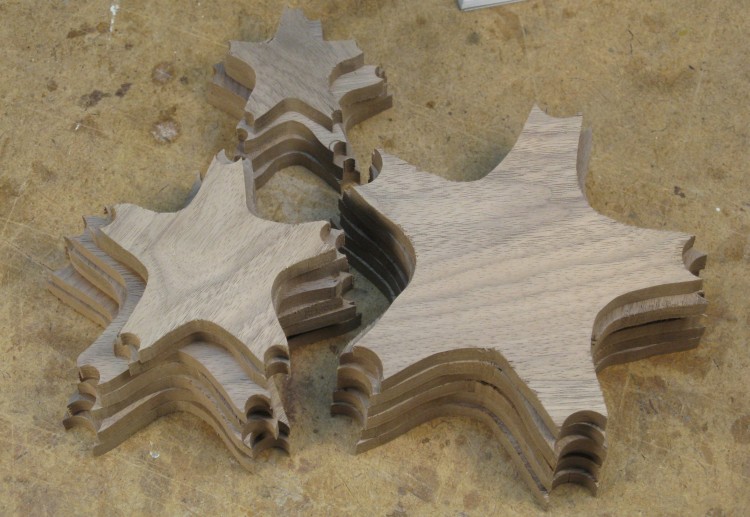
The pile of cut-out layers
Here's a gratuituous shot of the cut-out pieces with the cut-offs artistically out of focus in the background.
Planing down one of the thinner layers
A few of the walnut layers near the top and bottom needed to be thinner than the rest, so I ran them through the planer to get to the desired thickness.
The planer doesn't go down to zero, so for thin pieces I tape the piece to a sled (AKA maple plank) left over from another laminated vessel project. The walnut pieces on the sides perform the anti-snipe function.
The planer doesn't go down to zero, so for thin pieces I tape the piece to a sled (AKA maple plank) left over from another laminated vessel project. The walnut pieces on the sides perform the anti-snipe function.
The maple accent layers, cut from veneer
In addition to the walnut, the vessel needed maple layers as well. This shot shows three of the four thin maple layers, cut out from sheets of veneer.
Cutting these out was harder than expected since they were too thin to cut without damage on the jigsaw, even with the finest blade I had. I ended up using a ruler and a sharp knife, which accounts for the rather angular shapes of a couple of the pieces.
Cutting these out was harder than expected since they were too thin to cut without damage on the jigsaw, even with the finest blade I had. I ended up using a ruler and a sharp knife, which accounts for the rather angular shapes of a couple of the pieces.
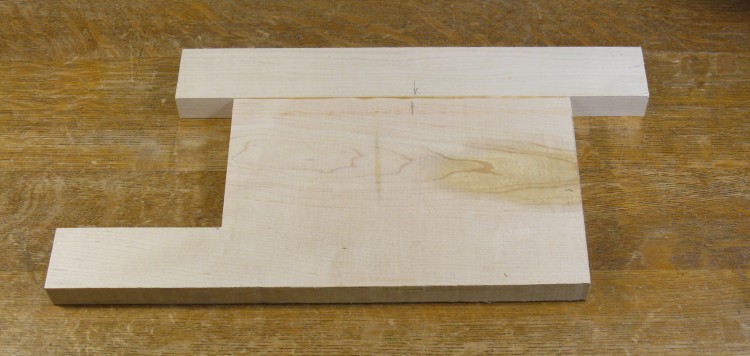
Maple piece for top and bottom layers (with anti-snipe protrusions)
The top and bottom layers are maple as well. And like the walnut, the required size was larger than the width of any planks I had, so I glued a couple pieces together. The extra protrusions on the ends are the anti-snipe sections.
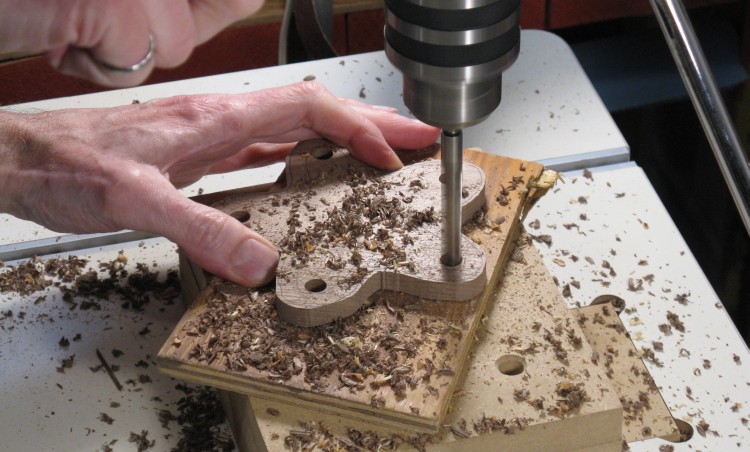
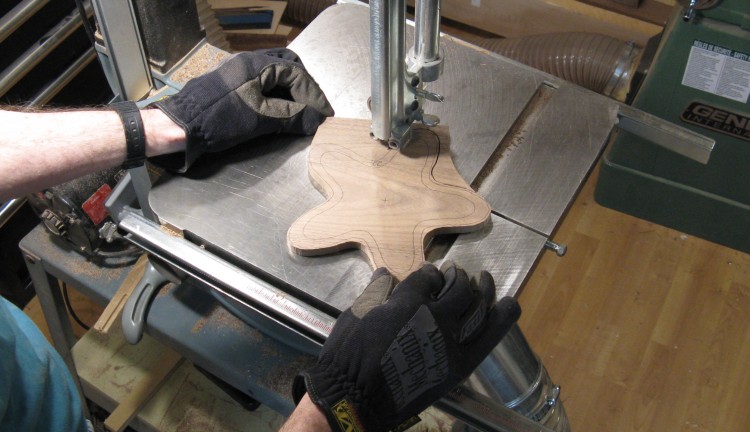
Drilling to aid cutting out the center
With the outside shapes done, the next step was to cut out the insides. This required a hole to start the sawing. But since it was pretty easy, I just drilled holes in all five lobes to make it a bit easier to cut out.
Cutting out the centers on the jigsaw
The centers were cut out using the jigsaw.
On the jigsaw, the blade can be removed, inserted through a hole in the wood, and re-attached to start the inside cut. I did this using just one of the holes, and then cut from hole to hole - that way I avoided having to cut the tight curves at the ends of the lobes.
This particular piece has extra-long lobes that still need to be cut off. That was from cutting this one out from the center of a larger piece.
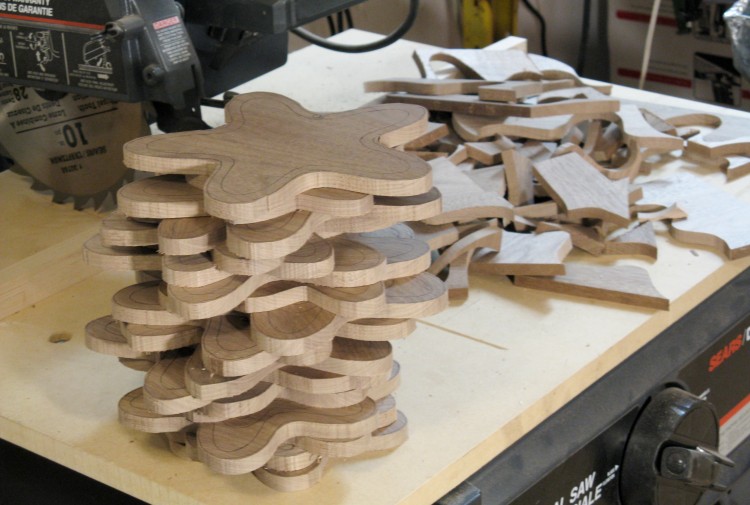
Orderly piles of cut-out centers
When I was done cutting out the centers, I was left with a nice graduated selection of oddly-shaped pieces. Rather than toss them out, I decided to use them for another little project.
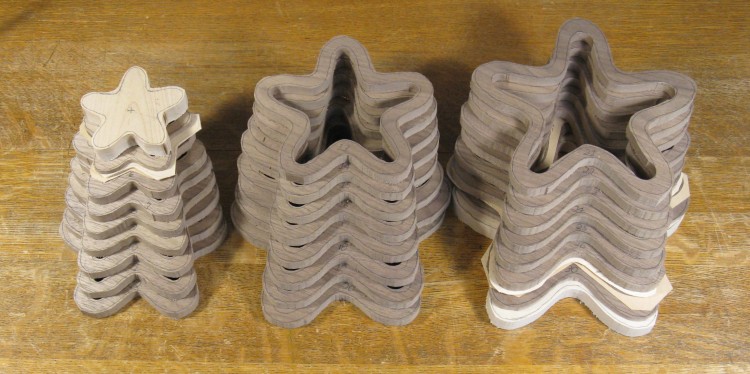
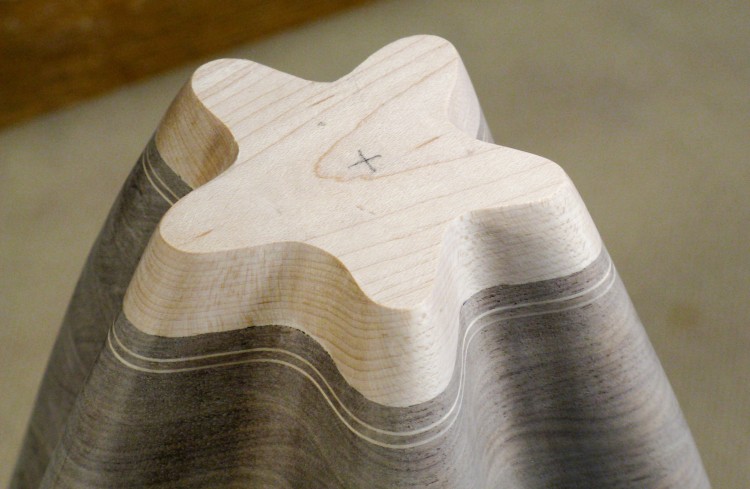
All 31 layers cut out and posed for the group photo
This shot shows the layers after the cutting-out was done. I was just confirming that I hadn't missed any pieces and getting ready to make them into one big pile.

...and stacked in the intended configuration for a quick check
This is what it will eventually look like when glued together, but with hopefully slightly better layer alignment.
Applying glue to a group of 4 layers
Gluing many pieces at once is a recipe for disaster (at least the way I "cook") so my gluing strategy was to make short stacks of about four layers, let them dry and then join groups of the small stacks.
One complication to the gluing was that I decided to flip every second layer so that the grain on adjacent layers would show a bit more contrast. As a result, I needed to keep track of the orientation of the pieces in adjacent stacks.
One complication to the gluing was that I decided to flip every second layer so that the grain on adjacent layers would show a bit more contrast. As a result, I needed to keep track of the orientation of the pieces in adjacent stacks.

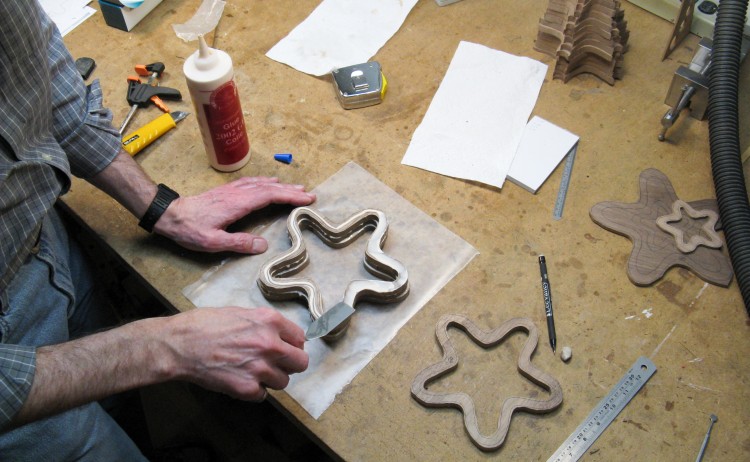
The final glue-up and clamping of the stack
After making the small stacks and then joining them together, that brings us to the last gluing step shown here where the two half-stacks are glued together at the visible white glue line.
I used this Workmate-with-a-bar-clamp setup to clamp all the stacks, using appropriately-sized pieces of wood top and bottom to distribute the clamping pressure.
I used this Workmate-with-a-bar-clamp setup to clamp all the stacks, using appropriately-sized pieces of wood top and bottom to distribute the clamping pressure.
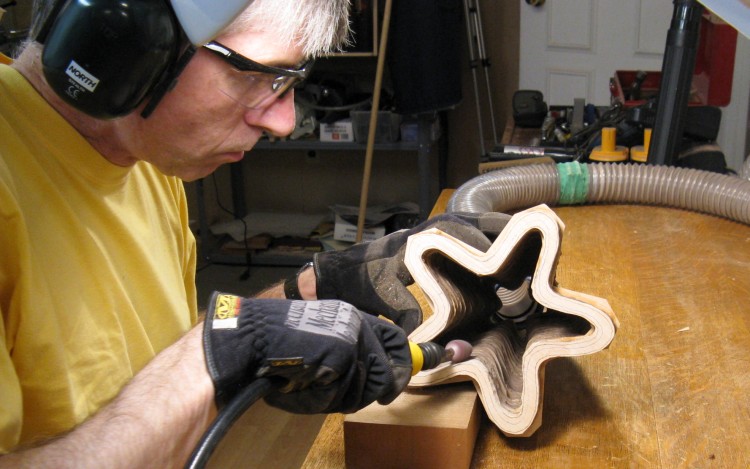
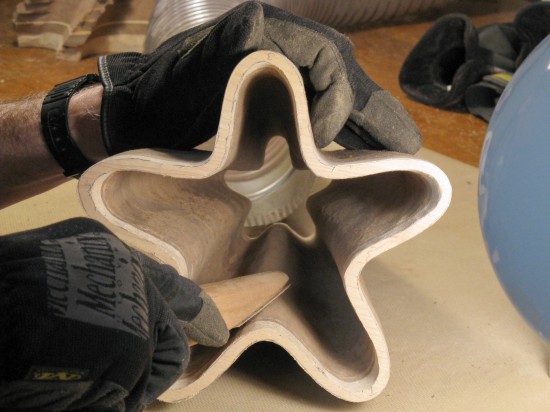
Starting on the inside shaping
So the efforts shown in the previous 25 or so photos basically just got me to the point where I have a "carving blank" that's in the approximate shape of the vessel.
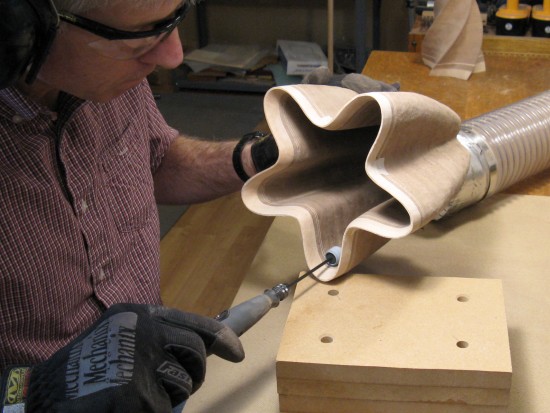
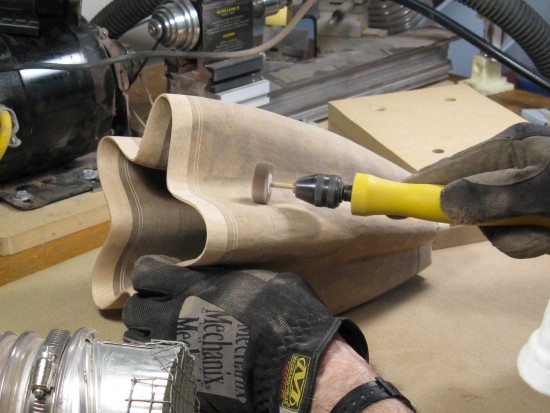
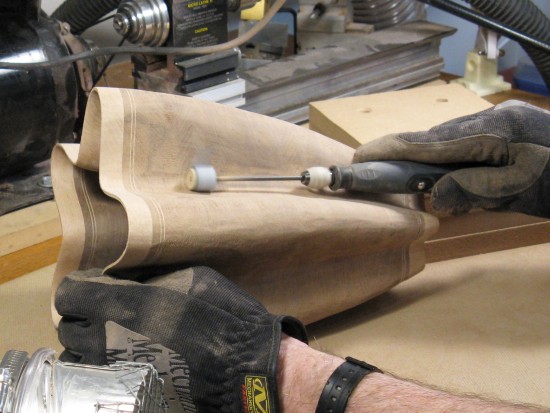
At that point, the shaping could start. It largely consisted of smoothing between the layers and removing material to get to the proper wall thickness and overall shape. I'm starting here on the inside, and using my main shaping tool which is a coarse carbide burr on a flexible carving shaft.
You can see that I've left the bottom off, both for better access and to be able to align the dust collection hose at the end.
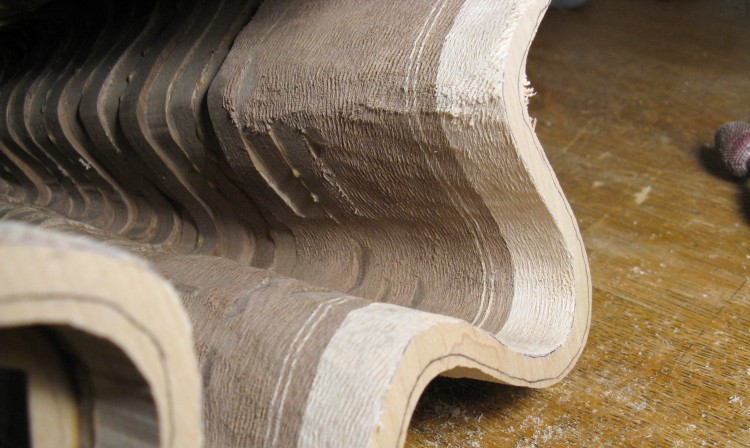
Pre and post-shaping surfaces
This photo shows both some of the untouched interior and the rather nasty surface that the carving burr leaves.
When I had done a previous non-round vessel, I was somewhat offended by the amount of shaping and sanding it had required. But even though this one probably took about as long, just the ahead-of-time recognition of that made it much more acceptable.
When I had done a previous non-round vessel, I was somewhat offended by the amount of shaping and sanding it had required. But even though this one probably took about as long, just the ahead-of-time recognition of that made it much more acceptable.
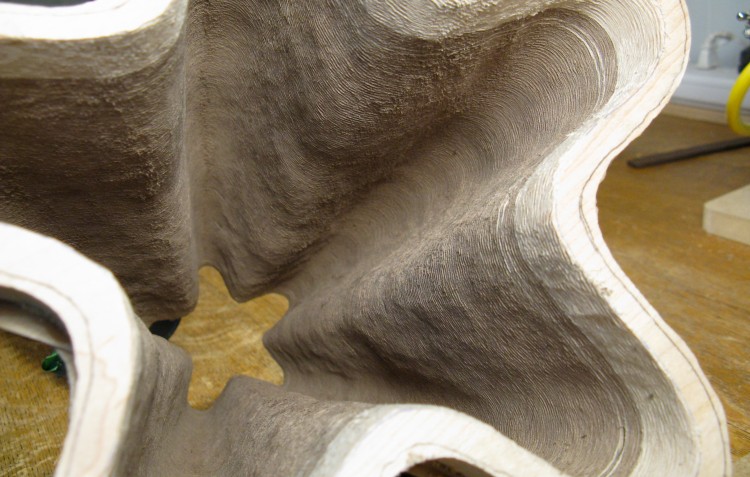
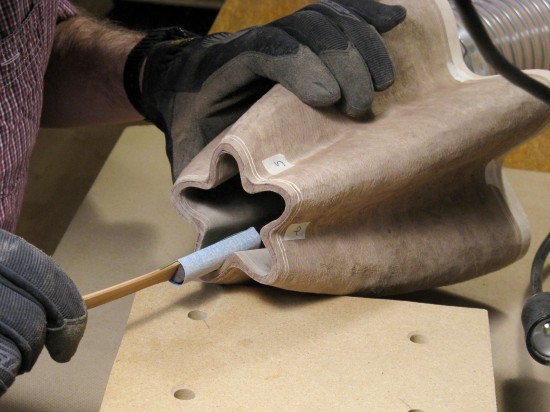
The coarse inside shaping is done, but the surfaces are...ummm...imperfect
I was actually concerned at the start that it would be impractical to reach inside the lobes all the way through the vessel to do the necessary shaping and sanding. However, using a combination of the main carving shaft and a smaller Dremel shaft and working from both ends, it was merely awkward. Ok, and there might have been the tiniest smidge of tedium in there too.
However, after a few hours, the inside shaping was done, resulting in the scabrous rolling surfaces seen here. This was gonna need some serious sanding.
However, after a few hours, the inside shaping was done, resulting in the scabrous rolling surfaces seen here. This was gonna need some serious sanding.
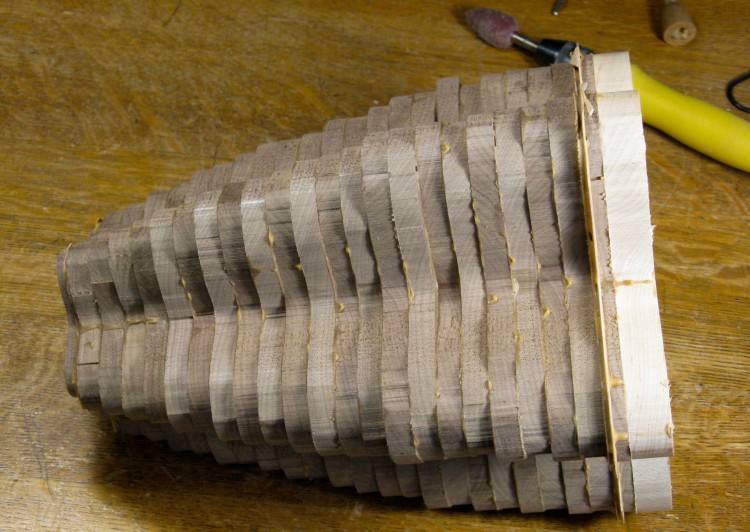
The outside, prior to the attentions of the red burr
But I thought I'd save the fun of sanding for later and instead turned my attention to the outside.
This shot shows the original stacked 'n glued surface that it started out with.
This shot shows the original stacked 'n glued surface that it started out with.

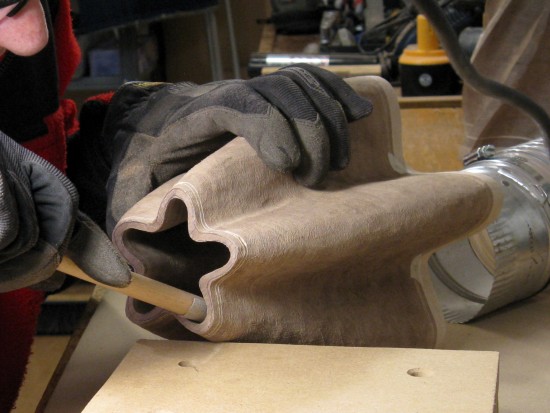
Starting on the outside shaping
And of course the shaping process was the same as the inside, minus the challenge of working in a deep narrow vessel.
I used the larger dust collection hose shown here and aligned the carving and hose so the sawdust was directed toward the hose and very little stayed in the air.
I used the larger dust collection hose shown here and aligned the carving and hose so the sawdust was directed toward the hose and very little stayed in the air.
Here the coarse shaping of the outside is done as well
The shaping was done in a relatively short time and the exterior surface now looks a lot like the moonscape of the interior.
A couple sanding aids getting sandpaper applied
I couldn't put it off any longer - it was time to tackle the interior sanding.
I made a couple of wooden jigs as shown here onto which I taped strips of sandpaper, starting with 100 grit.
I made a couple of wooden jigs as shown here onto which I taped strips of sandpaper, starting with 100 grit.
And then it was sanding with various jigs and rotary attachments to first smooth out the peaks and valleys and to then remove the deep scratch marks. I progressed through 100, 120, 180 and 220 grit sandpaper on the interior by the time it was complete. That took something on the order of 25 hours but I was reasonably pleased with the result when it was done.
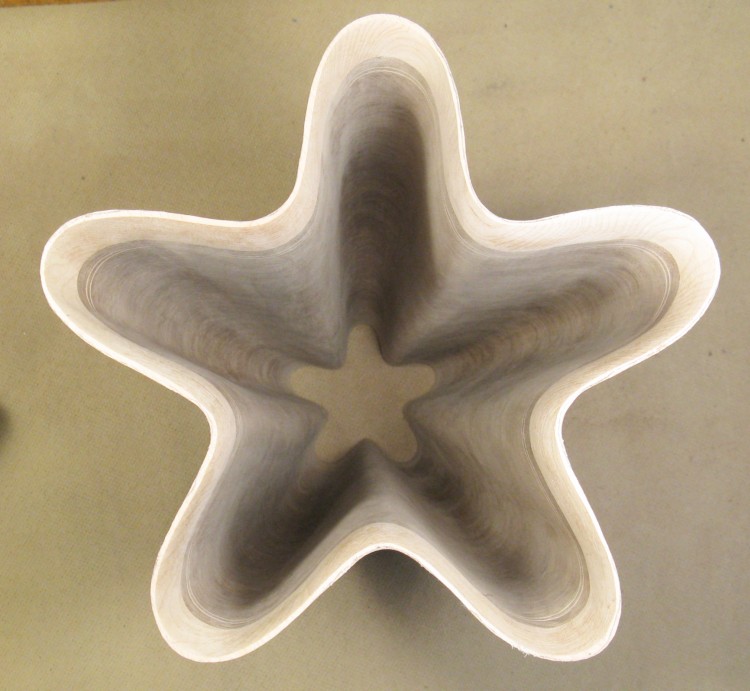
A view of the inside with the sanding done
Here's a shot of the inside, which I think is safe to say looks rather better than the "shaped' shot.
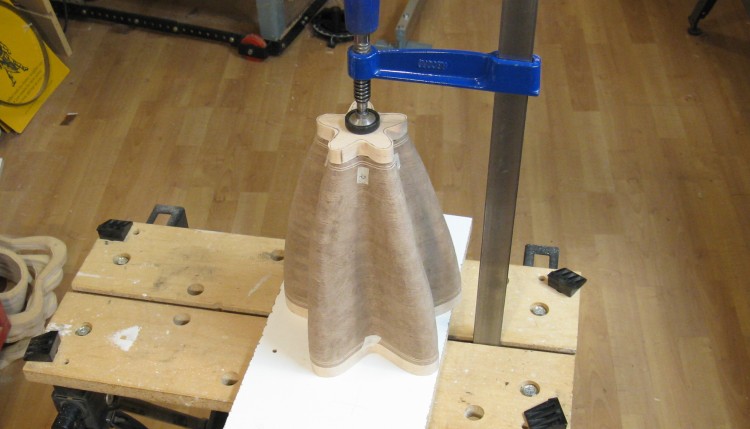
Gluing the bottom on
And now with the inside completed, it was safe to attach the bottom layer.
The walls were pretty thin and the amount of wood to make the glue joint was small. So I was concerned about how to remove any glue squeeze-out from the inside way down at the bottom. To sidestep that problem, I instead used Super-glue on the joint rather than standard wood glue so there was no squeeze-out.
Here the bottom is being clamped for a short time after gluing.
Bottom ready for shaping
The bottom layer obviously needs some attention to get it to blend into the rest of the vessel.

Bottom shaped to blend in with the rest of the vessel
And after a bit more work with the shaping burr, the bottom actually looked like it belonged there.
And then it was time to start the outside sanding.
And then it was time to start the outside sanding.
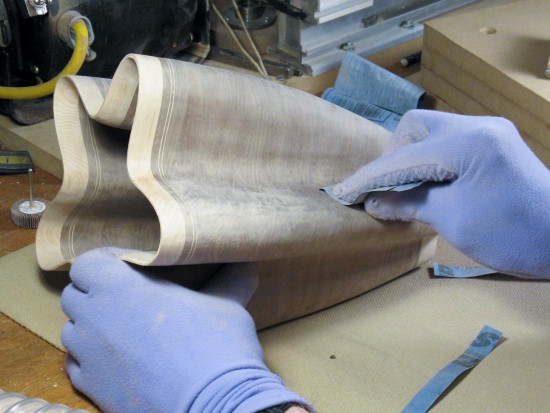
This big group of photos shows the sanding of the outside. I mostly used the sanding block and dowel to even out the surface and then the rotary tools and hand sanding to get rid of visible sanding marks. Some faces showed sanding marks more easily just due to the angle of the woodgrain, so I ended up having to work up to 400 grit sandpaper before I banished the last of them.
In some of these shots you'll notice a 1/2" grid over the end of the dust collector, where before it was open. I had set one of my gloves down too close to it once and it was sucked up and gone in an instant. I had to go dig it out of the dust barrel. I found the snap-on grid under my bench, probably from the last time that happened.
In some of these shots you'll notice a 1/2" grid over the end of the dust collector, where before it was open. I had set one of my gloves down too close to it once and it was sucked up and gone in an instant. I had to go dig it out of the dust barrel. I found the snap-on grid under my bench, probably from the last time that happened.
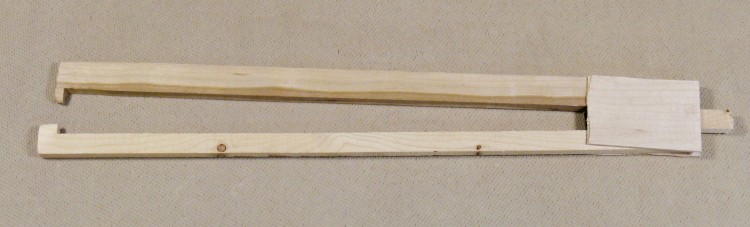
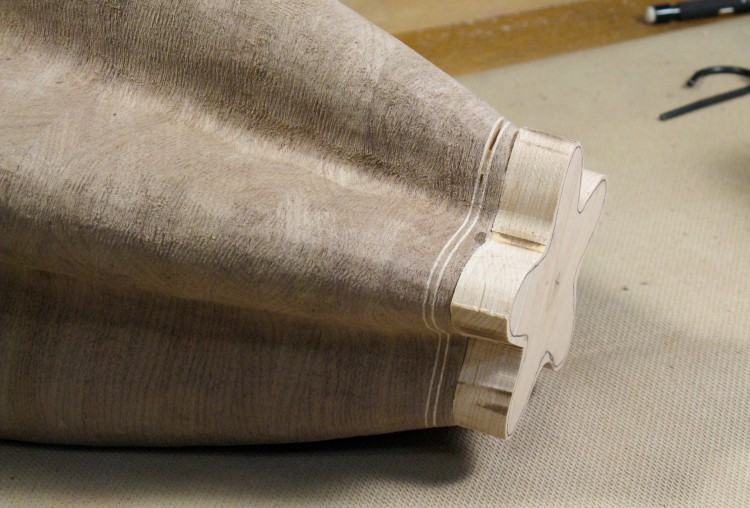
Super-crude "deep calipers"
When doing the shaping and sanding, I kept an eye on the wall thickness. Sanding a hole in the wall would have ruined my whole day. I didn't have any thickness-measuring tools that extended deep enough, so I made this fine metrology instrument out of some scraps.

Checking wall thickness
It wasn't very convenient to use since it had a fixed end-spacing large enough to go over the thickest section of wall. But by subtracting the distance on the outside from that fixed spacing, the wall thickness could be determined.
Here a professional model is contracted to illustrate measuring the wall thickness halfway down, but it was made long enough to reach to the bottom.
Here a professional model is contracted to illustrate measuring the wall thickness halfway down, but it was made long enough to reach to the bottom.
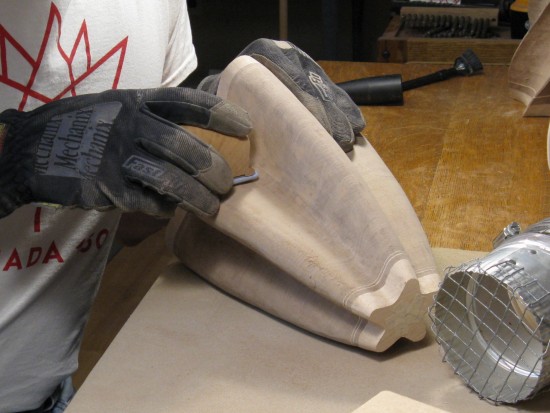
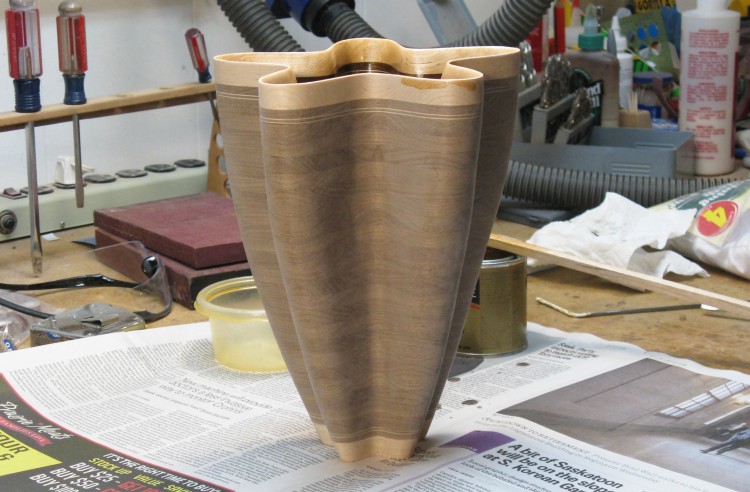
Vessel with outside sanding complete
This is a photo of the vessel with the outside sanding complete. All that was left was finishing the bottom.
Bottom - kinda flat and boring
With a round vessel, I often turn a "foot" into it (a ring that protrudes for it to stand on). But that obviously wasn't going to fly with this one. Nevertheless the flat bottom was pretty plain so I wanted to give it some enhancement.
I thought it might look interesting to just carve out all but a narrow outline.
I tried the carving concept out on a maple scrap and it seemed to go okay, but that was with the scrap held in a vise. How was I going to hold this tapered, smooth, non-round vessel solidly enough to carve it without messing up my nice sanded surface?
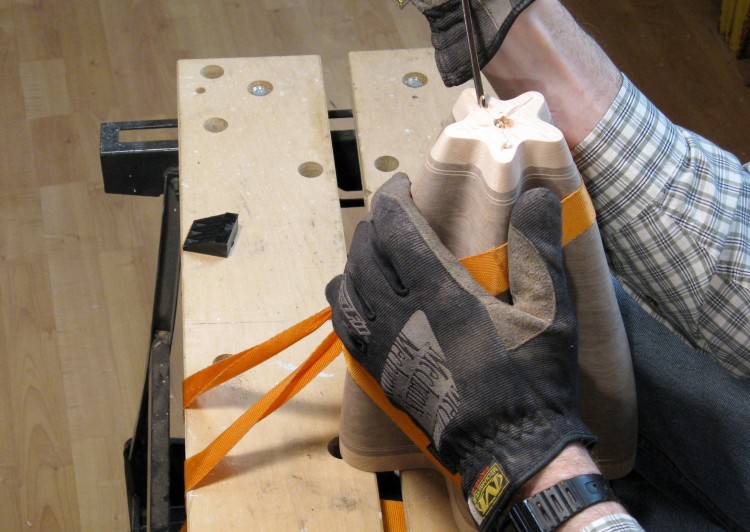
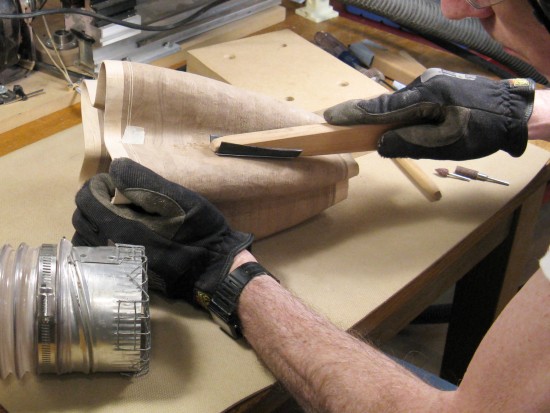
Doing some hand-carving on the bottom
The solution turned out to be a ratchet tie-down strap. It was nice and long and after a few trials I was able to wrap it around the vessel a couple times and then down each side. This went around the top of the Workmate and tightening up the ratchet held the vessel pretty solidly.
I had first drilled and flattened a hole in preparation for putting on my initials, so then I used a narrow gouge to carve from the outside towards the middle as shown.
I had first drilled and flattened a hole in preparation for putting on my initials, so then I used a narrow gouge to carve from the outside towards the middle as shown.

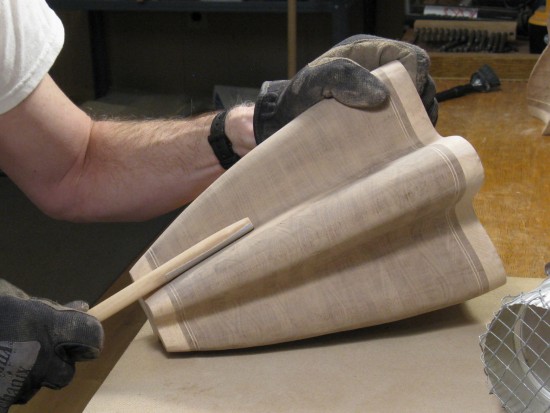
Completed bottom
This is the result (which probably no-one is likely to see again), but I kind of liked the effect.
Ready for some outside varnish
After removing all the dust, it was ready for the first coat of finish. Here, the inside is already done, and I'm getting ready to do the outside.
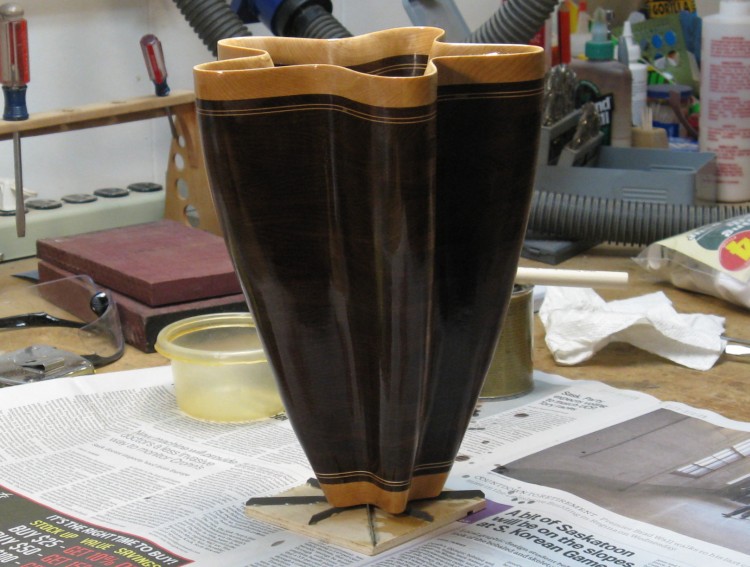
First coat of varnish applied
This is the vessel with the first coat of varnish, still wet. I was surprised how dark it turned, although it lightened up when dry.
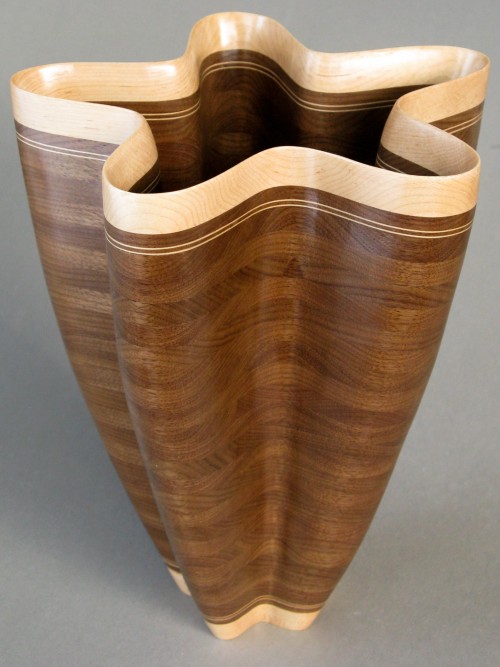
Done
Done.


