The shape of the triple-weave pattern is almost defined by the overlap of adjacent circles as you can see in the simplified plan below. However, it deviates from that due to the varying diameter of the vessel since smaller circles are needed for smaller diameters.
By the way, that three-lobed shape that forms each segment of the weave seems like it should have a specific name, but if so I wasn't able find it. The closest was a "Klein quartic" but that is neither precise nor informative so I'll just refer to the shape as tri-lobed.
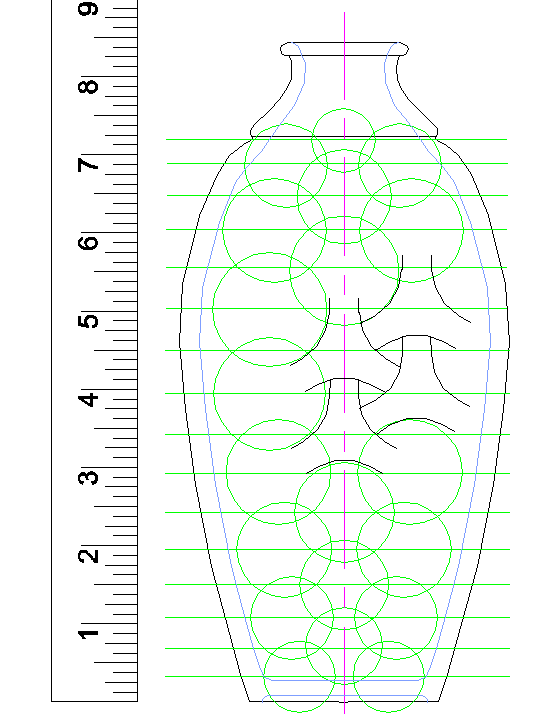
It should look something like the black lines
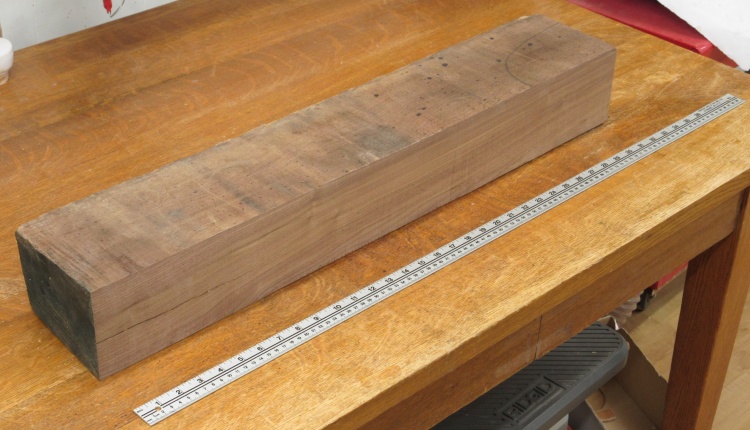
A long chunk of somewhat crackey walnut
I procured this largish piece of walnut locally since I wanted to get started and it was the only thing I could find on short order.
Unfortunately it has deep cracks from each end so only the middle part was usable unless I was going to patch cracks (I wasn't).
Unfortunately it has deep cracks from each end so only the middle part was usable unless I was going to patch cracks (I wasn't).
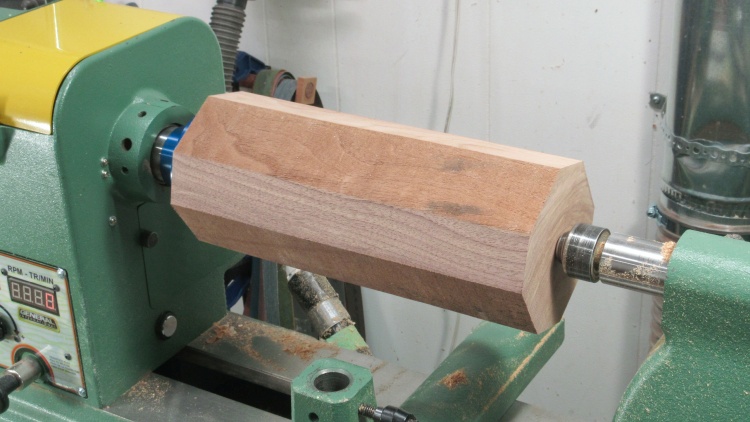
The tenderloin removed, trimmed and mounted
Most of the uncracked center part was cut out, mounted to a faceplate and had the corners cut off to reduce the amount of sawdust I was going to have to generate.
Adding some reference lines
After rounding with a roughing gouge, I started marking it with lines to guide the shaping.
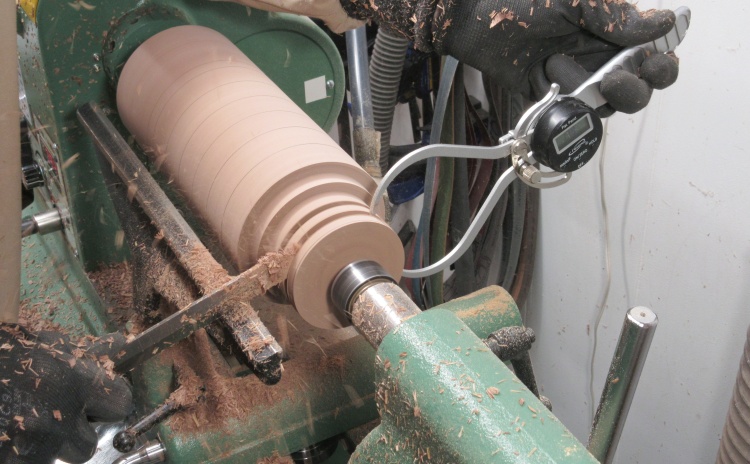
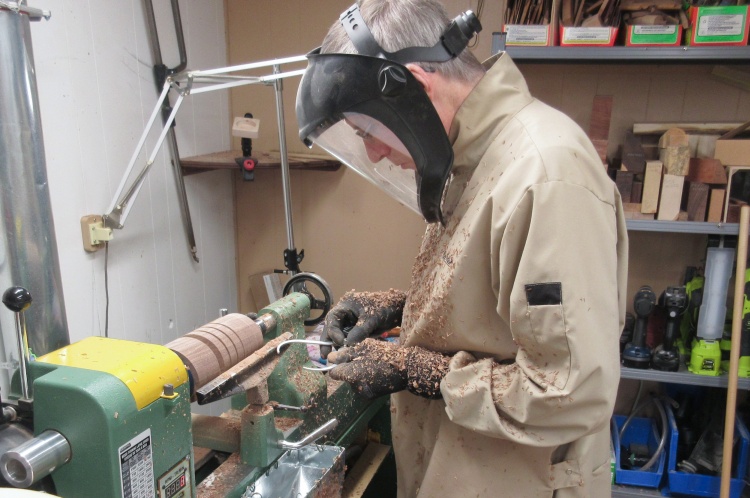
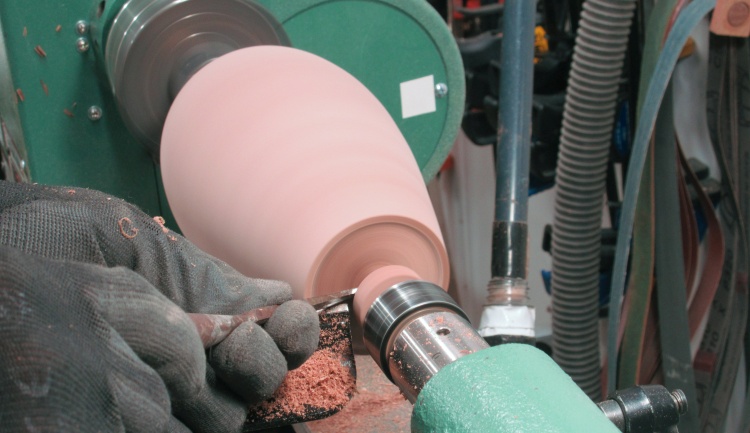
Using calipers to cut a specific diameter
I usually alternate between cutting a slot and measuring the diameter until I'm close to the desired value but that's a rather tedious and error-prone procedure.
My digital "outside" calipers can be locked to a fixed diameter with a thumbscrew so this time I set them to the desired diameter and held them against the vessel while I one-handed the parting tool until the calipers slipped over the vessel. I then tweaked the diameter if needed. That turned out to be a much more efficient approach despite the slightly iffy control of the parting tool.
My digital "outside" calipers can be locked to a fixed diameter with a thumbscrew so this time I set them to the desired diameter and held them against the vessel while I one-handed the parting tool until the calipers slipped over the vessel. I then tweaked the diameter if needed. That turned out to be a much more efficient approach despite the slightly iffy control of the parting tool.
Setting the calipers
This is a shot of me setting the calipers to the next diameter.
This photo should also reveals why it's a good idea to wear the turning smock.
This photo should also reveals why it's a good idea to wear the turning smock.
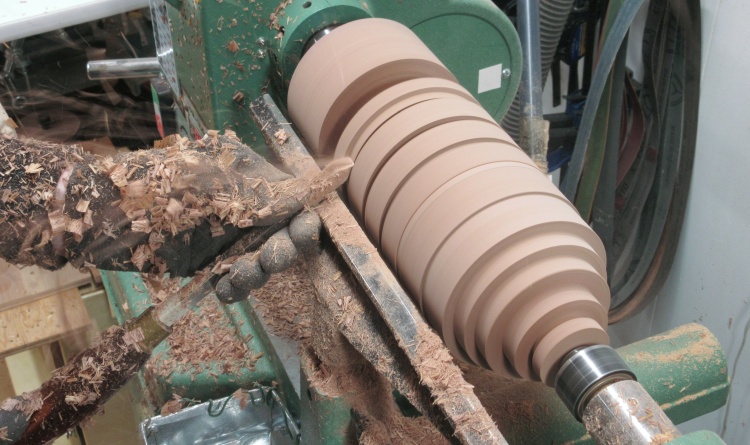
Removing excess wood between reference cuts
Once all the reference diameters were cut, I removed much of the excess wood with this beefy chisel tool.

Ready for some rounding
That resulted in this stepped version of the vessel whose final shape will be defined by removing wood to the inside corner of each step.
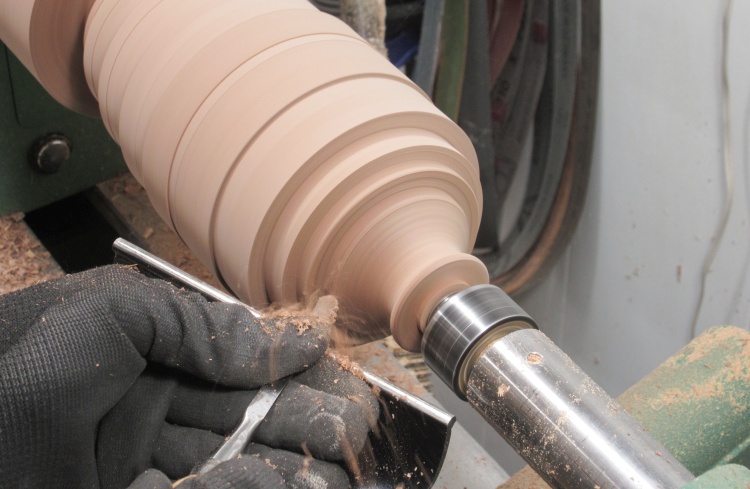
Shaping the top first
I started by forming the top flange and then shaping the cap-like top section, mostly using this small round-end scraper.
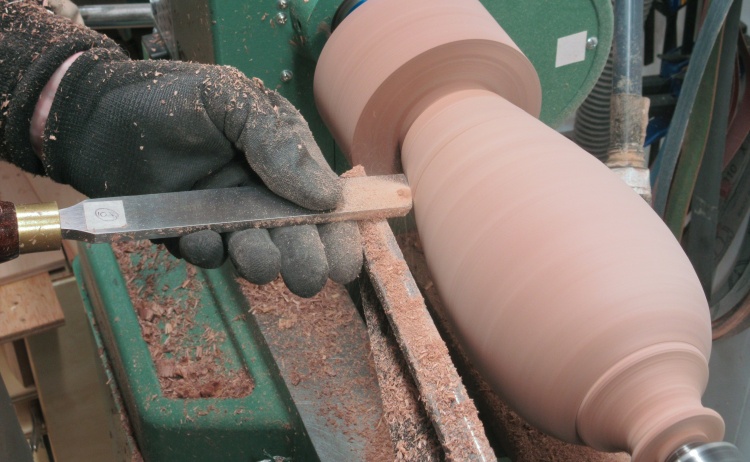
Finishing off the body shaping
The body of the vessel had the steps smoothed off using this large scraper and in this shot the vessel is nearly done.
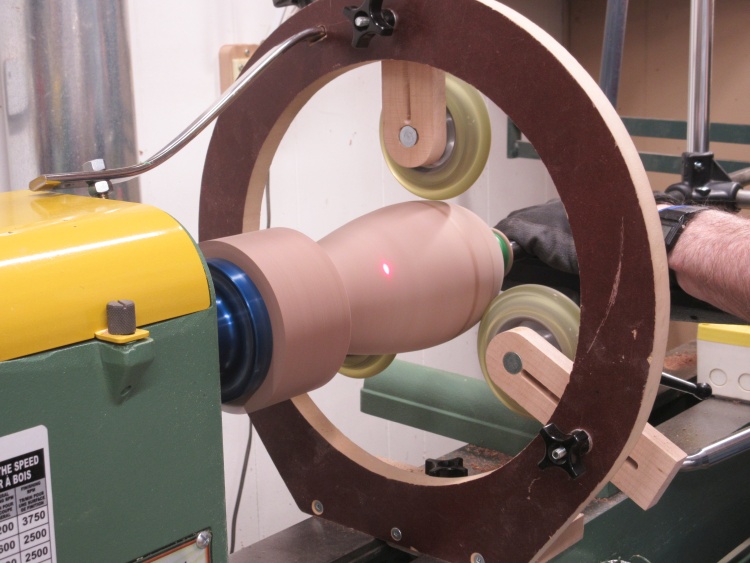
Hollowing out the innards
Once the outside was done I switched to hollowing using my usual setup. In this photo the laser dot shows that I'm maybe 2/3 of the way to the bottom.
Hollowing a vessel becomes trickier through a narrow throat like this one. The opening is about an inch in diameter but the hollowing tool is something like 5/8" diameter, meaning it doesn't have much room to move side-to-side. Going in at an angle increases the volume that can be hollowed and changing the angle of the cutting tool on the end helps as well. But too much angle means the cutter won't even be able to go through the opening, so hollowing limited areas with a multitude of settings and cutters are the things that gets it to the finish line.
Hollowing a vessel becomes trickier through a narrow throat like this one. The opening is about an inch in diameter but the hollowing tool is something like 5/8" diameter, meaning it doesn't have much room to move side-to-side. Going in at an angle increases the volume that can be hollowed and changing the angle of the cutting tool on the end helps as well. But too much angle means the cutter won't even be able to go through the opening, so hollowing limited areas with a multitude of settings and cutters are the things that gets it to the finish line.
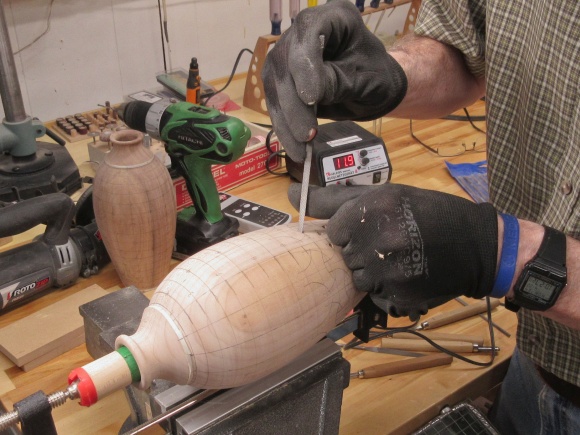
Flipped around to shape the bottom
Once the hollowing was done the vessel was flipped around so I could shape the bottom as seen in this photo.
I had been insufficiently careful during the hollowing and may have made the wall too thin in some areas but I thought I'd forge ahead and see how it looked further along.
I had been insufficiently careful during the hollowing and may have made the wall too thin in some areas but I thought I'd forge ahead and see how it looked further along.

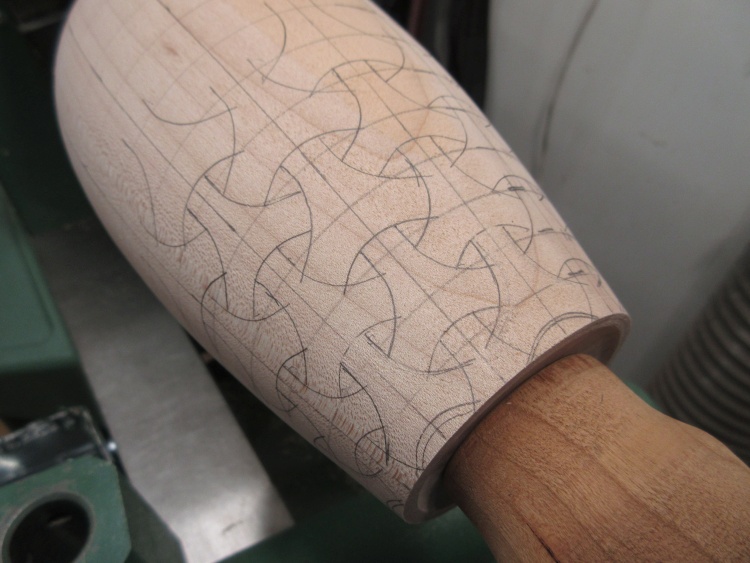
Marking "longitude" lines with the aid of a laser
The vessel has fourteen columns of tri-lobe shapes (with alternate columns offset vertically) so I needed 14 evenly-spaced lines running top-to-bottom around the vessel. I started by adding thin strips of white tape to the top and bottom which I had marked with the proper line spacing.
To ensure the lines were straight and properly aligned (not a "gimme" on a curved vessel) I used a laser for a guide as seen here. For each line location I marked the wood in a few places and later joined the marks using a flexible straightedge.
To ensure the lines were straight and properly aligned (not a "gimme" on a curved vessel) I used a laser for a guide as seen here. For each line location I marked the wood in a few places and later joined the marks using a flexible straightedge.

Marking "lattitude" lines
Circumferential lines were added to mark the vertical positions of the holes.
The spacing of these lines is dependent on the diameter at each point to properly fit the proportionally-sized tri-lobe shapes.
The spacing of these lines is dependent on the diameter at each point to properly fit the proportionally-sized tri-lobe shapes.
Cutting a circle template
Then I needed to figure out how to put the pattern on the vessel.
I tried tracing the shapes from a plan but that didn't work well due to flatness problems, alignment issues and wiggly-line syndrome.
So then plan B was drawing circles on the vessel to have the resulting center bits be the pattern. For that I needed a number of custom-sized circle templates which I cut using the lathe and a modified compass as in the photo.
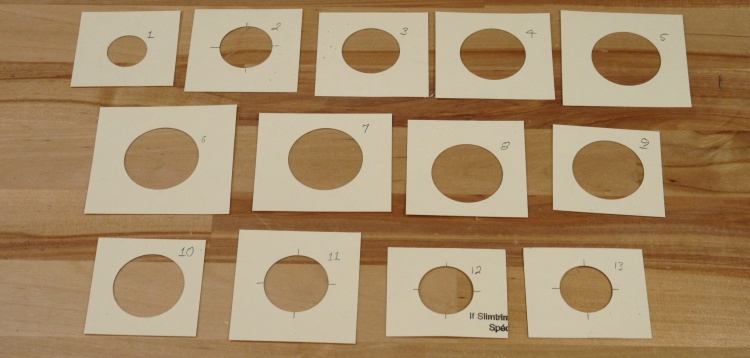
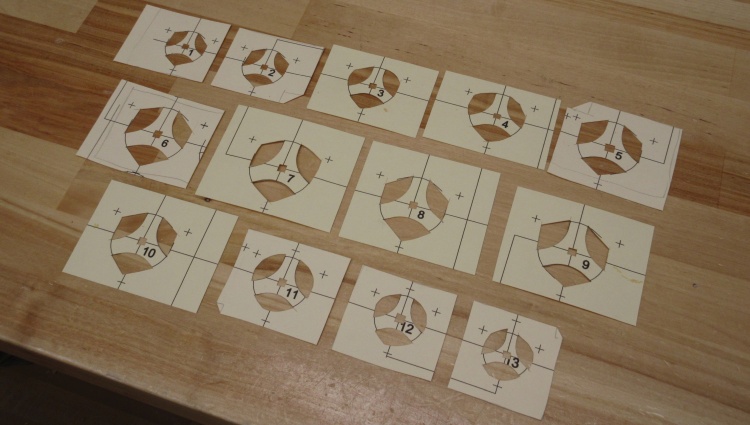
The full set of circles
I needed 13 different sizes of circles and eventually I had all the templates neatly cut out of thin cardboard (file folder material in fact, which accounts for the colour).
Unfortunately that didn't work out very well either as a result of tri-lobe shape distortions introduced by adjacent circles of different sizes.
Unfortunately that didn't work out very well either as a result of tri-lobe shape distortions introduced by adjacent circles of different sizes.

Cutting out some three-lobed templates
My next stab at it (Plan C for those keeping track) was cutting tri-lobe templates from the thin cardboard using overlaid paper patterns.
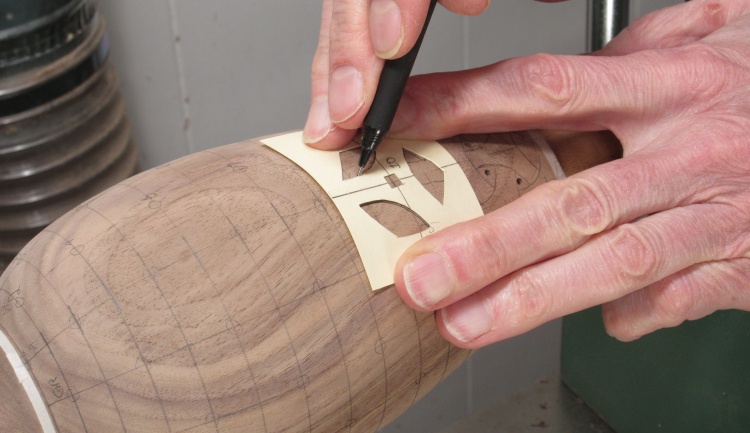
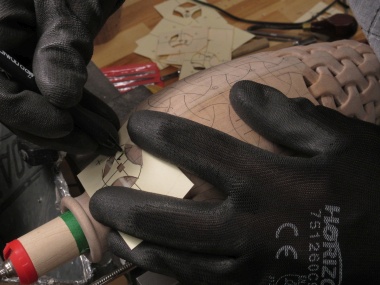
Tracing on a shape
This shows one of the patterns being traced out on the vessel. I had manually added alignment marks but their limited accuracy and small errors in the pattern cutting gave lousy results.
The pattern approach seemed like the best way forward but I decided I needed better patterns with curves cut more accurately.
The pattern approach seemed like the best way forward but I decided I needed better patterns with curves cut more accurately.
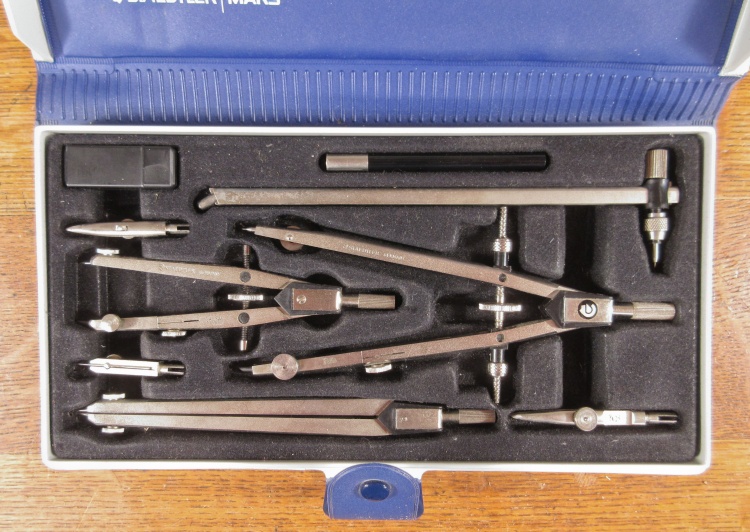
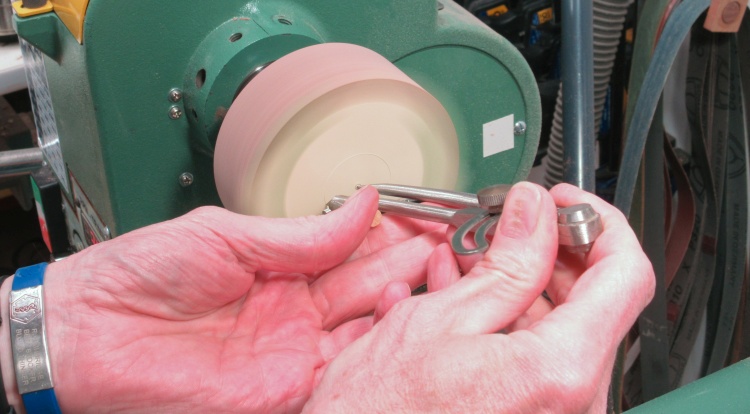
A precision compass set from the age of pencils
For better curves I figured the answer was a better compass, and one that could be equipped with a cutting modification to accurately cut the curves.
I managed to dig up my old precision compass set from almost 50 years ago which I found buried in a box of old electronics, naturally.
I managed to dig up my old precision compass set from almost 50 years ago which I found buried in a box of old electronics, naturally.
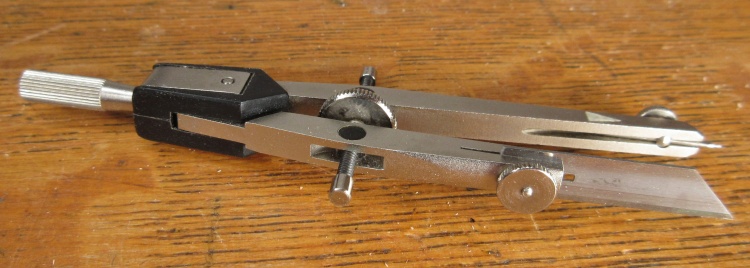
The small one modified into a cutter
I used the small compass and kludged on half of an old but re-sharpened X-Acto blade.
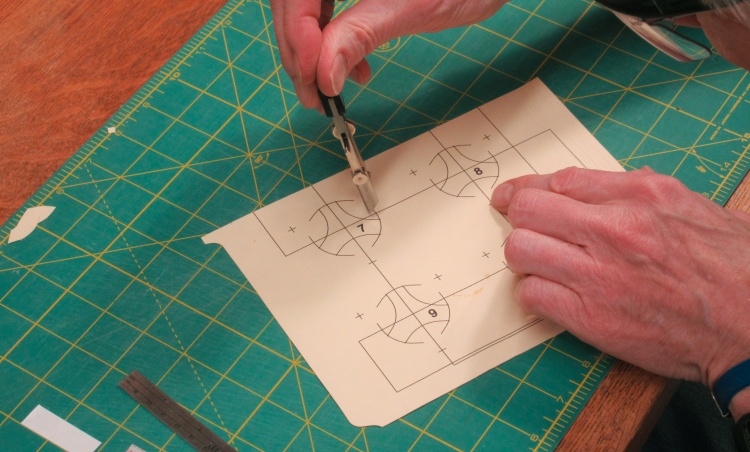
Cutting curves into more-accurate patterns
The cardboard went into the printer so the patterns could be directly printed on it.
I included center points for the circular curves and using those, employed the compass to cut the curves.
A bit of manual cutting after that with a utility knife did the rest of the pattern, including a small window in the center to enable alignment of the center lines with those on the vessel.
I included center points for the circular curves and using those, employed the compass to cut the curves.
A bit of manual cutting after that with a utility knife did the rest of the pattern, including a small window in the center to enable alignment of the center lines with those on the vessel.
The full set of 13 patterns
This shot shows the 13 different-sized patterns that would be needed.
That was Plan D for pattern transfer and fortunately it let me mark patterns with enough accuracy that they looked decent.
Finally! Then I could get back to the wooden part;
That was Plan D for pattern transfer and fortunately it let me mark patterns with enough accuracy that they looked decent.
Finally! Then I could get back to the wooden part;
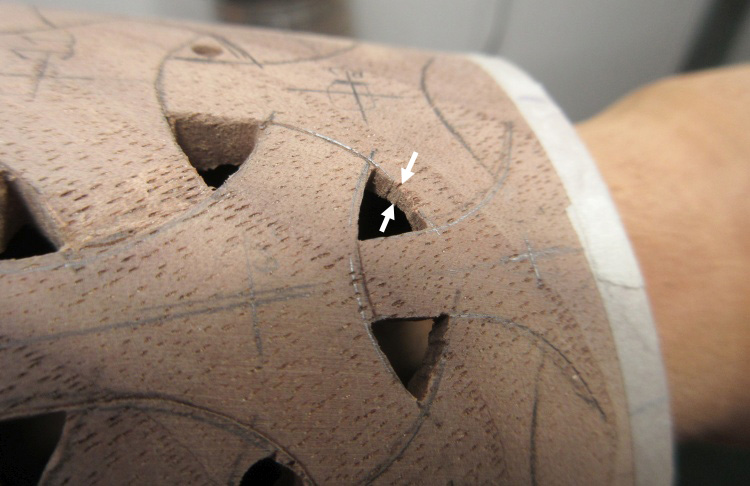
Unfortunately, the walls are too thin at one spot near the bottom
I traced a few patterns on the vessel near the bottom where I was worried about the thickness and started making some holes.
It was pretty obvious that this part was way too thin to carve the relief pattern I had planned.
Nothing for it but to gird my loins for a re-make of the vessel.
It was pretty obvious that this part was way too thin to carve the relief pattern I had planned.
Nothing for it but to gird my loins for a re-make of the vessel.
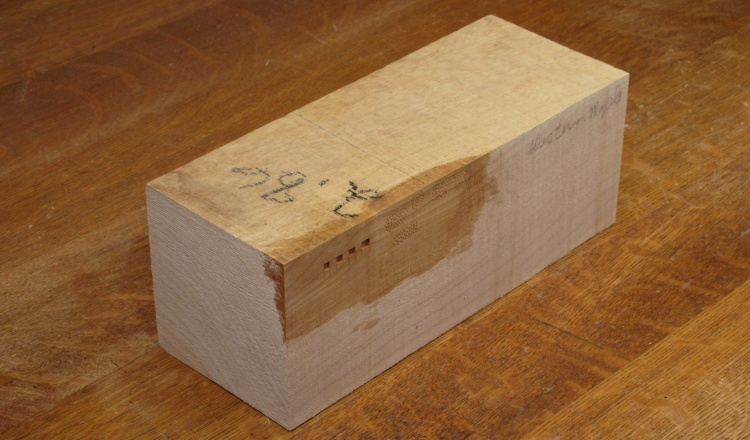
A nice piece of Western maple for a second attempt
While the remaining piece of walnut was long enough for another vessel, it would have had a fairly significant crack. I didn't want the vessel to incorporate even a repaired crack so I turned to the only other appropriate piece of wood in the shop; this Western Maple block.
It had some test carvings and varnish from some forgotten previous project but that will all be removed.
It had some test carvings and varnish from some forgotten previous project but that will all be removed.
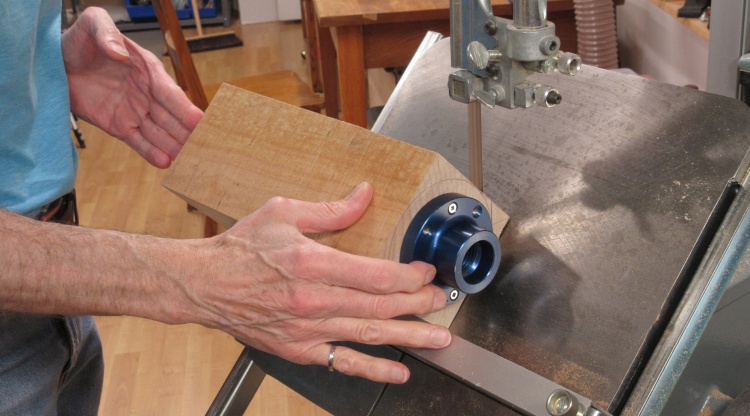
Chopping off the corners
The size was fine so I added the faceplate and cut off the corners in preparation for turning.
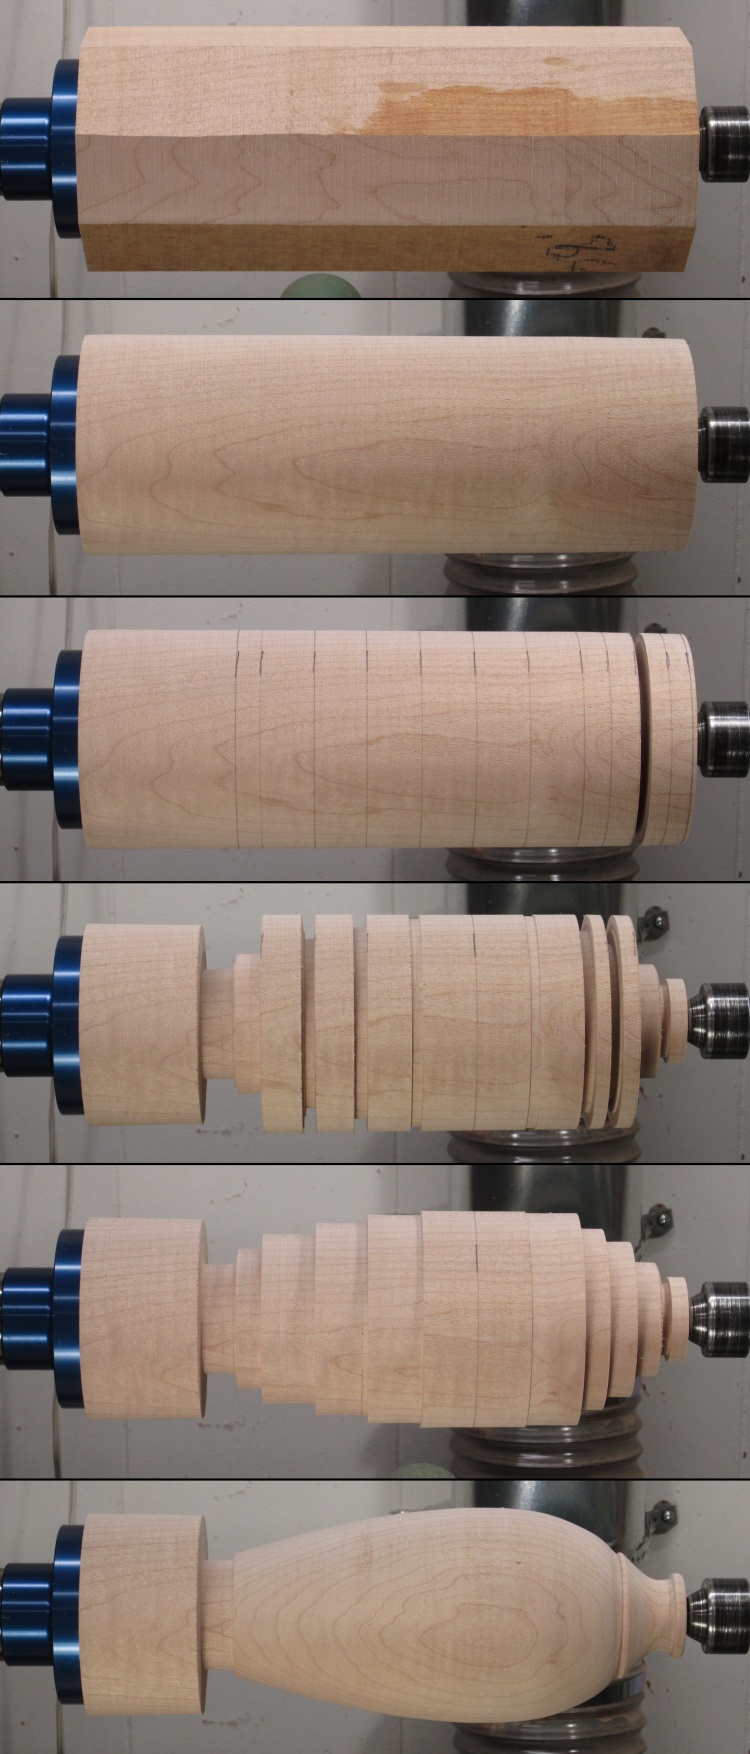
The turning summary composite
The turning process was similar to the previous walnut version, summarized in this long composite.
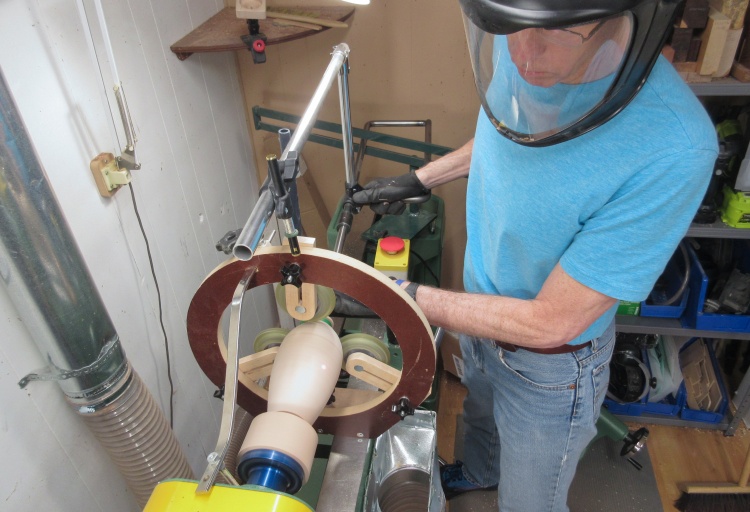
Hollowing the maple vessel
And then hollowing again (being, yes, slightly more careful this time).
That was followed by shaping the bottom as before (off camera).
That was followed by shaping the bottom as before (off camera).
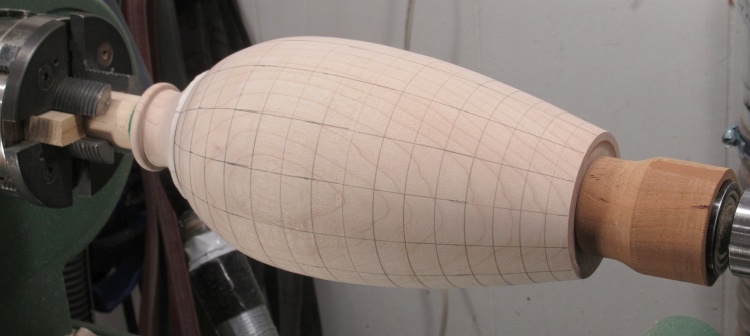
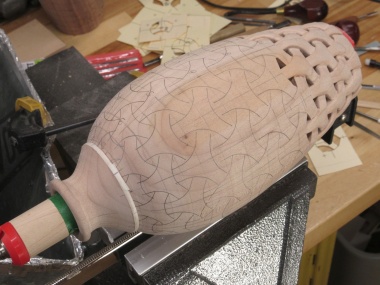
Marked, mounted and ready for patterns
Then once again remounted to the lathe and marked longitudinally and laterally.
At least the pencil lines are easier to see on the maple.
At least the pencil lines are easier to see on the maple.
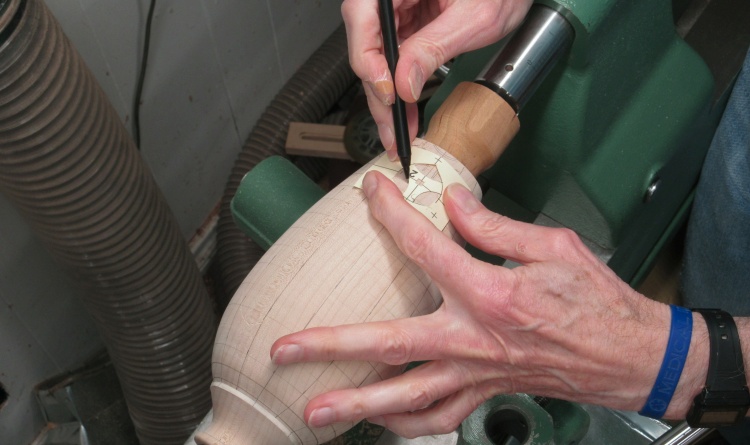
Starting to trace on the patterns
This photo shows me starting to trace the patterns onto the surface.
The first section marked
I started by marking shapes in a patch at the bottom.
Then it was carving time. In general i followed a multi-step process which included:
- Drill pilot holes in the triangular sections to be cut out,
- Cut out the holes using the small jig saw,
- File the holes to proper size,
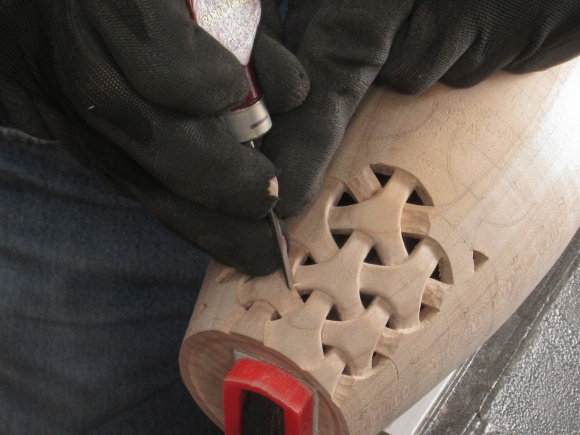
- Bevel the ends of the tri-lobe shapes where they go "under" the adjacent shapes,
- Sand the carved faces smooth,
- Chamfer the edges of the shapes,
- Sand the edges to round them off.
- Drill pilot holes in the triangular sections to be cut out,
- Cut out the holes using the small jig saw,
- File the holes to proper size,
- Bevel the ends of the tri-lobe shapes where they go "under" the adjacent shapes,
- Sand the carved faces smooth,
- Chamfer the edges of the shapes,
- Sand the edges to round them off.
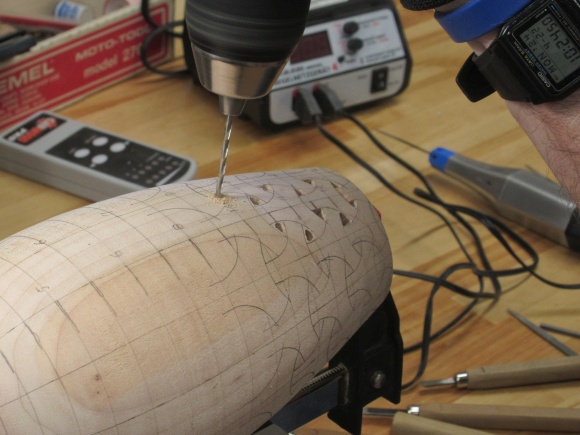
Drilling between patterns
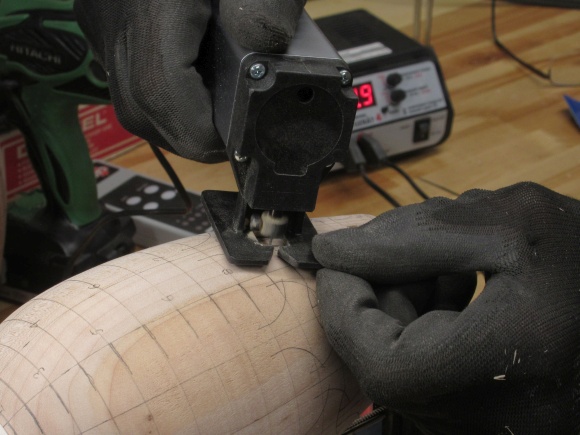
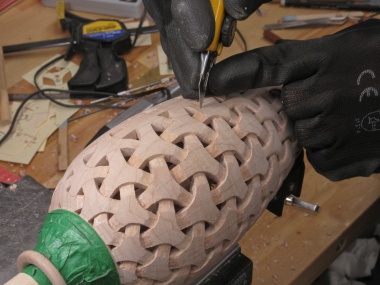
Jig-sawing out the little triangular holes
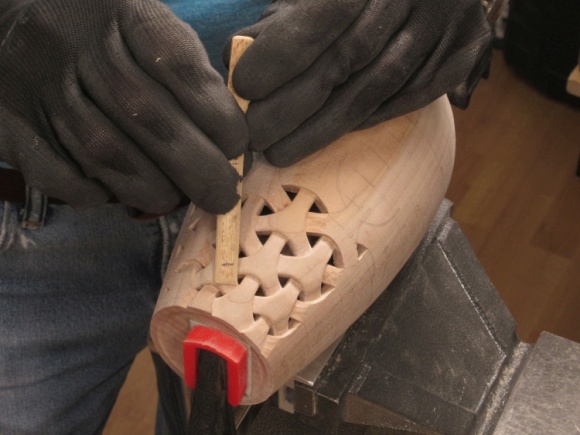
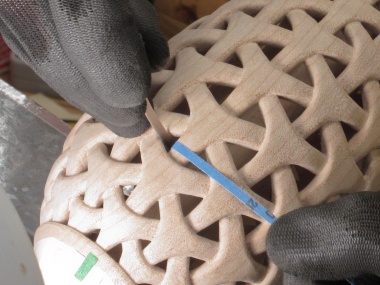
Filing the sides even
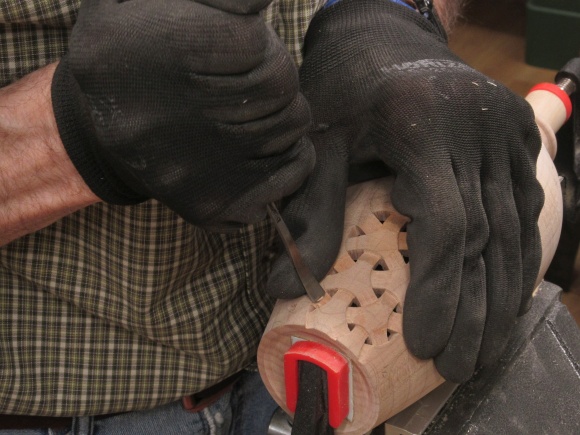
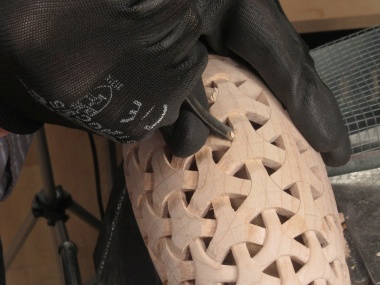
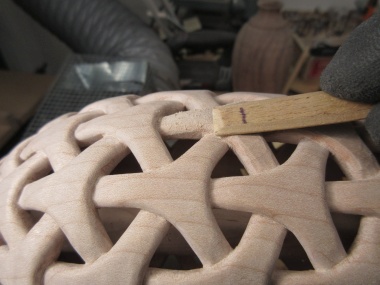
Starting to bevel pattern ends

Cutting fibers to help bevelling
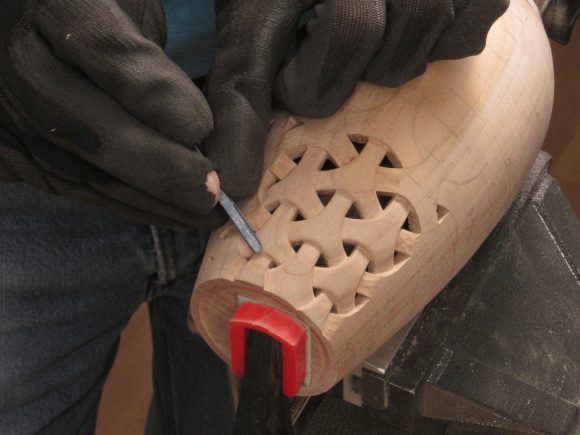
Chamfering edges of shapes
Sanding the surface smooth
A smaller sander for the corners
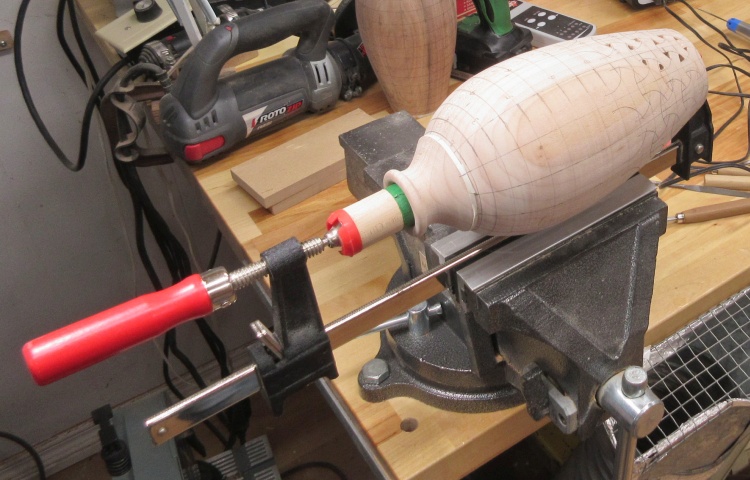
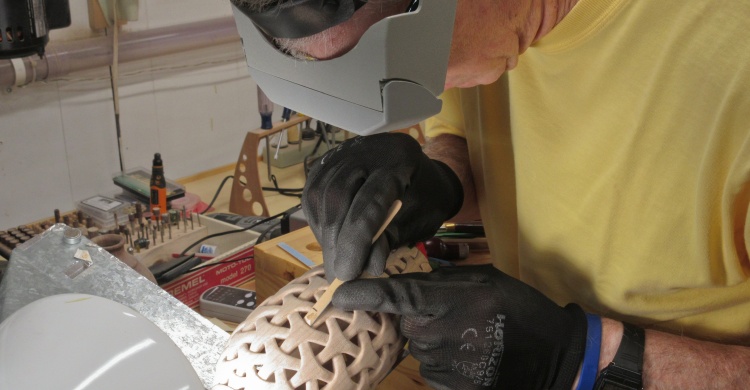
The vessel mounted using a clamp and vise
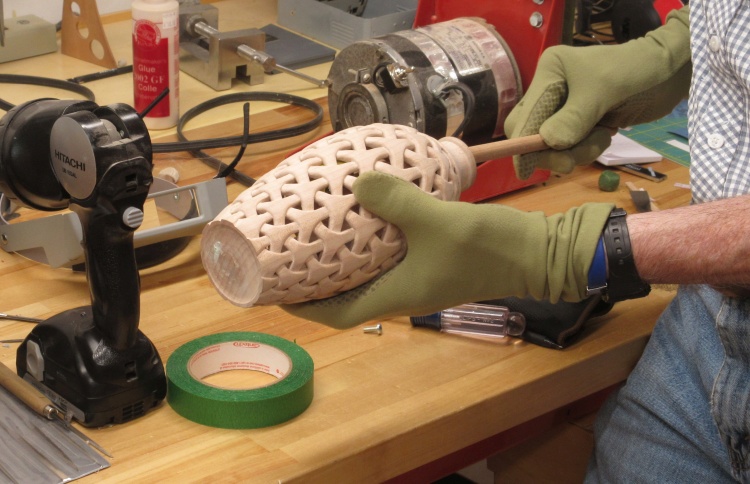
To do the carving the vessel was held in my bench vise with the aid of a clamp and a dowel that fit inside to clamp the vessel bottom.
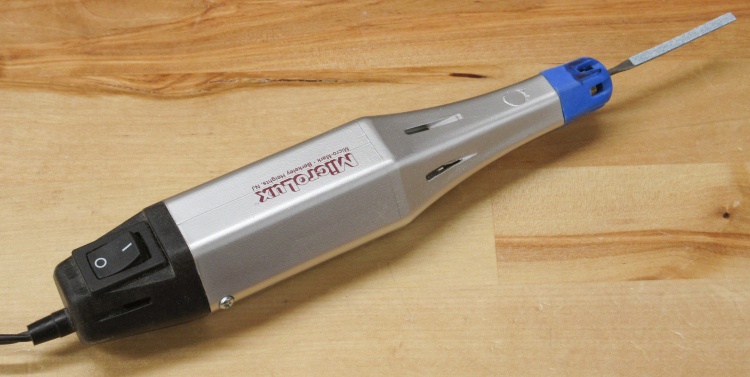
Electric filer modified with a sander attachment
I tried my electric filer to aid in the shaping of the triangular holes but I found that the fine files it held weren't particularly effective. To improve things I modified an extra file to hold coarse sandpaper, and that worked better.
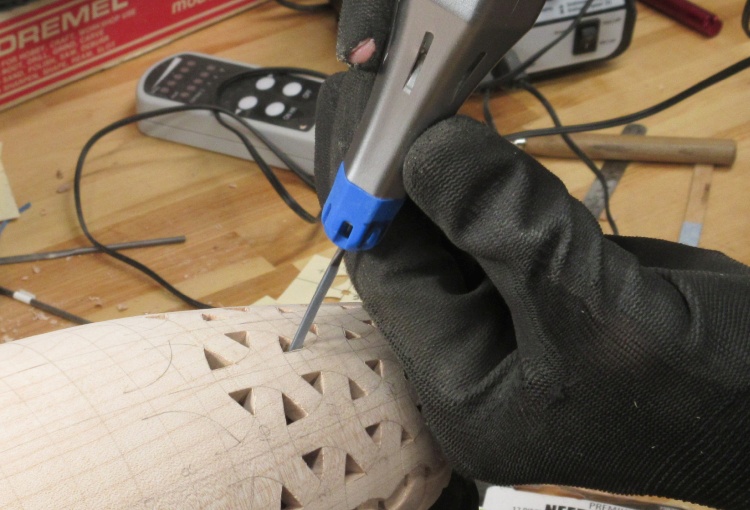
Sanding some hole edges
I used the filer to remove most extra wood before finishing off the holes with needle files.
I started working from the bottom of the vessel and once the bottom few rows were complete, I switched to doing the top part. Of course that was more of the same operations shown previously so I've just included some unannotated photos of top-part work;


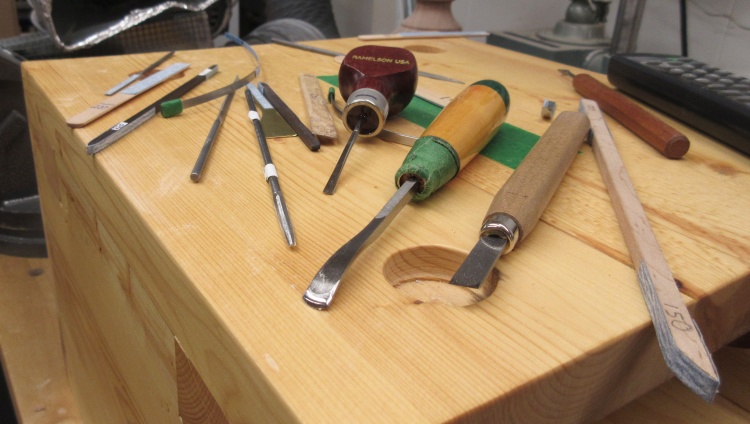
A selection of tools
I would need to change tools every few seconds so I set them on a small stool to get them closer to the height at which I was working.
The (mostly) 220 grit sandpaper on the small jigs didn't last long either and I'd need to get a fresh section (usually by unsticking and moving a strip) after five or 10 seconds of sanding. That helped account for why it took around seven weeks to do all the shaping and sanding.
Along with existing tools and jigs, I made another half-dozen tools (mostly sanding jigs) to make the shaping and sanding process more efficient.
Take it from the top...
So then after all the shaping was done, I started over and checked every hole and junction once again, cleaning up any that could use it (which was about 80% of them).
A strong light that I could move and a pair of magnifying lenses helped track down imperfections.
A strong light that I could move and a pair of magnifying lenses helped track down imperfections.
Cleaning up the inside face
Once I was satisfied with the outside I did a quick sanding of the inside to smooth out rough edges around the holes.
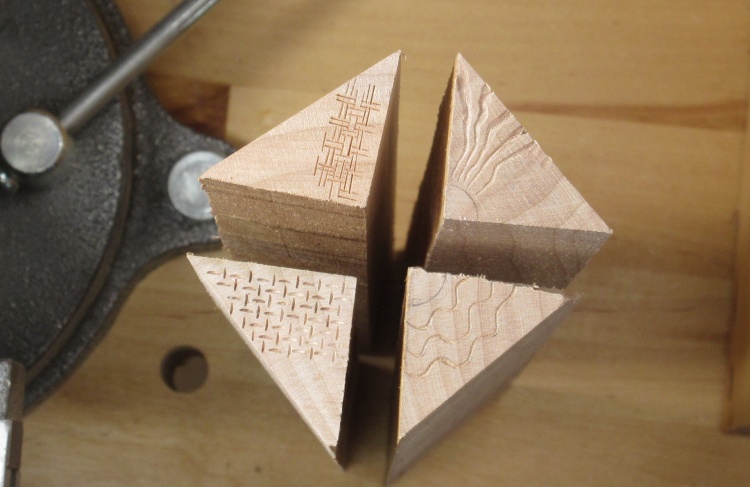
Some possibilities for a bottom design
The next step was to finish off the bottom. As is visible from the previous photo, it needed some further sanding due to the wear of the cardboard-lined holding clamp that lowered the friction enough to let me rotate the body.
I also thought I'd add a pattern to the otherwise flat surface. I tried out a few potential candidates on the end grain of some leftover corners.
I also thought I'd add a pattern to the otherwise flat surface. I tried out a few potential candidates on the end grain of some leftover corners.
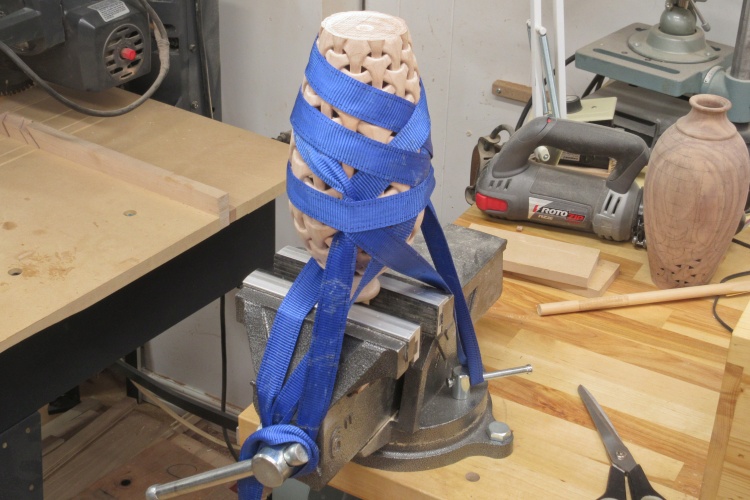
Strapped in place for bottom carving
I was going to need the vessel held securely to be able to carve the bottom so I put the center dowel back in to hold it vertical and strapped it to the vise. That provided a secure grip on the vessel with little danger of damage to the carved walls.
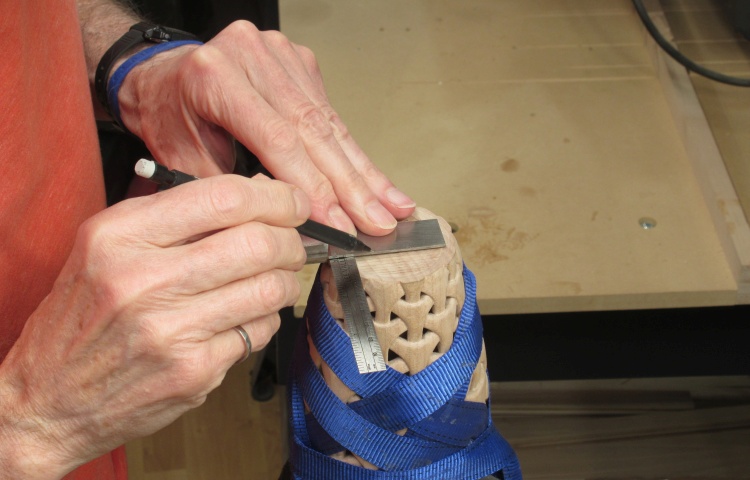
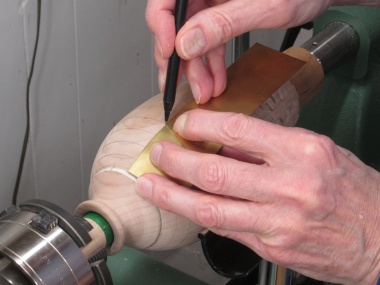
Marking on some guidelines
The inset circle for my initials was first added in the center of the bottom. The pattern would surround that and I had opted for the "woven" look to sort of jibe with the overall theme of the vessel. I started by drawing pencil lines to form a 2mm grid.
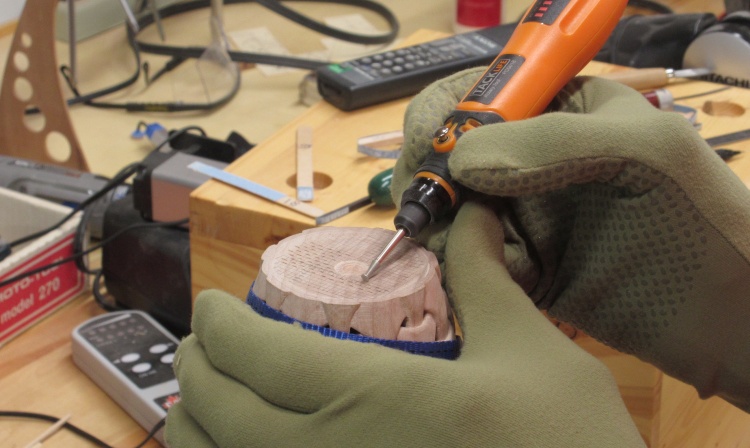
Carving with a tiny diamond disc
Then the carving commenced. I was able to use a small diamond-coated disc on a rotary tool to make the short lines forming the weave pattern, which ironically took little force and didn't really need the vessel to be securely held.
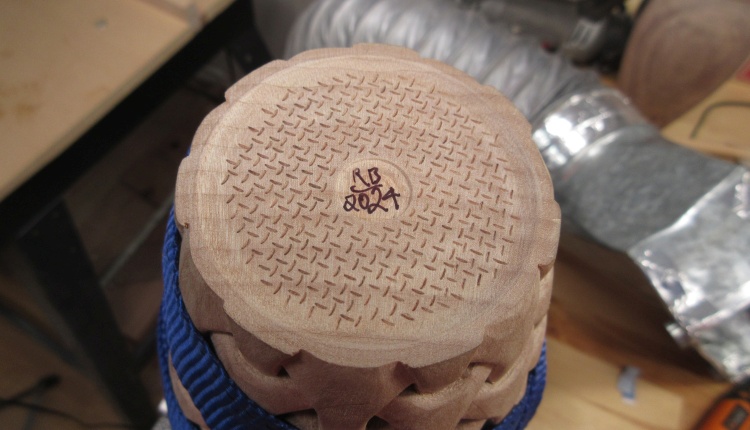
The bottom, complete
Well, the photo caption says the bottom is complete but I can now actually see two places where I missed adding the lines. More proof that you can't believe everything you read on the Internet.
That's it for the woodworking
And that was it for the woodworking.
Stats:
- Carving duration: 7 weeks
- Number of holes: 224
- Number of tri-lobe shapes: 112
- Carving injuries: 0
- Curses uttered: 5,382
Stats:
- Carving duration: 7 weeks
- Number of holes: 224
- Number of tri-lobe shapes: 112
- Carving injuries: 0
- Curses uttered: 5,382
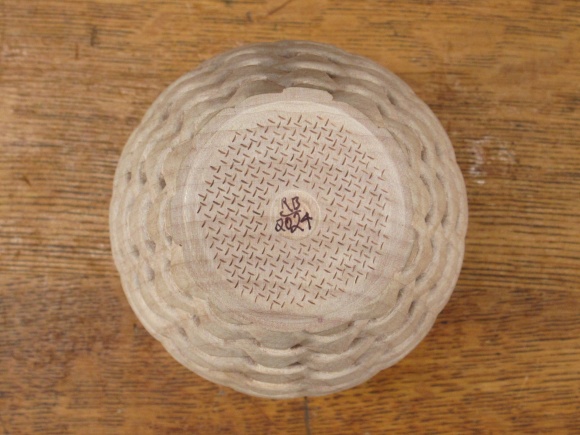
Bottom view

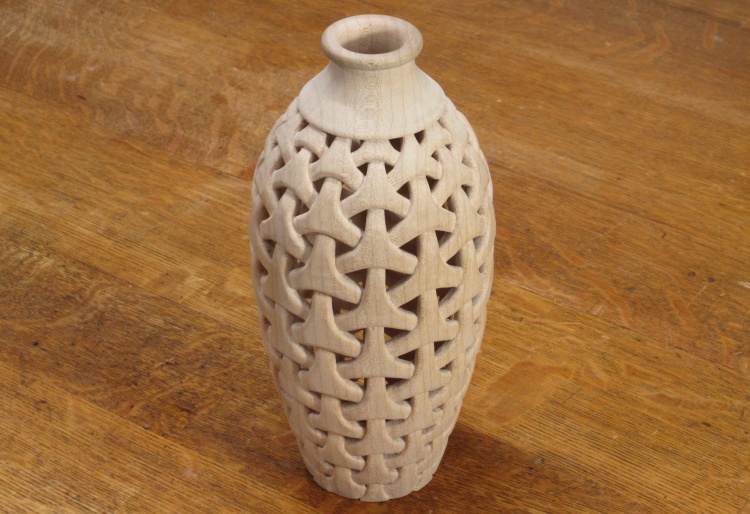
Top view
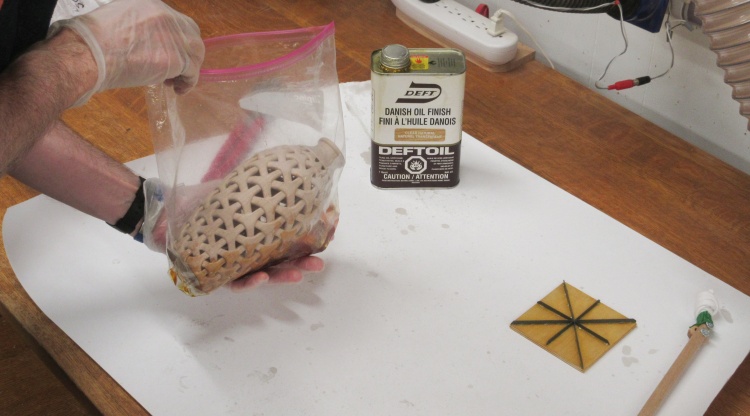
Starting to apply the finish, immersion-style
Given the convoluted surface I decided to use Danish Oil as a finish since it needs no treatment between coats.
I used an immersion technique to make sure I covered all the surfaces inside and out. The wood needs to be kept wet with the finish for half an hour and then any remaining gets wiped off.
For the wipe-off stage, I started with a cloth and then used the central-vac to suck finish to the top surface to be wiped off. A separate stick with a cloth-equipped end (seen on the right in this photo) was used for the inside.
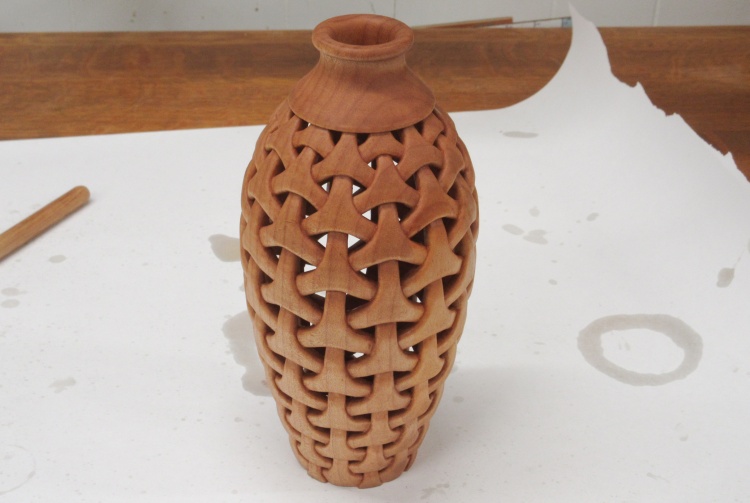
The oil darkened it up nicely
This is a shot just after the first coat was wiped off. The finish darkened the wood fairly significantly, making it look more like the colour of cherry than maple. But I'm good with that.
Done


