The flatbed wagon pulled by Connor was great for family hayrides where everyone was familiar with it, but it could be improved a bit for the less-familiar or less-agile. That boiled down to adding railings for safety. A few techniques were discussed and a baluster*-and rail approach was settled on. I volunteered to make the railings which meant getting right on it, since the wagon was needed about 7 weeks after we discussed starting. I whipped up some plans, we found some wood, and I got started.
*AKA spindle
*AKA spindle
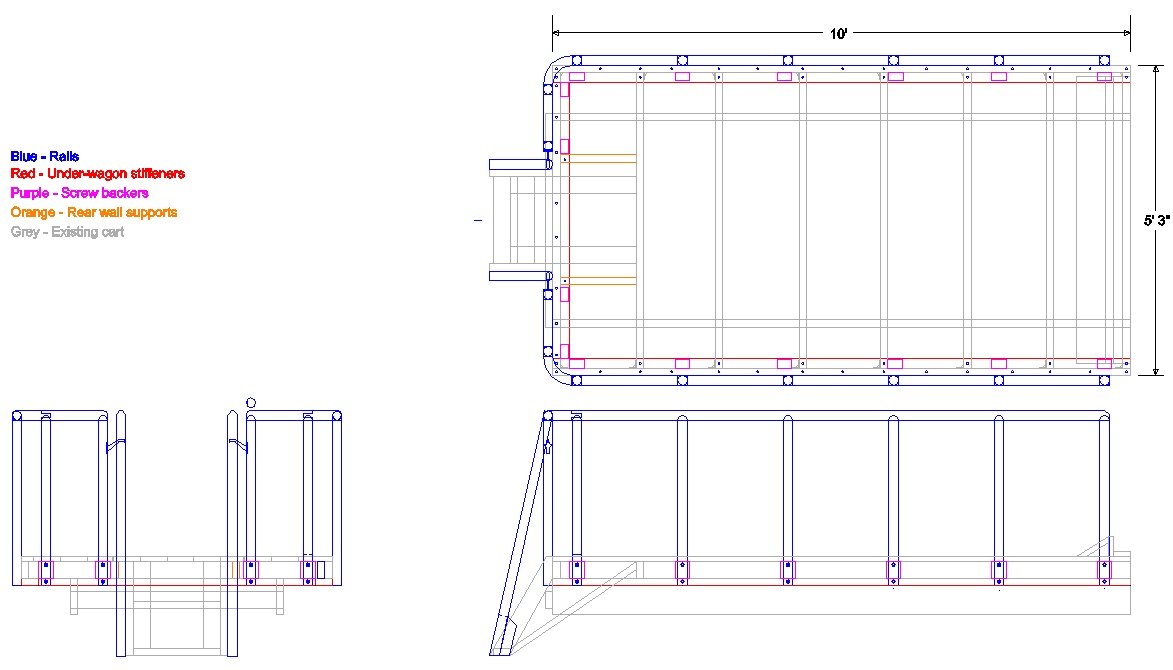
Existing wagon is in grey, coloured pieces are added.
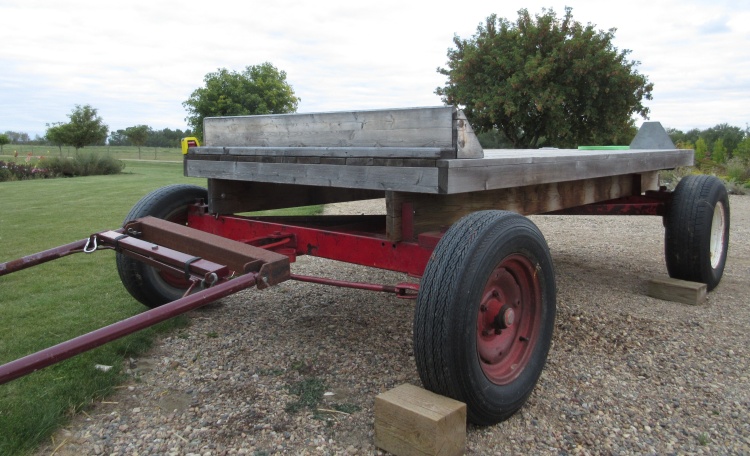
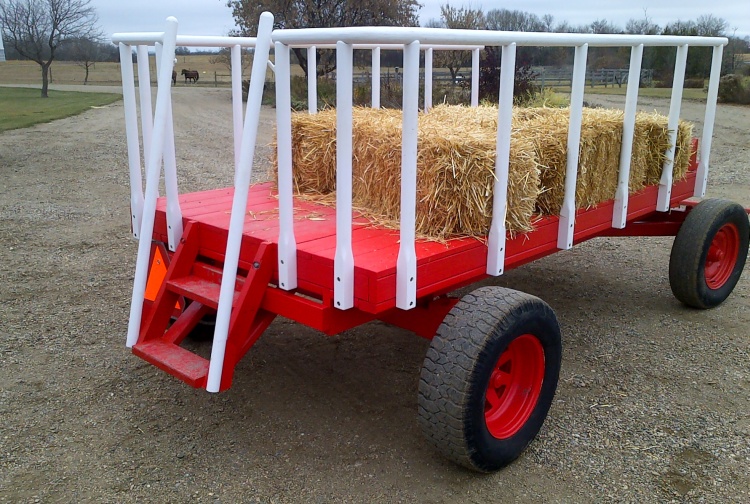
The wagon, in original form
This is the wagon in original form. For hayrides, a few rectangular bales are tossed on top and people just pile on. The driver sits on a "front seat" bale and off you go;
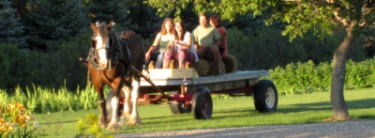
Like this
However, for general use with the public, it needed to be a bit more secure. Solid walls and/or seats were discussed, but each of those moves it further from the "hayride" experience.
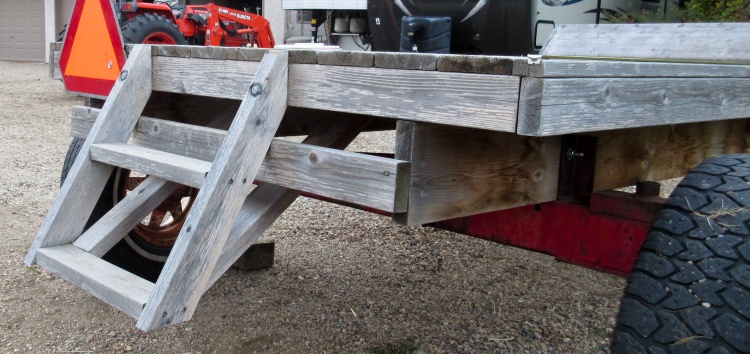
Open stairs on the back end
The solution settled on was side and rear railings to provide safety while maintaining an unobstructed view. The wagon also received a bit of reinforcement to better support the railings, and we planned for a stairway railing to help with the slightly daunting task of ascending the open stairs.
A surprising amount of wood was required (about 26 board-feet) and we decided again to use Birch since it worked well for Connor's cart shafts.
A surprising amount of wood was required (about 26 board-feet) and we decided again to use Birch since it worked well for Connor's cart shafts.
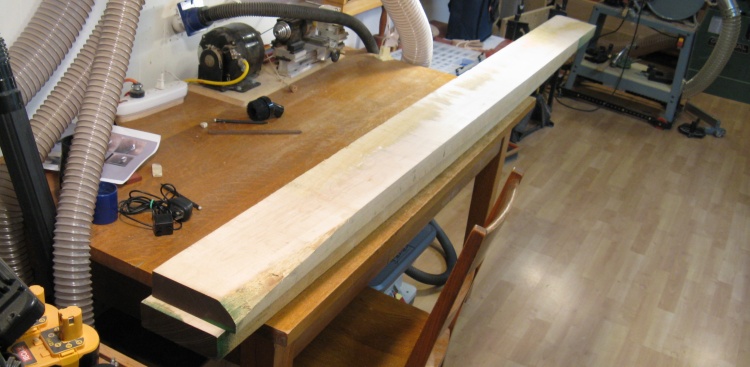
First couple pieces of wood
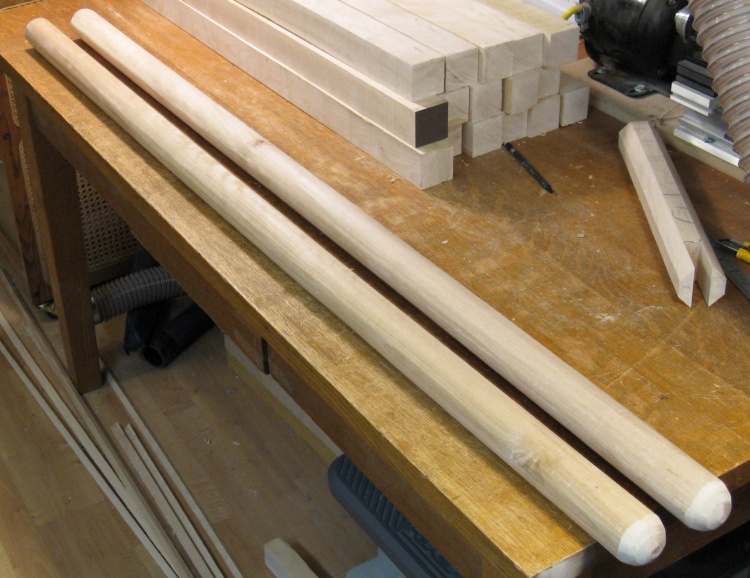
I started with a couple 8-foot planks as shown here. The side rails were over 9' so the plan was to use these for the balusters in the hope that I could find some longer pieces.
It ultimately took about this much wood again.
It ultimately took about this much wood again.
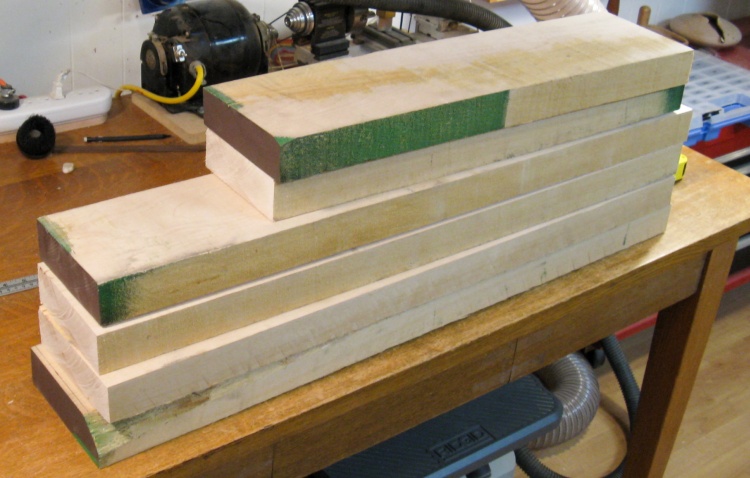
Baluster-length pieces and some leftovers
I chopped these up into 3-foot lengths, and of course had some leftovers from my 8-foot pieces. Those were used for other pieces of the railing.
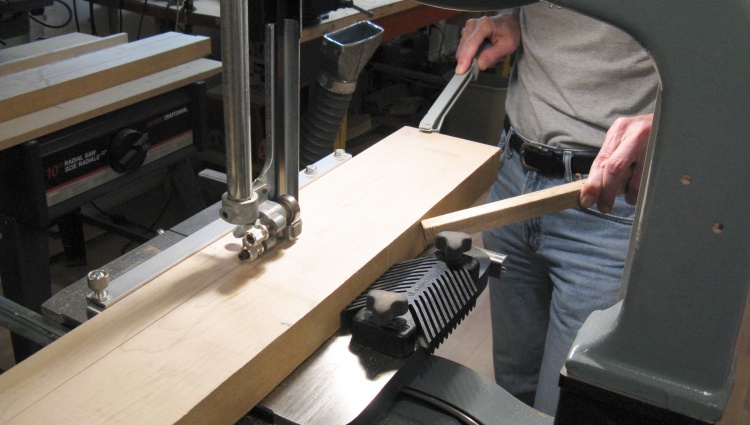
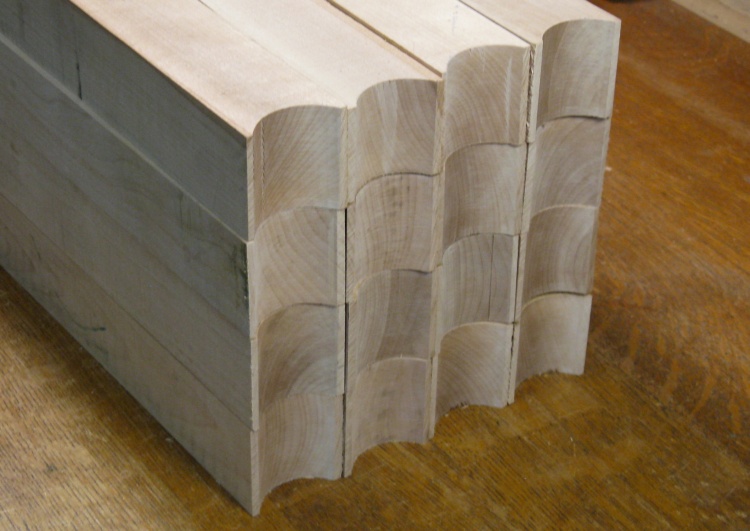
Slicing up into 2" widths
Each of these sections was run through the bandsaw. The planks were about 2" thick and they were cut to about the same width to have a square 2" cross-section.
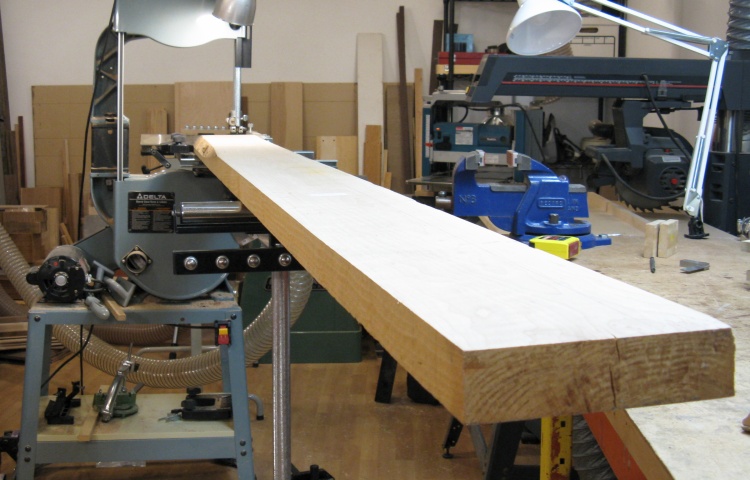
Slicing up side rails
Ultimately, I didn't manage to find any longer pieces of wood so I just used another 8-foot piece for the side rails too. Of course that meant they needed to have a second piece tacked on to get the required length.
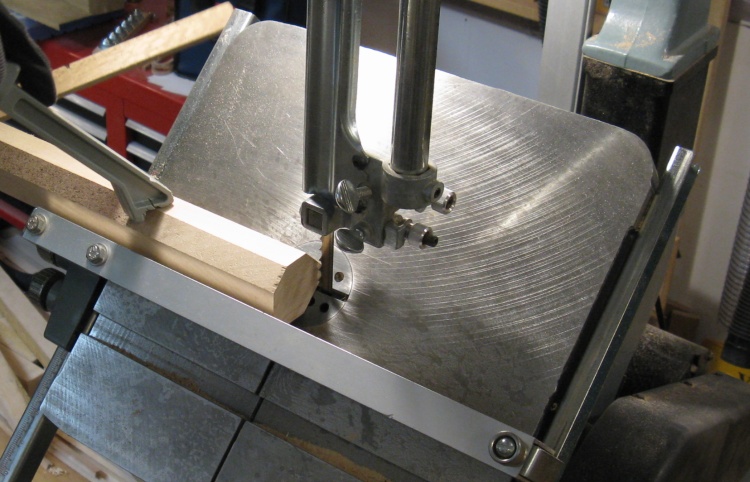
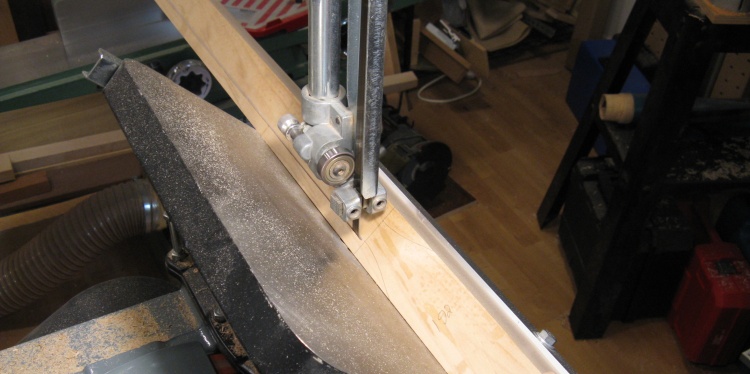
Here is one of the new pieces getting set to go through the bandsaw. This piece provided the two side rails, one of the stair rails and a single baluster.
Here is one of the new pieces getting set to go through the bandsaw. This piece provided the two side rails, one of the stair rails and a single baluster.
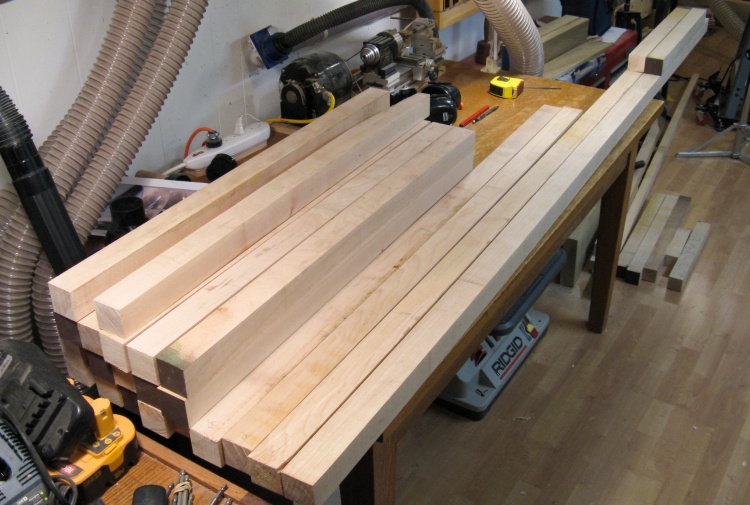
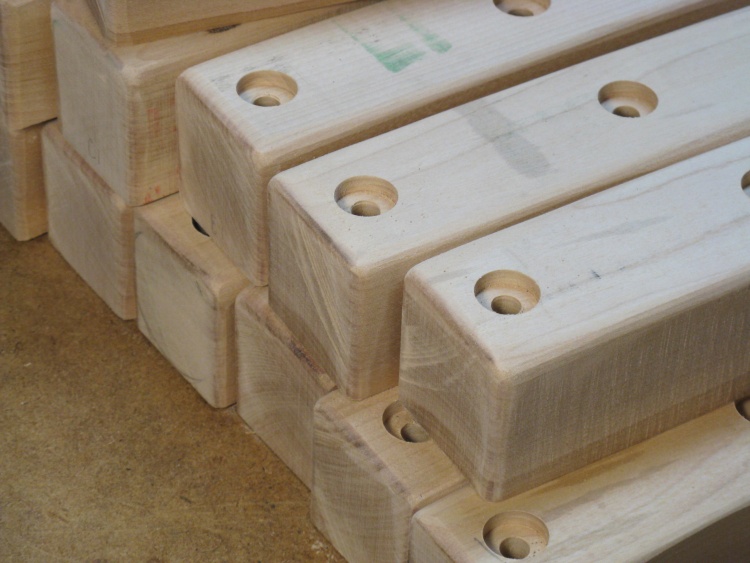
Rail blanks ready to go
So once the dust settled, so to speak, I had the following collection of rail blanks. That included:
16 balusters,
2 stair rails,
2 side rails (two pieces each), and
2 short end rails (to be made out of the 17th baluster-length piece).
16 balusters,
2 stair rails,
2 side rails (two pieces each), and
2 short end rails (to be made out of the 17th baluster-length piece).
Stair Rails
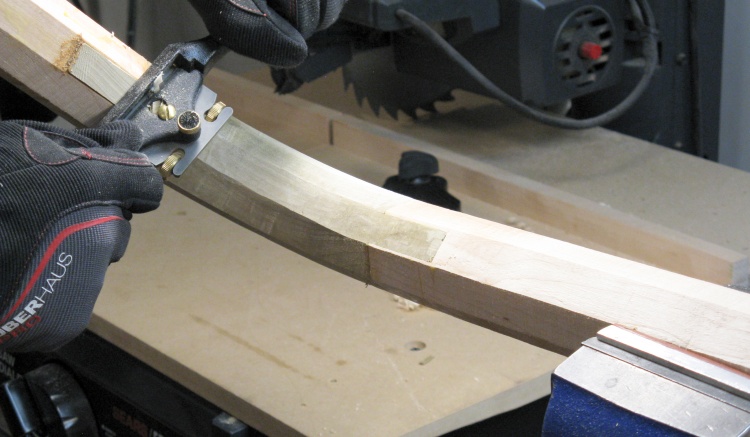
Cutting corner bevel
The stair rails were pretty straightforward in that they were just uniformly round for the full length, with a radiused top end.
As the eastern mystics know, when you are but a square, the first step to true roundness is becoming an octagon. So I started the blank on its journey by cutting the corners off.
As the eastern mystics know, when you are but a square, the first step to true roundness is becoming an octagon. So I started the blank on its journey by cutting the corners off.
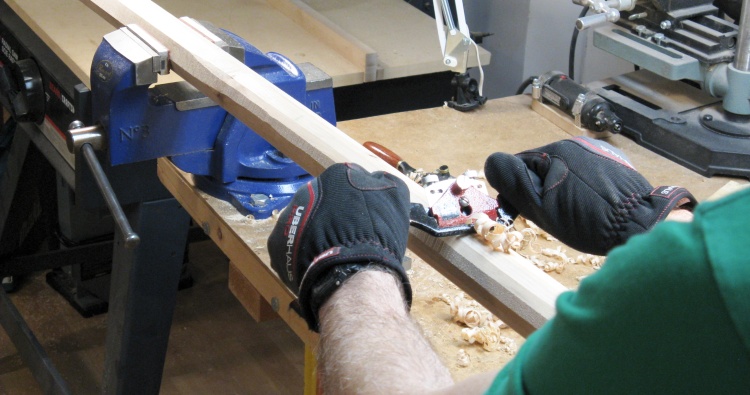
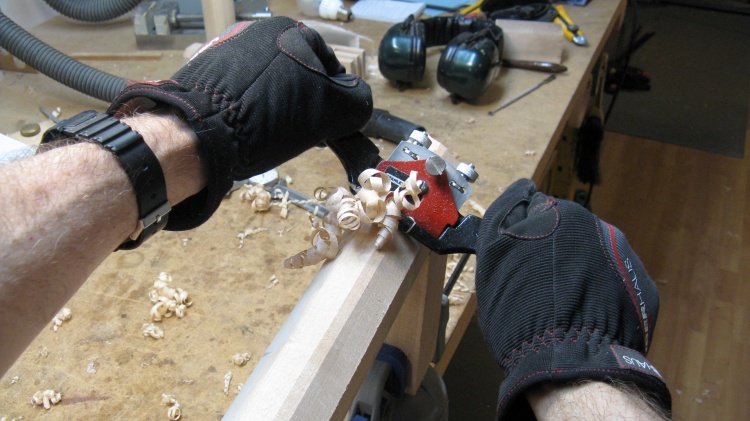
Shaving off the corners
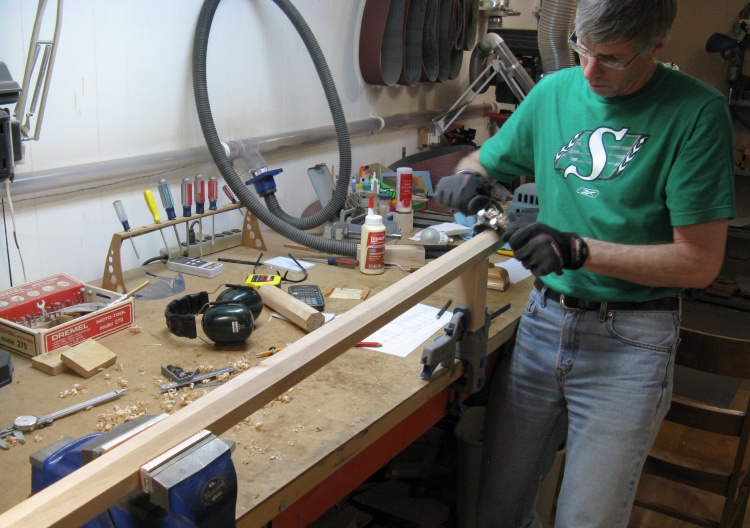
This shows the setup used to do the rounding. The blank was held in the vise with the end resting on a little makeshift support.
The spokeshave is drawn over the corners to flatten them a bit at a time until the wood has twice as many facets, and then those in turn are smoothed out until there is a reasonable facsimilie of a round shape.
The spokeshave is drawn over the corners to flatten them a bit at a time until the wood has twice as many facets, and then those in turn are smoothed out until there is a reasonable facsimilie of a round shape.
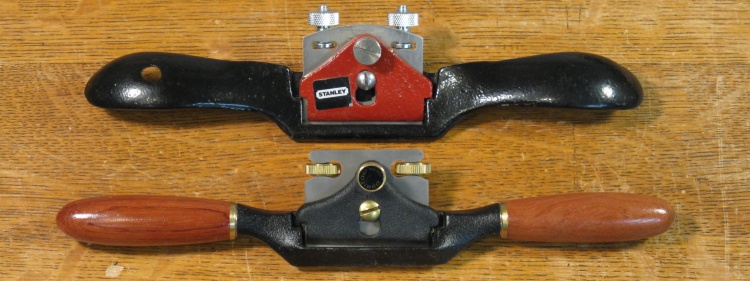
Spokeshaves
I have a couple spokeshaves, each of which consist of a blade protruding through a baseplate, and handles out the sides.
The black-handled Stanley has a flat base which is best for straight sections, while the classier-looking wooden-handled Veritas model has a curved base which lets it cut inside corners.
The black-handled Stanley has a flat base which is best for straight sections, while the classier-looking wooden-handled Veritas model has a curved base which lets it cut inside corners.
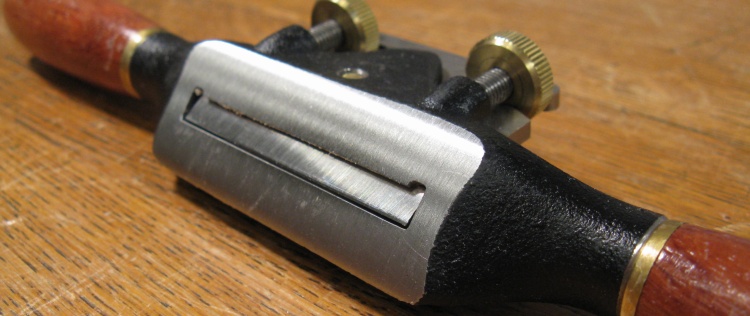
Blade on the curved-base spokeshave
The blade protrusion determines the depth of the cut, which I tend to keep quite thin. The Stanley was set for a bit heavier cut at about 7 mil (about the thickness of 2 sheets of paper) while the Veritas was about 4 mil. I tended to use the Stanley for the initial cuts and the Veritas for finishing cuts, and of course any corner work.
More "shaving"
Here the main corners have been removed. It took 20 to 30 strokes to reduce each of the 8 corners for about a 2-foot section. Then the other spokeshave was used to round that off further.
So the obvious question is how many total strokes did the whole project take? My guesstimate is somewhere in the 15000 to 20000 stroke range.
So the obvious question is how many total strokes did the whole project take? My guesstimate is somewhere in the 15000 to 20000 stroke range.
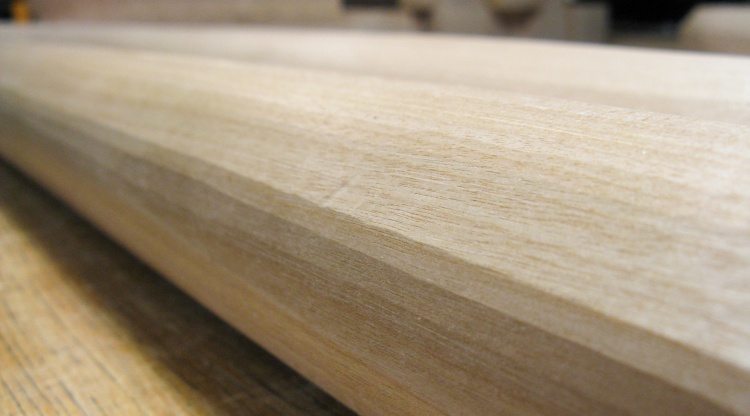
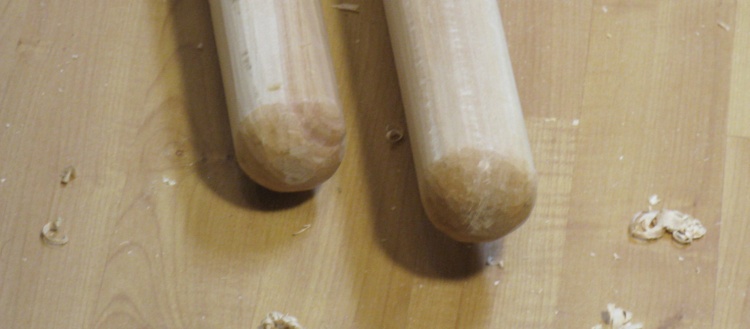
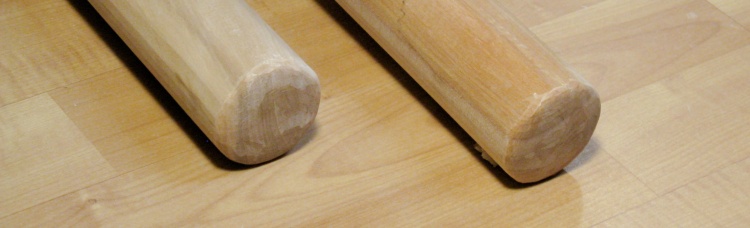
Closeup of the final finish
When done, the surface consisted of small facets as can be seen here.
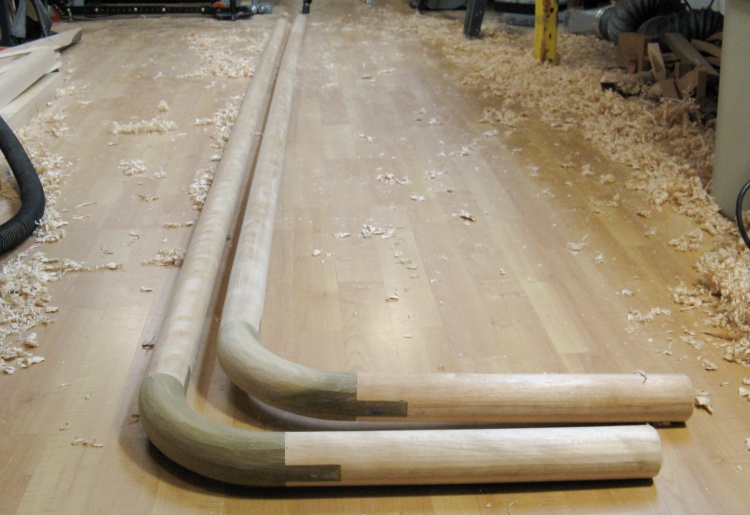
Mostly-completed stair rails
These are the two almost-complete stair rails.
The top ends are meant to be hemispherical, and here the ends have been belt-sanded into an approximation of that. These will be rounded off further with the spokeshave in the same manner as the rest of the rail.
The top ends are meant to be hemispherical, and here the ends have been belt-sanded into an approximation of that. These will be rounded off further with the spokeshave in the same manner as the rest of the rail.
Top Rails
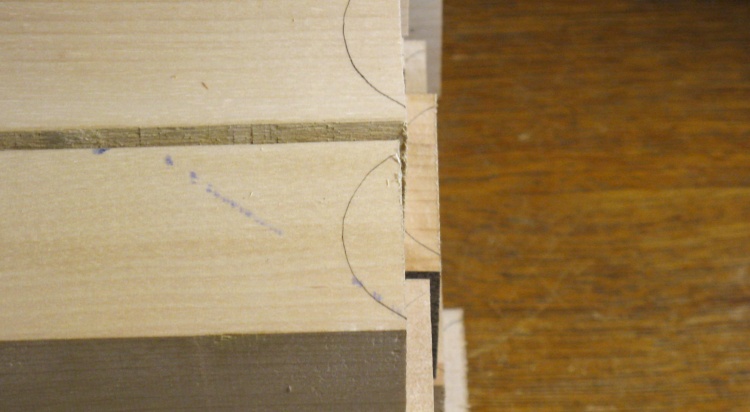
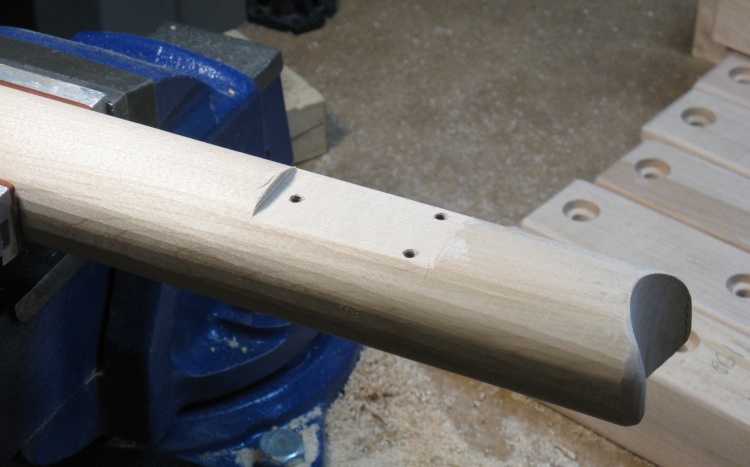
Joints outlined on side rail
The top rails run along the sides, around the back corners and for a short distance along the back of the wagon.
I decided to make a single L-shaped assembly for each side of the wagon, which I thought would be more accurate than doing assembly on the actual wagon.
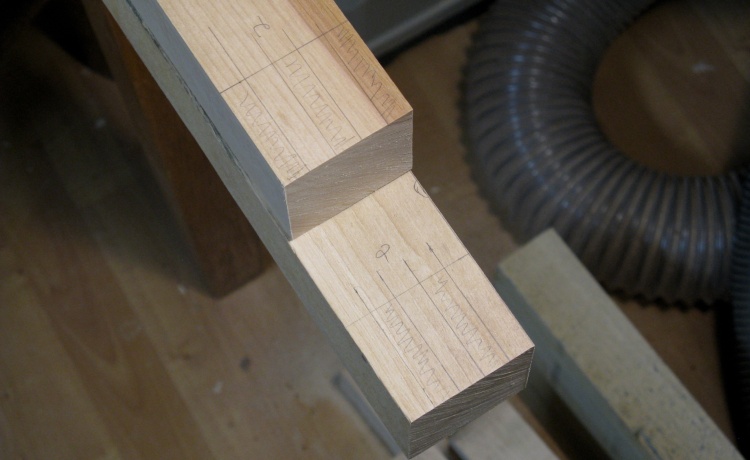
The side portions needed to be a bit over 9 feet long, so I needed to lengthen the 8 foot pieces I had. This was done by adding on an 18-inch length to each side rail, using finger joints to connect them. Here the joints have been drawn out on one pair to be joined.
I decided to make a single L-shaped assembly for each side of the wagon, which I thought would be more accurate than doing assembly on the actual wagon.
The side portions needed to be a bit over 9 feet long, so I needed to lengthen the 8 foot pieces I had. This was done by adding on an 18-inch length to each side rail, using finger joints to connect them. Here the joints have been drawn out on one pair to be joined.
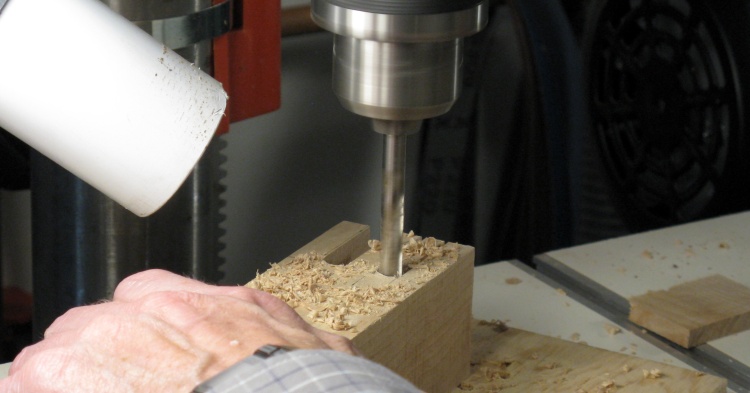
Drilling out the unneeded fingers
I used the bandsaw to cut the edges of the fingers on each piece, and then drilled through using the drill press to "sever" the fingers.
Trimming the inside
Of course that left a rounded base between each finger, so that was manually trimmed flat with a chisel. Where outside fingers were to be removed like the piece in this shot, the bandsaw was used to cut the fingers off.
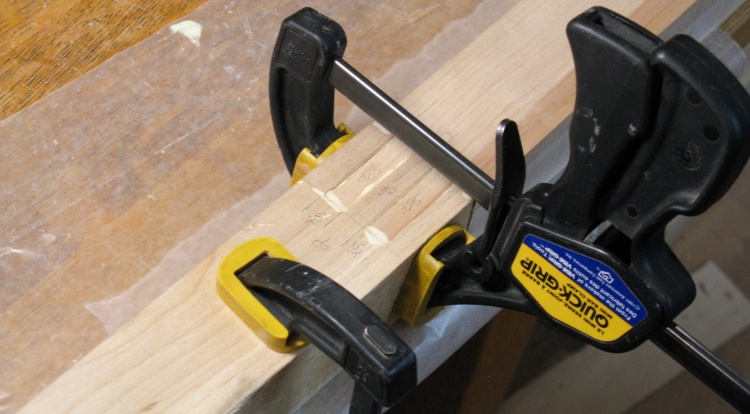
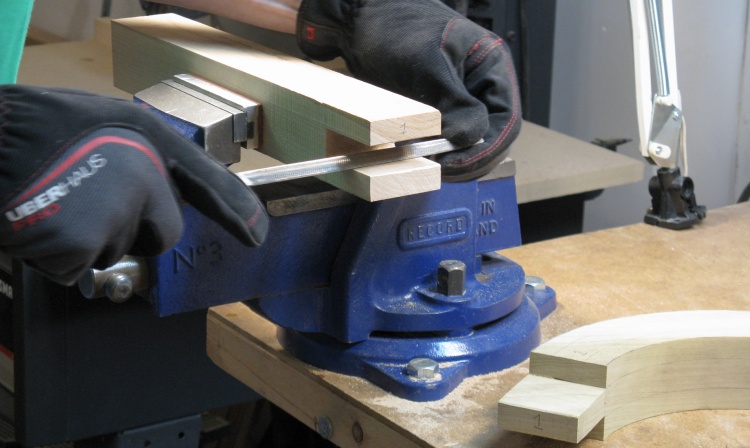
Clamps on the glued joint
After a bit of tweaking to get everything to fit snugly, the pieces were aligned and glued together.
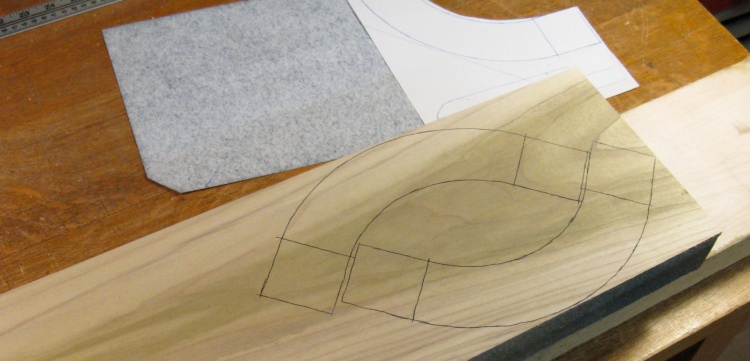
Corners marked out
The second part of the top rail assemblies was the actual corners. I had originally considered just making a square corner, but I thought a rounded one would look more finished.
Those round corners were to be made as separate pieces, and here they have been marked using a pattern and carbon paper onto the wood. This wood is a bit darker and was from a plank bought last year.
Those round corners were to be made as separate pieces, and here they have been marked using a pattern and carbon paper onto the wood. This wood is a bit darker and was from a plank bought last year.
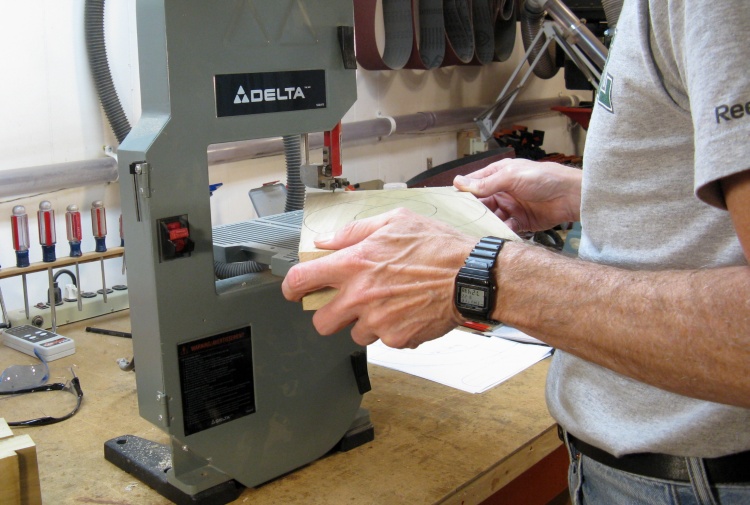
Cutting out the corners
These were cut out on the small bandsaw which I just popped on to my large bench (which saved me from the dreaded, seemingly interminable 5-minute job of changing blades on the large bandsaw).
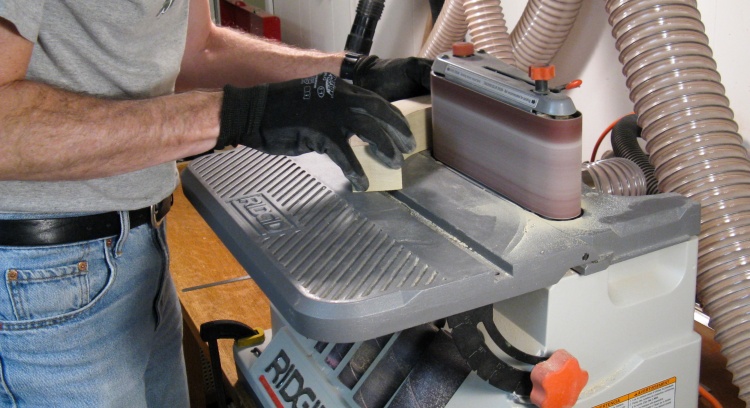
Sanding the corners to shape
And then my imperfect sawing was compensated for by using the belt sander to sand the corner pieces down closer to the outlines.
Cutting joints
Finally the ends were trimmed to form a minimalist finger joint. I didn't think whatever extra strength was provided by a larger number of fingers was warranted here, so the corner got a single finger and the rails got two flanking fingers.
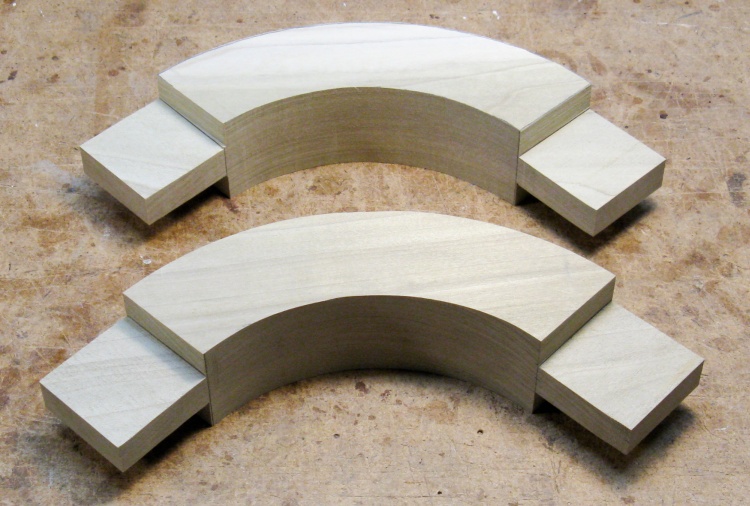
Completed corners
This shows the completed corners. Of course they need to undergo the same "octagonalization" as the other rails, which was done using a hand-held jigsaw before they were mated to the other rail pieces.
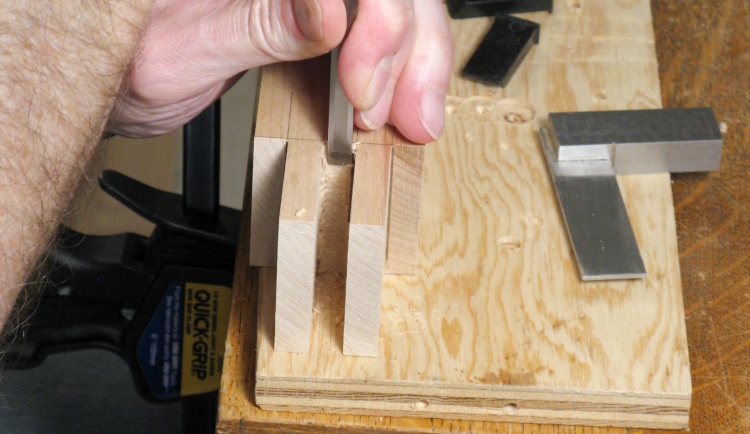
Adjusting the joint on one of the rear rails
The side and rear rails got the complimentary 2-finger joints, and here one of the short side rails is having its slot widened a bit with a coarse file for a better fit with the corner.
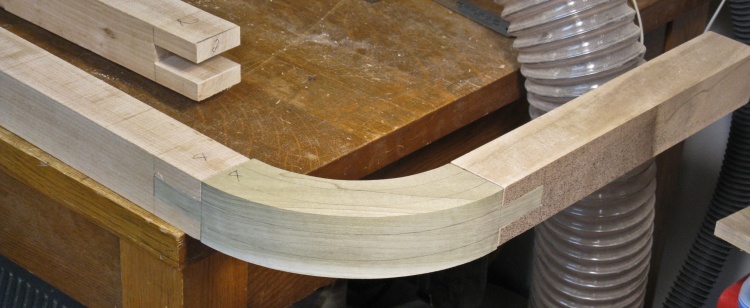
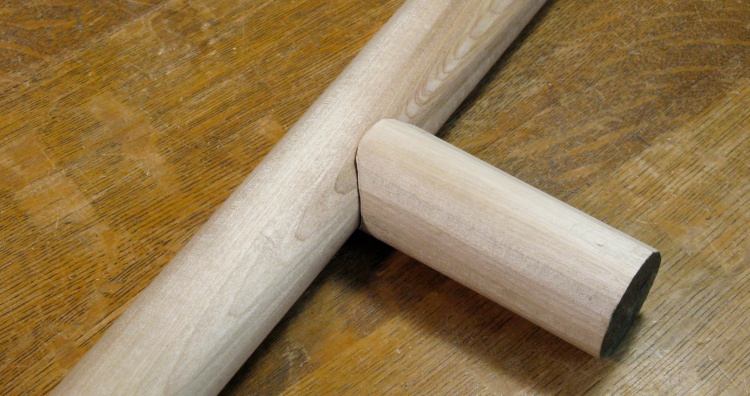
Corner test fit
This is a test fit of the corner piece with the side and back rails which gives an idea of what that assembly will look like.
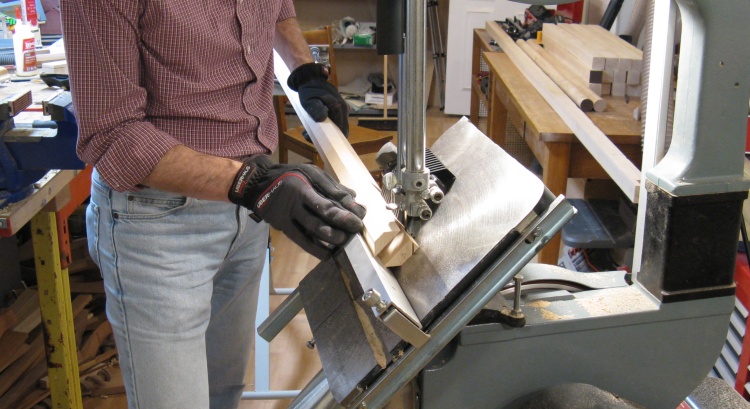
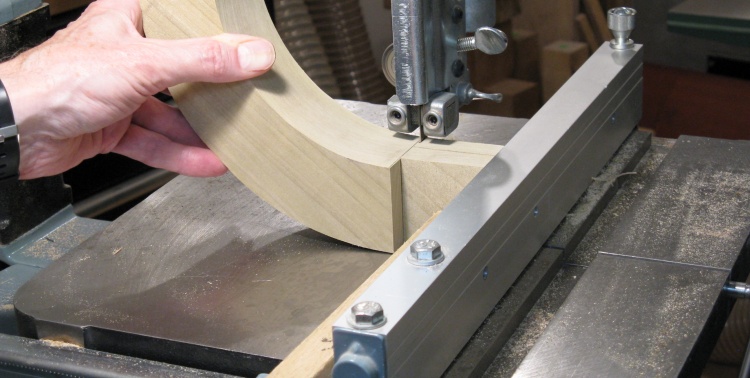
Chopping corners off side rail
The next step was to cut the corners off the rail pieces. Here the last corner is being cut off one of the side rails.
Rails ready to be assembled to corners
The two side rails have had their corners cut off, and you can see that one of the short back rails peeking out from behind the dust-collector hose has been done too.
Evening-up the width of the pieces prior to rounding
At this point, the corner and rail pieces have been glued together and the spokeshave is being used to even up the flat edges of the different pieces before starting on the rounding.
The completed top rails
Then after a few deft strokes of the spoke shave (OK, maybe 3000 or so) the top rails were done.
You can see that one rail is off the floor an inch or so due to warpage, but I didn't worry about that since I knew it would be screwed down to the balusters in eight places.
You can see that one rail is off the floor an inch or so due to warpage, but I didn't worry about that since I knew it would be screwed down to the balusters in eight places.
Front ends of the top rails
The front ends of the rails protrude past the first baluster by a couple inches so I rounded them off in the same manner as the stair rails.
Back ends of top rails
In contrast, the back ends needed to be almost flush with the last baluster to avoid interference with the stair rails. These were just slightly rounded, using files for shaping and then the spokeshave for the "haywagon finish".
Balusters
Rail-hugging shape test
The plan was to have the balusters contoured to cradle the railing for a nice integrated look. However, I wasn't sure how consistent the imperfectly-round railings would fit, so I thought I'd make a prototype rather than rolling the dice with one of the existing baluster blanks.
This is a little piece of scrap that was rounded and checked against the stair rail. After a couple tries and then a few adjustments it looked not too bad. It obviously isn't a perfect fit, but I figured it would squeak by the IHWC* standards. With this one as a guide, I started on the actual balusters.
*International Hay Wagon Council1
1. Yes, I just made that up.
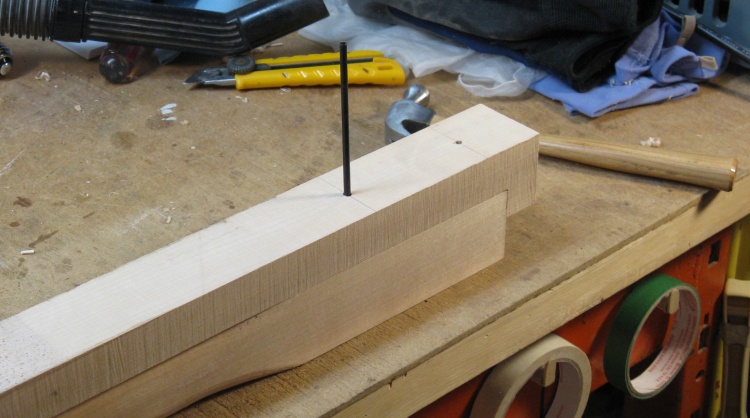
Baluster tops marked
It was going to be easier to put curves in the baluster ends while they were still square in cross-section, so I looked at doing that operation first.
Using an old business card, I made a little pattern and used that to draw the curves onto the wood.
Using an old business card, I made a little pattern and used that to draw the curves onto the wood.

Cutting the end curves
Then it was back to the mini bandsaw to cut out close to the marked line.
Smoothing the top curves
The spindle sander finished getting the curve close to the line.
Tops done
And in fairly short order all 16 spindles were done.
I will sometimes make an extra piece in case of screw-ups or other mishap, but this time I didn't have enough wood left over for another baluster. Fortunately, it turned out to not be needed anyway and I got by with the original set.
I will sometimes make an extra piece in case of screw-ups or other mishap, but this time I didn't have enough wood left over for another baluster. Fortunately, it turned out to not be needed anyway and I got by with the original set.
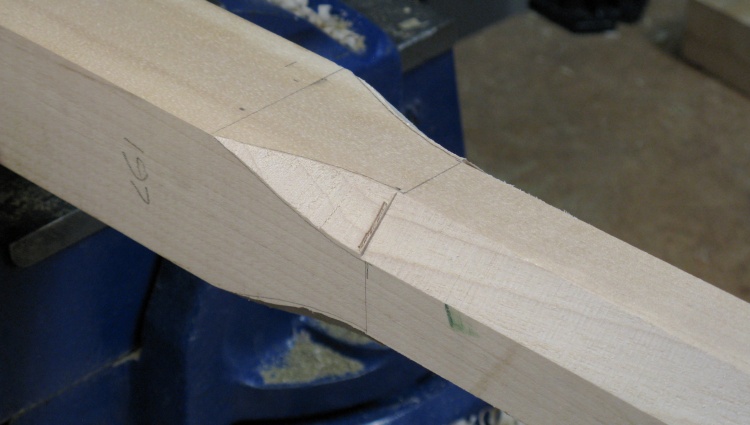
Marking square-to-round area
The balusters have a round cross-section but need to be bolted to the cart at the bottom, and the plan was to leave the bottom 6" square. As a result, they needed a region where they transition from square to round.
I sketched that out and then made another business-card pattern to use to mark the wood like you can see here.
I sketched that out and then made another business-card pattern to use to mark the wood like you can see here.
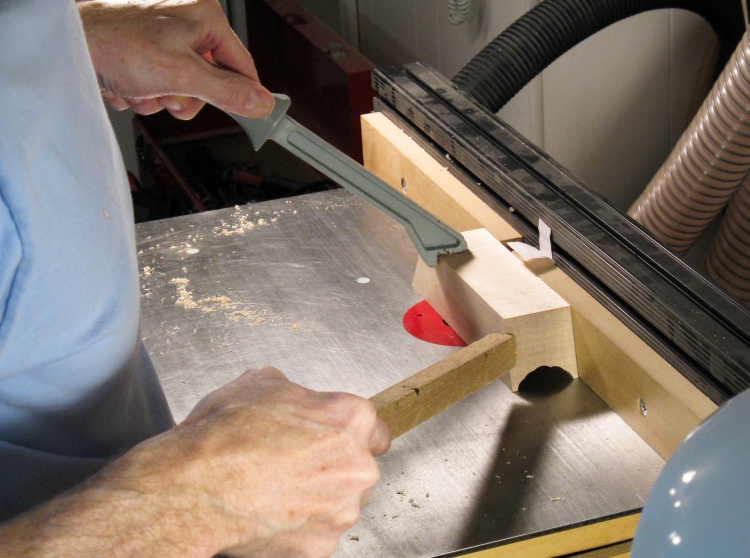
Cutting the corners of round section
I wanted to use the fence on the saw to help make nice straight cuts on the corners of the balusters, but that wouldn't let me cut the curved transition area so I needed to make the cut in two stages.
First I cut the corner as shown here just to the transition area, and then backed out the wood along the cut.
First I cut the corner as shown here just to the transition area, and then backed out the wood along the cut.
Cutting transition areas
Then I free-handed the short curved cut. This (fortunately) didn't need to be very accurately done since I could trim it with the spokeshave later.
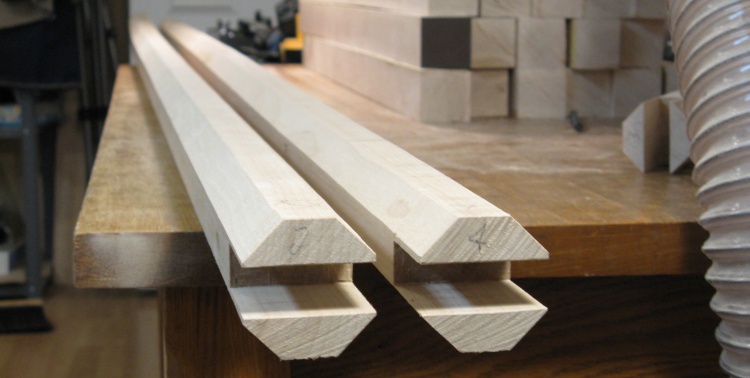
Square-to-round (eventually) transition area
This shows the lower part of a baluster hot off the bandsaw (well, metaphorically anyway).
Starting the shaping
I started by trimming the transition areas down further with the curved-bottom spokeshave until they were close to the desired curve and also flush with the corner facet on the baluster.
Then I started rounding that area. In this shot, the main corners have been trimmed and it needs a bit more rounding before moving on to the straight sections.
Then I started rounding that area. In this shot, the main corners have been trimmed and it needs a bit more rounding before moving on to the straight sections.

A baluster ready for rounding
This is the basic setup I used for rounding the balusters - same as for the rails as shown before.
You can see how meticulous I am about keeping the work area completely clean and uncluttered.
You can see how meticulous I am about keeping the work area completely clean and uncluttered.
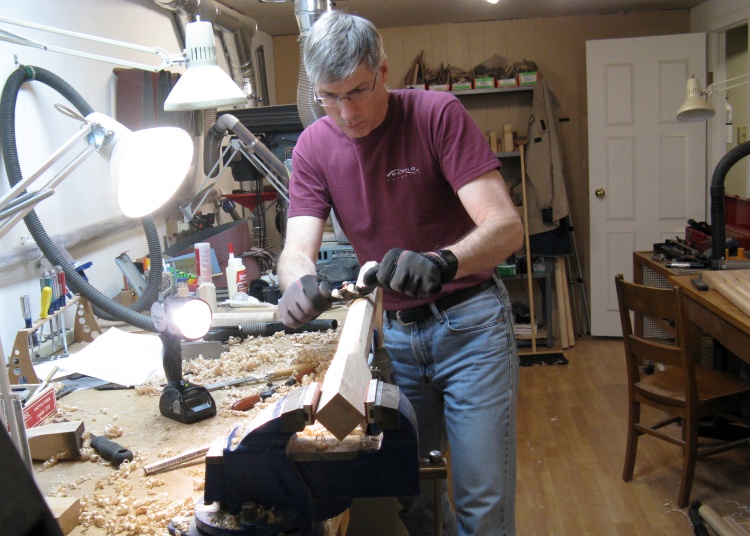
Shaving away on a corner
Here I'm shaving away on one of the main corners.
One thing I needed to be aware of was the grain direction of the wood. The cuts had to be made in the direction of the grain or it would tear out small pieces of wood. I would either pull away from the vise as shown here, or reverse my stance and pull toward the vise. The grain direction changed around the baluster and sometimes from end to end. I would guess a direction, check the effect of the first few cuts and adjust my direction accordingly.
The flashlight is giving a low-angle beam to better view the facet that is being cut.
Russ-eye view of spokeshave
Here you can see a new facet coming along nicely as I work on one of the 8 main corners of the baluster.
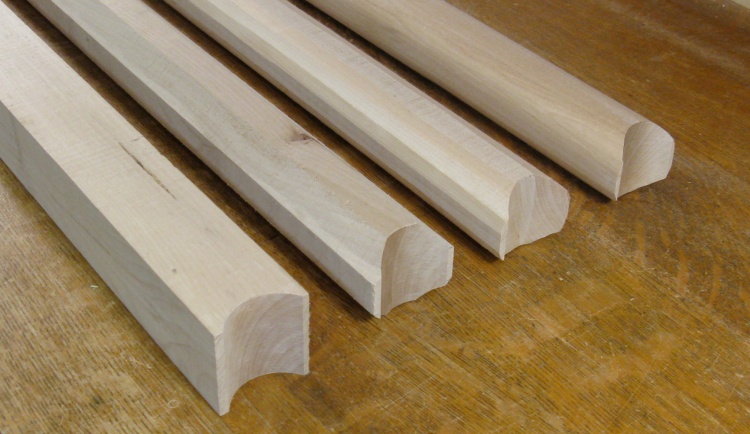
Rounding progression
Here's a little illustration of the rounding process; On the left we have the square blank, proceeding to octagonal, then 16-sided and finally roundish.
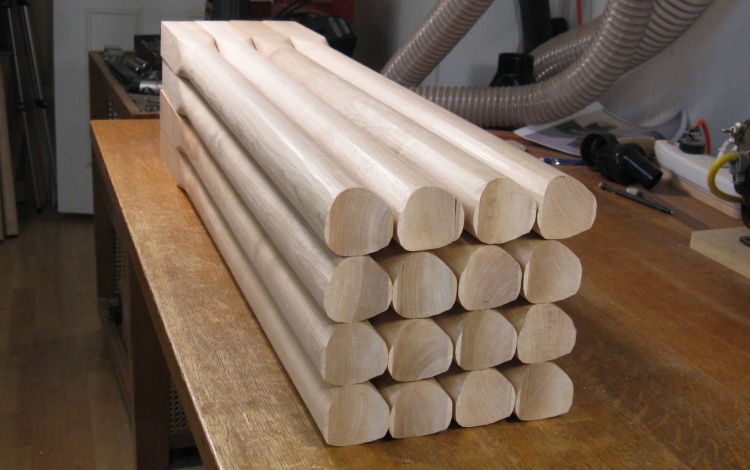
A phalanx of rounded balusters
And eventually they were all done. Here's a nice neat pile of them ready for the final stages.
Marking the mounting holes
After confirming the positioning of the mounting holes, I made a jig that could be used to mark the hole positions for both the balusters and the cart. Here the jig is sitting on a baluster and a center-transfer bit is used to mark the hole positions.
Bottom ends with mounting holes
The mounting holes were drilled to provide clearance for the lag screws we intended to use, and the top was counter-bored to let the screw head sit just below the surface.
To make painting a bit easier, the sharp corners of the square sections were rounded off with the belt sander and the result is seen here.
To make painting a bit easier, the sharp corners of the square sections were rounded off with the belt sander and the result is seen here.
Handrail bracket flats
Two of the rear balusters hold the handrail brackets that attach to the top of the handrail. They needed a flat spot for the bracket to mount, so a couple balusters were picked and the appropriate area was flattened with rasp and file. Then holes were drilled for the bracket.
Miscellaneous
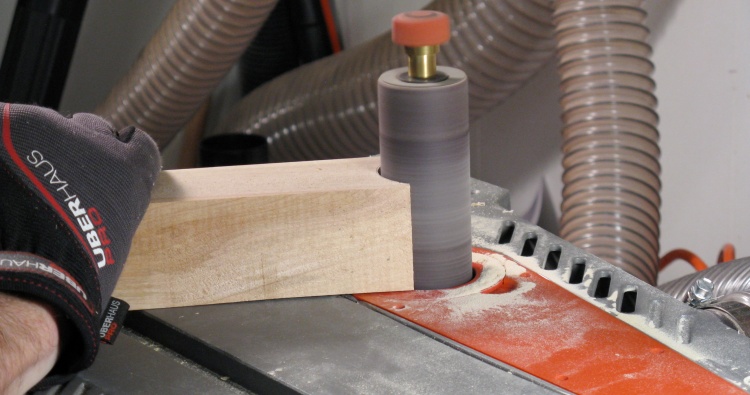
Routing the handrail support
A final bit which qualifies as miscellaneous is the bottom supports for the handrail. These mount to the stair and have a rounded section to attach to the railings and give them a solid support.
There were cut to size and a handrail-diameter notch was routed in one side.
There were cut to size and a handrail-diameter notch was routed in one side.
Wagon
Back of wagon, with seating loaded
The railings and balusters were painted before assembly. Meanwhile we added the reinforcement which consisted of an extra 2x4 around the bottom edge and some rear wall supports, and then rebuilt the stairs to be a bit deeper.
When the balusters were dry, the assembly was pretty straightforward. The baluster positions were marked on the wagon, the holes drilled using the jig and the balusters screwed in. A bit of tweaking with thin spacing washers was done to make sure all the balusters were correctly vertical, and then the top rail was screwed on to the balusters.
Finally the stair rail supports were added along with the railing and the brackets, and Bob's your uncle.
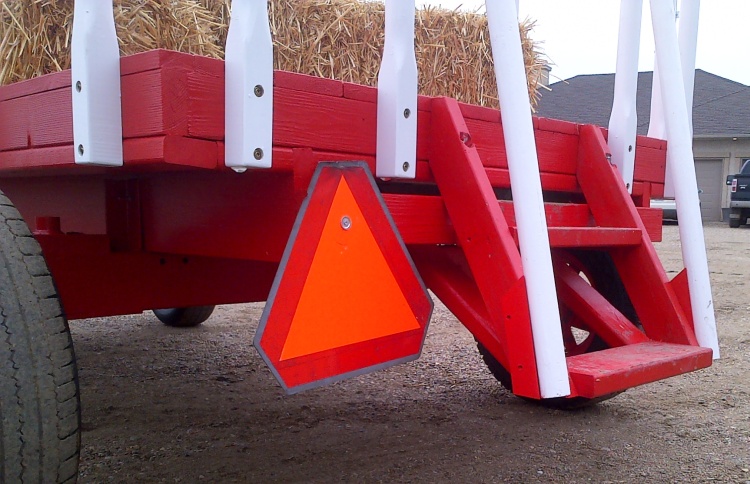
Stairs and railing bottoms
Of course the Slow-Moving Vehicle sign went back on for truck-pulled transport down grid roads.
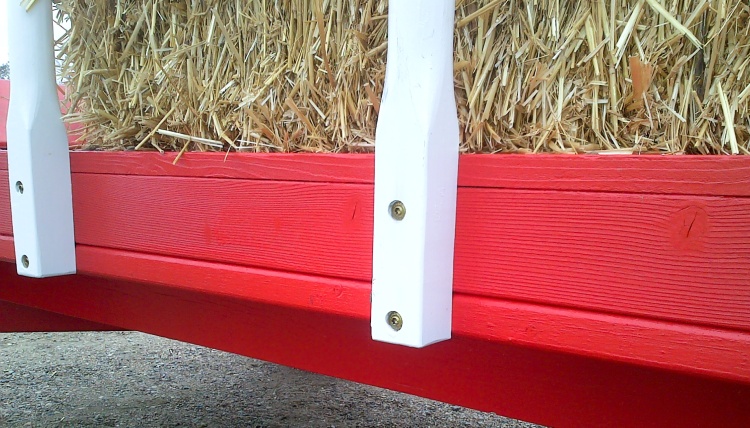
Baluster mounting
We used 4-inch Torx-head lag screws to hold the balusters on. They included an integral washer under the head and seemed to provide sufficient holding power.

The end.


