There isn't really such a thing as a "zero maintenance" ground cover but gravel is often touted as "low maintenance" and compared to a lawn it certainly is. Of course some people perform "zero maintenance" on their gravel and it gets buried in dirt, dust, seeds and leaves in a few years - it really needs to be cleaned if you want it to look decent. The good news is that you can usually get away with a single gravel cleaning each year but the bad news is that the cleaning isn't necessarily easy to do. In the spring there is that mat of dried leaves, branches, dust and seeds on much of the gravel and getting that off is what this vacuum is mostly used for.
Of course throughout the rest of the year, you get dust and seeds blowing in which settles between the stones so after 5 or 10 or 15 years, you might have as much dirt and mulch in the gravel bed as gravel. Raking can help to bring bare stones to the surface but this eventually becomes a losing battle and then you probably need to do the "shovel it out, clean it and put it back" thing. But yearly vacuuming should help extend this "deep clean" interval.
This vacuum arrangement has evolved since I first put it together and will probably continue to change. I'd still like to find a way to prevent the hose from wearing out so quickly. Hmmm...maybe a second hose outside it...hmmm...
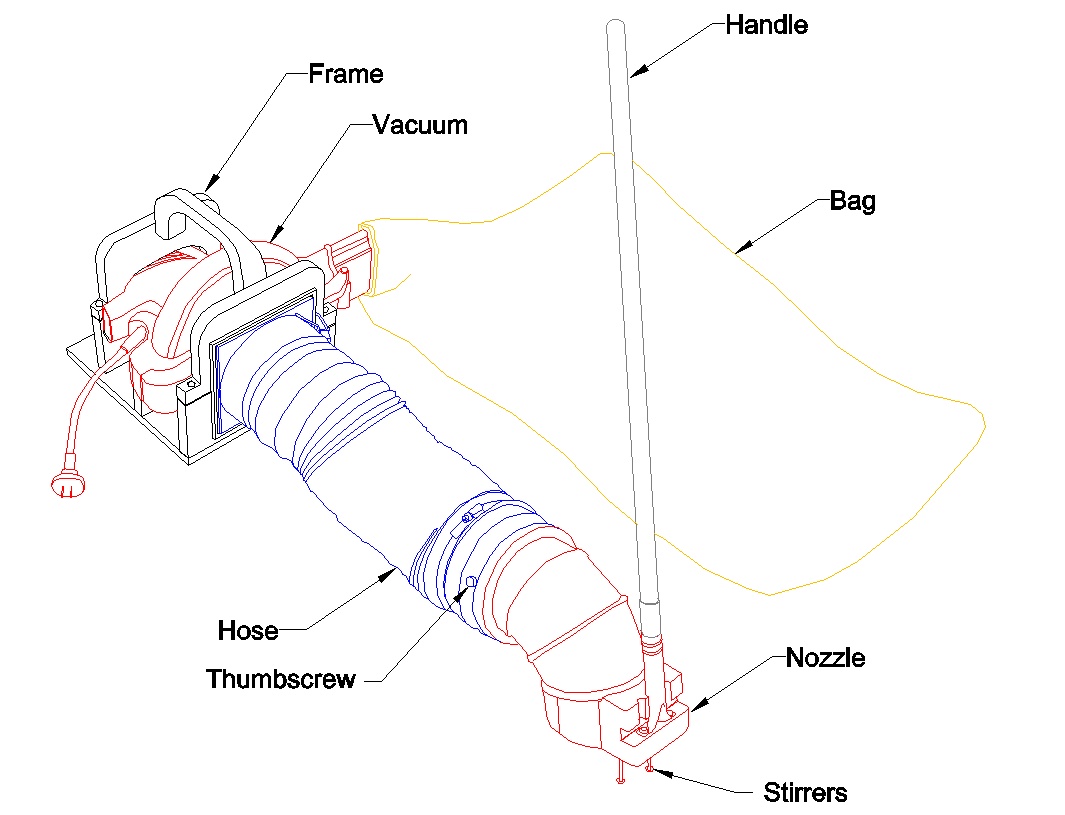
A sketch of the current version
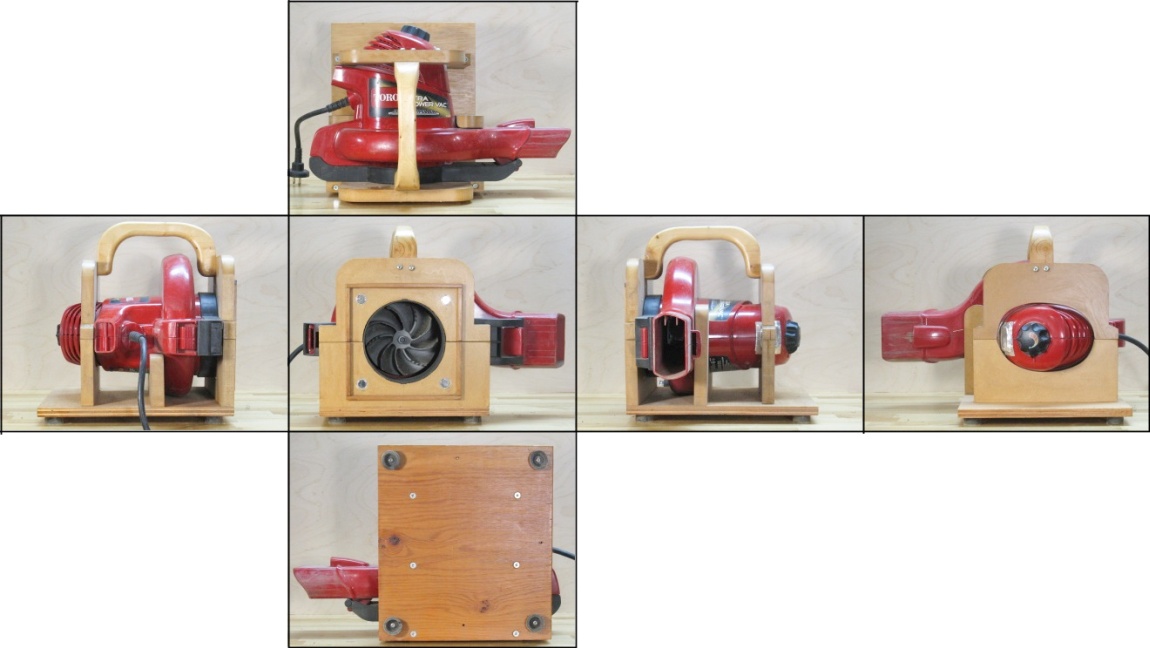
Six views of the base unit
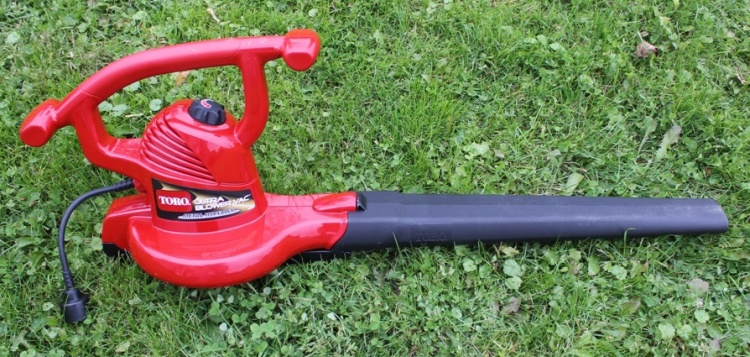
The Ultra Blower/Vac in vac mode
This is the model of leaf blower used for the yard vacuum; Toro 51599 Ultra Blower/Vacuum. Pictures most often show it in this, the blower mode, although I almost never used the blower function myself.
This Toro was a pretty decent unit (Consumer Reports top-rated!) and includes a variable-speed knob at the top in case you want it to work much more poorly than it's capable of.
This Toro was a pretty decent unit (Consumer Reports top-rated!) and includes a variable-speed knob at the top in case you want it to work much more poorly than it's capable of.
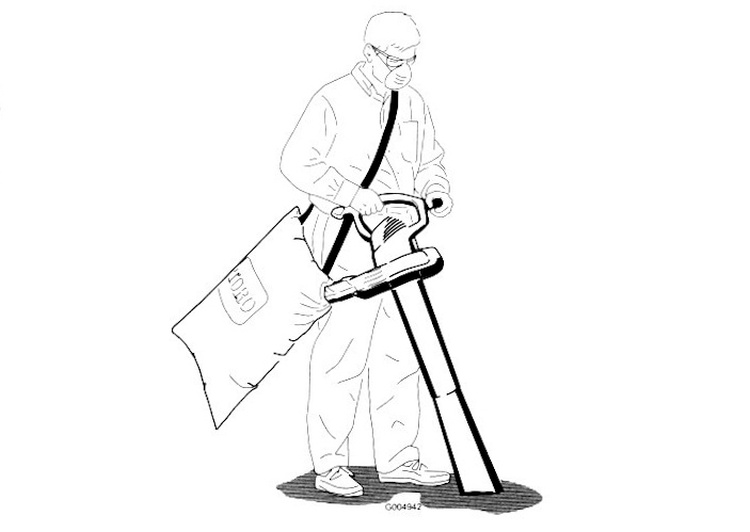
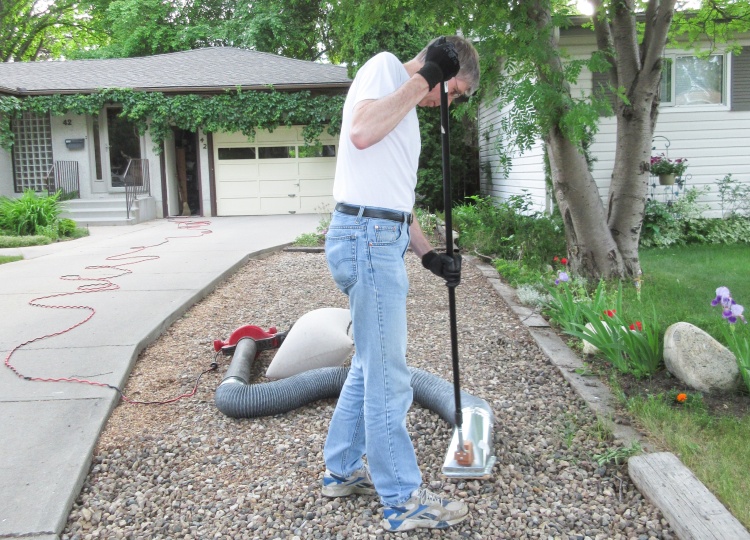
The unhappy vacuuming guy
This rather low-res manual illustration shows the unit in the vacuum mode where a tube is attached to the flat bottom and the bag replaces the blower nozzle.
The illustration shows the operator in a mask, but surprisingly no ear protection. It's not actually super-loud but manuals usually err on the side of bizarre paranoid safety ("Do not use in the tub!").
The illustration shows the operator in a mask, but surprisingly no ear protection. It's not actually super-loud but manuals usually err on the side of bizarre paranoid safety ("Do not use in the tub!").
A happier vacuuming guy, sans mask, blower weight and close-by motor
This was the first incarnation of the yard vacuum (June 2016) with a largely unmodified Toro unit coupled to the flexible hose with nozzle.
Functionally, this is almost as good as the present version since it accomplishes the main goal of separation from the noise, weight and dust of the Toro unit.
Functionally, this is almost as good as the present version since it accomplishes the main goal of separation from the noise, weight and dust of the Toro unit.
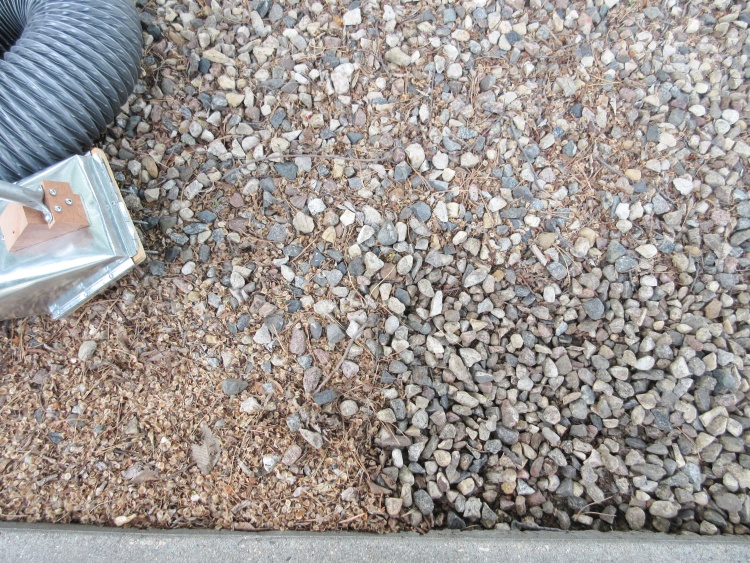
Lower-right corner has been cleaned
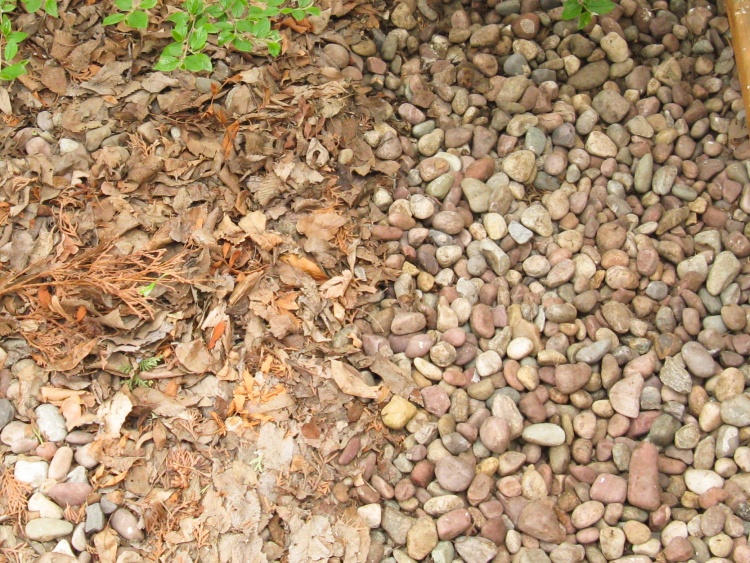
The gravel accumulates lots of debris right next to the driveway and a lighter dusting throughout the rest of the bed. This shot next to the driveway shows cleaned gravel in the lower-right corner with "to-be-done" sections elsewhere.
You can just see the screws protruding from the bottom of the end of the pickup nozzle. These permit stirring of the gravel to better loosen debris between and under the stones.
You can just see the screws protruding from the bottom of the end of the pickup nozzle. These permit stirring of the gravel to better loosen debris between and under the stones.
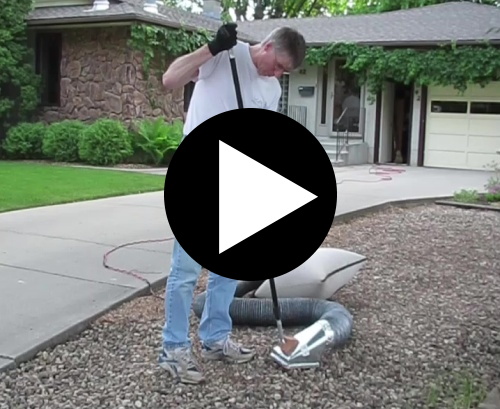
The general technique I use is to drag the nozzle over the gravel, letting the screws on the bottom move around the rocks so it can pick up the leaves. This unnecessary little video shows that in action.
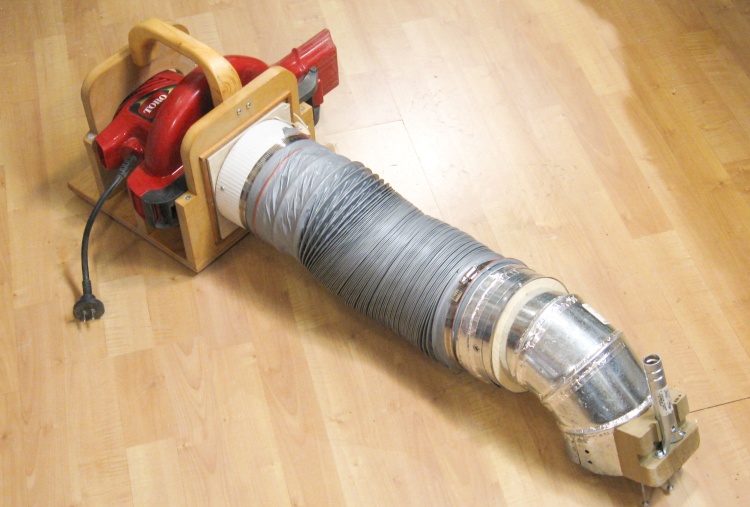
The current incarnation (less bag)
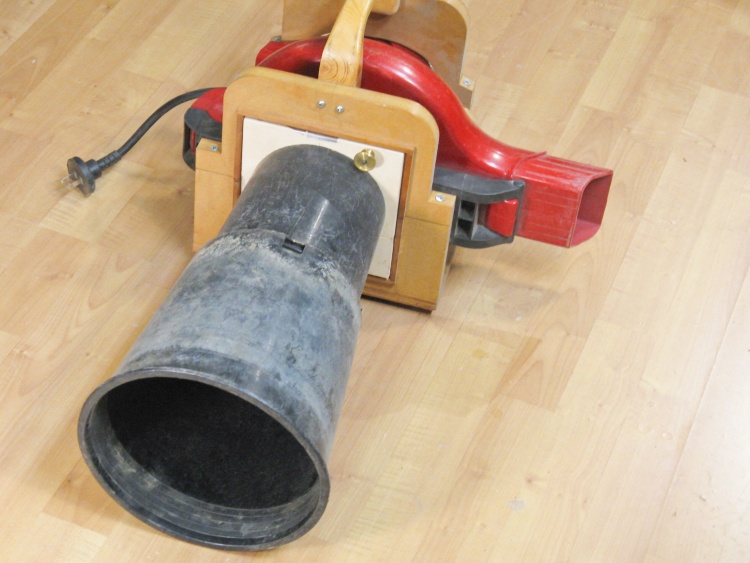
This photo shows the current version.
The Toro unit first underwent a handle-ectomy where the rather large handle/knob assembly was sawn off. The more-compact body was then mounted in a convenient rubber-footed frame with a carrying handle.
The hose assembly is attached magnetically to the frame and a pair of thumbscrews (not installed in this photo) holds the nozzle to the hose assembly. This new nozzle has a smaller area than the original square model which gives a bit faster airflow for better debris pickup.
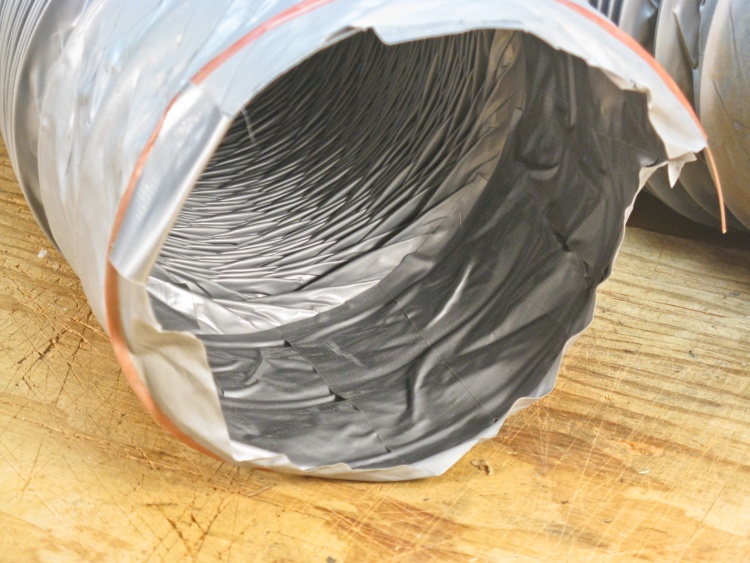
Worn-out hose needs replacing
As mentioned on the main page, the biggest drawback of the yard vacuum is the maintenance it requires.
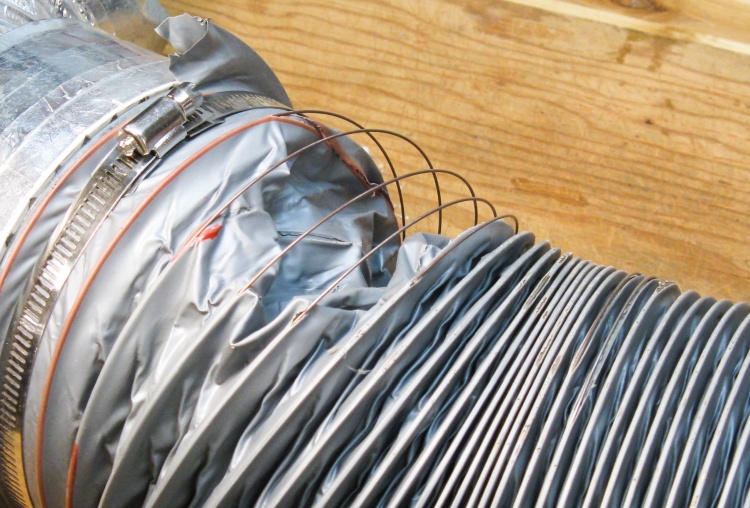
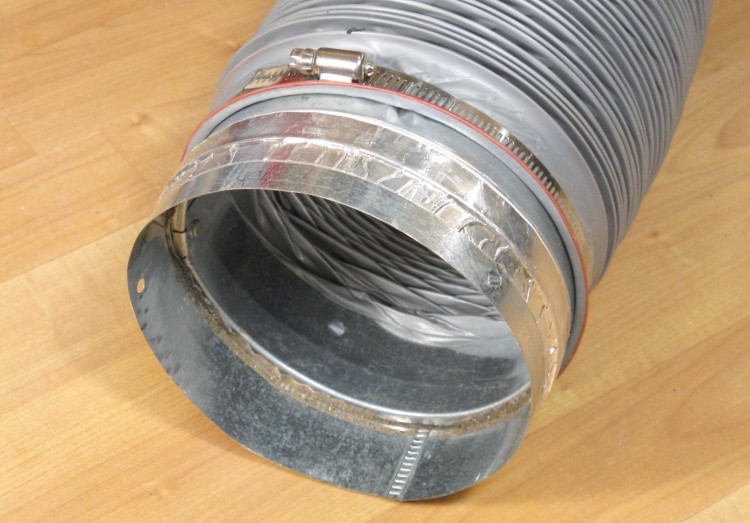
A consistent issue is hose wear. Unsurprisingly, rubbing the hose over concrete and gravel thousands of times tends to wear off the outer vinyl sheath, releasing the coiled wire which gives it structure. Fortunately the hose is still airtight but it starts to restrict airflow and debris passage.
A consistent issue is hose wear. Unsurprisingly, rubbing the hose over concrete and gravel thousands of times tends to wear off the outer vinyl sheath, releasing the coiled wire which gives it structure. Fortunately the hose is still airtight but it starts to restrict airflow and debris passage.

A new length of hose (about $15)
The hose I use is pretty flexible and here is a new one with the fully-collapsed 10' length being maybe 8" long.
Duct-taping one end for extra penetration resistance
The impeller in the Toro tends to whack debris around, which can hit the hose walls and wear them out prematurely. I now have a longer lead-in tube to help with that but I usually line the first couple of inches of hose with duct tape for a bit more toughness as well.
Turning a little toggle for hose removal
Strong magnets hold the hose assembly to the base unit and it takes a fair amount of force to separate them again. I originally had a knob to help pull it off but that pulled right through the wood frame.
I turned this little toggle to make a cord-based pull as a replacement.
I turned this little toggle to make a cord-based pull as a replacement.
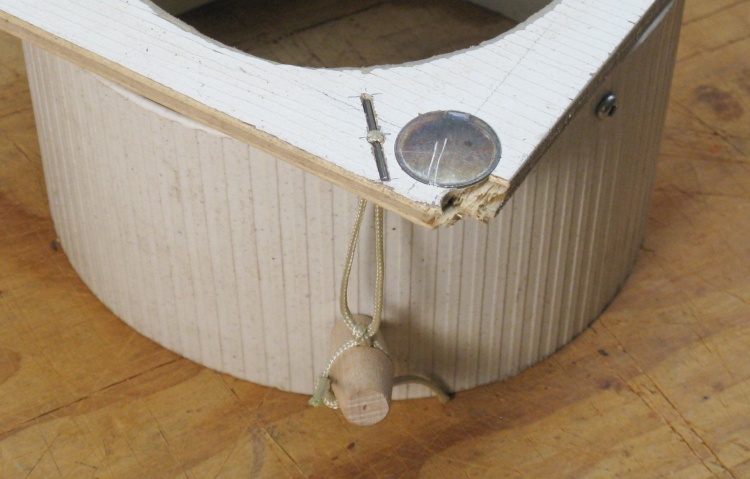
Hose-end with new toggle
This photo shows the base-unit end of the hose assembly with the new toggle and cord attached. The tube (OK, a piece of a plant pot) is a durable barrier for debris thrown by the impeller.
Metal rod anchoring pull rope
This shows the metal rod (remarkably similar to the center portion of a 1.5" finishing nail) that anchors the new cord pull on the back of the plywood faceplate. The nearby broken corner was where the screwed-on pull knob used to reside.
There isn't much clear space (or thickness) in the faceplate for the pull so in retrospect I should have made it out of a thicker material. Maybe next update...
There isn't much clear space (or thickness) in the faceplate for the pull so in retrospect I should have made it out of a thicker material. Maybe next update...
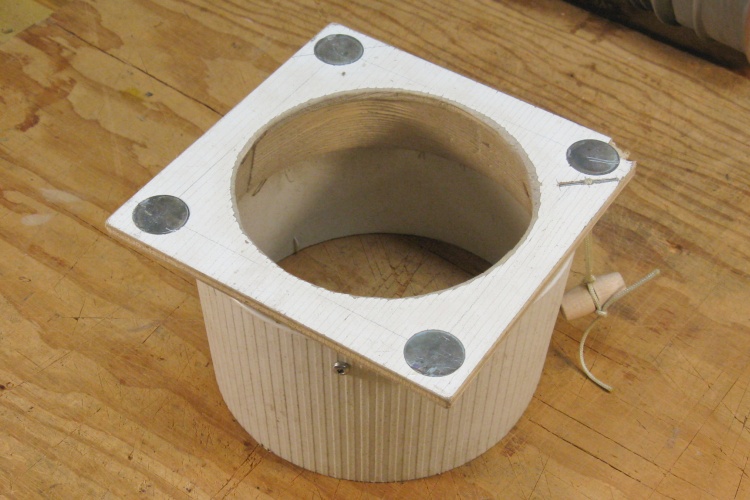
The faceplate showing steel inserts
And this photo shows the full faceplate with four epoxied-in metal slugs (remarkably similar to what you'd punch out of an electrical box) which mate with the magnets on the base unit.
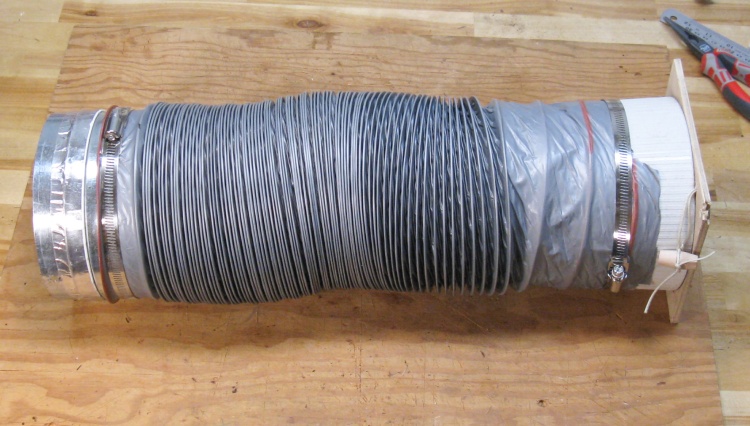
Repaired hose assembly
Here is the rebuilt hose assembly, ready for another season of abrasion.
Rotary joint at the nozzle end
One enhancement I made was to add a rotary joint on the end of the hose which permits the nozzle to rotate independent of the hose.
This is useful especially due to the tendency of the hose to rotate a bit as it is stretched.
This is useful especially due to the tendency of the hose to rotate a bit as it is stretched.
The new nozzle attached to the hose
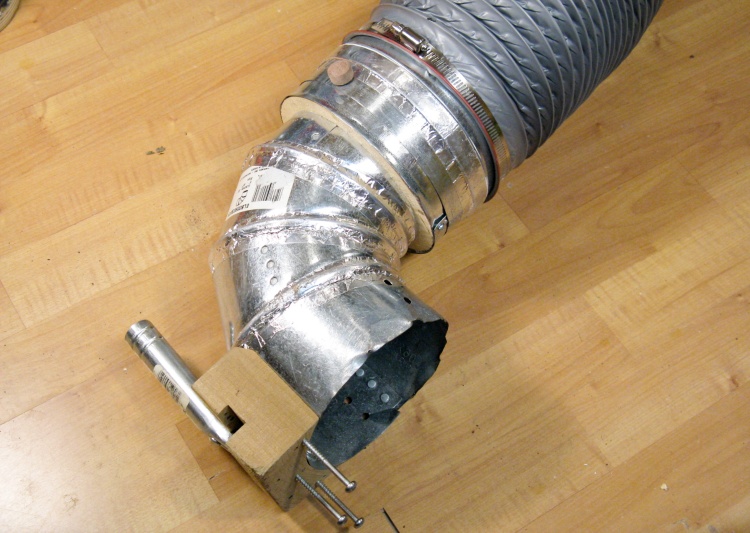
This shows the nozzle attached to the hose assembly. It slides inside and is held with two thumbscrews (with wooden heads, natch) that go through matching holes into a captive nut in the nozzle. Only one of the thumbscrews is visible in this shot.
The original nozzle
This is the original nozzle, which can be seen in action in the "first incarnation" shots above. It includes the gravel stirrer rods protruding from the underside as well as the screw-in pole mount on the front (remarkably similar to one you might find on a window squeegee).
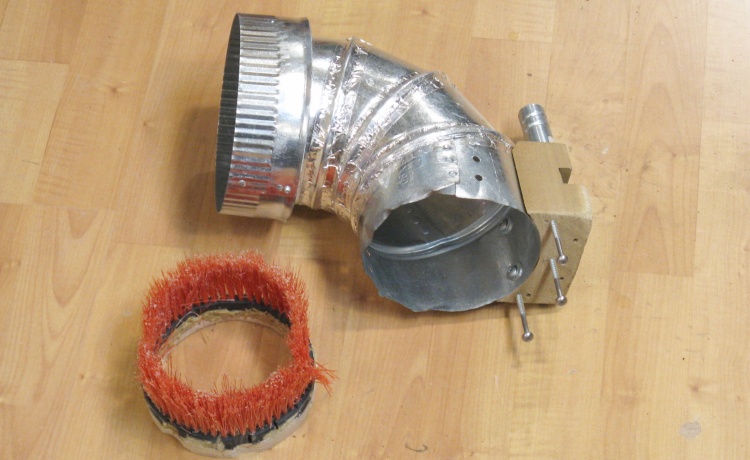
The (never used) brush attachment
The new nozzle has a 5" circular pickup area as compared to the original's 6"-square, which provides a bit higher air velocity and better vacuum action. It also includes the adapter necessary to mate to the 6" duct of the hose assembly. Otherwise it has the same stirrer and pole features carried over from the original.
I also made a brush that fits into the bottom (held in place with thumbscrews) but I haven't actually found an application where I've really needed it.
I also made a brush that fits into the bottom (held in place with thumbscrews) but I haven't actually found an application where I've really needed it.
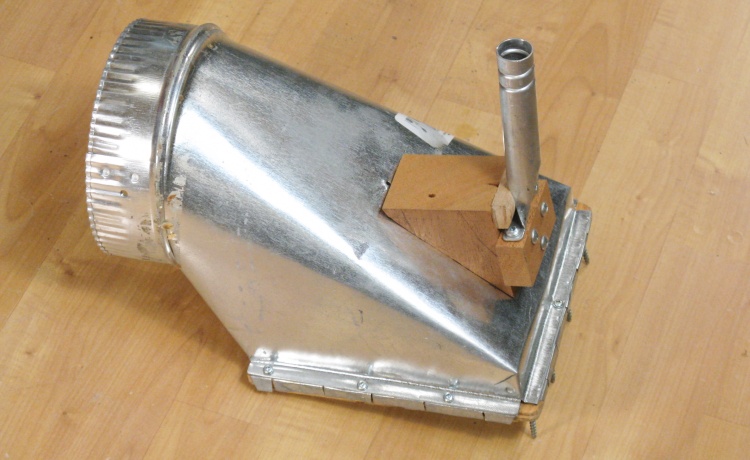
Base unit with ground nozzle
Another fine accessory is the ground nozzle. The Toro is actually a vacuum/mulcher so it does a great job of compacting dry leaves by chewing them up. This nozzle was made to enable leaves raked from the lawn to be directly fed into the maw of the vacuum for mulching.
It has the same faceplate interface as the hose assembly, except that I haven't broken off the knob yet.
It has the same faceplate interface as the hose assembly, except that I haven't broken off the knob yet.
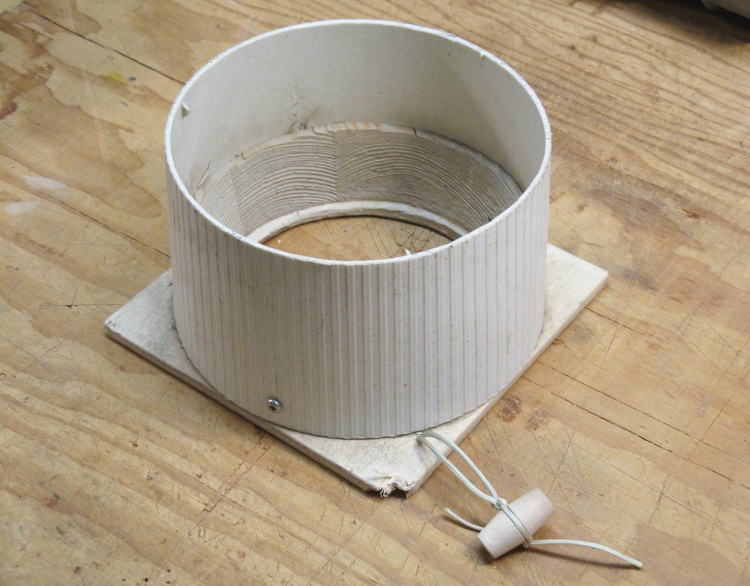
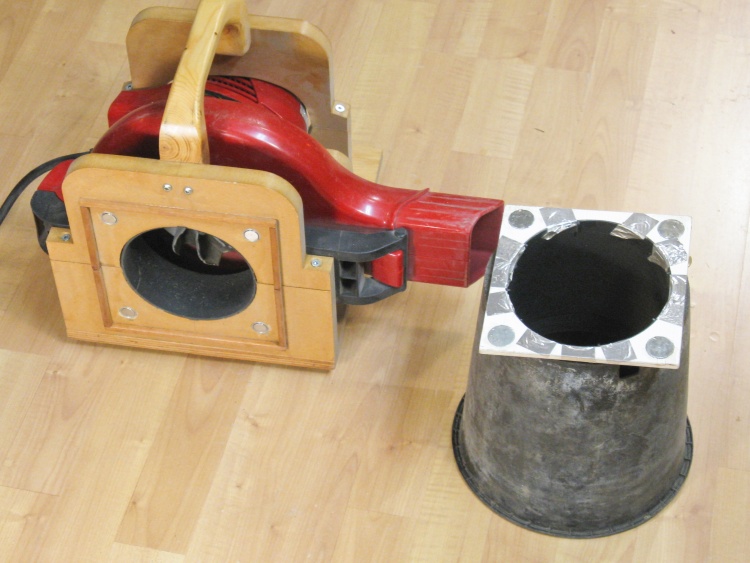
Ground nozzle attached and extended
This shows the ground nozzle in place and extended, revealing the innovative two-plant-pot construction.
A final half-and-half photo
Super-dirty gravel makes for a pretty satisfying cleanup operation. Fortunately only a smallish section of the sideyard gravel was this bad (spring 2021 cleanup).


