The bowl was made with a fairly conventional 4-step procedure;
1. I attached a faceplate to the top side with some short screws, and turned the underside and foot. I also left a cylindrical protrusion (a tenon) on the bottom. Then after sanding the underside;
2. I flipped the bowl around, gripping the tenon in a 4-jaw chuck. This let me turn the top side. After that was sanded;
3. The bowl was once again reversed so that I could remove the tenon. This time, the headstock just had a flat circular disc covered with some spongy material, and the bowl was squeezed between the disc and the live center in the tailstock. This let me cut off most of the tenon.
4. Taking it off the lathe, I then removed what remained of the tenon with a Dremel tool and sanded that section of the bottom.
Bowl blank
This is the bowl blank that I started with. It's about 17.5" in diameter, and I needed only 13.5". A faint pencil line can be seen showing the size of blank I needed.
The blank, "right-sized"
This shows the desired blank cut out. I cut it out of one side so that the remaining wood might be wide enough to make something out of (rather than being an almost-useless 2"-thick ring).
Update October 2018: That ring piece is still available for use...
Update October 2018: That ring piece is still available for use...

Big faceplate attached
A metal faceplate was mounted to the blank for the first stage of turning. Since the bowl is so shallow, I used short screws to make sure they extended in no further than the depth of the bowl.
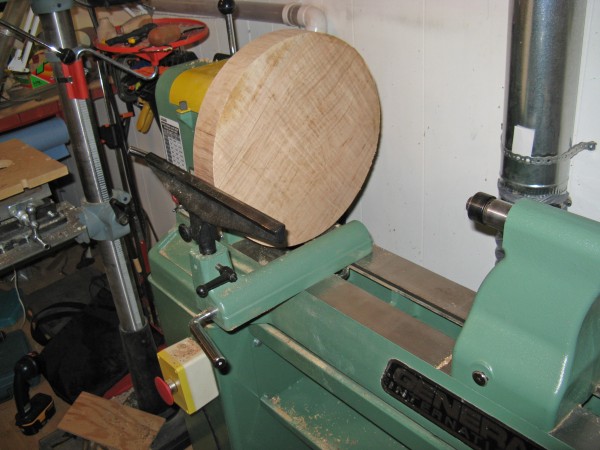
Ready to start turning
This shows the blank mounted to the lathe. It is a 16" lathe, which means 8" between the turning centerline and the bed so there are still a couple inches of clearance left.
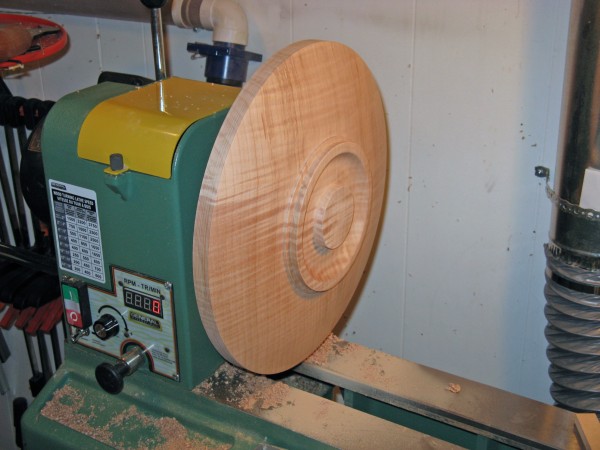
Bottom mostly shaped
This shows the bottom completed, including the center tenon. It has already been sanded, as can be seen from the sawdust on the lathe.
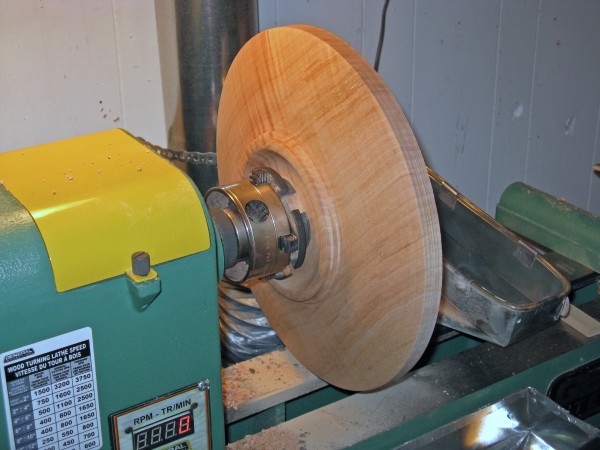
Flipped around to do top
Here the bowl has been flipped around, and the tenon is held in the adjustable-jaw chuck so that I can work on the "top" or inside of the bowl.
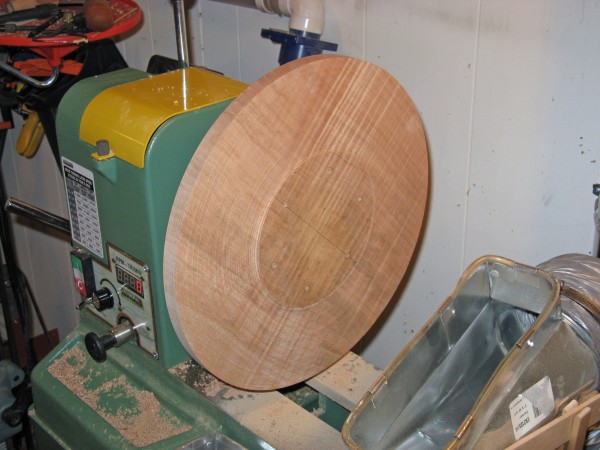
Top turning started
This shows the top side, with the holes from mounting the faceplate visible.
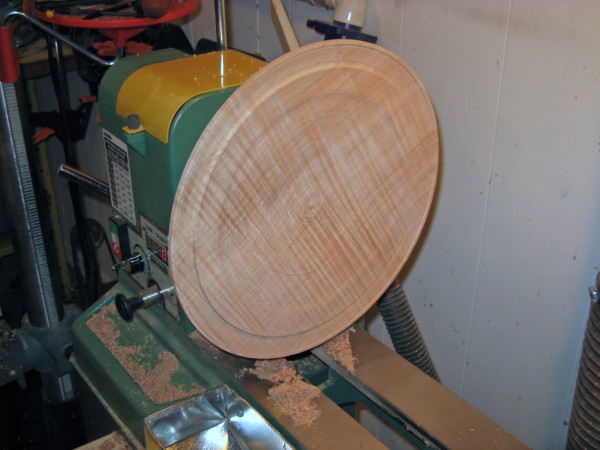
Top partially done
This shows the inside partially done.
When complete, the thickness of the wood varies from around 0.3" near the center to 0.18" at the edge.
When complete, the thickness of the wood varies from around 0.3" near the center to 0.18" at the edge.
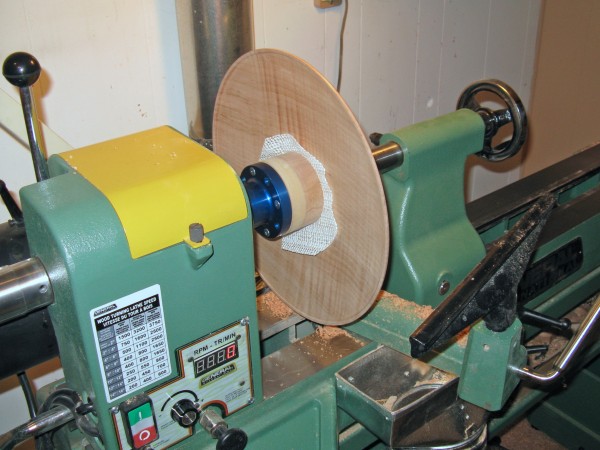
Flipped again to finish off the bottom
Here the inside has been completed and sanded. The bowl has been removed from the chuck and flipped around once again.
There is now a wooden mandrel with some cushioning material (for increased friction) just pressing on the bowl on this side.
There is now a wooden mandrel with some cushioning material (for increased friction) just pressing on the bowl on this side.

Squeezing bowl from the bottom side
On the other side, the tailstock has been moved into place, and pushes on the tenon to hold the bowl against the mandrel. This provides room to cut away most of the tenon.
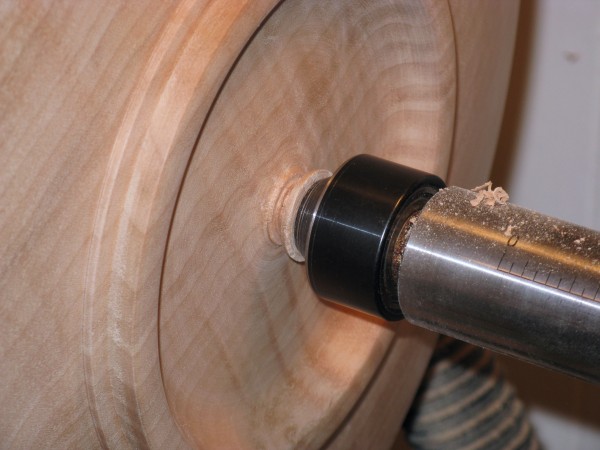
Center boss mostly removed
This closeup shows what is left of the tenon. I cut away as much as possible while leaving enough wood for the tailstock to keep applying pressure.

Bowl off the lathe
This shows the remaining tenon on the bottom. This has to be removed manually.
Bottom cleaned up
And this shows the bottom with the remains of the tenon removed. I used a dremel tool and sanding to smooth the surface.
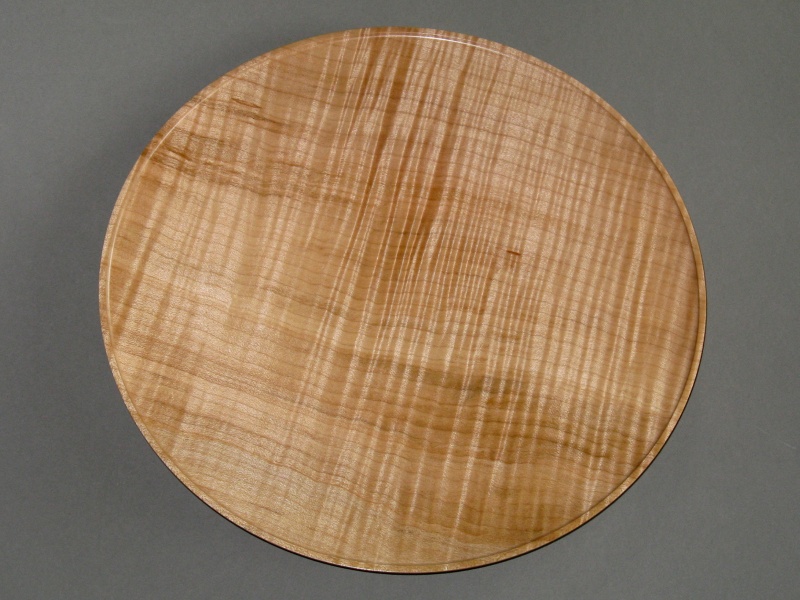
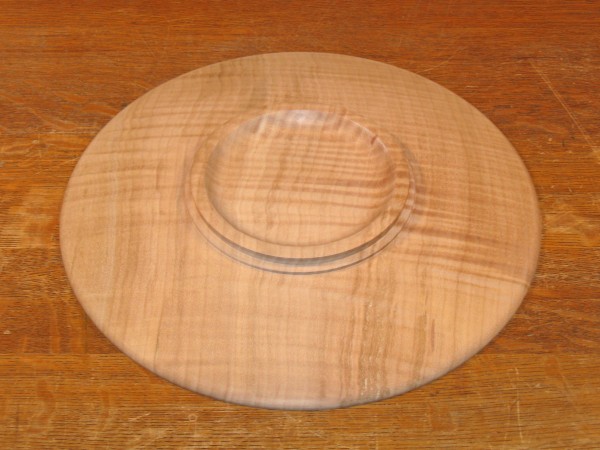
Completed (and finished) bowl
The bowl was then coated with a wipe-on polyurethane finish using a foam brush. Sanding between the three coats was done using #0000 steel wool.


