I had an irregularly-shaped piece of laminated wood saved from my previous turning project. It had been cut off the main blank of laminated wood to improve the balance before putting it on the lathe. Laminating the wood had been rather laborious so getting a "twofer" out of it was a nice bonus. The cut-off was big enough to make a small turned piece, so I just needed to mount it and do the turning.
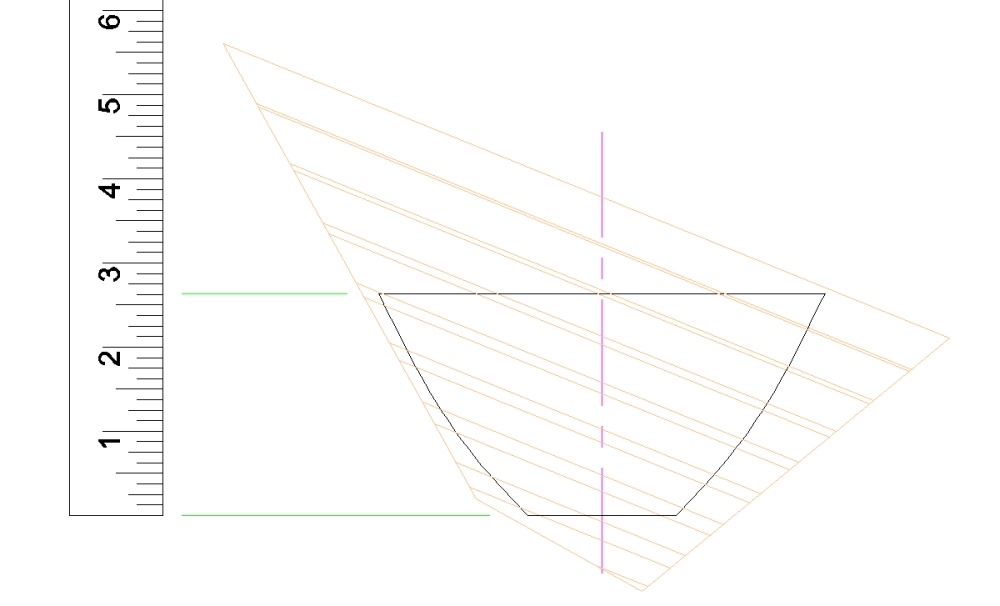
Bowl, optimized for size and lamination angle
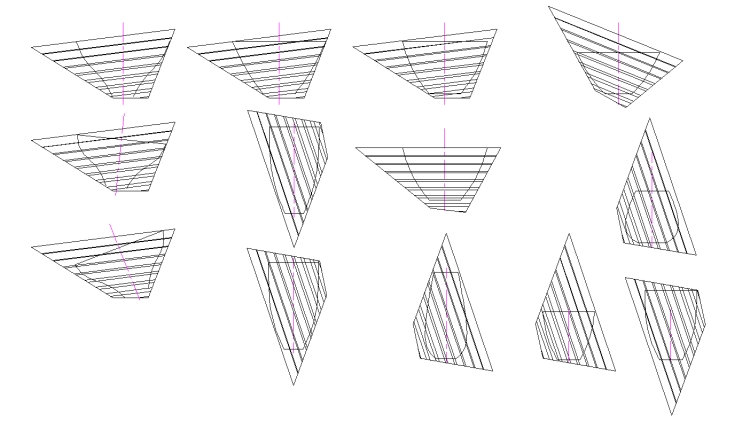
A few shape and angle options
I started by checking various vessel/bowl shapes at various angles. One of the tall vessels would have been the largest I could get out of the wood, but I thought they were a bit too similar to the original piece.
Instead I chose a wide bowl with the laminations going through at an "interesting" angle. What's interesting? Glad you asked; 22°.
Instead I chose a wide bowl with the laminations going through at an "interesting" angle. What's interesting? Glad you asked; 22°.
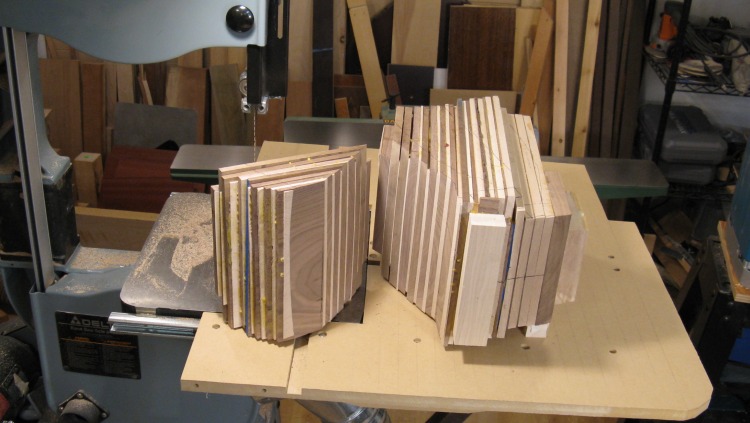
The original cut-off
When last we saw our bowl blank, it was in the "scrap piece" supporting role here on the left after being cut off the main lamination.
This project's blank
And now it's the star in its own minor bowl production, seen here chilling out on the main workbench.
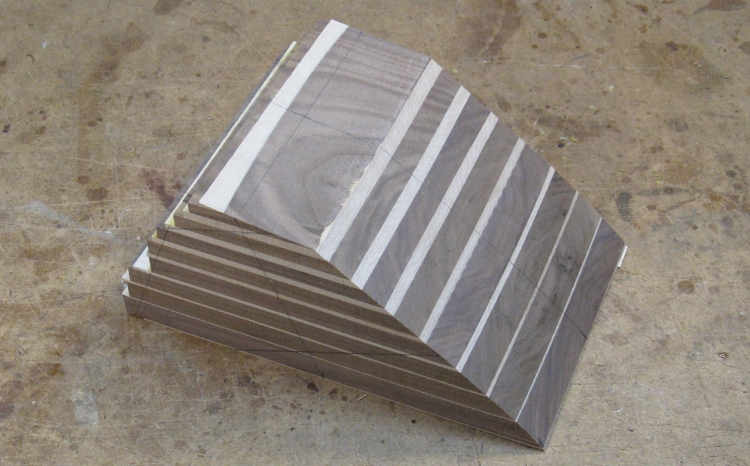
Trimmed down in length
It was a whole bunch wider than it needed to be so I cut the edges off closer to the bowl diameter.
There are also some lines visible on the near end with the most vertical being the center line of the bowl. I needed to attach a mounting plate at right angles to that line, so first I glued a block to the middle of the top side, and then cut through that and the laminations at right angles to the centerline...
There are also some lines visible on the near end with the most vertical being the center line of the bowl. I needed to attach a mounting plate at right angles to that line, so first I glued a block to the middle of the top side, and then cut through that and the laminations at right angles to the centerline...
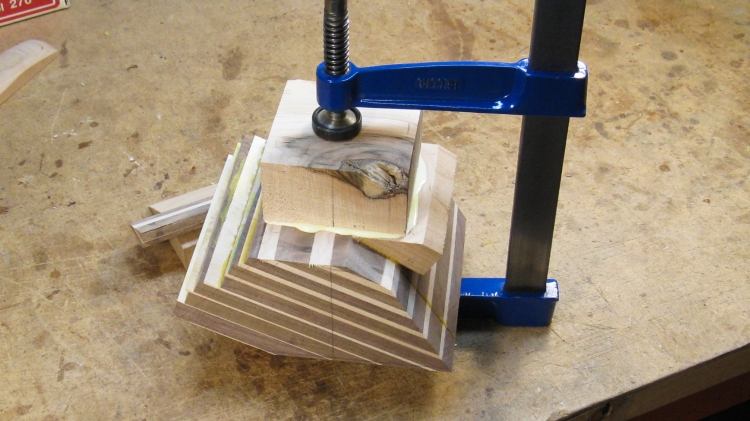
Gluing on a mounting block
...and then glued on the mounting block to the larger surface that remained.
I also cut off the long narrow end of the wood since it was unneeded.
I also cut off the long narrow end of the wood since it was unneeded.

Faceplate installed
And finally I mounted a smallish faceplate to the mounting block.
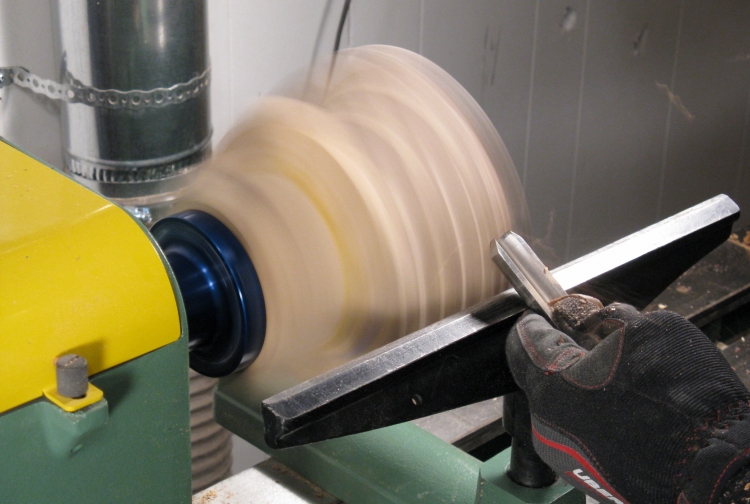
Roughing out the spikey shape
Next was mounting it to the lathe to start taking off the large number of oddly-angled corners.
Here you can see little shavings flying off as a roughing gouge smooths out the furthest-protruding corners.
Here you can see little shavings flying off as a roughing gouge smooths out the furthest-protruding corners.
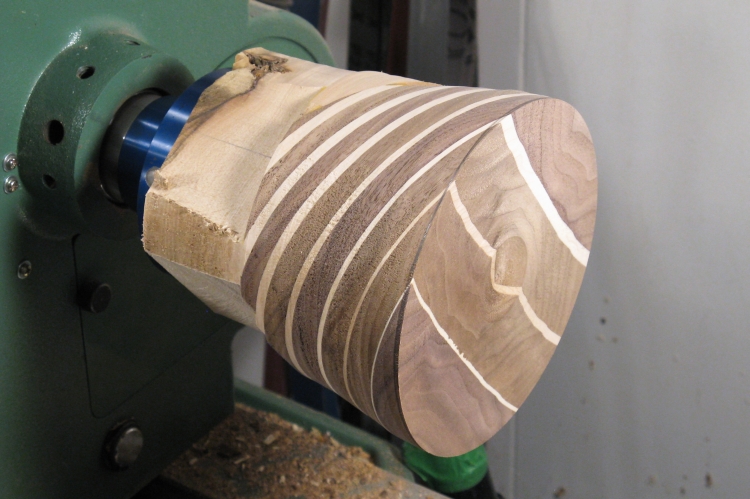
Nasty corners gone
Eventually it was reduced to something that might more believably become a bowl.
The front edge is about the right diameter, and the lower parts of the outside will be shaped next.
The front edge is about the right diameter, and the lower parts of the outside will be shaped next.

About half the outside done
I've started shaping from the top and here the upper half is done.
There are some cuts made to the proper depth as a guide on the lower part and those will be shaped next.
There are some cuts made to the proper depth as a guide on the lower part and those will be shaped next.

Most of the outside done
And in this shot, most of the outside shaping is done except for the very bottom. I'll return to do that when most of the inside is hollowed.
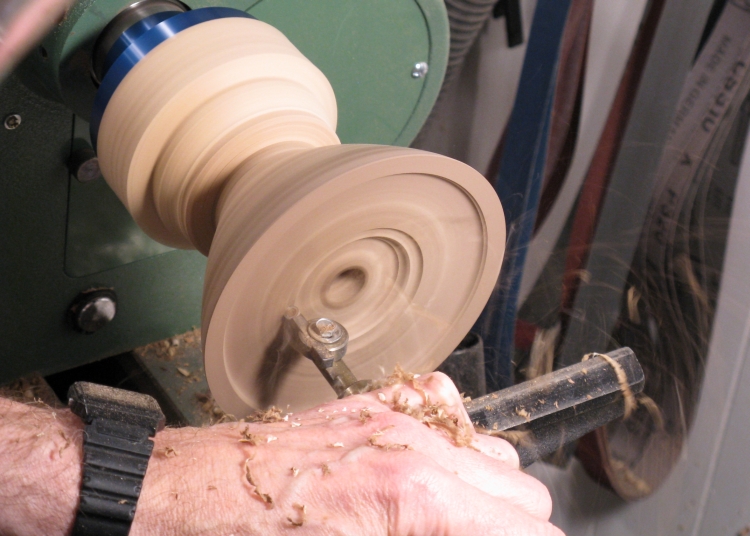
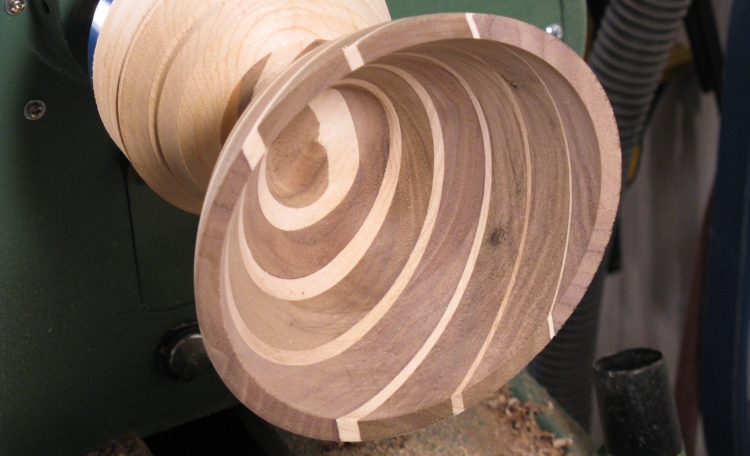
Hollowing the bowl
Here the central hole has already been drilled and I'm starting to cut out the inside using the hollowing jig.
Turning doesn't get much simpler than this - simple curve on outside, lots of room to work on the inside and a fairly shallow bowl.
Turning doesn't get much simpler than this - simple curve on outside, lots of room to work on the inside and a fairly shallow bowl.

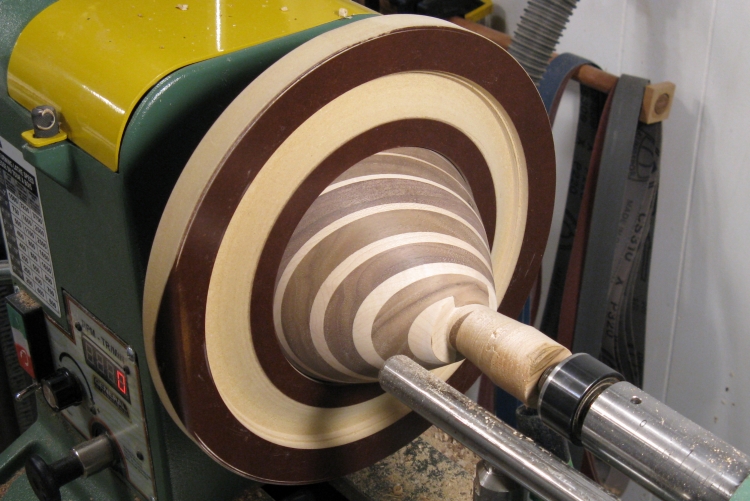
Outside completed
When the inside was mostly done, I switched back to the outside to shape the very bottom, so now the outside is complete.
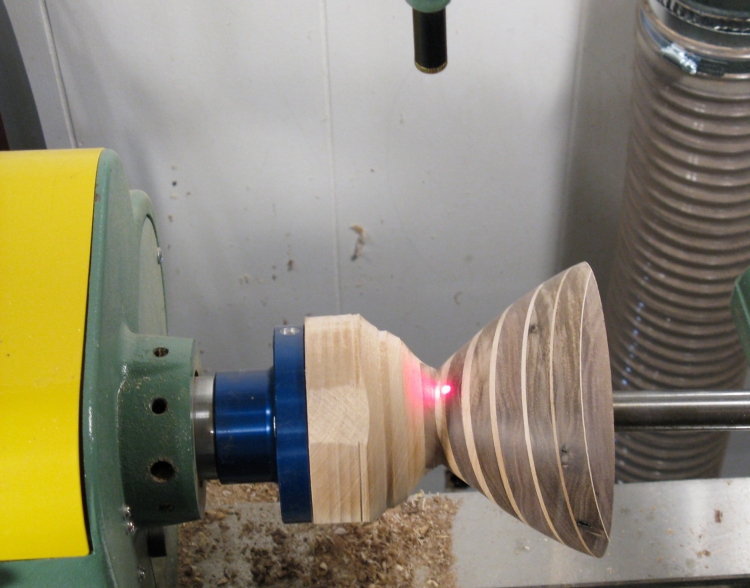
Checking the depth
Most of the inside is now cut out and here I'm checking the bowl depth to make sure I didn't screw up and go too deep.
OK, it turns out that I went a little too deep, but there's a bit of extra wood at the bottom so it should probably still be fine.
OK, it turns out that I went a little too deep, but there's a bit of extra wood at the bottom so it should probably still be fine.
Inside complete
This shot shows the inside. It is mostly cut out except for smoothing the inside walls a bit.
Shaping the bottom
While it was on the lathe, I sanded the inside and outside. Fortunately the grain goes mostly sideways in the bowl, so I could sand while it was spinning.
The next step was to complete the bottom. So after taking it off the lathe, the faceplate was removed and the piece was flipped around and fitted to a new jam chuck I cut for it (the large disc). Here I've already cut away most of the waste wood and started shaping the bottom.
The next step was to complete the bottom. So after taking it off the lathe, the faceplate was removed and the piece was flipped around and fitted to a new jam chuck I cut for it (the large disc). Here I've already cut away most of the waste wood and started shaping the bottom.
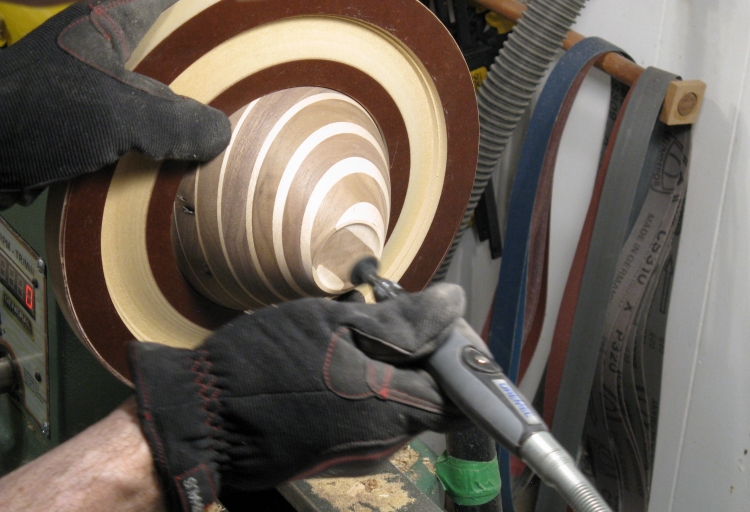
Sanding the bottom
After cutting off the little spindle from the bottom, here I'm sanding it smooth with a rotary sander (on a flex shaft from a Dremel tool).
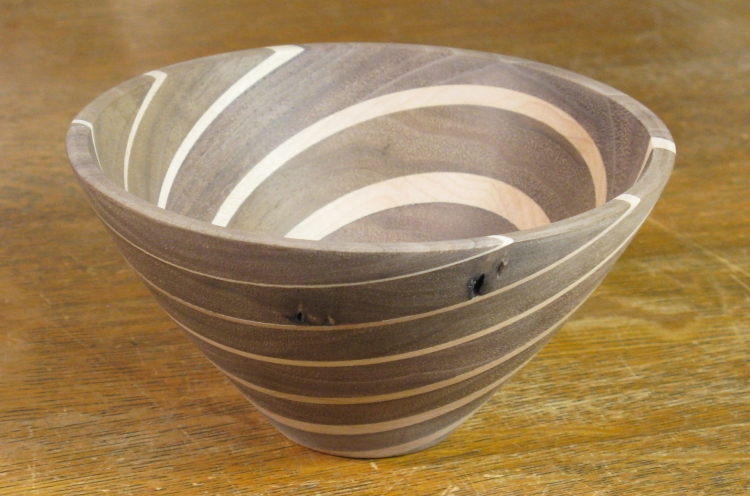
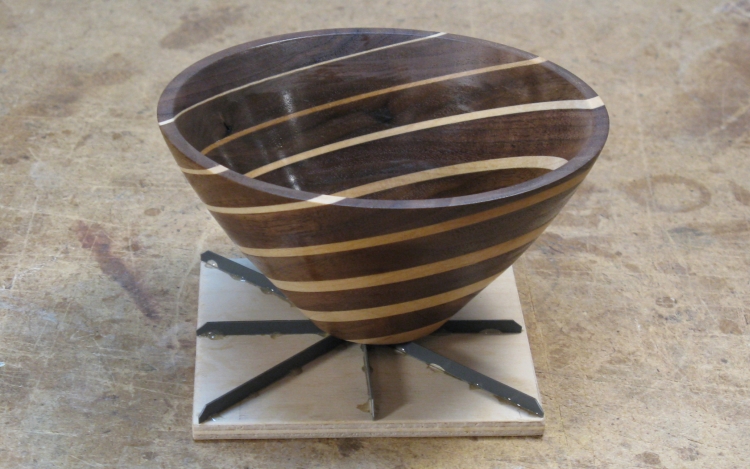
Completed except for finishing
And there it is complete along with the two little knots in the walnut (one of which is a hole all the way through).
First coat of finish applied
Once again I used my favorite Wipe-On Poly finish, applied with a cloth. Here the first coat is still wet.
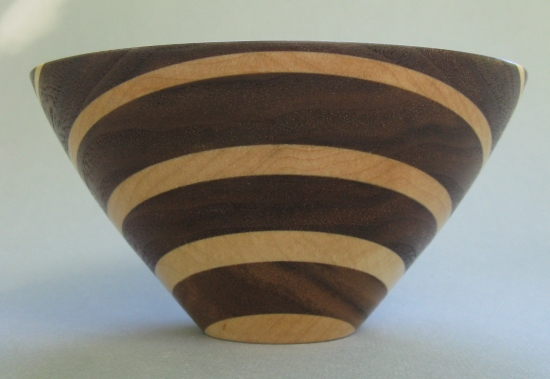
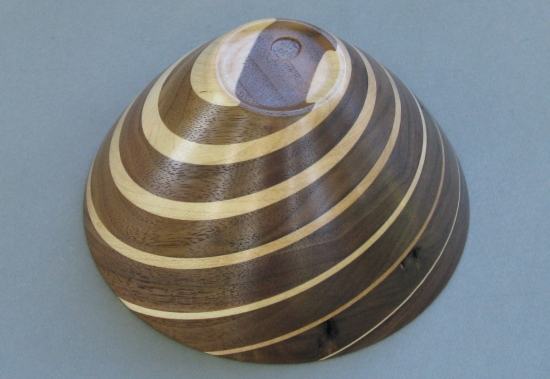
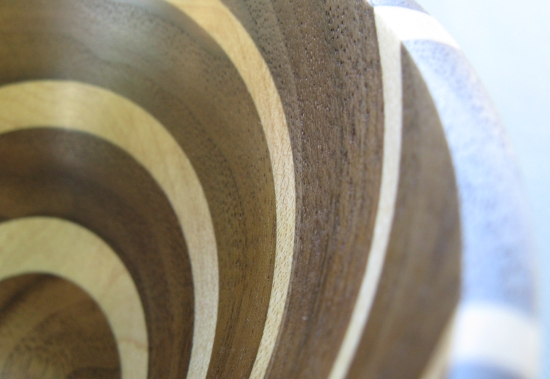
And here's a few extra shots of the completed bowl at various odd angles;
And here's a few extra shots of the completed bowl at various odd angles;