The 2021 cart was pretty straightforward since it was just based on a wagon undercarriage kit. It didn't even get a plan since it was basically "take the wheels out of the box and screw them to some plywood".
The 2022 cart had a few more degrees of design freedom including choices for wheel type and size, motivation method and deck size. After nailing down the wheel type and deck size, I originally planned to use the wagon-style motivation (a pull handle that also steers the front wheels) but after using a push-from-behind cart at the garden center I decided to use that method instead.
The 2022 cart had a few more degrees of design freedom including choices for wheel type and size, motivation method and deck size. After nailing down the wheel type and deck size, I originally planned to use the wagon-style motivation (a pull handle that also steers the front wheels) but after using a push-from-behind cart at the garden center I decided to use that method instead.
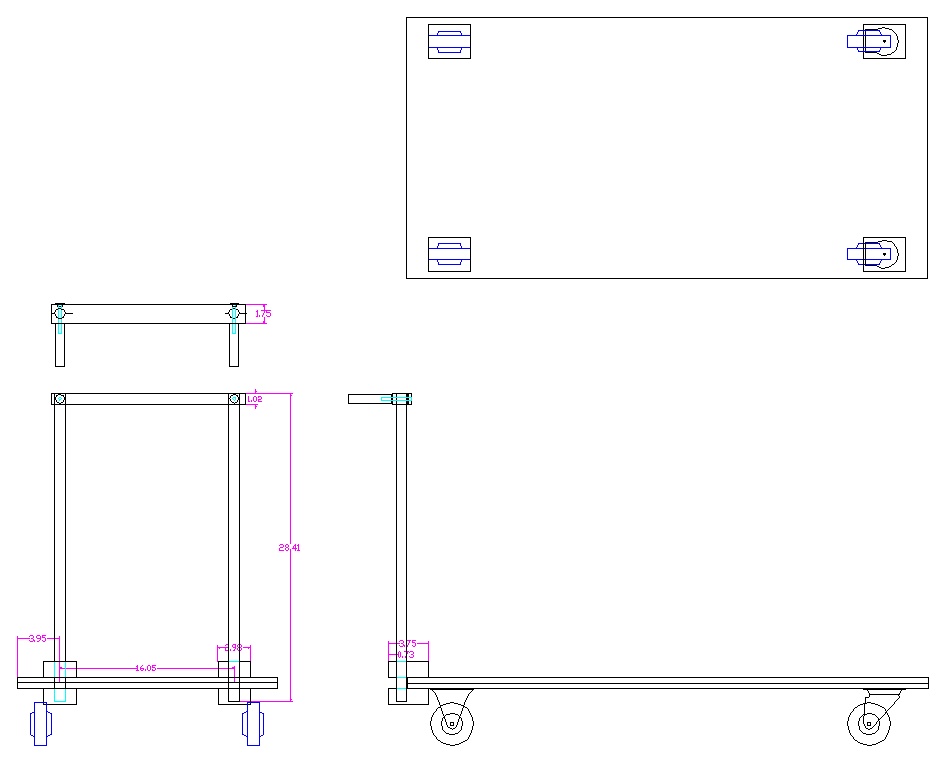
The 2022 cart plans
2021 Cart

The box label
I was pleased to find a wagon undercarriage kit available from Home Depot since most of the complete carts wouldn't work well for our application. It was even a sort of a deal since the whole kit cost significantly less than just four individual wheels.
It needed to be ordered on-line but that was easy enough and the box with the label shown arrived some time later.
It needed to be ordered on-line but that was easy enough and the box with the label shown arrived some time later.
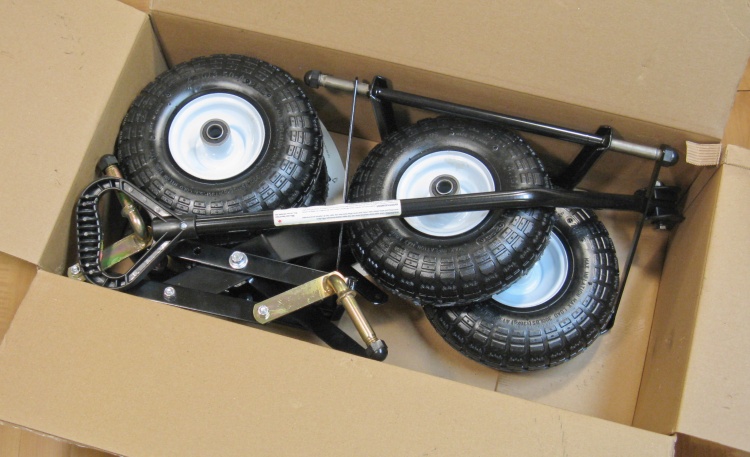
A big box of hardware
The contents were as expected; a pair of rear wheels with a fixed axle and a pair of front wheels equipped with a handle-driven steering mechanism.
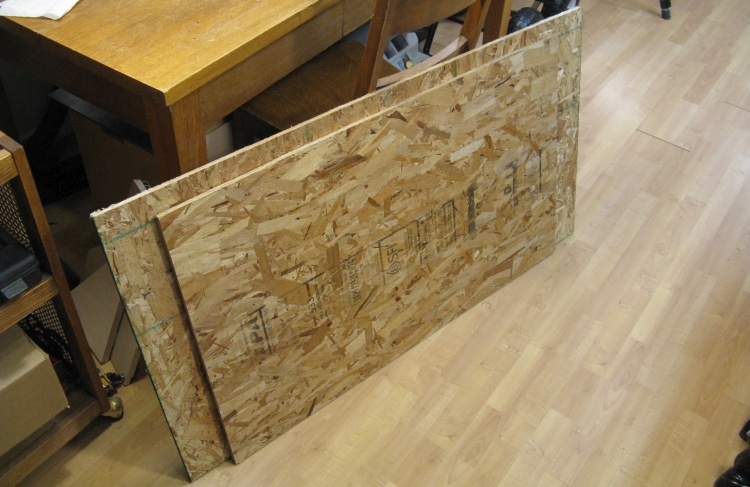
Scrap OSB for the deck
I planned to make the deck from a couple layers of 1/2" OSB plywood. I grabbed the pair of scraps shown here, left over from shed building in 2018.
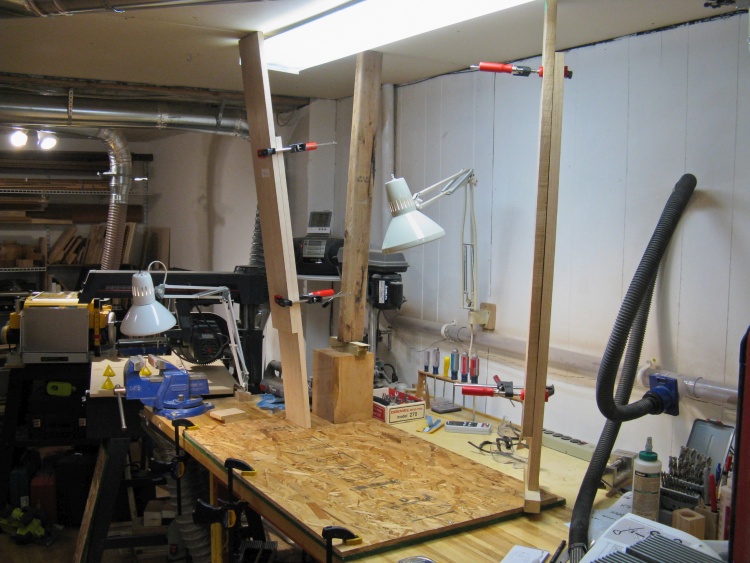
Gluing OSB sheets with novel clamping technique
The sheets were not very flat so I used bench-to-ceiling props to apply pressure to the far edge along with clamps for the near edge.
I used normal wood glue between the sheets but after a few hours it had not dried - the board faces were so lumpy that the gaps were too large.
I ended up removing the glue by scraping followed by scrubbing with a damp cloth and then letting the sheets dry before a second attempt.
I used normal wood glue between the sheets but after a few hours it had not dried - the board faces were so lumpy that the gaps were too large.
I ended up removing the glue by scraping followed by scrubbing with a damp cloth and then letting the sheets dry before a second attempt.
Cutting the OSB to size
Since the ceiling-to-bench clamping technique was rather awkward, I first trimmed the boards to the correct size so more-conventional clamping could be used (one sheet had been larger than the other for the first attempt).
Laminating two OSB sheets
This time I used PL construction adhesive to glue the sheets together. It is thick and gooey-enough to fill gaps plus it holds tenaciously. I used a series of conventional clamps around the perimeter along with screws in the corners to locate and hold the sheets in place while drying.
The axle mechanisms needed to be mounted using bolts but I didn't want heads protruding through the top side of the deck. I happened to have a number of #10-24 T-bolts, which have a flat head made to slide into a T-slot. The head is only maybe 0.1" thick so they could be inset flush to the surface without removing much of the plywood.
I first drilled 1/4" holes and then marked and routed out an oval shape for the head using a Dremel.
I first drilled 1/4" holes and then marked and routed out an oval shape for the head using a Dremel.
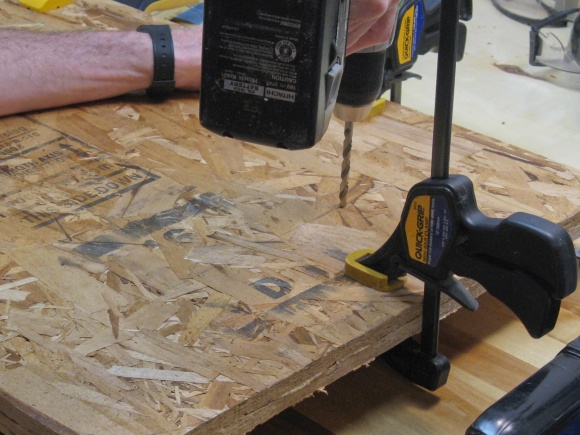
Drilling bolt holes
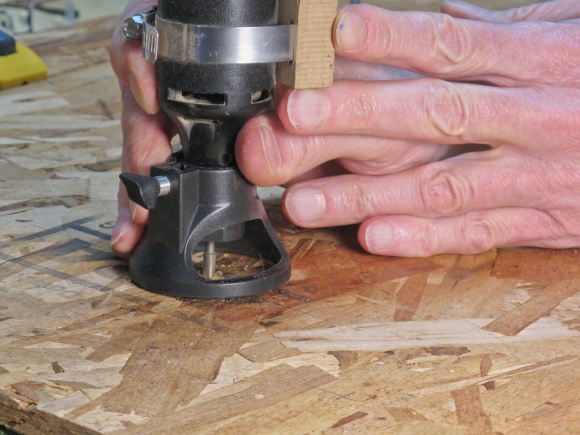
Routing bolt head clearance
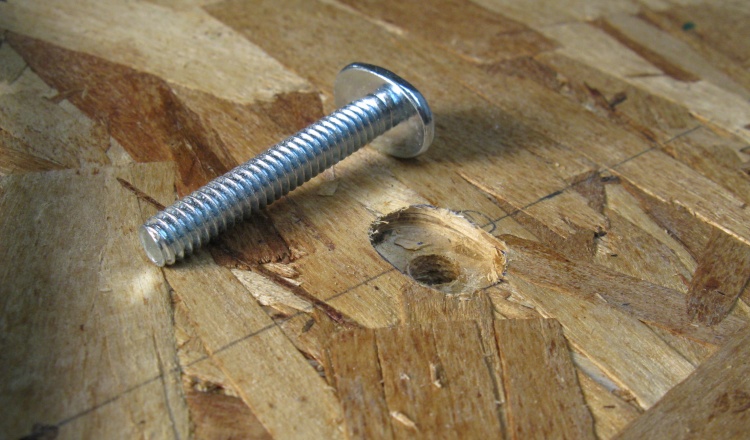
The T-bolt and matching hole
Like that.
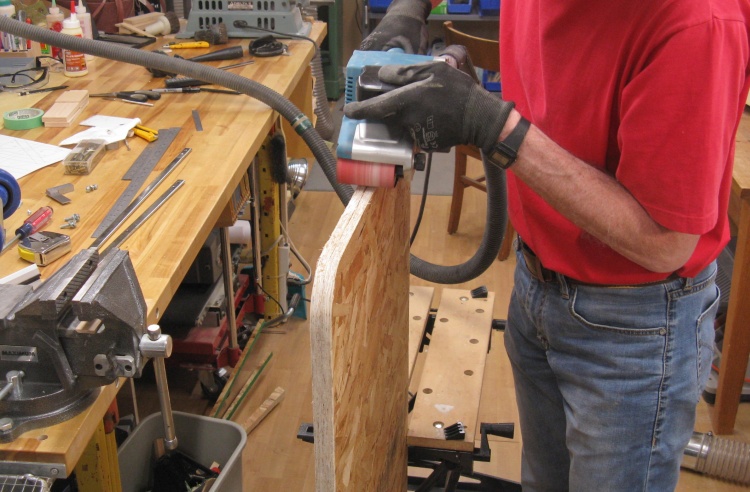
Sanding the deck edges
The edges of the OSB were pretty rough (and in some cases, green) so they got smoothed off/decolorized using a belt sander.
The four corners were also radiused for a more finished look (if that's in fact possible on unfinished sheets of OSB).
The four corners were also radiused for a more finished look (if that's in fact possible on unfinished sheets of OSB).
Bolting down the hardware
Then it was just a matter of bolting the hardware in place.
There were also some reinforcement brackets like the one angling down in this shot that I fastened to the deck using standard #10 wood screws.
There were also some reinforcement brackets like the one angling down in this shot that I fastened to the deck using standard #10 wood screws.
The completed cart
And that was it.
The handle of the cart can swivel front-to-back and is bent to fit over the top of the deck. Which as any kid who has seen a hill could tell you, lets the rider steer themselves.
The handle of the cart can swivel front-to-back and is bent to fit over the top of the deck. Which as any kid who has seen a hill could tell you, lets the rider steer themselves.
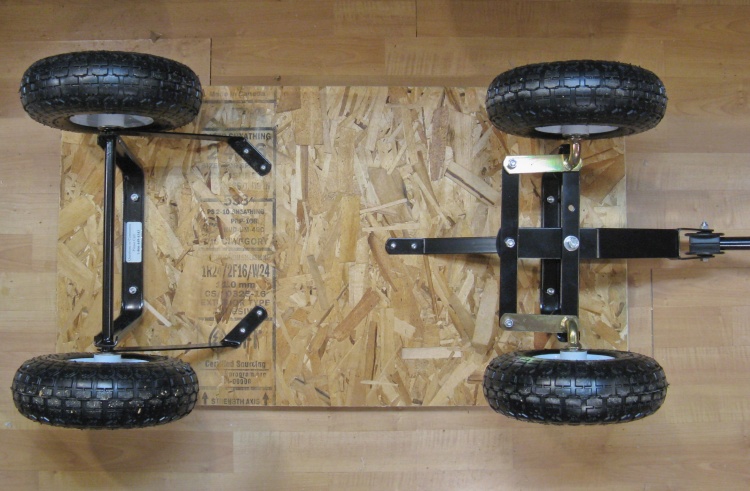
The underside gubbins
The mysterious underside details are revealed here.
2022 Cart
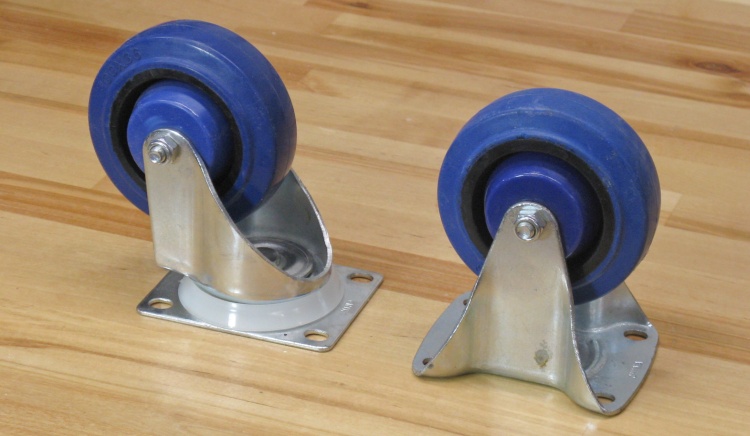
The new wheels
I started this year's cart by selecting a set of wheels (or technically casters since they are already mounted to an axle and swivel mechanism).
I selected smaller wheels - in this case 4" diameter - just to minimize the storage space the cart would take for the 11 months it isn't being used. The wheels are solid rubber rather than pneumatic so the cart isn't as ATV-like as 2021's but that's not a big problem since its theatre of operations includes only the garage floor and the brick walk.
I selected smaller wheels - in this case 4" diameter - just to minimize the storage space the cart would take for the 11 months it isn't being used. The wheels are solid rubber rather than pneumatic so the cart isn't as ATV-like as 2021's but that's not a big problem since its theatre of operations includes only the garage floor and the brick walk.
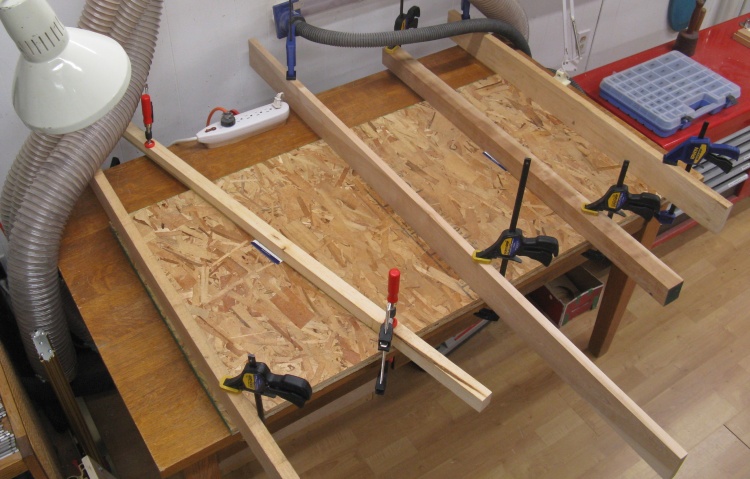
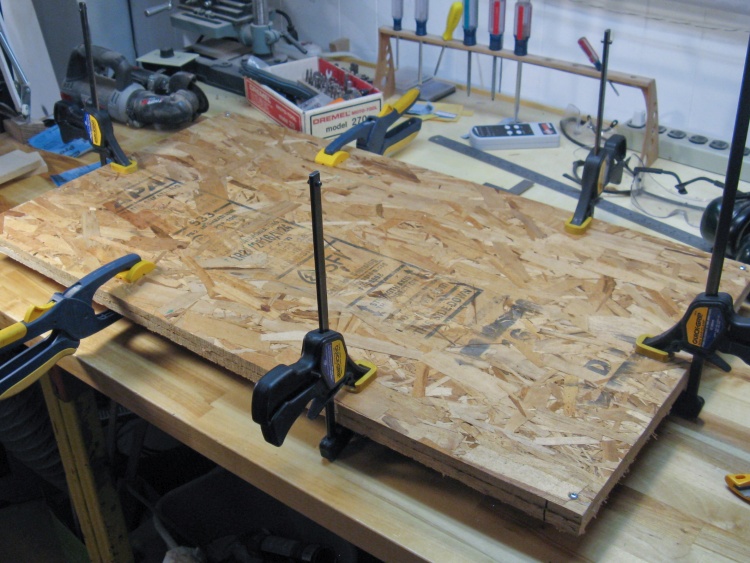
Laminating OSB sheets
The first step was to build the deck. At 24" x 48" it was a bit bigger than the 2021 cart and used the last of my larger scraps of OSB.
Now on this web page it is only about 9 photos ago where I found that regular wood glue didn't work well for OSB. But in real time it was about a year, giving me more than enough time to forget. So I used regular wood glue which again was a poor choice. Fortunately I had clamped it better so the adhesion wasn't too bad. I had to add a bit more glue and reclamp one edge but the sheets seem to have bonded Ok in the end.
This is of course the shot of the initial gluing operation with five cauls providing pressure every foot or so along the sheets.
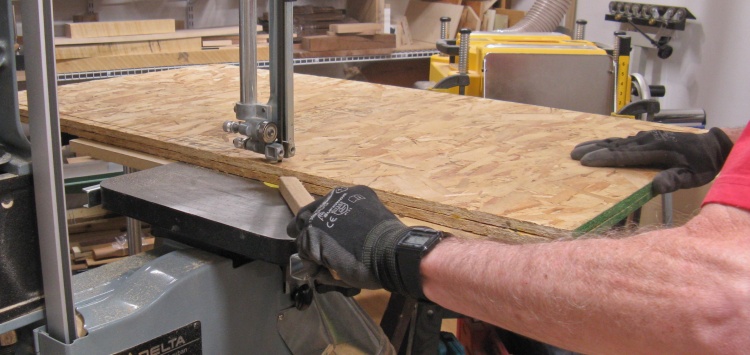
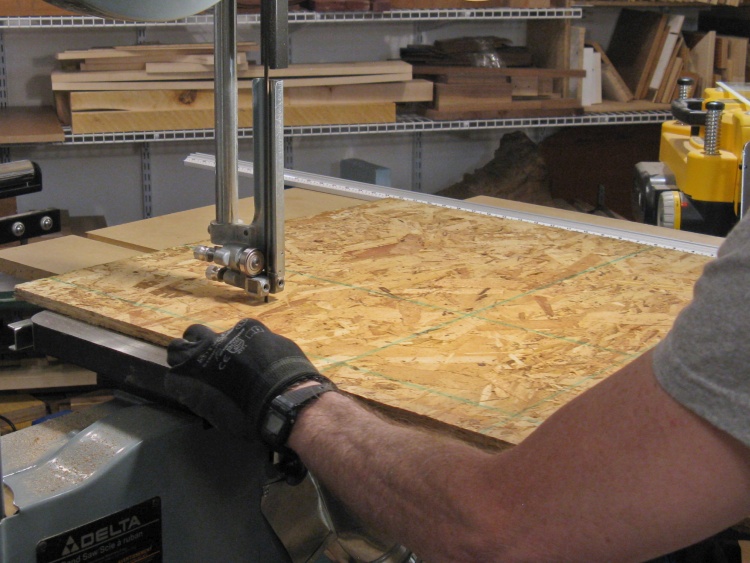
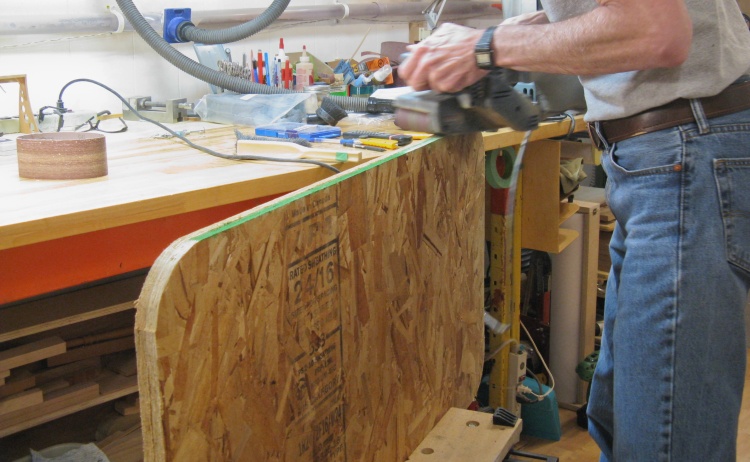
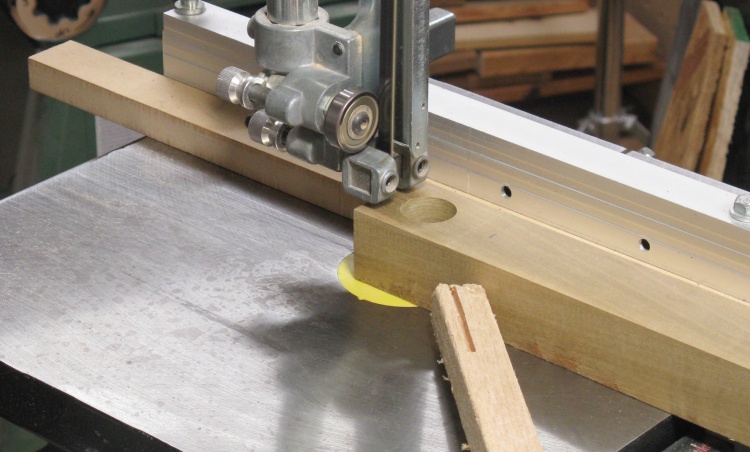
Cutting laminated stack to size
The sheets were a bit larger than needed so they were cut to final size on the bandsaw after the glue had dried.
Sanding the edges and corners
And similar to the previous cart, the corners were rounded (just the fronts in this case) and the sides and corners sanded.
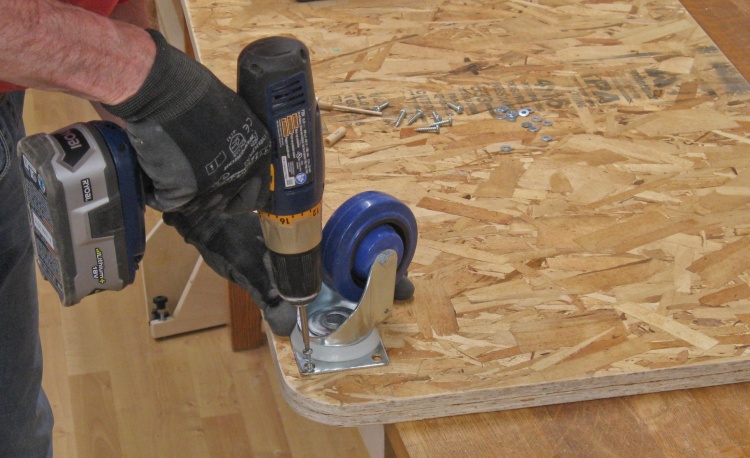
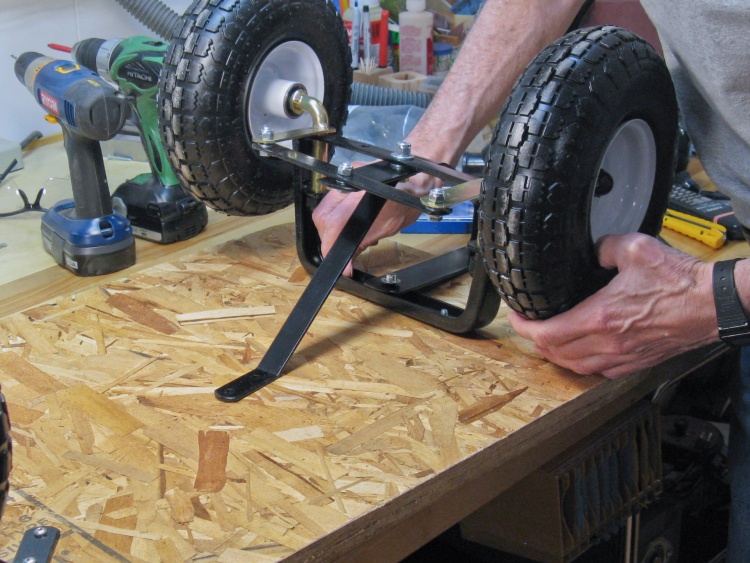
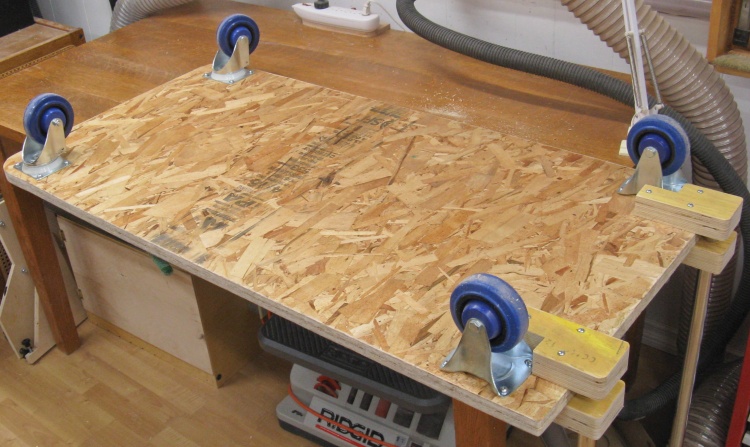
Installing the casters
After drilling pilot holes, the casters were fastened in place using #10 x 1" wood screws equipped with washers.
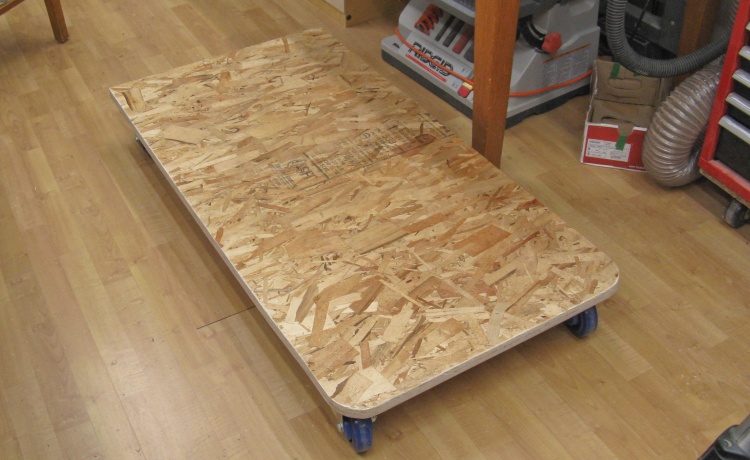
The base of the cart is complete
That completed the base of the cart. Here it sits on the floor with the aerodynamic curved front toward the camera.
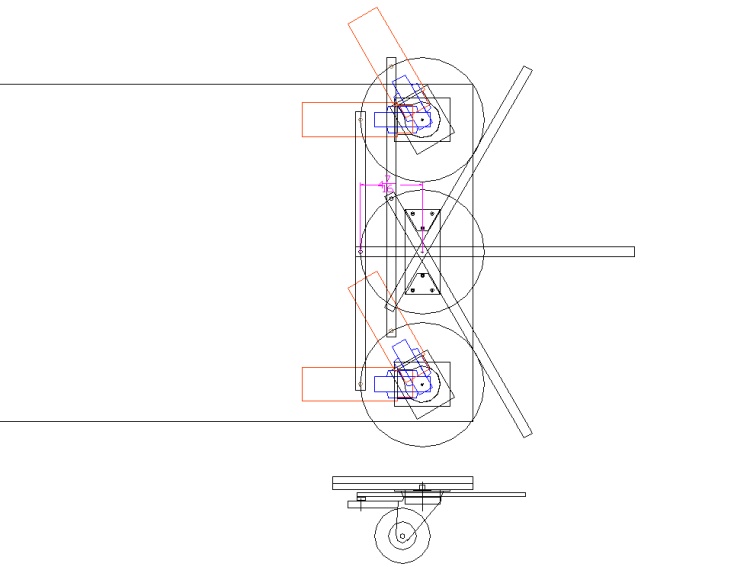
The steering geometry
I had originally planned to use the same wagon steering as on the 2021 cart. I obviously didn't have the handy hardware of the first cart so it was going to be made separately.
I needed some levers for the front swivelling casters, a tie rod and the rotating steering rod.
I needed some levers for the front swivelling casters, a tie rod and the rotating steering rod.
The levers were to be plywood that fit into the metal frame of the casters while the rest of the steering mechanism was made from spare metal rods (from broken quick-grip clamps).
These are a couple shots of those components being worked on;
These are a couple shots of those components being worked on;
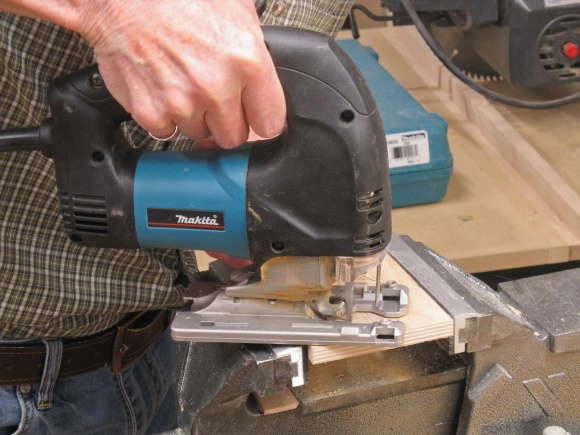
Cutting a wheel lever
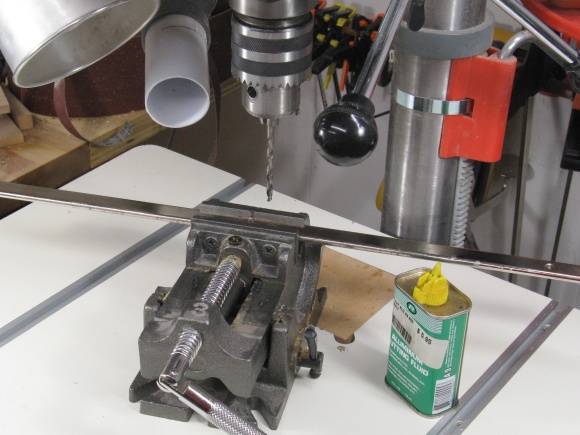
Drilling the tie rod
But part way through making the steering components, we went to pick up some plants. At the greenhouse I chose a cart with steer-from-behind handles and liked the maneuverability so decided to abandon the wagon steering and use that technique instead.
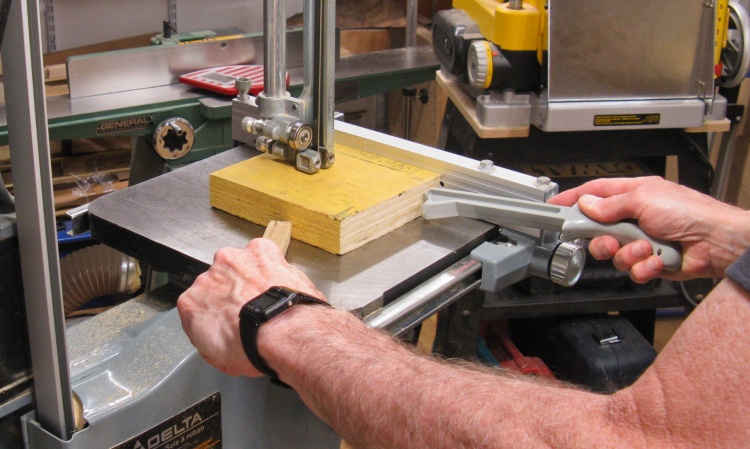
Chopping up an LVL piece
The new approach needed three main parts;
- an anchor at the deck
- posts and a crossbar
- handles
I started on the anchors by cutting up a couple pieces like this one.
This is actually a cut-off piece of a Microlam LVL* beam used in some house renovations back in 2004. I only had to wait 18 years to find a good use for it!
*Laminated Veneer Lumber
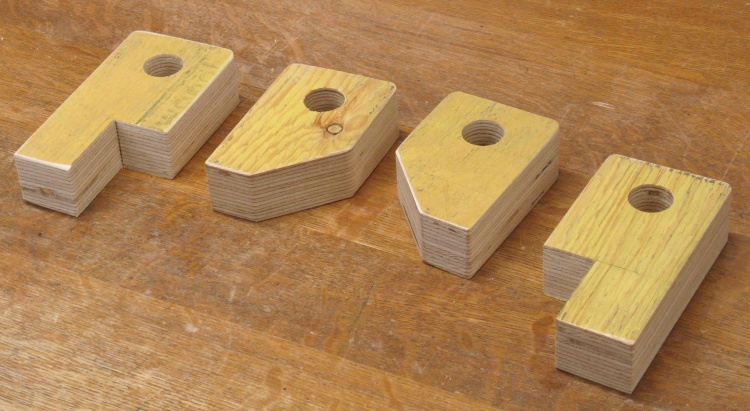
"pooq", or parts of our qart
These pieces will be screwed to the top and bottom of the cart deck to support the vertical posts.
There will be lots of torque at that joint which is why such thick pieces were used.
There will be lots of torque at that joint which is why such thick pieces were used.
Slotting the top crossbar
The top birch crosspiece joins the two vertical posts and holds the handles. Here I'm cutting a slot for one of the posts.
Provenance: The birch is left over from construction of wagon rails in 2016; much less venerable than the LVL.
Provenance: The birch is left over from construction of wagon rails in 2016; much less venerable than the LVL.
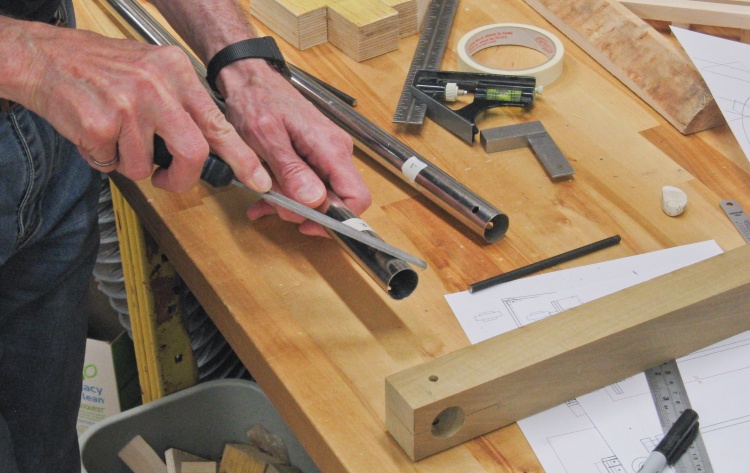
Removing burrs from vertical pipe piece
The vertical members are 1"-diameter stainless steel pipes that started life as closet clothes rods. They have probably been sitting around waiting for their time in the sun as long as the LVL.
The pipes were cut to length and then had 1/4" holes drilled in the top end. In this shot I'm filing off the burrs from the drilling operation.
The pipes were cut to length and then had 1/4" holes drilled in the top end. In this shot I'm filing off the burrs from the drilling operation.
An irregularly-shaped piece of birch on the lathe
The last bit was a pair of steering handles. I grabbed an irregularly-shaped piece of birch (provenance: probably wagon parts or cart parts from 2016) and mounted it on the lathe.
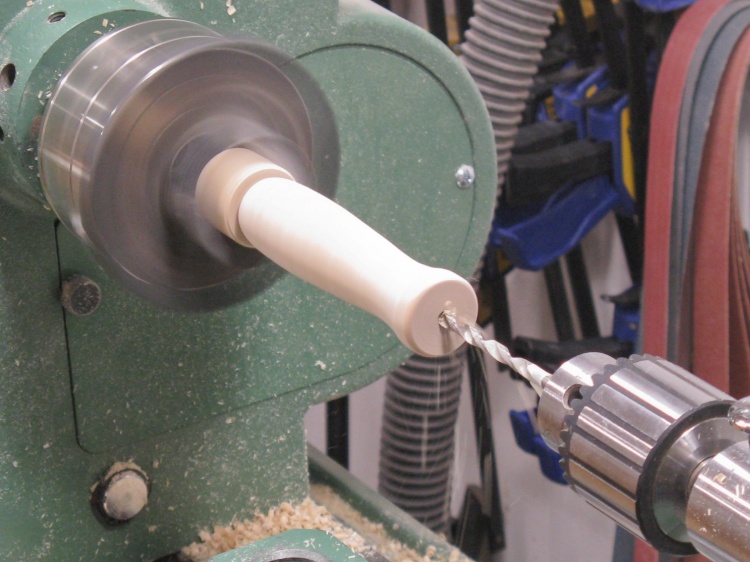
The first handle shaped and being drilled
That was turned until it looked handle-y (modelled on a burnishing tool handle) and in this shot it is being drilled for a threaded rod which will be used to attach it to the crossbar.
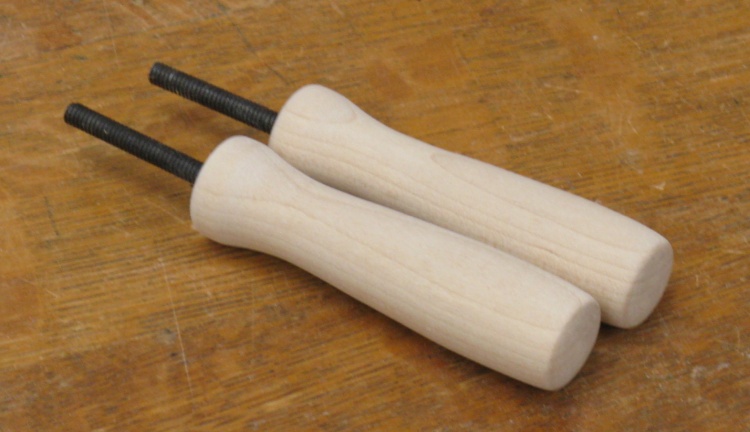
A pair of completed handles
I tapped the handles and threaded in the 1/4-20 rods but the hold was poor (probably due to having them go into end grain. So I drilled larger holes and screwed in threaded inserts, followed by threading in the rods again.
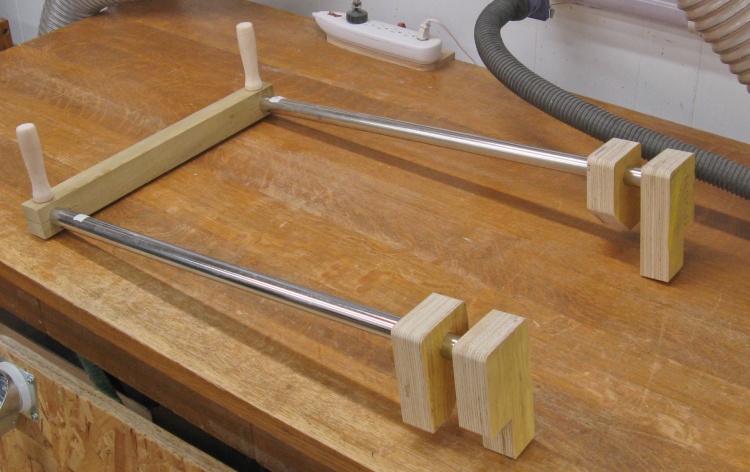
The push assembly all assembled
That was all the pieces for the push assembly, so I was able to put it all together as shown here.
The back side of the crossbar was equipped with hammer-in threaded inserts for the 1/4-20 rods. The handle threads were inserted through holes in the crosspiece and rods and into those inserts. Tightening up the handles squeezed everything together at the top.
The back side of the crossbar was equipped with hammer-in threaded inserts for the 1/4-20 rods. The handle threads were inserted through holes in the crosspiece and rods and into those inserts. Tightening up the handles squeezed everything together at the top.
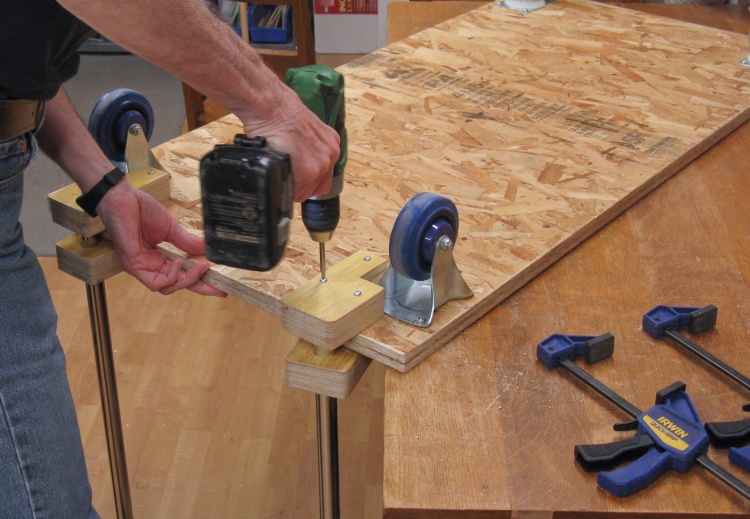
Attaching the assembly to the cart deck
The last step was mounting the push assembly to the cart. I used #10 x 2.5" wood screws to attach the LVL anchors to top and bottom sides of the deck.
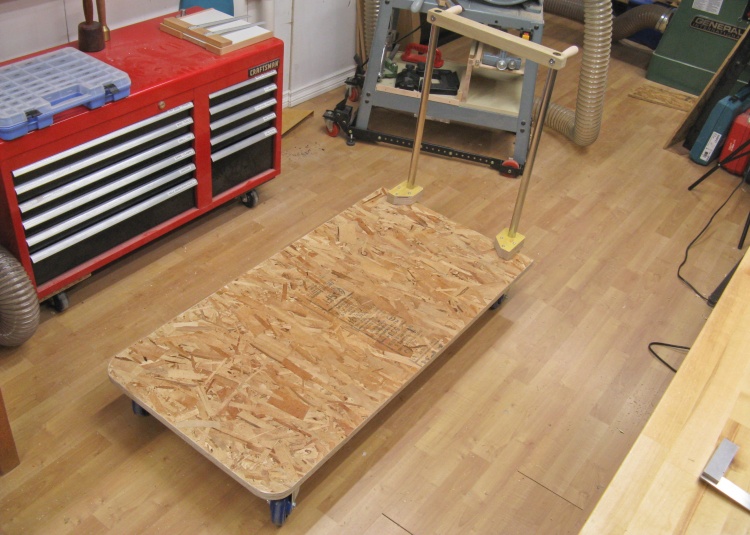
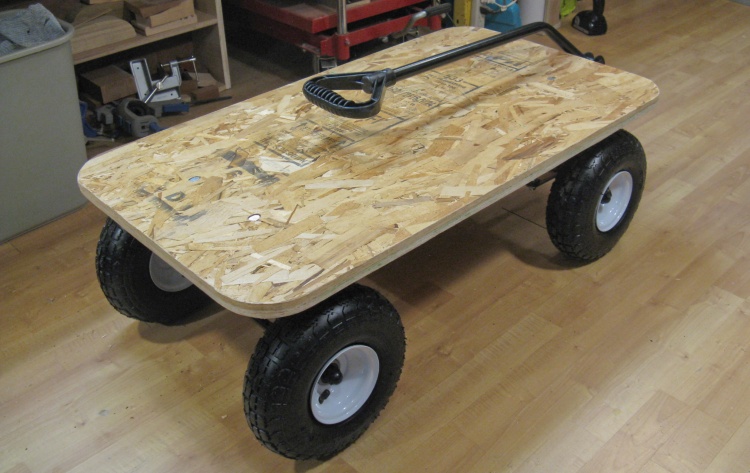
The completed cart
The completed cart.
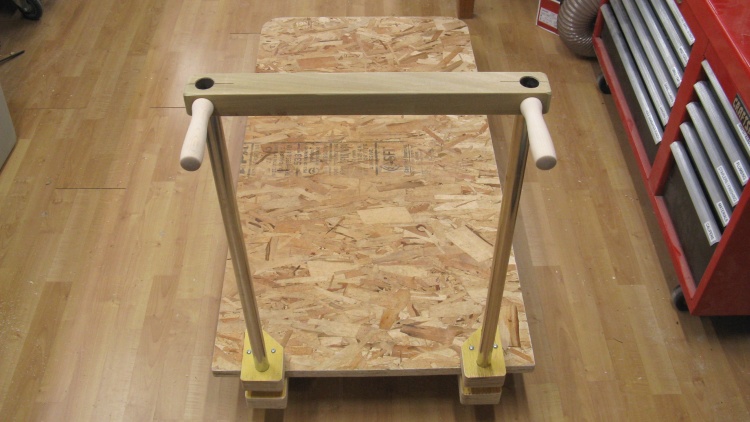
Pusher's-eye view
Another view of the cart.
A pretty simple underside
And a bottom view for completeness.


