
Warning! Long post - skimming advised.
Contents:
• Details
• Plugs
• Photo Setup
• Test Coaster
• Post-game Analysis
• The Real Coasters
• Holder
Details
The original coaster was made with tapered plugs which were almost cylindrical but with a 3° taper to the sides. By tapping one of these plugs into a hole, it would wedge in at the top which made for a very tight joint. The excess still sticking above the surface would be cut off and discarded. The problem was that good part of the joint was only skin deep which prevented any contouring of the top surface. Conversely there are gaps on the backside where the diameters of the plugs tapered smaller.
The obvious plan was to replace the tapered plugs with un-tapered cylindrical plugs so the joint would be good through-and-through. The issue with that approach is that all the plugs would need to be almost perfectly-sized for a good fit. Now theoretically if one could get a decent set of straight plug cutters, one could turn out barrels of perfect round plugs to use for one's coaster. However based on my experience I feel confident in stating that one can't get a decent set of plug cutters so one is left with a bunch of empty barrels.
The obvious plan was to replace the tapered plugs with un-tapered cylindrical plugs so the joint would be good through-and-through. The issue with that approach is that all the plugs would need to be almost perfectly-sized for a good fit. Now theoretically if one could get a decent set of straight plug cutters, one could turn out barrels of perfect round plugs to use for one's coaster. However based on my experience I feel confident in stating that one can't get a decent set of plug cutters so one is left with a bunch of empty barrels.
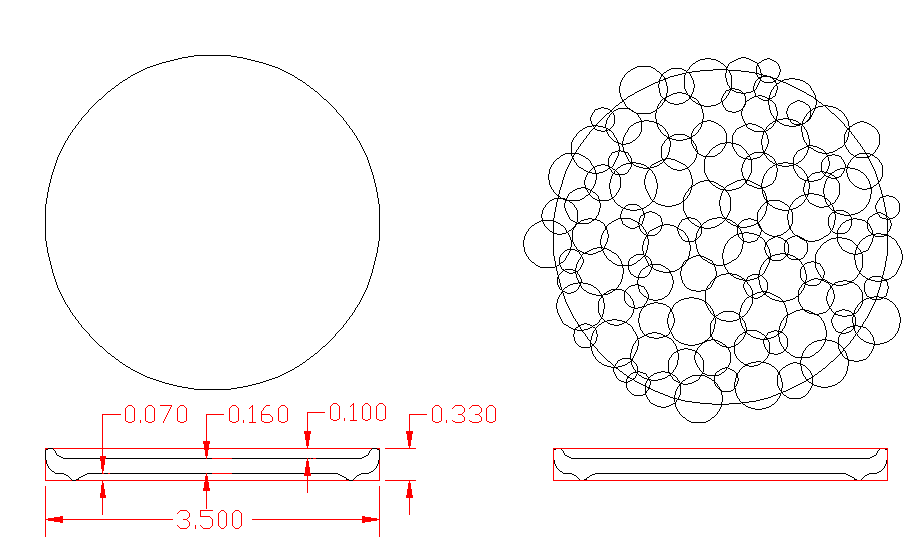
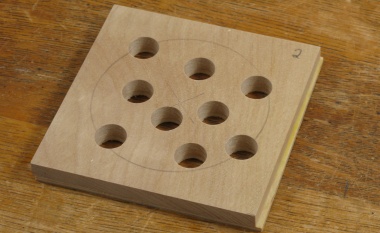
Some basic dimensions for the coaster
Now to get the classic wood grain look, you really need to display the side grain rather than the end grain. In the plug coasters, the ends of the plugs are what's visible so these ends need to show side grain. To achieve that a circle must be cut into the face of the wood which puts the cutting action at all angles with and against the grain and you can bet that some of those angles are going to cause a problem.
The tapered plug cutters that worked well for the original plug coaster shear the grain continuously due to the taper, and this (along with good tool design) seems to be able to make clean cuts. Normal cylindrical cutters; not so much. So it was a matter of figuring out how to make suitable cylindrical plugs.
The tapered plug cutters that worked well for the original plug coaster shear the grain continuously due to the taper, and this (along with good tool design) seems to be able to make clean cuts. Normal cylindrical cutters; not so much. So it was a matter of figuring out how to make suitable cylindrical plugs.
Plugs
The first step was to figure out how to make suitable plugs - or if it was even practical. They could obviously just be individually turned on the lathe but since I'd need hundreds that approach was a bit short on the practicality end.
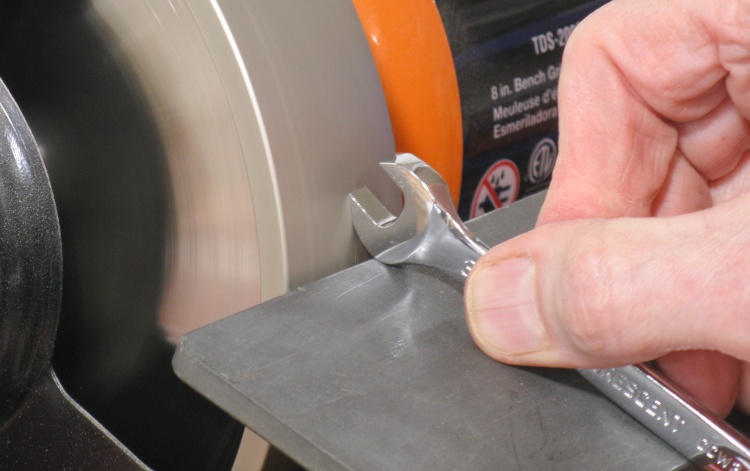
Sharpening up a 3/8" wrench
One idea that comes up commonly for making accurate-diameter plugs is use a sharpened open-end wrench as a cutter while turning on the lathe.
This was one of the first things I tried. Sharpening a wrench was a matter of a few seconds on the grinder.
This was one of the first things I tried. Sharpening a wrench was a matter of a few seconds on the grinder.
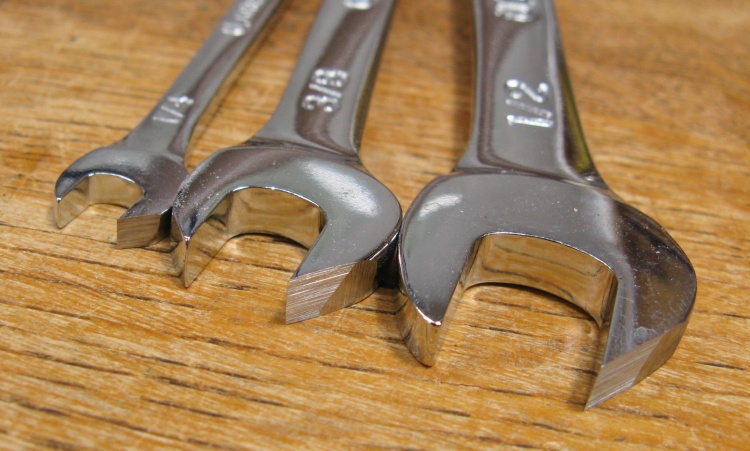
A nice shiny set of sharpened wrenches
In short order I had a nice set of sharp wrenches to try out.
Unfortunately despite the promisingly-high level of shininess I found that they weren't very effective cutters. They worked best when shaving off only a small amount of wood but even careful use chewed up the grain on many woods (since the cutter edge is going directly into the end grain for part of the diameter) and they weren't a good solution.
Unfortunately despite the promisingly-high level of shininess I found that they weren't very effective cutters. They worked best when shaving off only a small amount of wood but even careful use chewed up the grain on many woods (since the cutter edge is going directly into the end grain for part of the diameter) and they weren't a good solution.
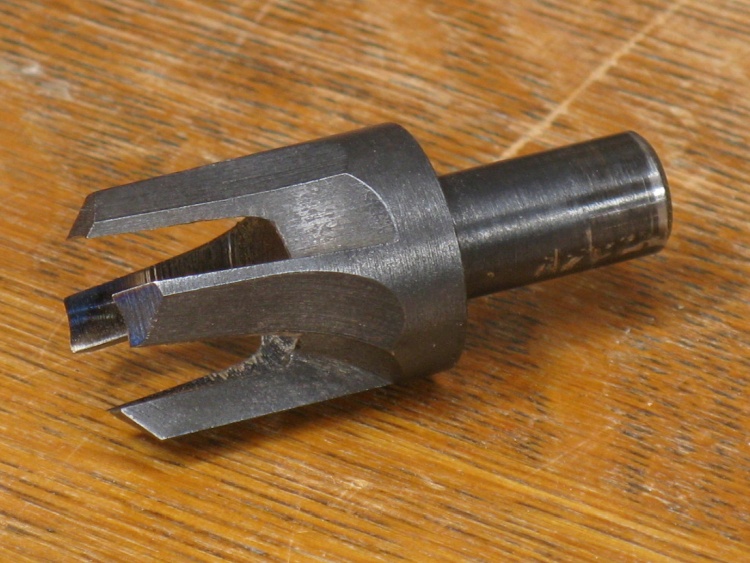
A cheesy plug cutter
The other obvious approach was a plug cutter. This one is from a Ryobi set and other manufacturers make very similar-looking parts. unfortunately it worked very poorly, cutting undersized plugs and sometimes breaking off the plug in mid-cut.
I tried another couple sets but they were as bad or worse than this one. One set advertised with Imperial sizes on Amazon.ca turned out to be a metric set with sizes I couldn't use. Which was fine since they also cut poorly.
I tried another couple sets but they were as bad or worse than this one. One set advertised with Imperial sizes on Amazon.ca turned out to be a metric set with sizes I couldn't use. Which was fine since they also cut poorly.
A deluxe, yet crappy plug cutter
Lee Valley had a promisingly good-looking set with carbide cutters and a robust construction. Yet they were still crap at cutting a cross-grain plug. It cut some woods undersized, some oversized and some both - an oval instead of a circle. Novel!
Some plug-cutting issues can be traced to insecure wood holding or drill-press runout but the best setup I was able to make didn't help appreciably.
Some plug-cutting issues can be traced to insecure wood holding or drill-press runout but the best setup I was able to make didn't help appreciably.
I eventually decided it wasn't feasible to make accurate-diameter plugs. My fallback approach was to make oversized plugs and trim them down individually using the lathe. To that end I modified some cutters to cut oversized plugs. They still had some break-off problems but the majority of the plugs were usable.
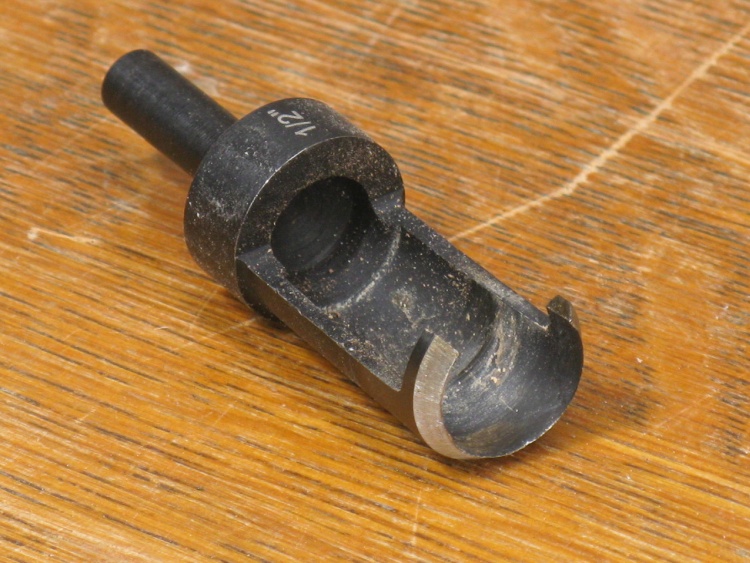
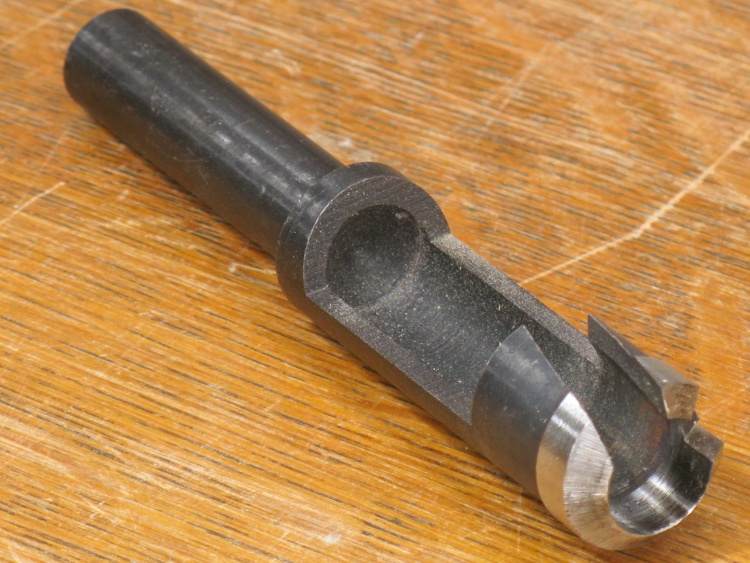
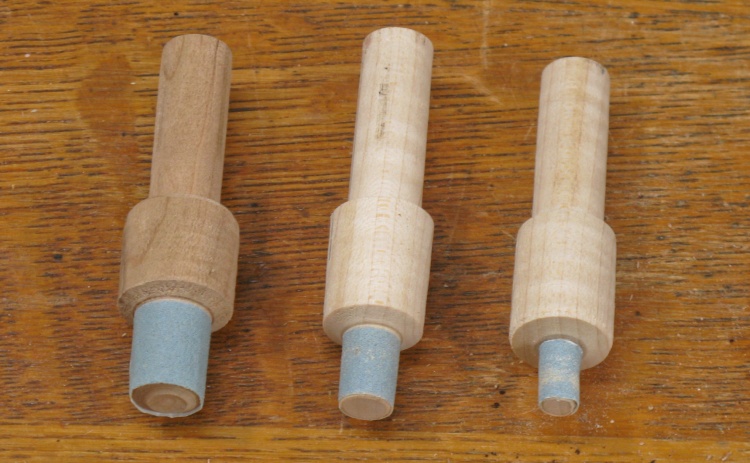
A good tapered plug cutter
This one is a tapered plug cutter of the type that actually works well. I used this to make 1/2" plugs which were then trimmed down on the lathe to get rid of the taper. Unfortunately the tapered cutters for the smaller sizes produced plugs too short to use on the lathe.
So then the question became how to trim down the various sizes of plug on the lathe for an accurate outside diameter.
So then the question became how to trim down the various sizes of plug on the lathe for an accurate outside diameter.
A dismal attempt at a plug trimmer
I had some success cleanly shearing plugs with a skew cutter on the lathe although the size was difficult to control. This was an attempt to replicate the shearing action to achieve a 1/2" diameter.
It worked essentially not at all.
It worked essentially not at all.
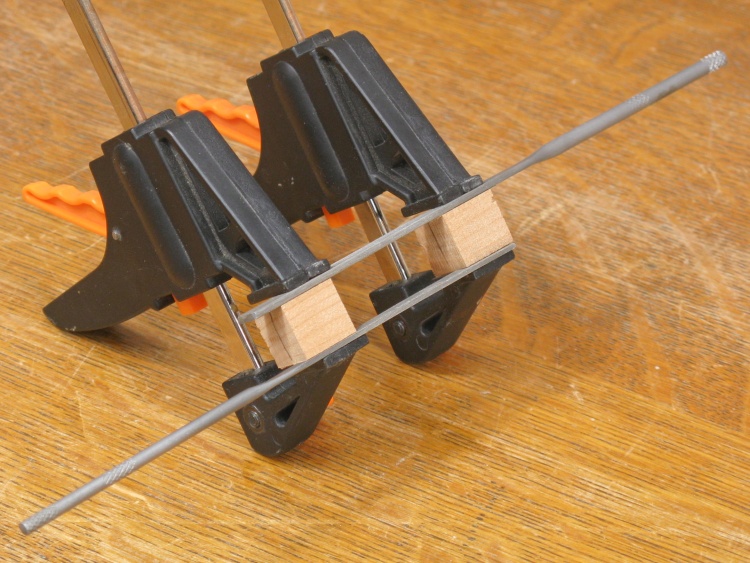
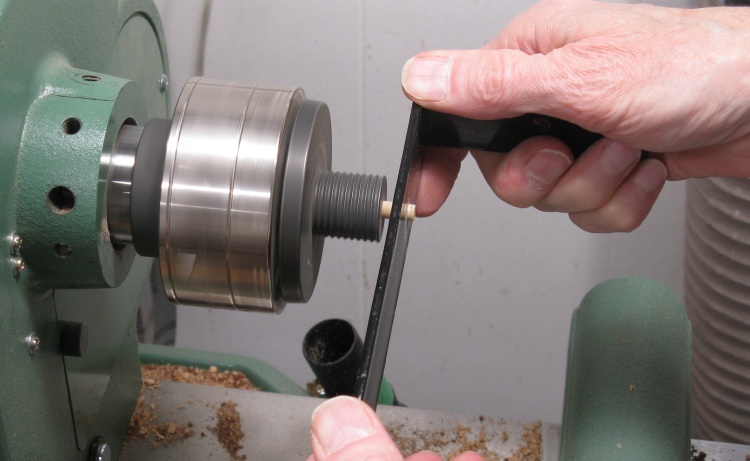
A pair of files spaced exactly 1/2" apart
Another thought was to use two accurately-spaced files to get down to the final diameter. However when either sanding or filing on the lathe, the side grain is affected more than the end grain so the plug becomes oval.
I ended up using this a bit but only on specific woods for very small diameter changes.
I ended up using this a bit but only on specific woods for very small diameter changes.
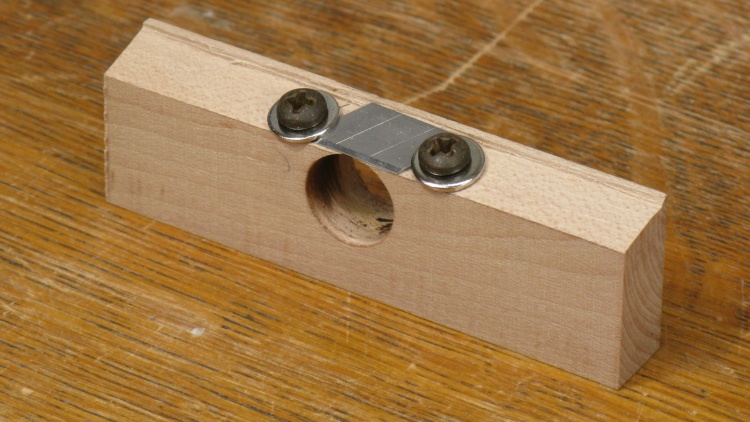
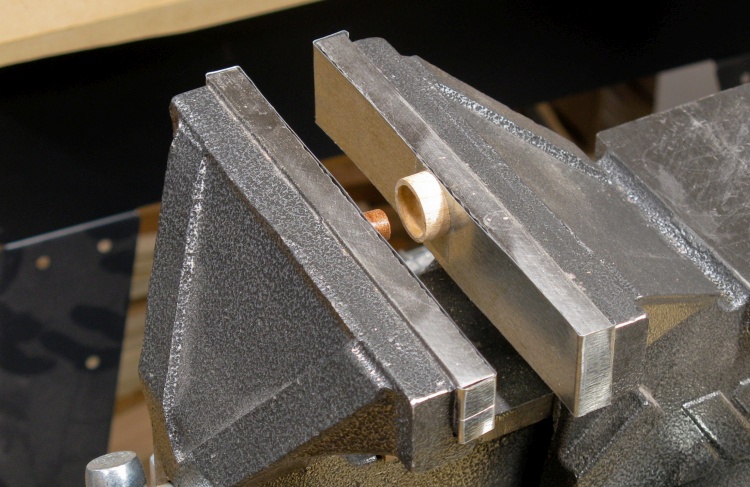
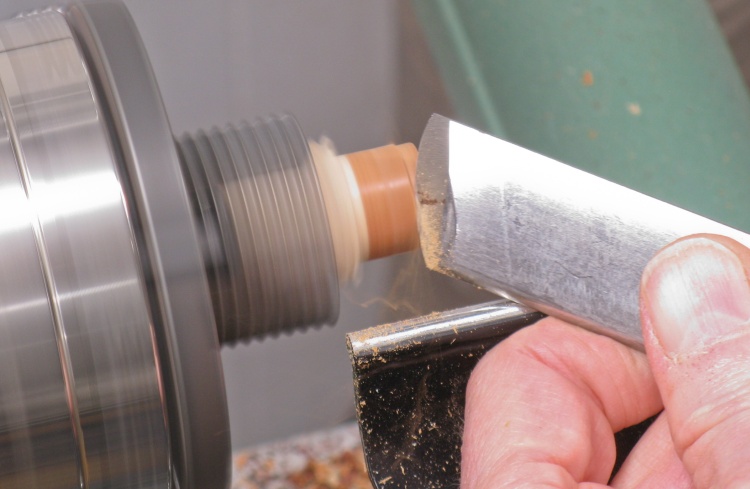
The "burnisher" in operation on a 1/4" plug
Another option was what I called a burnisher tool which consisted of a hole of the desired size in a thick piece of metal with some grooves filed into the interior. Pushed onto an oversized plug it would shear off the excess.
For some diameters of some woods this worked well but mostly it produced too much torque and the plug just broke off.
For some diameters of some woods this worked well but mostly it produced too much torque and the plug just broke off.
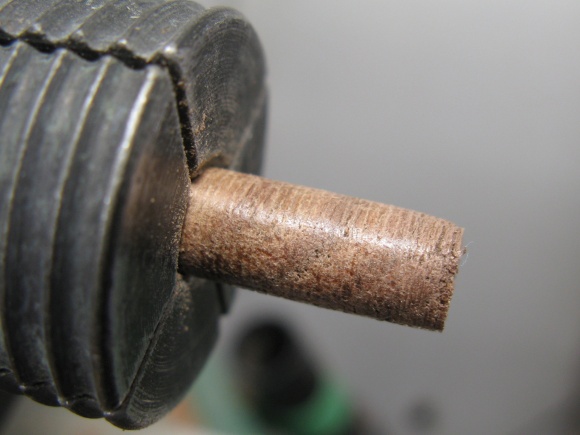
Slightly oversized plug
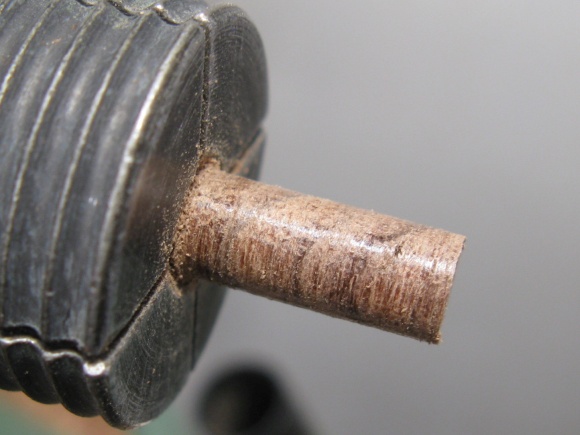
After treatment by the burnisher
Above is an example of the burnisher working well. It worked maybe 10% of the time so it wasn't a slam-dunk by any means. Sometimes I could get close enough with the skew chisel or a conventional turning gouge could be used to reduce diameter or sometimes I could use the double files or sometimes a single file would work OK. So armed with this haphazard selection of techniques I decided to push ahead.
Photo Setup
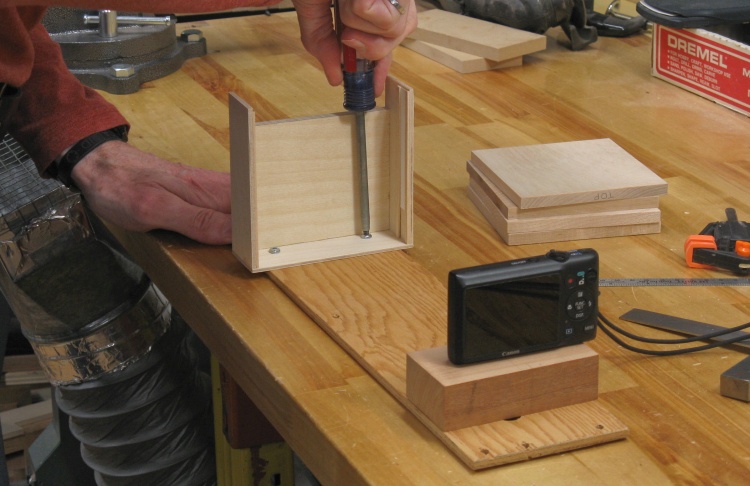
Building a photo stand
I had in mind to do a step-by-step photo shoot of making the coasters so it made sense to check this out with the test coaster as well.
The first thing I needed was some reliable technique to mount the camera and coaster with some repeatable lighting. I built this little setup with a slot for the coaster that held it in a fixed position relative to the camera. I spaced things out so the focus and default zoom on the camera worked out decently.
The first thing I needed was some reliable technique to mount the camera and coaster with some repeatable lighting. I built this little setup with a slot for the coaster that held it in a fixed position relative to the camera. I spaced things out so the focus and default zoom on the camera worked out decently.

Inserting the test blank in the photo stand
Then for consistent lighting I acquired a light tent and used a couple of my LED photo lights flanking it. This was set up in another room so it wouldn't need to be moved for however long it took to make the coaster (a couple weeks, as it turned out).
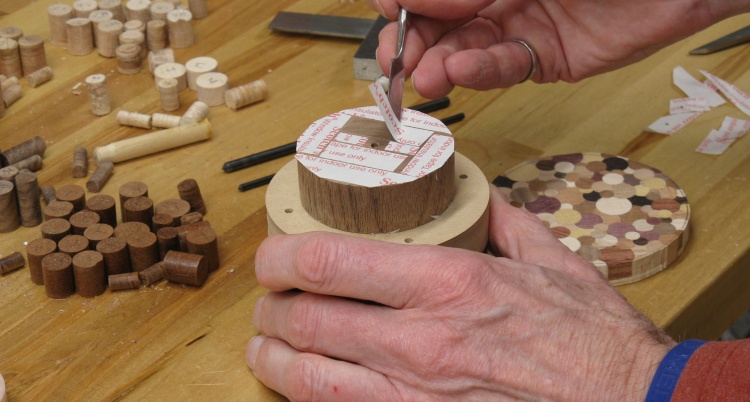
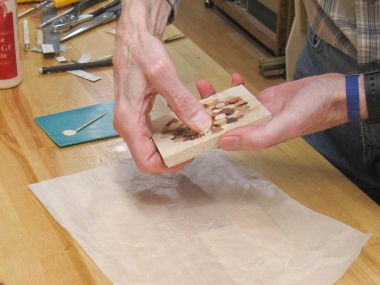
In this shot I'm putting the 3/4-done coaster into the holder for a shot.
In this shot I'm putting the 3/4-done coaster into the holder for a shot.

Taking a shot in the light tent
This shot shows the light tent and one of the photography lights.
I took photos at every stage - a hole drilled or a plug added or partial sanding so it was usually between 30 seconds to a couple minutes between shots. I'd turn the camera on, take a shot and shut it off again. There were 320 shots by the time I was done and while the camera setup was just in the next room, I estimate I walked about 5 km for the photography.
I took photos at every stage - a hole drilled or a plug added or partial sanding so it was usually between 30 seconds to a couple minutes between shots. I'd turn the camera on, take a shot and shut it off again. There were 320 shots by the time I was done and while the camera setup was just in the next room, I estimate I walked about 5 km for the photography.
Test Coaster
The original plan was to make a set of four coasters but I thought I'd be better off making a single test coaster to start and see how practical the construction would be.
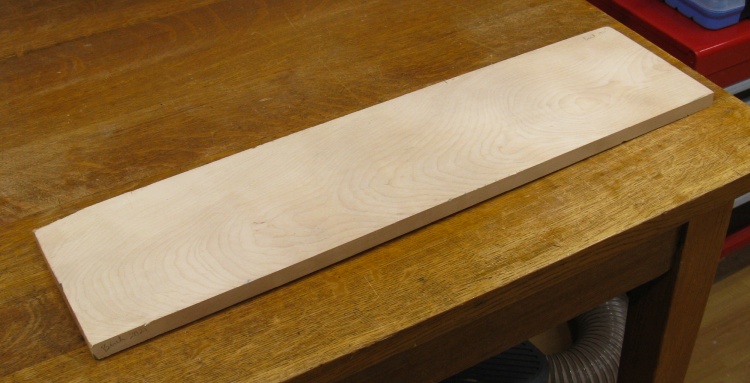
A piece of birch for the coaster blanks
I used birch for the coaster blanks. This piece would be enough for the four coasters plus the initial test coaster.
Marking coaster outlines
Once the birch was trimmed to a of thickness 0.33" and cut into 4.5"-squares, I added the 3.5" coaster outline to show what area needed to be filled.
The chipped-out backside after the first set of 1/2" holes drilled
This shows the backside of the test coaster after drilling 1/2" holes. This was done with it hand-held to a backing board but that evidently wasn't sufficient to prevent chipping. This seemed like a problem (although it actually wasn't since eventually all the birch would be replaced by plugs) so I later glued on a thin piece of plywood which had the added advantage of strengthening the birch to prevent splitting.
Which I eventually did, um, after it split.
Which I eventually did, um, after it split.
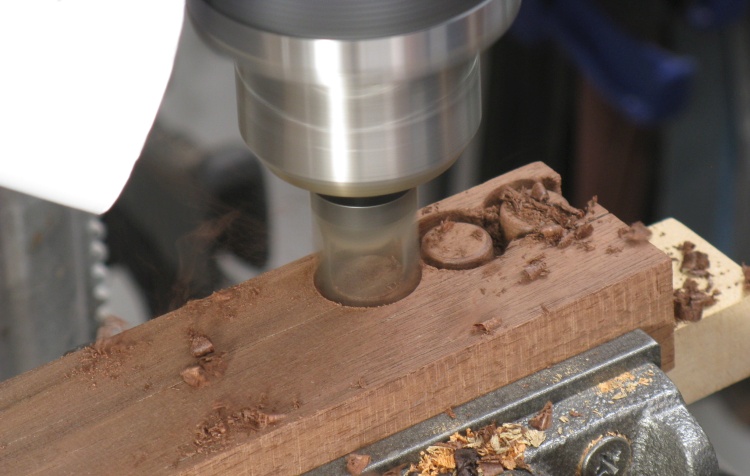
Cutting some 1/2" plugs
This shot shows some 1/2" plugs being cut with one of the modified cutters (ground out so it produces an oversized plug).

Cutting the plugs free
The plugs were cut free using the bandsaw.
The plugs were then put on the lathe one at a time and reduced in diameter using one of the techniques previously mentioned until they fit tightly in an appropriately-sized hole.
Or got reduced too far. Or chipped. Or got too oval. Or cracked and broke off. Success rate was rather dismal at maybe 60%.
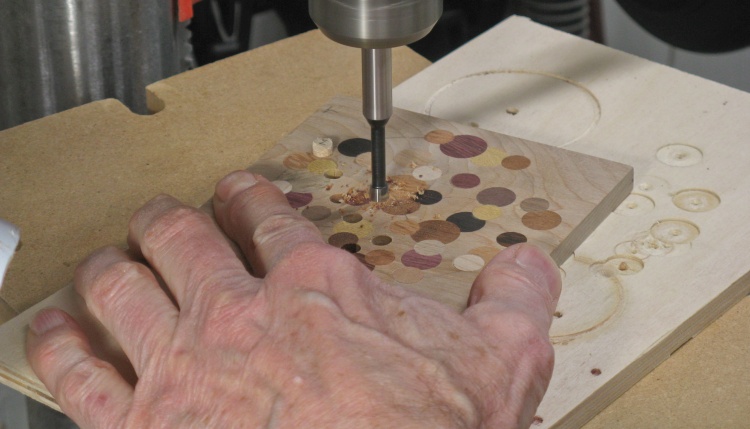
A few stages along, drilling 1/4" holes
Plug installation proceeded in a succession of stages with more of the coaster being filled in with each one.
Each plug-insertion stage involved:
- drilling holes,
- gluing in plugs and
- sanding them flush.
This is the fourth stage and I'm drilling holes for the 1/4" plugs.
Each plug-insertion stage involved:
- drilling holes,
- gluing in plugs and
- sanding them flush.
This is the fourth stage and I'm drilling holes for the 1/4" plugs.
Inserting a 1/4" plug
Once the holes were drilled, I glued in the plugs one at a time.
Plugs were made longer than needed which explains why they are poking out of the wood blank.
Plugs were made longer than needed which explains why they are poking out of the wood blank.
A plug press added to the bench vise
The plugs could be pretty tight in the holes so I added some snap-into-place custom jaws to the bench vise to make a plug press.
Pressing in a plug
This shows the press in action.
The blank after 1/4" plugs were added
This shot is actually of an earlier stage where a batch of 3/8"-diameter plugs have been inserted. The glue is dry so the next step is to sand the plugs flush with the surface.
Sanding the front smooth
...like that.
Backside after plywood added
This shot shows the plywood on the bottom, added to help prevent splitting.
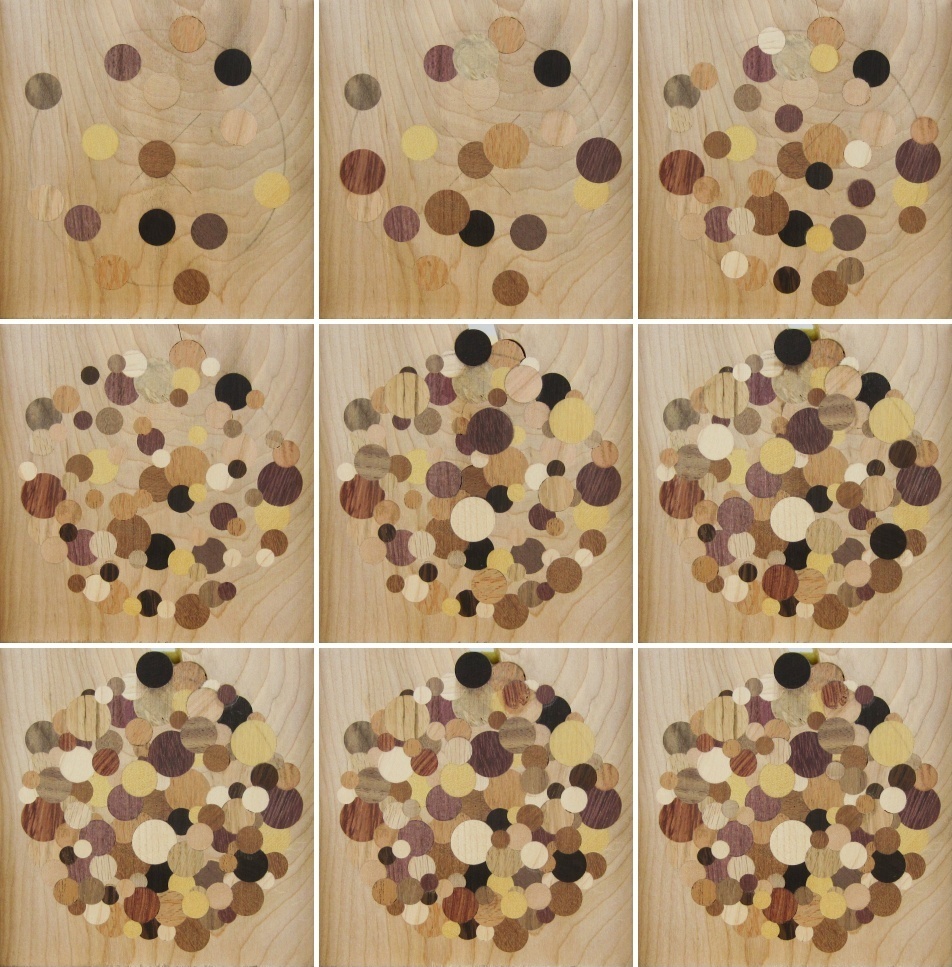
The 9 stages of plug installation
This group of photos summarizes the stages of plug insertion, of which there were nine in total. Each photo was taken after the plugs had been sanded flush.

100% plug coverage finally achieved
Eventually I ran out of birch to cover up with plugs. That happened after 110 plugs of 5/8", 1/2", 3/8" and 1/4" diameter.
Oh - and plug woods included African Blackwood, Amboyna burl, Bubinga, Cherry, Honeywood, Lacewood, Mahogany, Maple, Oak, Padauk, Purpleheart, Tigerwood, Walnut, Wenge, Yellowheart and Zebrawood.
Oh - and plug woods included African Blackwood, Amboyna burl, Bubinga, Cherry, Honeywood, Lacewood, Mahogany, Maple, Oak, Padauk, Purpleheart, Tigerwood, Walnut, Wenge, Yellowheart and Zebrawood.
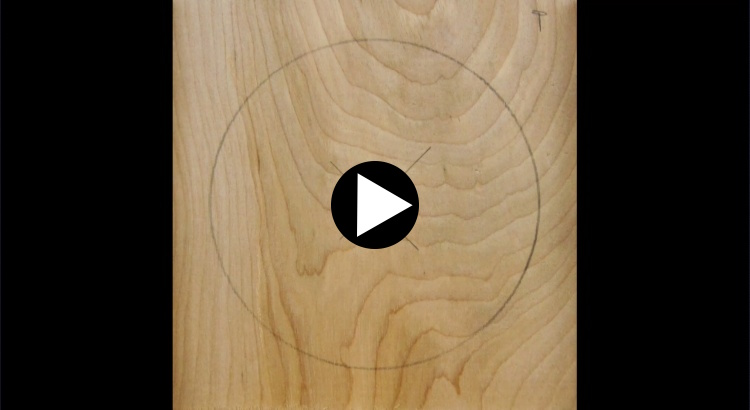
This video is composed of individual stills taken of the test coaster, one after each hole drilled, plug installed or marking or sanding operation. It compresses the 2 weeks or so of action down to a bit over a minute.
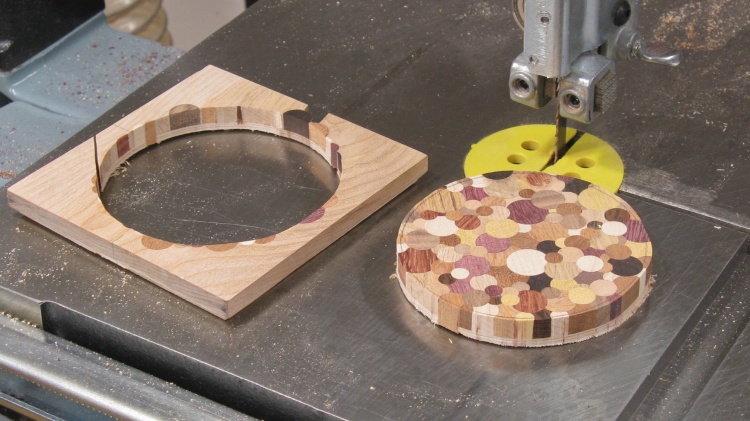
Cutting out the coaster
The next action was to shape the coaster and to that end it was cut into a round using the bandsaw.
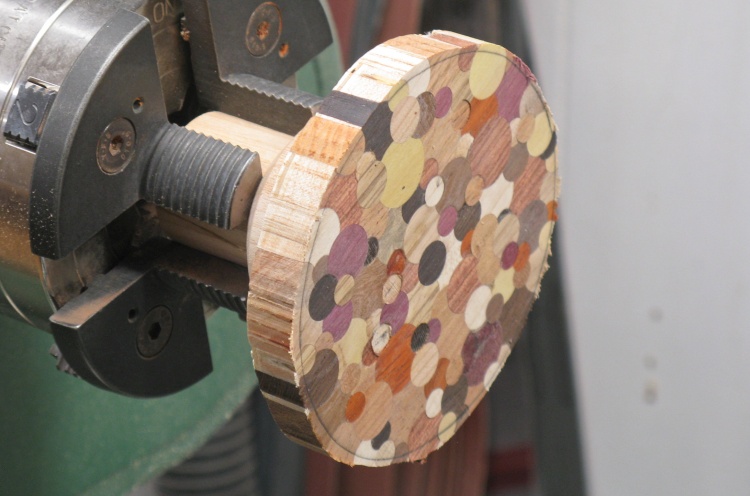
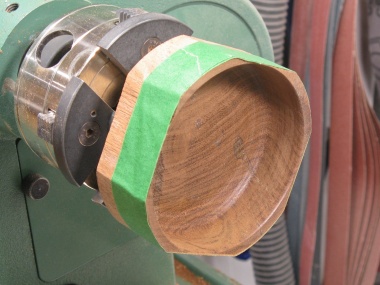
Adding some tape to stick coaster blank to lathe faceplate assembly
Since the blank didn't really have any extra thickness, it needed to be glued or taped to the faceplate. I went with the tape option and in this photo the backing is being removed from the thin double-sided tape. The aluminium faceplate has had a couple layers of wood added to make it easier to access the coaster's edge and back.
Ready to get turning
With the blank on the faceplate, it was ready to start turning.

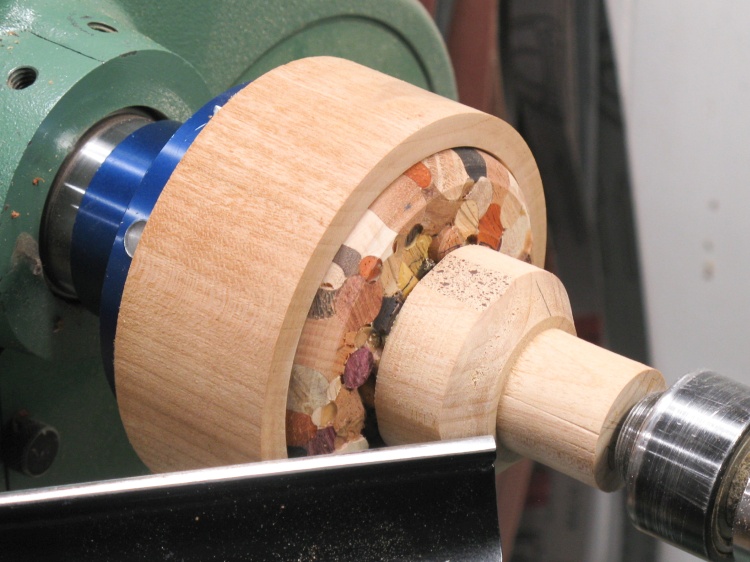
Oops. Some issues with conventional turning tools
Unfortunately, use of a conventional turning gouge resulted in a number of, well, gouges. Or more precisely: popped-out plug sections. I'm thinking the grain of the plugs conspired with the low level of glue (due to tight plug fit pushing out the glue like a syringe) to produce this disappointing result.
I was going to need a method to reduce diameter past the plug notches without losing any more plugs.
I was going to need a method to reduce diameter past the plug notches without losing any more plugs.

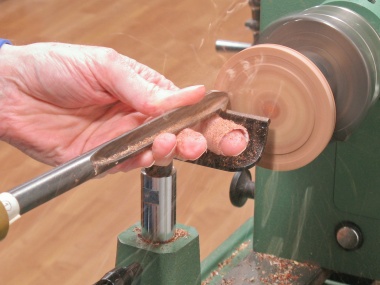
Hollowing the top
So while ideas for edge turning burbled away, I worked on the top of the coaster.
A bowl gouge (shown) followed by scrapers worked well to form the hollow in the top.
A bowl gouge (shown) followed by scrapers worked well to form the hollow in the top.
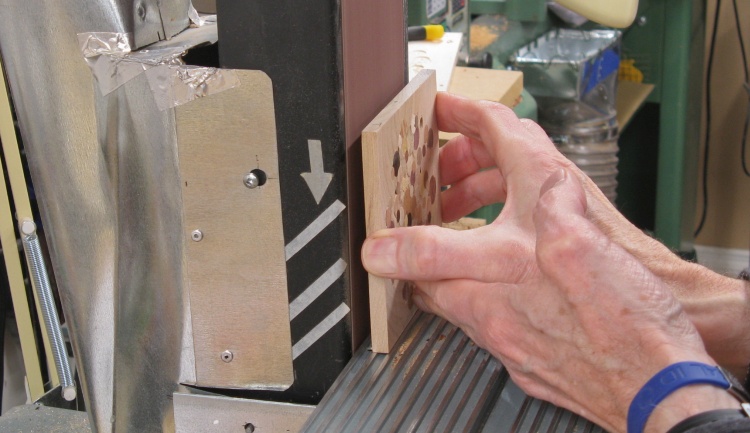
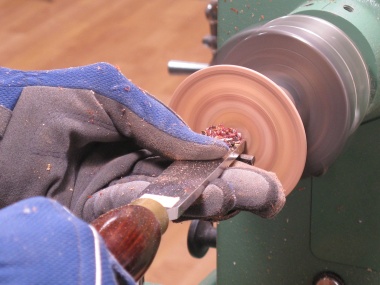
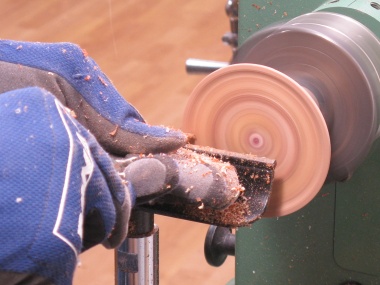
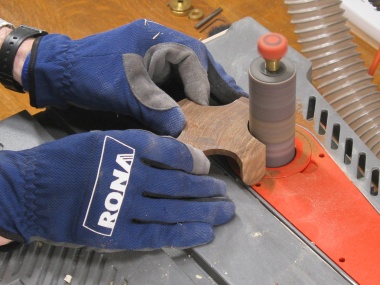
So then it was back to diameter reduction; I decided to try a belt sander to less-traumatically reduce the diameter. That worked but didn't result in a very constant diameter. Better roundness was achieved using a small drum sander since I was able to mount it securely to the tool rest.

Using belt sander on edges
...and drum sander for better roundness
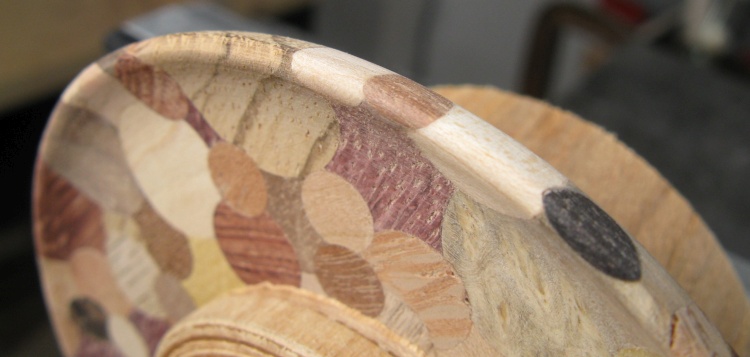
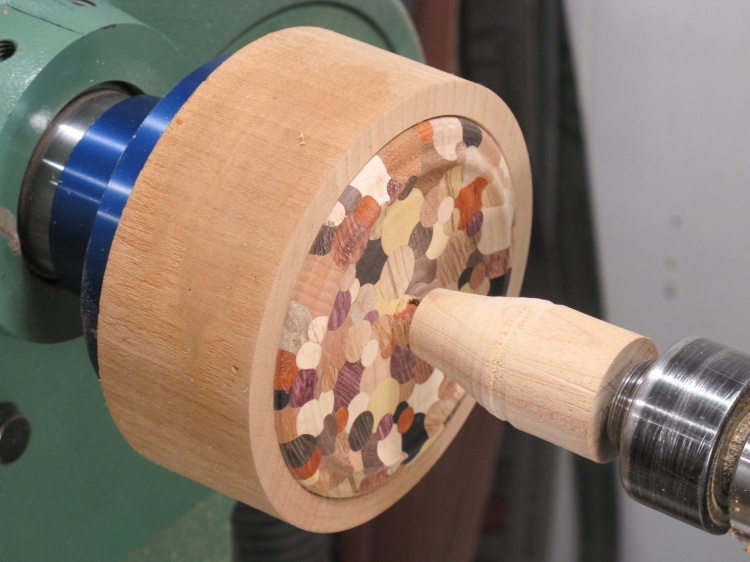
Profile done
And after the side sanding and then some scraper action on the backside it was left with the profile shown here.
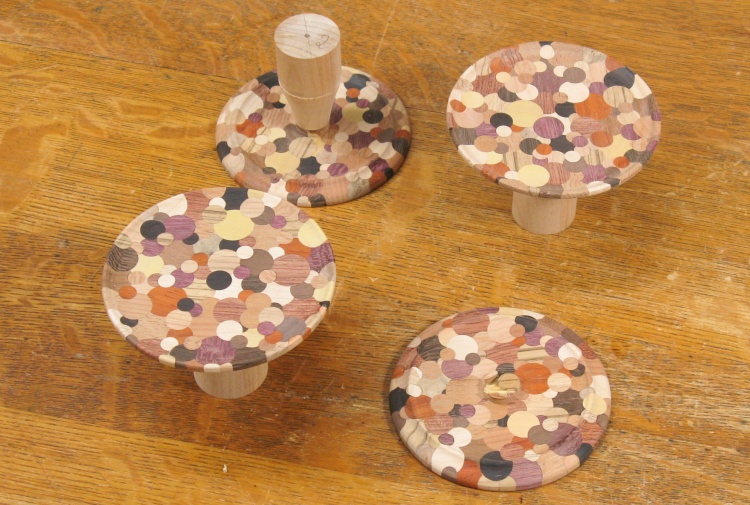
Flipped around to do the bottom
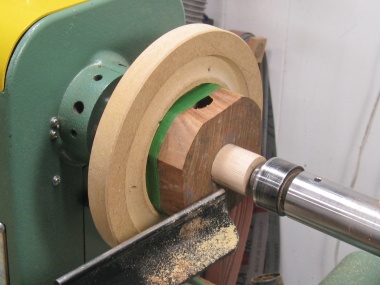
With the top and edge done, the coaster needed to be flipped around so the bottom could get some attention.
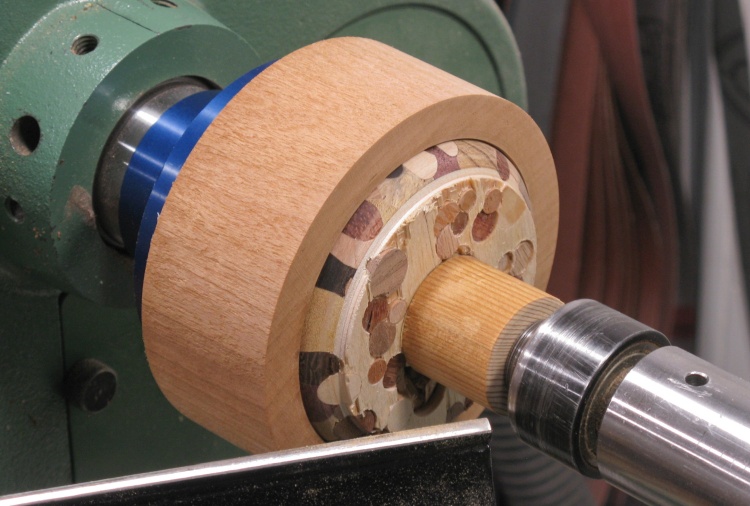
I made a jam chuck from that big mahogany disc, flipped the coaster around and glued a short piece of dowel to the bottom. I made sure to support the coaster top in the jam chuck so pressure on the bottom from the tailstock wouldn't crack the wood.
I made a jam chuck from that big mahogany disc, flipped the coaster around and glued a short piece of dowel to the bottom. I made sure to support the coaster top in the jam chuck so pressure on the bottom from the tailstock wouldn't crack the wood.
Forming the circular foot
Once again the bowl gouge followed by scrapers worked to remove the plywood and form a circular foot on the bottom.
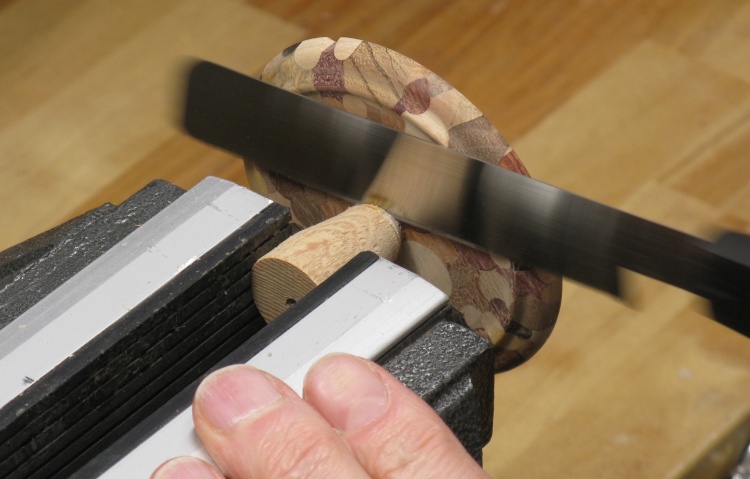
Cutting off the support
Off the lathe, the glued-on support needed to be removed. I started by cutting it off close to the bottom.
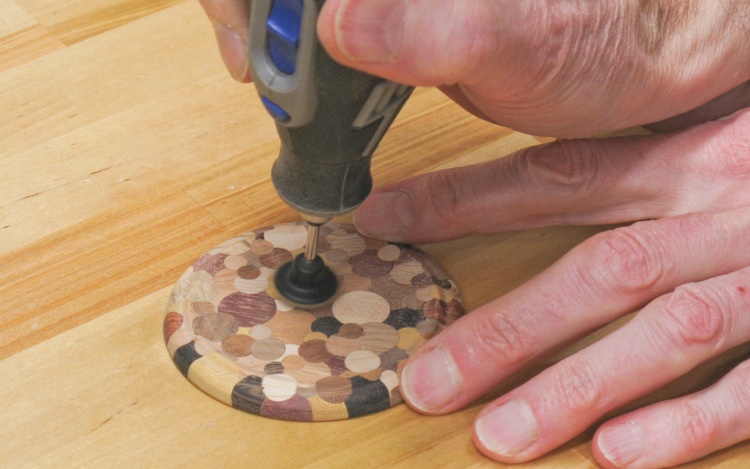
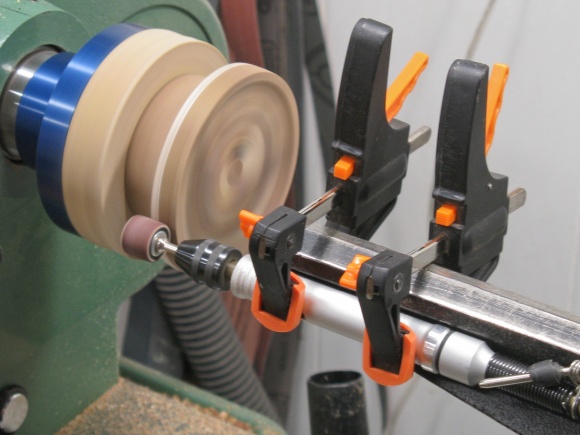
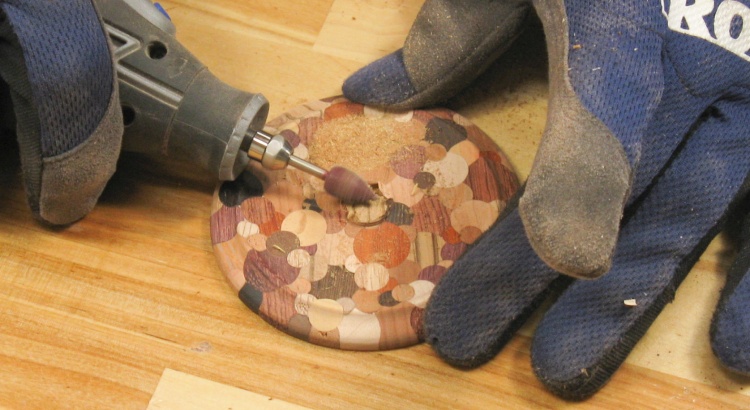
Smoothing the bottom
That was followed by some grinding and finally sanding with this Dremel-mounted sanding disc.
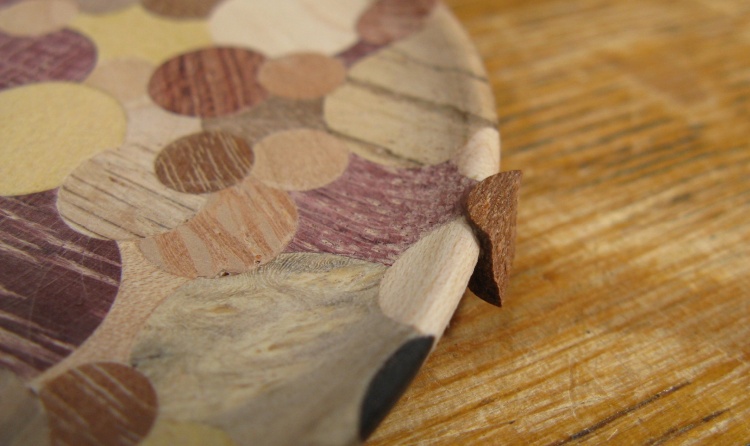
Time to fix that missing piece
I had reduced the diameter by sanding to eliminate some missing-plug notches but the worst one was still there. That one I filled using a section of a plug as shown here.
Looks fine after sanding
Then a bit of sanding and Bob's yer uncle.
That's the woodworking done
And that's the woodworking done for the test coaster.

Adding varnish
Making more coasters was not looking very promising at this point so if this was going to be the only one, it made sense to add varnish and at least finish it off.
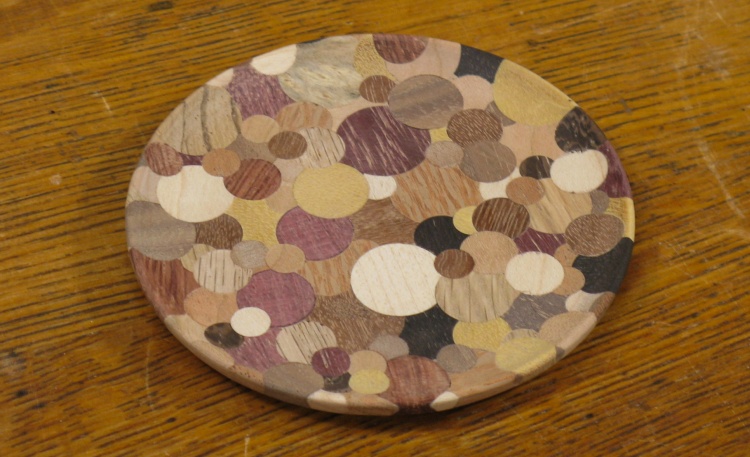
Complete after three coats of varnish
The completed test coaster.
Post-Game Analysis
It had taken about three weeks to make the single test coaster with a laborious and uncertain method for making plugs. Given the broken-out edge pieces when turning, I was also concerned about the coaster strength due to glue-starved joints. Plus some of the plug joints were not as tight as I wanted. I couldn't really see making another four coasters under these conditions.
I was almost prepared to leave it at one coaster. If only I could use the tapered plug cutters and didn't need to "tune" each plug individually (which was a multi-minute operation with a depressing failure rate). So I wondered: could I actually use the tapered plugs but then cut tapered holes to match?
I was almost prepared to leave it at one coaster. If only I could use the tapered plug cutters and didn't need to "tune" each plug individually (which was a multi-minute operation with a depressing failure rate). So I wondered: could I actually use the tapered plugs but then cut tapered holes to match?
The Real Coasters
Tapered sanders for 1/2", 3/8" and 1/4"
First up was seeing if the tapered hole idea would hold water, so to speak.
On the lathe I turned three "tapering sander" bits from maple. They were cut with a 3° taper to the sides to match the plugs.
A long-lasting 150-grit sandpaper was adhered to the business end of each using window film tape.
On the lathe I turned three "tapering sander" bits from maple. They were cut with a 3° taper to the sides to match the plugs.
A long-lasting 150-grit sandpaper was adhered to the business end of each using window film tape.
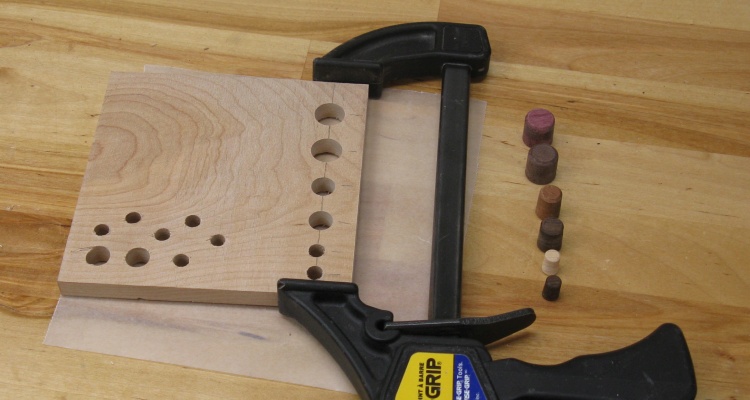
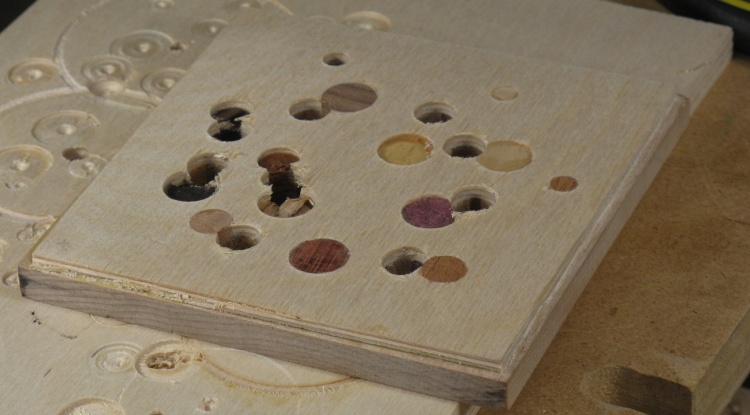
A test board with some tapered plugs and holes
Then on a coaster-blank-like piece of birch I drilled and tapered two holes each for 1/2", 3/8" and 1/4" plugs.
The sanders seemed to work decently but the sandpaper peeled off the 1/4" version after just one hole. As a replacement I ground a taper into the end of a 5/16" twist-drill bit at the requisite 3° angle and that worked well to shape a tapered hole.
The sanders seemed to work decently but the sandpaper peeled off the 1/4" version after just one hole. As a replacement I ground a taper into the end of a 5/16" twist-drill bit at the requisite 3° angle and that worked well to shape a tapered hole.
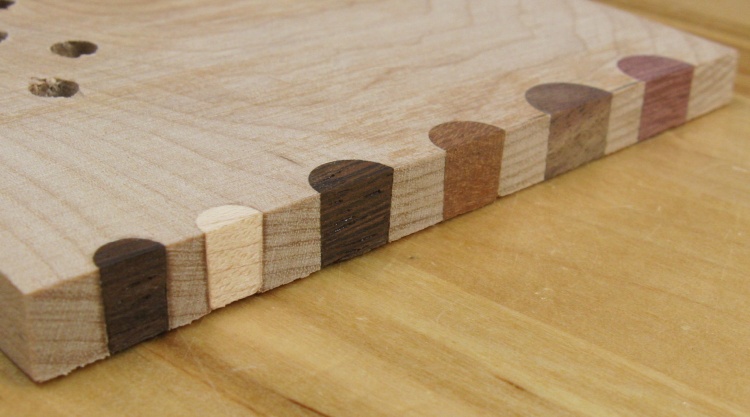
The cross-section of the plugs
Then after the test holes were tapered and the plugs glued in and sanded flush, I cut the board down the centre of the plugs to examine the joints. They looked pretty decent so I figured this was worth trying.
The four coaster blanks
The coaster blanks cut many photos ago had plywood glued to the base and then they were ready to go.
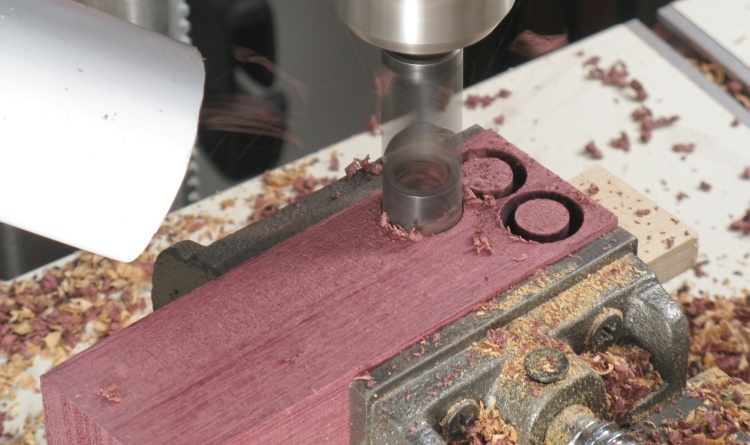
Making a 5/8" plug
In addition to the 1/2", 3/8" and 1/4" plugs, I decided I should add some 5/8" plugs. I didn't have a 5/8" tapered cutter so the plugs were cylinders formed on the lathe and went into standard holes.
This shot shows one of the plugs being made using a skew chisel which could cut the sides cleanly.
This shot shows one of the plugs being made using a skew chisel which could cut the sides cleanly.
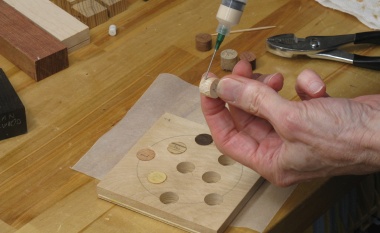
The photo grouping below shows the first plugging stage which consisted of drilling and gluing in the plugs. I started with a few of the 5/8" plugs in each coaster.
I used a syringe to apply glue to these first plugs but it turned out to be very hard to squeeze so I gave up on it for subsequent stages and just used a toothpick to apply glue.
I used a syringe to apply glue to these first plugs but it turned out to be very hard to squeeze so I gave up on it for subsequent stages and just used a toothpick to apply glue.

Drilling 5/8" holes
The first holes
Adding 5/8" plugs
The four coasters with 5/8" plugs in place
Here the first stage of plugging is completed except for sanding the surface.
Subsequent stages will install 1/2", 3/8" and 1/4" plugs, all tapered.
Subsequent stages will install 1/2", 3/8" and 1/4" plugs, all tapered.

Tapering a 1/2" hole
Here a 1/2" hole is being tapered with the sander.
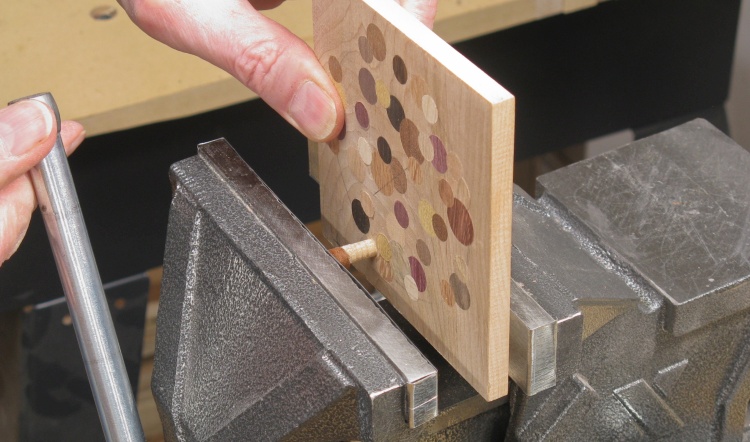
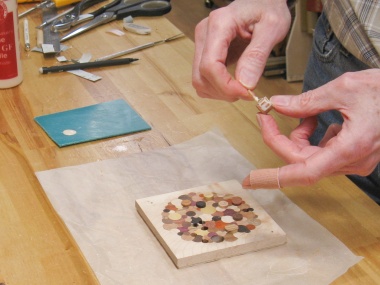
I checked each taper with a test plug
I checked the taper of each hole with a test plug (here I'm checking a 3/8" hole) and did a bit more sanding if the plug didn't go in far enough.
Here the left forefinger sports a bandage covering five stitches worth of a workshop goof featuring a utility knife and an inadvisable hand position.
Here the left forefinger sports a bandage covering five stitches worth of a workshop goof featuring a utility knife and an inadvisable hand position.
Cutting plugs
This is a shot of the 1/2" plug cutter in action on a piece of walnut.
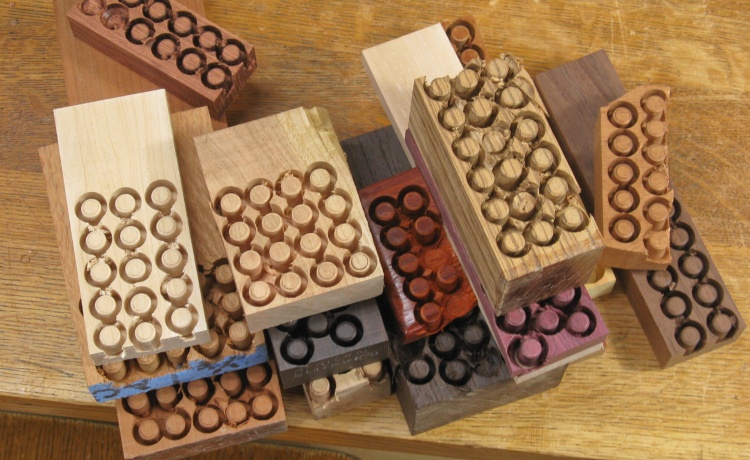
A schwack of plugs cut
I typically formed a bunch of plugs and then cut them all free later on the bandsaw. This is a pile of 3/8" plugs ready to hit the saw.
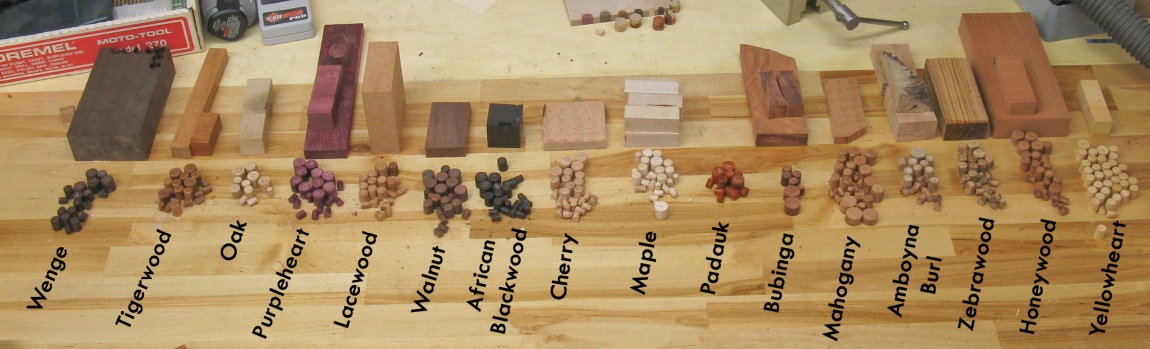
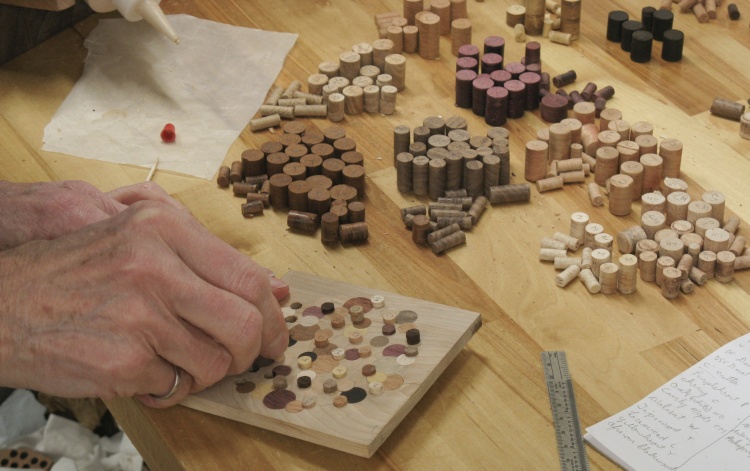
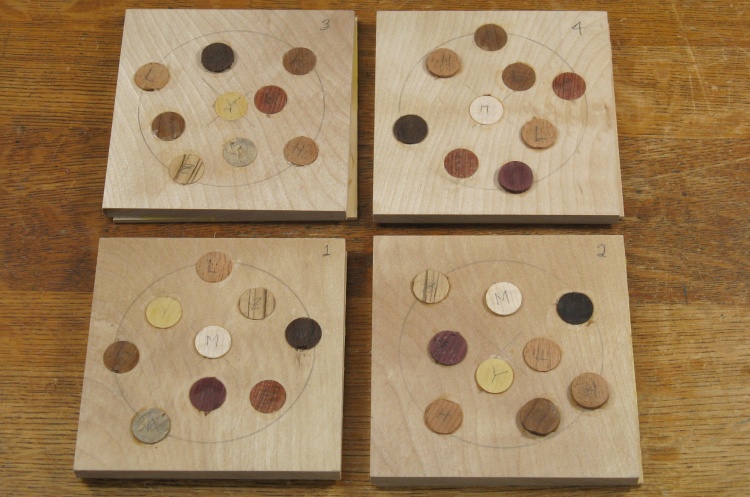
The plug selection
Above is the annotated plug selection, spread out on the workbench. I didn't install the plugs to any particular plan, although I generally tried to arrange them for a good colour contrast.
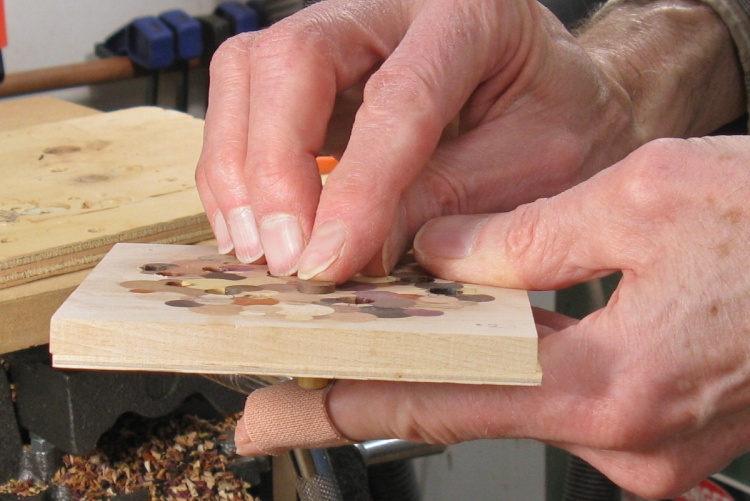
Below shows one of the plugs going in. I applied glue to the inside of the hole and while that soaked in, put it all around the outside of the plug as well in hopes it would be sufficiently infused. However based on some break-outs while turning I'm not convinced there was much in there.
Below shows one of the plugs going in. I applied glue to the inside of the hole and while that soaked in, put it all around the outside of the plug as well in hopes it would be sufficiently infused. However based on some break-outs while turning I'm not convinced there was much in there.

Gluing-up the hole
Covering the plug too
...and pluggin' er in
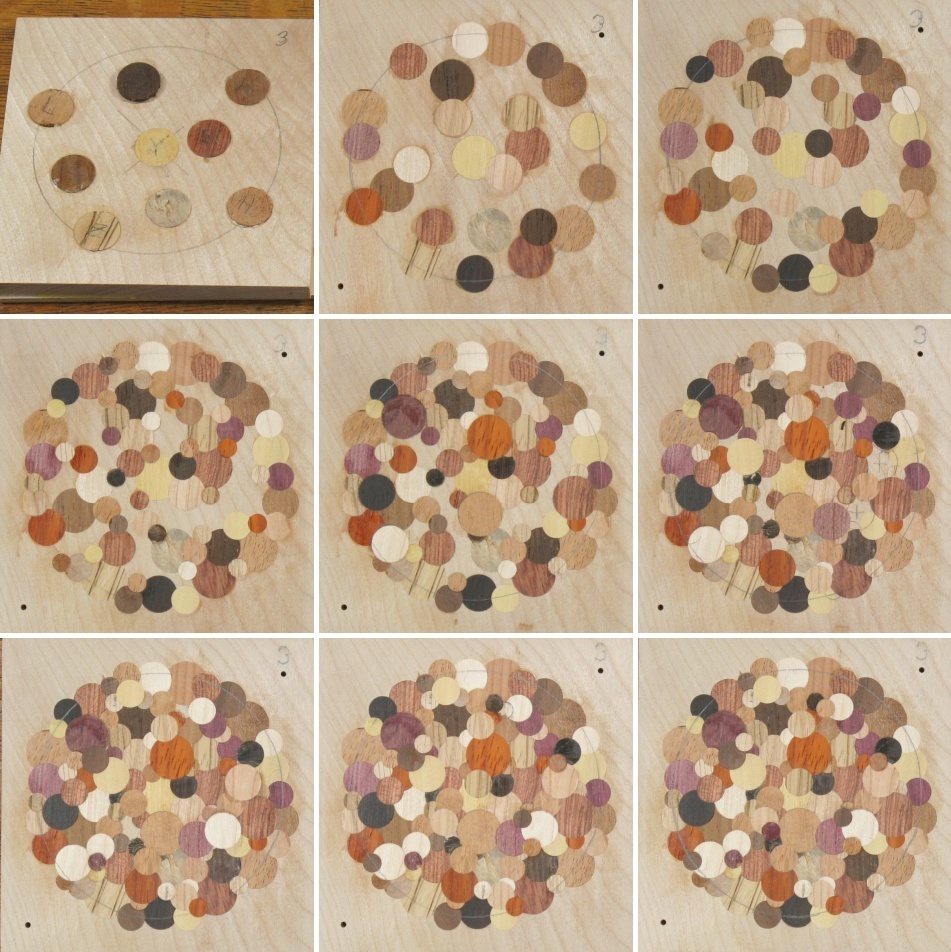
The nine stages on plugging
As with the test coaster, it took 9 stages of adding plugs before I covered all the birch. This composite photo tracks the stages of coaster #3.
The last few stages were mostly filling small areas and didn't involve many plugs.
The last few stages were mostly filling small areas and didn't involve many plugs.

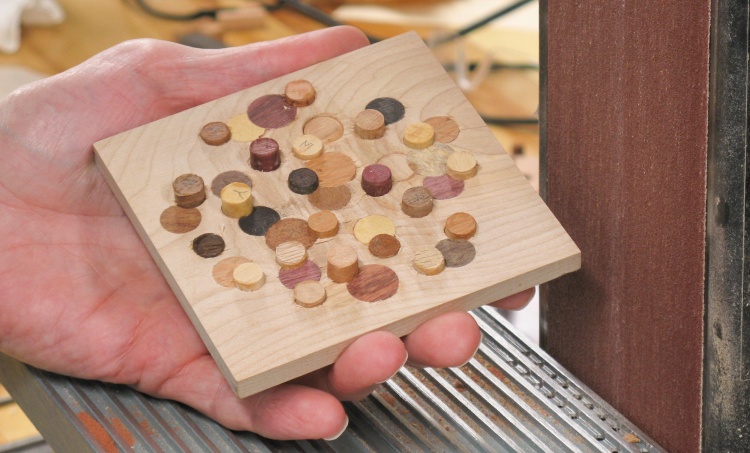
The four coasters with all plugs in place
It again took a couple weeks of (nose not really very close to the grindstone) drilling and plugging to complete the coasters. Of course this time I did four but the plugs were much easier to make and perhaps not running out to the camera 320 times helped with construction efficiency.
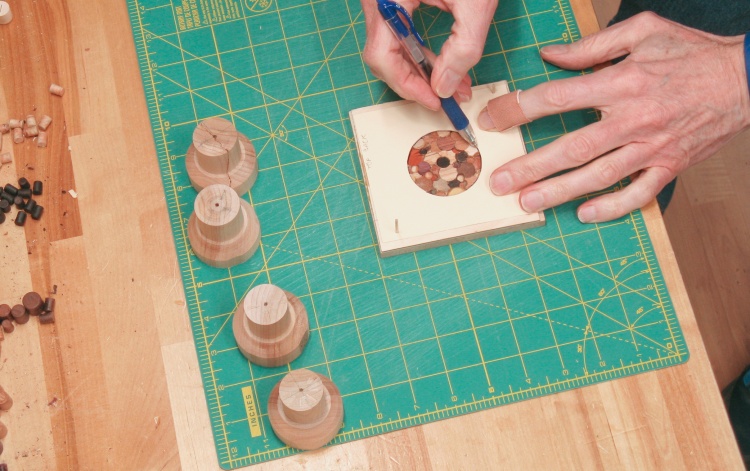
Marking the back for the lathe mounts
I needed some method of holding the coaster blanks in the lathe for turning. On the test unit I had taped the back side to a faceplate but the backs on these are much rougher so that wasn't practical.
On the test coaster I had also eventually glued a dowel to the back for the tailstock live center and I thought I could just do that one step sooner and use it for the main turning too. I made up the four lathe-jaw-compatible adapters seen here and would glue them on.
In this shot I'm using a cardboard pattern to mark the center on the back sides to position the adapters.
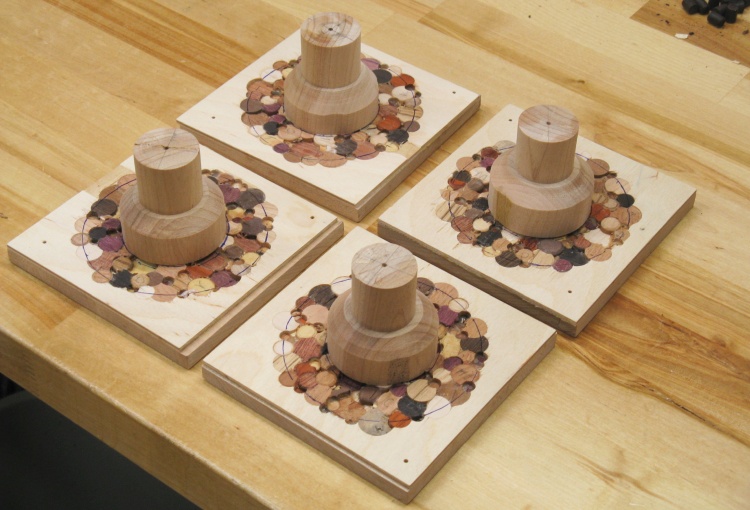
Lathe mounts glued on
Ready to hit the lathe.
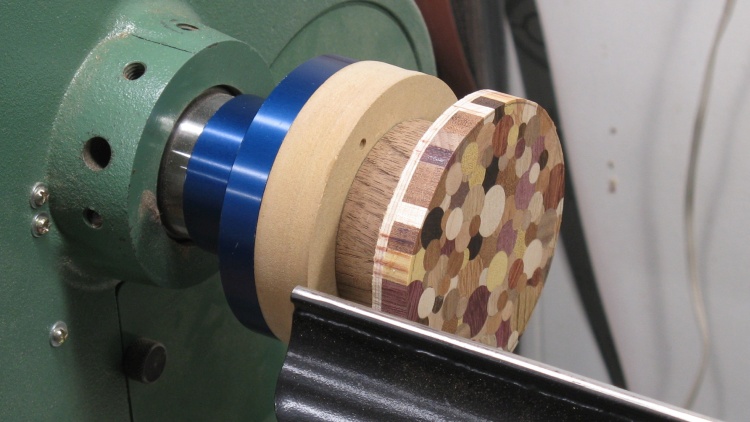
The first one cued up on the lathe
This is the first coaster cut out in a crude circle and mounted to the 4-jaw chuck on the lathe.
I used a skew chisel to round the outer perimeter which worked decently and didn't knock out too many plug fragments. Then I switched to shaping the top side using a bowl gouge to remove most of the wood, then a large flat scraper to even out the center area and finally a small circular scraper to define the rounded lip.
A bowl gouge for bulk removal
Flat scraper to even it out
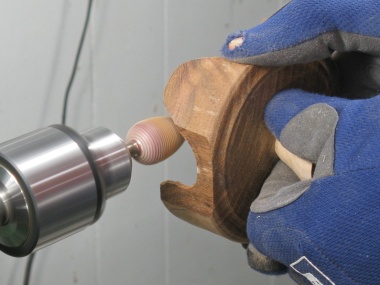
Round scraper for the corner
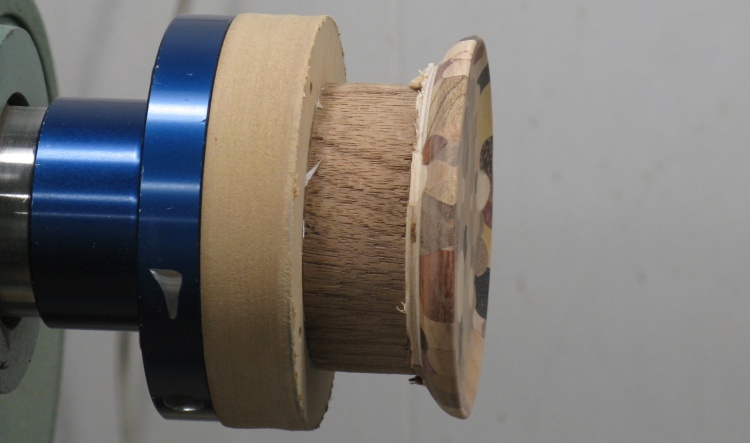
Flipped and in jam chuck
When the top side was done, I recut the jam chuck I'd made for the test coaster a bit larger to fit the new ones. Then I flipped the coaster and mounted it to be able to work on the bottom.
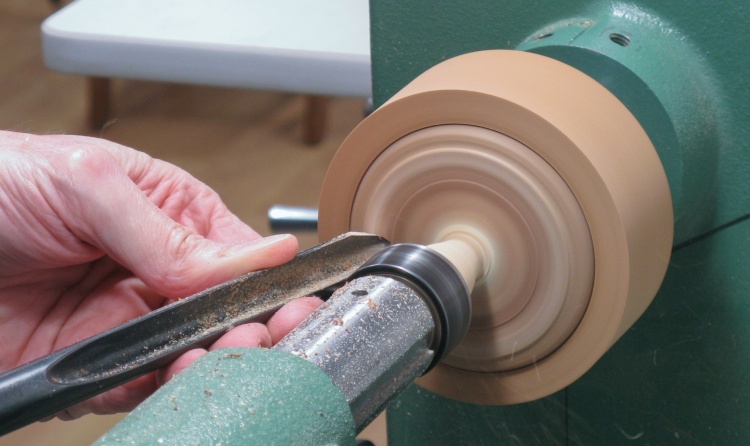
Bottom foot formed
The excess thickness was cut off and a circular foot about 0.07" high was formed. The glued-on adapter piece was also thinned to make it easier to remove.
That's the turning done on the set
Then three more like that and the set was pretty much done.
Starting to remove the nubs
On each coaster the lathe adapter piece was cut off as close as practical to the coaster and the remaining nub was ground down and then sanded off for a smooth bottom.

Applying the first coat of varnish
I whipped up a 4-place cardboard 'n nail holder and then started applying varnish.
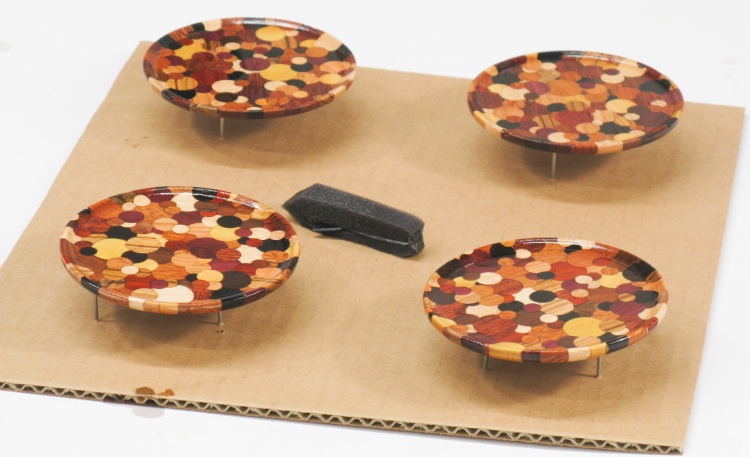
The first coat drying
Here the coasters have been given the first coat of varnish (done with that little piece of foam brush).
They received four or five coats of Fast-Dry Polyurethane varnish which should make them waterproof (and coffeeproof and beerproof, etc.)
They received four or five coats of Fast-Dry Polyurethane varnish which should make them waterproof (and coffeeproof and beerproof, etc.)
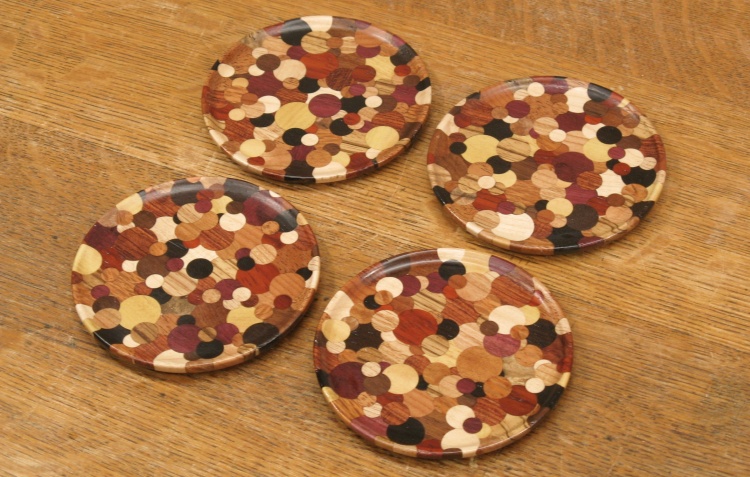
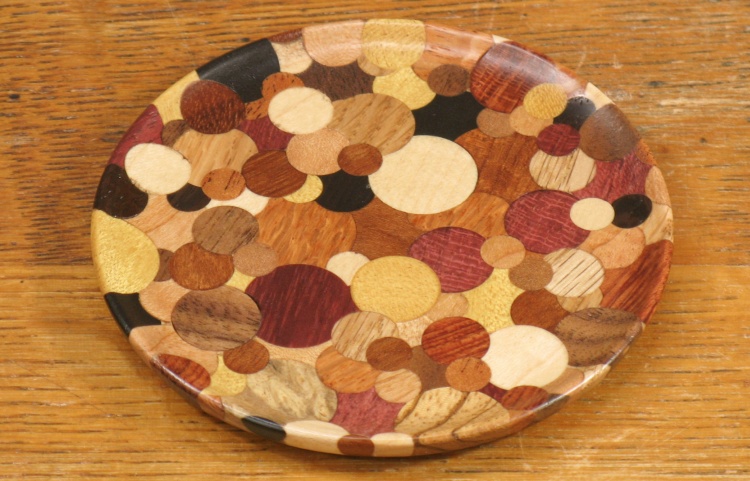
Done
The set.
Holder
A set of coasters kind of needs a home so I thought I'd make a holder to store them.
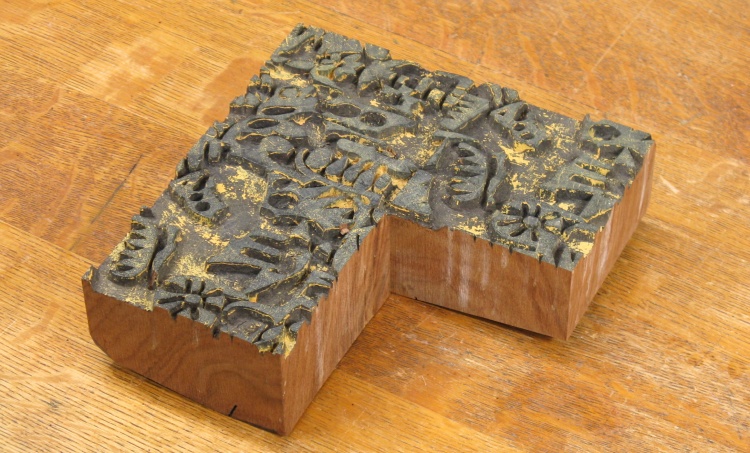
Some nice wood left in that stamp
This odd-looking piece of wood is a stamp (well, three-quarters of a stamp) used to print the funky pattern seen in black. The remnants of yellow paint stand witness to it's use probably back in the 70s in my childhood home, although I can't remember which wall it was used on. It may have come originally from Expo '67 which was attended by my parents and I speculate from an African display of some sort.
However its stamping days were done and I decided to use another quarter as the raw material for a coaster holder.
However its stamping days were done and I decided to use another quarter as the raw material for a coaster holder.
I took a few shots of the fabrication and the photos below make the process pretty self-explanatory.
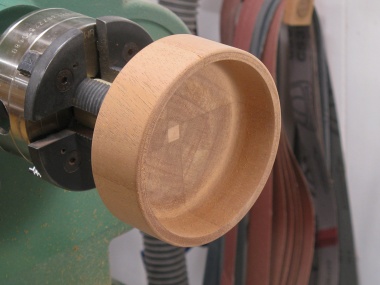
Blank on the lathe
Hollowed
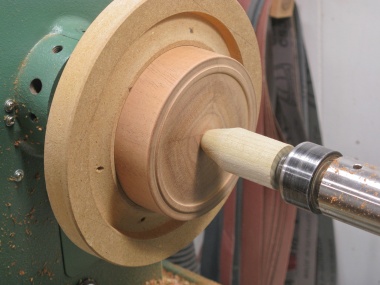
Flipped to work on the bottom
Turning done
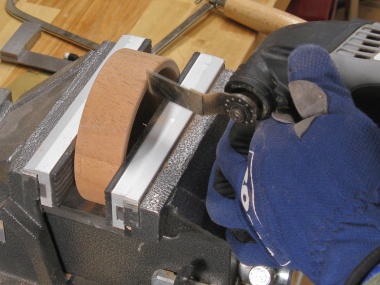
Shaping the sides
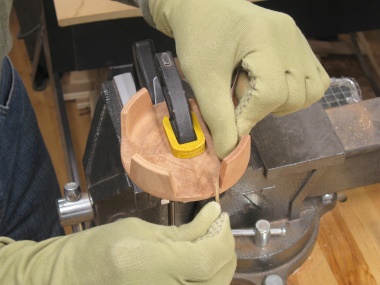
Shaping the bottom
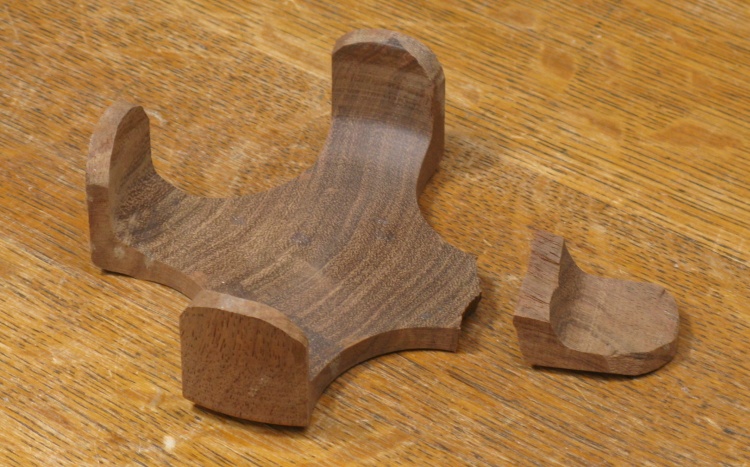
Oops
Unfortunately I managed to fumble the holder during the sanding process and a roving gang of malicious gravitons grabbed it and slammed it against the planet. It did not survive.
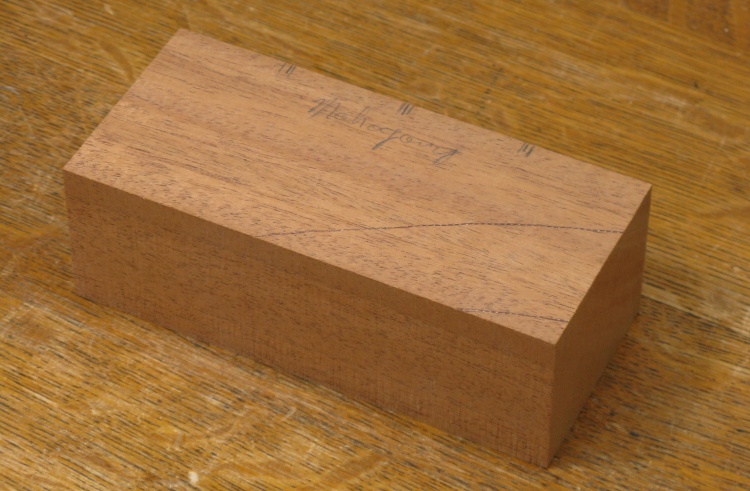
A nice piece of mahogany for a second chance
Yah, so then a second try was in order, ideally with something less brittle.
I started with this piece of mahogany that should be just barely long enough if I cut it into four using the bandsaw which has a smaller kerf than the radial arm saw.
I started with this piece of mahogany that should be just barely long enough if I cut it into four using the bandsaw which has a smaller kerf than the radial arm saw.
Cut in four and glued together
I needed a good four inches of width but the wood was a bit less than two inches. Hmmm.
My solution as can be seen here was to offset the pieces to get the needed width, filling the resulting center void with a 1/4"-square piece of maple for some nice contrast.
My solution as can be seen here was to offset the pieces to get the needed width, filling the resulting center void with a 1/4"-square piece of maple for some nice contrast.
As before it went onto the lathe for turning, followed by some hand work to give it that modern angled profile.
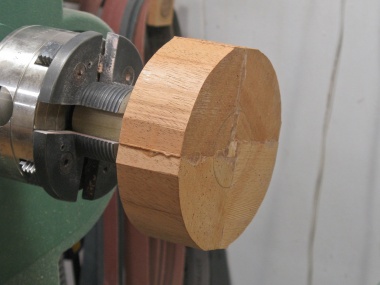
Blank ready to hollow
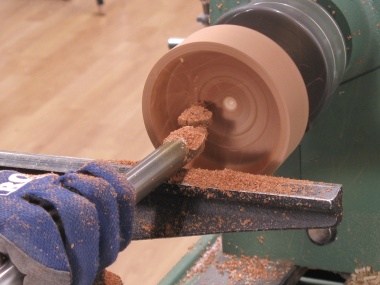
Hollowing
Hollowed
Bottom foot formed
Cutting the walls
The inevitable hand sanding
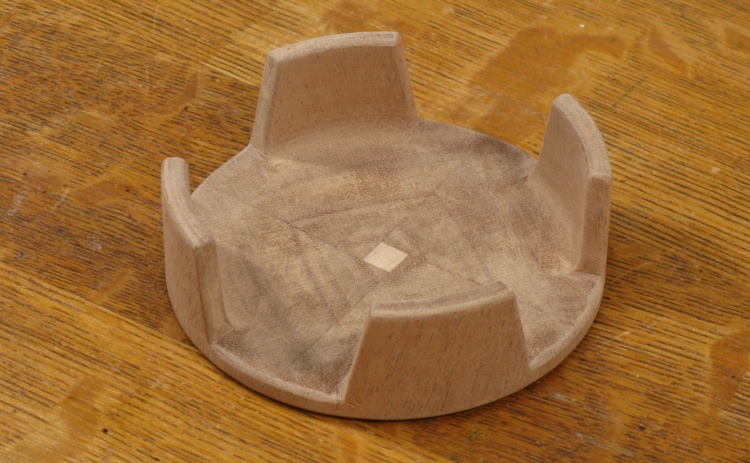
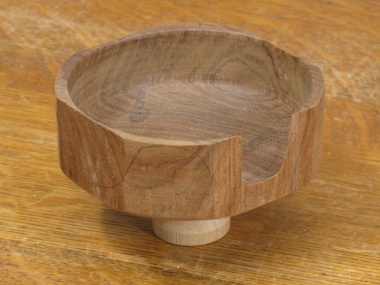
Done and undropped
The completed holder, intact.

Now with three coats of varnish
A few coats of varnish and it's good to go.
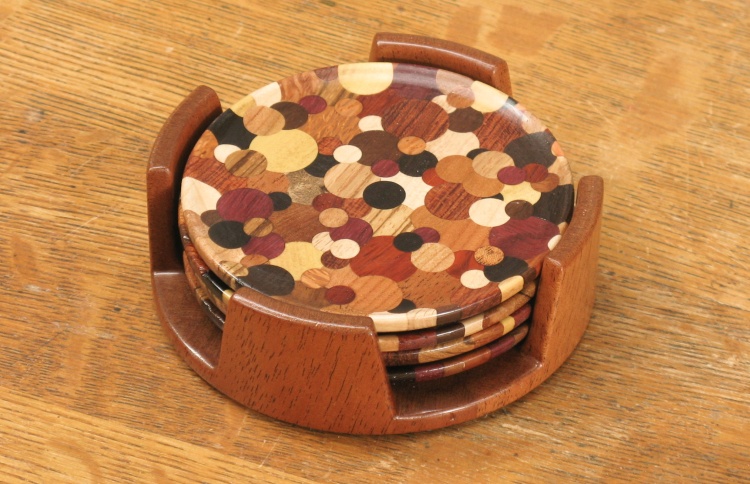
The coasters in their new digs
The completed set.


