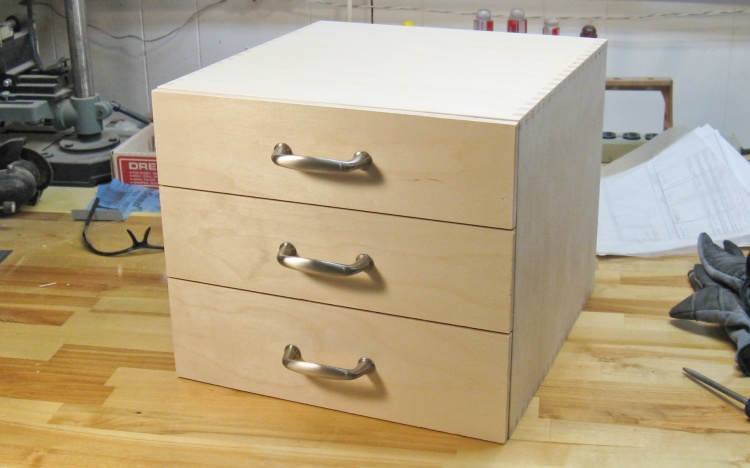
The nice thing about making a set of drawers like this is that they can be made to fit exactly into the spot where they're needed. And since they're just junk drawers in a utility room, I obviously didn't need to get too fussy about the exact look and finish.
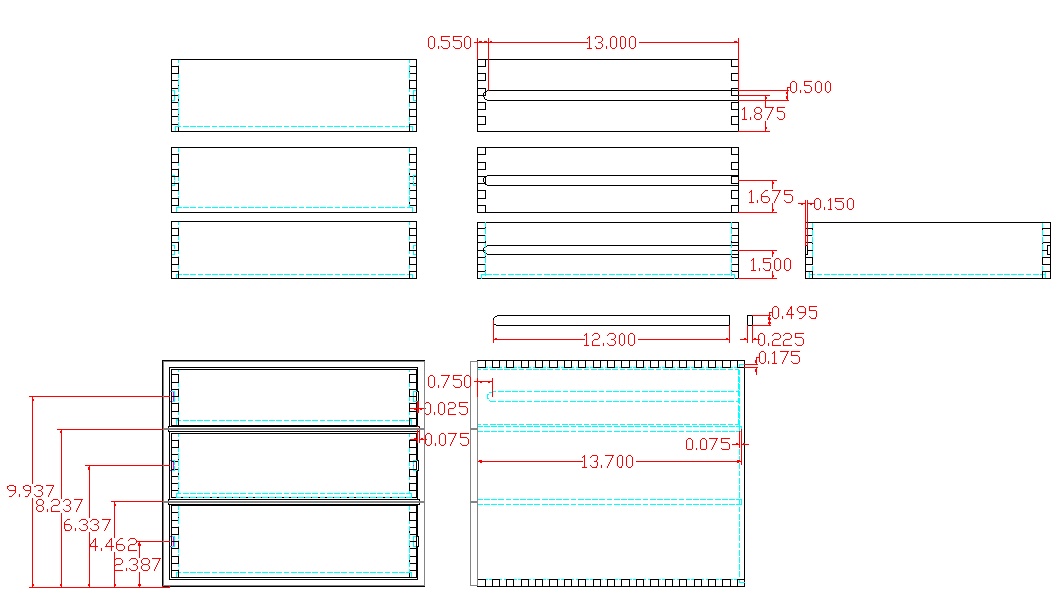
2D plans with dimensions in archaic Imperial units of "Inches"

The 3D view
Design
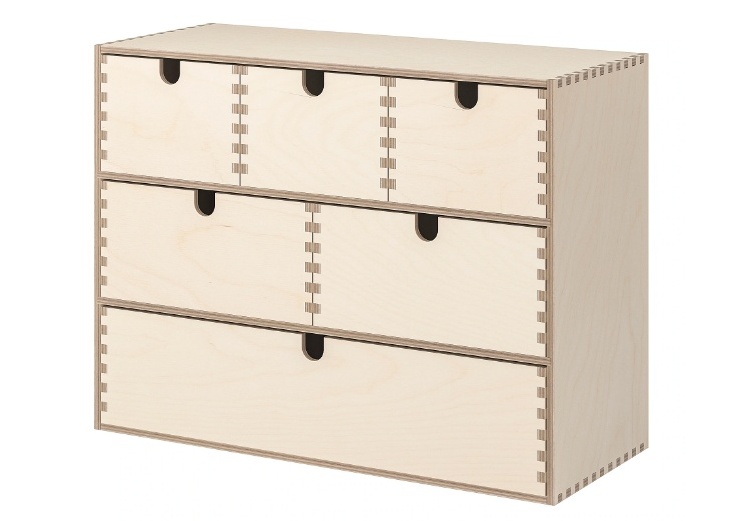
The MOPPE design from Ikea
I based the construction on the MOPPE drawers from Ikea and replicated its box-jointed 3/8" baltic birch plywood construction.
Of course I needed a completely different configuration and the one I used had three stacked drawers.
Of course I needed a completely different configuration and the one I used had three stacked drawers.
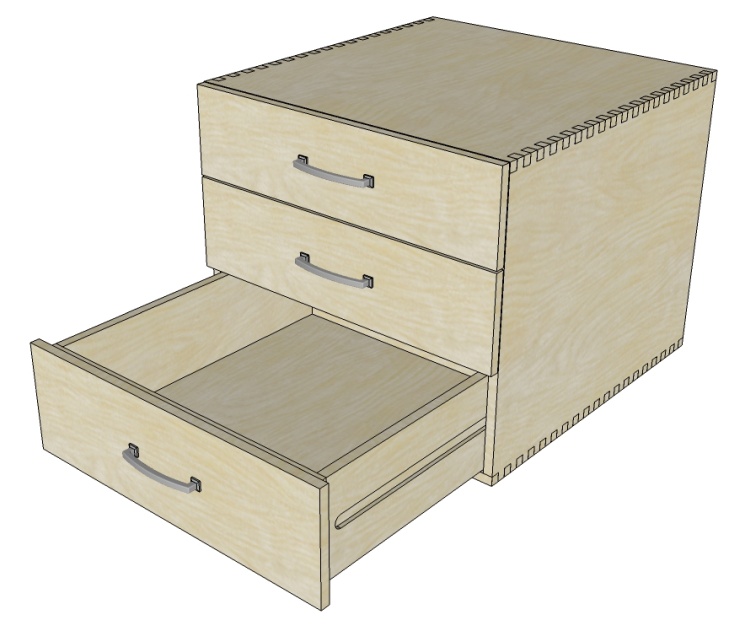
The drawers, in an unrealistic empty state
I needed at least one of the drawers to be over 3.25" inside to fit some specific rolls of wire, but three that height wouldn't fit so I decided to make three different heights of drawers. For ease of construction I made the heights all multiples of the 3/8" size of the box joints so there would be an integer number of fingers on all the drawers (i.e no undersized fingers).
Of course I then decided to add drawer fronts and handles so the joints with their even-sized fingers were covered up and only the case box joints remain as a visual signature of the construction.
While the MOPPE product has a very simple design where the drawers just sat in their pockets and slid against the bottom, this one has the drawers supported on wooden slides. The slides are glued to the cabinet and fit into slots in the drawer sides, centering the drawers in their individual cavities.

Drawer construction
The drawer construction is pretty basic; four sides joined with box joints, a bottom glued into a routed notch and a plain front panel with handle.
Construction
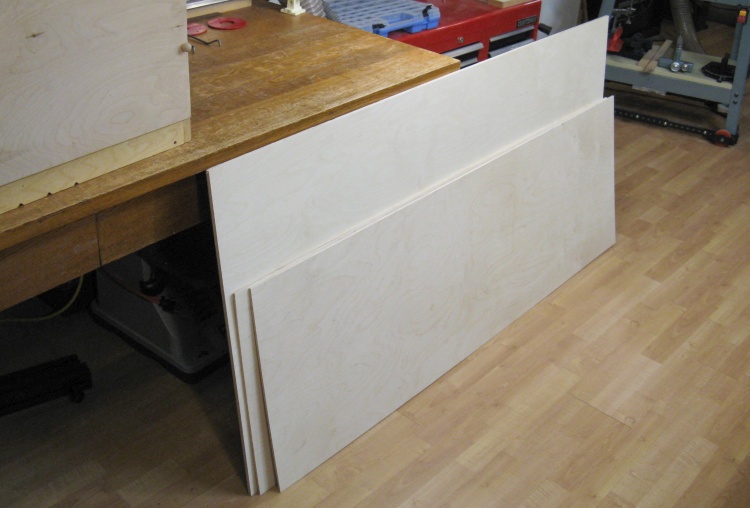
The sheet goods
The wood choice was pretty much defined; Baltic birch plywood of 3/8" thickness. I went with 1/4" for the case back and drawer bottoms since they didn't need to be particularly strong.
The locally-available (Windsor Plywood) wood comes in square sheets 5' on a side. They often cut it into three even-sized pieces of 20 x 60" for convenience, which is the size of the 1/4" material they had on hand. They had none of the 3/8" sheets cut so I got them to cut one in half which meant I could get all the pieces I needed from the single half-sheet.
The locally-available (Windsor Plywood) wood comes in square sheets 5' on a side. They often cut it into three even-sized pieces of 20 x 60" for convenience, which is the size of the 1/4" material they had on hand. They had none of the 3/8" sheets cut so I got them to cut one in half which meant I could get all the pieces I needed from the single half-sheet.
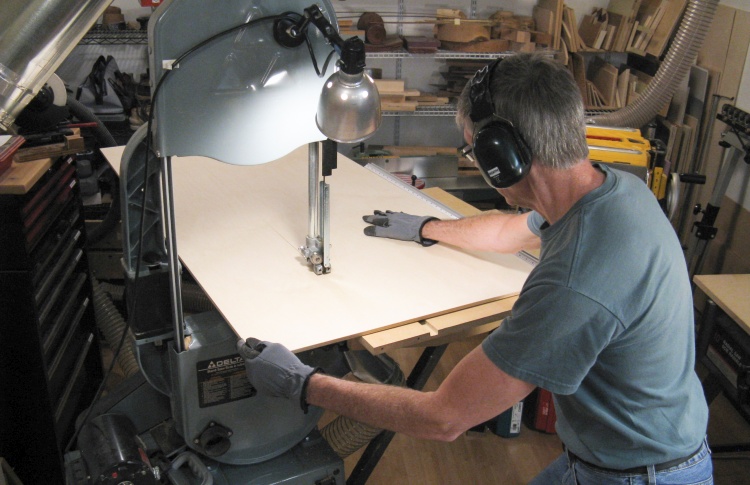
Cutting the long way
I was able to cut the sheets to the correct width on the bandsaw which is not necessarily a given since on my 14" bandsaw you can cut off a maximum of only 13" before the wood hits the side structure. I had just enough room in this case.
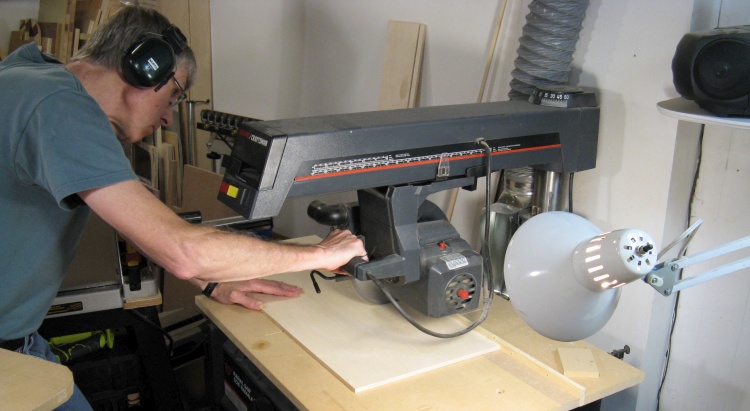
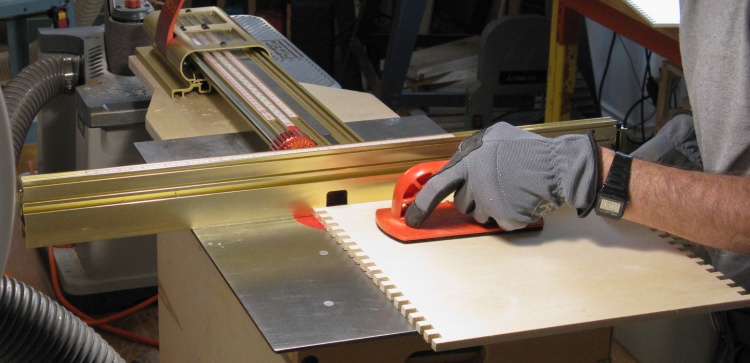
Cutting the short way
Then I was able to cut off the correct lengths on the radial arm saw, although I did need to reconfigure the table so the fence was further back to get enough range to cut through the full width of the wood.
That was handy since the circular blade cuts the cross-grain outside plys much cleaner than the bandsaw would.
That was handy since the circular blade cuts the cross-grain outside plys much cleaner than the bandsaw would.
Cleaning up the edges on belt sander
After cutting the drawer sides, I cleaned up the edges using the belt sander.
Then it was time to start on the joints.
Then it was time to start on the joints.

Joint jig (Incra "LS Positioner")
This sketch from the manual shows the jig I used for the joints, which is attached to a router table.
The piece into which the joints are cut gets clamped to the sled ("Right Angle Fixture") to be slid over the router bit. Typically a router bit of the same width of the joint is used (I used a 3/8" bit for a 3/8" joint).
To cut the next tooth, the whole assembly is moved a different distance from the router bit by sliding the carriage through the base the appropriate amount.
The lever on the base is used to lock and unlock the position of the fence which holds the sled. For the next joint finger, the fence is manually slid exactly 3/4" with the aid of a scale and a mechanical interlock that ensures the fence moves only in exact multiples of 1/32".

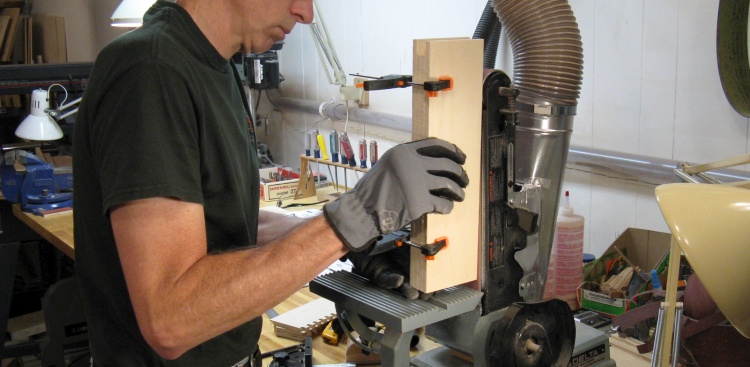
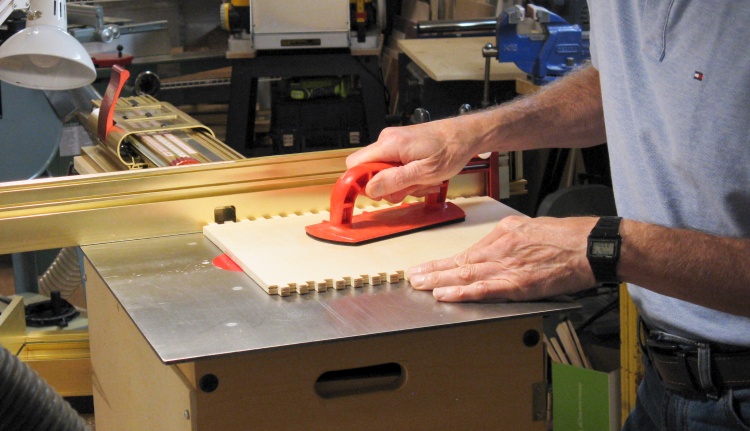
Drawer sides mounted in joint jig
This is a photo of two drawer sides clamped to the sled of the joint jig.
The sled is moved over the router bit to the red stop and back to cut a 3/8" slot. Then the fence is moved exactly 3/4" and that process is repeated until all the fingers are cut.
The extra pieces of scrap wood flanking the two drawer sides prevent the router bit from splintering the good pieces as it enters and exits the wood.
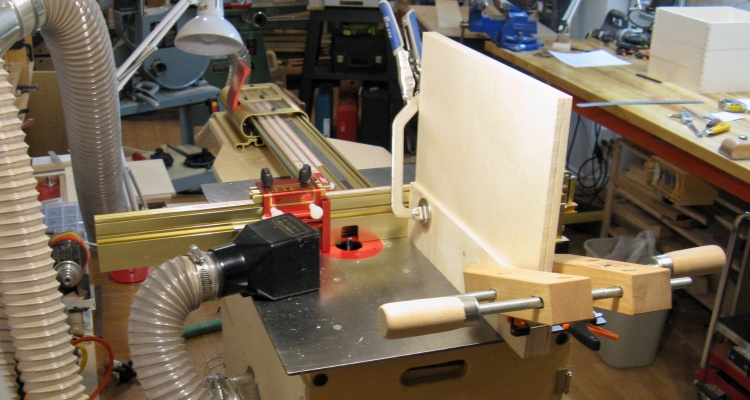
Cabinet sides in jig
This is the same setup as above but with the much-wider case sides in the jig, ready to have slots cut for the joint.
Routing end for cabinet back
Here that movable fence is locked into position to guide one of the cabinet sides past the router bit to cut a notch into which the back of the cabinet will fit. The same was done with the drawer sides to accept the bottom piece.

Middle drawer assembled and glued
With the joints and bottom notch cut on the drawers, I was able to begin assembly. In this shot the four sides and bottom of the middle drawer have been glued and the clamps are already removed.
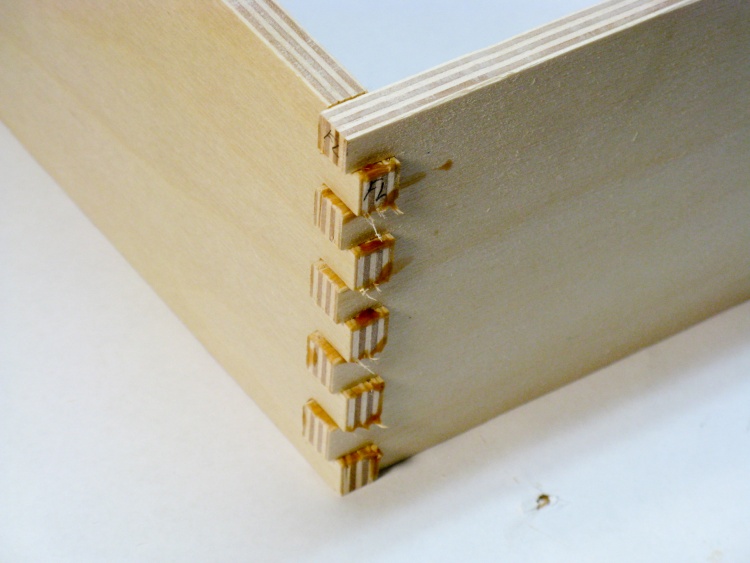
Over-long joint fingers
The fingers of the joints were made about 1/16" longer than they needed to be, and you can see them sticking past the adjoining wall in this photo (along with the generous application of glue).
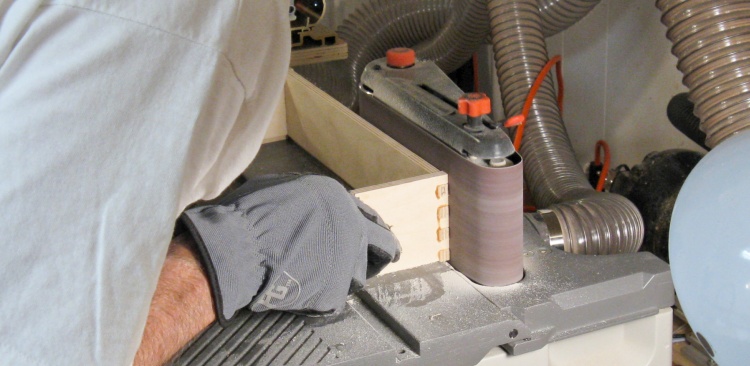
Sanding down those joint fingers
Those over-long joint fingers were sanded flush with the sides using the belt sander...
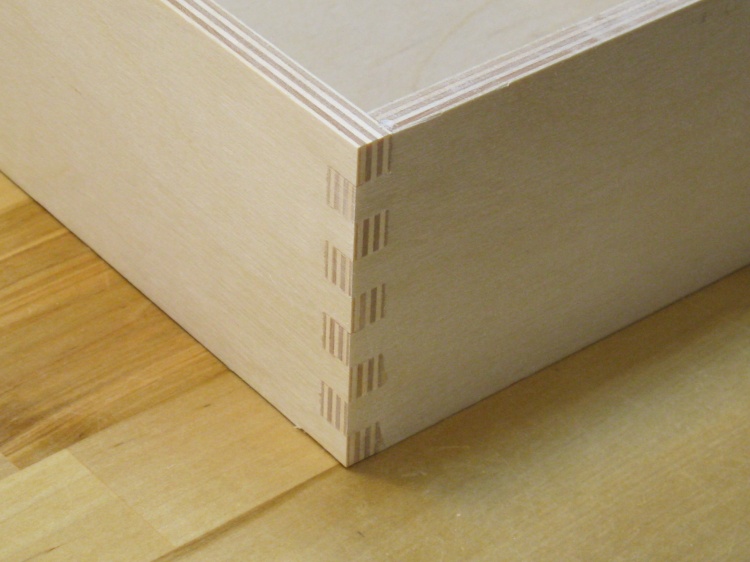
A bit neater looking now
...which also cleaned up the glue, leaving this nice flush corner joint.
Routing drawer slide notches
After all the drawers were together, I shifted focus to the cabinet. Here a shallow groove is being routed in one of the cabinet walls to accept the drawer slide.
I used a similar setup to route deeper 1/2"-wide slots in the drawer sides to accept the slides as well.
I used a similar setup to route deeper 1/2"-wide slots in the drawer sides to accept the slides as well.
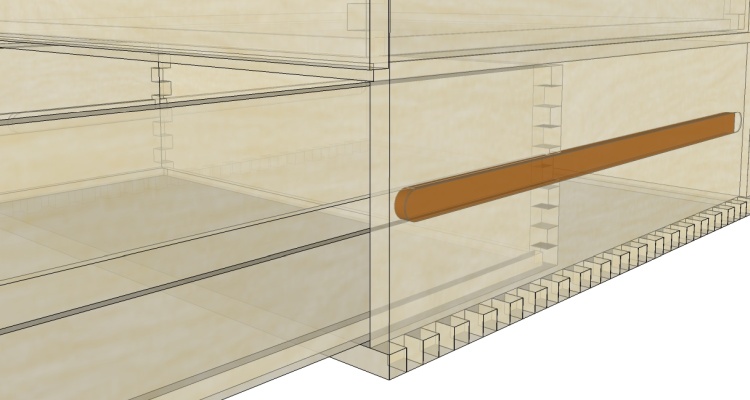
X-ray view of drawer slide
This is an "X-ray" view of one of the drawer slides, which is shown in darker brown.
The slide is glued into a shallow slot in the cabinet side and extends out so a matching but deeper slot in the drawer will fit over it.
The slide is glued into a shallow slot in the cabinet side and extends out so a matching but deeper slot in the drawer will fit over it.
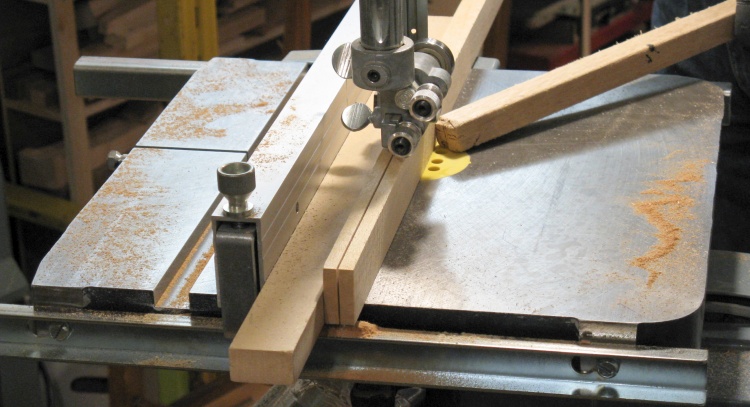
Cutting up some maple for drawer slides
The drawer slides were made from solid wood, in this case maple. here I'm cutting a piece of maple to be used for the slides.
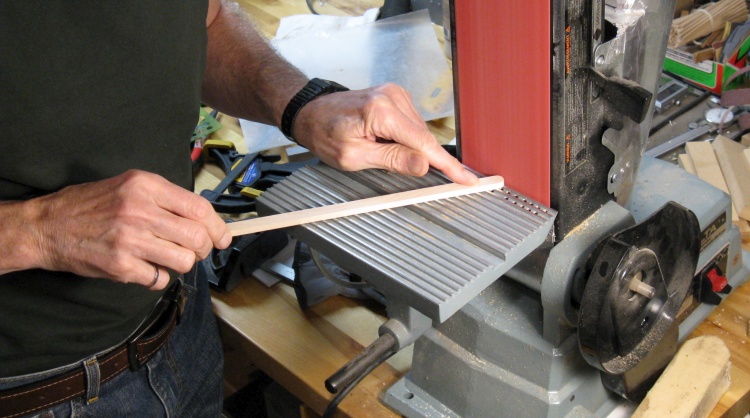
Rounding a drawer slide end
The rough-cut slides were machined to the final size using the planer. Then after being cut to length I rounded the front ends on the belt sander to make the drawers easier to install.
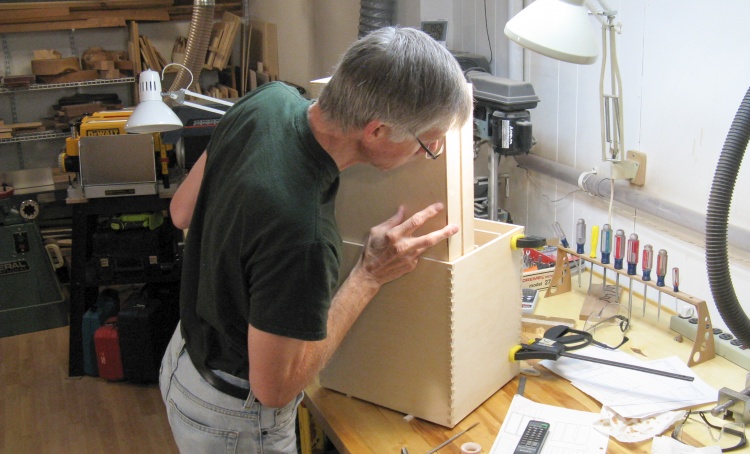
Trial assembly
Then with the cabinet clamped together and drawer slides taped in place, I did a test fit of all the drawers to make sure there were no fit issues. It all looked good, meaning it was safe to start putting the cabinet together.
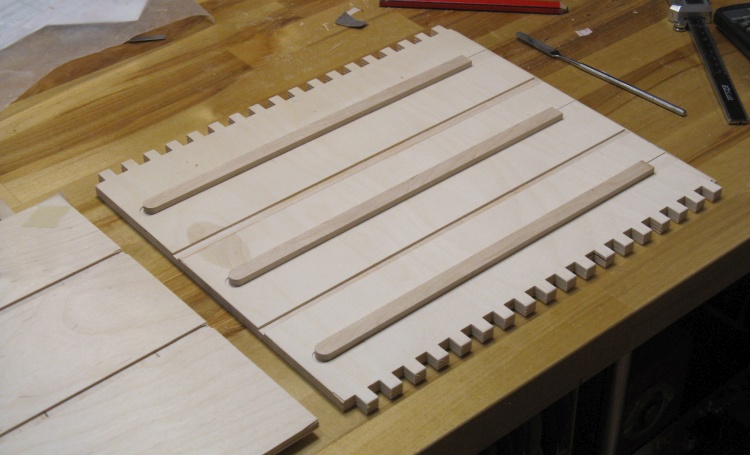
Glued-in drawer slides
First I glued the drawer slides in place. On the cabinet side you can also see the narrower slots into which the drawer cavity dividers will slide.
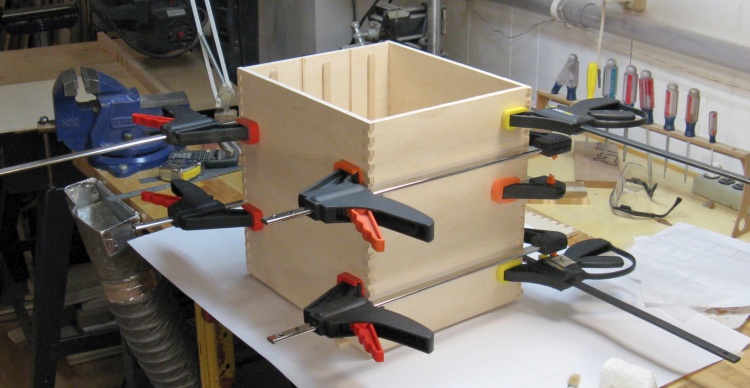
Glue-up of the cabinet
Next was gluing and clamping two of the four corner joints as seen here.
When those were dry I glued the last two corner joints, and then finally slid into place and glued the two drawer cavity dividers.
The back panel was inserted into place as the cabinet was glued which ensured the cabinet was square.
When those were dry I glued the last two corner joints, and then finally slid into place and glued the two drawer cavity dividers.
The back panel was inserted into place as the cabinet was glued which ensured the cabinet was square.
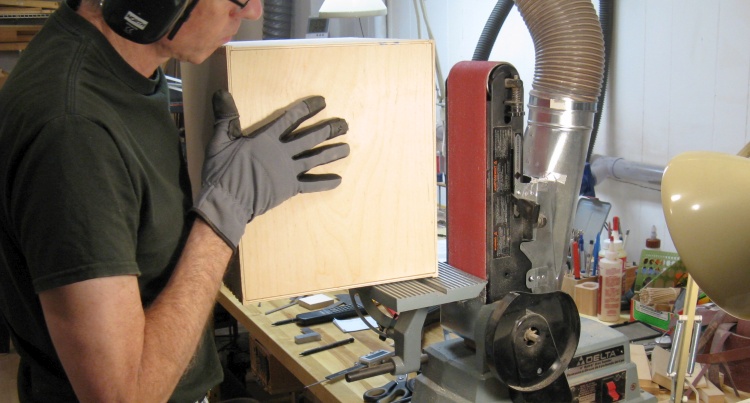
Sanding the cabinet joints flat
Like on the drawers, the box joint fingers were made long on the cabinet and here I'm employing my go-to tool (the belt sander) to remove most of the excess length.
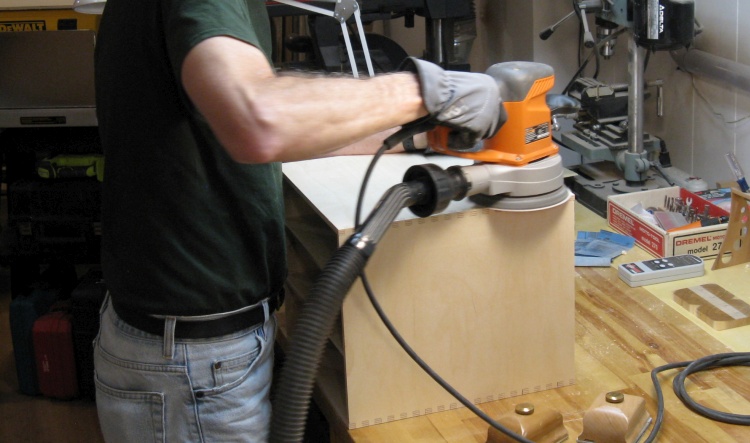
A bit more outside sanding
I finished the flattening of the corner joints by using the orbital sander and then broke the sharp edges with one of the nice wooden sanding blocks also in this photo.
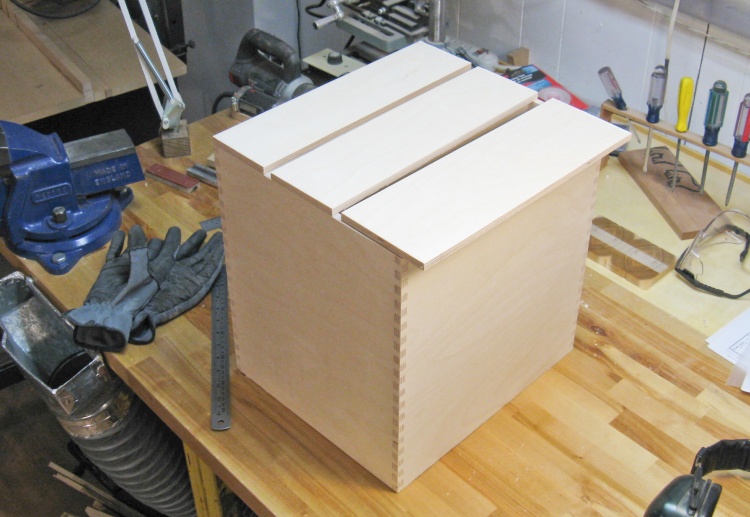
Drawer fronts partially sized
With the cabinet finished off I started on the front panels, which don't get much simpler than this; they were just rectangular 3/8" plywood pieces slightly narrower than the cabinet that would attach to the front of each drawer.
Here the front panels are roughly sized and the heights will be tweaked once the positioning and spacing is finalized.
Here the front panels are roughly sized and the heights will be tweaked once the positioning and spacing is finalized.
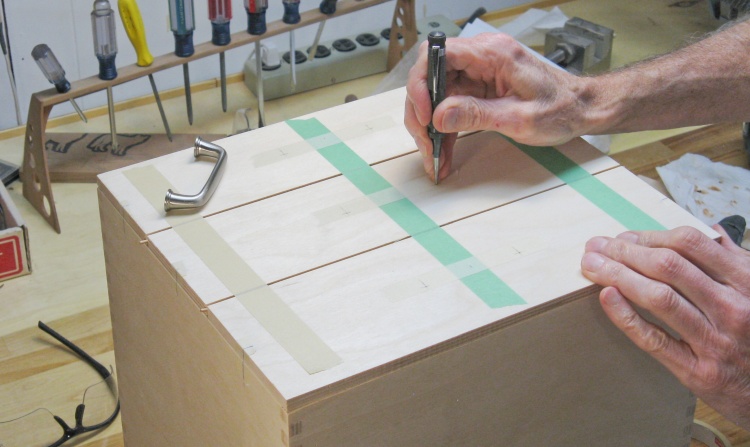
Marking drawer fronts for handle holes
I've got the final sizing and spacing done here and the three fronts are taped together along with spacers to make it easier to mark the handle holes. In this shot I'm using the automatic punch to mark the holes for drilling.
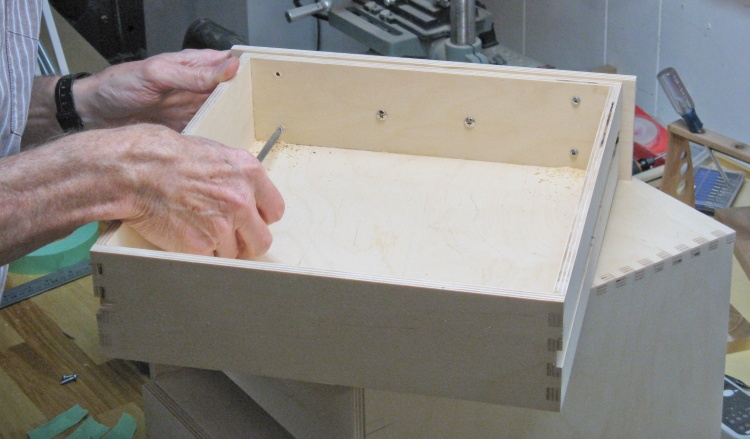
Attaching front panel to a drawer
After drilling, the panels were mounted to the drawers using two handle screws - the ones near the center of the drawer in this shot. I used slightly oversized screw holes so the position of the panel could be tweaked to align correctly with the cabinet when the drawers were in place.
I then added four screws from the inside to more-firmly attach the front panels to the drawers.
I then added four screws from the inside to more-firmly attach the front panels to the drawers.
Everything assembled
And that was it for assembly. This shot shows the set of drawers before the finish was applied.
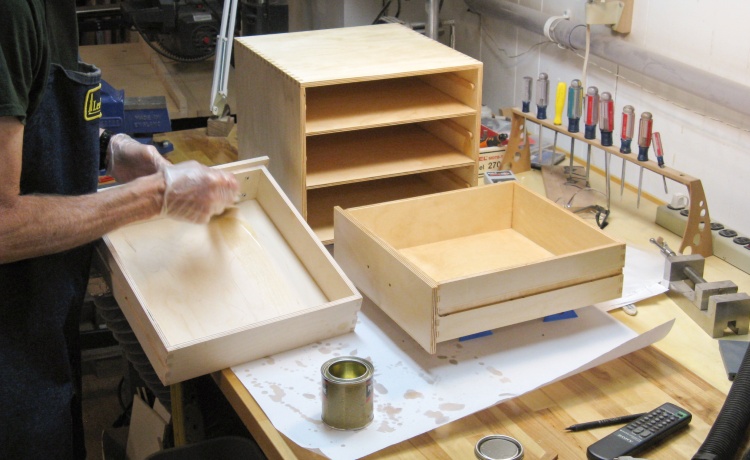
Putting on the first coat of varnish
Then the handles came back off and I started applying the finish.
I wasn't looking forward to applying finish to the inside of the cabinet (and in particular sanding between coats) so I looked around for a simpler finish than the polyurethane varnish I normally use. But it turns out that almost everything needs sanding between coats so I just stuck with the varnish since its other properties are good.
I wasn't looking forward to applying finish to the inside of the cabinet (and in particular sanding between coats) so I looked around for a simpler finish than the polyurethane varnish I normally use. But it turns out that almost everything needs sanding between coats so I just stuck with the varnish since its other properties are good.
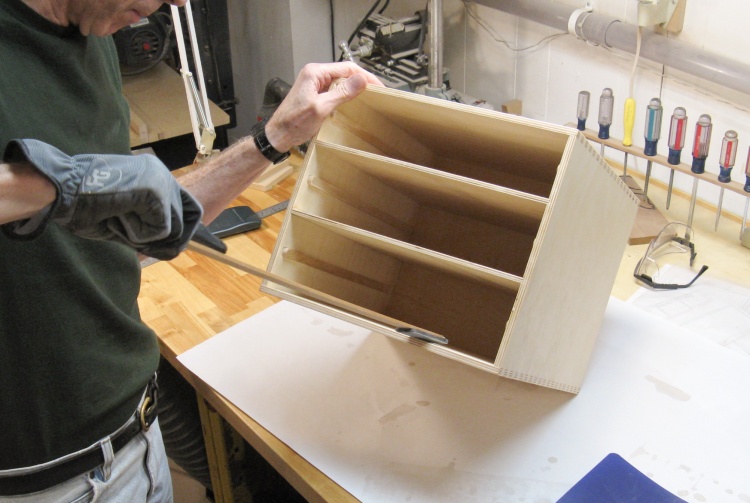
Sanding between coats
So yah, then I sanded between coats, using various jigs to reach inside the drawer cavities.
In this shot for the inside walls I'm using a stick with a rubber pad that has sandpaper taped to it. Fortunately the outside and most of the drawer surfaces could just be sanded with a standard sanding block.
I ended up applying only two coats, but that seemed to be adequate.
In this shot for the inside walls I'm using a stick with a rubber pad that has sandpaper taped to it. Fortunately the outside and most of the drawer surfaces could just be sanded with a standard sanding block.
I ended up applying only two coats, but that seemed to be adequate.
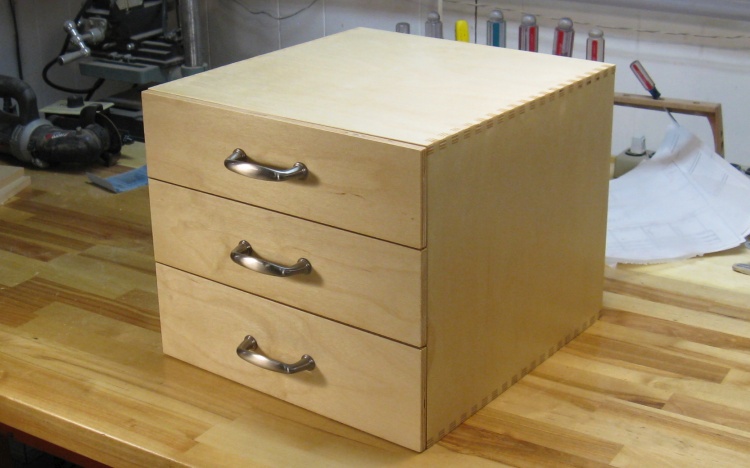
Varnished and reassembled
Once the last coat was dry, the drawer handles went back on and I put the drawers back in.
I added a bit of wax to the slots in the drawers so they would slide more smoothly, and they work pretty well.
I added a bit of wax to the slots in the drawers so they would slide more smoothly, and they work pretty well.
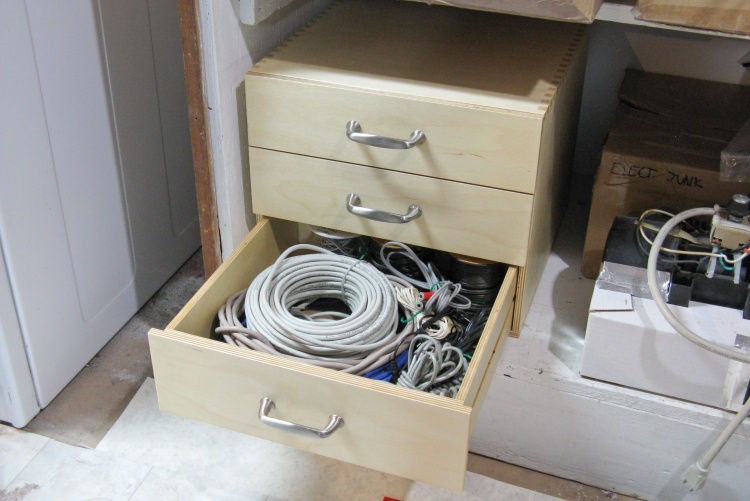
Now with junk!
This shows the drawers in their new (low rent) home with convenient access to the dryer.
I managed to stuff all my wire bits into the drawers so now they are almost as full as the original cardboard box was. At least it looks neater.
I managed to stuff all my wire bits into the drawers so now they are almost as full as the original cardboard box was. At least it looks neater.


