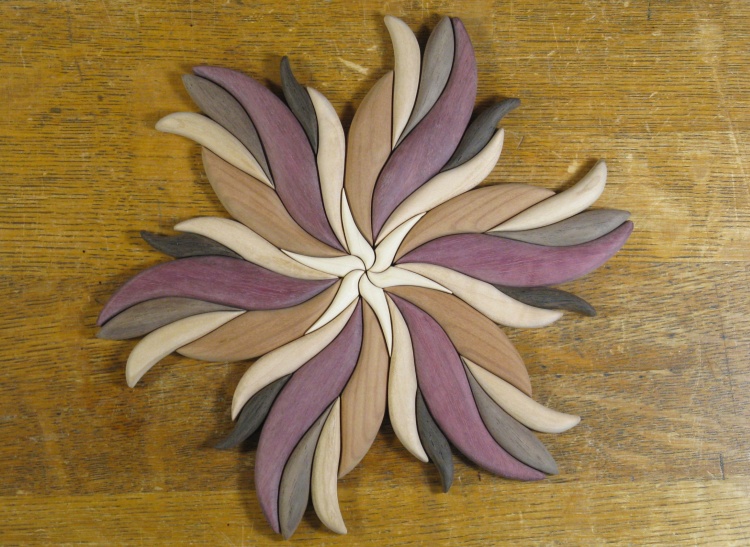
I have to confess that I've never been a fan of intarsia work. The pieces I've seen are mostly animals or animal faces and while I can appreciate the skill that went into them, they never appealed to me aesthetically. Sort of like chainsaw carving. That being said, I found that this flower figure to be more of a semi-abstract geometric exercise and so it didn't seem to push the same "dog's head" buttons.
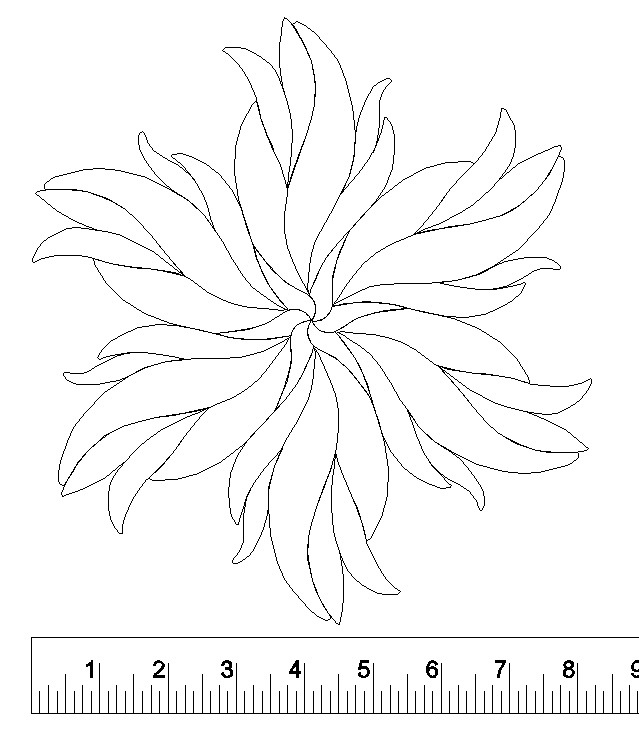
It should look like this, but woodier
Wood
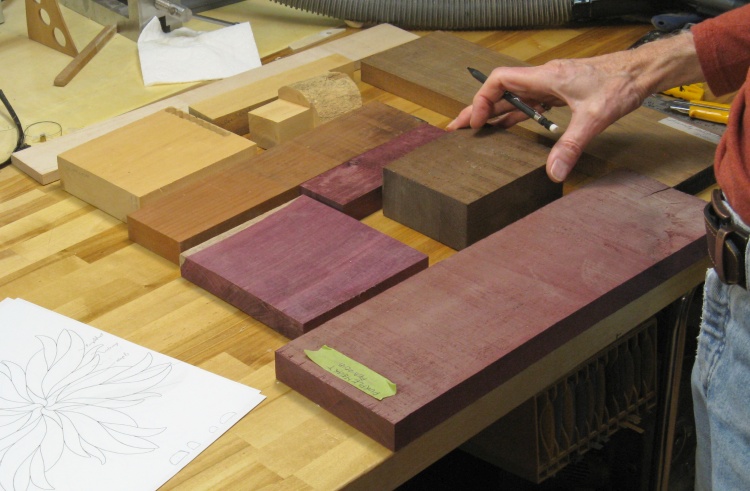
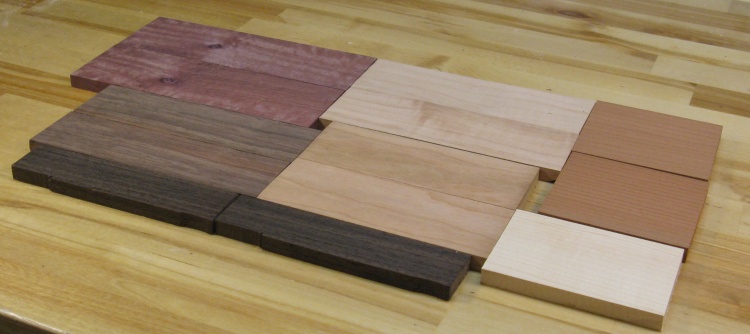
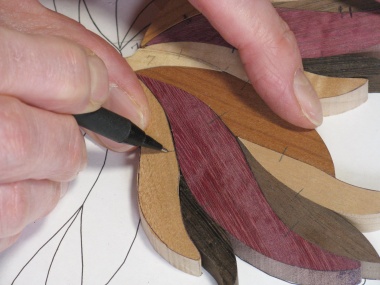
Selecting some suitable woods
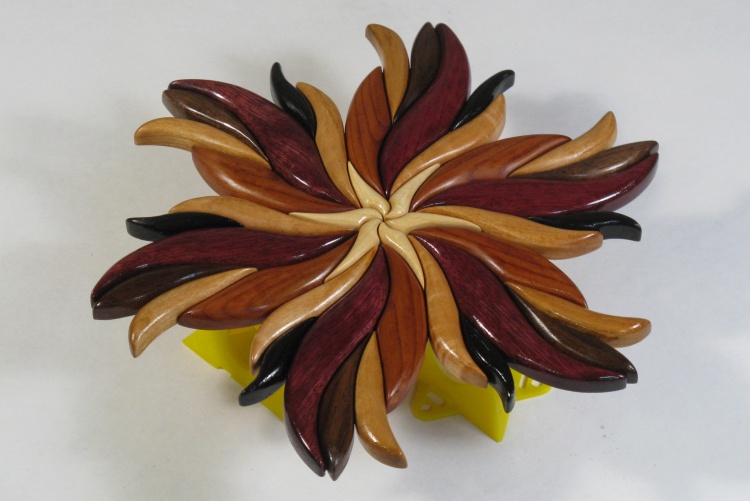
I liked one of the flower examples I had seen which had mostly darker brown, red and black tones, so I thought I'd make one with a similar mix. I grabbed a bunch of possible wood pieces and combed through them to find an appropriate combination.
I wasn't going to need much wood so even small scraps would be usable.
As a matter of interest, I did a quick count of hardwood species in my shop that could have been used and it was about 35, most left over from various past projects and some very, very dusty.
I wasn't going to need much wood so even small scraps would be usable.
As a matter of interest, I did a quick count of hardwood species in my shop that could have been used and it was about 35, most left over from various past projects and some very, very dusty.
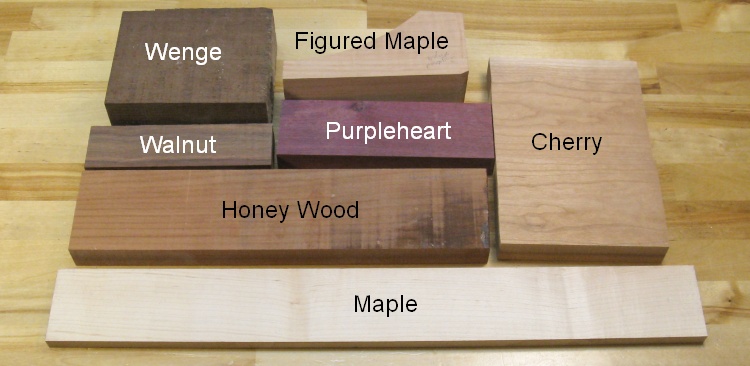
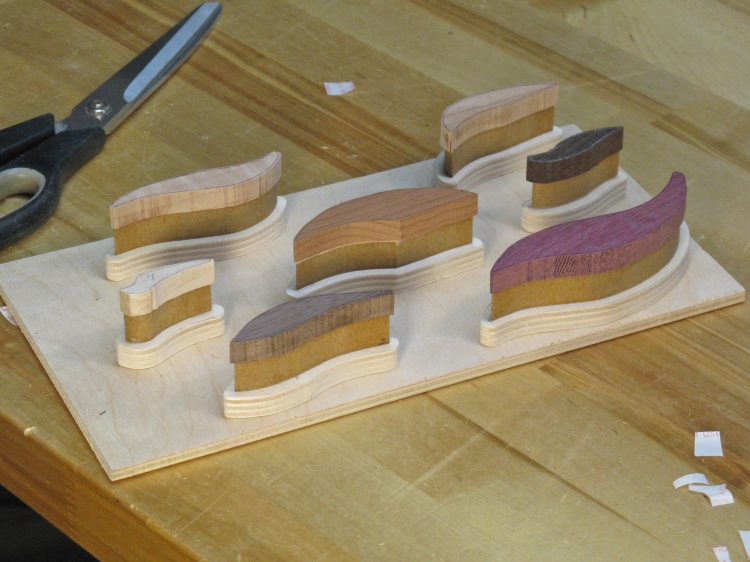
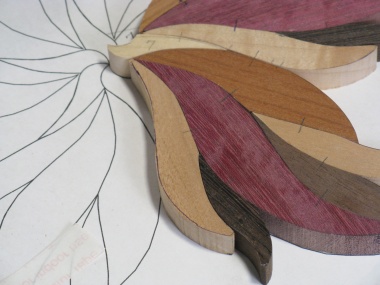
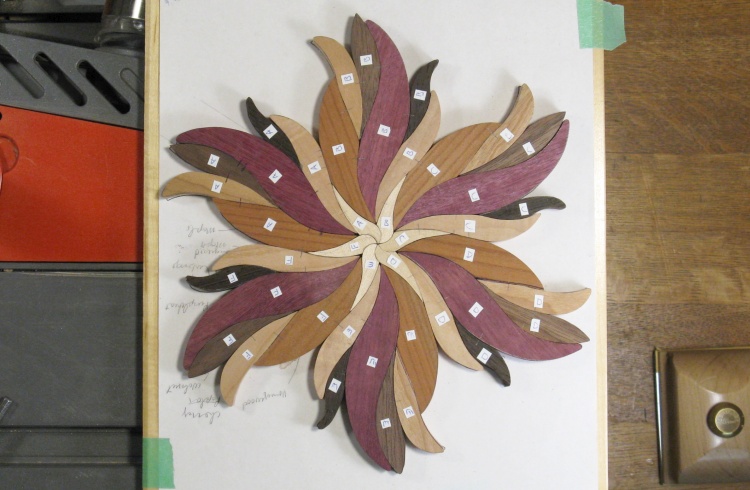
The selection
This is a shot of the seven woods chosen, a different one for each of the seven petals that form the six identical sectors.
Petal Patterns
Given that the six sectors of the flower were identical, my plan was to make patterns which would help fabricate the six identical pieces. The pieces are too small for easy pattern routing using a flush router bit so I decided that what I really needed a flush sander. It turns out that they make those and in fact I was able to pick one up locally at Lee Valley Tools.
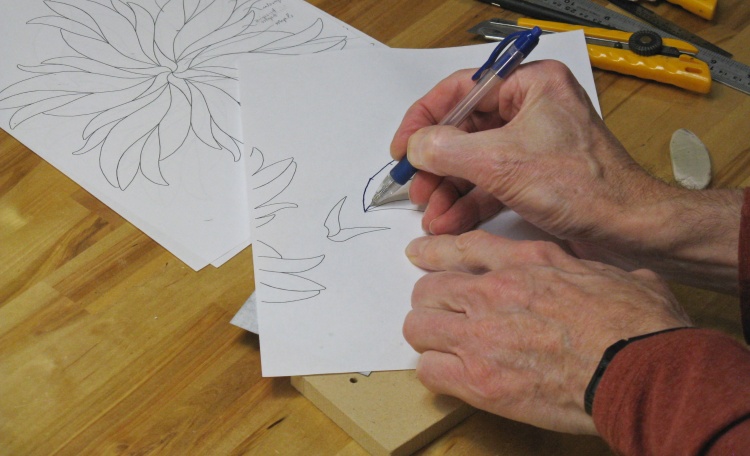
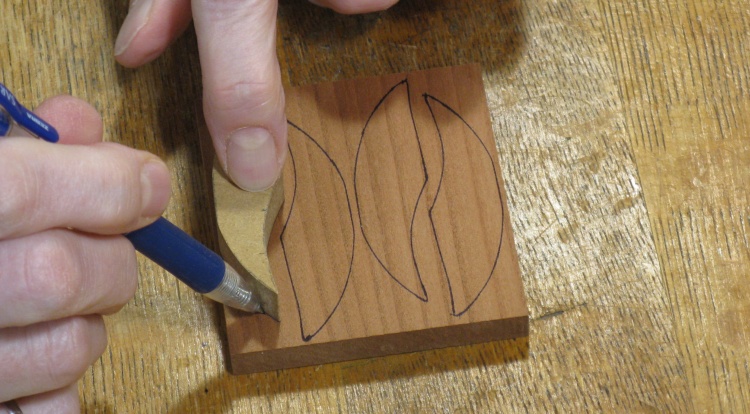
Tracing out a pattern piece
I would make the patterns out of MDF and here I'm tracing one of the petal shapes onto a 3/8"-thick MDF scrap.
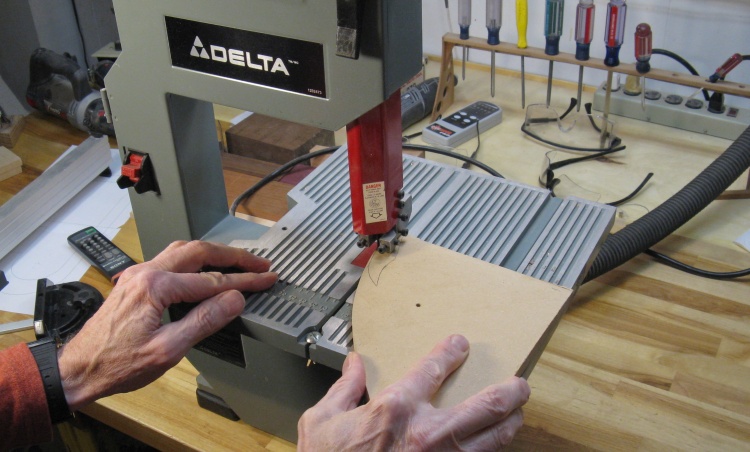
Cutting a pattern piece
The patterns were cut out a bit oversized on the 8" bandsaw equipped with a 1/8" blade which allows for cutting tight curves.
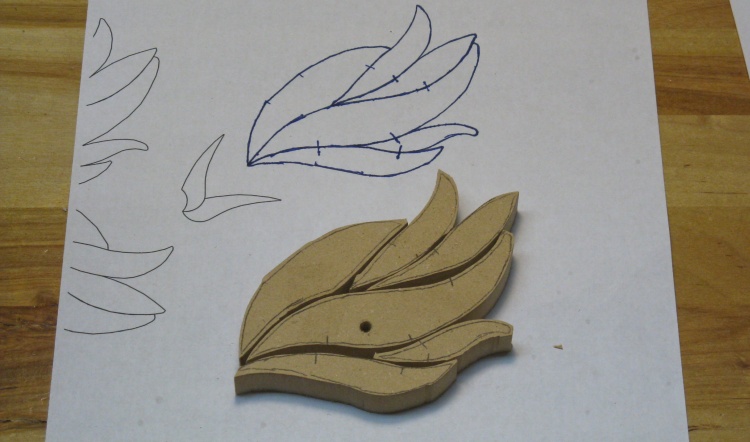
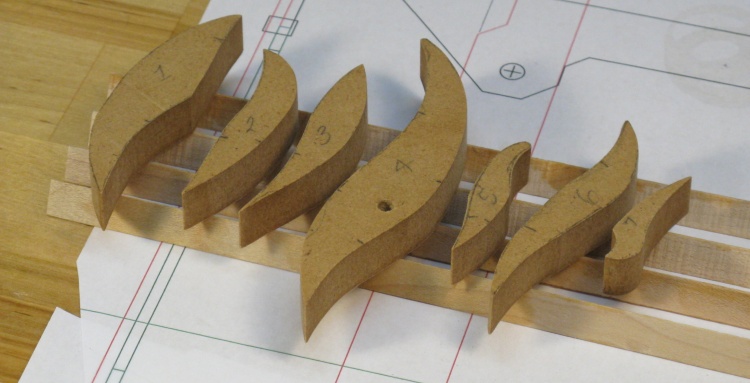
The roughly-cut-out pattern pieces
Here six of the seven petal shapes have been cut out and arranged in their proper relative positions for a nice family photo. The seventh and smallest member of the family has not yet been born.
So then the patterns needed to be trimmed closer to the lines. Since there was only maybe 1/16" that needed to come off, that was accomplished with sanding. I used the belt sander for the convex areas of the shapes and the spindle sander with a 1" diameter for the concave areas.
The traced-on lines were not very accurate and only useful to get the pieces to the approximate shape. After that, I started sanding the edges so they would nest closely with the adjacent pieces.
The traced-on lines were not very accurate and only useful to get the pieces to the approximate shape. After that, I started sanding the edges so they would nest closely with the adjacent pieces.
Belt sander for convex areas...
...and spindle sander for concave areas
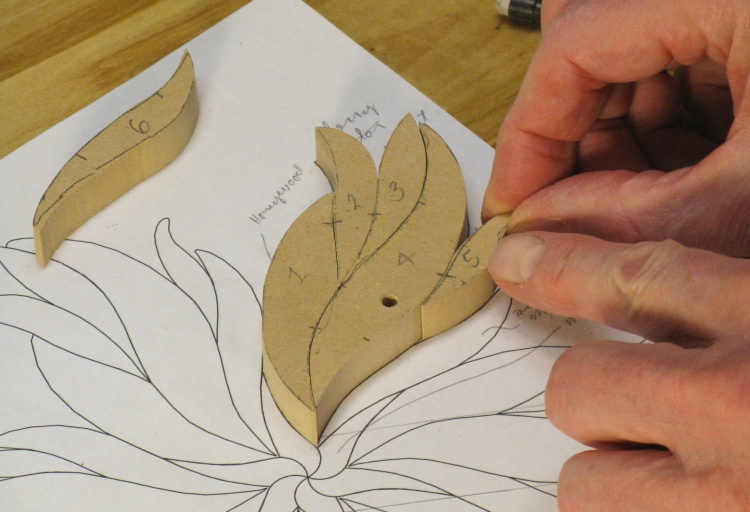
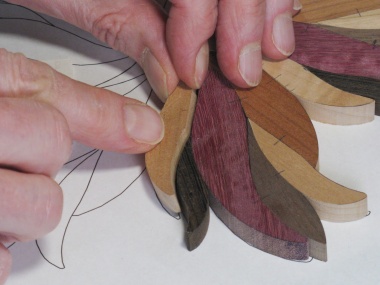
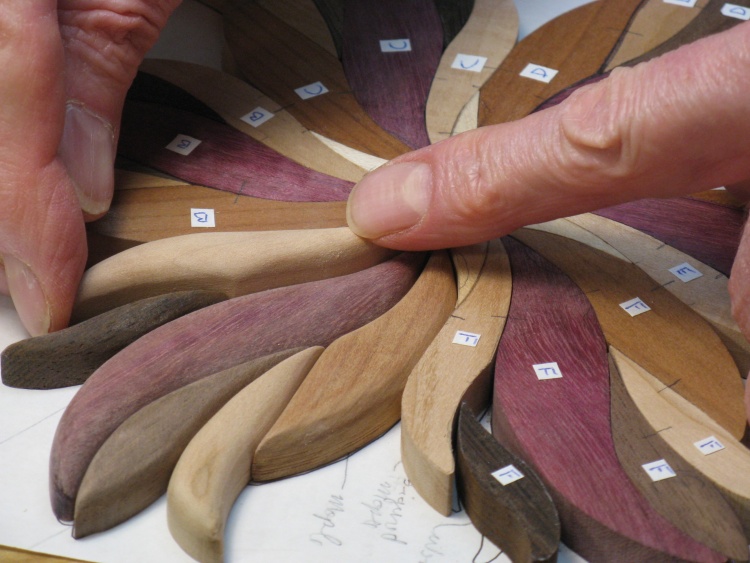
Fitting patterns together after shaping
I started with a default shape for piece #1 and then sanded piece #2 to nest accurately with it. Then I sanded the other side of piece #2 to a default shape and worked to get #3 to accurately nest with that one and so on. I added alignment marks so I could reproduce the positioning after a sanding adjustment.
After each piece was done, I taped it down to the paper pattern to hold things in place.
After each piece was done, I taped it down to the paper pattern to hold things in place.
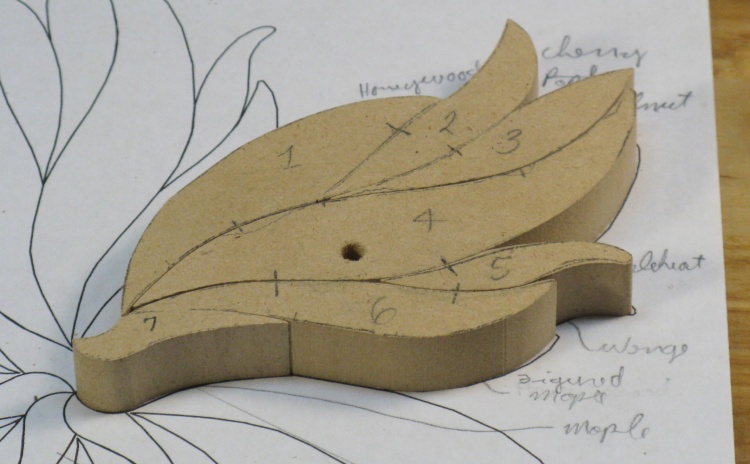
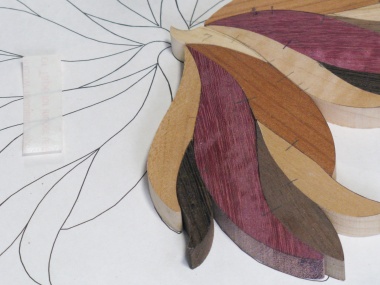
A full set of petal patterns
Here all seven pattern pieces are tweaked to nice nesting shapes.
The patterns were varnished to toughen them up
I was planning to use tape to hold the wood to the patterns but since raw MDF does not hold tape well, I varnished the pieces to toughen up the surfaces.
Making the Petals
Starting to chop up petal woods
The flower pieces needed to be only 3/8" thick so I cut appropriate slabs off of the different types of wood.

Four of the woods on the planer sled
The slabs were cut a bit thick so the next step was to send them through the planer to get them to the correct thickness.
Here four of the woods are taped to the planer sled, ready for planing.
Here four of the woods are taped to the planer sled, ready for planing.
All seven woods planed to 3/8" thick
Consistent thickness has been achieved.
Using the pattern to trace the petals
I traced around the MDF patterns to mark the wood in preparation for cutting out petal shapes.
In this shot I've marked four petal #1s on one of the Honey Wood slabs.
In this shot I've marked four petal #1s on one of the Honey Wood slabs.
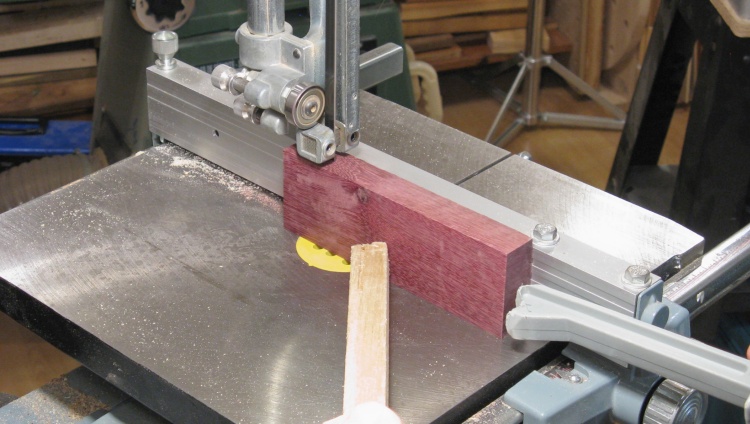
Cutting out a Purpleheart petal
Once again the small bandsaw was used to cut out the pieces slightly oversized.
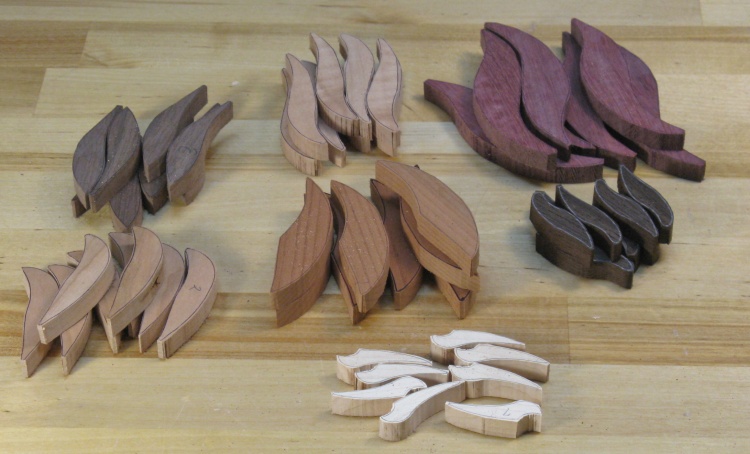
All the petals that the flower will need, plus some spares
Here is the full suite of petals including a couple spares of each as "oops" insurance.
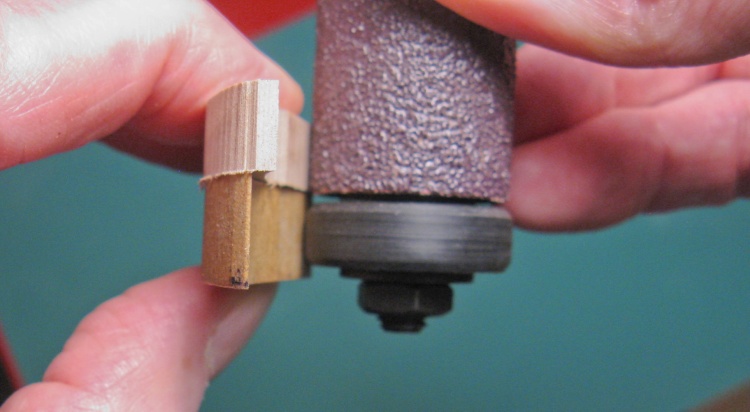
A bit of "underhang" on the sander
I was about to check out the flush sander but ran into an issue.
I had made the patterns before picking up (or even looking closely at) the flush sander so I failed to notice this rather significant problem; The bearing needs about 1/4" of pattern to run on but the assembly nut extends another 1/4" below that. The pattern would need to be around 3/4" thick to avoid problems rather than the 3/8" I made it.
I had made the patterns before picking up (or even looking closely at) the flush sander so I failed to notice this rather significant problem; The bearing needs about 1/4" of pattern to run on but the assembly nut extends another 1/4" below that. The pattern would need to be around 3/4" thick to avoid problems rather than the 3/8" I made it.
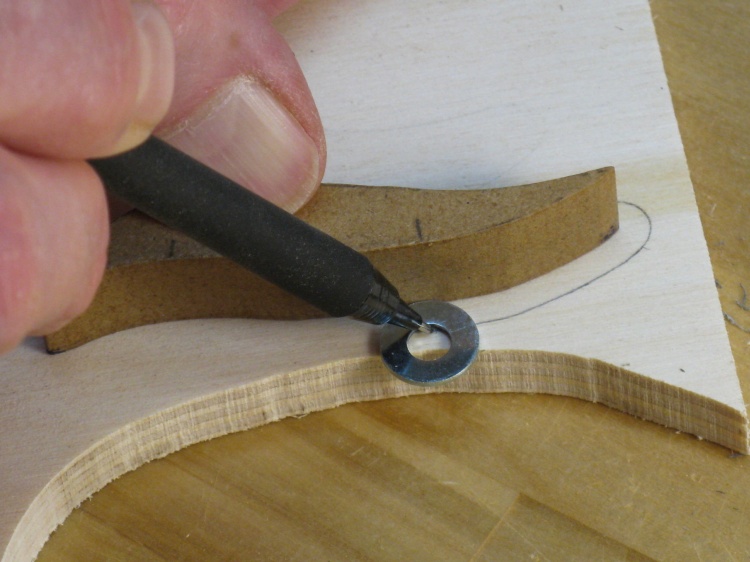
Tracing out a larger base for one of the patterns
I needed to make the patterns taller but the extra bits didn't need to be flush since they could extend under the bearing. So rather than make exact-sized pieces, I made wider ones that would be easier to make and align.
In this photo I'm tracing a larger shape onto 3/8" plywood, using a washer as a "bigger than" guide.
In this photo I'm tracing a larger shape onto 3/8" plywood, using a washer as a "bigger than" guide.
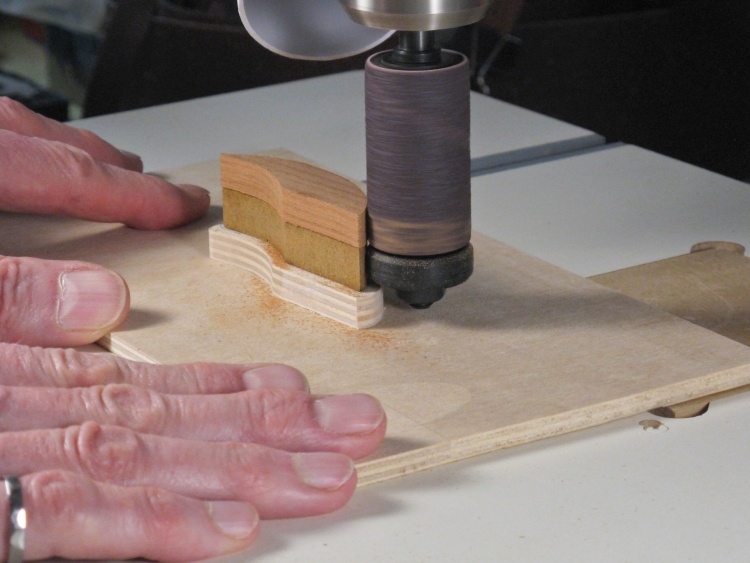
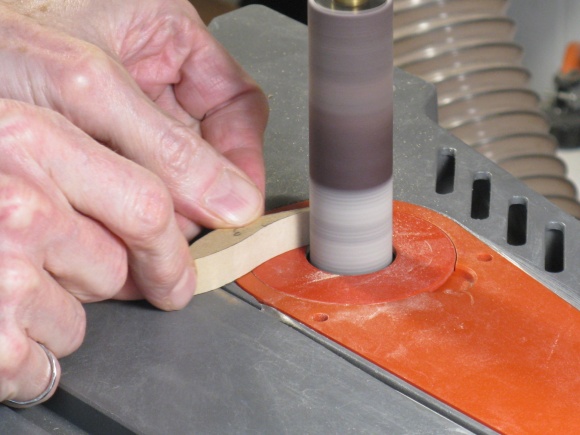
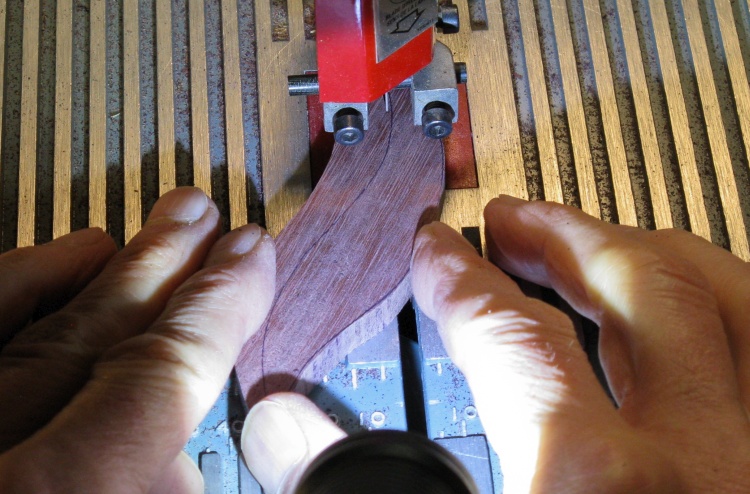
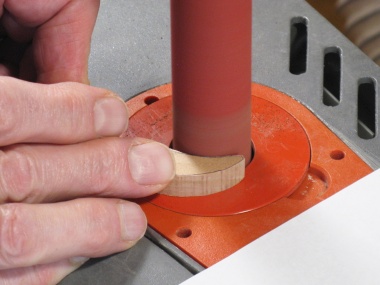
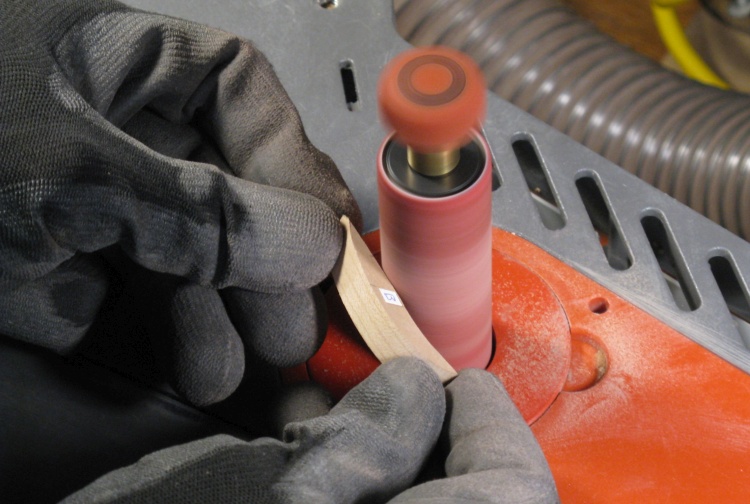
Finally checking out the flush sander operation
So then with the wood on the pattern on the plywood lift, I finally got to try out the flush sander.
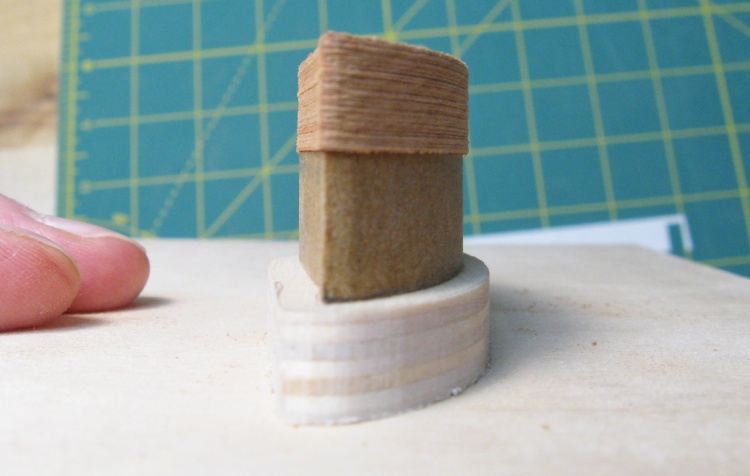
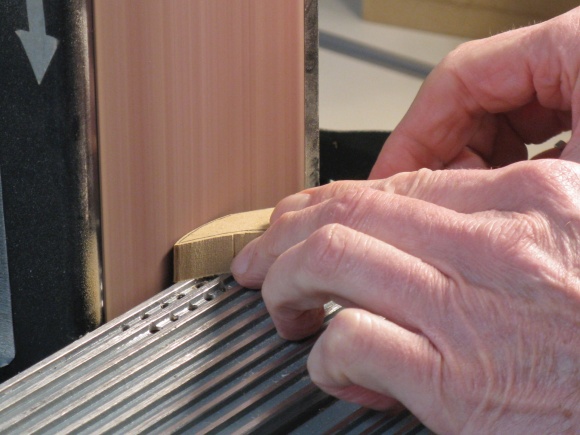
Yah, maybe not so flush
I had wondered just how flush the tool would be given that sandpaper thickness varies with grit. It turns out: not very.
The Honey Wood piece on the top is noticably wider than the MDF pattern.
The Honey Wood piece on the top is noticably wider than the MDF pattern.
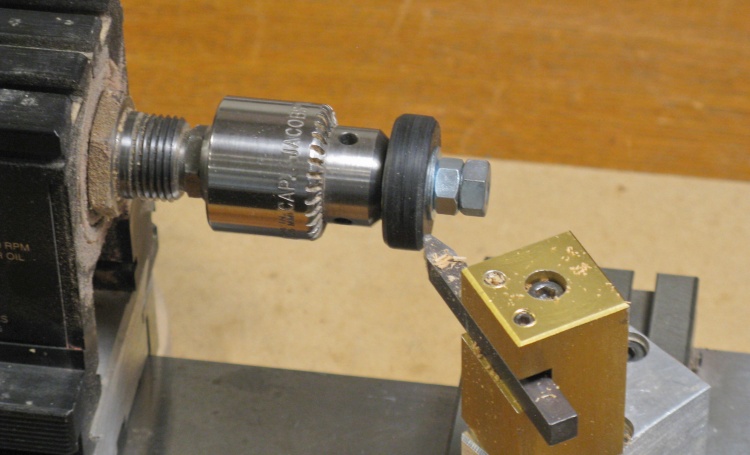
Sander bearing about to get modified
Yah, well the flushness was easy enough to adjust. Here the flush sander bearing wheel is mounted in the metalworking lathe and is about to be reduced in diameter.
Optimistically Setting up all petals to flush sand
The adjustment worked pretty well and seemed to sand pretty flush. So in a burst of (foolish) optimism I mounted all seven patterns and got ready to sand.
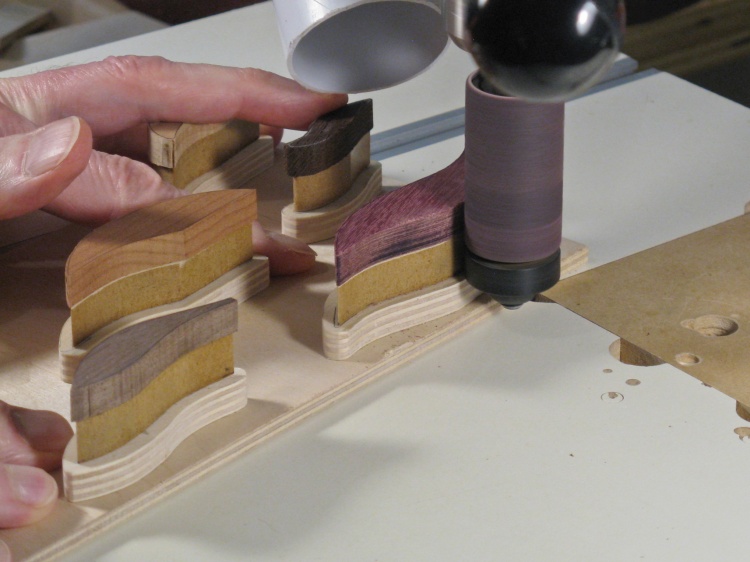
Checking it out again
This shows the largest piece being sanded. Unfortunately the force of the sanding (on admittedly the hardest wood) ended up nudging the piece around on the pattern - the tape wasn't strong enough to hold it in place.
I considered alignment pins or other methods but finally decided that I had wasted enough time on the "pattern" approach. The pieces probably would have needed to be individually tweaked with sanding anyway so I decided to just manually sand all the pieces into shape.
I considered alignment pins or other methods but finally decided that I had wasted enough time on the "pattern" approach. The pieces probably would have needed to be individually tweaked with sanding anyway so I decided to just manually sand all the pieces into shape.
The Manual Method
Welcome to the Manual Section! Also known as the "sand it until it fits" technique. The captions for the following photos describe the sequence I used on each of the 42 pieces.

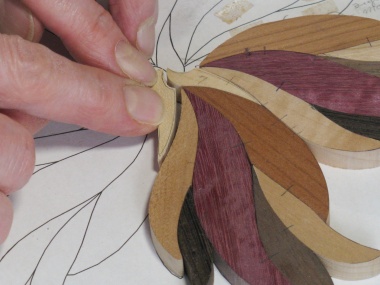
Marking approximate outside using pattern
Sanding to that line
Adding alignment mark

Checking gaps to know where to sand
Inside profile good now after 5 to 20 sanding tweaks
Marking approximate outside profile

Sanding outside profile
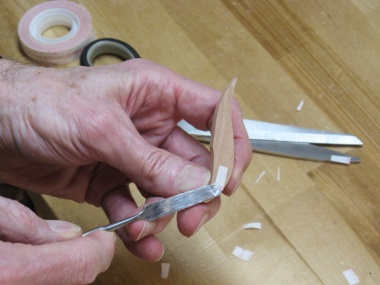
Adding bottom tape when done
Sticking into place
New piece in place
Starting on the next piece

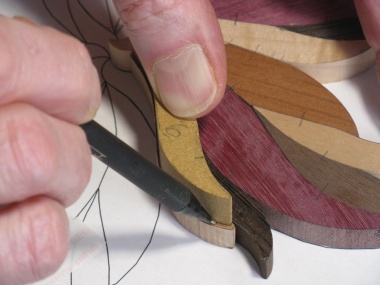
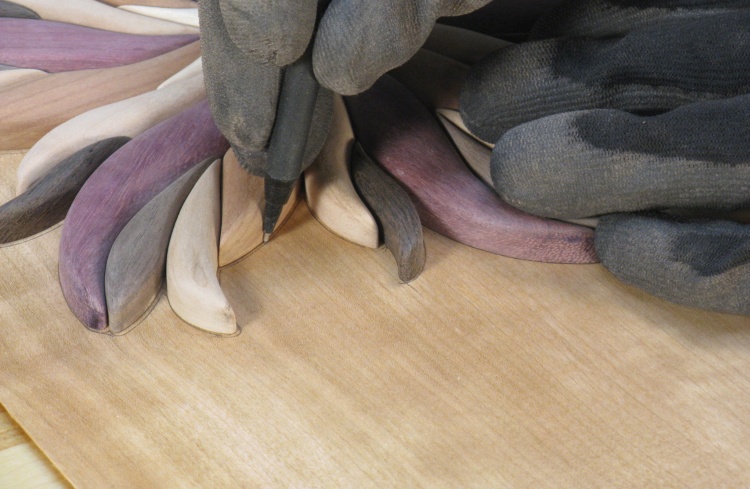
New piece properly shaped to reveal half of black pattern line
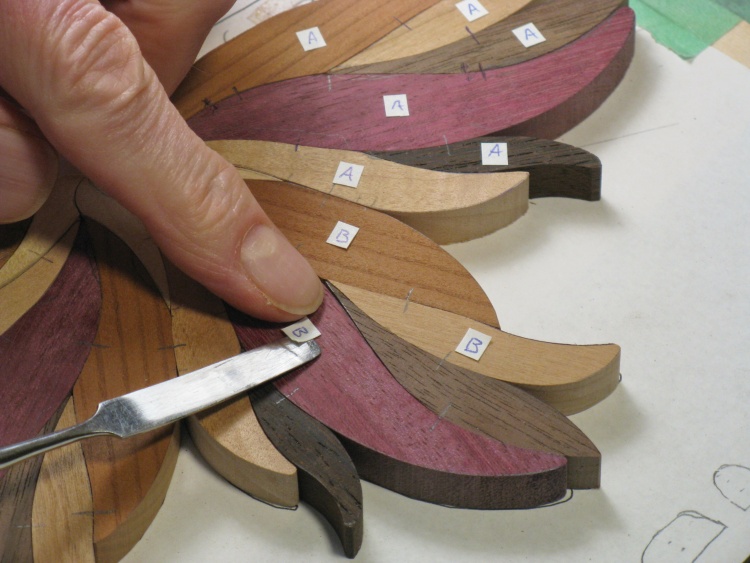
Labelling pieces in case of dropping disaster
I'm about half done the shaping of the pieces in this shot. I thought it prudent to add sector numbers in case the pieces somehow became mixed up (unlikely since they are taped down to the paper but sometimes my fumbling can accomplish impressive feats).
All the pieces have edges shaped and are taped down
And after a few days of work all the pieces were shaped.
Rounding & Assembly
Starting to round the petal tops
My plan was to have rounded tops on all the individual wood pieces.
I used the spindle sander to first sand a 45° bevel into the top corners and then roughly rounded it with more spindle time.
I managed to goof up and sand the bottom of one piece instead of the top and had to remake the piece (thus justifying my Oops Insurance) so I left the sector labels in place after that (as seen on this piece) until after I had started sanding to help avoid a repeat of that particular problem.
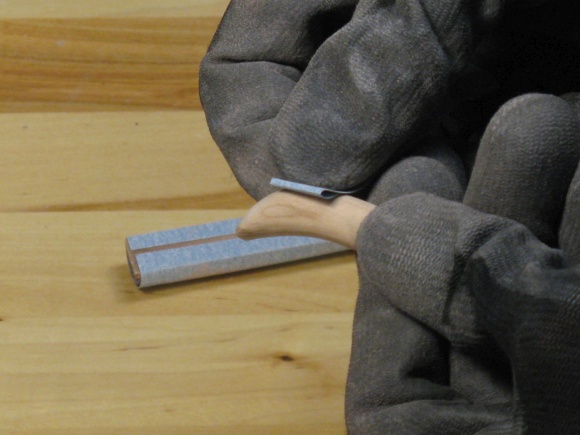
The spindle sander left the edges rather coarsley rounded so the lumps and dips were smoothed out with hand sanding. The foam-equipped stick with 220 grit did most of the work and then the surface was smoothed a bit more with a strip of 320 grit.

Smoothing out the spindle sander marks
Doing a final sanding
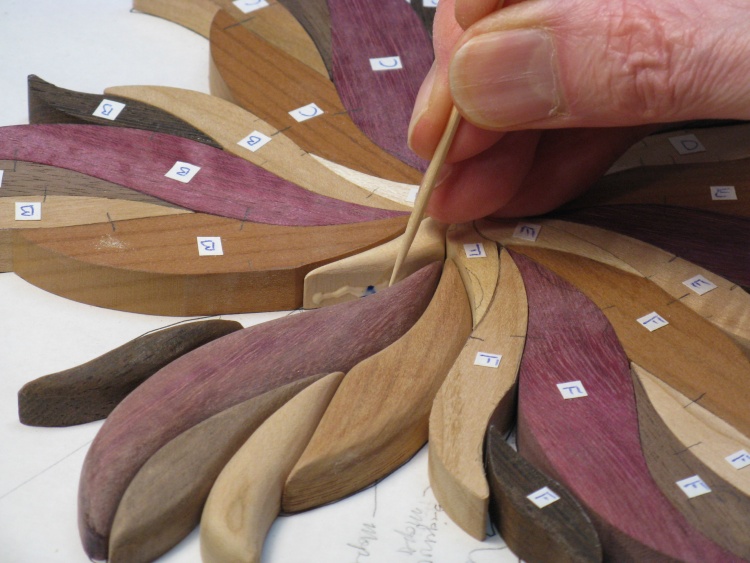
Adding glue to adjacent piece bottom
Once I had all seven of the petals in one sector sanded, I glued them together back onto the paper plan.
In this photo I'm adding glue to the bottom edge of piece #7 and will then insert piece #6 beside it.
In this photo I'm adding glue to the bottom edge of piece #7 and will then insert piece #6 beside it.
Gluing in the piece
Like that.
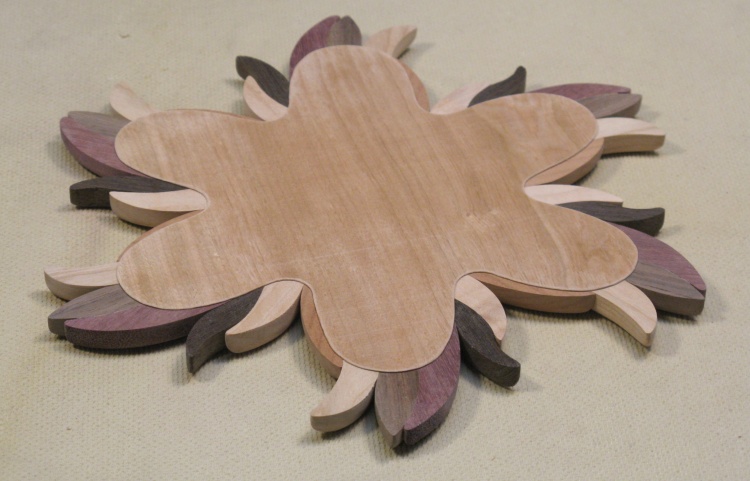
Everything shaped and glued
Then I unstuck the seven pieces of the next sector, sanded them round and glued them back into place as well.
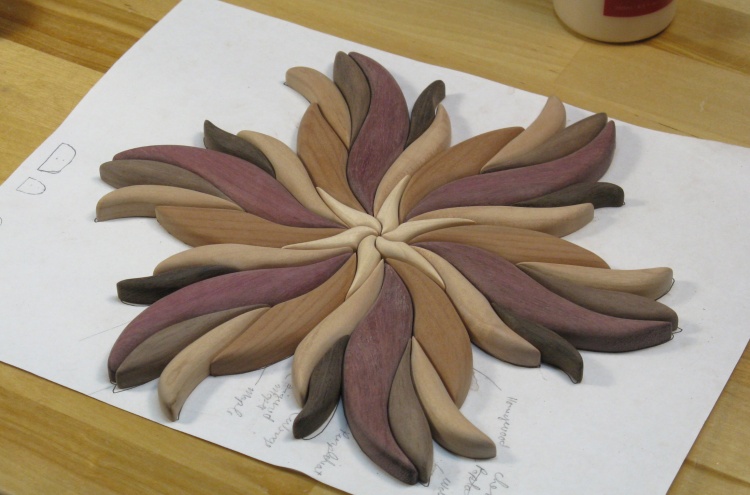
This shows the flower after all the shaping and gluing had been completed.
This shows the flower after all the shaping and gluing had been completed.
The next step was to check the bottom. After the glue was dry I peeled off the paper plan and then sanded off the worst of the glue and paper bits. The bottom wasn't perfectly flat so it didn't look particularly good.
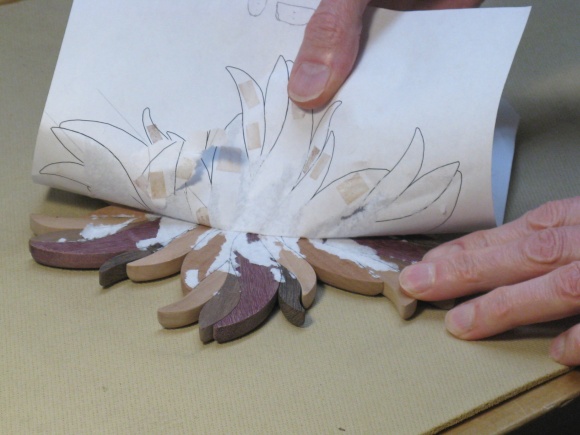
Peeling off the paper plan
A not-great-looking back
Tracing the shape on veneer for a backing
I decided to add a layer of veneer to the back, both to help increase the strength and to improve the look. I used a sheet of veneer from a big exotic selection and I have to confess I don't actually know what wood species it is.
I had initially hoped to cut the veneer just a bit smaller than the outline of the flower so I started by marking the perimeter as shown here.
I had initially hoped to cut the veneer just a bit smaller than the outline of the flower so I started by marking the perimeter as shown here.
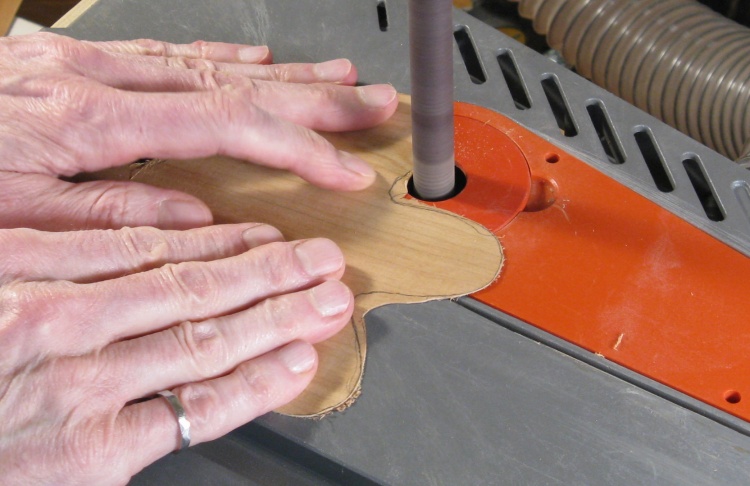
Shaping the backing veneer
Matching the flower perimeter obviously involved shaping lots of thin stickey-outy bits. Unfortunately veneer is pretty fragile and there is really no good way to cut it in detailed curves other than a laser or some numerically-controlled cutter, neither of which I have. So after some failed attempts to do the cutting I just drew a smooth curve that would cover most of the flower bottom.
In this photo I'm sanding the veneer to my smooth and easier-to-achieve shape.
In this photo I'm sanding the veneer to my smooth and easier-to-achieve shape.
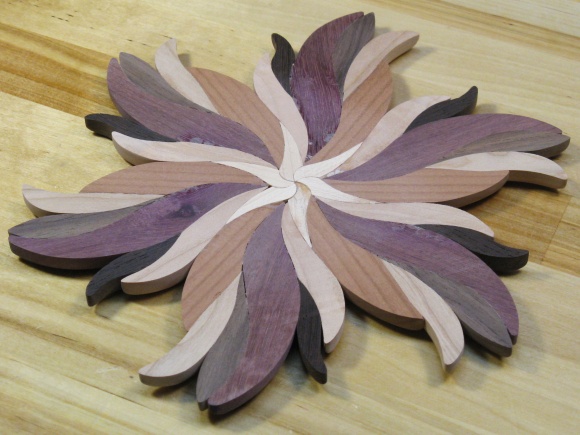
Back glued on
The veneer backing piece was then just glued to the bottom.
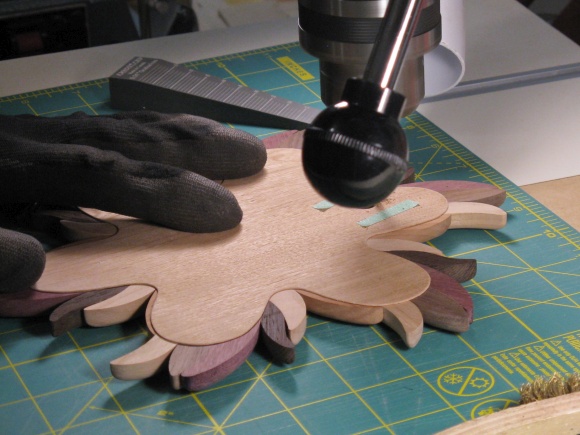
There were a couple of bottom details that needed to be added. First was a keyhole to accept a screw head for hanging. That was "built" with three operations on the drill press (the middle operation being redacted by the drill press for unknown reasons). The keyhole was followed by the normal circle for initials, a bit shallower than usual so it didn't go through the veneer.
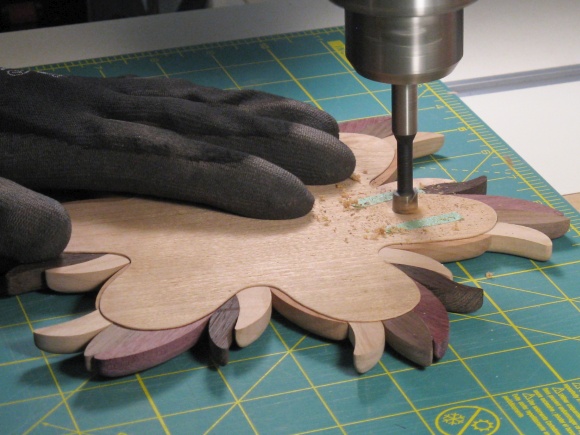
Drilling the main hole
Routing a slot (hate it when that happens)
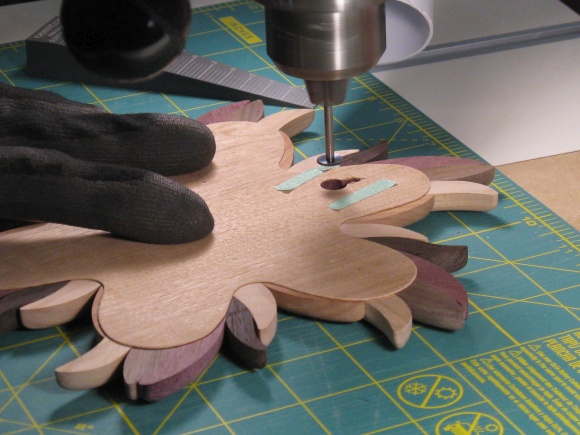
Undercutting the slot
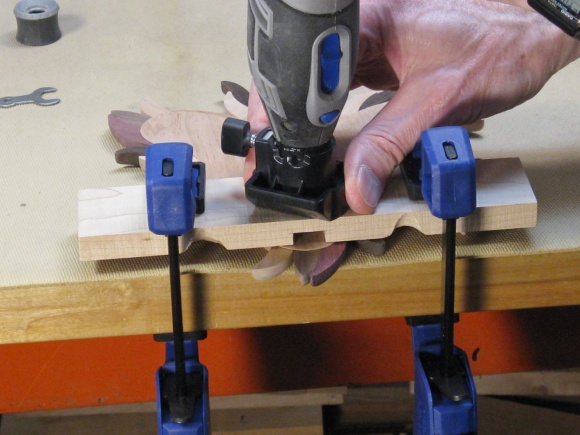
Adding initial circle
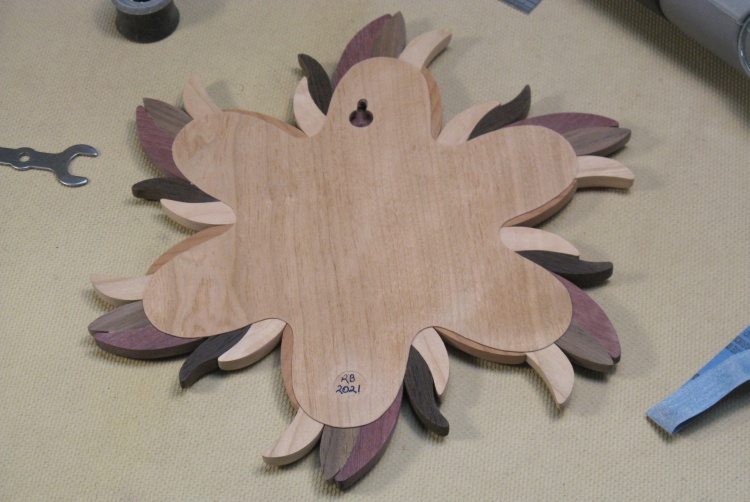
The completed back
This shot shows the completed back.
The keyhole is in an off-center-y spot since it needed to be in the middle of a single petal.
The keyhole is in an off-center-y spot since it needed to be in the middle of a single petal.
Woodworking is complete
And that's it for the woodworking.

Adding the first coat of varnish
The last step was finishing. I used my normal three coats of polyurethane varnish with this photo showing the first coat going on.
First coat of varnish is on
Here is the first coat of varnish on the flower, still wet.
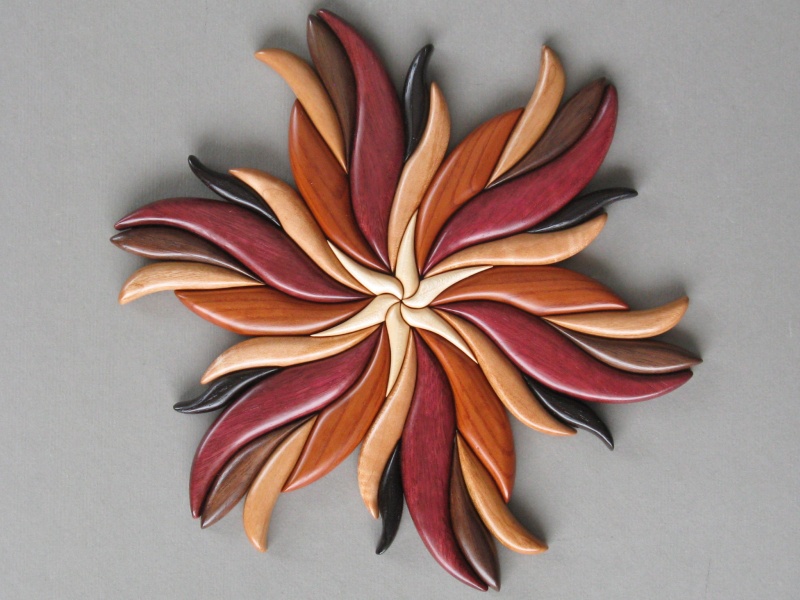
Done
Complete.


