I thought that the availability of an entrance door that matched the overhead door would have been a nice option, but the garage door manufacturers apparently didn't think so. Perhaps it's unusual to be able to see both doors at the same time but for whatever reason I didn't run across any. That just meant that I'd need to do it myself. I had in mind that I could probably use a garage door section to source the material for the entrance door.
A drawing of the door section profile helped confirm that the front fascia was a separate piece that could presumably be separated from the rest of the door. That would result in a piece a bit more than a quarter-inch thick that could be glued to the outside of the passage door.
Armed with this knowledge, I ordered an extra door section for this purpose.

The overhead door section profile
The Historical Context
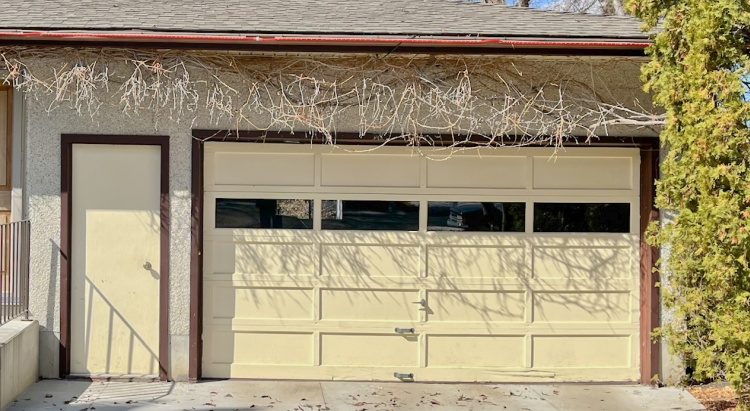
The original wooden door
This shot shows the original wooden overhead door, complete with peeling-once-again paint and an actual hole through the frame at the bottom.
The adjacent passage door - a hollow wood model - has the same paint, just with a bit more peeling. The doors face East and get sun until around noon which is pretty tough on any paint.
The adjacent passage door - a hollow wood model - has the same paint, just with a bit more peeling. The doors face East and get sun until around noon which is pretty tough on any paint.
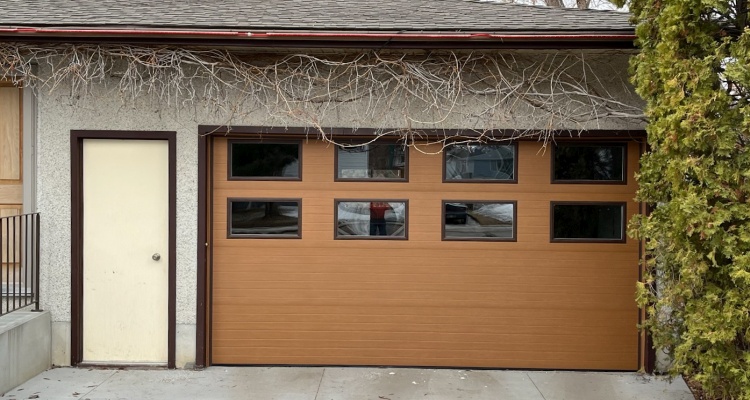
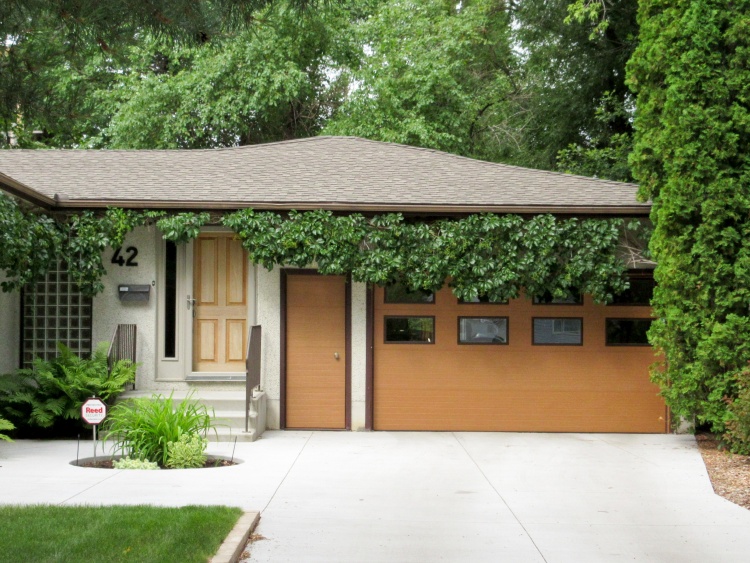
Snazzy new metal door
We ordered the new Cedar-toned metal door in the spring of 2022. And got it the spring of 2023. I'm not sure whether to blame the supply chain or the laughably disorganized Steelcraft door vendor.
However, the correct (non-standard) size arrived with the correct finish with the correct number of windows plus was installed competently so I can't complain too much.
However, the correct (non-standard) size arrived with the correct finish with the correct number of windows plus was installed competently so I can't complain too much.
Older garage doors like ours typically had 16"-high sections which required 5 of them for a standard 7'-high door. For whatever reason (OK, who am I fooling - lowering costs) all the manufacturers have gone to taller sections like 21" or 24". That means a 7' door has only four sections. That's fine unless you have windows in which case they typically go into the top section, which puts them above eye height or in the next section down which puts them below eye height. I chose to get both which leaves one staring at a strip of door with windows above and below. Now garage door windows aren't really made to look out but being unable to look out conveniently is rather annoying.
Of course many people would choose frosted windows to prevent thief window-shopping and then you couldn't see through anyway and this is less of an issue. It always seems like I want things different than the majority. I guess I'm just special...
Of course many people would choose frosted windows to prevent thief window-shopping and then you couldn't see through anyway and this is less of an issue. It always seems like I want things different than the majority. I guess I'm just special...
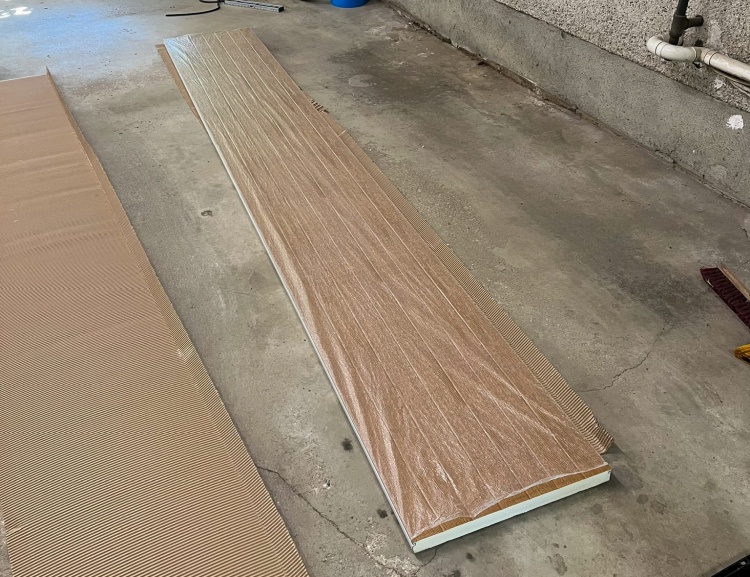
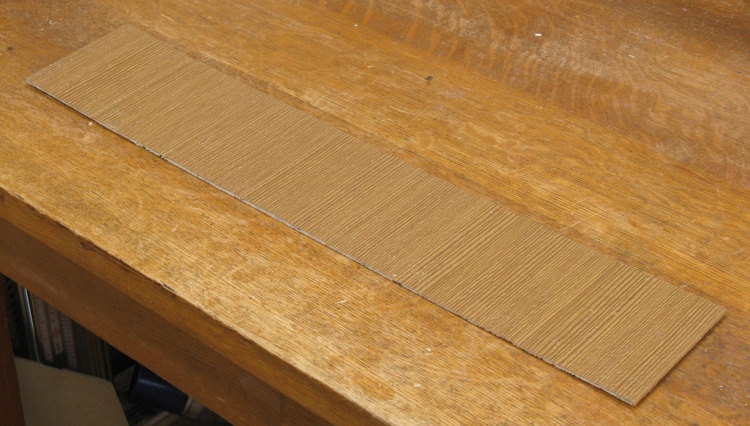
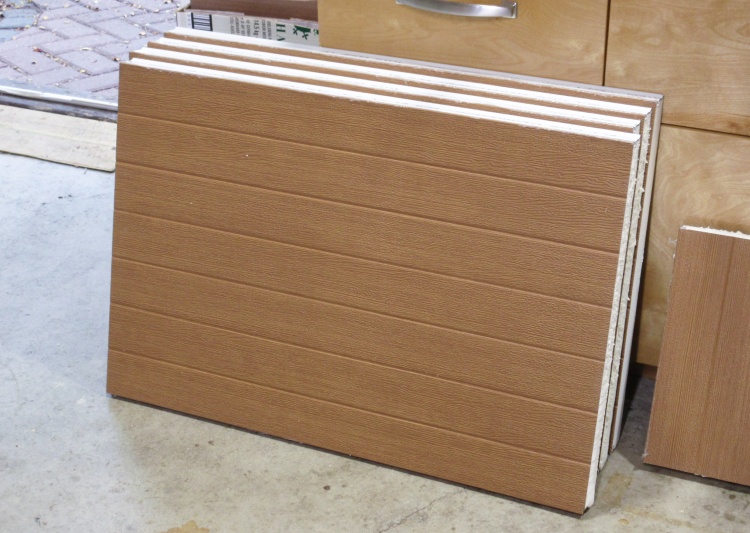
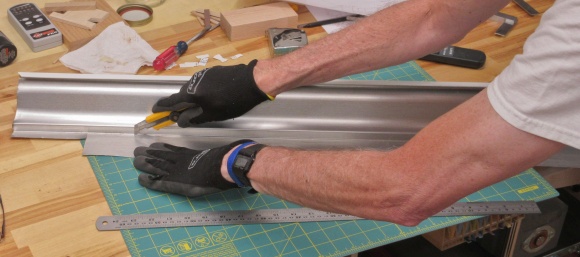
A 12' piece of garage door
I had actually ordered the extra panel at the same time as the door but the overwhelming forces of chaos at Steelcraft prevented that from happening. Their record keeping was bad enough (and their computers were supposedly out for a month or more) that I could never confirm what I was going to get.
So after the door arrived I tried ordering the extra section again, hoping it wouldn't take 10 months this time. They couldn't ever tell me when it was due but a couple months after ordering, it showed up. Wohoo!
This is the panel, laying on the garage floor and it's a 12' length of 21"-high door section. That would give me enough for the four pieces I needed to cover the passage door.
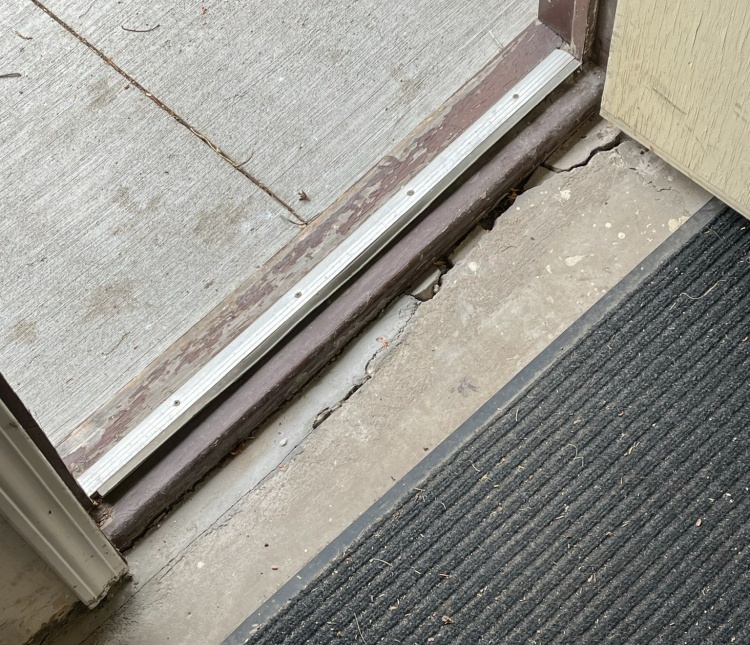
The door base needing a bit of attention
I was going to take advantage of the door upgrade to do a bit of work on the concrete as well. It needed filling and patching in the area of the door sill and I wanted to replace the sill with something lower and more level as well.
I made both of these (unphotographed) upgrades before doing anything else door-related as soon as the door panel arrived in June.
I made both of these (unphotographed) upgrades before doing anything else door-related as soon as the door panel arrived in June.
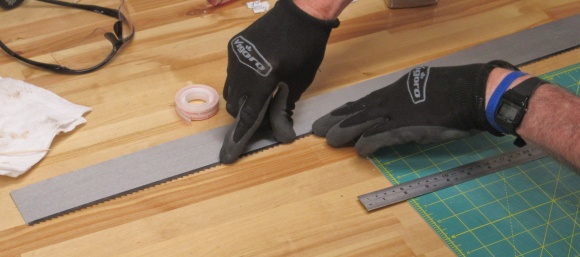
Test Panel

Chopping off a 4" test section
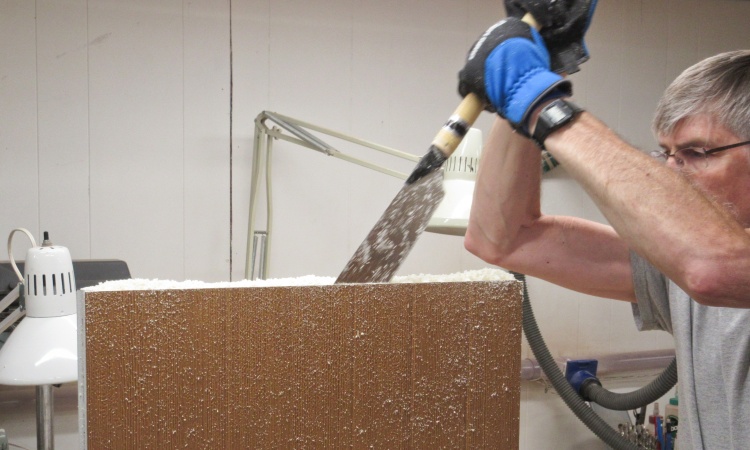
There were a number of questions that needed answering like how to cut the sheet steel, how to get the front part off, how to deal with the insulation, etc. I decided to start with a test piece to help answer those. I had about 16" of extra length so I used four of those as a test piece.
In this shot, I'm using a regular wood-cutting circular saw with a narrow carbide-tipped blade to cut the sheet steel of the panel. That worked quite well, with clean, burr-free cuts.
In this shot, I'm using a regular wood-cutting circular saw with a narrow carbide-tipped blade to cut the sheet steel of the panel. That worked quite well, with clean, burr-free cuts.

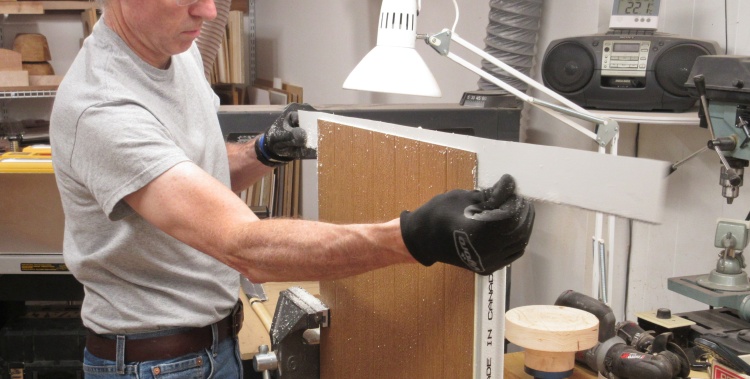
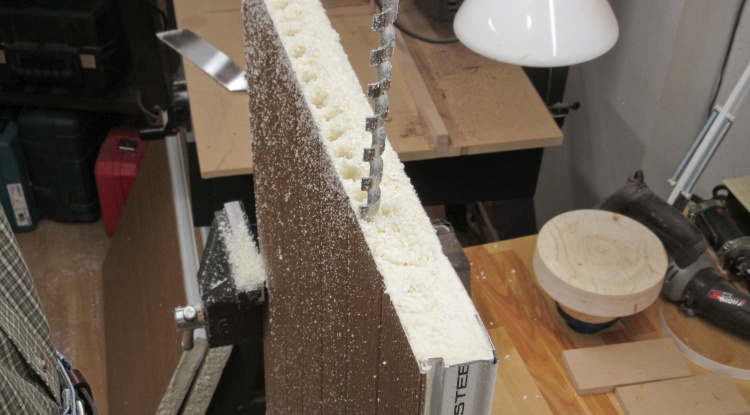
Cutting internal insulation
After cutting the back and the two edges as well, the piece was just held on with the rigid polyurethane insulation. I sliced through that using a pruning saw.
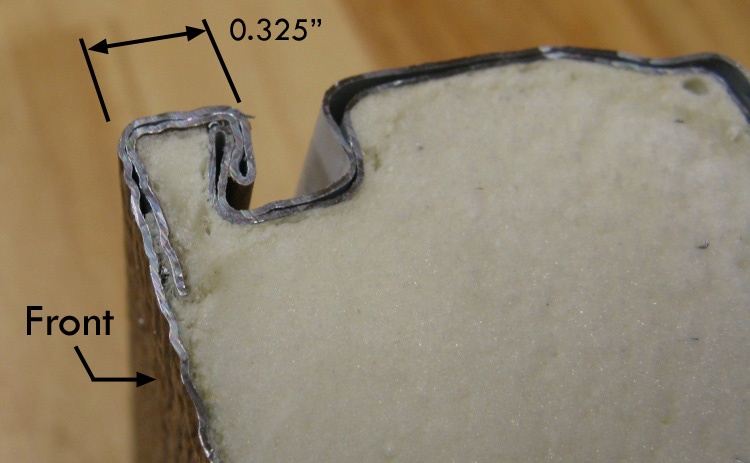
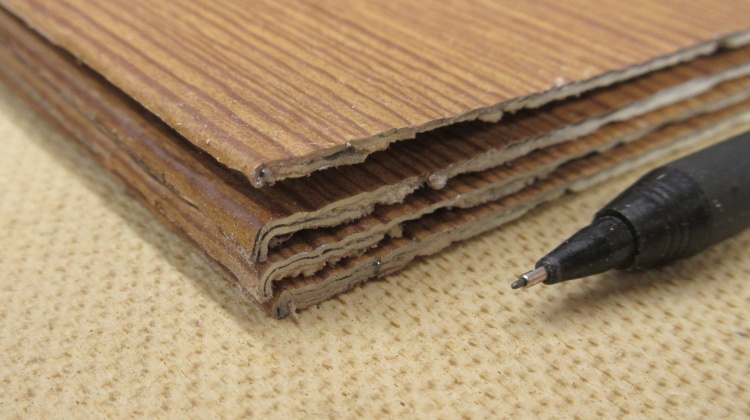
The profile
This photo shows the profile of the door after cutting, and it looks pretty similar to the drawing. The original plan was to remove everything from the front section, leaving a piece that would have been 0.32" thick to be added to the door.
Unfortunately, the door was already 1-3/4" thick which is about as much as a standard lockset can handle. You can theoretically get hardware for thicker doors but they are very rare and since this lockset also matched two others I didn't really want to change it.
I considered door frame changes or mounting changes or a thinner door but those all brought their own sets of problems. I decided to see if I could thin the fascia further so I could stick with the existing door and lockset.
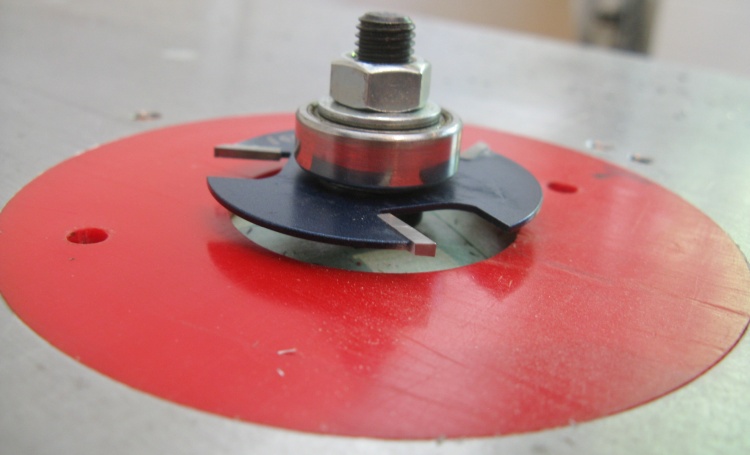
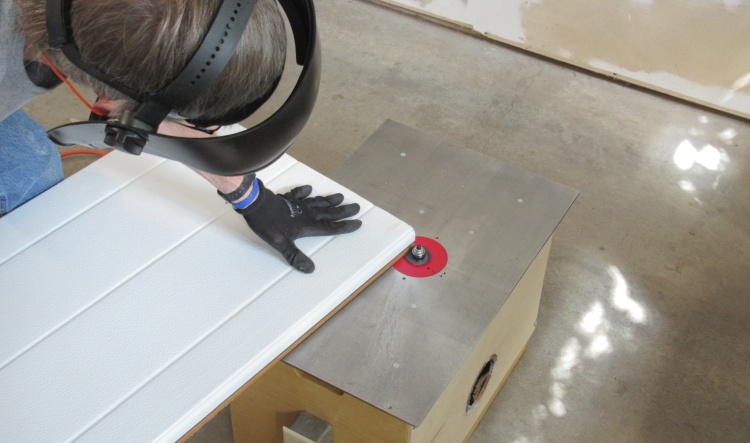
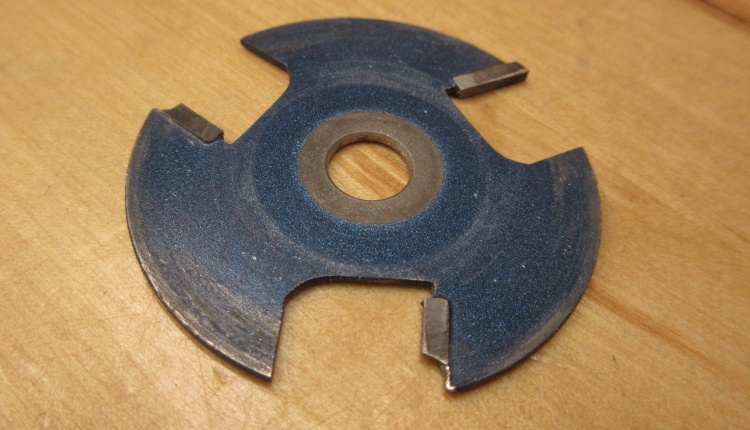
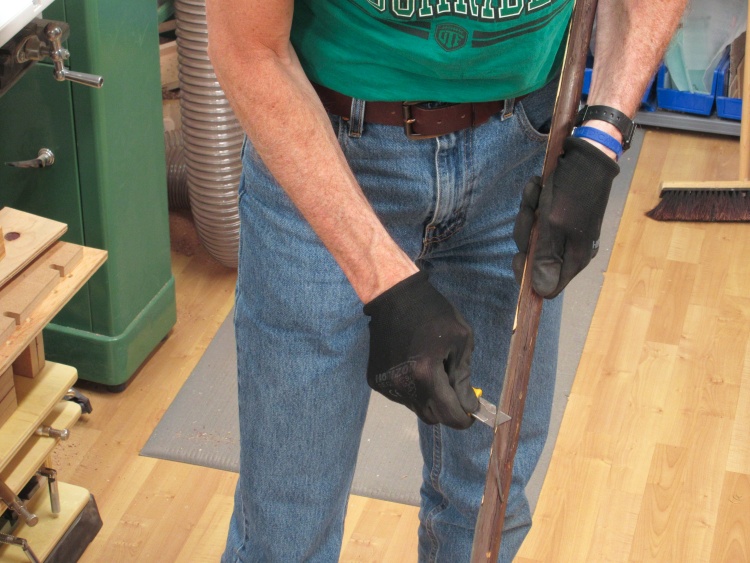
A narrow carbide cutter
To thin the fascia, there's a double thickness of metal to cut through so I looked for the thinnest carbide blade I could find and ended up ordering a couple of Bosch slot-cutting router bits.
This shows one of them mounted to the router table with the cutters on it being only 1/16" thick.
This shows one of them mounted to the router table with the cutters on it being only 1/16" thick.
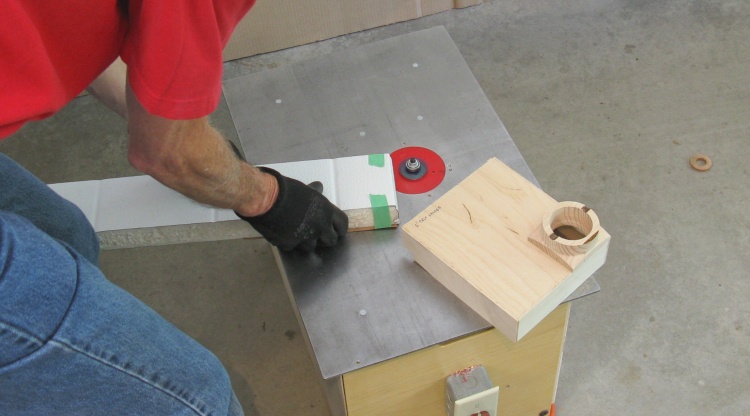
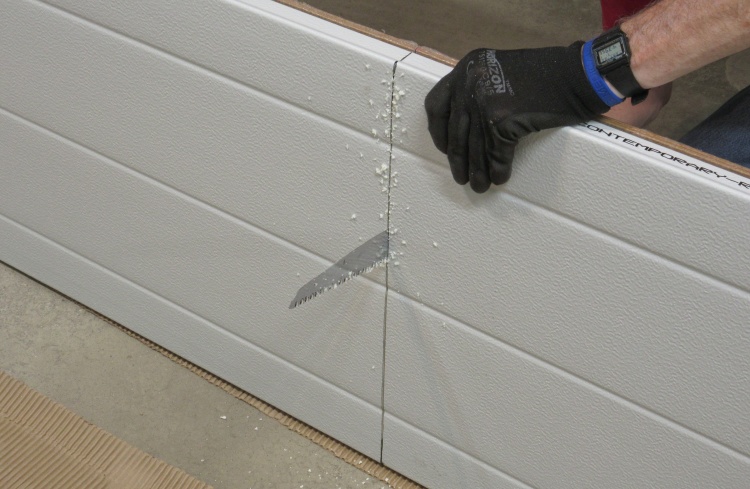
Cutting the folded edge
This shows me cutting through the edge of the folded front of the door section. I did this in the garage to keep metal shavings out of my (much harder to clean) workshop.
A nice clean slice in the out-of-focus edge
This is a shot of the resulting cut. While the photo is fuzzy, the cut is nice and clean and leaves a thickness of only about 0.08" to go on the door.
The skin left when the rest is removed
Down in the shop I chopped through the insulation with a wood saw and then sanded the insulation smooth. That produced this nice thin piece of fascia so I concluded that the thinning technique was going to be workable.
On to the Real Thing
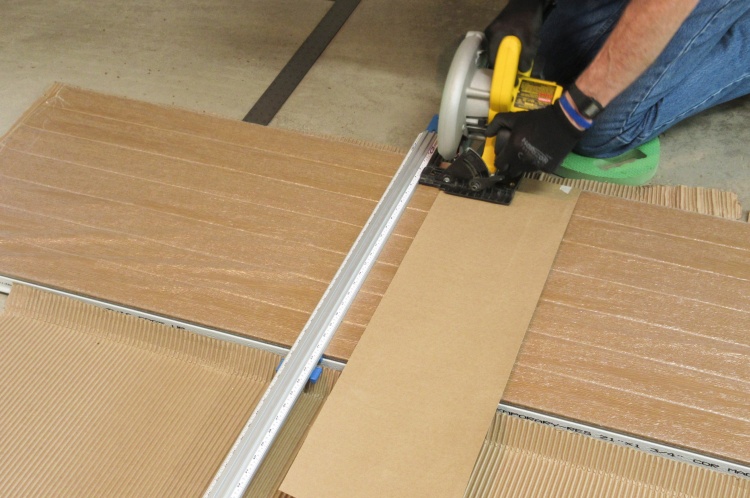
Starting a cut on the first door-width section
With the theoretical and practical framework of thin panel production solidly established by the rigorous test process, I felt confident moving on to the door panels.
I used the same cutting techniques as the test panel, except I interposed a thin strip of cardboard to prevent the saw bottom from scratching the fascia (the assumed source of some scratches on the test piece).
I used the same cutting techniques as the test panel, except I interposed a thin strip of cardboard to prevent the saw bottom from scratching the fascia (the assumed source of some scratches on the test piece).
Clamping on a support to hold section vertical
To cut the edges, the door section was held vertically by clamping it to a piece of plywood using a bench clamp with the conveniently correct geometry.
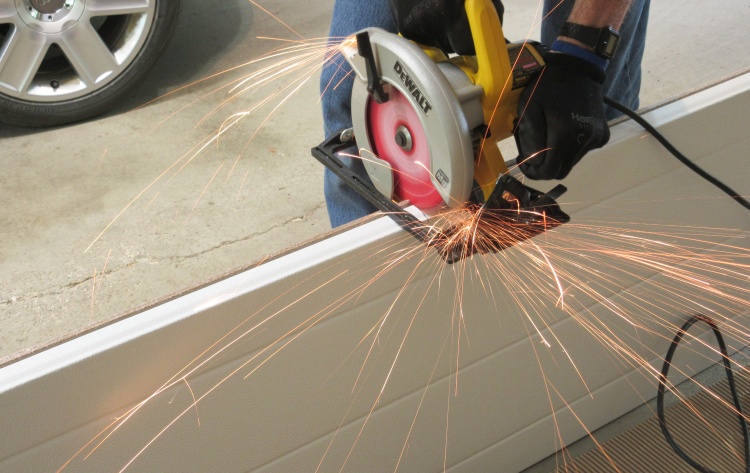
Thicker metal on the edges generated proportionally more sparks
The extra layers of folded-over metal on the edges generated an extra helping of sparks when cut.
I wore a full-face shield for all the metal cutting operations.
I wore a full-face shield for all the metal cutting operations.
Separating a piece
Once the four sides were cut through with the circular saw, I again used the pruning saw to cut through the insulation and free the section.
The four pieces I'll need
Eventually I had the four door-width panels that I'd need.
Slicing the edge on the router table
As with the test piece, the folded edges of each of the door-width pieces were sliced using the router.

The blade in action
A shot of the edge cutting in action.
The first blade got a bit...worn
I wasn't sure how long the blades would last so I bought two. Good thing since this is the first blade after the cutting was just over half done.
The panels were 21 x 31-1/2" so anything I used for cutting through the insulation was going to need to be pretty long. Having nothing appropriate I thought I'd make up a quickie long saw that could reach from side to side. I cut a 38" piece of aluminum as a back and then taped to it a piece of a used bandsaw blade (yes, it is very good tape). Here's a couple shots of the saw construction.
Cutting a strip of aluminum
Taping on some teeth
Trying out the long saw
I tried out the long saw on the first of the door-width pieces. It sort of worked but there was too much resistance probably since the saw kerf was too narrow. Operating it with two people didn't help much either.
Sue suggested drilling out some of the insulation which would be a silly suggestion unless you had a huge long drill bit.
Sue suggested drilling out some of the insulation which would be a silly suggestion unless you had a huge long drill bit.
Plan B: Drill first
Which I did. I tried drilling holes (1/2" diameter) along the front of the panel to remove material like this.
Cutting through with dozuki saw
Then I attacked the remaining insulation with the Dozuki saw, coming in from the top and sides. That worked pretty well. Thanks Sue!
Trimming off too-thick insulation
I did the drill-and-saw treatment from both ends, and that was enough to free the fascia.
The insulation was pretty thick especially near the middle so I sliced it thinner using my foam-cutting knife.
The insulation was pretty thick especially near the middle so I sliced it thinner using my foam-cutting knife.
The back after sanding
Then I got out the random orbital sander set to it's most aggressive action and with some 40 grit attached, sanded the foam flat until it was level with the plank-defining indents.
That gave the nice flat back as seen here.
That gave the nice flat back as seen here.
Back to the drill...
Then it was back to the drill/saw routine for the other three panels.

Four sections done
The process was pretty messy but after only a couple hours I had all four panels done.
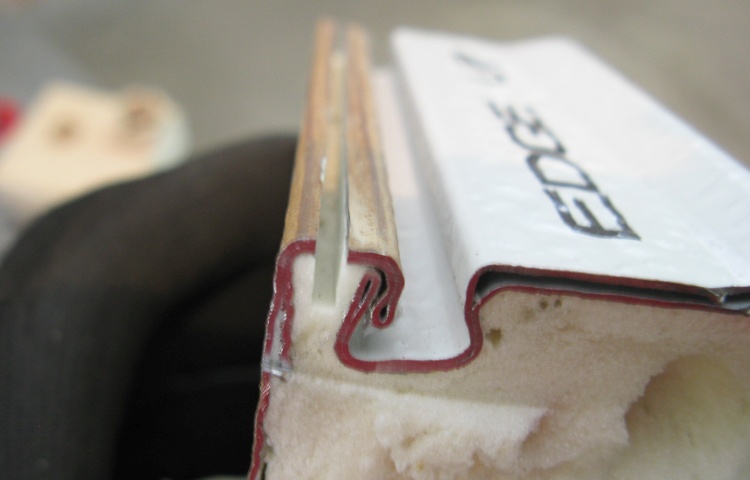
A close-up of the edges
This shows a close-up of the edges. A couple panels are somewhat thicker at the edge but fortunately that wasn't obvious when they were mounted on the door.
Modifying Door
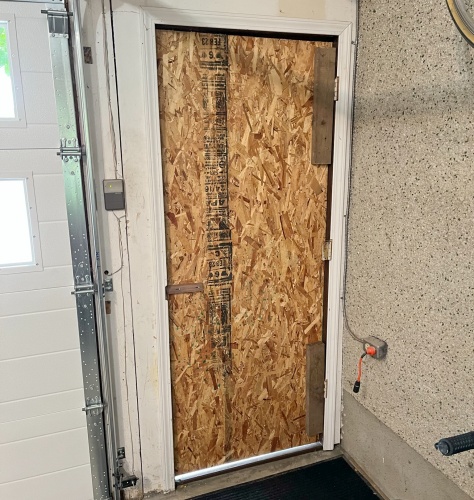
Temporary OSB door
I figured it would be a pain to try to work on the door while it was still mounted so I needed a replacement for door duties while the fascia work got done. I had a sheet of 7/16" OSB cut to door-size and with some scrap 2x4s, attached that to the hinges as a temporary door.
It worked fine to keep the weather and varmints out for the week or so it was in place.
It worked fine to keep the weather and varmints out for the week or so it was in place.

...with custom walnut latch!
I didn't bother with a lockset but I whipped up a quickie manual latch out of a scrap of walnut that would hold the door closed by sliding it into the jamb.
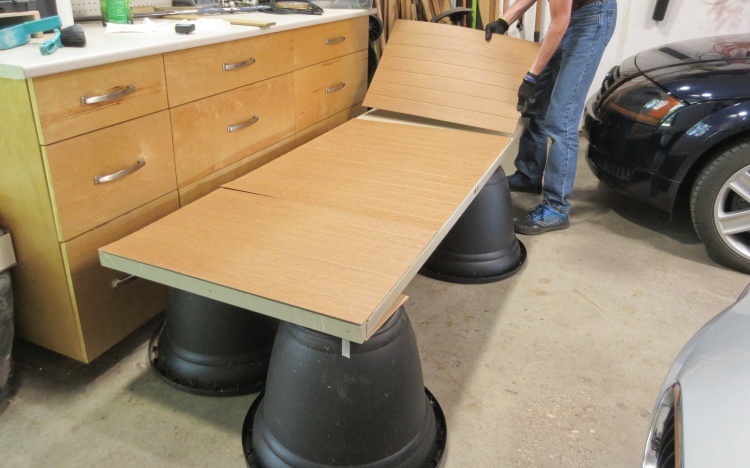
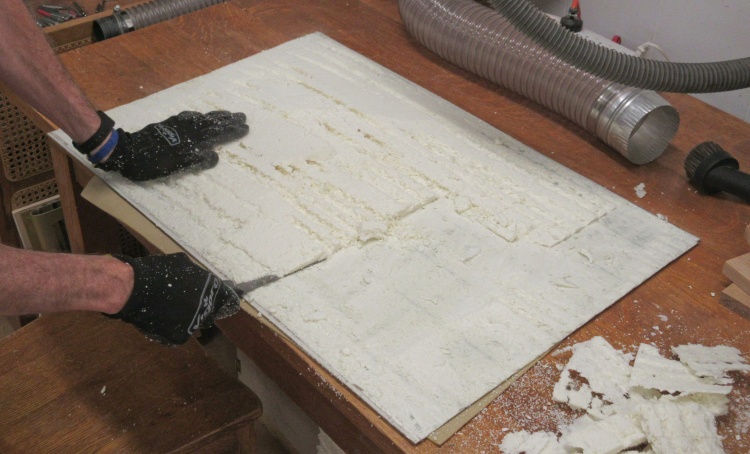
Test-fitting the fascia pieces
The first step was to sand and paint all sides of the door. So much for avoiding painting it again. Oh well, needs must.
After letting the paint dry for a couple days, I tried out the fit of the panels, cutting short the top one with tin snips to exactly fit the door height.
After letting the paint dry for a couple days, I tried out the fit of the panels, cutting short the top one with tin snips to exactly fit the door height.
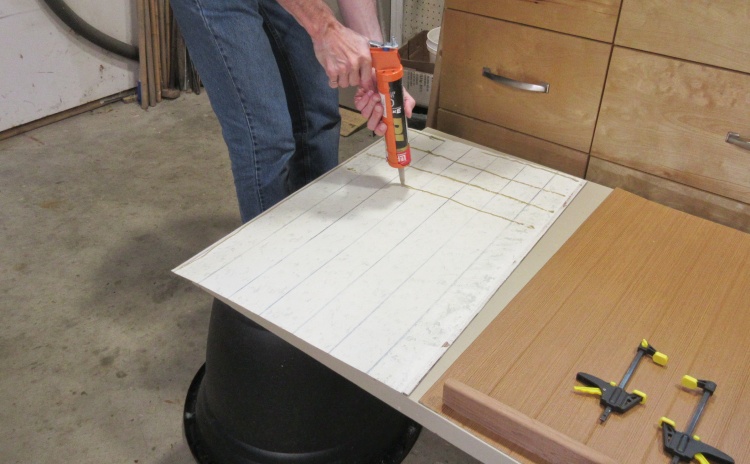
Adding adhesive to the first piece
I used PL adhesive to glue on the panels and then added a small bead of silicone near the top and bottom edges to help weather-seal each section.
Manually squooshing down the glue
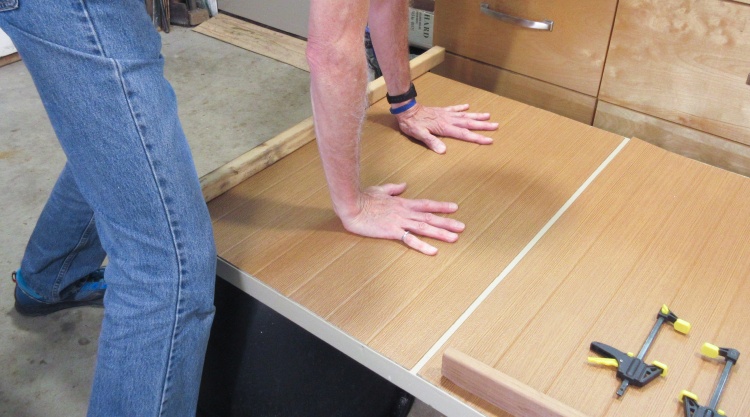
I pressed down on the panel to ensure the adhesive was all in contact and no larger blobs held the panel out.
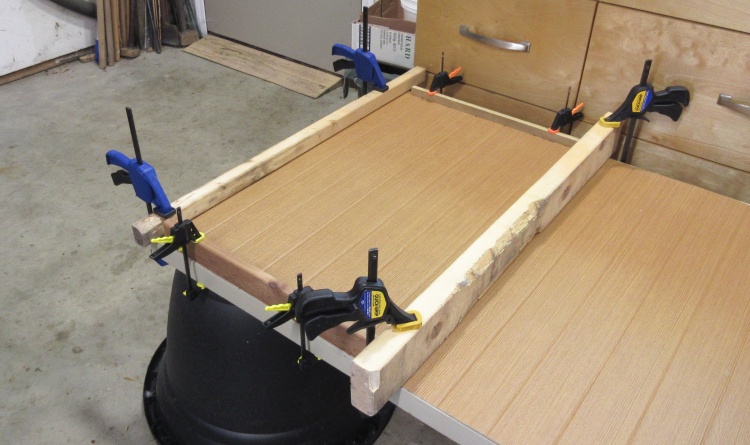
Edges clamped
The four edges were then clamped lightly to ensure the panel periphery was sitting flat to the door.
To ensure the panel stayed flat in the center, I harnessed the awesome power of one of the Fundamental Forces Of The Universe. i.e. I added a nice flat piece of MDF weighted down with a pail of grit.
To ensure the panel stayed flat in the center, I harnessed the awesome power of one of the Fundamental Forces Of The Universe. i.e. I added a nice flat piece of MDF weighted down with a pail of grit.
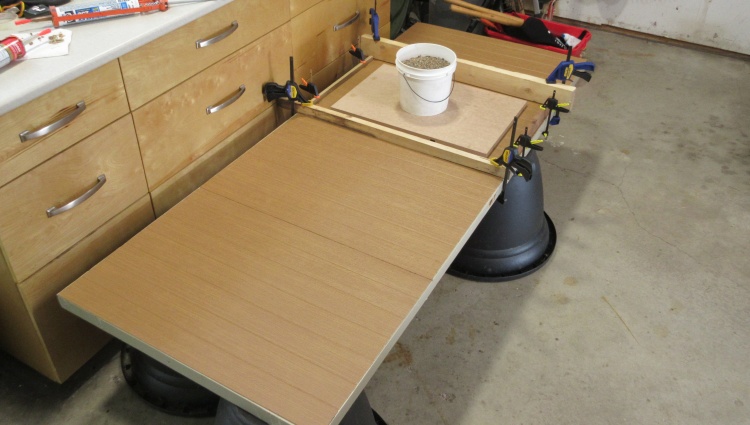
Third section glued (with continuous squoosher)
In this photo I'm up to the third panel with the gluing and the Fundamental Force activator can be seen doing its thing.

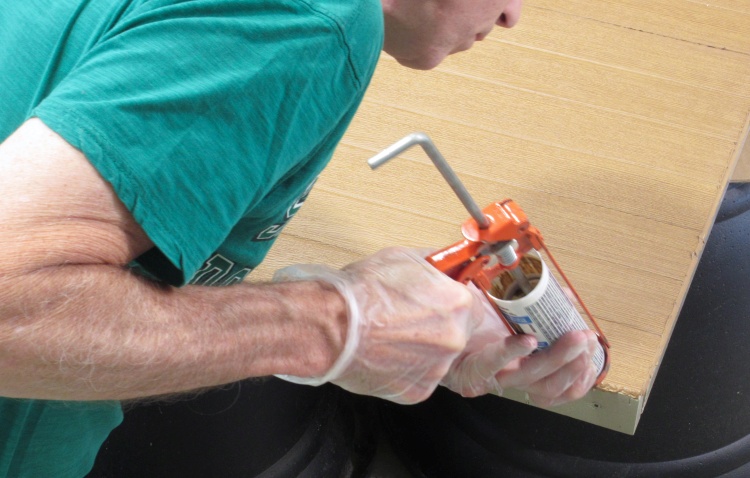
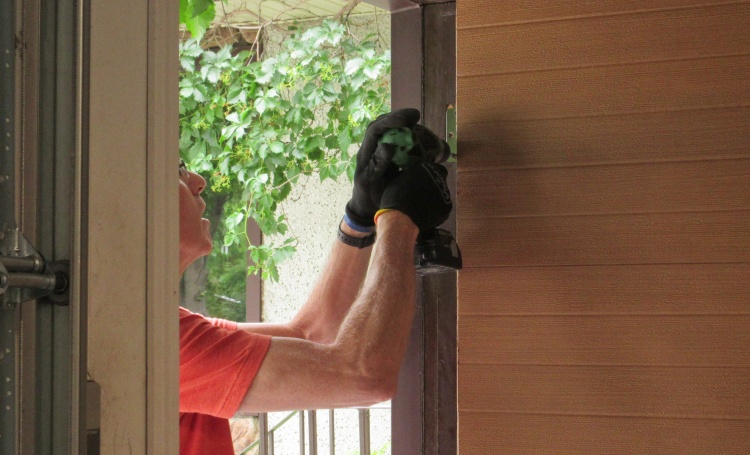
Drilling the hole for the handle
Once tha panels were on and the glue had a chance to harden, I drilled the fascia for the 2-1/8" diameter hole needed by the lockset.
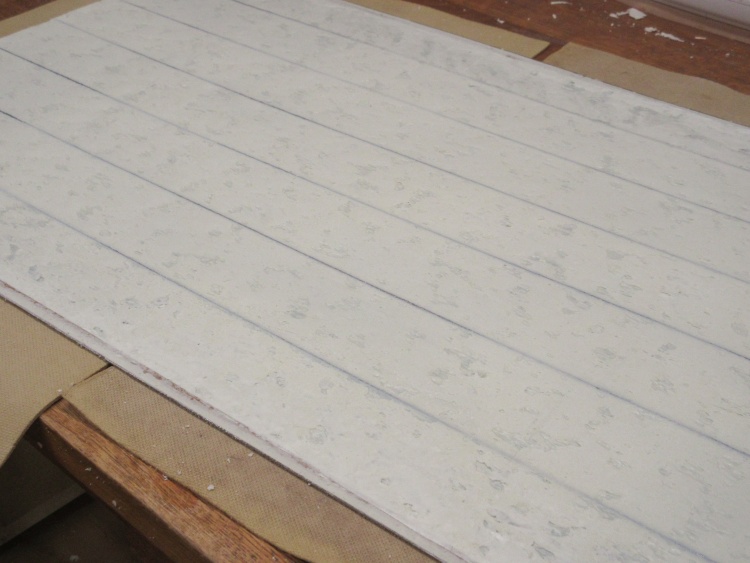
Covering edges with silicone
Finally I sealed/hid the edges of the panels with some surprisingly-well-color-matched silicone.
Stripping old silicone from a door stop
Once the door was ready to go, I pulled off the old door stops since they were going to need to move out a bit. I stripped off the old silicone that had sealed them on one edge and sanded all four sides, then added a couple coats of paint.
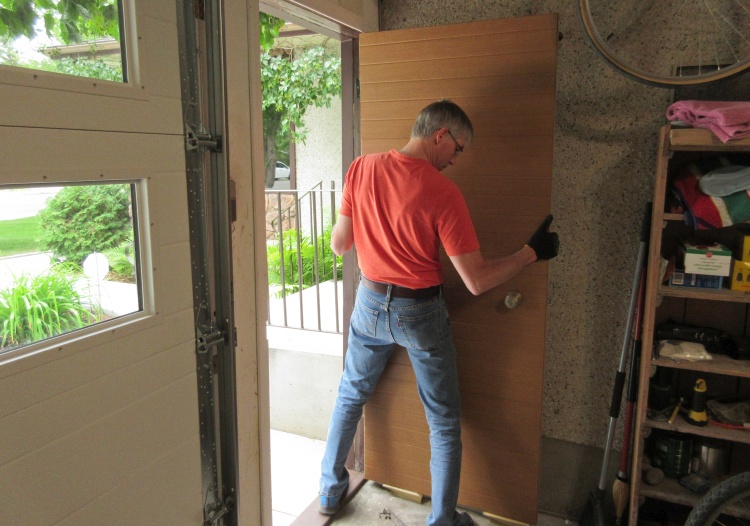
Putting new door in place
Then it was time to put the door in place. I pulled off the temporary door and put the new one in place, setting it on a couple sets of wedges so I could align the hinges correctly with the holes in the door frame.
Screwing in hinges
Then it was just a matter of putting in the hinge screws.
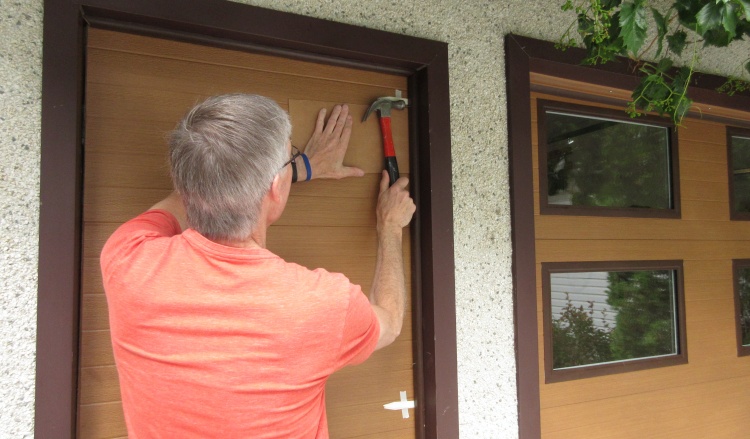
Installing stops
Lastly, the door stops were reinstalled, spaced from the door the industry standard of two plastic plant labels.
A new bottom seal went in as well and the door stops got a bead of clear silicone which pretty much finished things off.
A new bottom seal went in as well and the door stops got a bead of clear silicone which pretty much finished things off.
Done
Complete.


