This page has short sections on a few different jigs that didn't rate a whole page by themselves. The buttons below will jump to the referenced sections.
Horizontal Drill Jig Bandsaw Table RAS Step Jig Vessel Clamp Jig Lathe Grinding Jig
Horizontal Drilling Jig
It's pretty tough to drill into the end of a long object on the drill press. You can build a jig to hold the piece vertically but my drill current press setup prevents that so instead I built a simple jig to allow "end" drilling on the lathe. The lathe spindle is mounted sideways so the jig is for horizontal drilling.
The jig is pretty simple, just being a flat piece of plywood with a side wall and an optional end wall. It mounts in place of the normal tool rest in the lathe banjo (AKA tool rest base).
The jig is pretty simple, just being a flat piece of plywood with a side wall and an optional end wall. It mounts in place of the normal tool rest in the lathe banjo (AKA tool rest base).
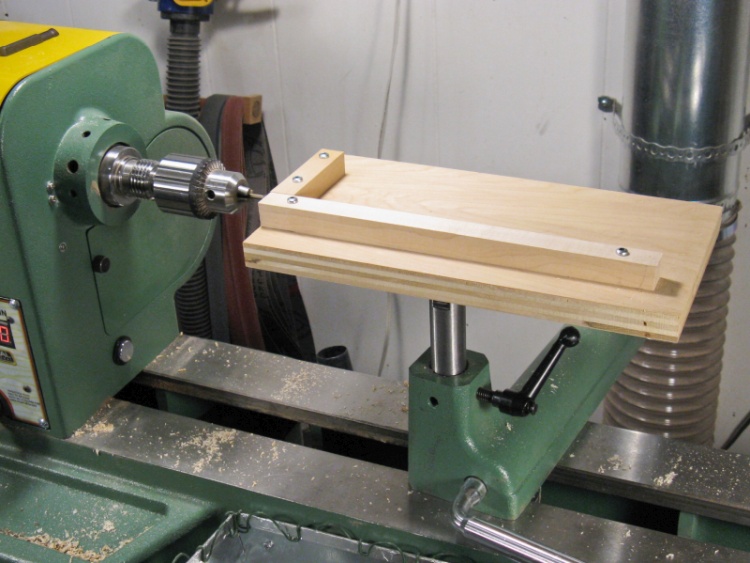
The horizontal drilling jig in place
The jig is just manoeuvred into position relative to the drill bit to get the correct drilling location relative to its base and fence. Then it's locked into place.
The alignment is actually a pretty finicky process to get right. In addition to getting the drill depth correct, you want the fence parallel to the spindle axis and at the correct height and lateral position as well. Getting all of these things right at the same time usually takes a bunch of fiddling, helped along by light cursing. However when locked in place the jig is very stable.
The alignment is actually a pretty finicky process to get right. In addition to getting the drill depth correct, you want the fence parallel to the spindle axis and at the correct height and lateral position as well. Getting all of these things right at the same time usually takes a bunch of fiddling, helped along by light cursing. However when locked in place the jig is very stable.
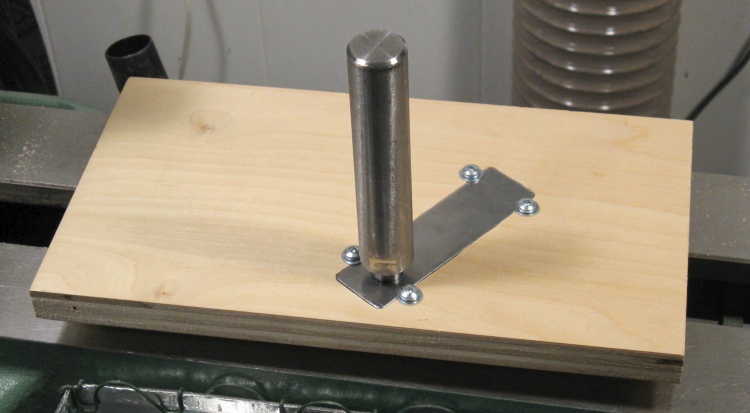
The bottom side
The trick to holding the jig is a flat tool rest. It includes the 1"-diameter post which threads into a flat "box scraper" platform. I've embedded the platform in the plywood and held it in place with four bewashered screw heads.
The platform is angled more towards the front to provide a bit more support longitudinally.
The platform is angled more towards the front to provide a bit more support longitudinally.
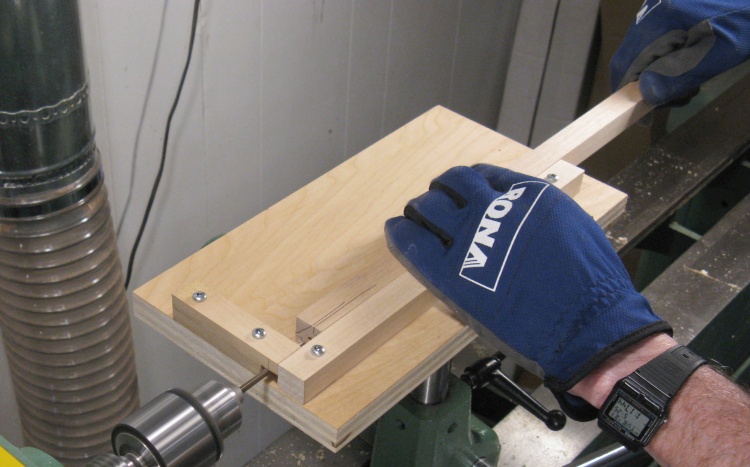
In use
This is an example of the jig in use. In this photo I'm drilling a hole in the end of the square wooden rod which is part of a tool case frame.
The drill bit length is used with the short front fence to control the depth of the hole.
The drill bit length is used with the short front fence to control the depth of the hole.
Bandsaw Table
I mostly end up using the bandsaw for modestly-sized pieces of wood but occasionally I need to chop up some sheet goods. In those cases the table usually isn't wide enough to support the wood, so many years ago I made a table extension. It's constructed from 3/4" MDF and fits around the current table.
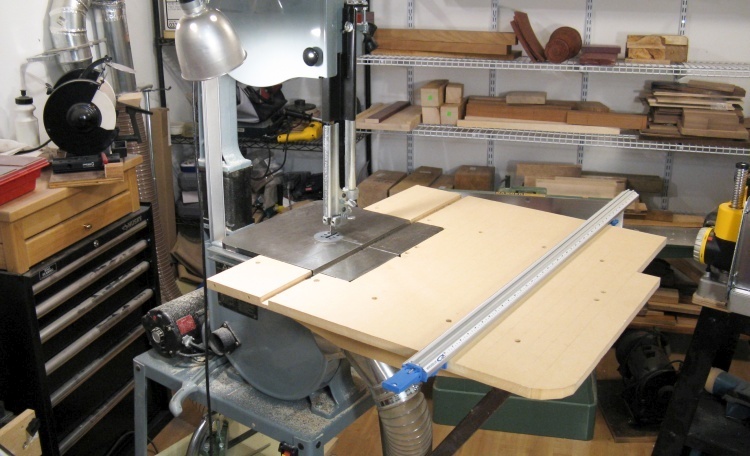
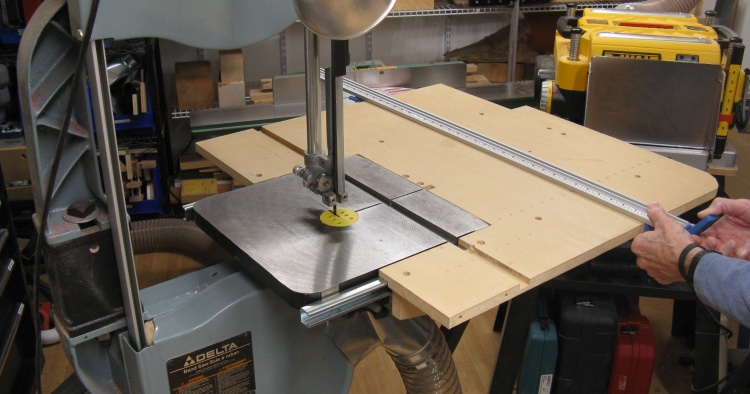
In place
This shows the table (or perhaps more properly the bandsaw table extension) in place with the adjustable fence installed as well.
The table includes a slot to match the one in the metal table for use with a miter gauge as well, although I don't end up using that very often.
And of course a 14" bandsaw like this one is limited to cutting off pieces less than about 13" wide due to clearance to the left of the blade, but that can still be pretty useful.
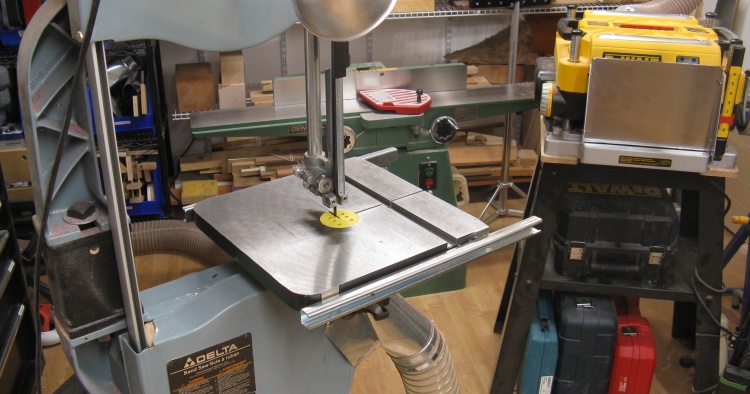
The bare table
The normal table is a cast steel piece which is 14" square. With the blade in the center, that gives only 7" of support on any side.
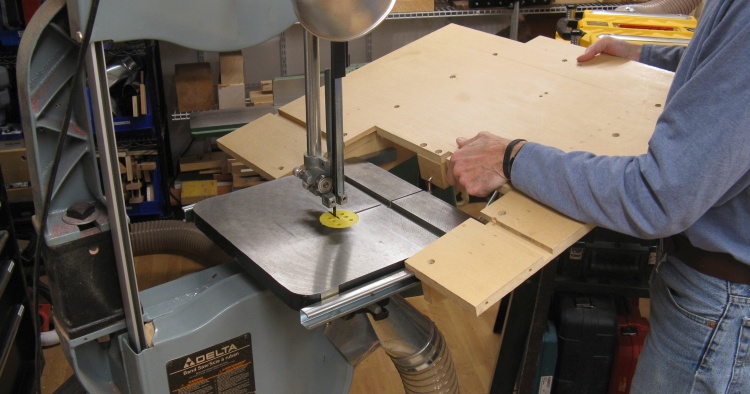
Setting the extension table in place
The table extension fits around the metal table and sits on the C-shaped rails used for the normal bandsaw fence.
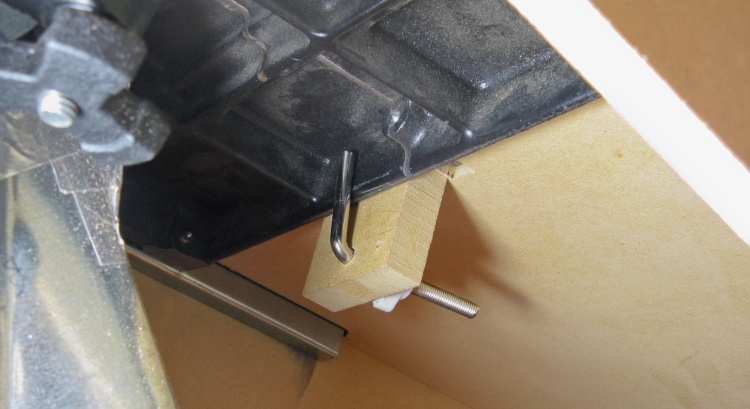
The clamp holding the extension in place
On the underside a simple clamp re-purposed from a clamp-on lamp holds the extension to the edge of the metal table.
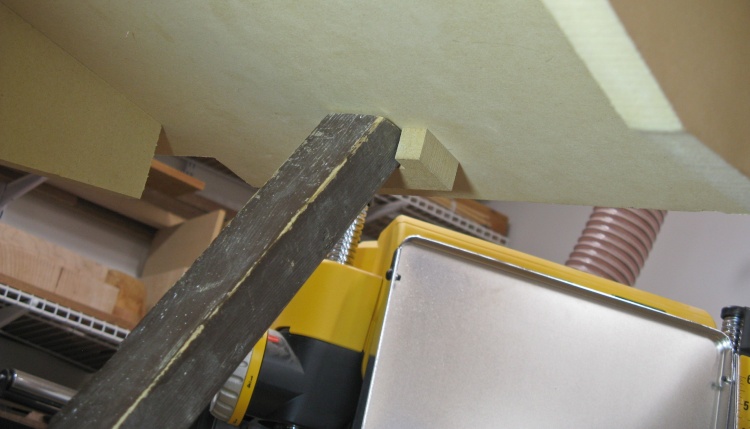
Additional support for the table side
And on the right side I included a diagonal strut to provide additional support. It just fits over the bottom rail of the bandsaw stand and into an open socket on the table underside.
Attaching a clamp-on fence
I usually use a low clamp-on fence as a cutting guide. It can be set up to 24" away from the blade.
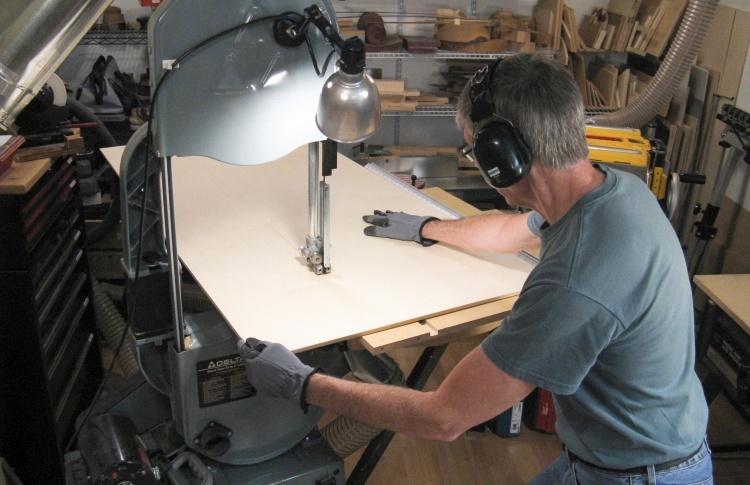
Cutting a plywood sheet
And this shot shows the table in action, cutting a plywood sheet.
For long pieces like this, I usually use a roller stand to support the wood as it comes off the bandsaw.
For long pieces like this, I usually use a roller stand to support the wood as it comes off the bandsaw.
Radial Arm Saw Step Jig
I was cutting some slots using the radial arm saw and wanted a way to make sure they were evenly spaced. I knocked together this little jig to help with that.
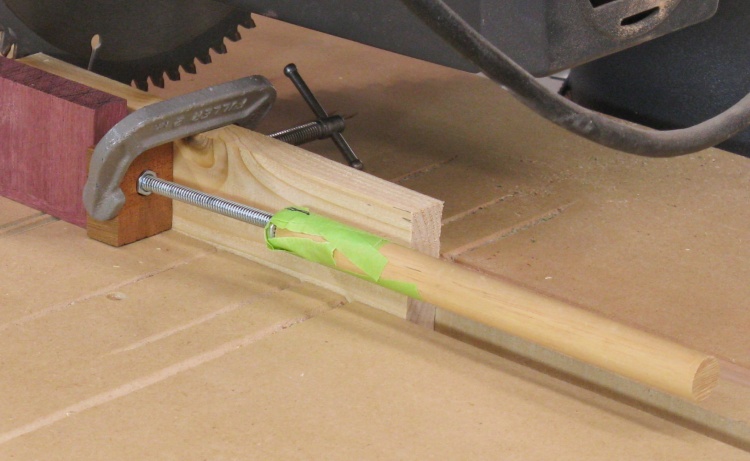
The jig, clamped to the saw
The jig just consists of a long 1/4-20 nut press-fit into a small piece of wood, combined with a longish T-bolt with a taped-on dowel as a convenient handle.
The wood to be cut is positioned by placing it against the end of the bolt.
The wood to be cut is positioned by placing it against the end of the bolt.
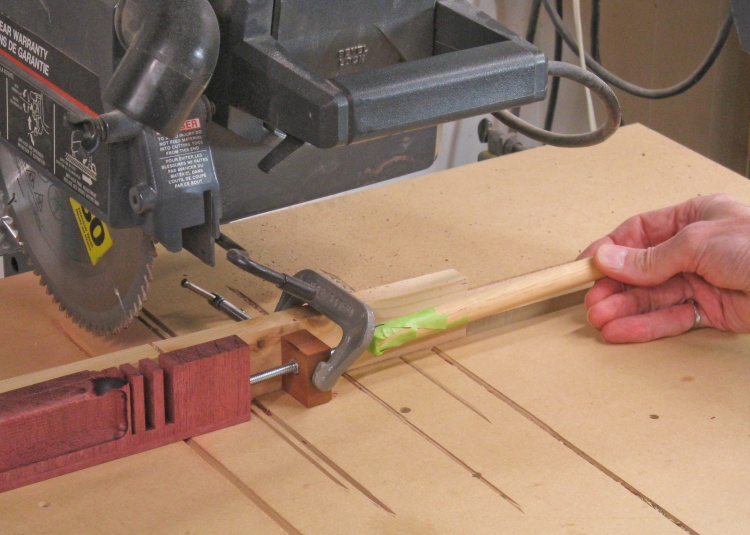
Turning the handle to do a "step"
A full turn of the handle moves the bolt end by 1/20". I just made a list of how many turns were needed to correctly position the wood for each cut. By estimating fractions of a turn (E.g. 3.7 turns) it's possible to position the bolt end within .005" or .01" of the desired spot.
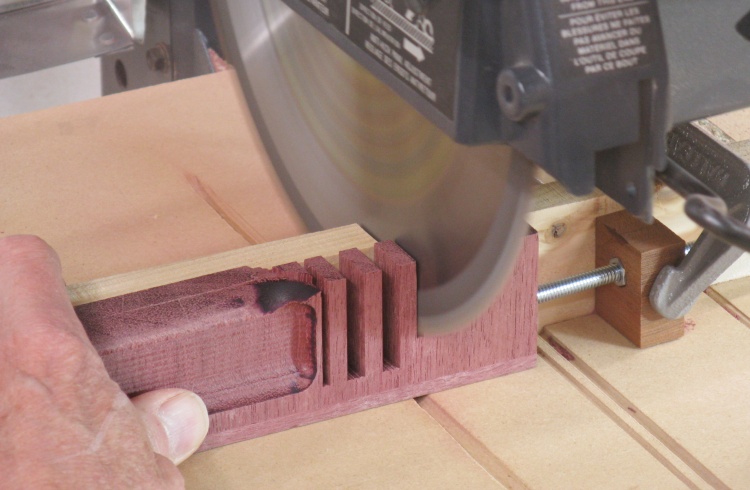
Saw cutting a new (precisely-spaced) slot
A nice action shot of cutting one of the slots.
Hollow Vessel Clamp Jig
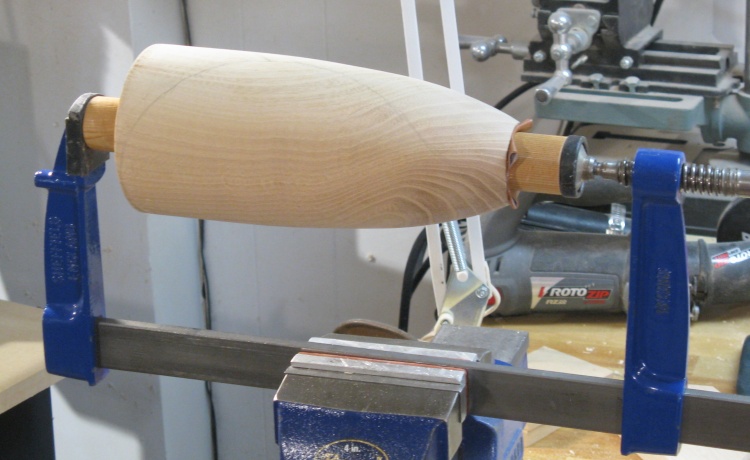
I've done a number of turned-and-carved vessels and holding the turned vessel solidly for carving can be a bit tricky. I've used a few different techniques and this is one of them that I've used a couple times. You don't want to squeeze the sides of round vessel in a vise since that could easily crack it. Even holding then ends is an iffy proposition unless the sides are straight. This technique clamps just the bottom of the vessel and stabilizes the top with a custom ring spacer.
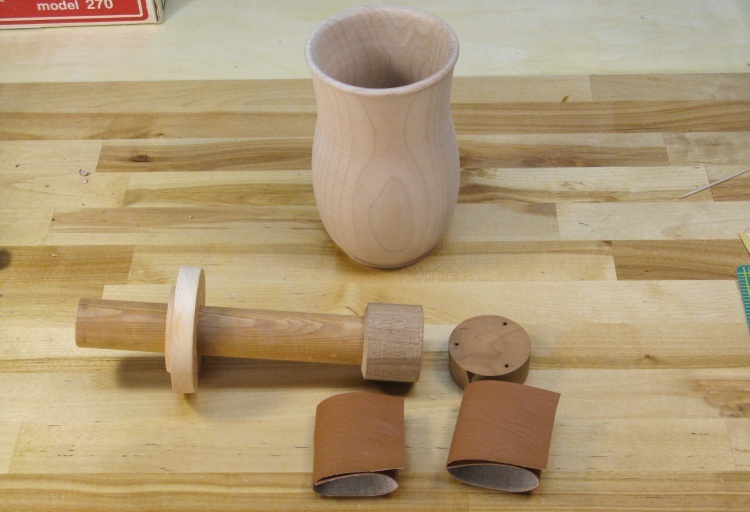
The jig with a waiting vessel and clamping accessories
The jig is simply a dowel to reach in and clamp the bottom in combination with a appropriately-sized ring. The ring can slide on the dowel although it is a tight fit. On this one, I've also added a larger bottom to spread out the clamping pressure more widely.
The "accessories" include a disc to distribute clamping pressure on the outside of the bottom and two fake-leather pads to prevent marring of the vessel by the jig.
The "accessories" include a disc to distribute clamping pressure on the outside of the bottom and two fake-leather pads to prevent marring of the vessel by the jig.
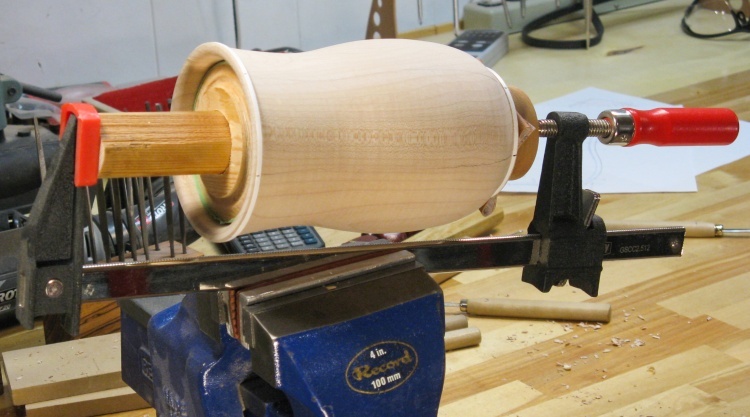
Vessel in the vise with the help of a bar clamp
The dowel reaches in to contact the bottom and the large bar clamp squeezes the bottom via the dowel and the outside wooden disc. The ring is slid in to be tight with the sides of the vessel and prevents any side-to-side motion.
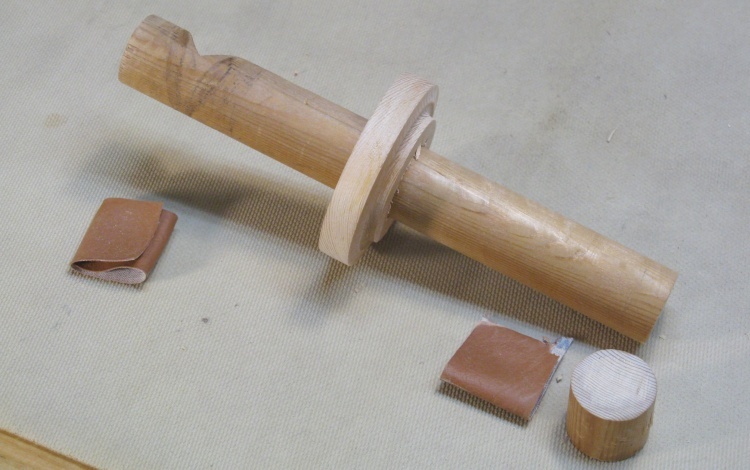
A jig for a smaller-bottomed vessel
This is another version of the jig, but made to fit a slightly taller vessel with a smaller bottom..
Ready for carving
This is mounted the same way as the previous vessel.
Lathe Grinding Jig
I've had a few situations where I've wanted to use the lathe to rotate a piece, but couldn't use standard lathe tools for one reason or another - the piece was too weak, not round or whatever. I occasionally resort to using a grinder to remove wood with low pressure but trying to hold a grinder steady enough is tough to do. I made up this adapter to hold a small cordless rotary tool in an adjustable dial indicator gauge stand. It holds the grinder in place and allows for small adjustments of the position.
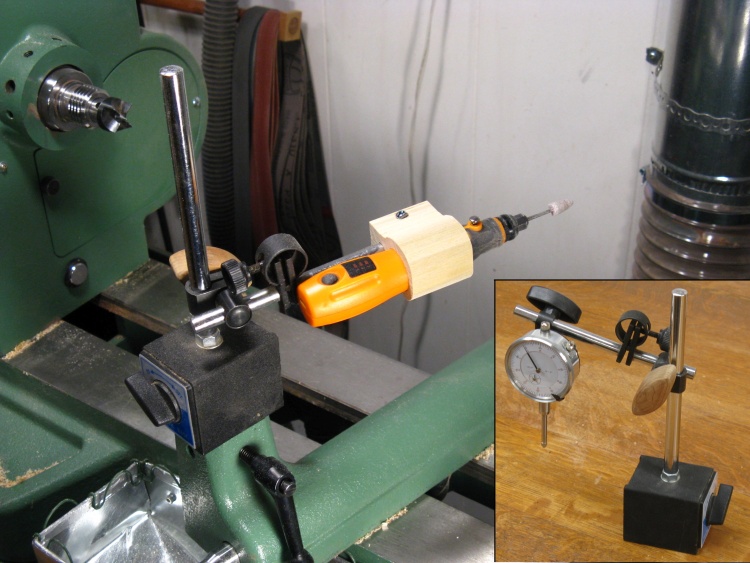
Grinding jig set up on the lathe tool rest base
The jig is a wood collar that fits around the rotary tool which then replaces the dial on the dial indicator setup.
The magnetic base is activated to hold the system in place at a suitable location and angle and then the position adjustment knobs and fine-adjust mechanisms allow for positioning of the grinder bit.
The magnetic base is activated to hold the system in place at a suitable location and angle and then the position adjustment knobs and fine-adjust mechanisms allow for positioning of the grinder bit.
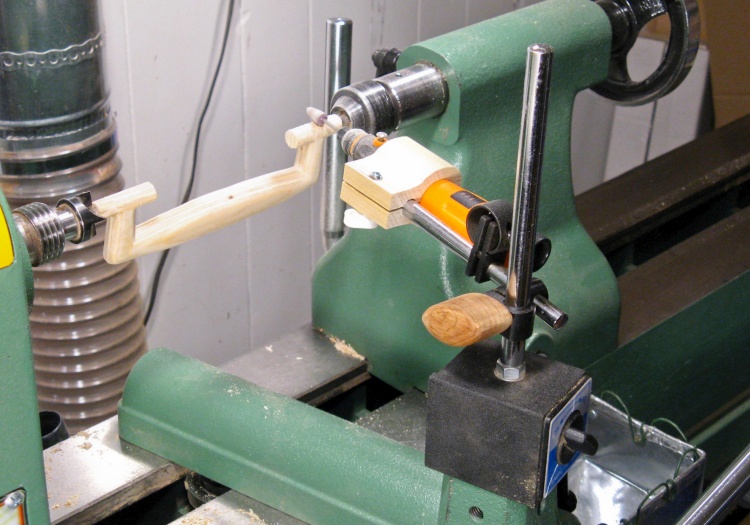
Helping to grind an inner flange round
This is an example of the jig in use. I needed to make the flanges of this handle round but obviously you can't get to the inner ones with the handle spinning. Instead I used the grinder and just rotated the handle manually - not a speedy operation, but it got the job done.


