I didn't have any significant projects on the go so this is-it-really-worth-doing-for-just-one-more-slot? knife block got an easy thumbs up from the Projects Approval Committee. It helped that I had some uncommitted cherry planks languishing on a shelf in the shop.
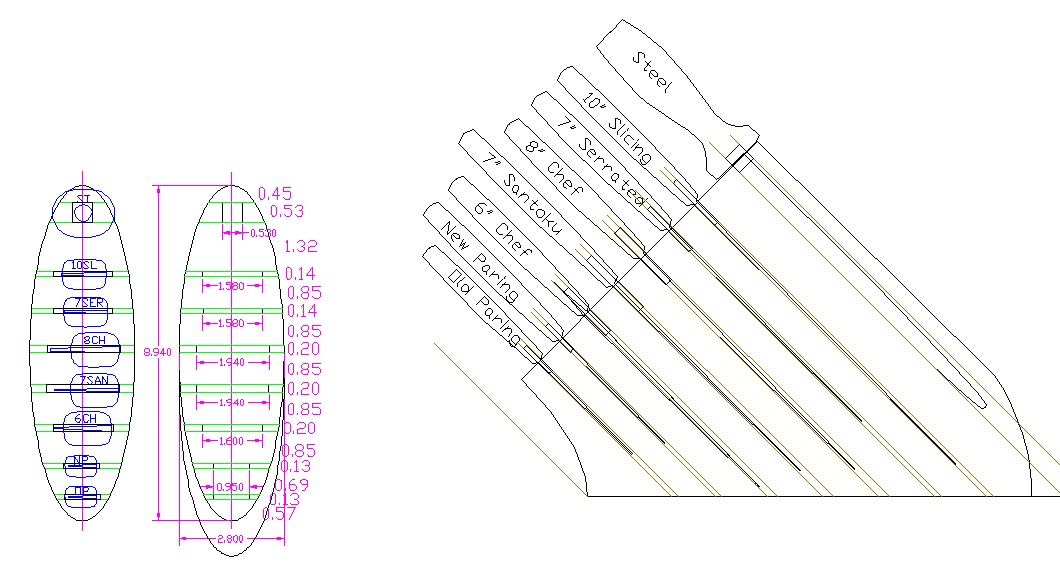
As for the design, I still liked the original laminated approach and after looking at options for knife block shapes I found the vast majority were either a boring variation of rectangular or some wierd impractical approach; after that the original eliptical cross-section was looking pretty good. I examined a few variations on that as well but ultimately opted for the same "pure" design as the original, just one slot longer.
And yes, I could have planned for extra slots but I figured we had enough knives already, plus the knife block was already going to be pretty big.
A bunch of variable-thickness planks + glue = knife block
Knife Block Blank
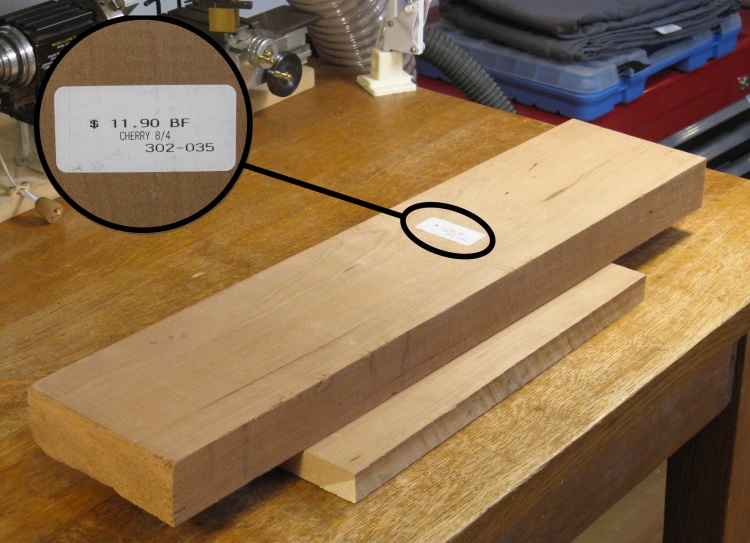
It would take both of these planks
I had a nice thick plank of cherry but that wasn't going to be quite enough so I grabbed another smaller piece that would make up the deficit.
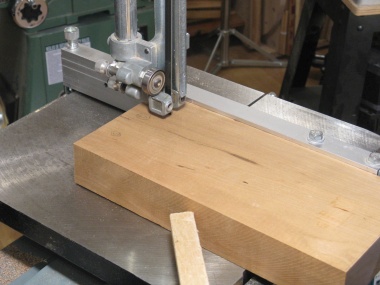
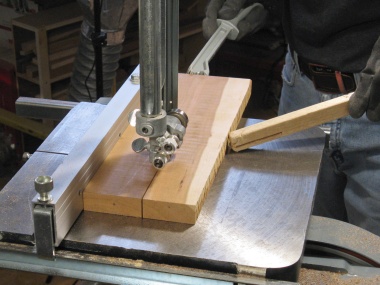
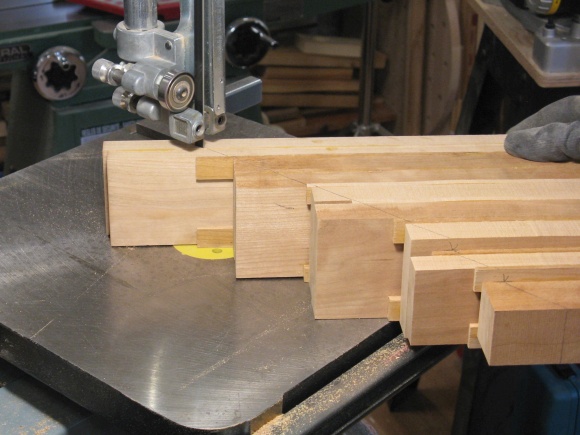
If I was writing a patent application, it would say that the knife block is formed from a plurality of wooden layers, arranged in such a manner as to provide slots for insertion of the knives and appropriate spacing for handle access. After some careful planning about the best way to get those layers out of the planks, I started cutting things up with the radial arm saw and the bandsaw. These shots show a few of those operations.
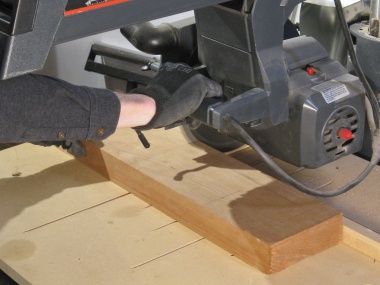
Chopping up the thick plank
Cutting an appropriate width
Working on the thinner plank
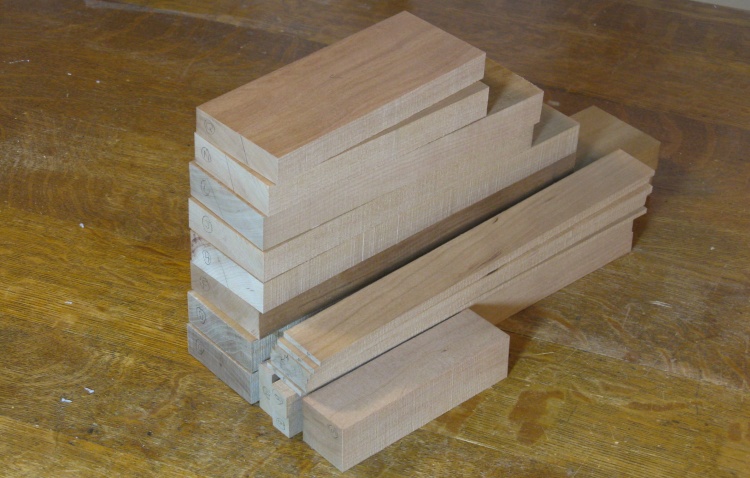
All of the pieces roughly cut out
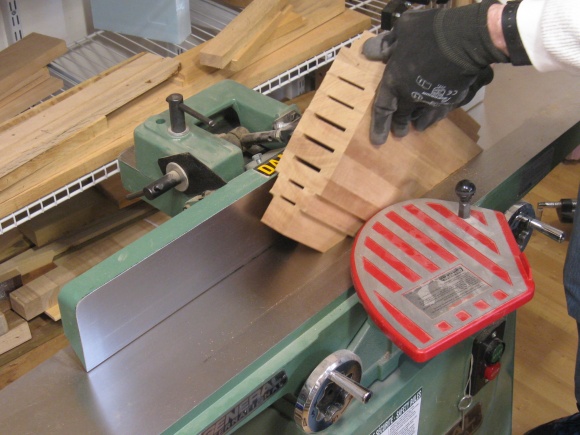
This is the resulting pile of pieces, cut a bit oversized. They will all need to be taken down to the correct thickness.
There were lots of pieces so I decided to use the drum sander rather than the planer since the latter requires a bunch of extra work to avoid the snipe that would ruin a laminated block like this one.
There were lots of pieces so I decided to use the drum sander rather than the planer since the latter requires a bunch of extra work to avoid the snipe that would ruin a laminated block like this one.
The drum sander is slower than the planer but less labour-intensive since it doesn't need the parts to be taped down to a sled to prevent snipe. Plus it's less risky - the planer will sometimes grab an imperfectly-secured piece and ruin it and/or shoot it out of the machine. The drum sander is several stops more "zen" than the planer, and I'm all for maximizing zenness.
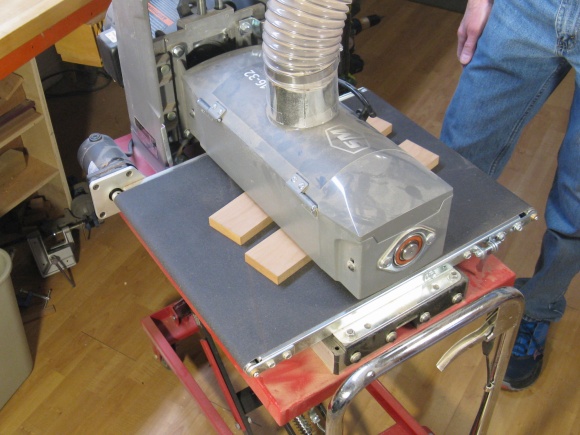
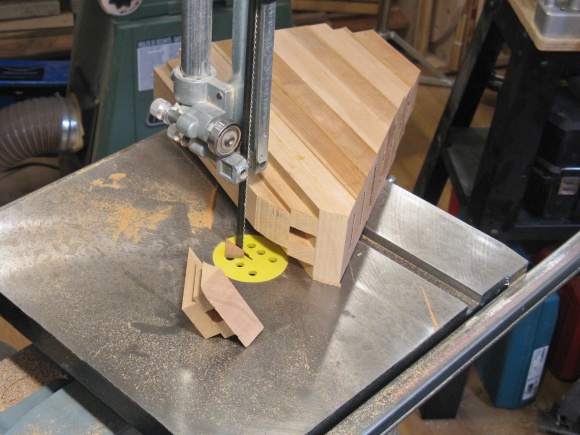
Contemplating life whilst the sander slowly does it's thing
Doing it's thing on some thinner layers
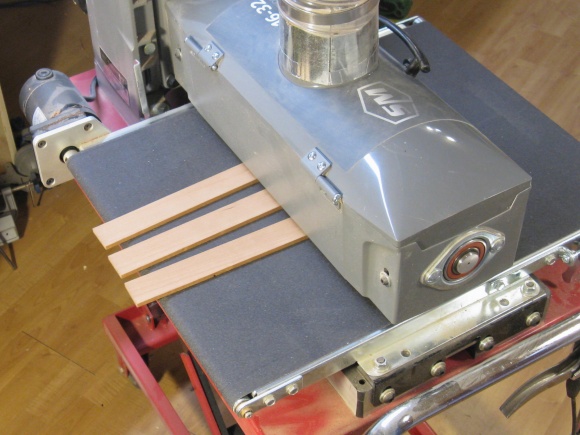
All the knife-opening spacers ready to go
The thin pieces of wood (either 0.14" or 0.2" thick) were used for establishing the slot heights for the knives.
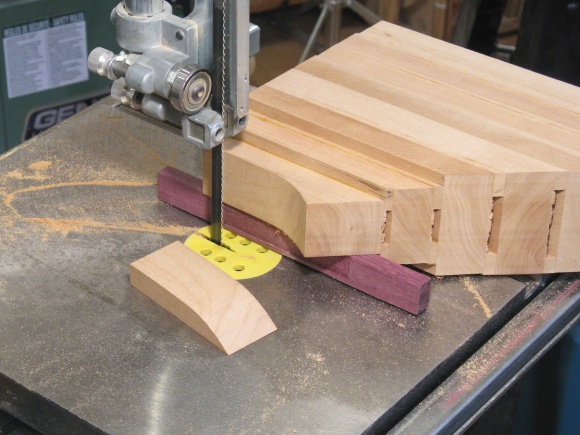
After they were sanded to the appropriate thicknesses, they were each cut in half to make two pieces that would flank the slot.
After they were sanded to the appropriate thicknesses, they were each cut in half to make two pieces that would flank the slot.
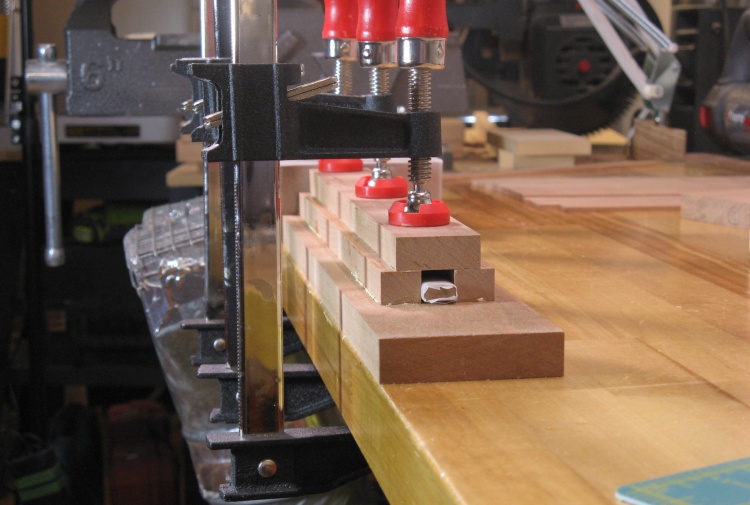
The first three layers being glued
Then with all the pieces correctly sized, it was time to start gluing.
This three-layer stack (which has the squarish hole for the sharpening steel at the top of the block) was done first.
I included a spacer in the slot to make sure the width was correct. Wrapping the spacer in wax paper prevented it from being accidently glued in place.
This three-layer stack (which has the squarish hole for the sharpening steel at the top of the block) was done first.
I included a spacer in the slot to make sure the width was correct. Wrapping the spacer in wax paper prevented it from being accidently glued in place.
Here are a couple of in-process gluing shots. The three-layer stack from the previous photo is being glued to the next (previously-glued) three-layer stack.

Spreading glue
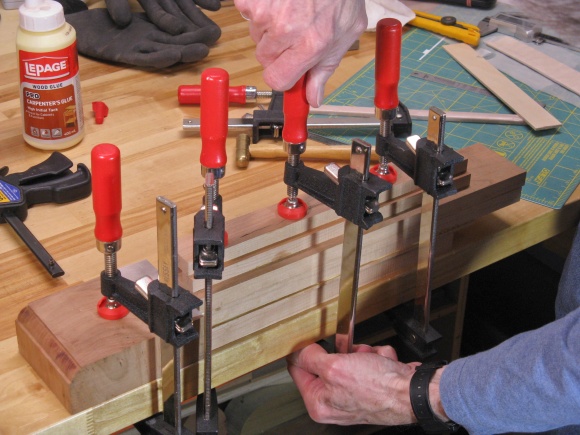
Adding a screw clamp
Gluing about halfway done
When I made the original knife block I glued multiple layers at once. Despite having wood pins to align the layers, that still resulted in layers sliding around when put under clamp pressure. These days I limit the number of layers glued. That also let me just align the parts by hand rather than rely on a much-more-complex arrangement with alignment pins through the layers.
This is another three-piece gluing operation; the now-solid top six layers are being glued to the solid bottom three layers with a thin knife-slot layer between them.
This is another three-piece gluing operation; the now-solid top six layers are being glued to the solid bottom three layers with a thin knife-slot layer between them.

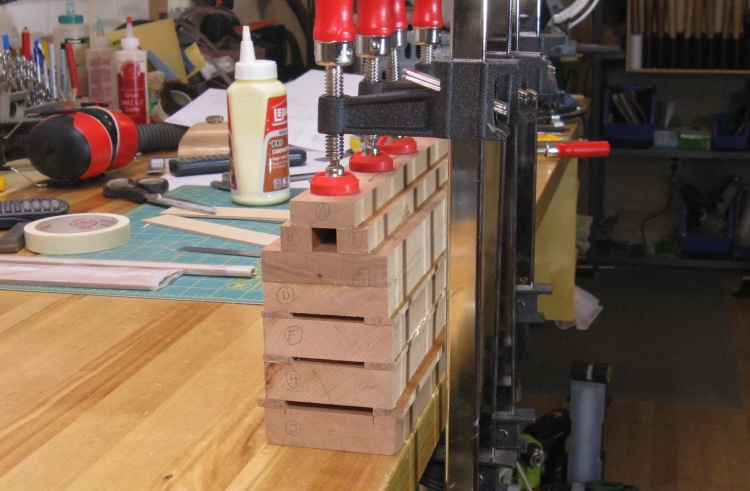
The final gluing stage
I kept making three-layer stacks and adding them on with this photo showing the final gluing.
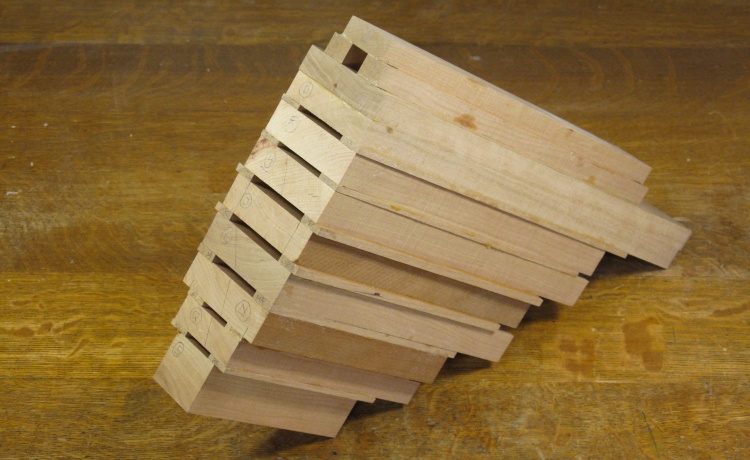
The knife block, just needing some sanding
The final result was the full stack of 18 layers shown here.
Shaping

Starting by sanding the main face
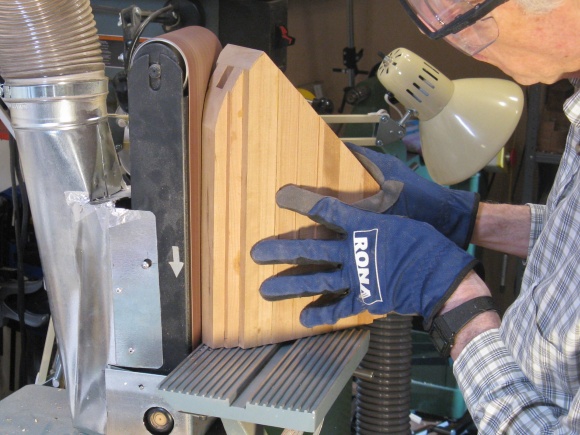
OK. Then it was time to get the rectangular-block stack into something a whole bunch smoother.
The first thing I did was to even out the face of the knife block where the knives go in. The belt sander did a nice job of that.
The first thing I did was to even out the face of the knife block where the knives go in. The belt sander did a nice job of that.
Next was dealing with the ragged bottom. I started by cutting off the excess freehand on the bandsaw and then straightening the surface with a few passes over the jointer.
Trimming the bottom
Flattening the bottom on the jointer
The design called for a rounded rear edge and a curved front. Both of those were started with appropriate cuts of the bandsaw.
Rounding the rear edge
Trimming the front edge

Tracing a nice ellipse onto the top
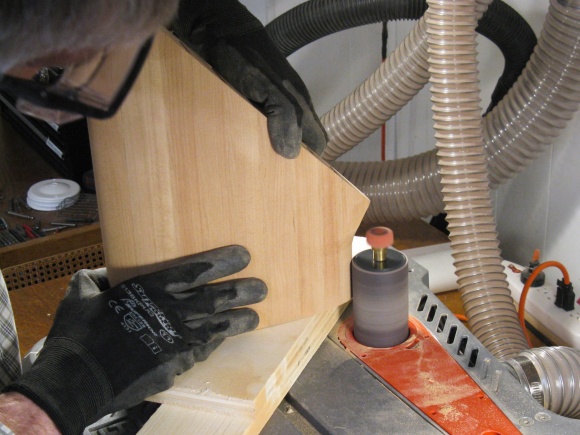
With the side profile largely done, I then addressed the body shape.
Looking into the slots, the face is elliptical in shape so an appropriate ellipse was traced onto the wood using my usual technique of a full-sized plan and carbon paper.
Looking into the slots, the face is elliptical in shape so an appropriate ellipse was traced onto the wood using my usual technique of a full-sized plan and carbon paper.
The wood layers had a series of square corners that needed to be removed. I tried a bit of corner cutting with a spokeshave (too slow) and then a draw knife (too much chance of taking too much off) so I settled on belt-sanding with 80 grit sandpaper. Due to the curve on the front, I needed to switch to the spindle sander with some props to sand just the straight bottom portion. These shots show the back slope and then the front being rounded.
Belt-sanding the back slope
And a bit of work on the front
The flared shape on the front needed some extra attention to blend the curves. I started with a coarse file and then switched to sandpaper to complete the shaping.
Using a coarse file to finish shaping

And then some sanding to smooth things out
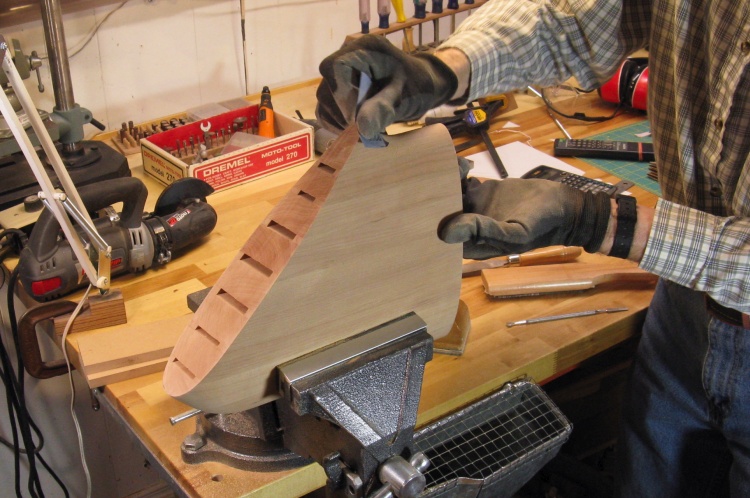
And of course some hand sanding
And then the whole block was hand sanded with grits up to 320.
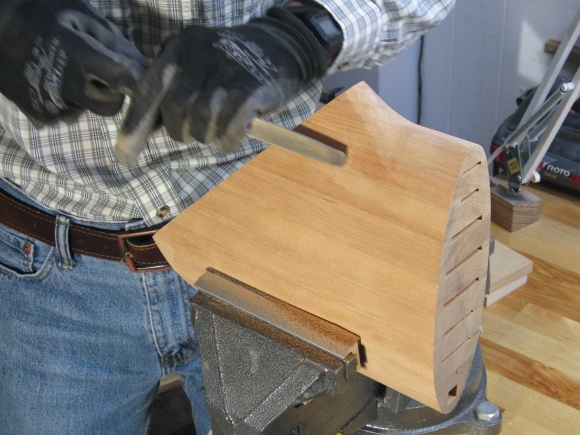
Rounding off the edges
The edges of the knife slots were very sharp-edged so I rounded those off slightly using sandpaper strips attached to a thin stick as shown here.
Headphone Pegs
Starting on the top pegs
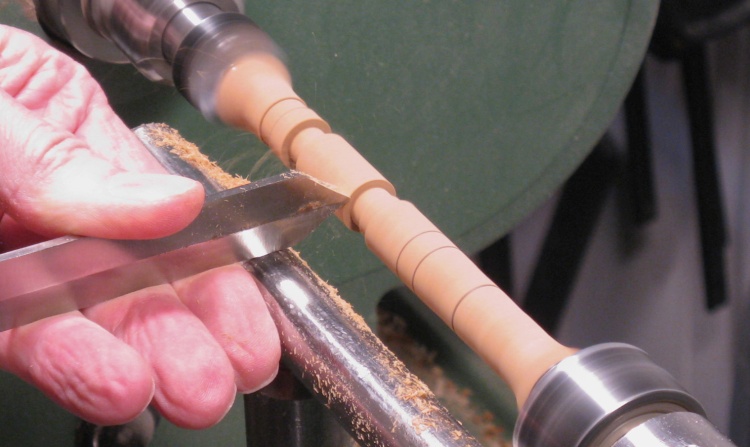
With the block body largely done, I switched my attention to the pegs that would mount in the top edge to hold a couple pairs of wireless headphones.
The plan was to make one longer and one shorter peg to match the headphones.
I started with a six-inch length of cherry which in this photo has already been mounted to the lathe and rounded.
The plan was to make one longer and one shorter peg to match the headphones.
I started with a six-inch length of cherry which in this photo has already been mounted to the lathe and rounded.
I started by cutting the bodies of the pegs. After the bodies were sanded, the mounting sections and between-peg areas were cut. They were left for last since they would significantly weaken the wood.
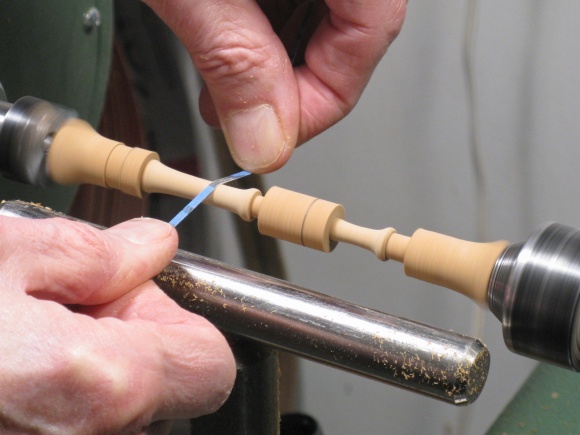
Sanding the mostly-shaped pegs
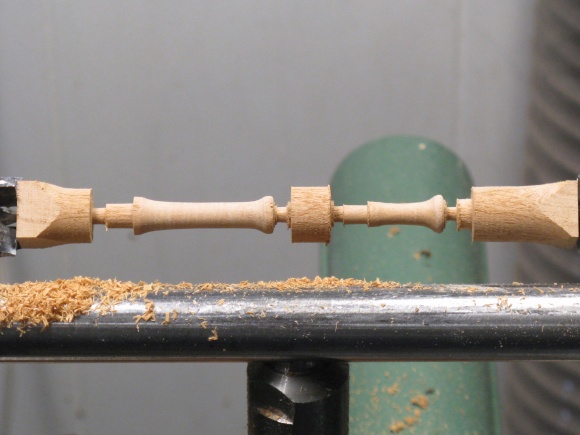
Ready to be cut apart
Sanding a peg top
The pegs needed some sanding on the top where they were cut off the lathe. Since it's a bit tough to hold small round pieces securely, here I've stretched out a of strip of sandpaper and the peg is just being held by hand.
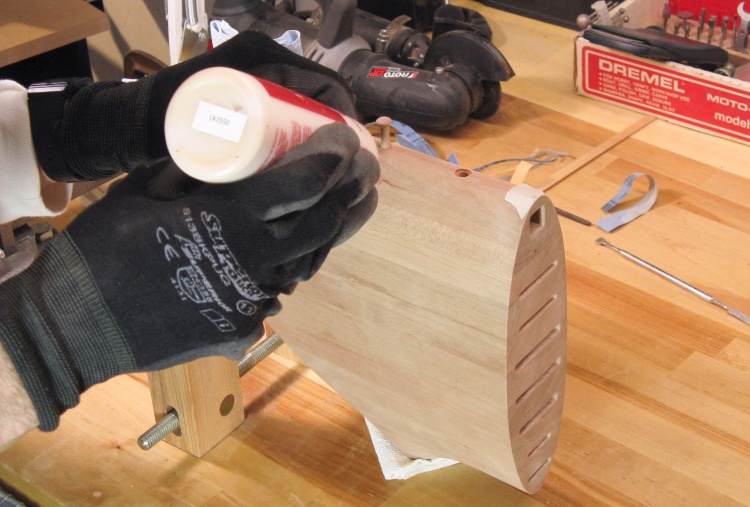
By the way, my grippy sanding gloves (obviously aimed at the female demographic) are are in the delicate "moss" color, the other choice being a light blue called "periwinkle"; what's a guy to do? I propose "Alligator" and "Steel Blue".
By the way, my grippy sanding gloves (obviously aimed at the female demographic) are are in the delicate "moss" color, the other choice being a light blue called "periwinkle"; what's a guy to do? I propose "Alligator" and "Steel Blue".
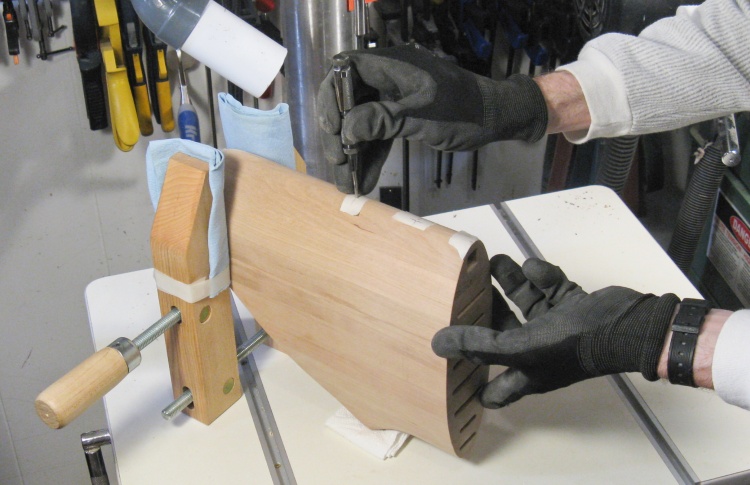
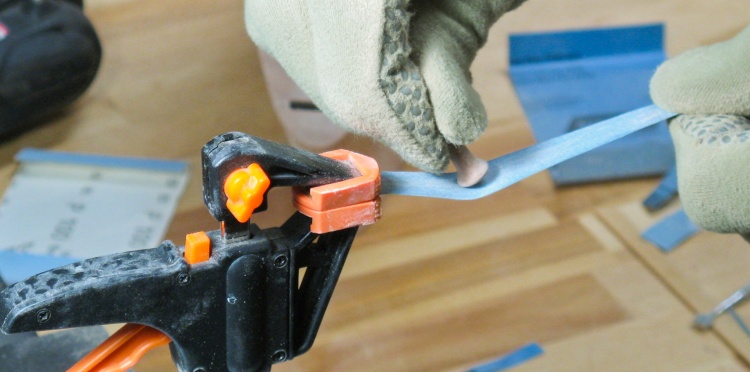
Marking peg holes
The larger and smaller pegs were made to mount in 1/4" and 3/16" holes respectively. I rigged up a wooden hand clamp to hold the block top-edge-up for drilling and in this photo I'm marking the hole locations with a center punch.

Drilling the first peg hole
The pegs were made to fit into a countersunk hole for a gap-free fit. I first drilled a shallow outer hole and followed up with a deeper inner hole.
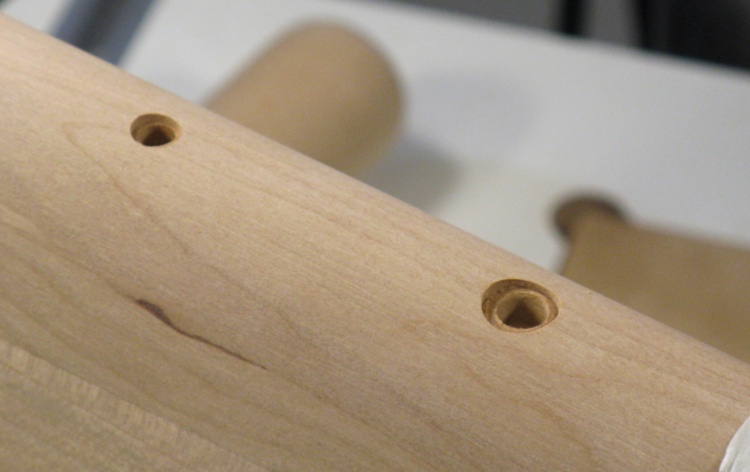
A pair of countersunk holes
This close-up shows the pair of stepped peg holes.
A nice shot of the glue bottle bottom while gluing in pegs
In this terribly-composed shot, one can make out the smaller peg already in place and a clear view of the bottom of the glue bottle whose spout (and you'll have to take my word for this) is applying glue to the larger peg.
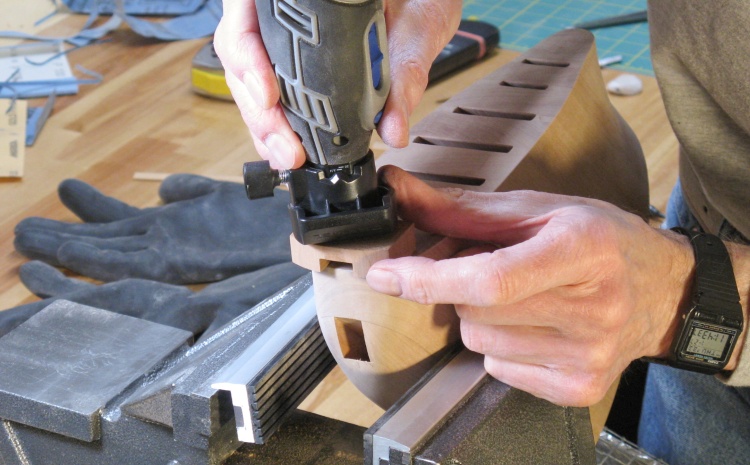
Cutting the initial circle
The last woodworky bit was to cut the circle in the bottom for my initials and the year (gotta remember it's 2022!)
As usual this was done with a taped-on jig and a cutting bit in the Dremel.
As usual this was done with a taped-on jig and a cutting bit in the Dremel.
Finishing
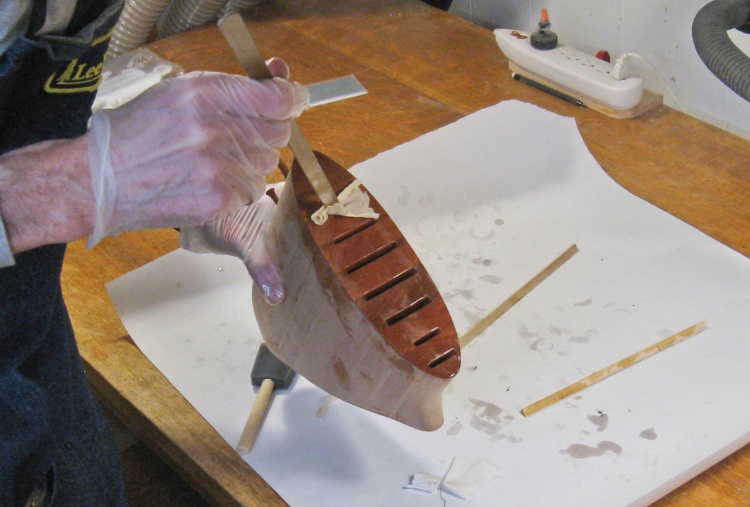
Starting on the first coat of varnish
The original knife block was finished with Danish Oil but I decided to try varnish for this one.
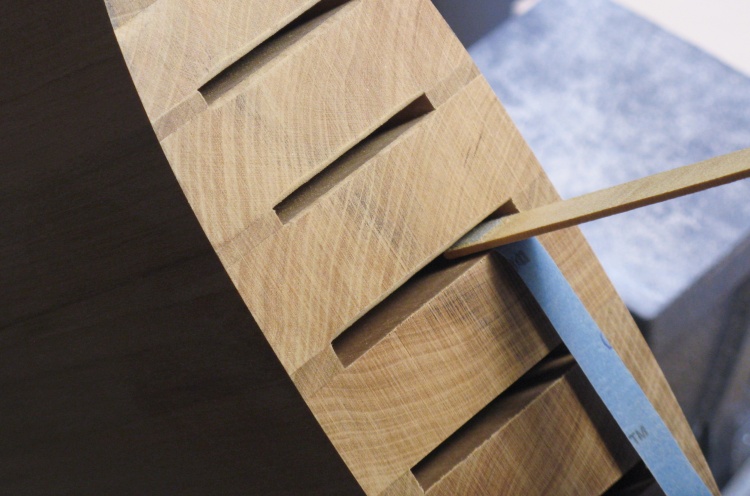
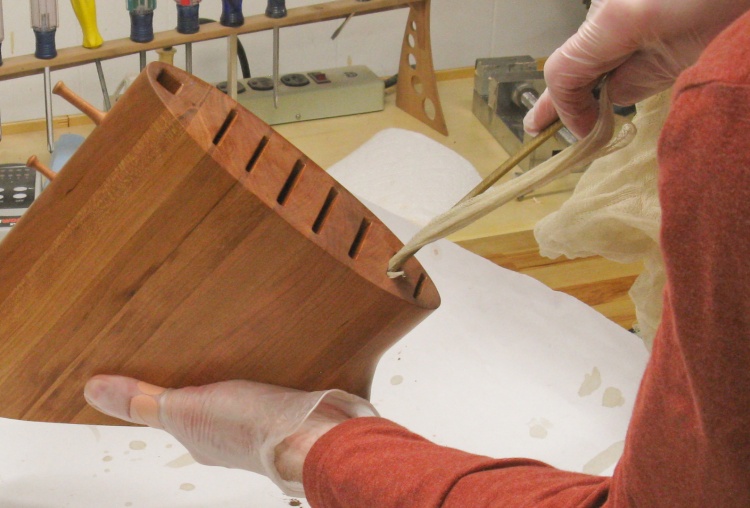
Of course the tricky part was coating the inside of the slots. I used a thin slat of wood to push through a varnish-impregnated scrap of cloth a bunch of times as shown here. Another difference in this knife block is that I left the knife slots open on the bottom so any dust or crumbs could fall through rather than piling up on the bottom of a closed slot - that made the varnishing easier too. The outside was then coated normally using a foam brush.
Of course the tricky part was coating the inside of the slots. I used a thin slat of wood to push through a varnish-impregnated scrap of cloth a bunch of times as shown here. Another difference in this knife block is that I left the knife slots open on the bottom so any dust or crumbs could fall through rather than piling up on the bottom of a closed slot - that made the varnishing easier too. The outside was then coated normally using a foam brush.
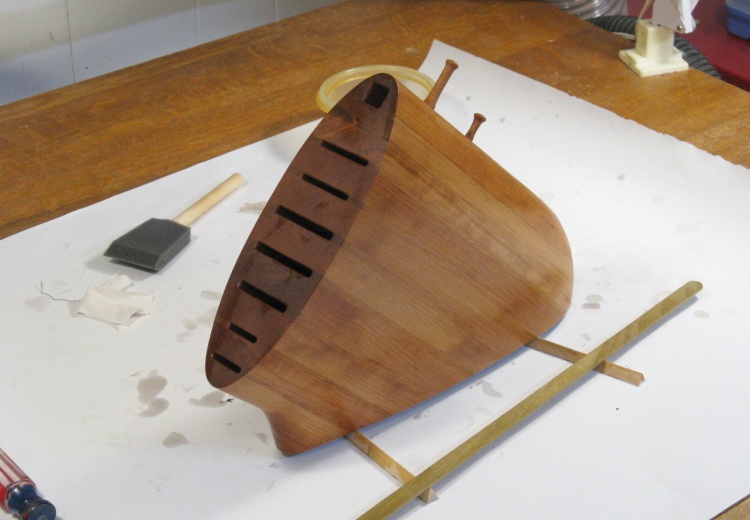
First coat of varnish on
The first coat of varnish is drying is this photo.
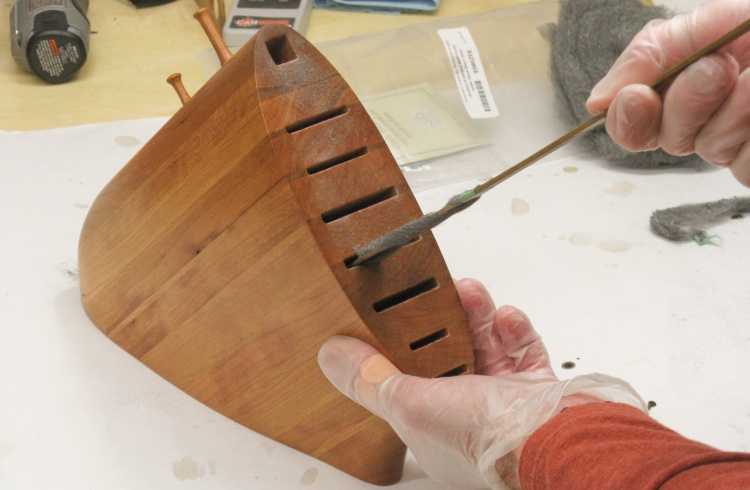
Using steel wool to roughen up the surface
Of course one issue with polyurethane varnish is that it must be roughed up between coats which meant more slot work.
I eventually came up with this steel-wool wrapping technique which worked pretty well on both heights of slot.
I eventually came up with this steel-wool wrapping technique which worked pretty well on both heights of slot.
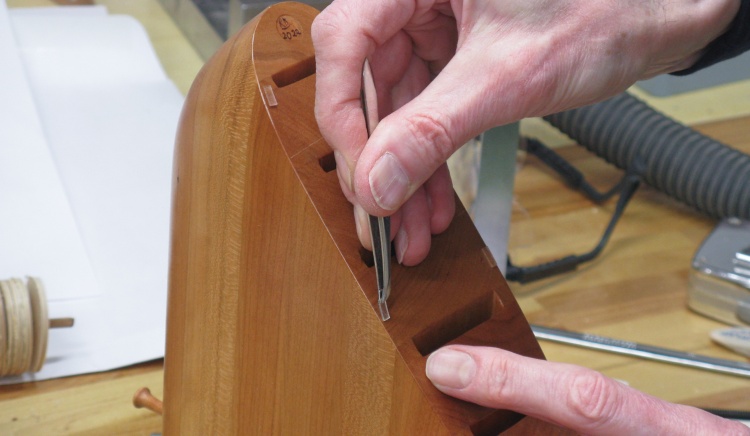
Removing steel wool remnants with a tack cloth
The tack cloth used to remove steel wool dust was another challenge due to the narrowness of the slots.
I found was able to push in just the end of a single layer of the varnish-impregnated cheesecloth with the wood slat while keeping the bulk of the cloth beside it, which worked well.
I found was able to push in just the end of a single layer of the varnish-impregnated cheesecloth with the wood slat while keeping the bulk of the cloth beside it, which worked well.
Adding some feet
The original knife block had thin wooden feet but I decided to use soft versions on this one.
Once the last coat of varnish was dry, the feet could be added. In this shot I'm placing one of the small self-adhesive feet.
Once the last coat of varnish was dry, the feet could be added. In this shot I'm placing one of the small self-adhesive feet.
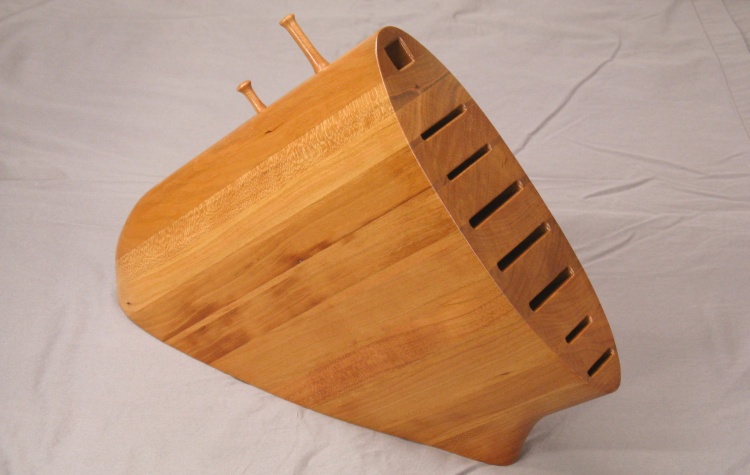
Done
Completed.


