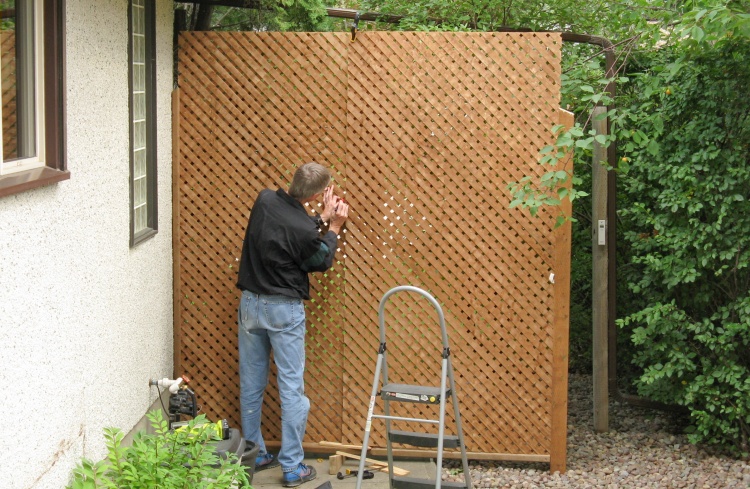
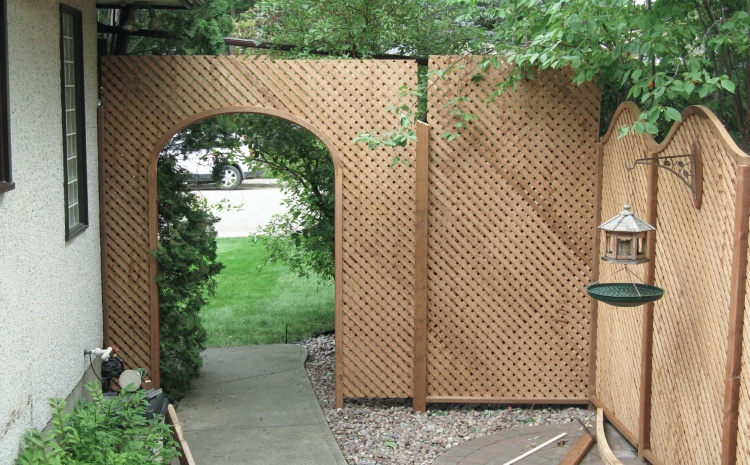
I had seen a picture of a lattice-based side yard divider a number of years ago and liked the look, but it never rose to a high-enough level of necessity to inspire me to create one. However, since we just built a lattice-based fence right next to where it would go, I thought that might be a sign that it's time had come. Putting in the divider also gives us the option of removing or trimming a rather haphazardly-growing dogwood bush that we've left largely unmolested since it's the only thing blocking the view from the street.
Some flat plans for a curvey lattice
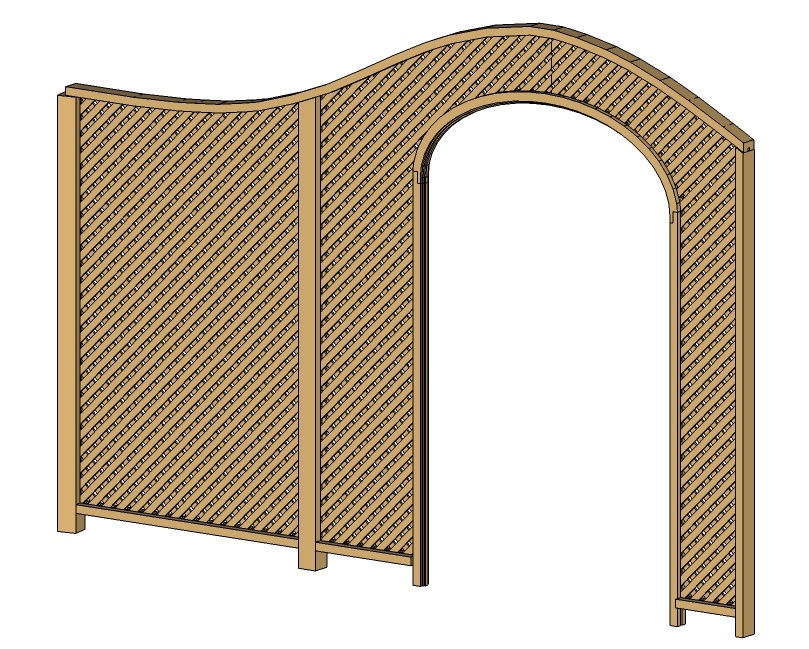
The 3D view in unrealistically-consistent color
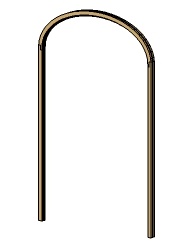
Design
The logical design would involve using the same sinusoidal top profile as the rest of the fence, but the dimensions just didn't want to cooperate;
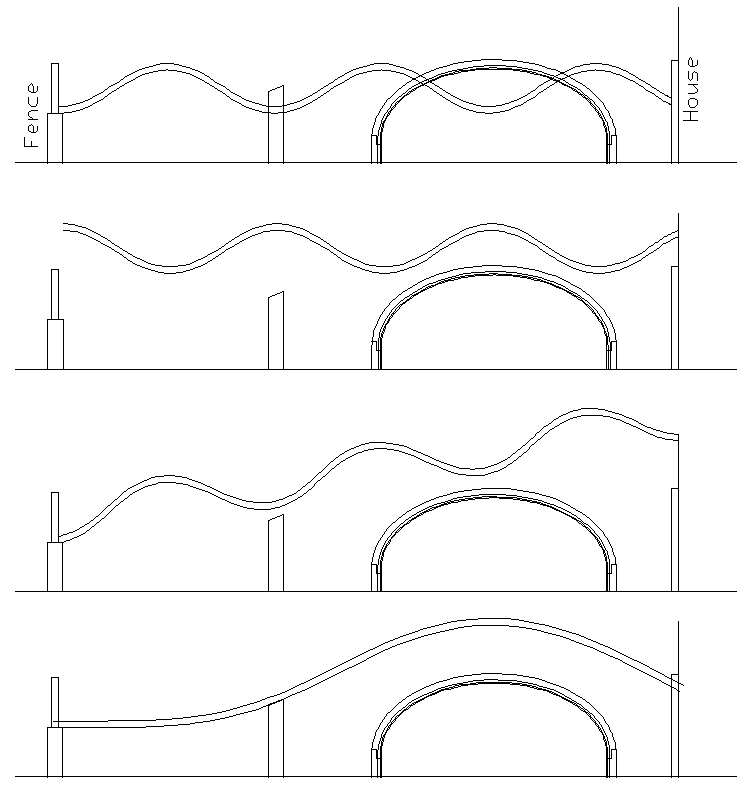
Some top "options"
Yah, that's not gonna work.
Nope.
Uh-Uh.
And variations of this shape weren't great either.
OK - something different;
Low at the fence and just one curve.
Nope.
Uh-Uh.
And variations of this shape weren't great either.
OK - something different;
Low at the fence and just one curve.
Top & door profiles
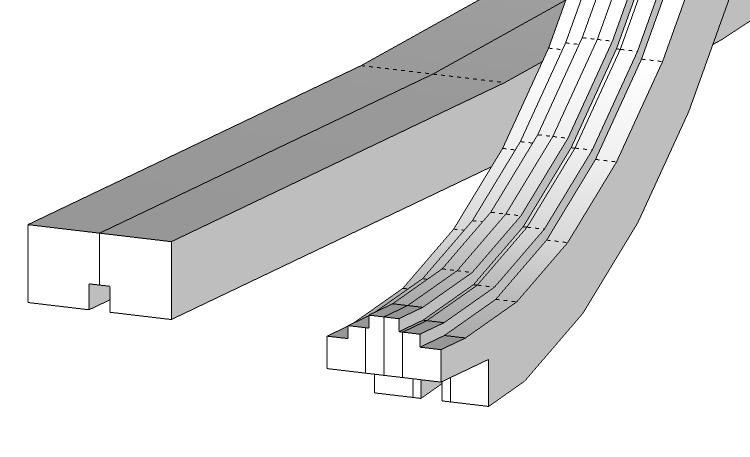
For the top of the lattice (on the left here) I decided to use a thicker frame than was used for the fence to provide a bit more strength so I used two laminated 2x4s which were trimmed to the finished 1-1/2" height. It would have simple lap joints between sections formed from the widths of the 2x4s.
To give the doorway frame (on the right here) a bit of heft, it was made about 2-1/4" square in cross section with a stepped profile on the inside for visual interest. Obviously for a large curved piece like the doorway top I was going to have to use multiple pieces of wood. Since I wanted to avoid doing any fancy wood joinery, I opted to use three multi-piece layers of wood (1x6 fence pickets) laminated together and overlapping. Those are the blue pieces in the plan above.
To give the doorway frame (on the right here) a bit of heft, it was made about 2-1/4" square in cross section with a stepped profile on the inside for visual interest. Obviously for a large curved piece like the doorway top I was going to have to use multiple pieces of wood. Since I wanted to avoid doing any fancy wood joinery, I opted to use three multi-piece layers of wood (1x6 fence pickets) laminated together and overlapping. Those are the blue pieces in the plan above.
Door Frame
The pattern for doorway top
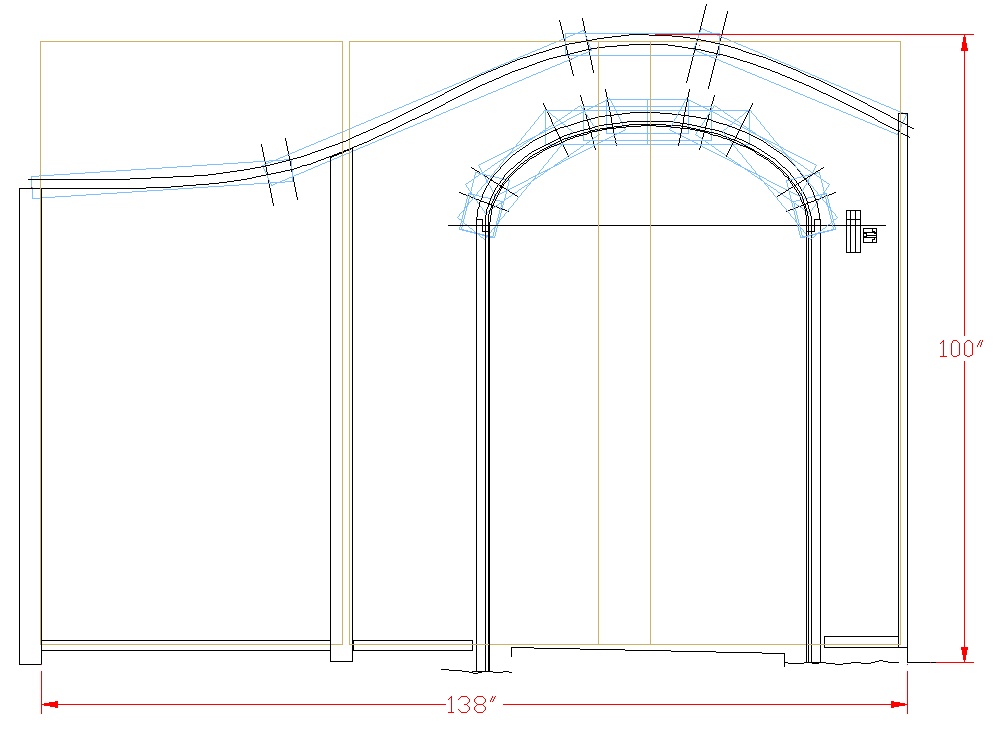
The doorway opening was to be made a bit over 50" wide to make sure there was enough room to get things like aerators and lawnmowers through.
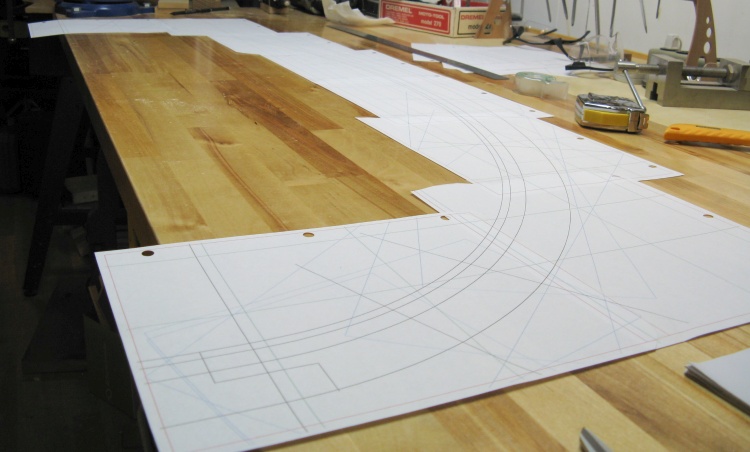
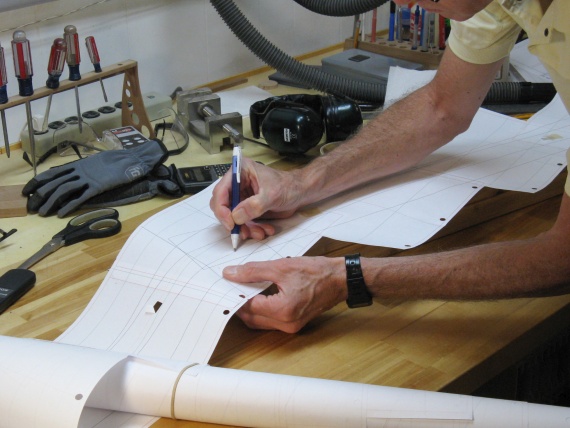
I started with the curved (elliptical, in fact) top by printing out a full-sized plan. The 8-1/2x11 sheets were then held together through the magic of, well, magic tape.
I started with the curved (elliptical, in fact) top by printing out a full-sized plan. The 8-1/2x11 sheets were then held together through the magic of, well, magic tape.
Cutting the center lamination in half
To build up to the 2.25" thickness I decided to use three layers of 1x6 fence pickets (which are in fact closer to 0.7" thick). In an effort to make final lattice assembly easier I also made the doorway in two halves, each 1-1/2 boards thick.
In this shot I'm cutting one of the pieces forming the center lamination into two sections to get the "half" board thickness for each side.
In this shot I'm cutting one of the pieces forming the center lamination into two sections to get the "half" board thickness for each side.
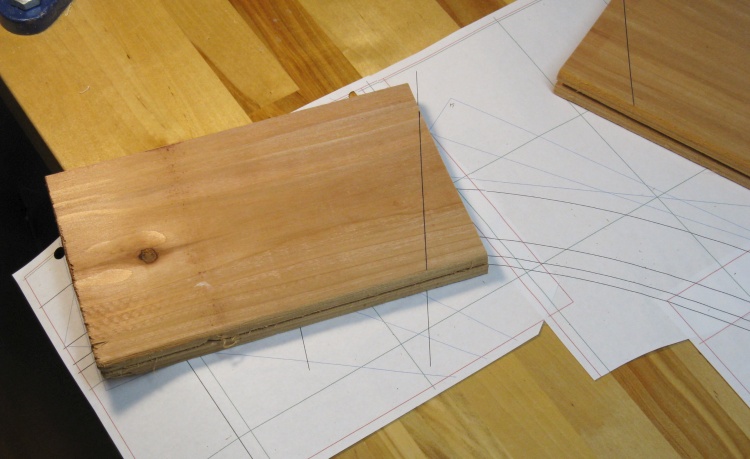
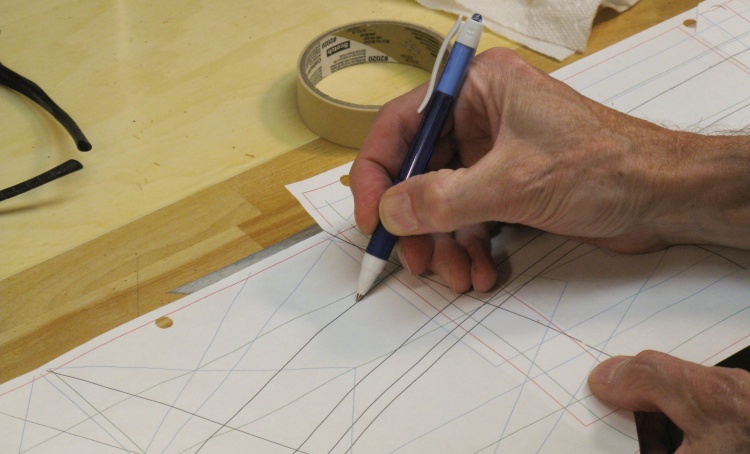
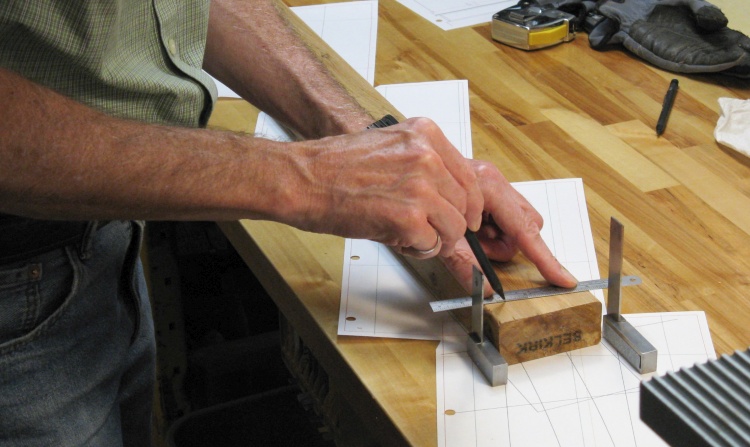
Marking a piece for cutting
Each layer was composed of either three or five pieces laid out to cover the curve. The simple butt joints between the pieces were offset from layer to layer so there was always two layers of solid wood beside a joint.
Here a couple of pieces are marked with the cut lines they need to line up correctly along the curve.
Here a couple of pieces are marked with the cut lines they need to line up correctly along the curve.
Cutting ends
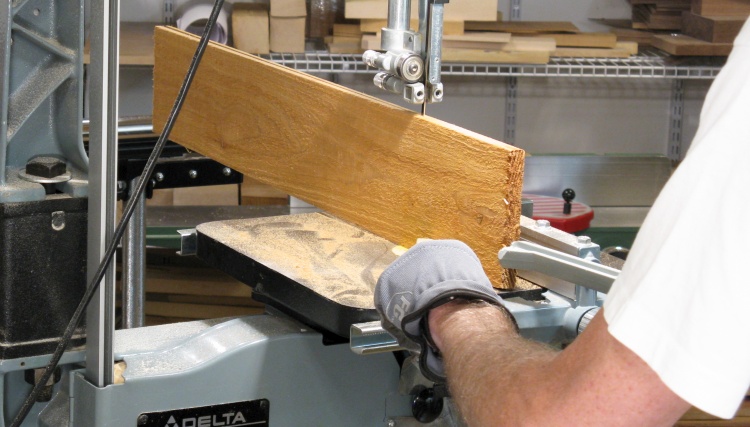
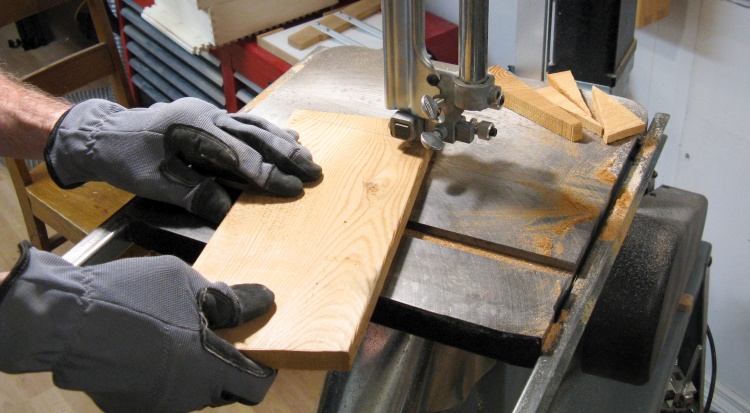
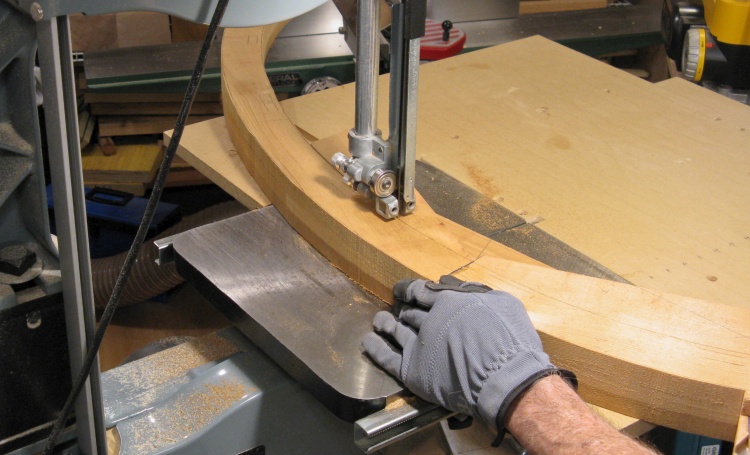
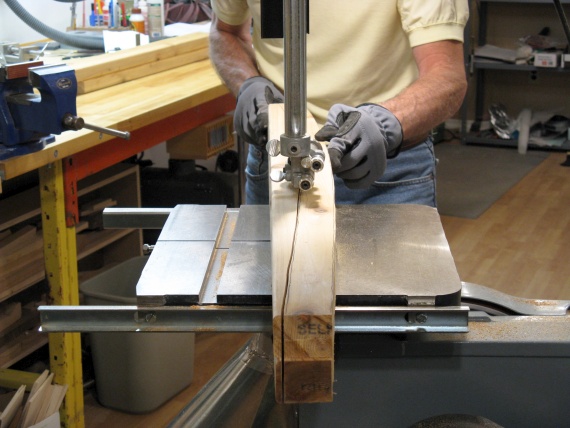
I trimmed the ends freehand using the band saw since I didn't want to have to set up each of the specific angles using the miter gauge. That resulted in a bit of a wavy cut, but the next stage fixed that.
Flattening out the imperfectly-cut end
The cut ends were flattened to the marked line using the horizontal belt sander.
I have pretty good dust collection but some fine sawdust always gets into the air. As a result, working on the cedar boards gave the workshop a really nice smell for a week or two.
I have pretty good dust collection but some fine sawdust always gets into the air. As a result, working on the cedar boards gave the workshop a really nice smell for a week or two.
Three layers laminated together
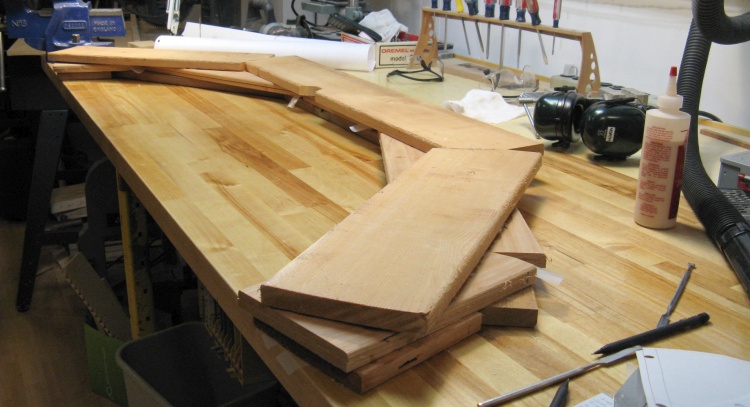
After cutting pieces for all three layers and then gluing the layers together, I ended up with the rather unruly stack shown here.
The center lamination is composed of the two halves which have been glued together using a temporary adhesive. They'll stay together until the whole lattice is assembled.
The center lamination is composed of the two halves which have been glued together using a temporary adhesive. They'll stay together until the whole lattice is assembled.
Tracing the curve on the stack of wood
Then I stuck the plan on top of that stack and used carbon paper to trace the curve onto the laminated pieces...
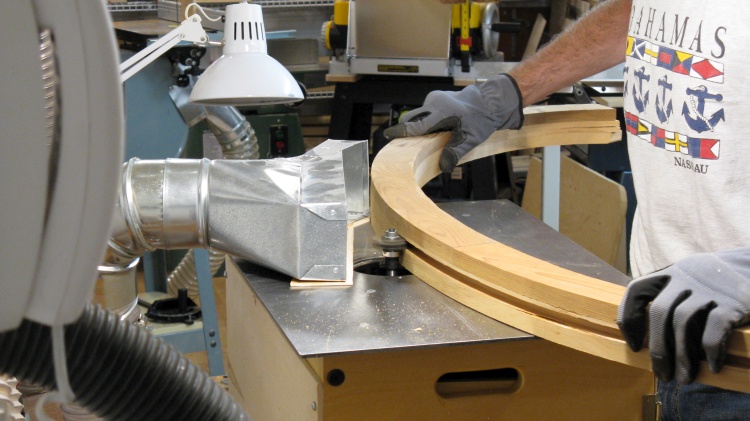
Cutting the doorway top
...and the curve was cut out with the band saw.

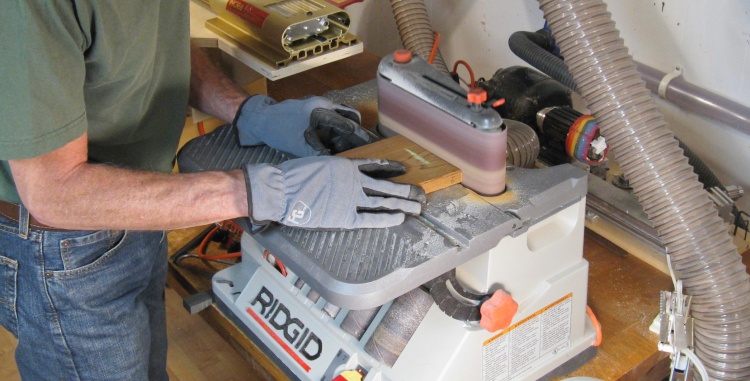
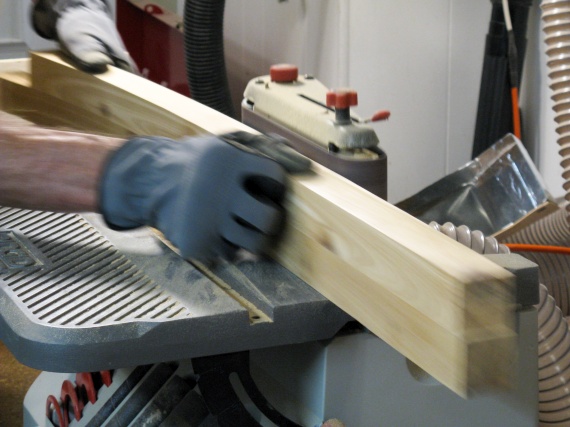
Smoothing off the curve on the belt sander
Of course the hand-guided cuts were a bit wavy so then it was back to the sander to smooth the curves.
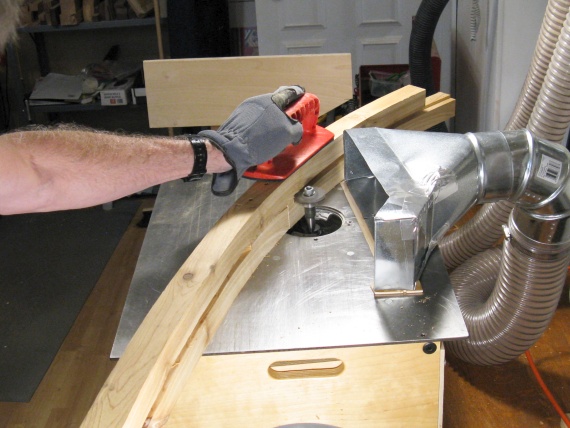
Routing a notch for the lattice
The lattice will fit into a notch on the outside of the door frame, so an appropriate notch was cut using the router.
Historical note: Bahamas shirt is from circa 1996 (should read: "My spouse went to Bahamas and all I got was this T-shirt". But I was good with that).
Historical note: Bahamas shirt is from circa 1996 (should read: "My spouse went to Bahamas and all I got was this T-shirt". But I was good with that).
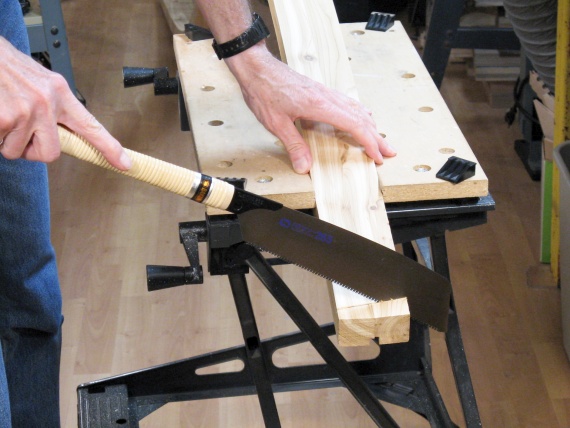
Cutting up more fence pickets, this time for the doorway sides
Then it was time to switch over to the doorway sides, which being straight were rather simpler.
Here I'm cutting another cedar fence picket into two of the three layers I'll need for each side.
Here I'm cutting another cedar fence picket into two of the three layers I'll need for each side.
Gluing one of the sides
And three of those picket-halves were glued together to get the proper thickness.
At this point the center lamination is still solid - it will be cut into two halves to match the top a bit later.
In the background is a bottle of Titebond III - the waterproof glue I'm using to hold things together. I switched over to that from the regular glue I used on the fence since I'm a bit concerned about whether it will hold in the long term as it gets soaked by rain or melting snow.
Straightening the edge of the door sides
To get nice straight sides the best way is to use the jointer. Unfortunately my workshop wasn't wide enough to put a 6' piece through the jointer so to get enough room I rearranged things to let the jointer to run the long way in the shop and here I'm flattening one of the sides.
Following this the sides were cut to width on the band saw and then that edge smoothed using the planer. Finally the stack was cut in half to get 1-1/2 layer-thick pieces and glued back together with temporary glue.
Following this the sides were cut to width on the band saw and then that edge smoothed using the planer. Finally the stack was cut in half to get 1-1/2 layer-thick pieces and glued back together with temporary glue.
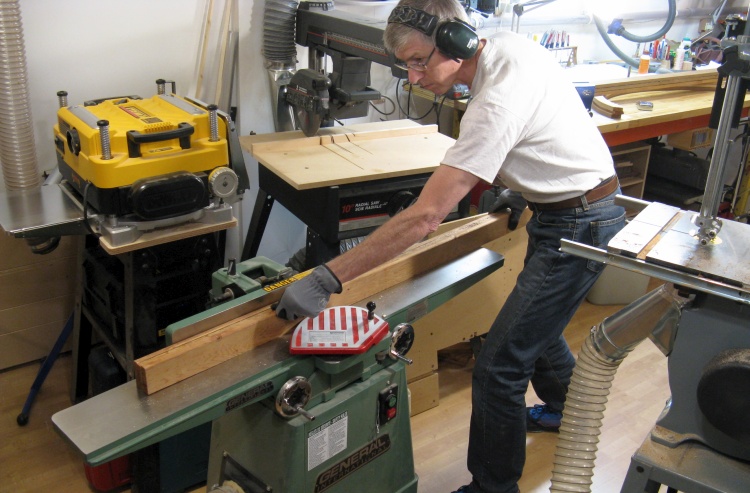
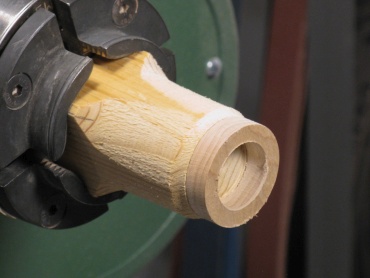
I needed to do some shaping on the pieces. Some could be done with the same router bit used for the slot but I also needed a shallower cut made. For that I had to modify the bit by increasing the size of the bearing. The following shots show a small maple ring being turned for this purpose.
Cutting a couple blanks from maple
A ring turned on the lathe
Ring added to bearing to get proper depth of cut

The edge profiles after a bit of routing
Then after a few passes with the regular and modified bit, the inner side of the door frame acquired the stepped profile I was aiming for.
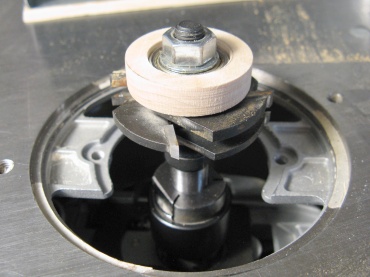
Supposedly all cedar
It became more obvious that I probably should have paid more attention to the color of the wood I was using since the sides look rather different than the top in the shot above.
It's surprising how much grain and color difference there was just amoung the 10 or so boards I bought (admittedly chosen for lack of knots and cracks rather than color). And the cedar 2x4s were another shade/grain entirely.
It's surprising how much grain and color difference there was just amoung the 10 or so boards I bought (admittedly chosen for lack of knots and cracks rather than color). And the cedar 2x4s were another shade/grain entirely.

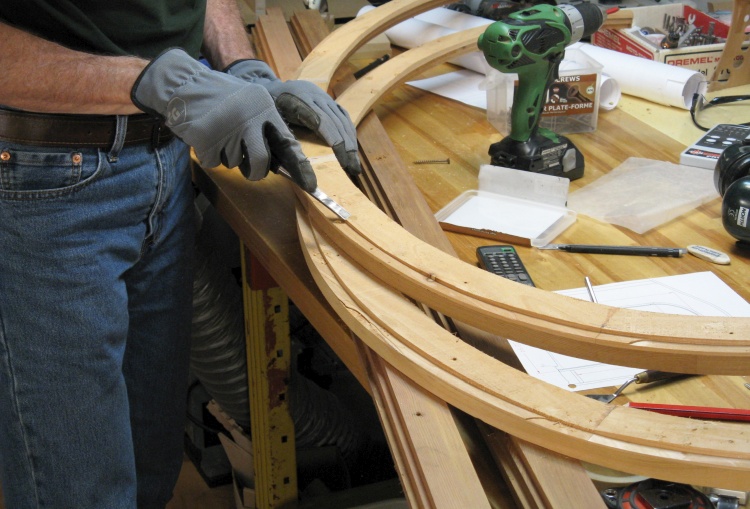
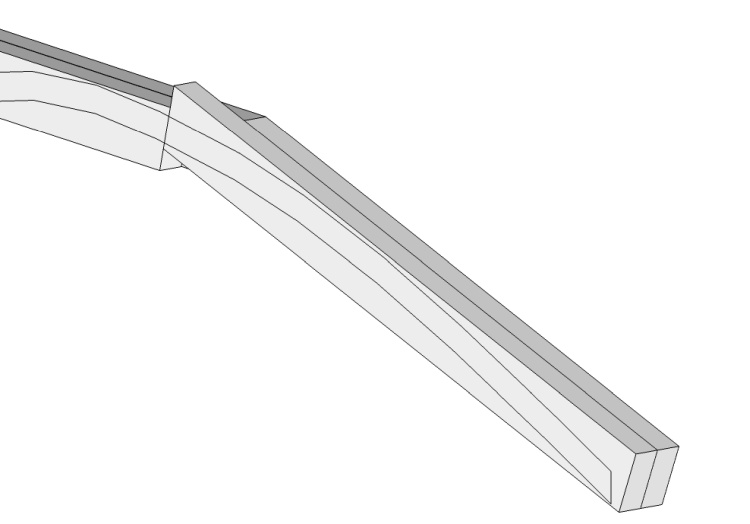
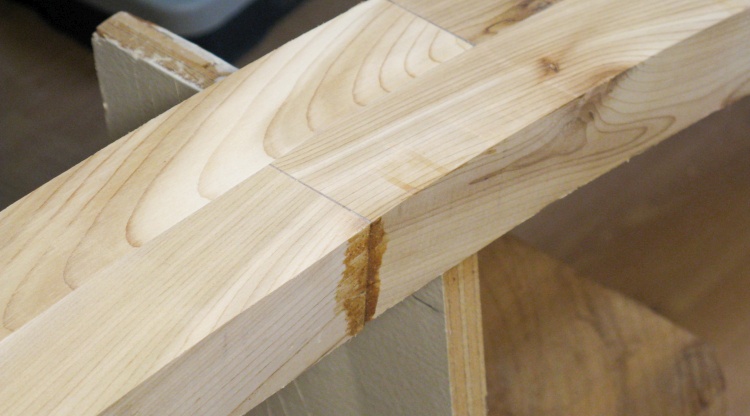
Cutting a simple lap joint
The final step was to cut a simple lap joint at the ends of the top and sides to enable them to be joined.
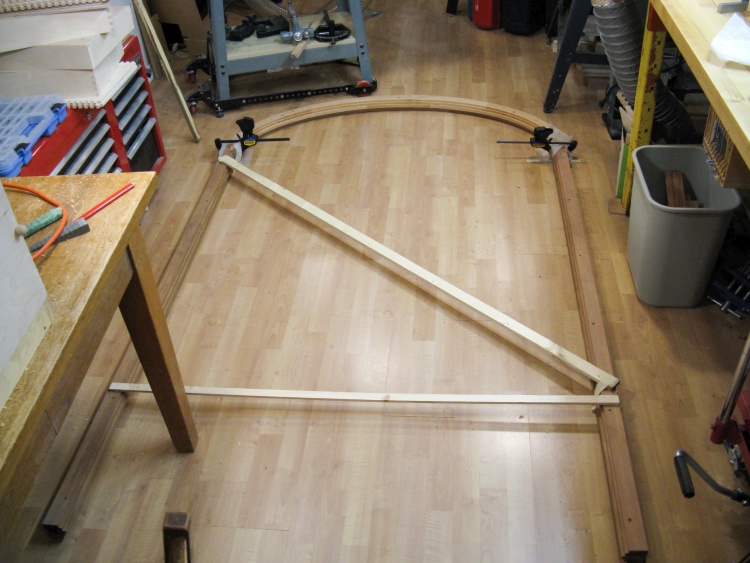
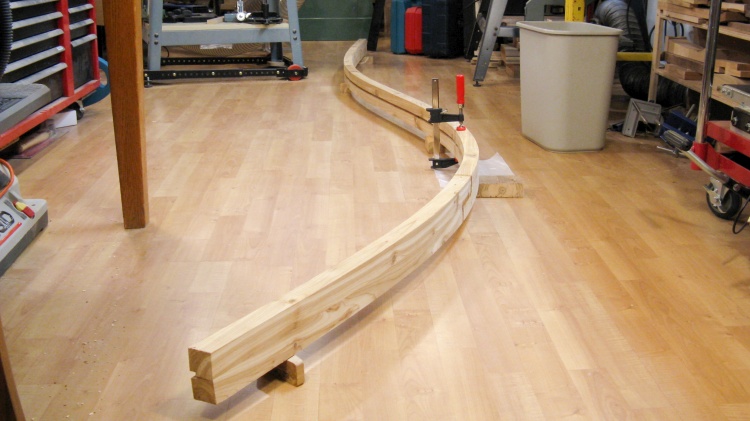
Checking fit on the door frame
This is a shot of the assembled door frame taking up rather a lot of my shop floor space.
Separating frame halves and removing glue
So with the door frame looking OK, I then drilled holes for screws that would be used to put the halves back together and then separated the two halves.
Here I'm scraping the rubbery temporary glue off one of the top-curve pieces.
Here I'm scraping the rubbery temporary glue off one of the top-curve pieces.
Frame glued together and reinforced
Then the screws went in to hold the halves of each piece back together and I glued the top to the sides. I also added the light-colored reinforcement straps seen here using temporary glue to keep everything together as it was moved (and later added another pair of similar straps to the other side as well).
Lattice top
Laminating 2x4s for top curve

I wanted the top of the lattice to be wider than the 1.5" I'd used for the fence so that it would have a bit more strength. I decided to laminate two cedar 2x4s together and then cut the curve out as this sketch shows. I staggered the joints between the 2x4s to give a good glue joint.
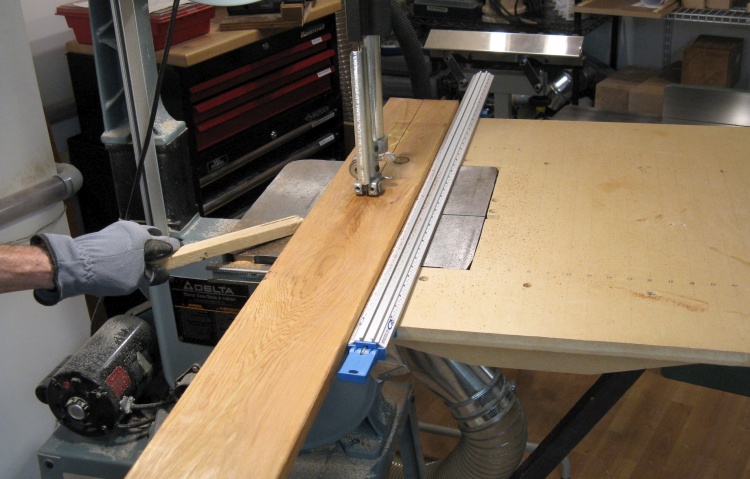
Marking a 2x4 end with the proper cutting angle
Once again I printed out a full size plan (which took 15 8-1/2 x 11 sheets since it is over 11 feet long) and used that to guide the 2x4 cutting.
Here I'm marking the cut angle on to one of the pieces based on the plans.
Here I'm marking the cut angle on to one of the pieces based on the plans.
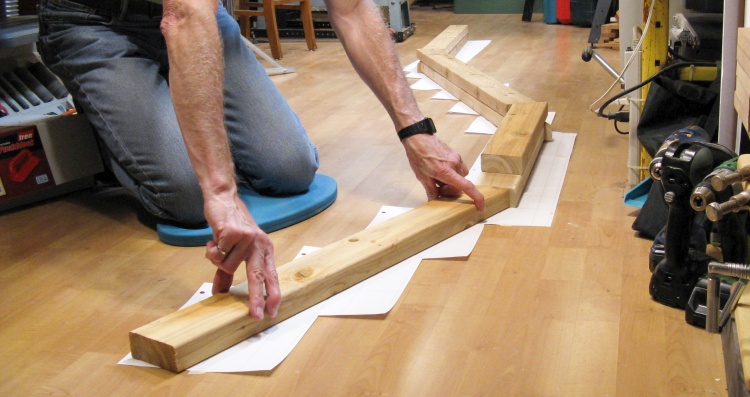
Lining up all the pieces on the full-sized plan
I checked to make sure all the angles were correct by lining up the pieces on the plan prior to gluing.
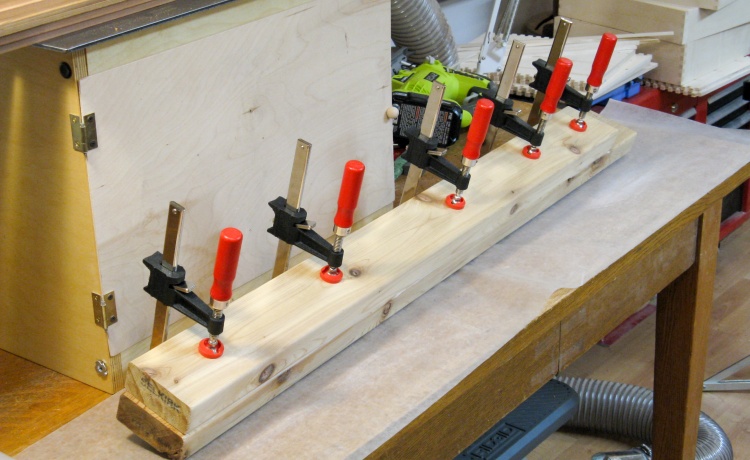
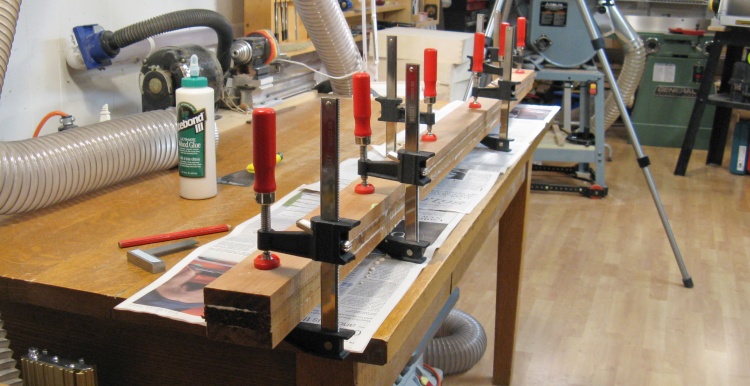
Gluing & clamping one of the sections
Then the side-by-side 2x4s in the individual segments were glued together. I left the segments separate initially to make for easier handling.
The next photo matrix shows the process used to get the top into final shape. Much like the door frame top; mark, saw, smooth & route.
Gluing together the top curve
Finally the individual segments were glued and screwed together, producing the complete top curve seen here.
A bit of filler for imperfect joints
There were small gaps in some of the joints so I decided to fill those with a glue/sawdust mixture to prevent water ingress. In this shot of the lattice top rail, both the top and side surfaces have been filled and the top has been sanded clean.
There were a couple of ends to cut at tricky angles where the top curved down to meet the house and the side 2x4 post. In addition to the downward curve of the top rail, it was also 8° off square. For the top rail, I used the plan as a guide and then cut the angle by hand. The wall post was already mounted on the house so I took the dimensions off the 3D model and then drew lines on the 2x4 and cut the top with a reciprocating saw.
Trimming tricky end of top

The tricky top of the wall post
Assembly

Planting the one post that I'll need
Then it was time to move outside.
First up was digging a post hole and planting the one post I needed. I used a 9' treated-wood post just like those used for the fence.
Here I've got the hole dug with the post positioned, levelled and wedged into place and I'm tamping down the fill.
First up was digging a post hole and planting the one post I needed. I used a 9' treated-wood post just like those used for the fence.
Here I've got the hole dug with the post positioned, levelled and wedged into place and I'm tamping down the fill.
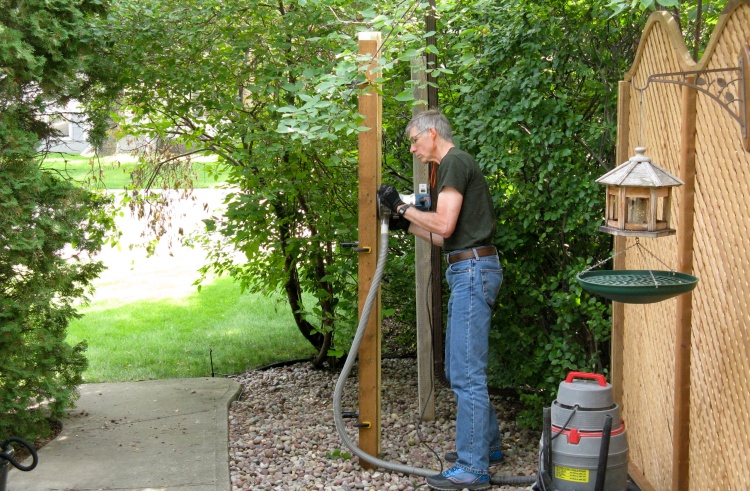
Routing slots for the lattice
I put together a long guide for the router, clamped it to the post and then routed slots in the new post and the end fence post to accept the lattice.
The shop-vac is collecting most of the copious quantities of sawdust that was generated.
The shop-vac is collecting most of the copious quantities of sawdust that was generated.
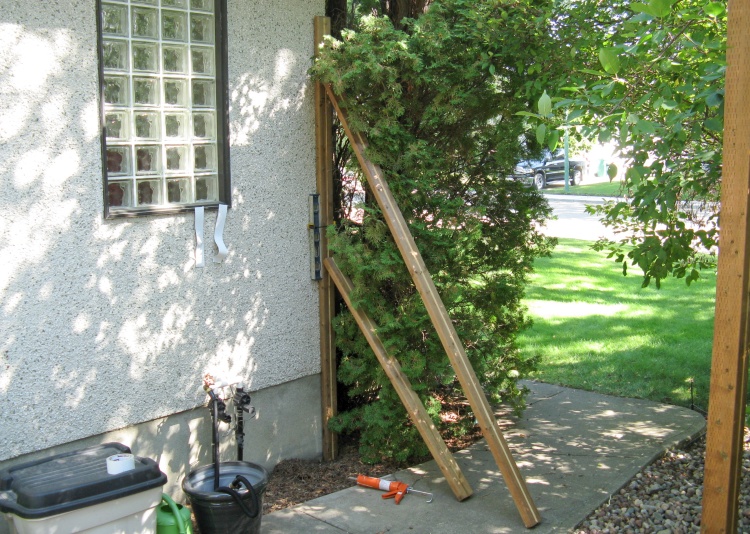
Gluing on the wall "post"
An actual post isn't really needed at the house so instead I glued a 2x4 to the stucco on the corner of the house.
In this shot I have a couple 2x4s leaning against the wall post to hold it in place while the PL construction adhesive sets.
In this shot I have a couple 2x4s leaning against the wall post to hold it in place while the PL construction adhesive sets.
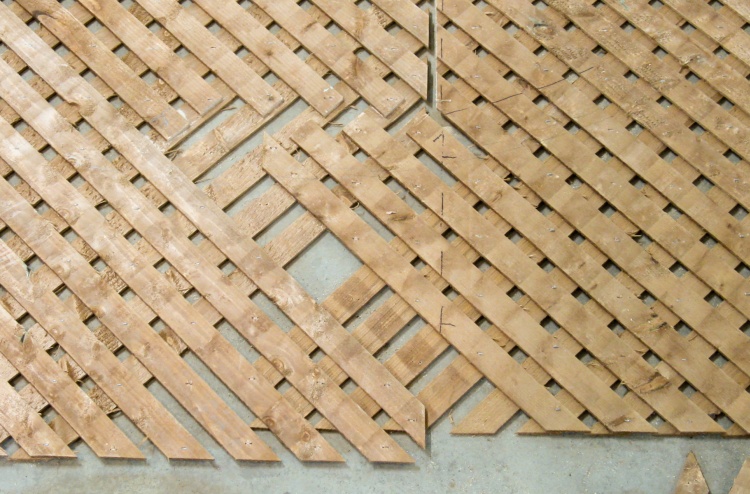
Marking lattice overlap
I was going to need to have the lattice + door assembly the correct width so I started by putting two sheets of lattice in place and here I'm marking where they overlap so I can reposition them at the same spacing elsewhere.
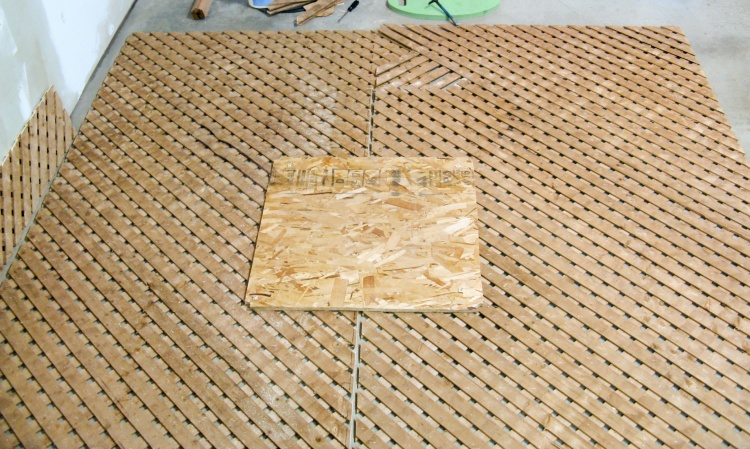
Joiner plywood added to hold pieces in position
And now we are "elsewhere" which is the floor of the garage. Fortuitously Sue's Audi went in for service so the spot was empty for a few days.
In this shot I have cut off the overlap except at the top and screwed on a piece of plywood to hold the lattice in position.
My plan is to get rid of the joint between the lattice sheets above the door frame.
In this shot I have cut off the overlap except at the top and screwed on a piece of plywood to hold the lattice in position.
My plan is to get rid of the joint between the lattice sheets above the door frame.
I started by aligning the lattice sheets so the slats overlapped exactly. I then trimmed the edges by the same amount I moved the pieces so the overall width was unchanged. Then any slats that ended at the joint were removed (or cut off in the door opening area and then removed).
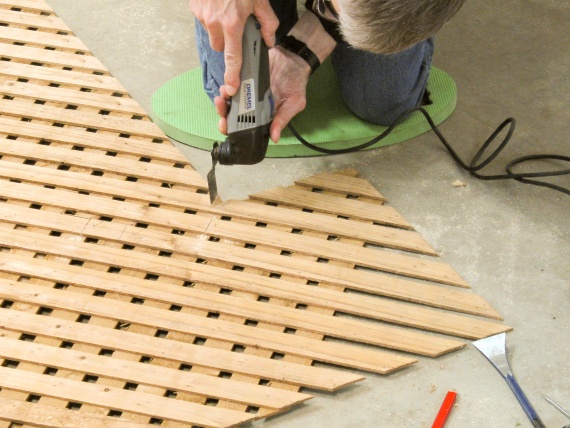
Trimming short pieces
Removing short pieces
The overlap with short pieces gone
When that was done there were only three pieces that needed to be added to complete the pattern (the two empty spots and the one long piece still in there that ends at the joint).
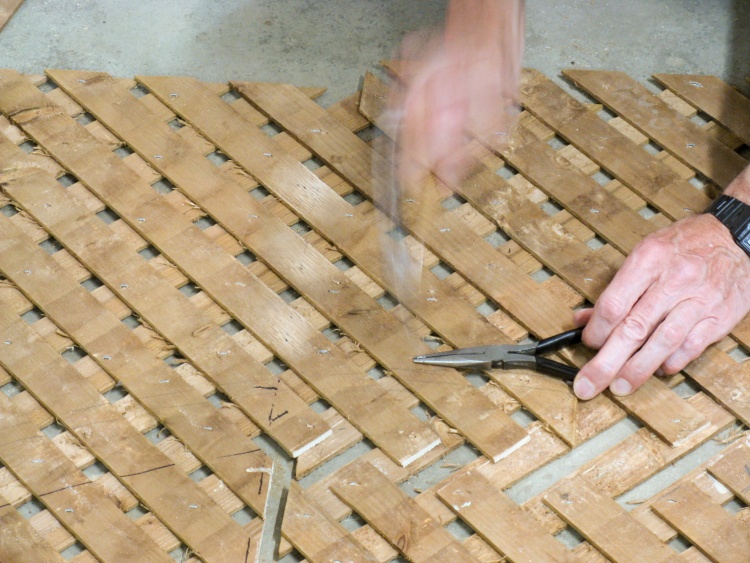
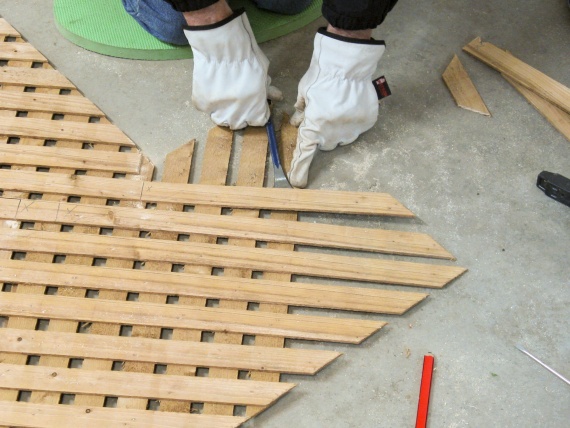
Re-stapling the lattice with new strips in place
I pulled some slats from the door area where they weren't needed, inserted them in the gaps and then held everything together by re-installed the staples I had removed.
In this shot the replacement pieces are in place and I'm using a small hammer to drive a staple into one of the overlap areas.
In this shot the replacement pieces are in place and I'm using a small hammer to drive a staple into one of the overlap areas.
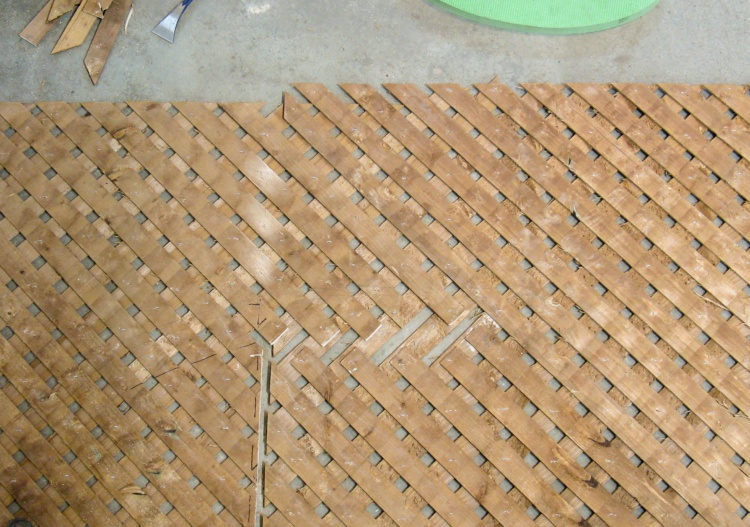
The sewn-together lattices
This shows the joint-free lattice section that will be above the doorway.
The incomplete area is inside the door opening and will be cut out.
The incomplete area is inside the door opening and will be cut out.
So then it was time for the door frame. I positioned the frame on top of the lattice and marked the outline, and then cut about 1/2" inside the outline to provide a lip that goes into the slot in the door frame.
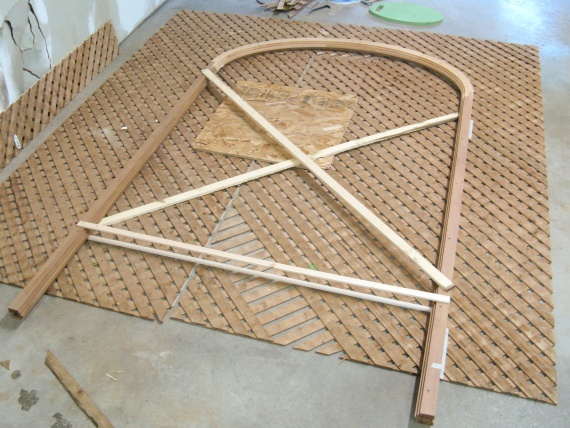
Door frame positioned to mark cutout
Cutting out door opening
So this is where I see if making the door frame in two pieces was worth the trouble. Rather than having to try to slide the lattice down over the whole slotted frame, instead I was able to pull it apart and set the half under the lattice. Then I just tacked the lattice to one side of the door frame slot using 3/4" brads. When that was done the other half was put on top and they were held together with screws. Given that when building the fence I had to pound vigorously to get the lattice to slide downwards, I'm thinking the two-pieced door frame was probably worthwhile.
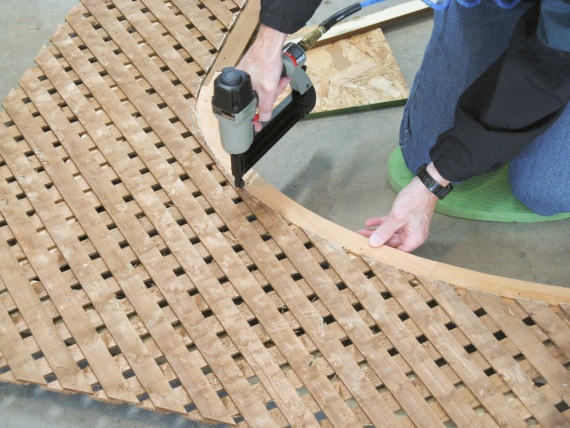
Nailing lattice to door frame
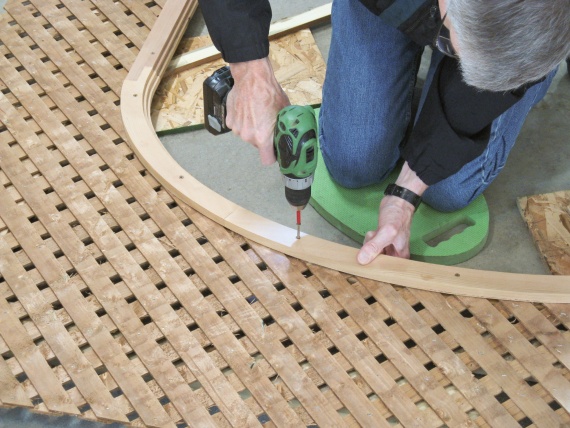
Assembling the second side of the door frame
The assembled door section
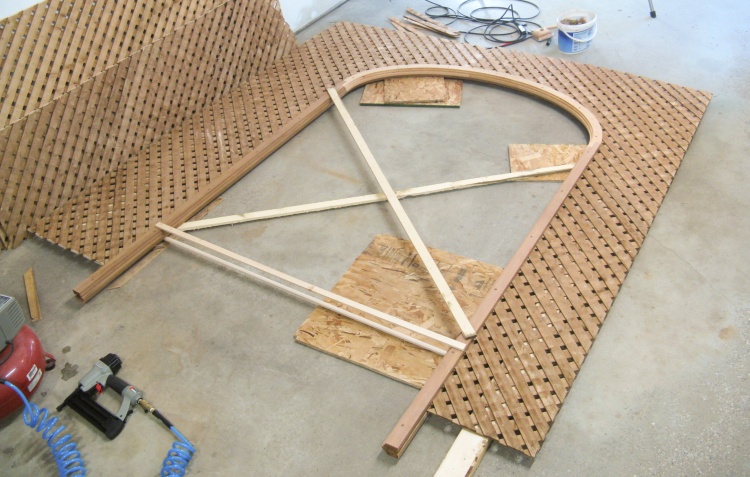
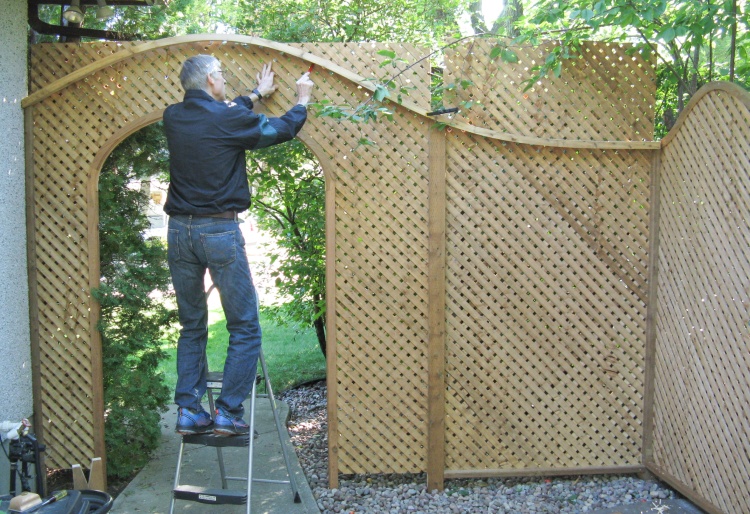
Door and plain sections of lattice in place
Sue was still a bit shell-shocked from getting the final servicing cost from the Audi dealership, but I recruited her to help and we manuevered the frame and lattice into place and got it into the slots on both sides.
I had already installed the bottom rail for the adjacent section so I then cut and installed the normal rectangular piece of lattice on the right side here.
I had already installed the bottom rail for the adjacent section so I then cut and installed the normal rectangular piece of lattice on the right side here.
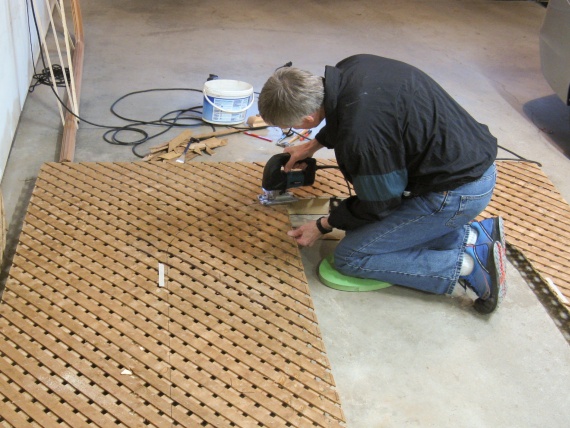
Marking to top contour
Next up was installation of the top frame. I positioned it beside the lattice and clamped it on so I could mark the location of the bottom edge. Then I manually drew in a cut line about 1/2" above the bottom profile to guide the cut.

Installing the top frame
The curve was cut using a jigsaw and then I installed the top by manuevering, coaxing, cajoling and maybe whacking a bit to get the lattice into the slot on the top frame.
I had seen some shifting of lattice in the fence already (specifically where I'd installed a bird feeder which put some weight on the lattice) so I tacked the lattice to the end posts and the top using 1-1/4" brads to prevent shifting.
I had seen some shifting of lattice in the fence already (specifically where I'd installed a bird feeder which put some weight on the lattice) so I tacked the lattice to the end posts and the top using 1-1/4" brads to prevent shifting.
I managed to mess up a bit on the positioning of the lattice so a few slats were a bit short at the highest point. Rather than replace the problem slats, I just glued on some patch pieces as shown here.
Oops.
Not too-obvious fix
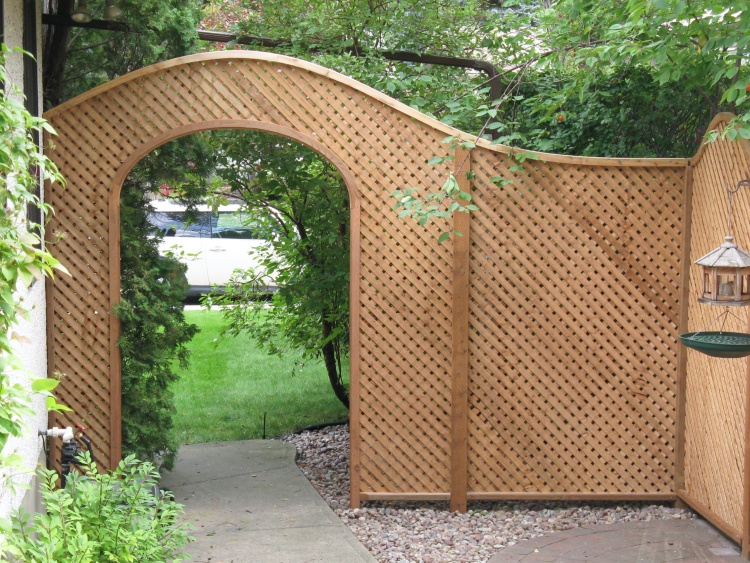
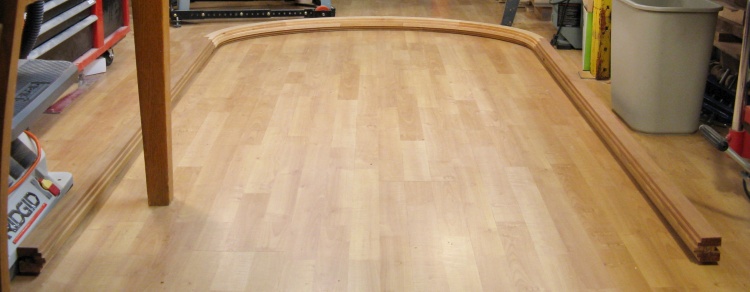
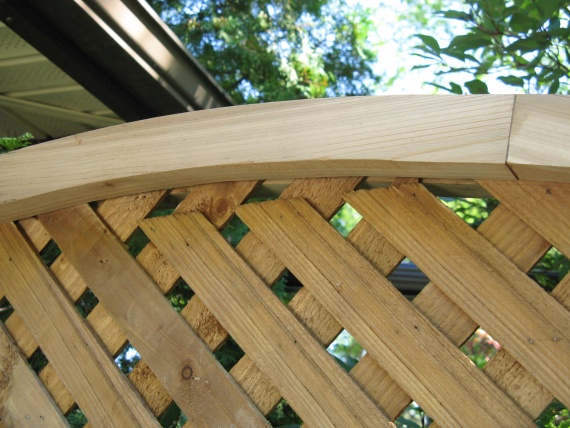
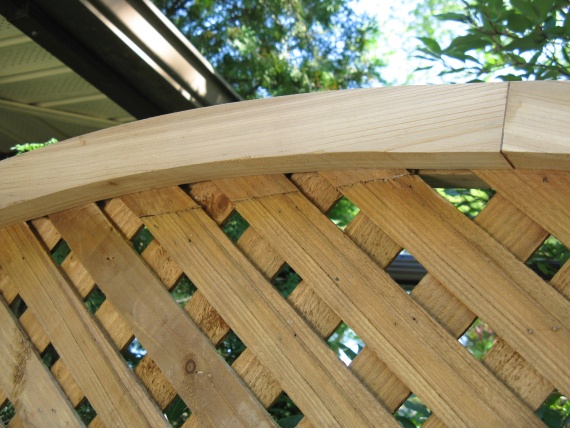
Completed lattice sections
After screwing the top rail to the posts and adding the bottom trim pieces, the lattice was complete.

Harbinger
And just in time too - winter is coming.


