The squarey inspiration
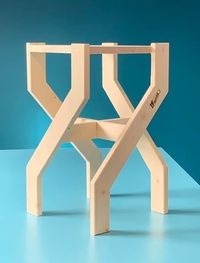
Once again I drew inspiration from existing plant stands. The version shown here had an intriguing twisty configuration although it also had a made-from-spare-fence-boards look that wasn't doing it for me. I thought I could keep the twist part but change the profile from square to round using curved legs to make it look a bit less "8th-grade shop class". Mind you, my spice rack with bent acrylic retainer I made in 8th grade was something to behold.
I've built curved items in the past using thin pieces of wood and I had in mind that I could do that again and laminate these together to build up to the thickness I needed. In the past I've soaked thin pieces of wood in warm water prior to bending but all the real woodworkers use steam bending so I thought I'd better give that a try.
I've built curved items in the past using thin pieces of wood and I had in mind that I could do that again and laminate these together to build up to the thickness I needed. In the past I've soaked thin pieces of wood in warm water prior to bending but all the real woodworkers use steam bending so I thought I'd better give that a try.
More of a concept than a plan
Steam Bending
There are three main components required for steam bending and they include:
1. A source of steam
2. A steam box to hold the wood in a steamy atmosphere
3. A bending form, perhaps with straps.
The source of steam I solved with the simple expedient of a trip to Lee Valley Tools, there to hand over a large bag of fancy sheets of polymer in exchange for a steam generator. OK, OK - I actually used my debit card and just tapped but the "bag of fancy polymer" is much more evocative of the odd trading process we use.
1. A source of steam
2. A steam box to hold the wood in a steamy atmosphere
3. A bending form, perhaps with straps.
The source of steam I solved with the simple expedient of a trip to Lee Valley Tools, there to hand over a large bag of fancy sheets of polymer in exchange for a steam generator. OK, OK - I actually used my debit card and just tapped but the "bag of fancy polymer" is much more evocative of the odd trading process we use.
A small piece of exterior plywood
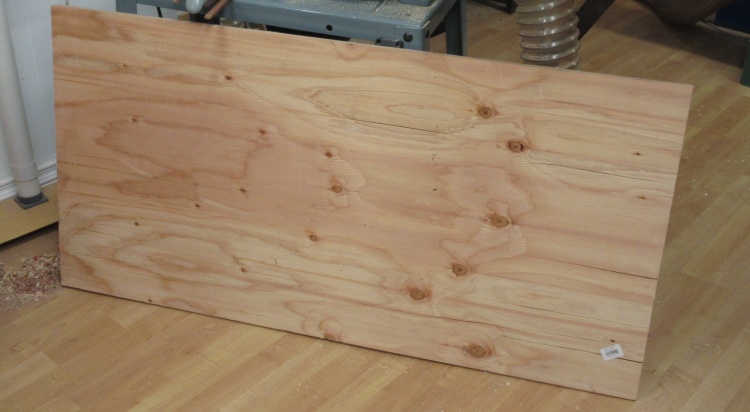
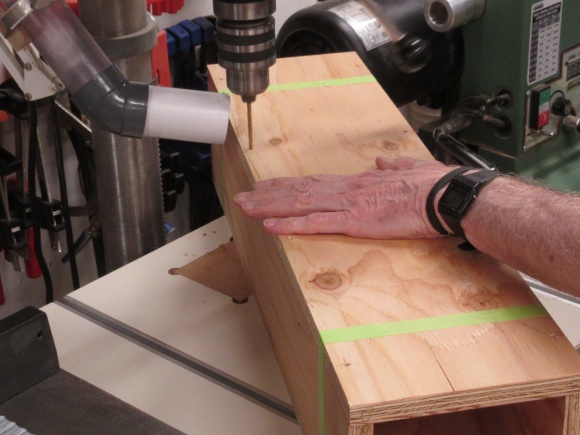
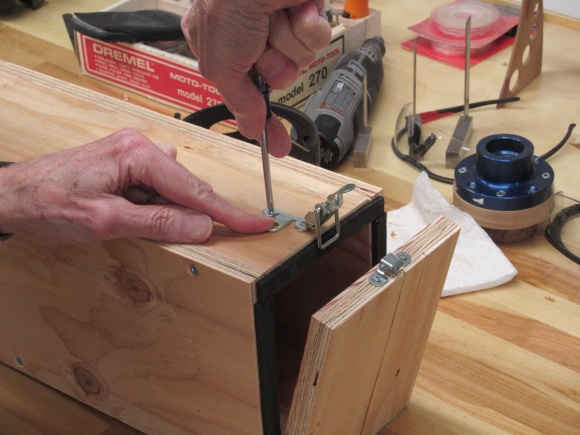
Then I needed a steam box. There are a few ways people make these but I opted for the classic "box screwed together from exterior plywood" approach.
I had earlier dug through my hardware bins and managed to find appropriate screws, hinges, a door latch and weather stripping so this plywood was all I needed to buy for the box construction. I felt quite frugal.
I had earlier dug through my hardware bins and managed to find appropriate screws, hinges, a door latch and weather stripping so this plywood was all I needed to buy for the box construction. I felt quite frugal.
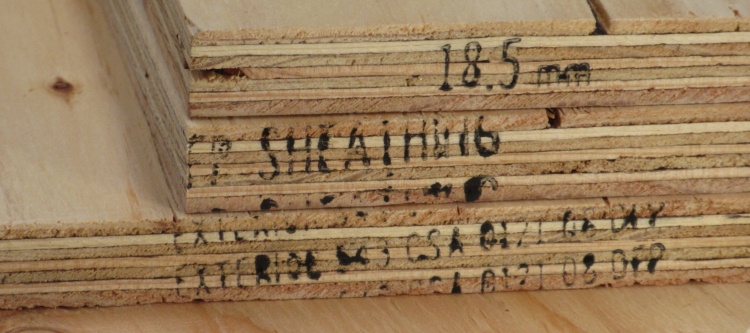
All the stats, poorly stamped
I didn't need a great deal of plywood for the box I was planning so the 24 x 48" Home Depot "handy panel" shown above was ample. As a bonus, it fit into the trunk of my car.
They somehow missed this in the comprehensive (if barely comprehensible) edge stamping, but this is Fir plywood.
They somehow missed this in the comprehensive (if barely comprehensible) edge stamping, but this is Fir plywood.
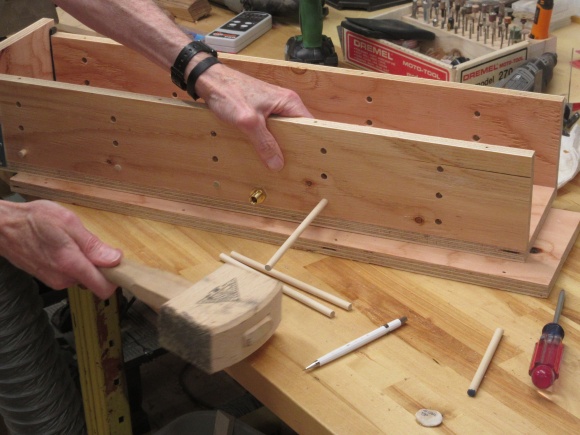
I didn't bother drawing plans for the box other than noting down some dimensions so once I had the plywood I proceeded directly to cuttin' and buildin'.
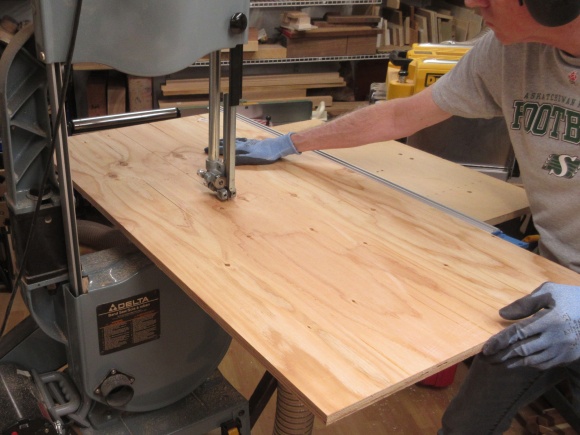
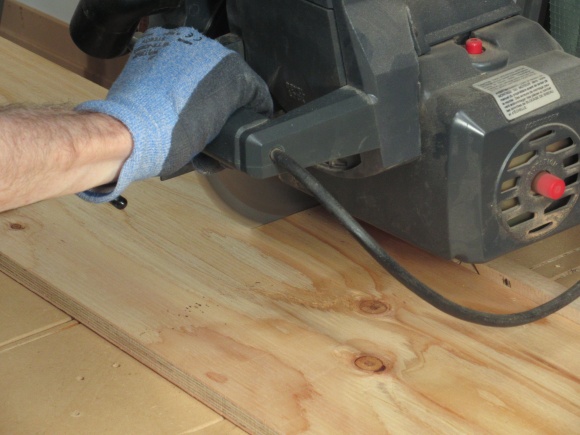
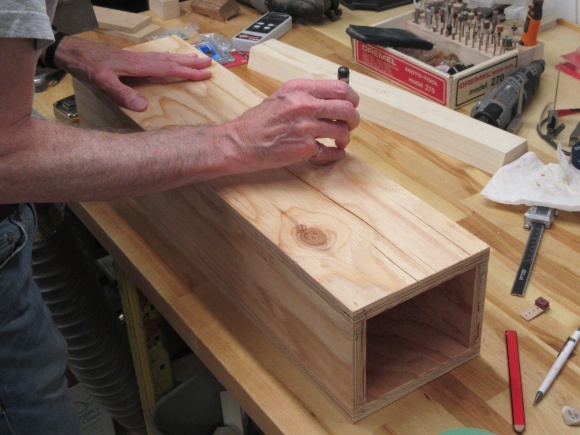
The steaming setup, ready to go
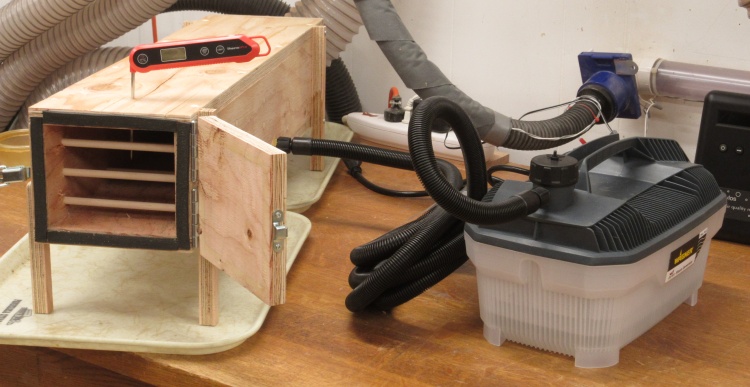
I added some legs to tilt the box toward the far-end drain hole, a shiny new meat thermometer to monitor steam temperature and some fiberglass trays underneath to contain what I assumed would be copious leaks.
The box was hooked up to the steam generator with the way-too-long hose that came with it and everything was ready to go.
The box was hooked up to the steam generator with the way-too-long hose that came with it and everything was ready to go.
Bending Form Tangent
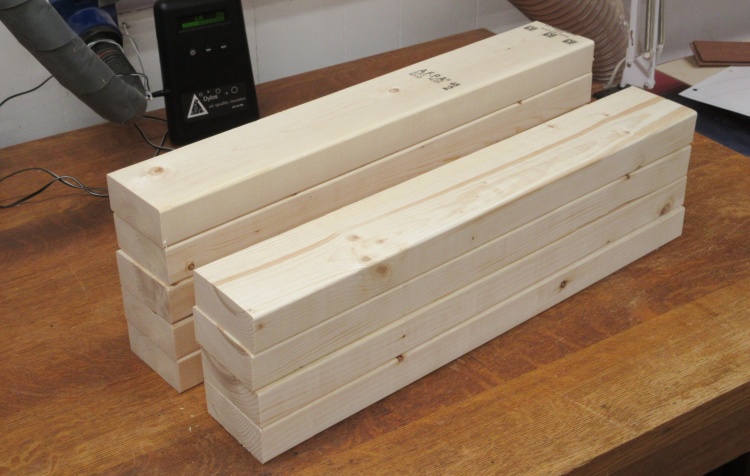
Some garden-variety 2x4s
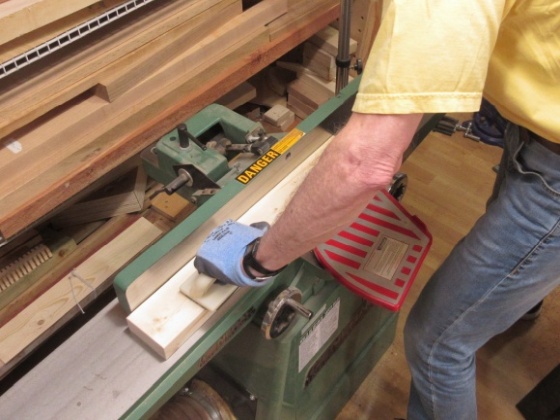
Little bit of flattening
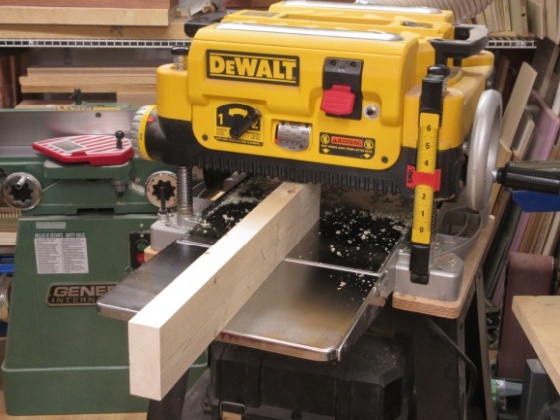
Some width planing
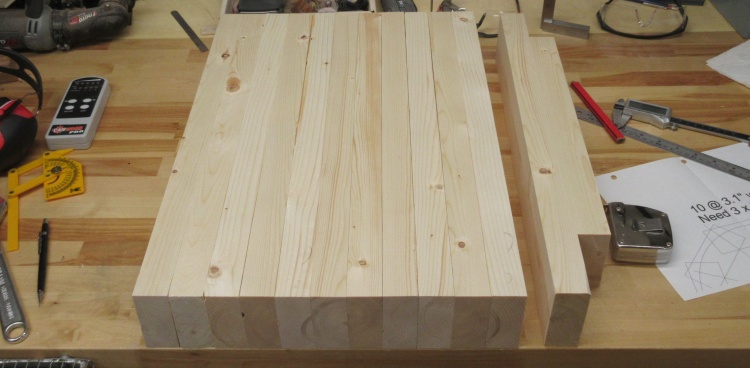
The 10 I'll need plus a spare
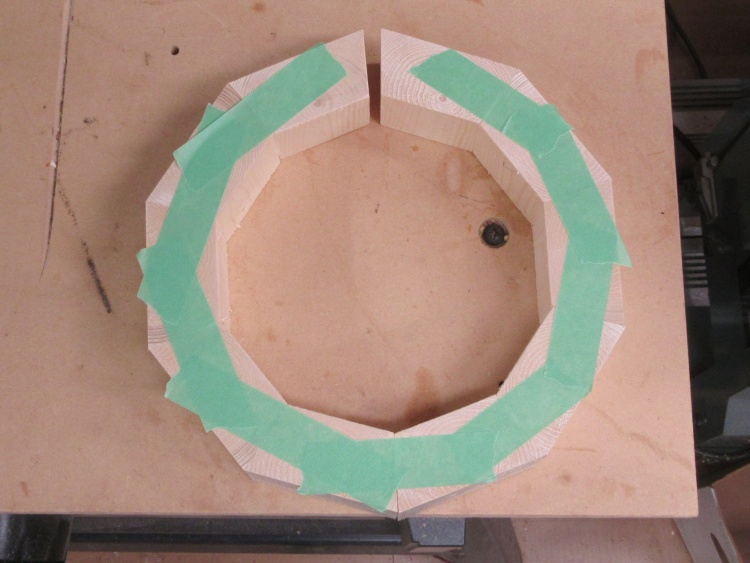
First stab at the cutting angle
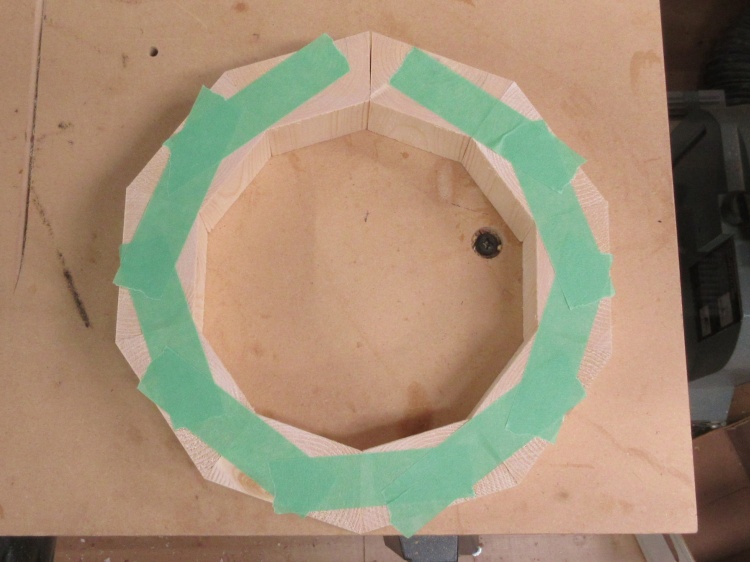
OK, that one is close enough
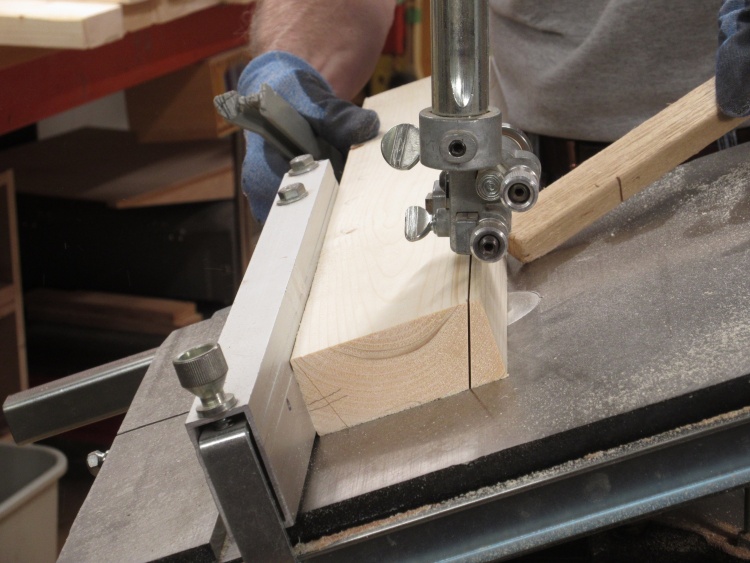
Cutting an 18° angle on the sides
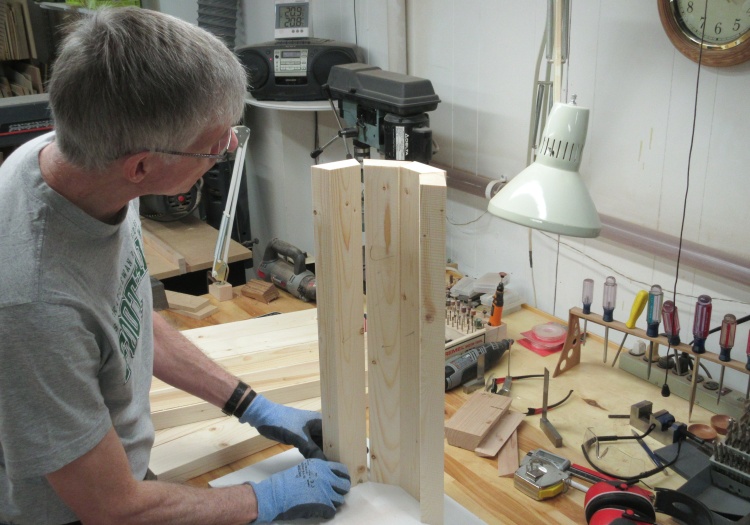
Checking the fit
A generous bead of glue
Band clamping while the glue hardens
Caps added and mounted to the lathe
Let the rounding begin!
Using a long sanding block
Round, straight and smooth
I was eventually going to need a form around which I would bend the wood while it dried out, and that would consist of a 9" cylinder a bit over 20" long. Bending thick pieces of wood usually requires metal straps to constrain one side of the wood. However I felt I could forgo that measure since I was contemplating only thin pieces.
I considered a bunch of methods to make the form, rejecting some (plywood bent around wooden discs), abandoning others (a large log that turned out to be way too heavy to work with, cardboard concrete forms with reinforcing wooden discs), and finally had the brilliant idea (if I do say so myself) of making one that I could then use as a frame for my next plant stand so I wouldn't end up with a big useless form to try to figure out what to do with.
(My humble apologies for ending that last sentence with a preposition. I should have said "...so I wouldn't end up with a big useless form with which I would have to figure out what to do." I hope you can find it in your heart to forgive me.)
I considered a bunch of methods to make the form, rejecting some (plywood bent around wooden discs), abandoning others (a large log that turned out to be way too heavy to work with, cardboard concrete forms with reinforcing wooden discs), and finally had the brilliant idea (if I do say so myself) of making one that I could then use as a frame for my next plant stand so I wouldn't end up with a big useless form to try to figure out what to do with.
(My humble apologies for ending that last sentence with a preposition. I should have said "...so I wouldn't end up with a big useless form with which I would have to figure out what to do." I hope you can find it in your heart to forgive me.)
Some garden-variety 2x4s
The form/frame could be more substantially made than something single-use so I decided to make a softwood version. Of course the most accessible softwood is dimensional lumber for construction - SPF by name, meaning Spruce, Pine or Fir. I think it's usually Spruce we get here but it also doesn't matter in this case.
Anyhoo, I started with a few 10' 2x4s from the local Co-Op and chopped them up into enough pieces (10) to make a cylinder.
Yes, admittedly, there are only 9 in this image but you can rest assured that the missing one looks a lot like these.
Anyhoo, I started with a few 10' 2x4s from the local Co-Op and chopped them up into enough pieces (10) to make a cylinder.
Yes, admittedly, there are only 9 in this image but you can rest assured that the missing one looks a lot like these.
Insert standard woodworking shots here...
Little bit of flattening
Some width planing
The 10 I'll need plus a spare
After cutting the wood to length I flattened two adjacent sides on each and thickness-planed to achieve the squarer-than-lumberyard versions seen here. I also made a couple spare pieces the same cross-sectional size to use for test cuts.
First stab at the cutting angle
The required cutting angle can easily be calculated to several decimal points (18.0000°) but the saw just laughs at any digits past the decimal point ("Zeros - Ha ha!"). So anyway I set it up as close as awkward angle measurements permitted, chopped up a spare 2x4, taped the pieces together and this was the result.
OK, that one is close enough
Looks like I need maybe 0.2° more angle - time to get out the little "adjustment hammer" to tap the table a bit. So, a bit of tapping, another length of 2x4 sacrificed for the cause and:
Close enough for something made with 2x4s.
Close enough for something made with 2x4s.
Cutting an 18° angle on the sides
I've been cutting the angles using the band saw as seen here. The table is tilted the appropriate angle and in this shot I'm cutting the first side on one of the staves.
Checking the fit
The acid test! They seemed decently close once I had them all standing in place.
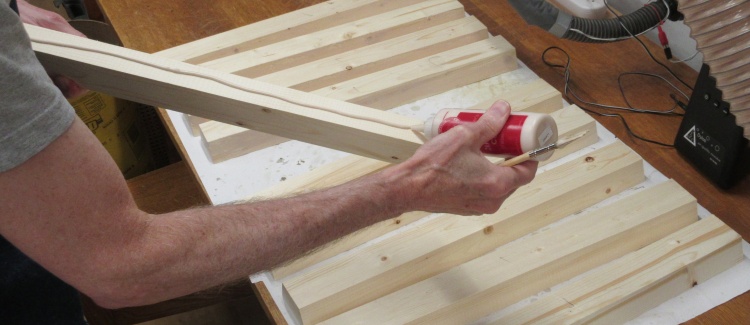
A generous bead of glue
Given the softness of the wood and the non-critical nature of this form, the edges were left with the saw-cut roughness.
I just used a generous amount of glue - spread with the paintbrush I'm holding - to make sure any gaps were filled.
I just used a generous amount of glue - spread with the paintbrush I'm holding - to make sure any gaps were filled.
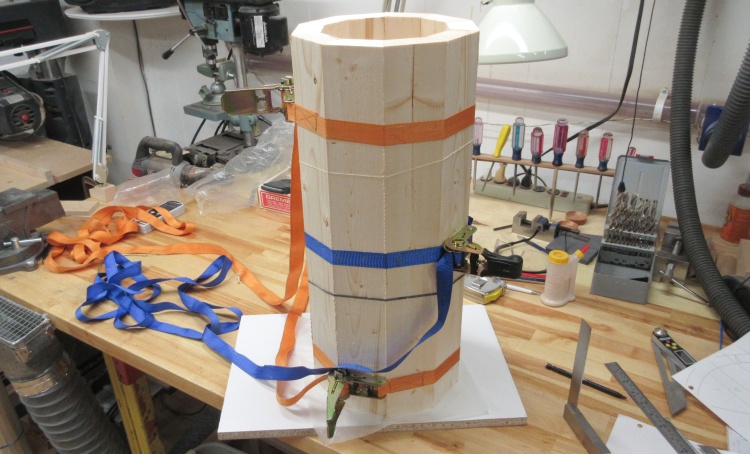
Band clamping while the glue hardens
It was easy enough to glue all the edges in one go, so I did that and then used band clamps to hold the whole thing together while the glue dried.
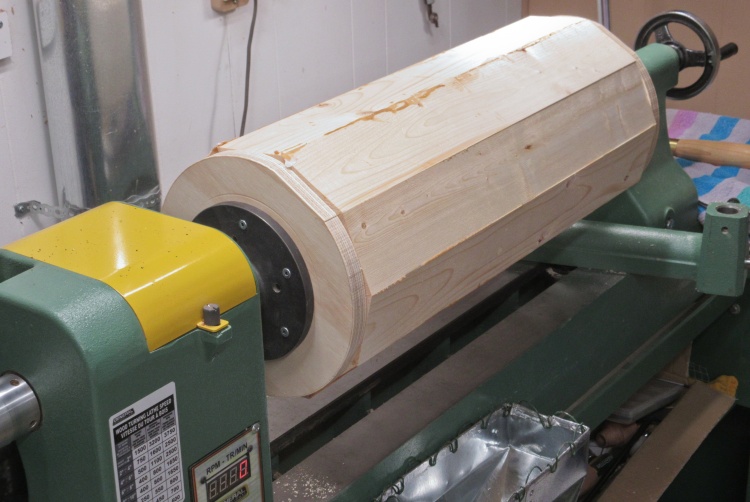
Caps added and mounted to the lathe
I also cut a pair of plywood discs that were glued in place to cap the ends to enable turning on the lathe.
In this shot, the whole shebang is on the lathe with a large faceplate screwed to one end.
In this shot, the whole shebang is on the lathe with a large faceplate screwed to one end.
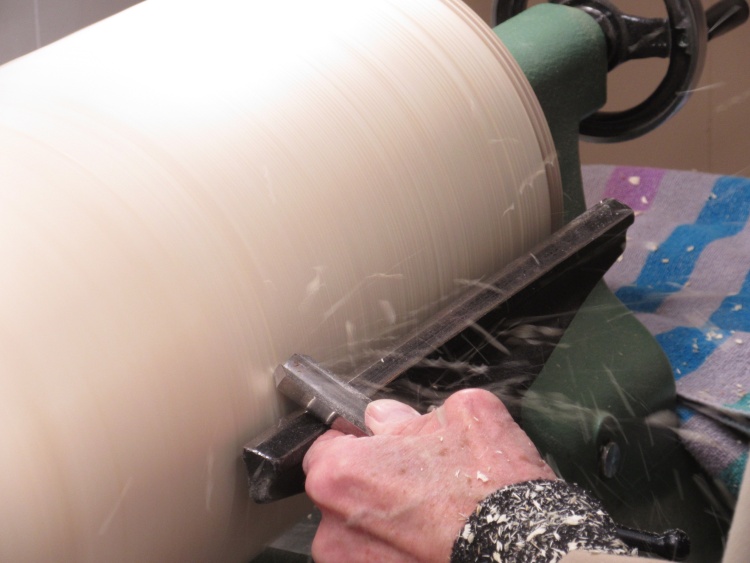
Let the rounding begin!
Rounding commenced with the roughing gouge. I got as close as possible to cutting it evenly along the full length and aimed for a 9" diameter.
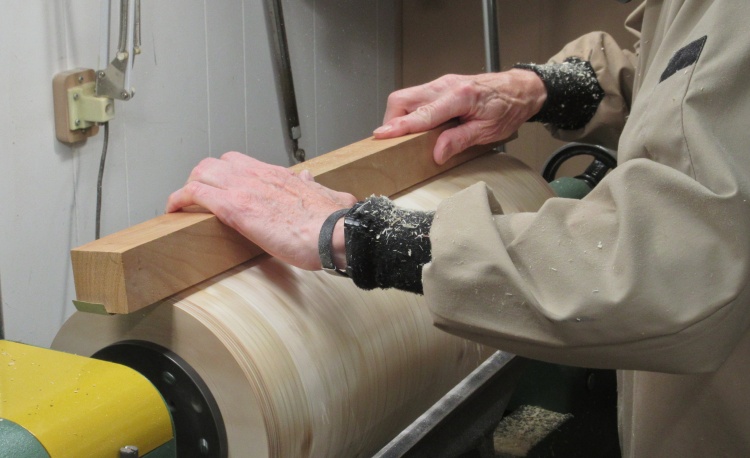
Using a long sanding block
My evening-out job was...imperfect. To get the profile nice and straight (which admittedly wasn't really necessary) I used a long straight sanding block with coarse sandpaper to even things out.
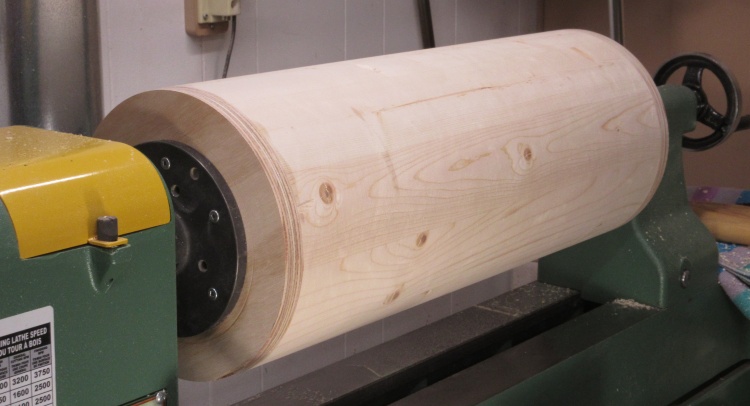
Round, straight and smooth
That resulted in a satisfyingly smooth and straight cylinder to use as a form.
Okay - back to the steam bending.
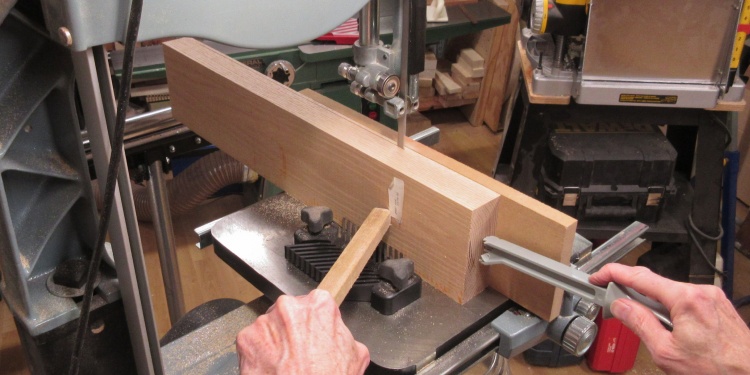
Cutting a test piece of Red Oak
Various wood species perform differently for steam bending but Oak is one of the best so I thought I'd start with that.
I cut a not-too-thin strip of Red Oak (5/32" thick) to use as a sample. Much thinner than that and I would need an awful lot of laminated layers to get to a decent leg thickness.
I cut a not-too-thin strip of Red Oak (5/32" thick) to use as a sample. Much thinner than that and I would need an awful lot of laminated layers to get to a decent leg thickness.
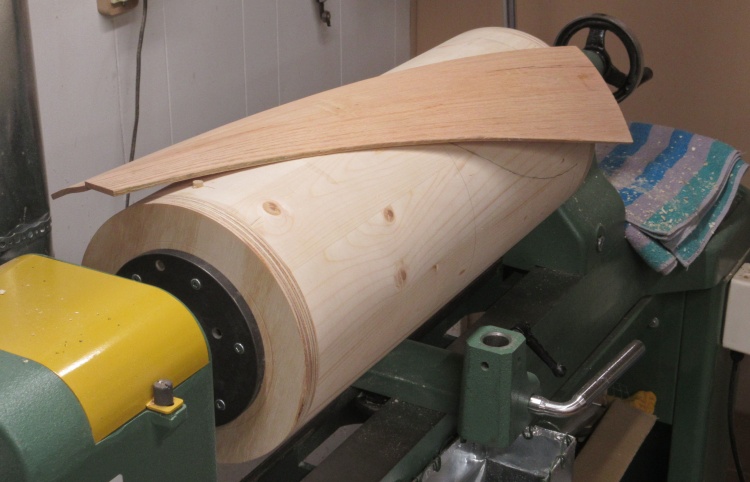
Disappointing result after bending process
The steaming went well and the form worked fine but the wood retained only about half of the curvature after it was dry.
I tried an even thinner piece (3/32" thick) and that held slightly more of the bend but it was still way off the curve I wanted.
It looked like it would take a trial-and-error approach to get to an appropriate curvature of form that would spring back to what I needed.
Yah, I don't think I'll go down that rabbit hole; Time to find a more deterministic process.
I tried an even thinner piece (3/32" thick) and that held slightly more of the bend but it was still way off the curve I wanted.
It looked like it would take a trial-and-error approach to get to an appropriate curvature of form that would spring back to what I needed.
Yah, I don't think I'll go down that rabbit hole; Time to find a more deterministic process.
Plan B - Coopering Legs
Another way to make a curved surface is to start with a series of side-by-side pieces with their edges cut at appropriate angles - like making a barrel. This process of coopering doesn't provide the continuous wood grain that you get with bent pieces but it should be almost as good-looking. It will need some shaping to get rid of the corners but that's not a big deal. For strength the grain runs vertically, which also allows for strong long-grain glue joints between the pieces. Here's the (monochromatic) idea:
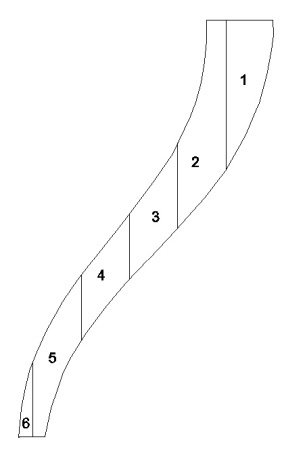
Dividing the leg into 6 pieces
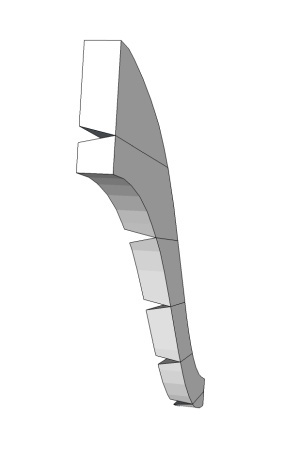
...which have angled edges
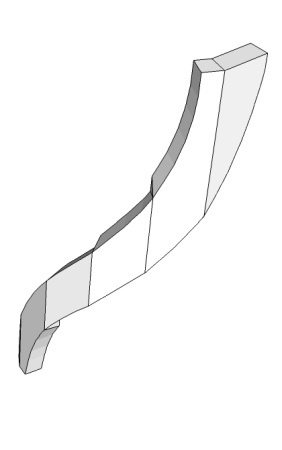
...to bend into a curve
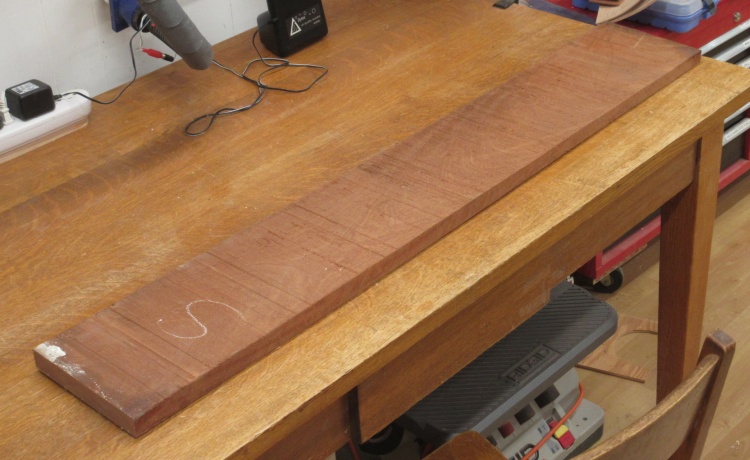
A rather rough Sapele plank
I decided on Sapele for the plant stand, partly since I had some spare bits left over from a previous project. This rather rough plank should be enough for the legs.
The leg segments all start out at just over 2" in width and I had determined an efficient way to get the six segments out of a couple 18" blanks. So then it was a matter of whipping up the appropriately-sized blanks.
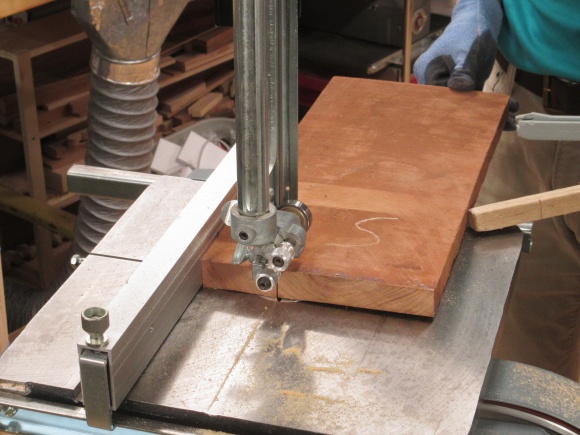
Cutting to width
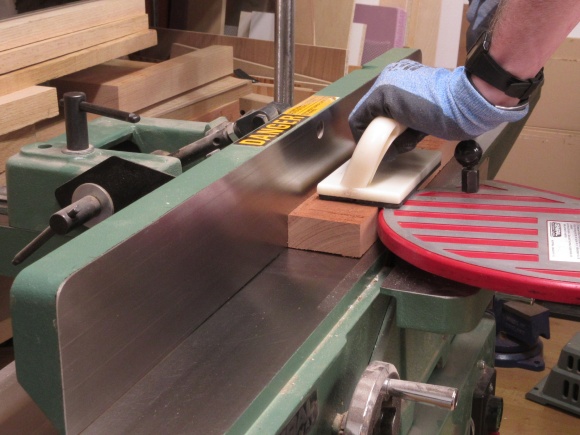
Flattening faces
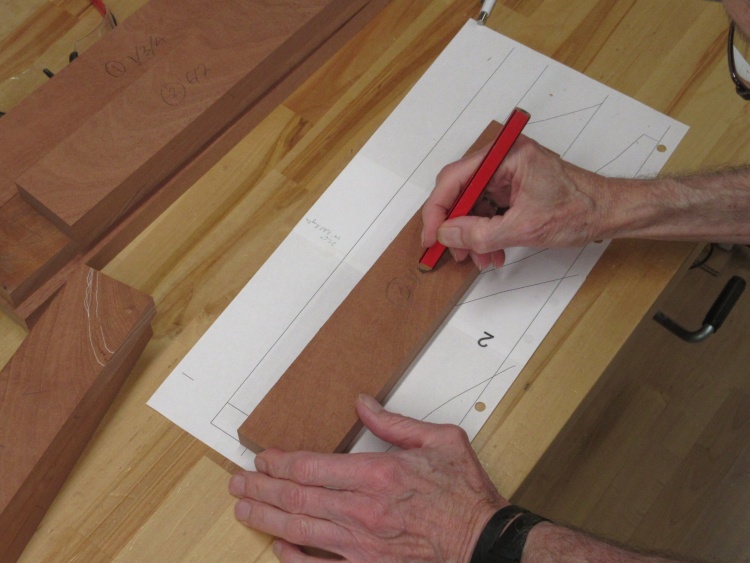
Allocating boards to legs
Due to some cracks in the plank that I hadn't initially noticed, some of the blanks were shorter than others. I went through and assigned specific segments to specific blanks based on length.
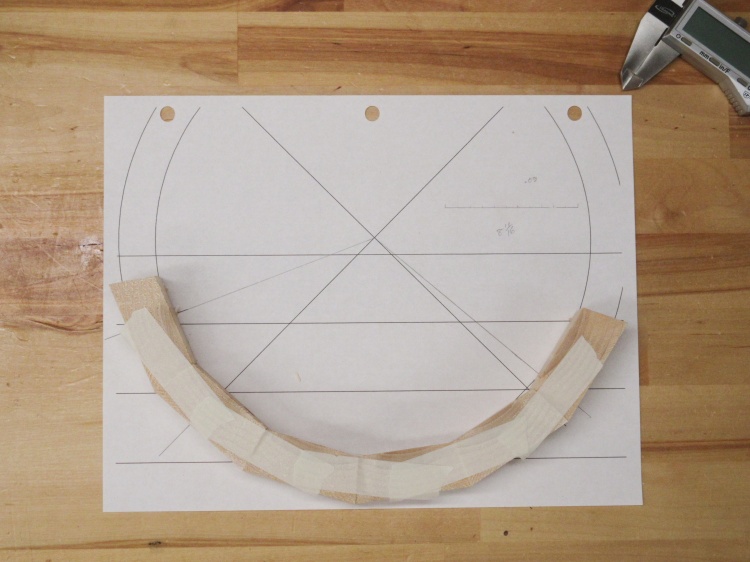
The cutting-angle test
But first I needed to (once again) nail down the angle of the band saw table to have the legs curve appropriately.
That was a theoretical 12.6° and so I set the table to that ballpark and just ignored its laughter ("snort - zero point six degrees - right").
Then I grabbed another 2x4, cut it to the appropriate size, cut the angled sides and assembled it. Close enough!
That was a theoretical 12.6° and so I set the table to that ballpark and just ignored its laughter ("snort - zero point six degrees - right").
Then I grabbed another 2x4, cut it to the appropriate size, cut the angled sides and assembled it. Close enough!
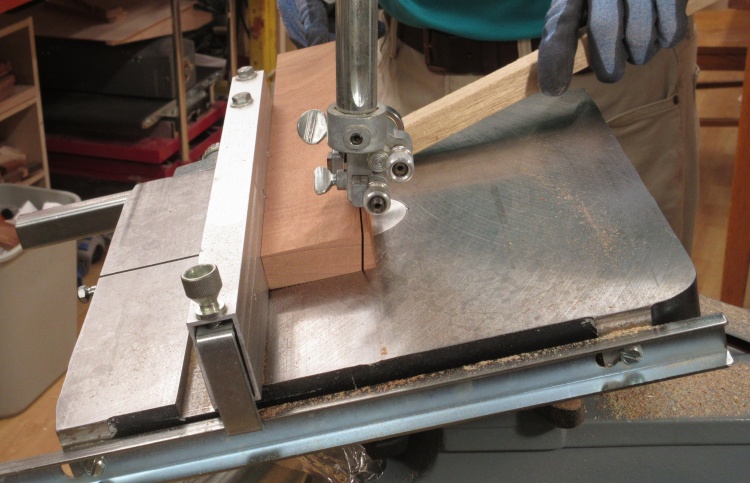
Starting to bevel the edges
With the angle nailed down I proceeded to cut the sides of the blanks.
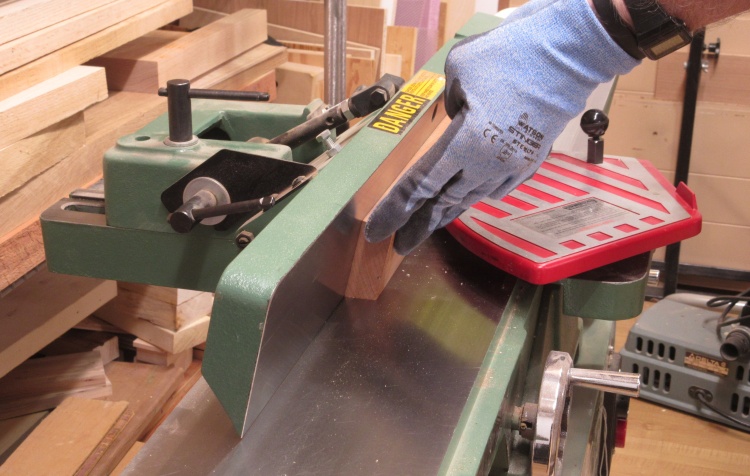
Cleaning up the cut edge
I wanted the joints between the leg segments to be nice and tight but the rough surface the band saw leaves wouldn't help with that. So I set up the jointer to as close as I could get to 12.6° and took a single pass to clean up the edge.
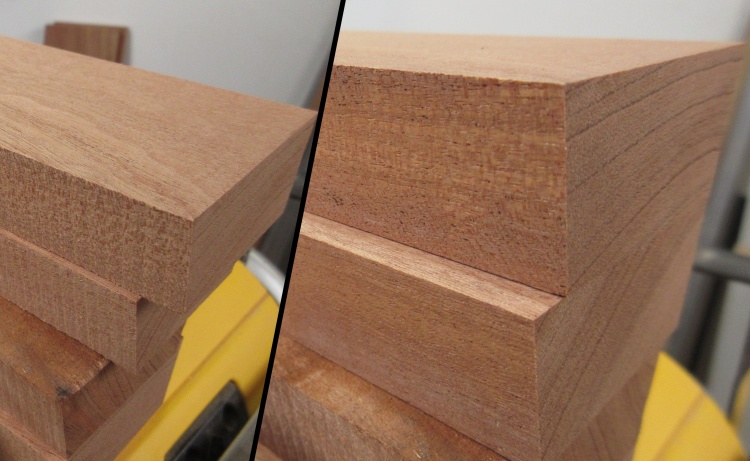
Before and after edge shots
This is before and after the jointer. The "after" edges are obviously way smoother plus they're guaranteed to be straight as well which should make for tight joints.
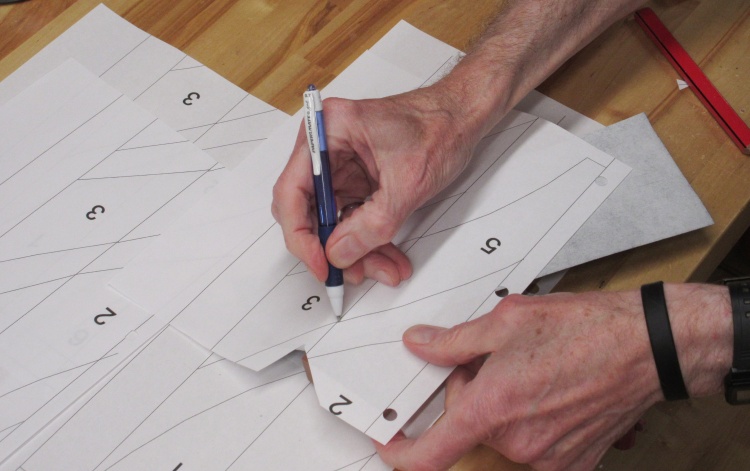
Tracing on the piece shapes
Then out came the carbon paper and I traced the segment shapes on to all of the blanks.
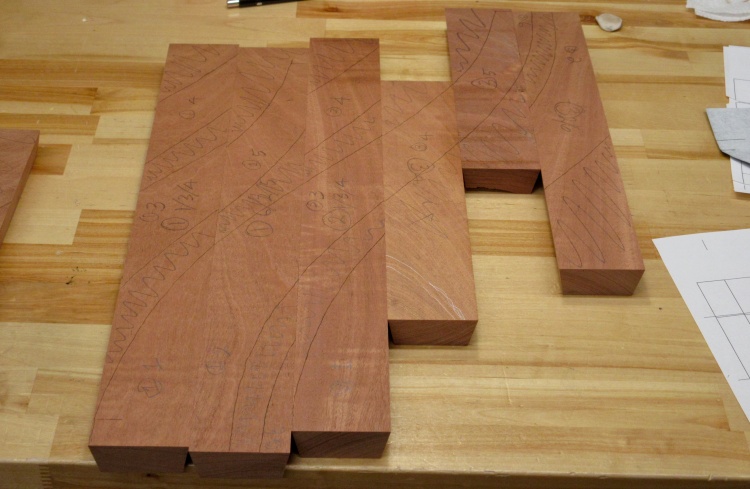
You can see a full leg snaking through the middle
This is a bit over half the blanks and winding through the middle you can make out the complete shape of one of the legs.
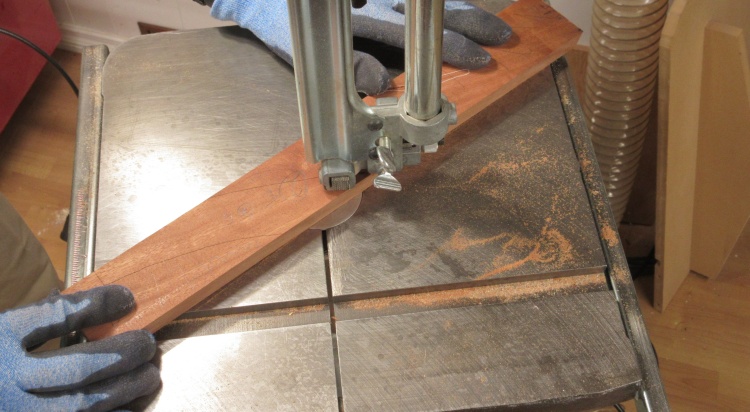
Cutting out individual pieces
Back to the band saw to cut out the individual segments.
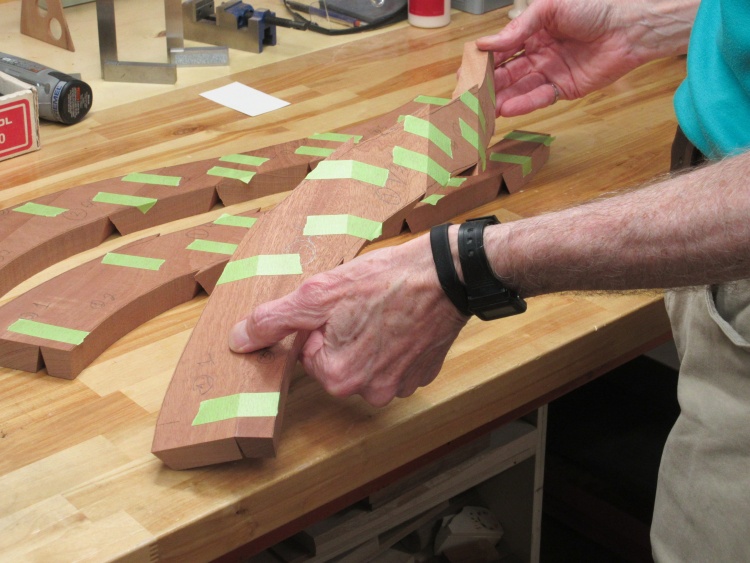
Legs taped together to check the fit
Here I've taped together the segments for the three legs as a check. The hand-held one shows what the glued-together version will look like.
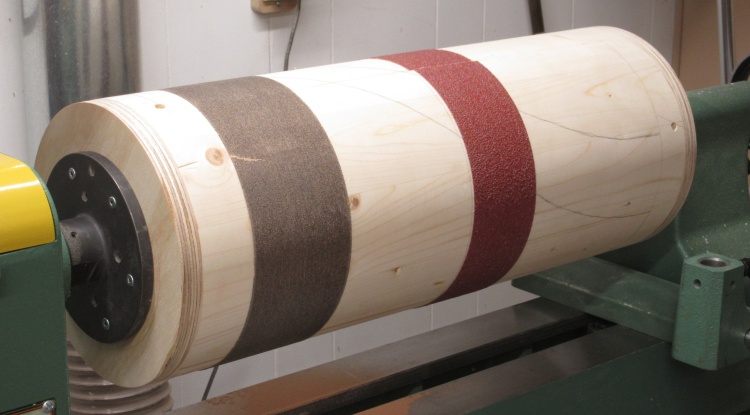
The big form re-purposed!
Remember the big cylindrical form? Well, the diameter matched what I'd need for the inside of the legs so I added some sandpaper strips to turn it into a drum sander.
That's a nasty 36 grit on the right with 80 grit on the left.
That's a nasty 36 grit on the right with 80 grit on the left.
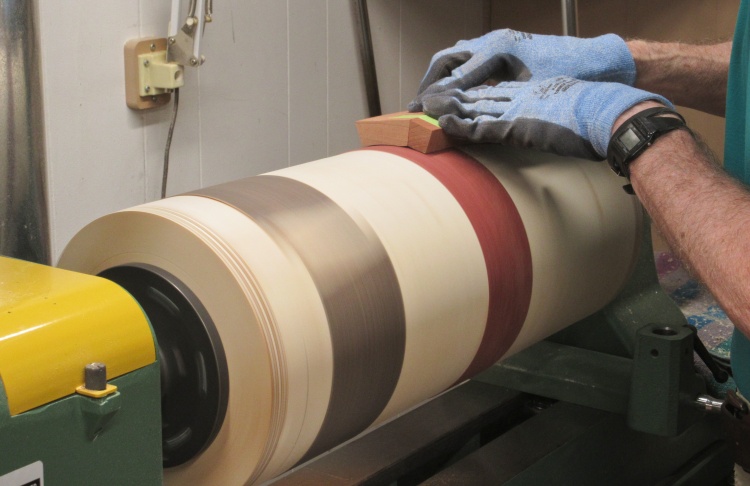
Rounding the inside profile
The insides of all the leg segments would need to be changed from flat to a 9"-diameter concave surface. I taped pairs of segments together and sanded them into curvedness.
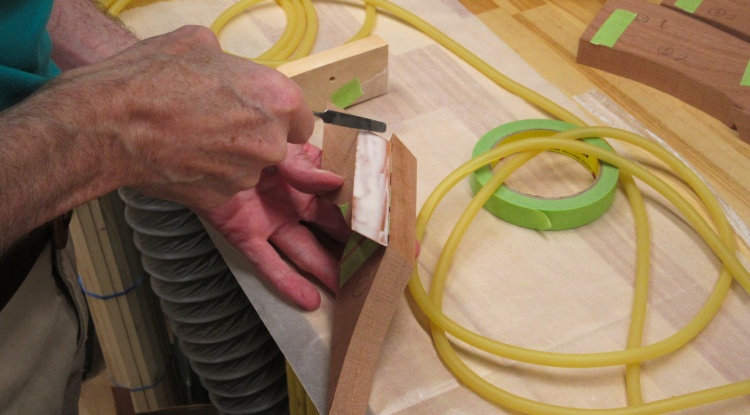
Gluing a joint
Once the inside faces had at least approximately the correct curve, I started gluing segments together. I just glued pairs of adjacent segments and later put those pairs together.
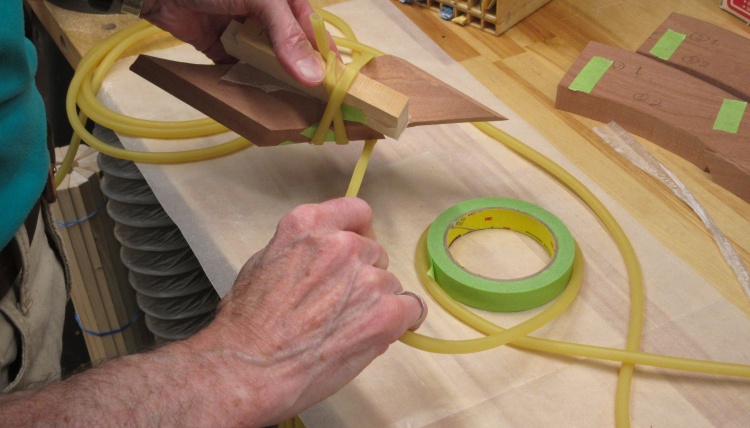
Clamping with surgical tubing
Given the odd angles, conventional clamping was impractical so I taped the top surface and then wrapped surgical tubing around to apply "clamping" pressure.
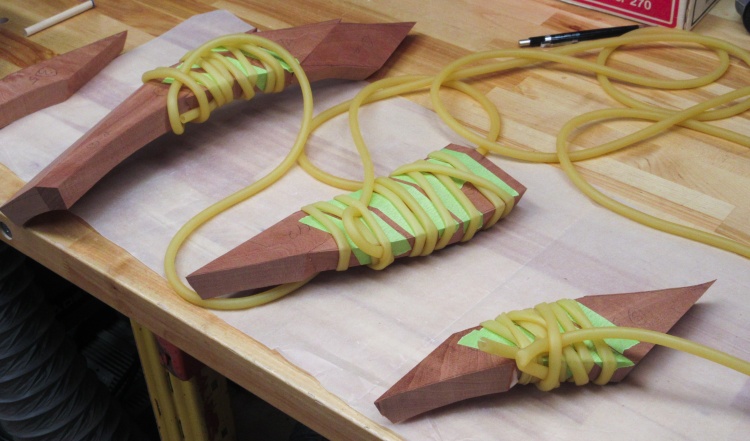
I usually did three joints at a time
I usually did three gluings in a sitting. The nearer two are segment pairs while the further one consists of two pairs going together.
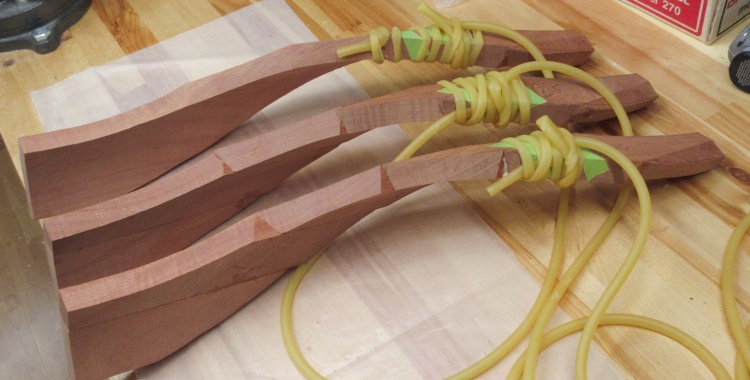
The last bits of the legs going on
The final gluing for all three legs.
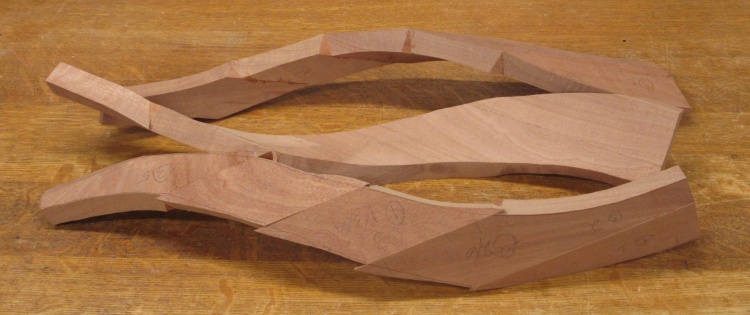
Three piecewise linear approximations of curved legs
The "raw" legs are done in this shot but they cry out for the edges and faces being sanded into curves.
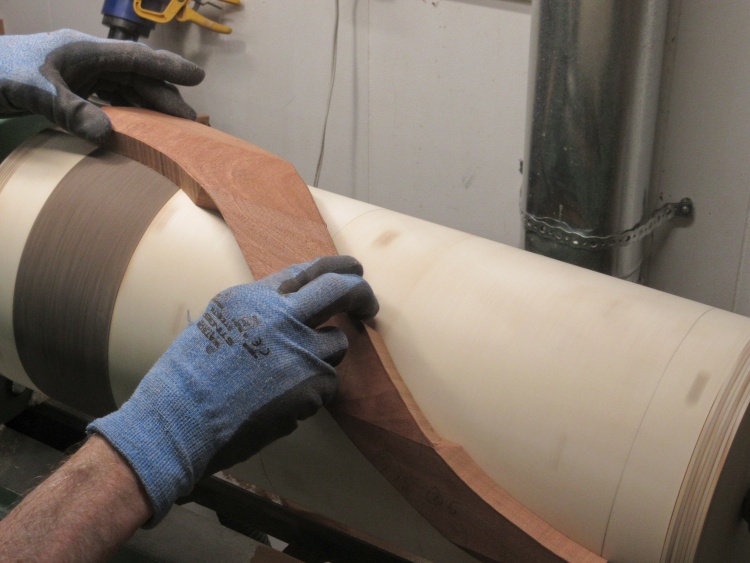
Touching up the interior curve
The inside curves were already almost right. I just re-did the full inside to make sure all the segments were properly flush.
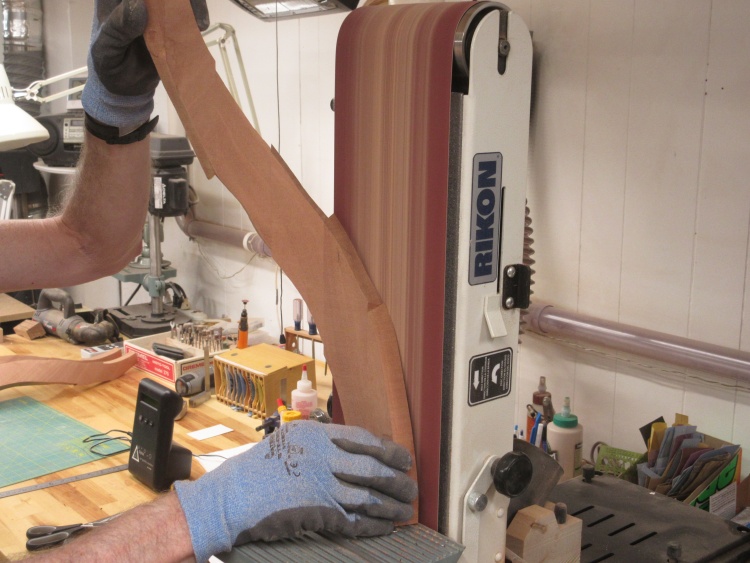
Rounding the outside profile
Next the angular outside joints got some attention using the belt sander.
The edges needed some serious attention. I started the smoothing with the drum end of the belt sander and then smoothed my somewhat warbley curves with a curved form by hand. I then gave a rounded profile to the edge using the spokeshave followed by sanding.
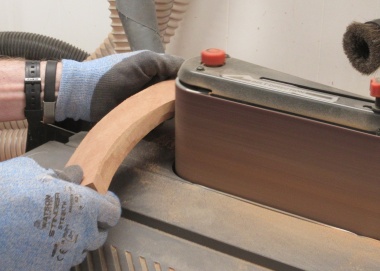
Evening out the edges
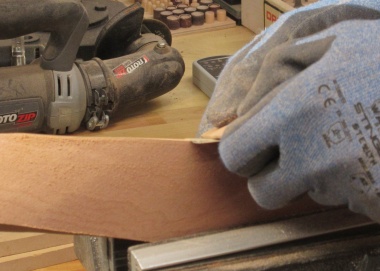
Smoothing the edges
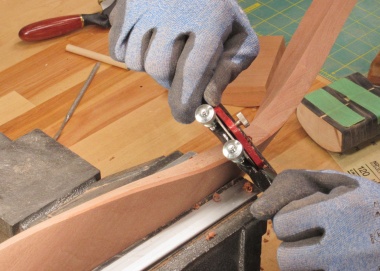
Adding a curve to the edge
Oops
So it was at about this stage that I was upstairs doing something unrelated and realized - "Hey - this plant stand was supposed to have (checks plan) 4 legs, not three." Ya. Well, I hardly want to go through another leg-building exercise when it will stand perfectly well with three. So I guess it's a 3-legged plant stand. Yay triangles...
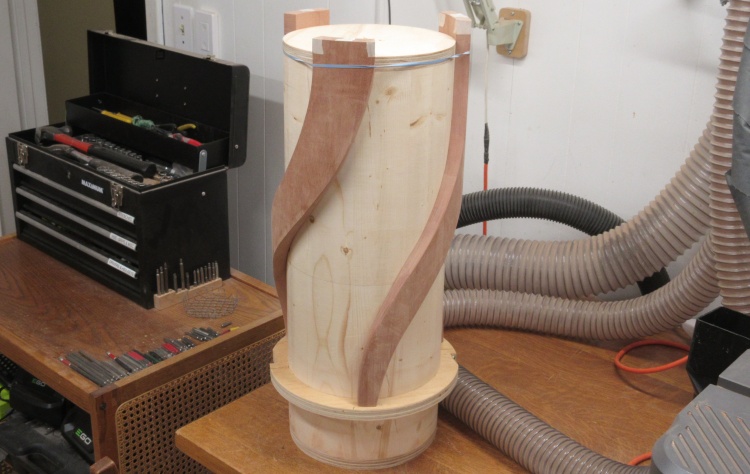
Another use for the form
At least with three legs it can't rock if the legs or floor are uneven. Bonus!
So then it was back to my multi-purpose form. It seemed like it would be a good place to assemble the table since I could make sure the legs were "vertical" and evenly spaced. I added a plywood disc to act as a floor and checked out the positioning of the legs; Thumbs-up.
So then it was back to my multi-purpose form. It seemed like it would be a good place to assemble the table since I could make sure the legs were "vertical" and evenly spaced. I added a plywood disc to act as a floor and checked out the positioning of the legs; Thumbs-up.
Stretcher
The legs would be poorly supported if they attached only at the top so the stand was going to need a stretcher: an assembly that ties the legs together in some manner lower down.
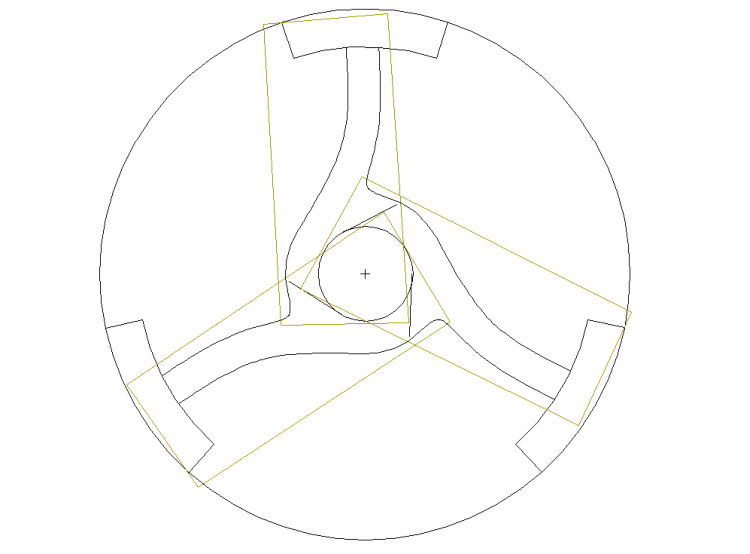
A three-armed stretcher
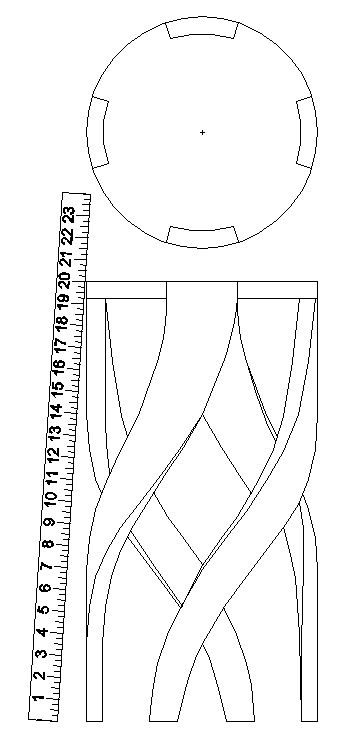
In keeping with the curved motif, I drew up a curved stretcher to tie the three legs together.
I decided I would have the same grain direction to each leg so it would need to be composed of three identical parts.
I decided I would have the same grain direction to each leg so it would need to be composed of three identical parts.
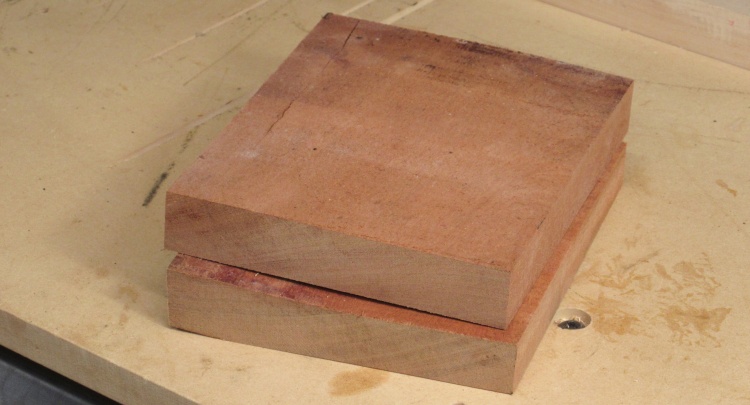
Pays to save scraps!
This would be a good way to use up some short scraps so I grabbed a couple of those.
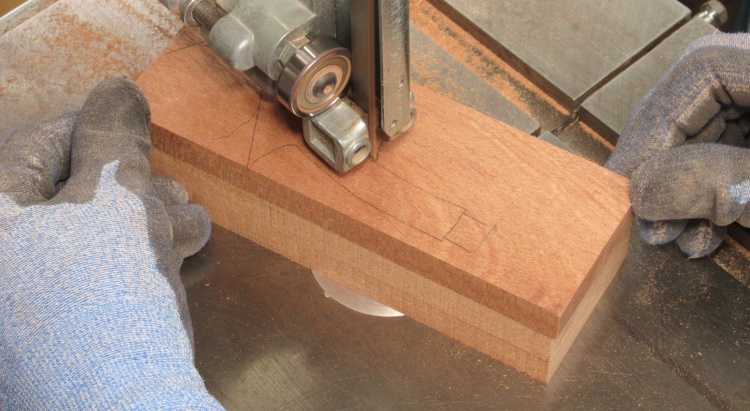
Cutting out a stack of stretcher pieces
After cutting three blanks to the appropriate size and thickness, I traced the shape onto one and taped them together so I could cut them out with one operation.
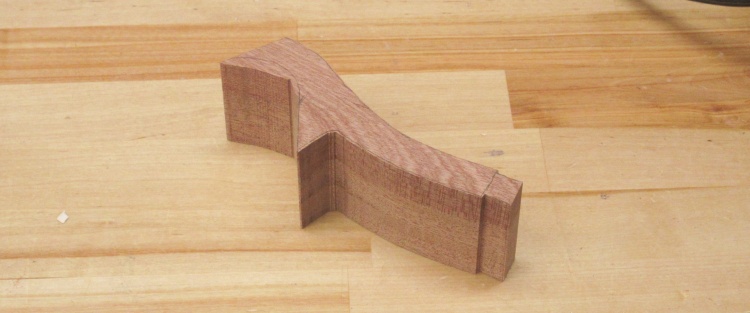
Ready for some finer shaping
That's the pieces, hot off the band saw. They are going to need some work.
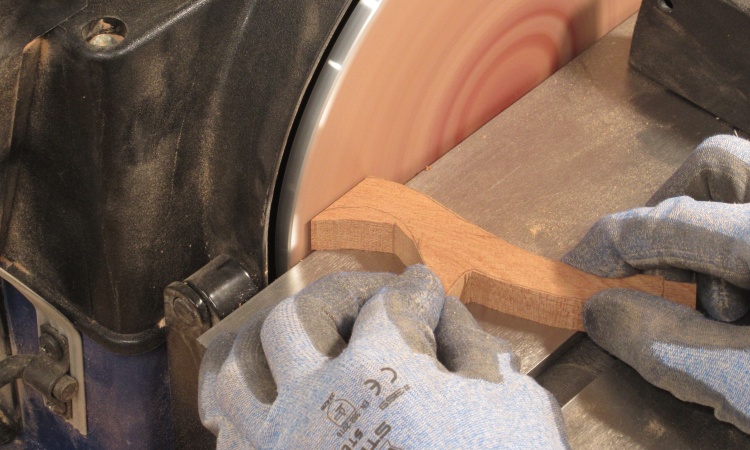
Flattening an end
I used the disc and belt sanders to straighten the mating areas and tweaked the angle of one of the ends to ensure a tight fit of the three pieces.
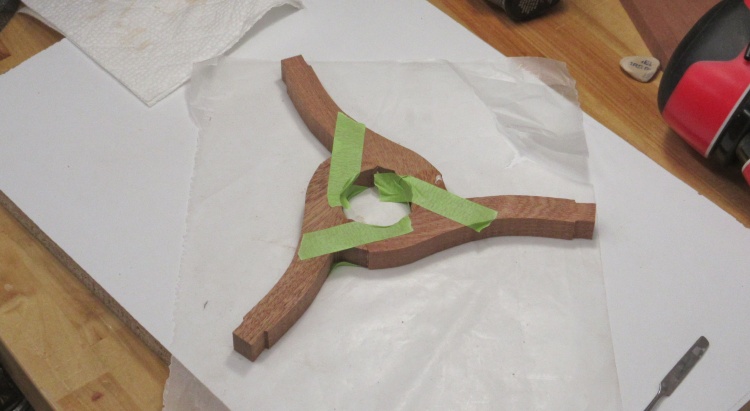
Glued and tape-clamped
The three pieces were glued together and binding tape was added to both sides to provide a bit of clamping pressure.
Then it was a matter of cleaning up this rough-looking piece. The drum sander was used for most of the outside sanding with a smaller drum used for the center hole. Small belt and drum sanders helped with corner areas. I also needed circular tenons on the ends to go into the legs and then worked toward getting a circular profile for the whole stretcher.
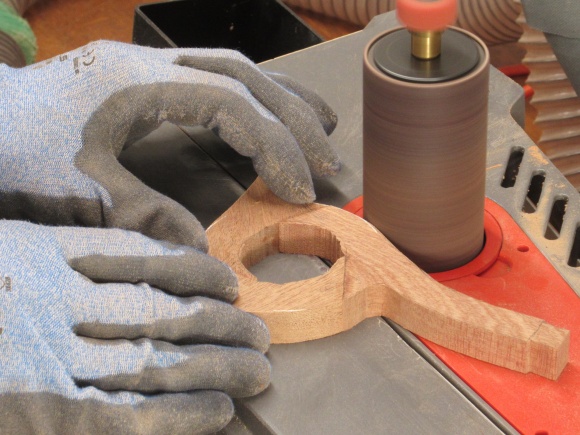
Smoothing the outside
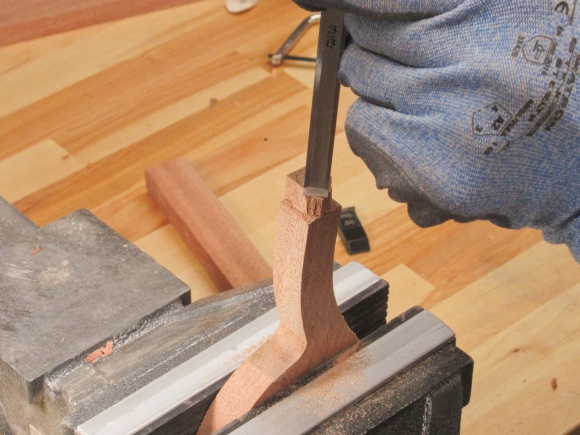
Cutting a circular tenon
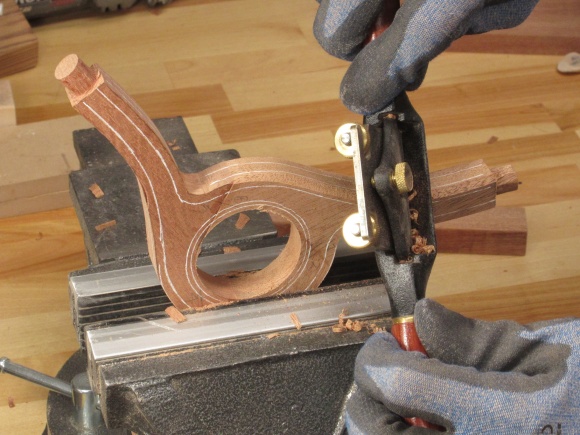
"Octagonalling"; first step to a round profile
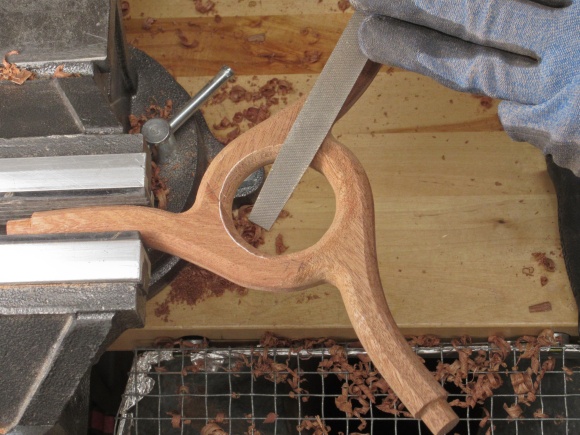
Adding a 16th facet
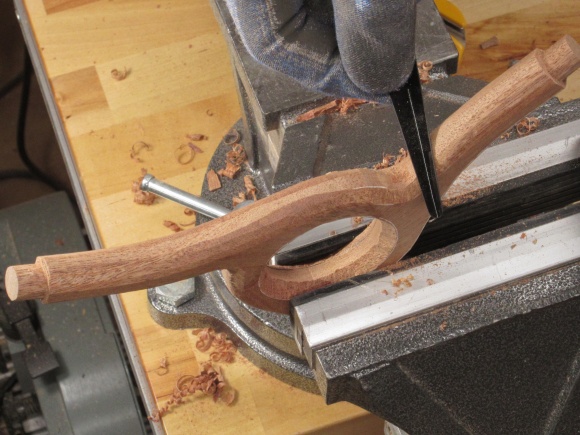
A curved sander helped on inside corners
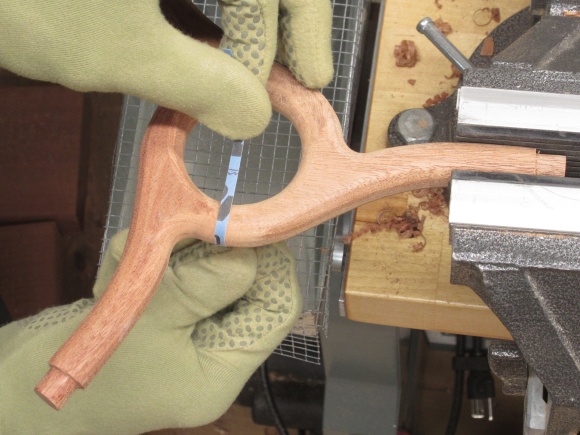
Sanding the profile round
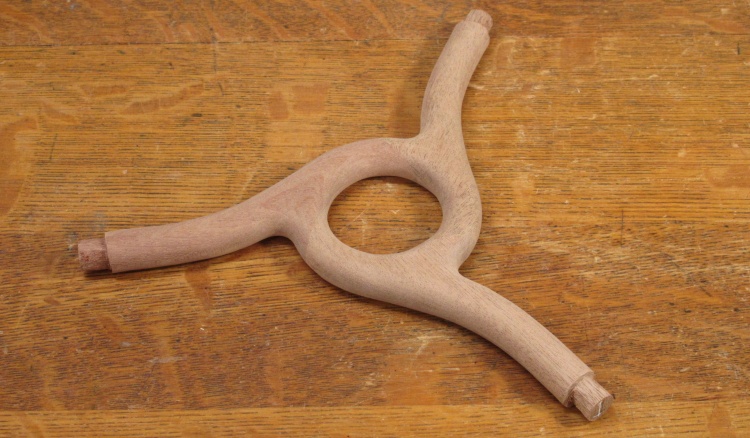
The completed stretcher
The above photos pretty much tell the story. When done I was left with this round-profile stretcher that should fit inside the three legs.
Top
OK, the top of the plant stand is a bit late to the game, but it's also pretty simple so I wasn't too worried about it. The trickiest part was accurately cutting the notches into which the legs would fit.
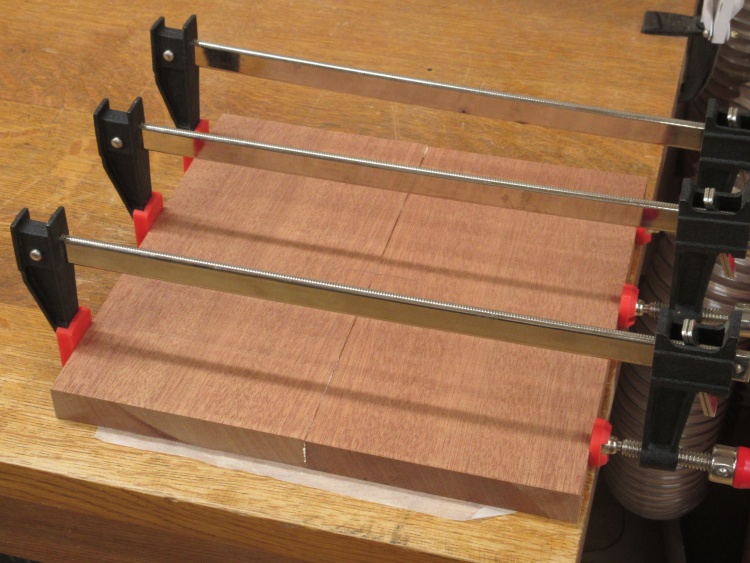
Laminating pieces for the top
I started with some 8/4 Sapele and cut it in half the hard way (i.e. into two 1"-thick pieces) to make a book-matched pair which were reunited edge-to-edge as shown here.
I don't have a circle cutter for my band saw and decided it would be too much work to build one so I just marked the circle and cut the top manually a bit outside the line. And then with some more manual work, sanded it to size. I do have a circle sander for the belt sander and that helped with final circularizing. I then went on to cut appropriately-sized notches for the legs.
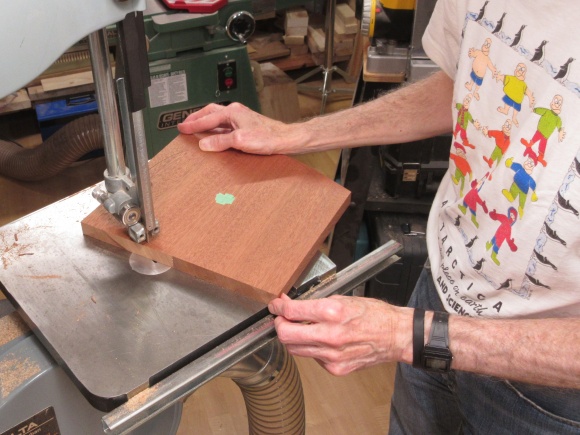
Cutting round
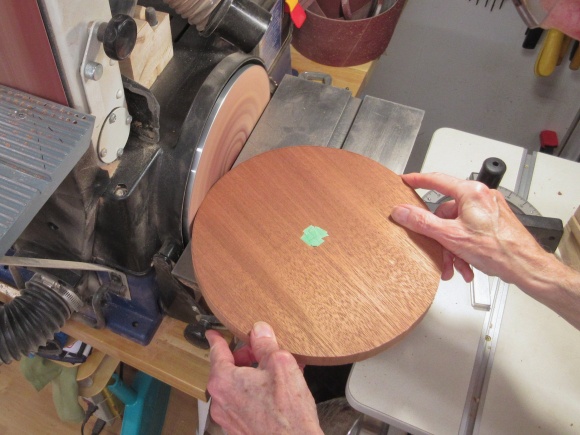
Sanding closer to the line
After marking, the leg notches were largely cleared out using a Forstner bit in the drill press. A finer Dremel cutting bit was used to level the top surface of the opening and then chisel work finished cutting the opening to the correct size and shape.
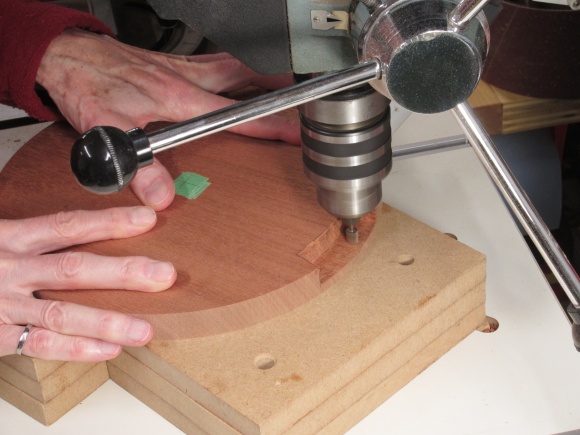
Hollowing a leg notch
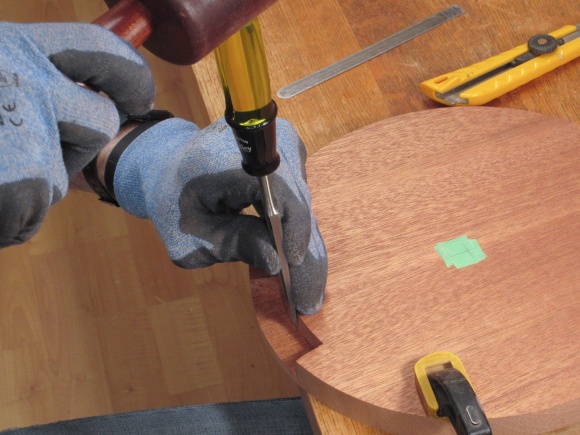
Shaping a leg notch
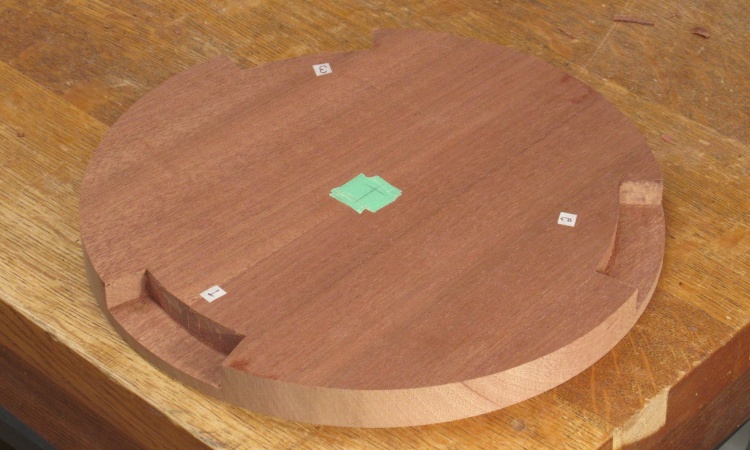
The underside of the top
This shot is of the underside of the plant stand top after the shaping work.
Assembly
I thought that the leg-to-top joints would benefit from some reinforcement. Dowels or biscuits are the usual techniques but since the odd radial fit of the legs may make dowels problematic, I went the biscuit route. Those just require a matching slot in the two mating pieces.
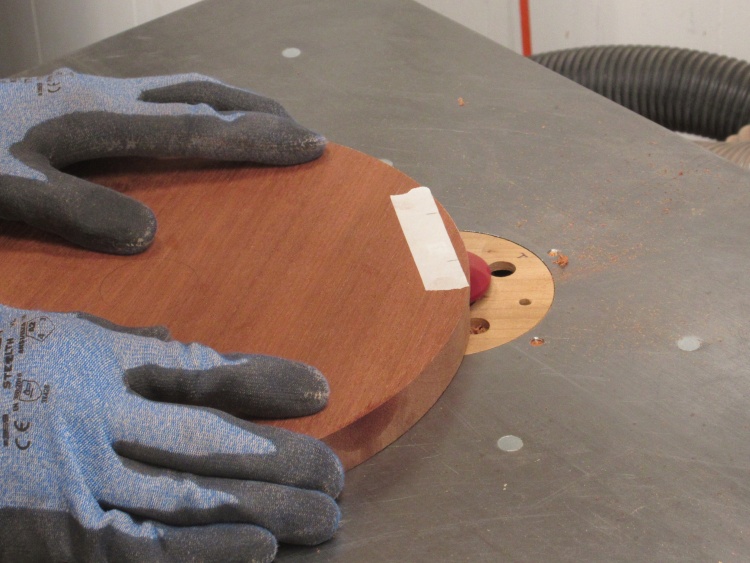
Adding a biscuit slot to the top
I needed to modify my slot-cutting bit to be able to fit under the limited height of the leg notches but then it was a simple matter to put a slot in the back of the notch.
Fortunately the length and horizontal position of the slot isn't too critical so I didn't need precise positioning.
Fortunately the length and horizontal position of the slot isn't too critical so I didn't need precise positioning.
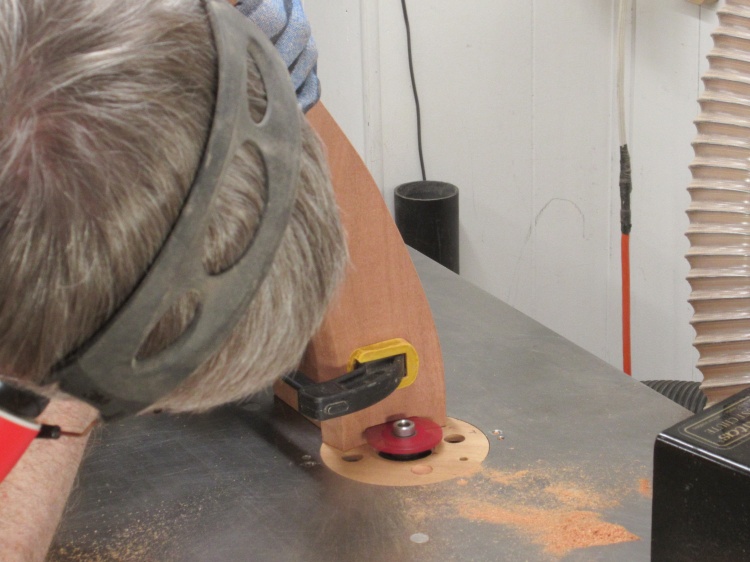
...and to the legs
The legs got a "hold-it-square" block clamped to the outside and insides received a matching slot.
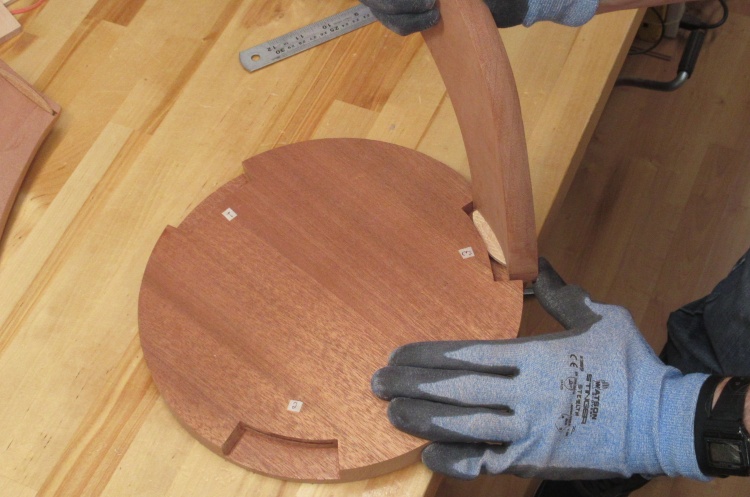
Leg test fit
Here I'm trying out the fit of one of the legs with the biscuit in place. Everything seemed to fit OK.
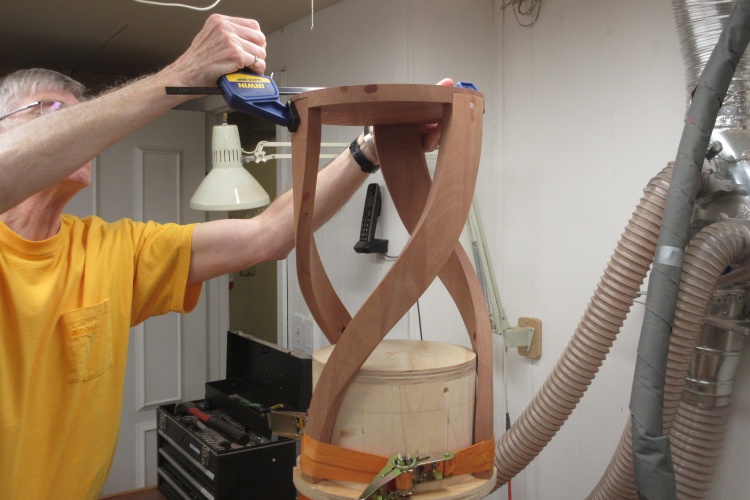
Gluing in the first two legs
I needed to do some more-detailed fitting of the stretcher before it could go in so I started by gluing in only two of the three legs.
I used the form to ensure the legs were held in the correct positions.
I used the form to ensure the legs were held in the correct positions.
With only two legs in place, I could insert and remove the stretcher and the third leg. That let me mark the stretcher ends and then I trimmed to the marked lines to match the curvature of the legs.
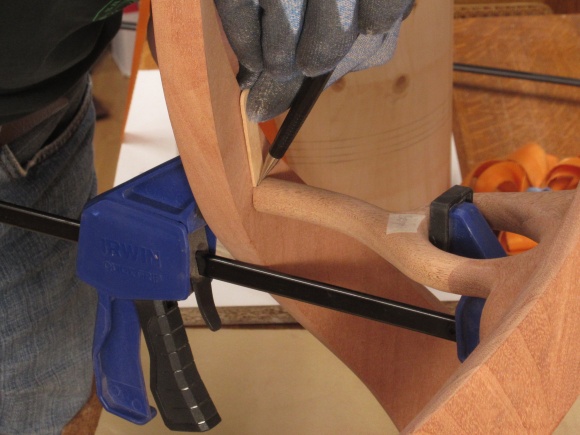
Marking leg contour on stretcher
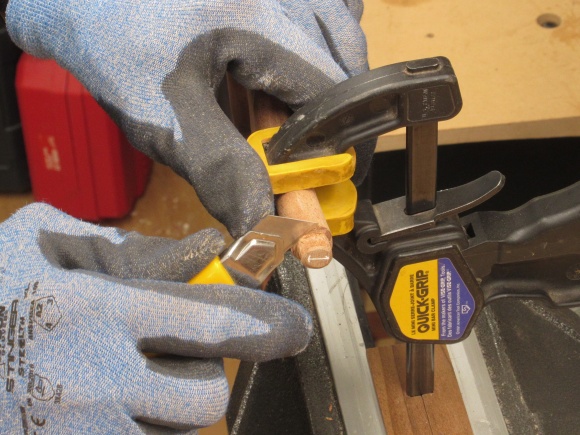
Trimming stretcher end
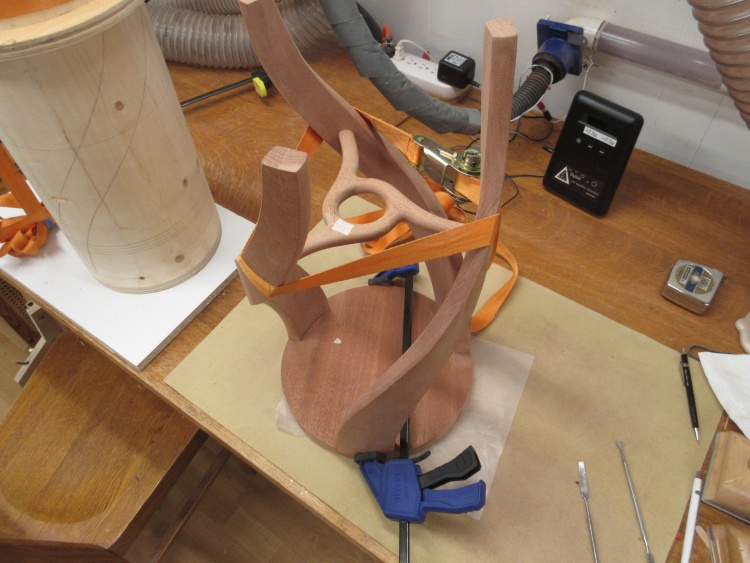
Gluing the last leg and the stretcher
Once everything was fitting nicely, I could put the pieces together one last time, but with glue. Here the last leg plus stretcher are glued and things are clamped to close up any gaps.
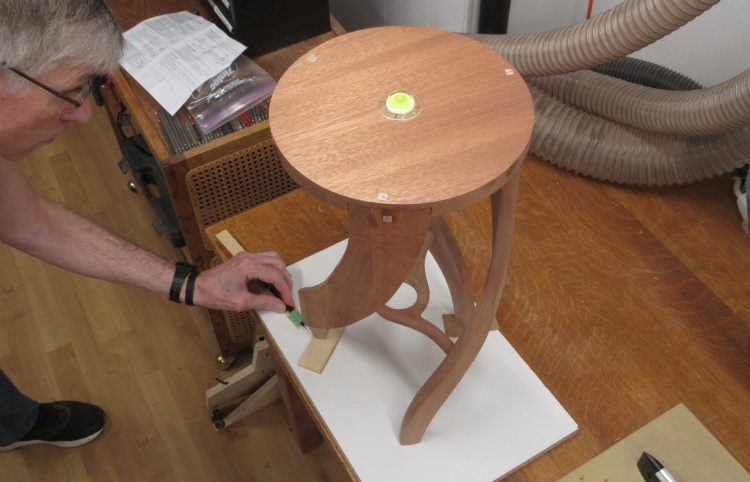
Tweaking leg length for a level top
The leg lengths were not all exactly the same so I adjusted them until the top was level in all directions.
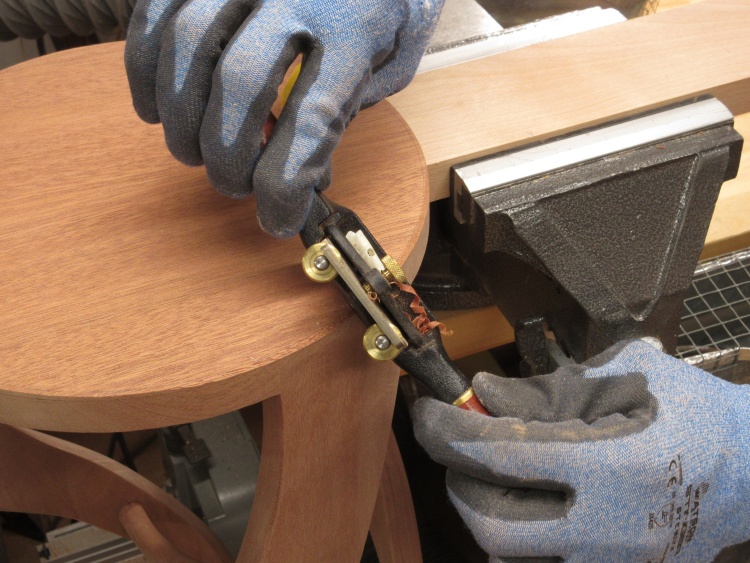
Bevelling the top as start of rounding
The last detail was to round over the top with a small radius. That was done with the spokeshave followed by sanding.
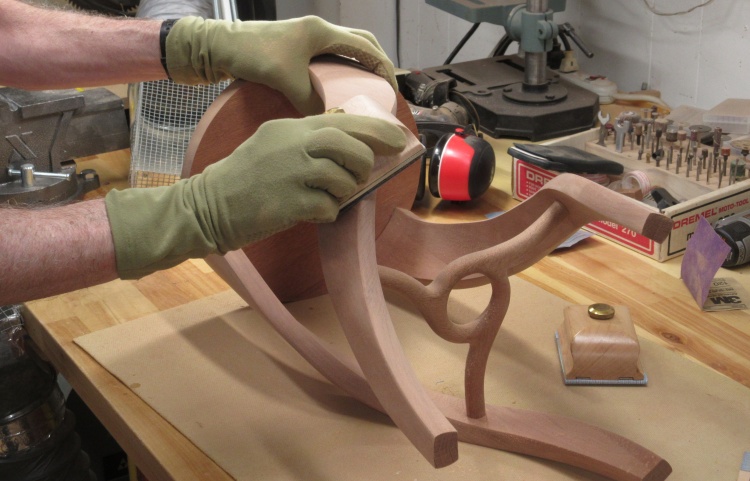
A final hand sanding
And then it was time for the final round of hand sanding.
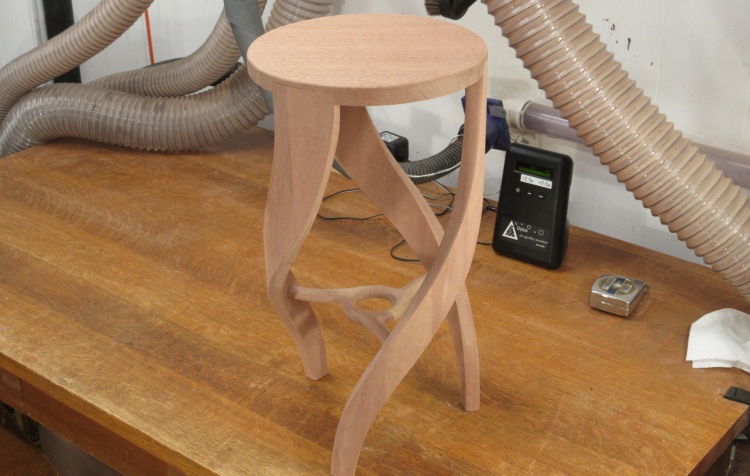
Woodworking done
And that was it for the woodworking.
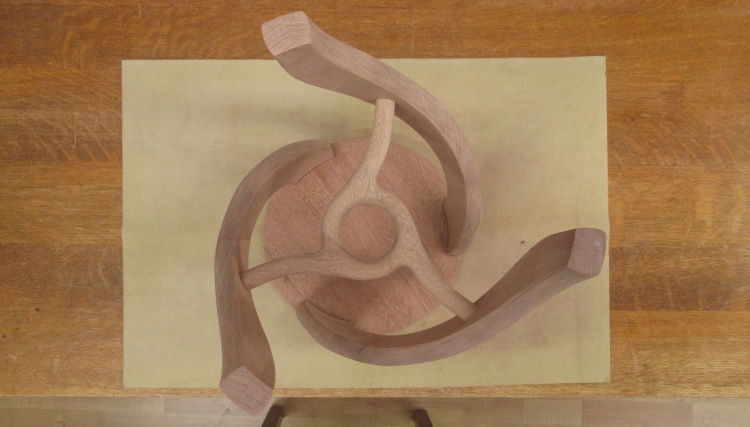
The bottom view
This upside-down view is exactly what a bug on the floor looking up would see. Ignoring the whole compound-eye thing, of course.
Finishing
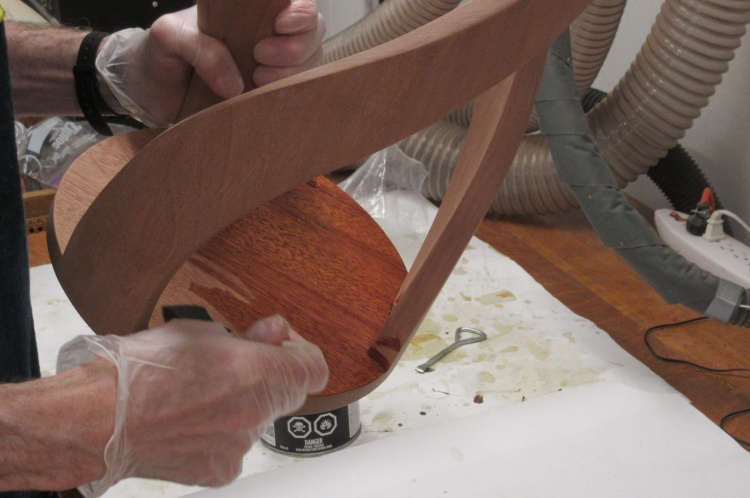
Starting the varnishing
Then out came the varnish. I used my usual Minwax Fast-Dry Polyurethane in a satin finish.
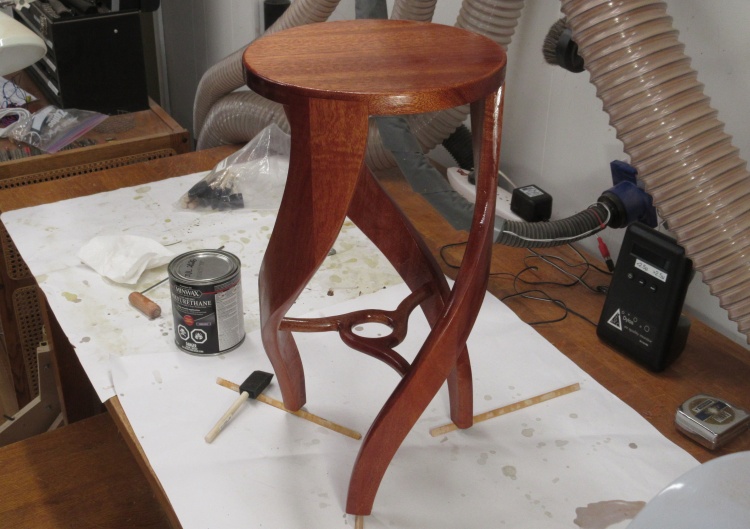
First coat of varnish on
Here's the first coat of varnish just soaking in.
As is my usual practise I used a foam brush for the first coat and then cloth-covered foam brushes for the subsequent coats, with sanding and steel-wooling between coats.
As is my usual practise I used a foam brush for the first coat and then cloth-covered foam brushes for the subsequent coats, with sanding and steel-wooling between coats.
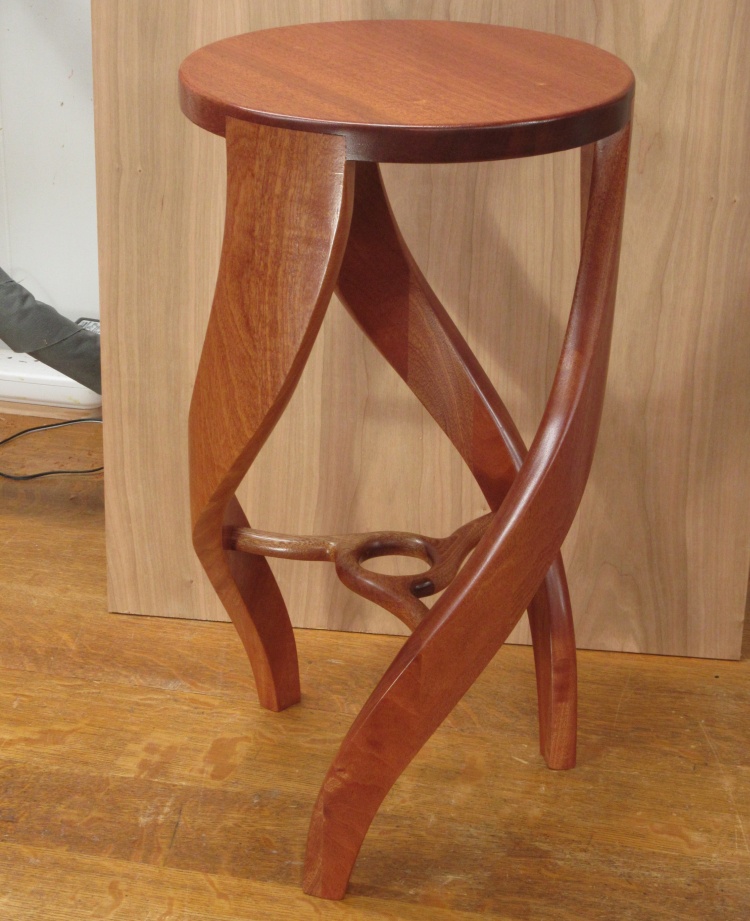
Complete
Done