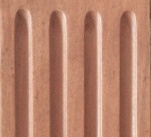
This plant stand is closely based on a photo of one I'd seen in an extensive Internet search of plant stand examples (yes yes, technically a World Wide Web search via the Internet but everyone knows what I mean - sit back down). Anyway I had found a number of others made the same way but they didn't look as good so I tried to isolate the characteristics of the "good" one. Those seemed to include lack of bark, rounded log contours, consistent colour, minimal gaps between the logs and a rounded overall outer surface. I'm not sure mine is quite as nice as the example photo but it passed the "good enough for the sun room" test, which is all that matters.
And I'm using the term "logs" here rather loosely but of course I'm really talking about short sections of small branches ranging from 1/2" to 2" in diameter. Not exactly your truckload of trees rumbling out of BC, but from the same general exposed-tree-growth-ring family.
And I'm using the term "logs" here rather loosely but of course I'm really talking about short sections of small branches ranging from 1/2" to 2" in diameter. Not exactly your truckload of trees rumbling out of BC, but from the same general exposed-tree-growth-ring family.
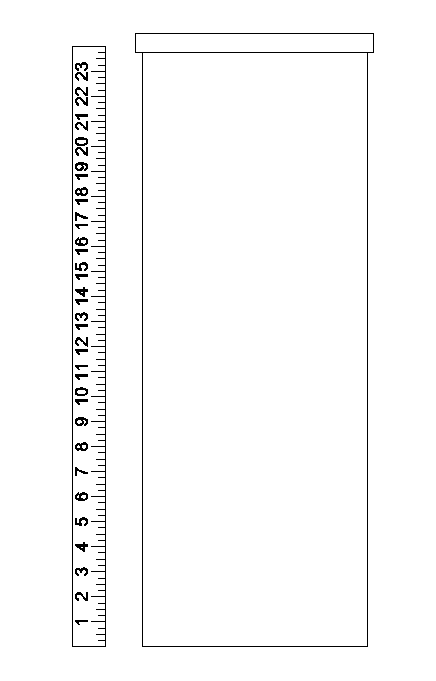
The "plan". Like this, but covered with little logs
The Form
Since it was rather impractical to have the logs go right to the center of the plant stand, something else was going to have to act as the structure. Fortunately I had anticipated this need and while working on my previous plant stand, made a form that I intended to reuse for this one. It's a sturdy cylinder made from Spruce (probably) with 3/4" plywood end caps.
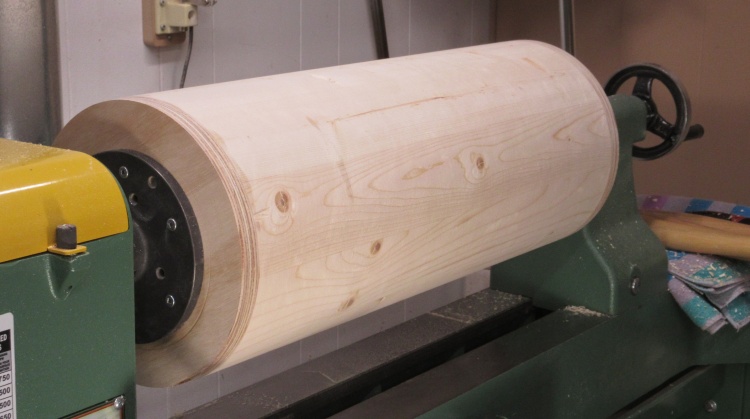
The form, already good to go
The form is just under 24" long with a 9" diameter. In this shot from a month or two ago it is still mounted to the lathe where I had just finished smoothing it off.
Build-A-Jig Workshop: Drum Sander
Gluing 10 segments into a circle
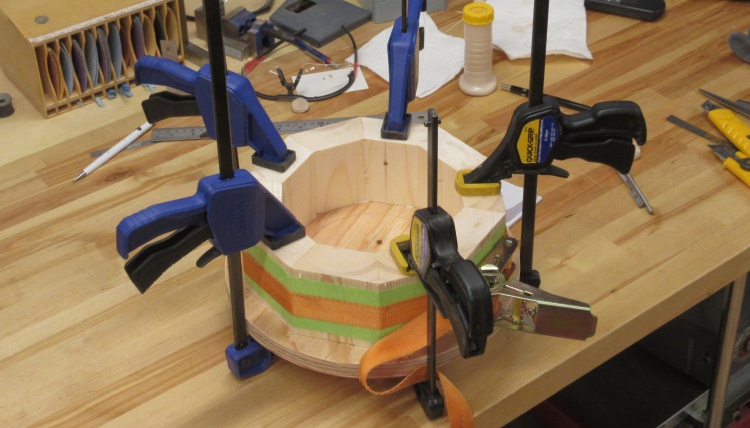
Circularized (actually decagon-ized) and clamped
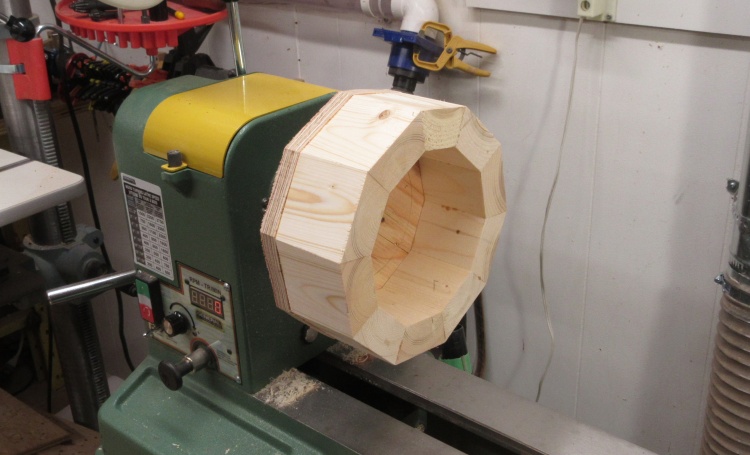
End plate added and mounted to the lathe
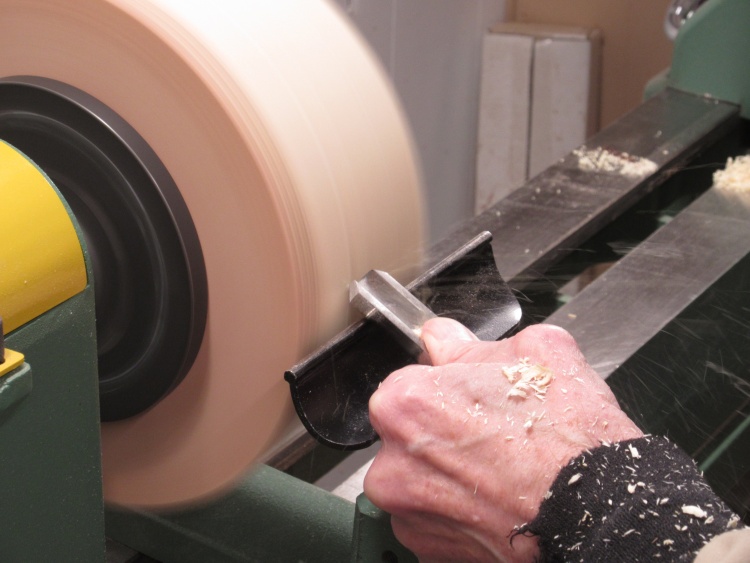
Getting circular
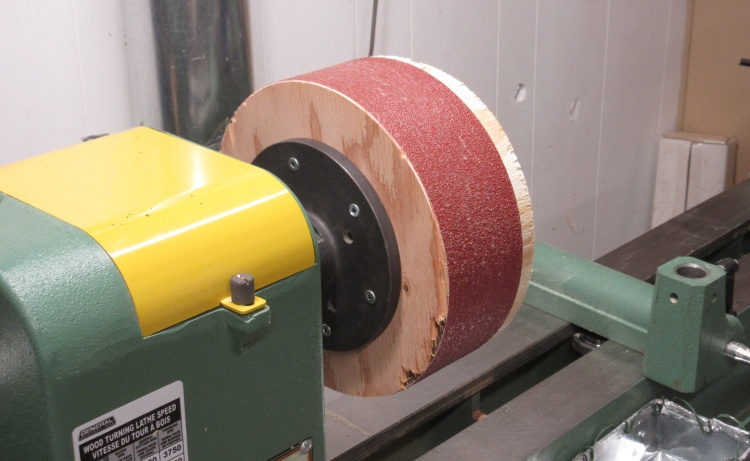
Some 36-grit added and ready for sanding
While working on the previous plant table, I had needed a 9"-diameter sander to shape the inside of the rounded legs of the table and I had used the above form for that purpose. However for this plant stand the form was going to be occupied by log bits so I needed to whip up a replacement 9" sanding drum.
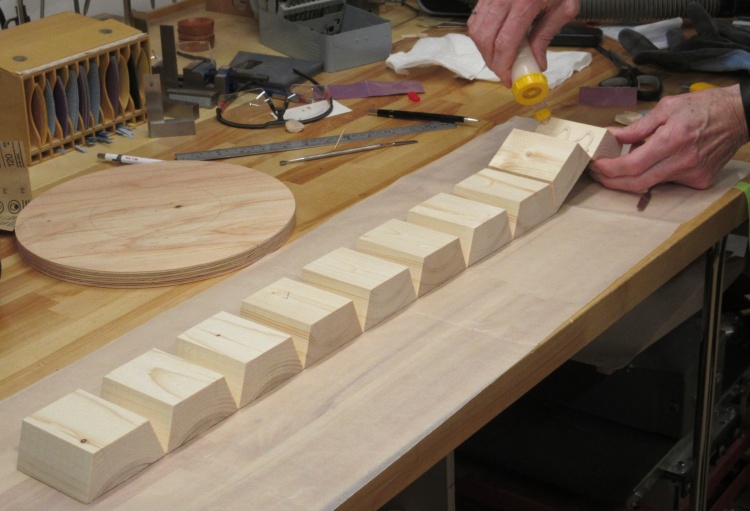
Gluing 10 segments into a circle
The drum was assembled from 10 lengths of 2x4 cut to the appropriate taper using the band saw. That angle turned out to be pretty close but I tweaked the angle of the last segment to close the remaining gap.
Here the pieces have been taped together on the bottom in preparation for rolling up and I'm starting to add glue to the joints.
A plywood end plate is standing by in the background.
Here the pieces have been taped together on the bottom in preparation for rolling up and I'm starting to add glue to the joints.
A plywood end plate is standing by in the background.
Circularized (actually decagon-ized) and clamped
I used a band clamp to keep the segments together and a passel of regular clamps to hold the glued-on end plate at the same time.
End plate added and mounted to the lathe
The oversized end plate was trimmed using the band saw and the assembly was mounted to the lathe using a large faceplate.
Getting circular
It was then a simple matter to get the 10-sided shape rounded down to a circular 9" diameter.
Some 36-grit added and ready for sanding
I used thin double-sided tape to attach a length of 36-grit sandpaper to the drum. That super-coarse grit will leave lots of visible lines in the sanded surface but those surfaces just get glued to the form so that isn't a problem.
You definitely want to keep your knuckles away from that nasty grit and I can report that I was successful in that endeavour. The fingertips of my gloves however, were not as lucky and some were completely gone due to incidental contact over hundreds of log sandings.
You definitely want to keep your knuckles away from that nasty grit and I can report that I was successful in that endeavour. The fingertips of my gloves however, were not as lucky and some were completely gone due to incidental contact over hundreds of log sandings.
Okay - ready to start the actual plant stand work.
Logging
Most of the effort in the construction was prepping the 300-odd log pieces. But first I wanted to try to get a feel for how it was going to look with the typical log pieces I had.
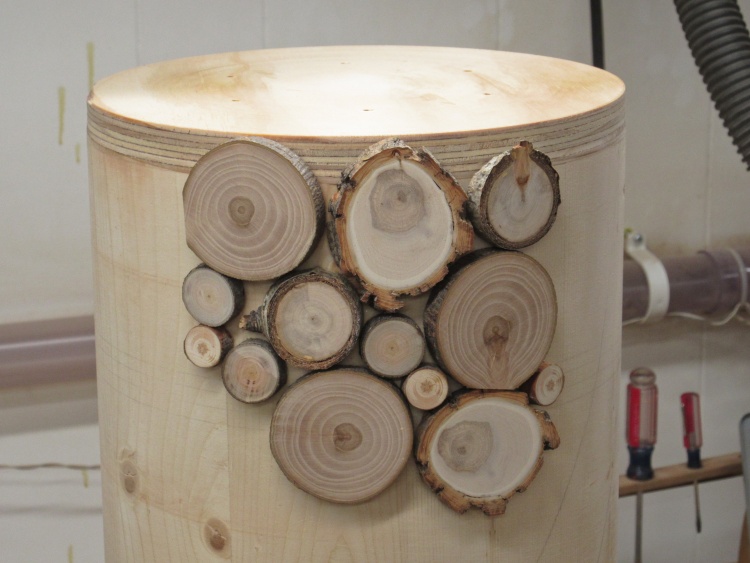
Kinda ugly...
I started with a few random log pieces pulled from my current branch collection. Yes, I have a branch collection - but purely as raw material for woodworking. It's not like I save particularly interesting logs for aesthetics sake, you may be relieved to know. Anyway, they were cut to size, sanded smooth and taped to the form.
I gotta say, that doesn't look particularly nice.
I gotta say, that doesn't look particularly nice.
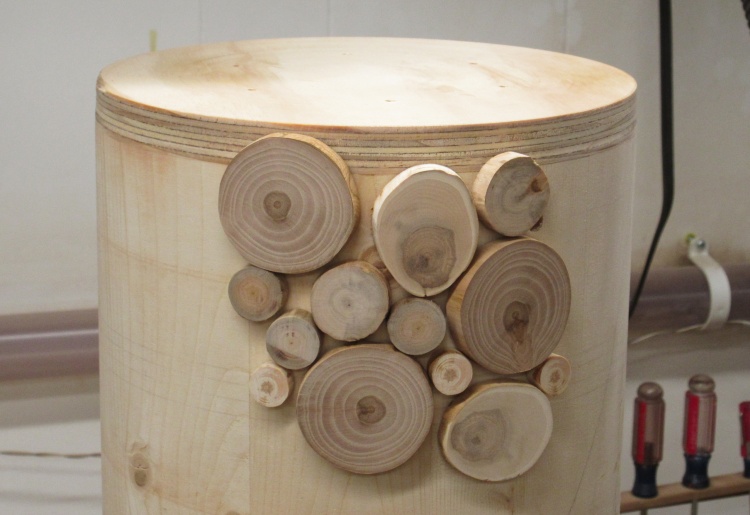
Somewhat better without bark
After a closer look at my model, one of the things that stood out was a lack of bark so I tried the same logs minus bark.
That was better but I think these particular samples have a bit too much color and decided I should aim for less obvious grain patterns.
That was better but I think these particular samples have a bit too much color and decided I should aim for less obvious grain patterns.
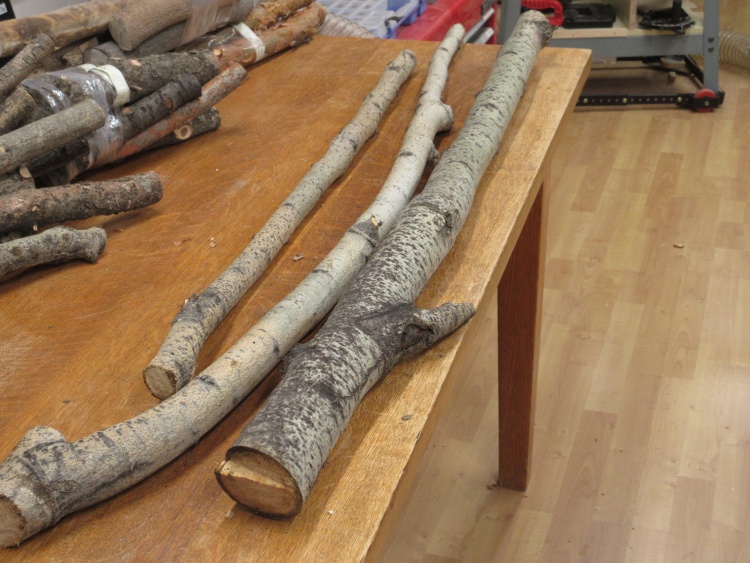
Some garden-fresh Swedish Aspen branches
We have a few tall Swedish Aspen trees in the back yard which seem to be near end-of-life (if one can infer that by the total lack of leaves this last summer).
I cut a (long) branch off one of those thinking the wood should be a light color.
I cut a (long) branch off one of those thinking the wood should be a light color.
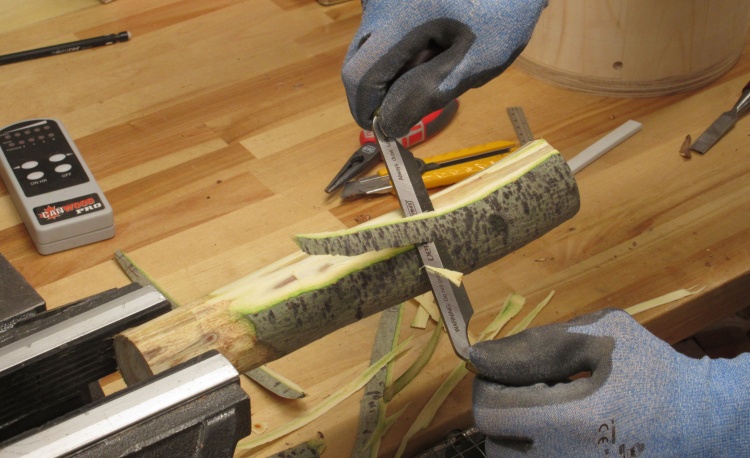
Getting rid of the bark
The first step was to remove the bark from the branch since doing it on cut-up pieces would be impractical. The branch wasn't quite as dead as the lack of leaves might suggest, as indicated by the moist green interior.
This draw knife was the ideal tool for the job and it didn't take long to remove most of the bark.
This draw knife was the ideal tool for the job and it didn't take long to remove most of the bark.
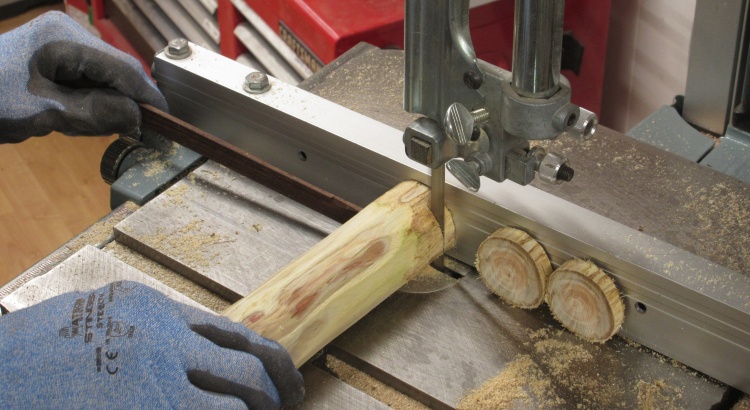
Chopping into very short logs
Then it was on to the band saw to slice off pieces about 3/8" thick.
One side was sanded smooth on the belt sander to ensure any irregularities were removed and then any bark remnants were sanded off as well. Finally the non-smoothed side was sanded in a 9" arc using the drum sander so it would fit nicely on the cylindrical form.
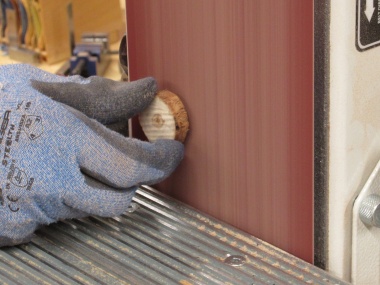
Sanding one face smooth
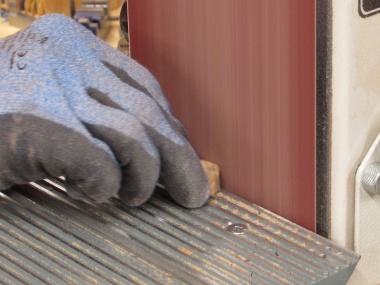
Cleaning off bark remnants
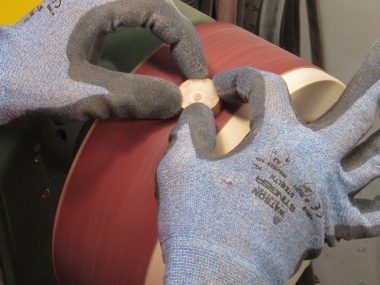
Rounding inside face
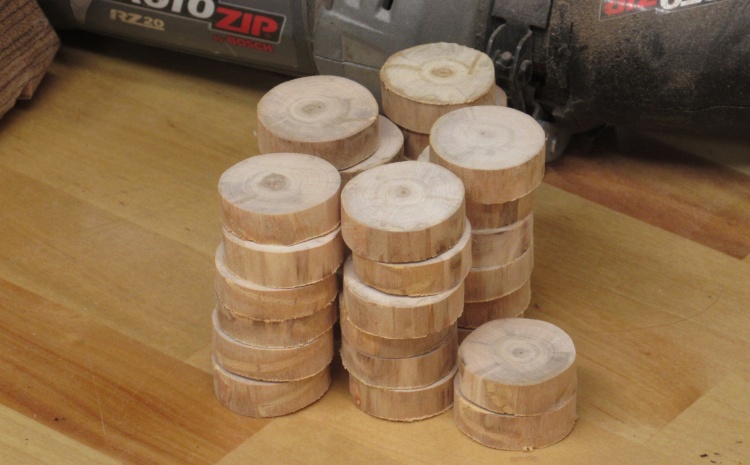
One branch's worth of logs in progress
I did the sanding in batches. This shot shows some 1"-diameter logs (one branch-length worth of some unknown species) with the face and edge sanding done.
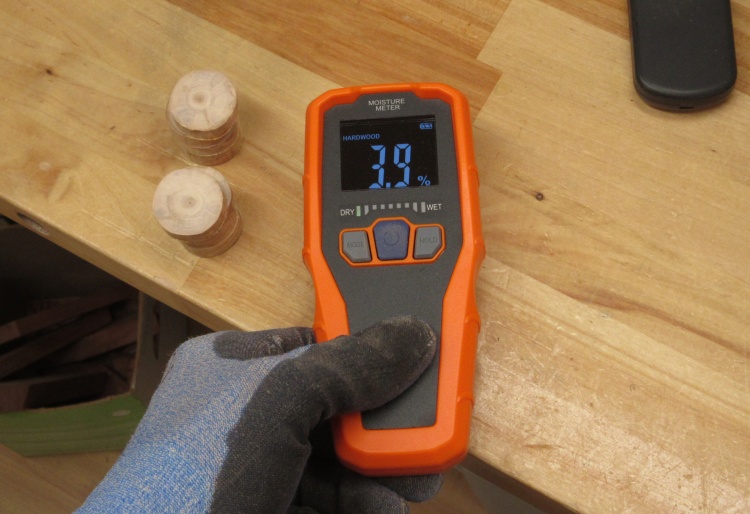
Checking moisture level - these are good
Some of my branches were not properly aged so the moisture level had the potential to be high which could be a problem for splitting or perhaps poor adhesion of finish or glue. So I thought I'd better check them.
These particular logs have a very low moisture level - you want something South of 8% in a hardwood like this branch.
These particular logs have a very low moisture level - you want something South of 8% in a hardwood like this branch.
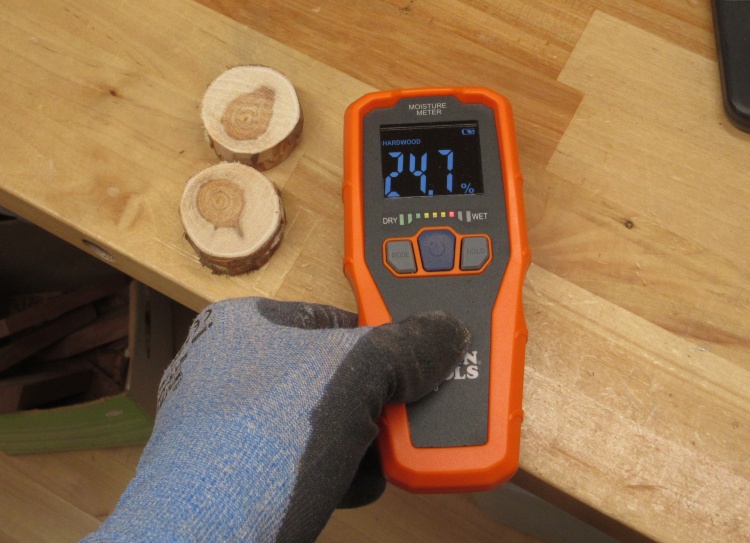
This branch was pretty moist
These guys, however are pretty juicy. This is a section of the not-as-dead-as-I'd-thought Swedish Aspen branch.
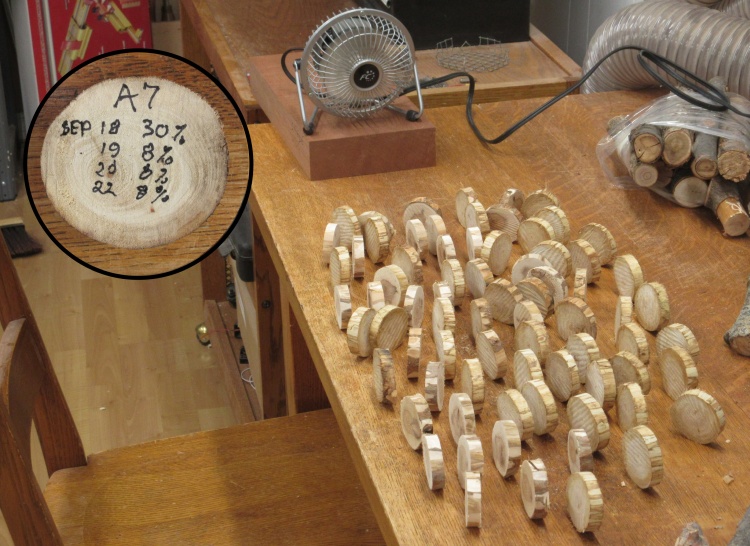
Some gentle moisture reduction
Normally measures such as time (like a year or two) or a drying kiln or kiln-like measures (an oven or microwave) are needed to drop moisture levels. None of those appealed to me so I thought I'd see how they dried just with some moving air.
That turned out to work well, no doubt due to the short length of the pieces - virtually all the moisture comes out the end grain so it doesn't have far to go on these pieces. Usually just a single day was enough to drop the moisture to acceptable levels.
I was surprised to find that cracking was very rare. I think I had to toss only a few pieces because of a crack.
That turned out to work well, no doubt due to the short length of the pieces - virtually all the moisture comes out the end grain so it doesn't have far to go on these pieces. Usually just a single day was enough to drop the moisture to acceptable levels.
I was surprised to find that cracking was very rare. I think I had to toss only a few pieces because of a crack.

Out in the field with trusty cordless saw gathering branches
I'd mostly used up my eligible branches and needed some more of appropriate size and coloring. I decided to try some bush areas on an acreage of relations who had more than enough dead trees to share (thanks G&C!).
I headed out on a sunny day with my saw, boots, hat and sunscreen. There were quite a few dead trees although my naive thoughts of wandering through the bushes were rudely dashed by largely impenetrable bushes with poor footing, so I was limited to the outer 10 or 20 feet. However after half an hour I had a large-sized Walmart bag's worth.
I will hasten to add that we were given the bag at a church-basement book sale recently to forestall any scurrilous accusations of me being an avid Wal-Mart shopper.
I headed out on a sunny day with my saw, boots, hat and sunscreen. There were quite a few dead trees although my naive thoughts of wandering through the bushes were rudely dashed by largely impenetrable bushes with poor footing, so I was limited to the outer 10 or 20 feet. However after half an hour I had a large-sized Walmart bag's worth.
I will hasten to add that we were given the bag at a church-basement book sale recently to forestall any scurrilous accusations of me being an avid Wal-Mart shopper.
A pile of disreputable-looking dead branches
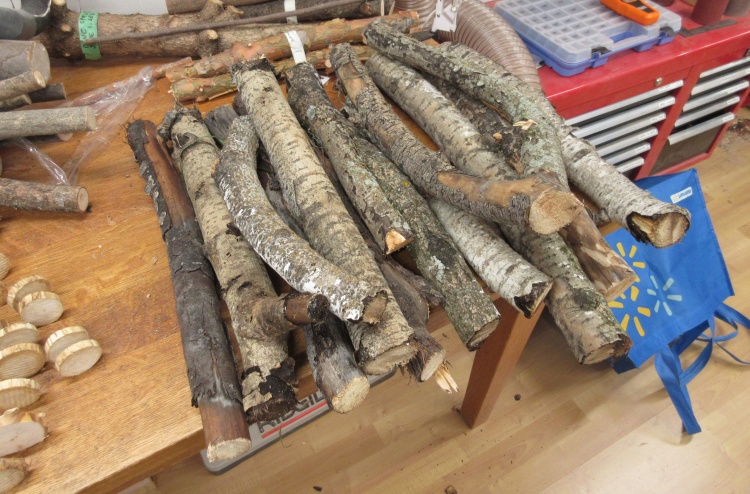
This the haul of "fresh" branches. Despite all being dead and covered with lichen and starting to rot, they were mostly still pretty wet - often 30% moisture level. Fortunately my bare-bones drying setup took care of that.
There wasn't as much species diversity as I might have hoped but ultimately there was sufficient branches to get enough log bits to cover the form.
There wasn't as much species diversity as I might have hoped but ultimately there was sufficient branches to get enough log bits to cover the form.
The "do I have enough yet?" test
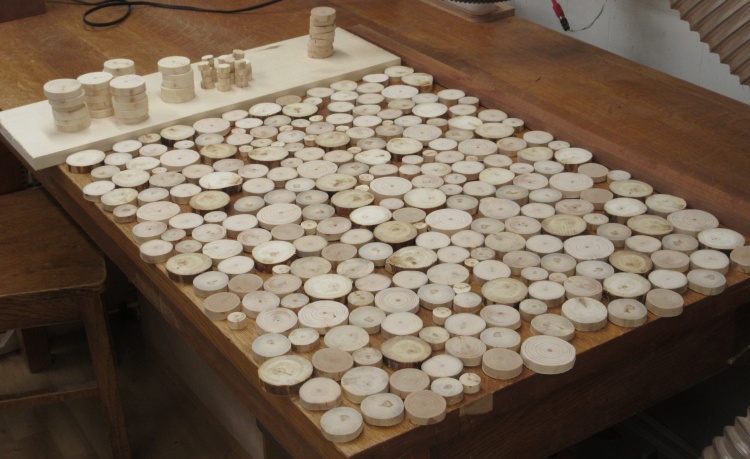
I set up some wood scraps to define an area equal to that of the form and crowded the logs in to do a visual check on whether I had enough logs; Looked like it was going to be fine.
Some edge cleanup
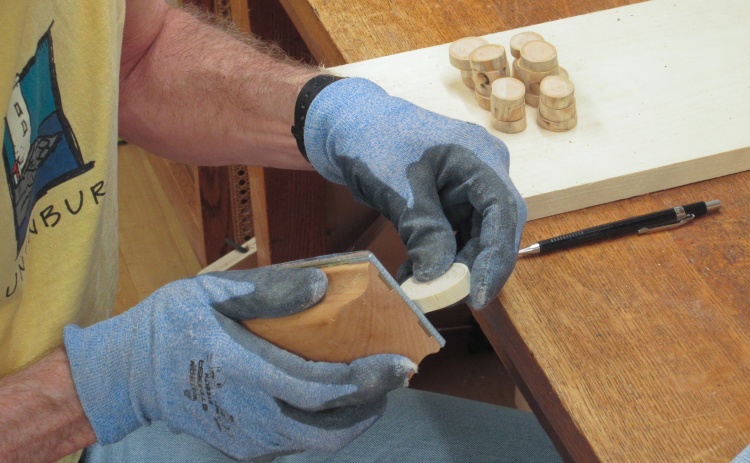
The coarse grit on the drum sander tended to leave some fuzzy shavings on the lee edge of the sanded area, so I cleaned those up one by one with some 220 grit.
Marking the orientation
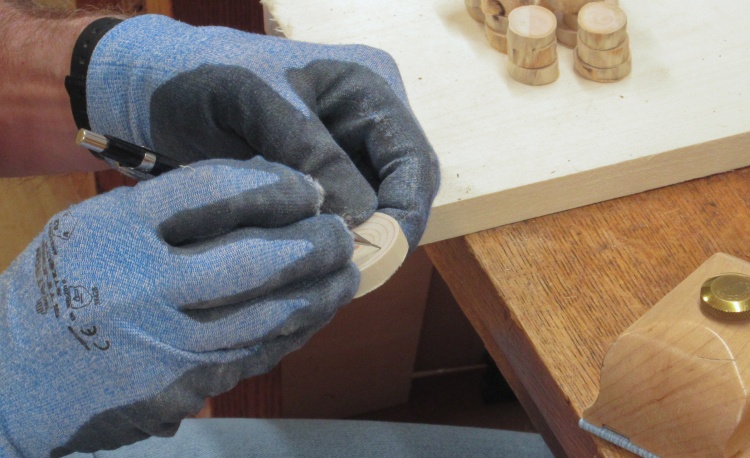
And while I was already handling all the pieces, I took the opportunity to put a pencil orientation mark on them to make it easier to tell how they aligned on the curve of the form.
Finish test
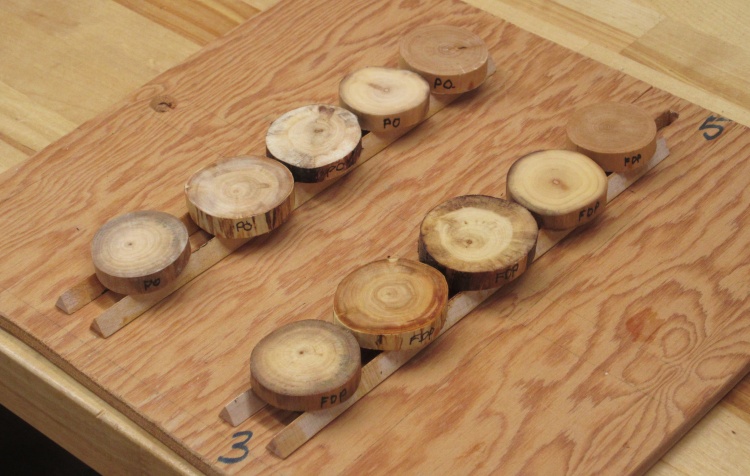
Meanwhile I thought I'd better figure out how I was going to finish this thing. My normal varnish requires roughing-up between coats which would be very painful with all the gaps between logs. I thought I'd retry some "hard wax oil" although I wasn't very happy with the last can I had bought. This time I bought the matte finish version which should at least solve the too-shiny issue of the previous "satin" can. This finish doesn't require any special treatment (sanding between coats, wiping off excess, etc.) so it should be easier.
I coated a few logs with the oil plus similar logs with varnish for comparison. After a couple coats the oil versions looked fine so I decided to use that.
I coated a few logs with the oil plus similar logs with varnish for comparison. After a couple coats the oil versions looked fine so I decided to use that.
Working on a bottom treatment
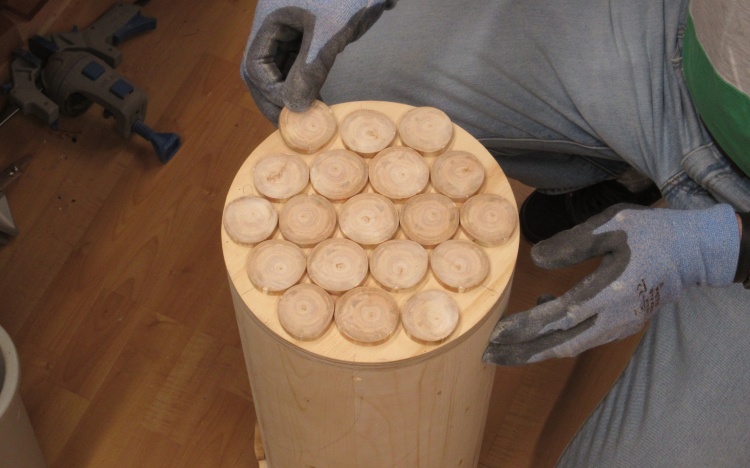
The stand was going to have a big blank bottom so I thought I should dress that up a bit. I kept with the log motif and just planned to tile it in one variety of logs - I'm checking the pattern in this shot.
I would make three of the logs thicker to act as feet and position them evenly around the perimeter for a wobble-free base.
I would make three of the logs thicker to act as feet and position them evenly around the perimeter for a wobble-free base.
Varnishing bottom cover pieces
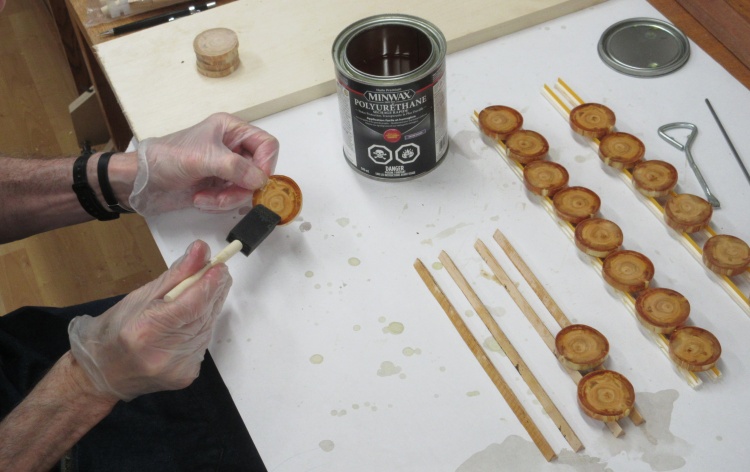
The bottom logs got three coats of polyurethane varnish for toughness (although only the three leg pieces touch anything).
Final form sanding
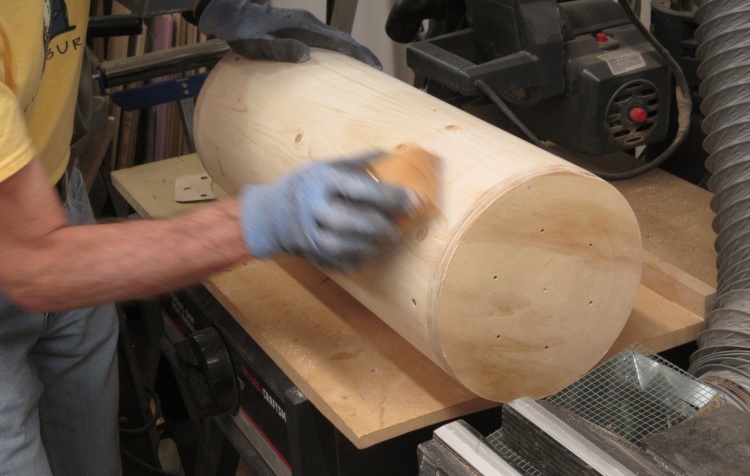
So with all the components ready to go, I couldn't put off the log positioning any longer.
Well, except to sand the form a final time and make sure any marks from this and the previous project have been removed.
Well, except to sand the form a final time and make sure any marks from this and the previous project have been removed.
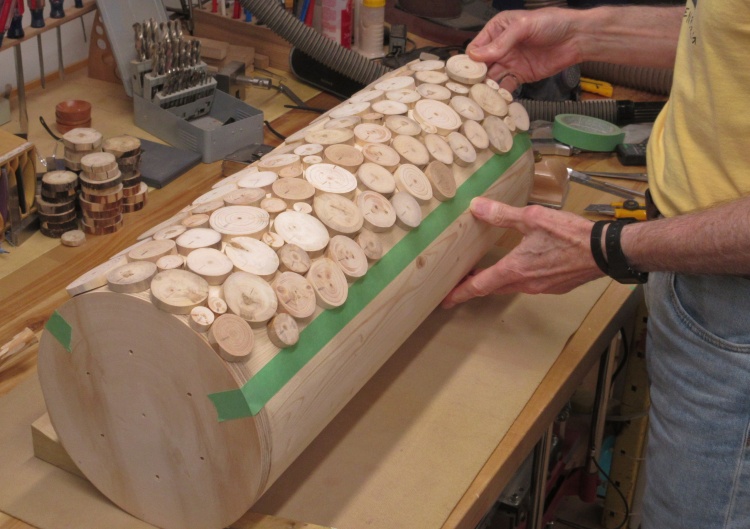
Trial positioning on the first quadrant of the stand
I wanted to ensure I had a uniform distribution of logs around the stand so I divided each type of log into four groups so there would be a roughly equal number that could go onto four quadrants of the form.
I was still wary of glue-enforced commitment so I did a trial positioning on the first quarter of the form. In this shot the logs are either just sitting in place or are weakly held with a loop of masking tape.
I was still wary of glue-enforced commitment so I did a trial positioning on the first quarter of the form. In this shot the logs are either just sitting in place or are weakly held with a loop of masking tape.
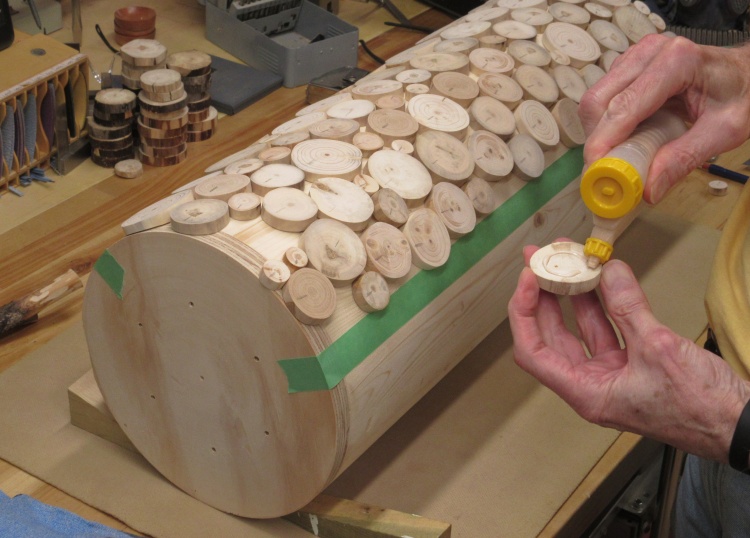
Committing the positioning to permanence
The above pattern looked fine and I used the allocated quarter of the log stock so it was time to lock them down. I just went log-by-log and glued each one in place to preserve the pattern.
That flows-from-the-bottom glue bottle is great. The glue is always ready to come out the spout - no more tipping and shaking the half-empty glue bottle. I'm not sure why it took me 30-odd years of woodworking to figure that out. Slow learner maybe?
Now, that problem got solved in ketchup bottles by making them to be stored upside-down. However when I've tried that with wood glue, it tends to flow out when the cap is removed whether you want it or not. Some odd pressure-differential effect perhaps.
That flows-from-the-bottom glue bottle is great. The glue is always ready to come out the spout - no more tipping and shaking the half-empty glue bottle. I'm not sure why it took me 30-odd years of woodworking to figure that out. Slow learner maybe?
Now, that problem got solved in ketchup bottles by making them to be stored upside-down. However when I've tried that with wood glue, it tends to flow out when the cap is removed whether you want it or not. Some odd pressure-differential effect perhaps.
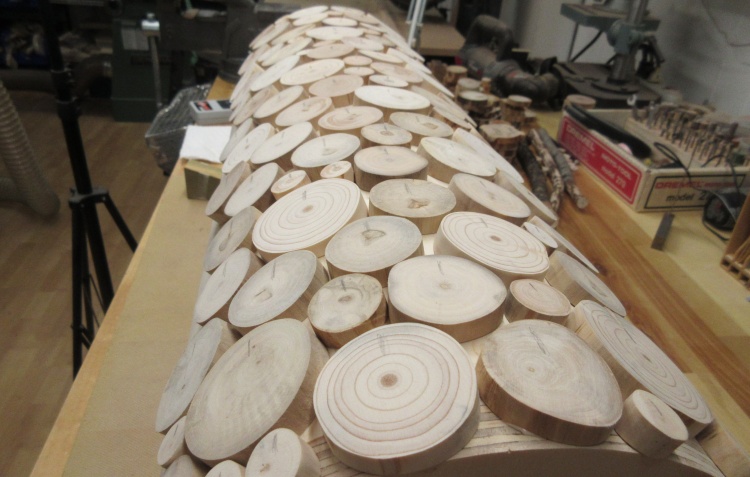
Log sections all correctly aligned
There's the first section glued in place. You can see all the pencil marks I used to indicate vertical alignment.
And then there were three more rounds of filling up quarters of the form. I moved the form to the lathe (on which the rotation was locked) to make it easier to handle.
And then there were three more rounds of filling up quarters of the form. I moved the form to the lathe (on which the rotation was locked) to make it easier to handle.
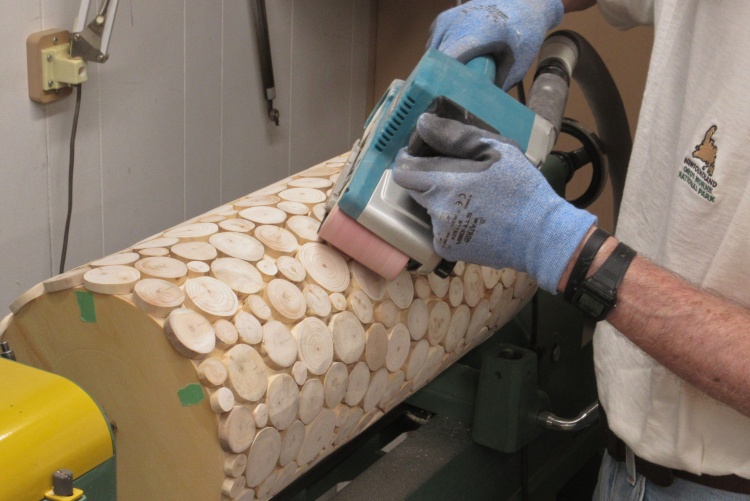
Rounding off the profile
In this photo all the logs are in place and the glue is dry.
The logs originally had the "show face" sanded flat. That looks good on each individual log, but due to the radial alignment on the form, the edges don't nicely follow the curve. I had done an earlier test to see how noticeable this was and decided that the entire outside should be round to look the best.
So out came the hand-held belt sander. I went over the whole outside and essentially removed all the edges so each log was curved properly on the outside face and edges of adjacent logs aligned.
The logs originally had the "show face" sanded flat. That looks good on each individual log, but due to the radial alignment on the form, the edges don't nicely follow the curve. I had done an earlier test to see how noticeable this was and decided that the entire outside should be round to look the best.
So out came the hand-held belt sander. I went over the whole outside and essentially removed all the edges so each log was curved properly on the outside face and edges of adjacent logs aligned.
Cleaning up from the rounding off
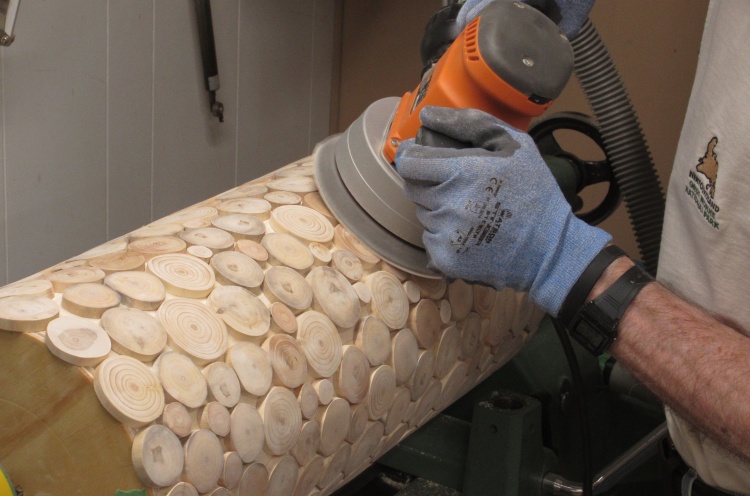
I used a pretty coarse belt for the rounding so I started cleaning it up using a sanding block with 220 grit.
After perhaps 1 minute of this I thought to myself "What am I doing?" and pulled out the random orbital sander with a 240 grit disc. Aaaahh...power tools.
After perhaps 1 minute of this I thought to myself "What am I doing?" and pulled out the random orbital sander with a 240 grit disc. Aaaahh...power tools.
Sanded and ready for some finish
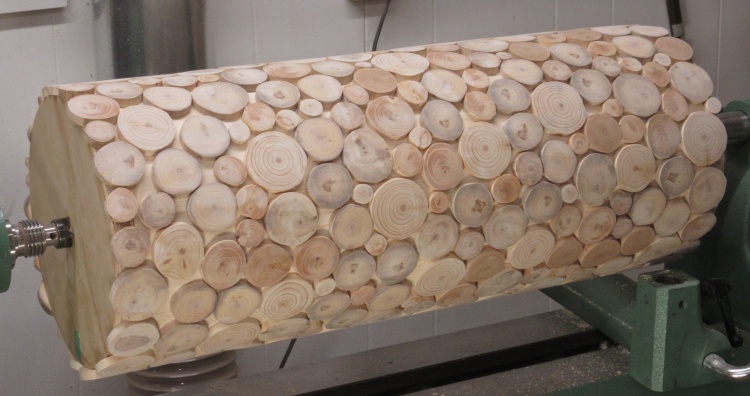
Here it is all sanded and ready for finish.
That tiny can lasted for 2 coats
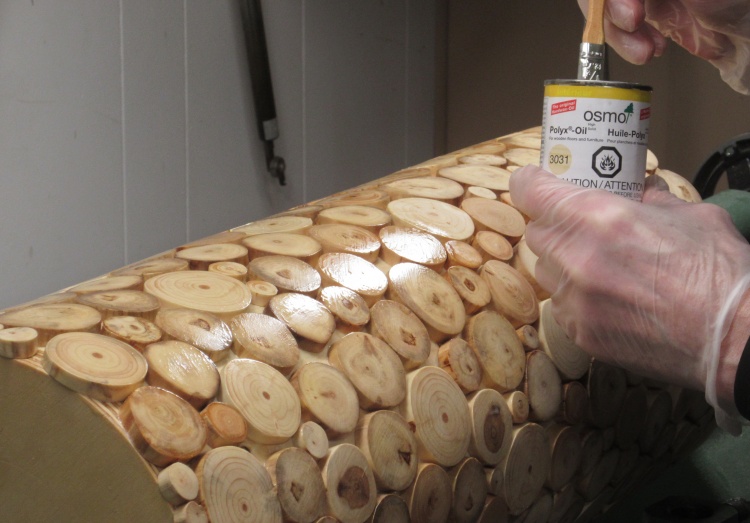
I had tried out the Osmo Polyx-oil finish several times before but wasn't happy with the performance, whether it was endurance, gloss or whatever. I finally tossed the can. I thought I'd try again since the simplicity is a big draw and I noticed they have a matte finish which is more to my taste.
It seemed to work pretty well in this application. You can see brush marks in the lighted sections but those levelled out by the time it was dry. It also seemed to go pretty far - I was surprised to find I had more than enough for 2 coats in this tiny 1/2-cup can.
It seemed to work pretty well in this application. You can see brush marks in the lighted sections but those levelled out by the time it was dry. It also seemed to go pretty far - I was surprised to find I had more than enough for 2 coats in this tiny 1/2-cup can.
Finish on and dried
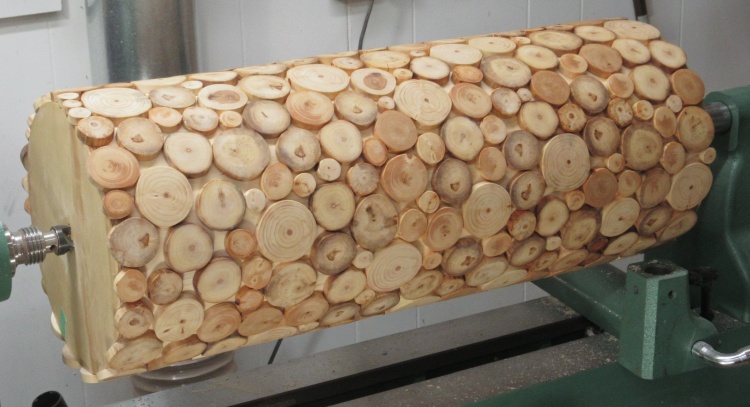
That's the finish in place. The logs have a bit more contrast but they still look pretty natural.
Top
I had planned for the top to be a separate and solid piece of wood attached to the form. I decided to use Purpleheart.
I had a 2"-thick plank of Purpleheart so that was cut into two 1" pieces and laminated for the 9.5" diameter disc I needed.
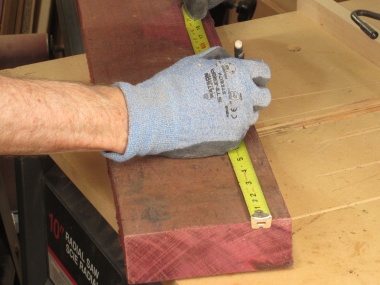
I need about 9"
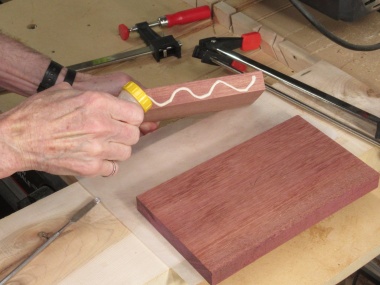
Laminating for square piece
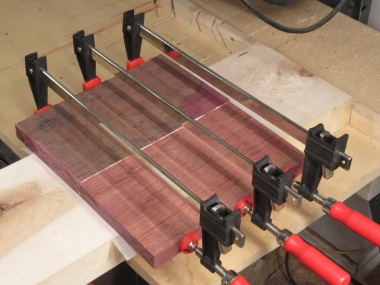
Clamping the halves
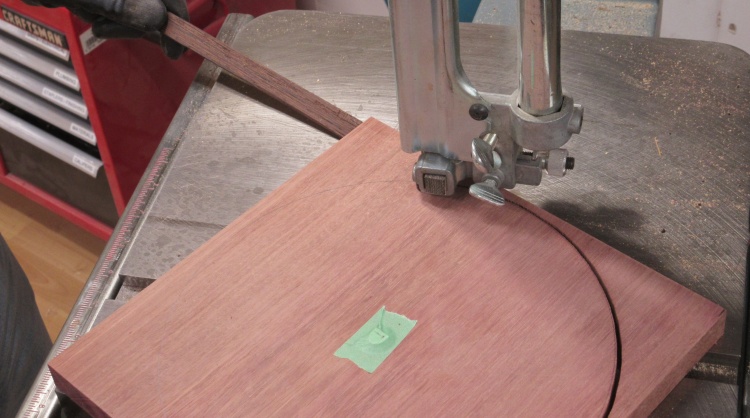
Band saw and a steady hand makes a circle
The composite piece was cut closer to the proper size and planed flat on both sides.
I still don't have a circle jig for the band saw so I just drew on a circle and cut to the line by eye.
I still don't have a circle jig for the band saw so I just drew on a circle and cut to the line by eye.
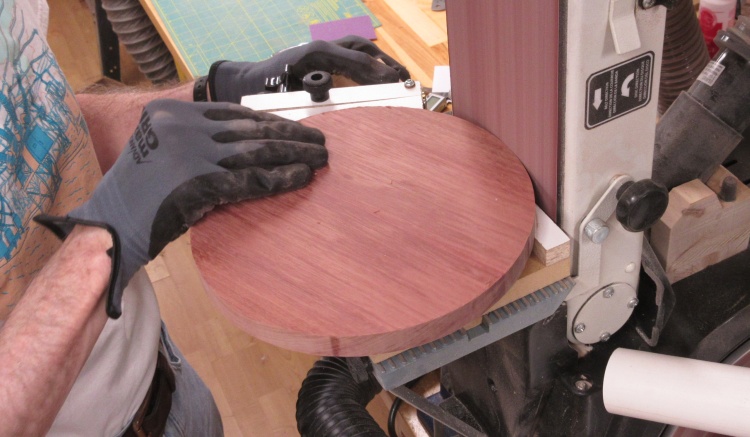
Sander circle jig for even more roundness
I got any imperfections out of the circular shape by using my sander circle jig.
For example, the darker spot pointing toward the camera on the edge is a little dip that needs to get evened out by making the whole diameter slightly smaller.
For example, the darker spot pointing toward the camera on the edge is a little dip that needs to get evened out by making the whole diameter slightly smaller.
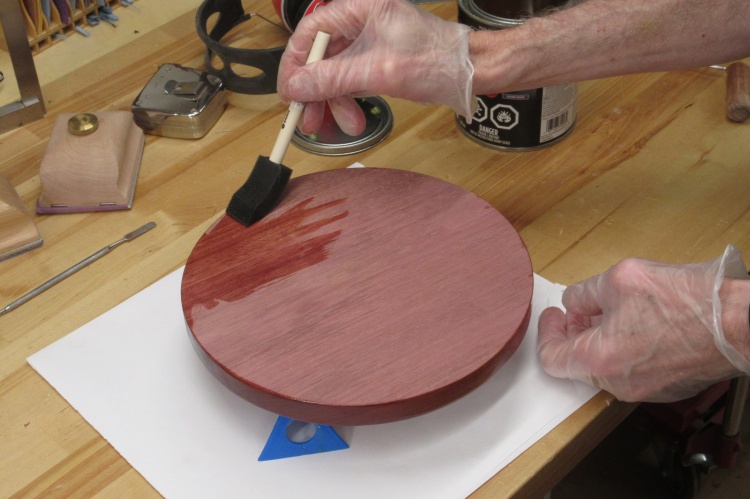
Starting on the varnishing
After a bit of finish sanding and breaking the sharp edges I started with the finishing.
For good waterproofing I used polyurethane varnish on the top, applying three coats to all surfaces.
For good waterproofing I used polyurethane varnish on the top, applying three coats to all surfaces.
Assembly
And then there were just a few last bits to go together.
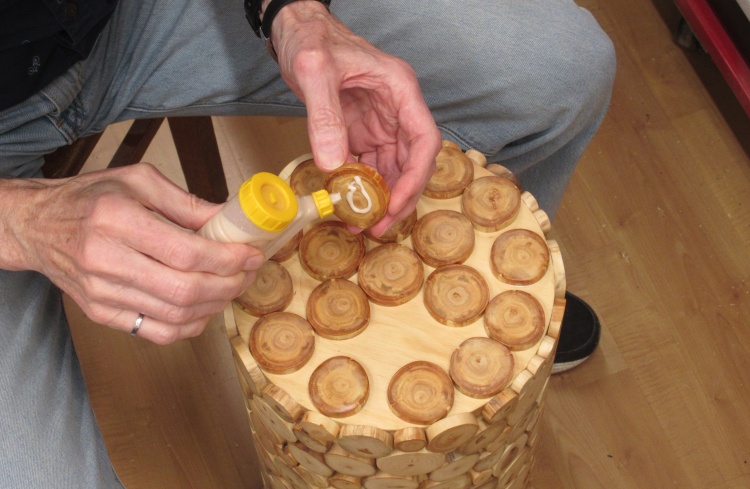
Gluing on the bottom cover & feet
The now-varnished bottom logs were glued into place. I just used wood glue to make a varnish-to-varnish bond, but a test seemed to show it was strong enough (tried to yank off a glued test log, and failed).
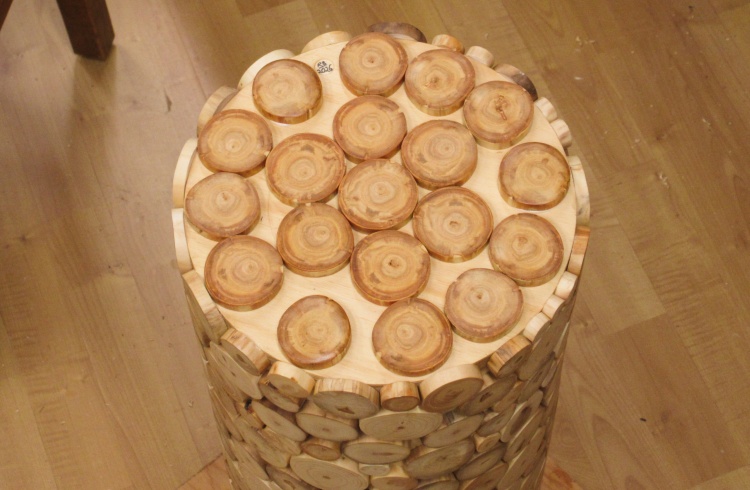
Completed bottom
That's the completed bottom. The three slightly separate logs near the outsides are the feet and they are about 1/8" taller than the other logs.
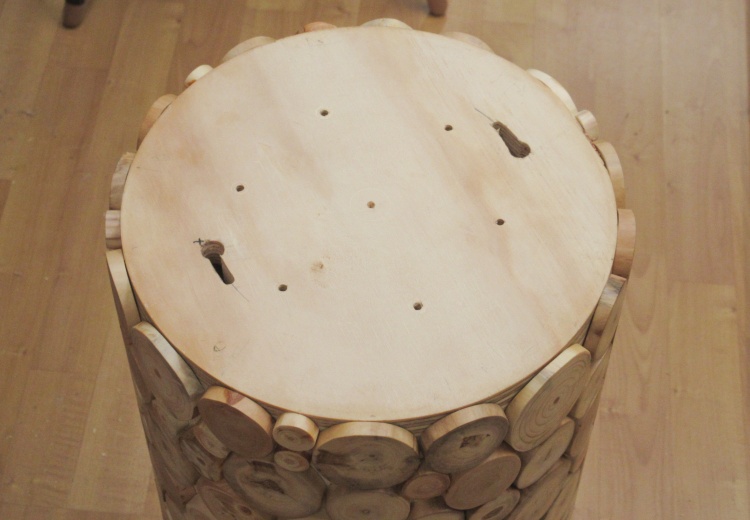
Form top key-holed to hold real top
The top of the form would need the "decorative" top attached and to do that I used a keyhole technique. This shows the two holes that will hold the top (the other smaller holes are remnants of the lathe faceplate screws).
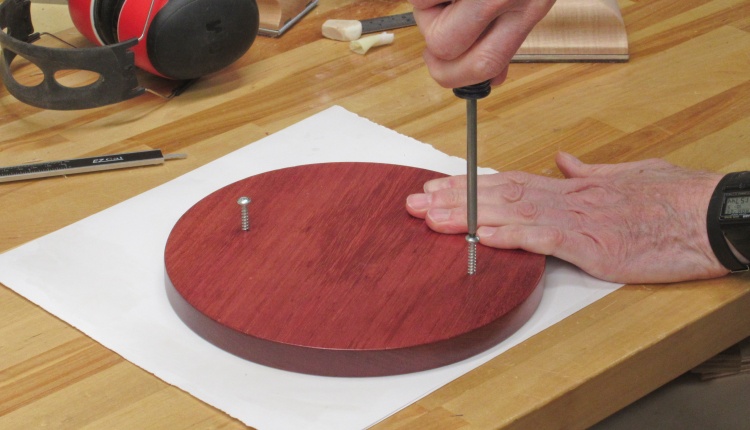
Screws to go in the keyholes
The bottom side of the top received two precisely-located screws. The protruding length was carefully adjusted to just grip the plywood of the form.
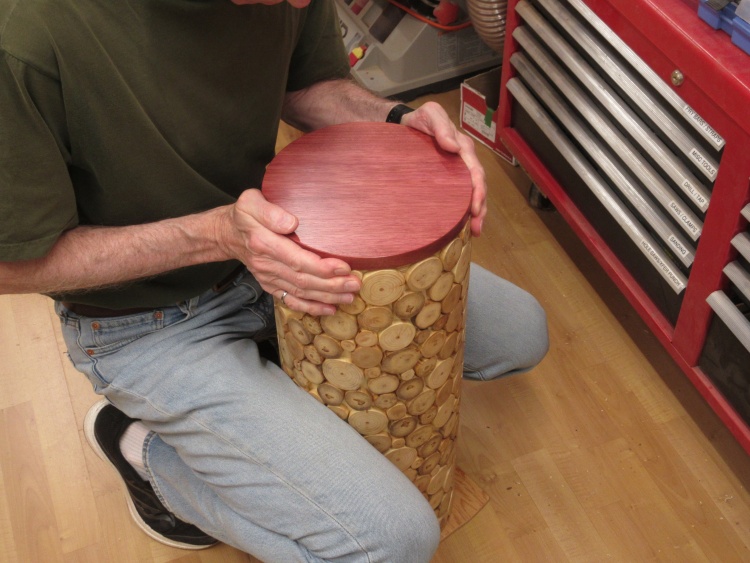
Twisting the top into place
The top received a line of glue in the center and then the screws were inserted in the keyholes and the top rotated to lock it into place.
This holds the center of the top and allows for some seasonal expansion of the wood through a bit of extra room for the screws to move.
This holds the center of the top and allows for some seasonal expansion of the wood through a bit of extra room for the screws to move.
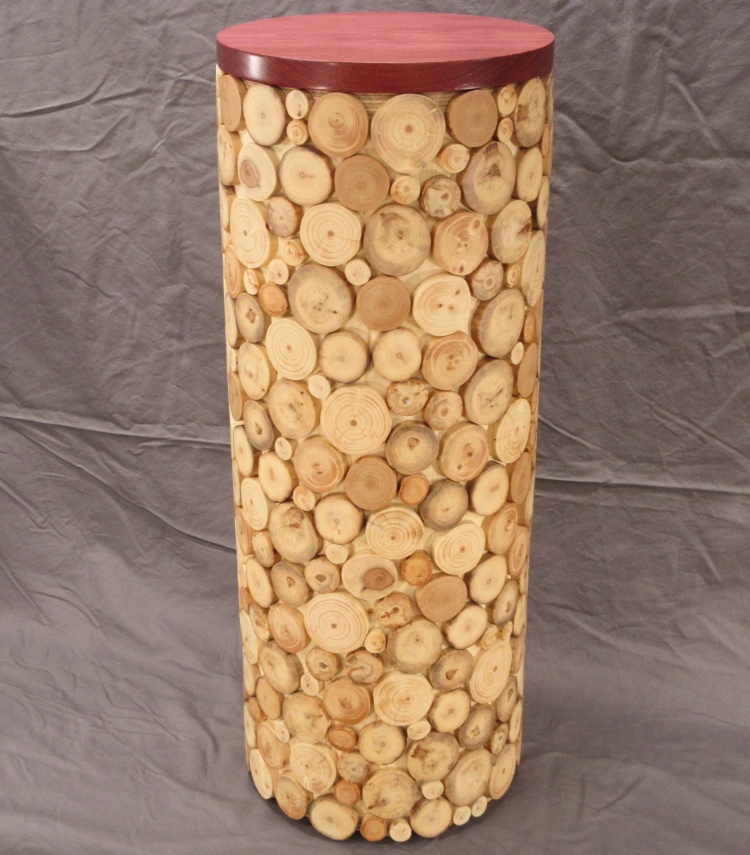
Completed
Done
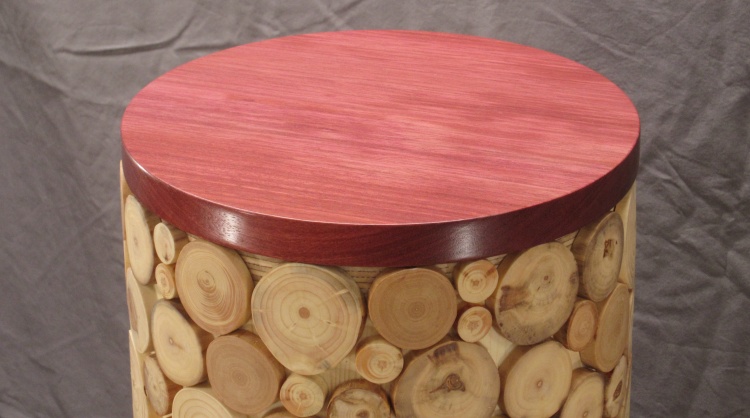
Top close-up
A closer view of the Purpleheart top.