Of course you can buy divided plates, but since I was looking for a woodworking project I didn't bother. However doing a post-plate review reveals that you would need to have a taste for bright primary colours and perhaps Thomas the Tank Engine artwork to fully appreciate the commercial products on offer. I'll stick with the classic wood-grain finish.
The first thing I did before starting the plate was to check into an appropriate finishes for contact with food. It appears that the only finish formally approved for food contact is shellac. In fact, purified versions are considered edible and are used as a coating like wax to produce a shiny finish on such edible items as pills and candies.
However, while the solvents in most other finishes are fairly nasty, they are gone when the finish hardens and in fact most modern finishes are probably suitable for food contact when dried. I used a polyurethane varnish, which dries to a hard plastic-like structure and shouldn't pose any problem.
I did check the tolerance of the coating to various liquids by placing droplets on a previous item I had made with the desired coating. After sitting for several hours, there was no visible effect on the finish, so I concluded that it would be fine.
De plan, boss, de plan!
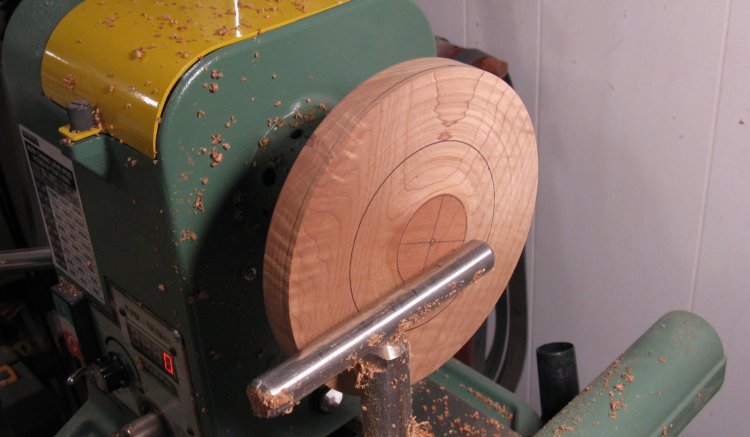
Cutting out the blank
I started by cutting a slightly oversized turning blank out of a 1 inch thick plank of roasted curly maple as shown here.
Attenuated screw on mount
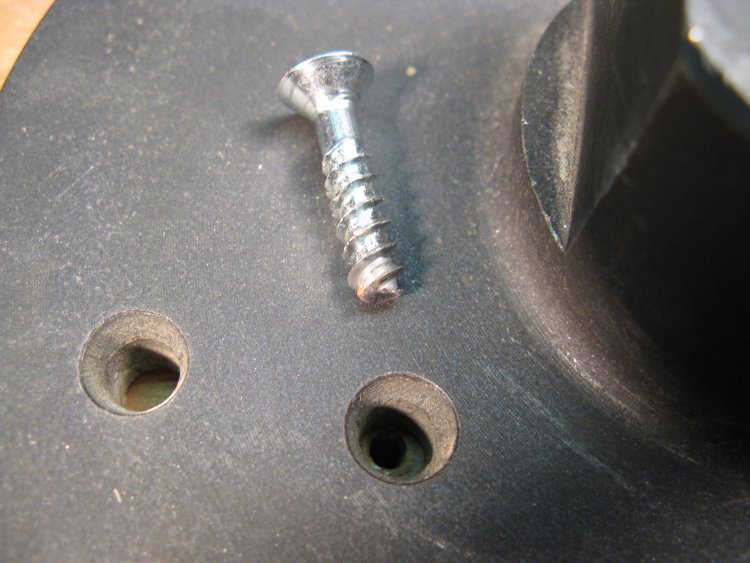
The thickness of the blank was only about 1/2" more than the finished thickness, so there wasn't much extra depth for mounting screw holes. I could have used another method but the screw-on mount was the simplest and I figured the depth was OK.
I ground down some #10 screws for mounting so they only went about 3/8" into the wood, but still had lots of holding power.
I ground down some #10 screws for mounting so they only went about 3/8" into the wood, but still had lots of holding power.
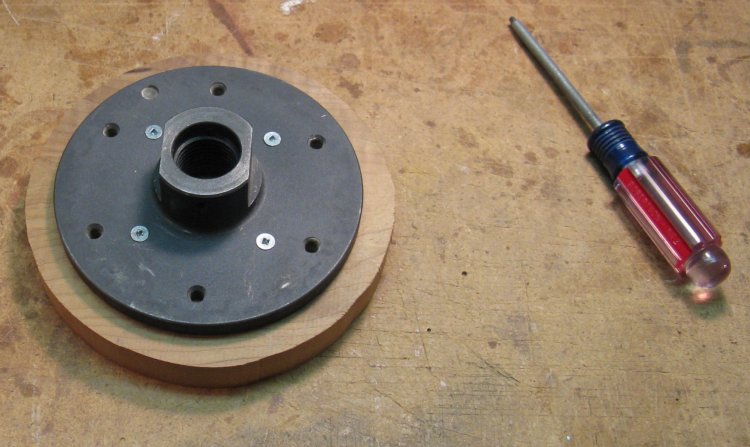
Screw-on mount attached
Here the mount is attached to what will be the top side of the plate.
Mounted on lathe & turning started
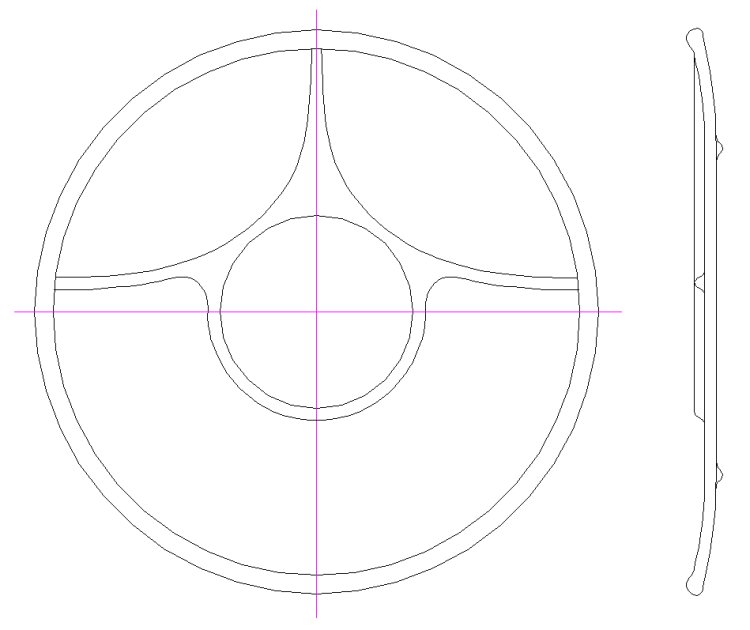
The piece has been mounted to the lathe and the turning of the bottom has been started. The plate needed some means of attachment for when it was eventually flipped over to do the top side. For that, I turned a boss on the bottom that could be gripped by a chuck. The boss diameter is shown by the inner pencil circle, while the larger circle marks the foot.
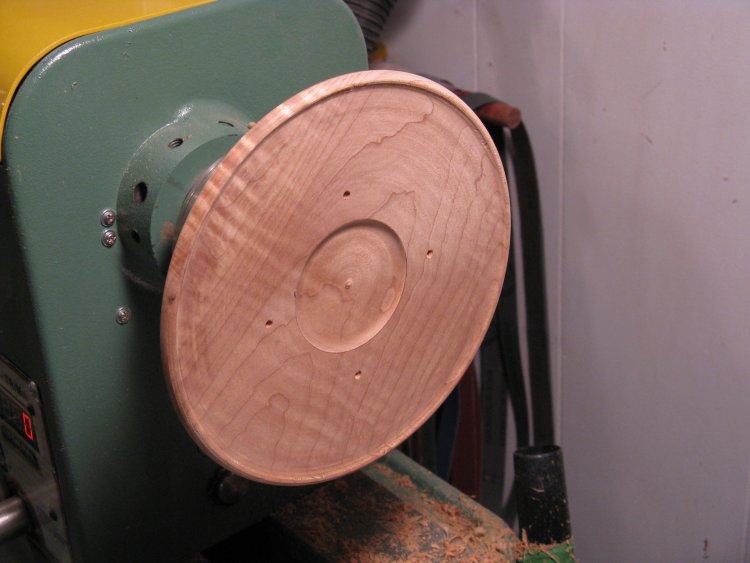
Initial bottom side turning done
And here the initial turning of the bottom side is done. It will eventually need the boss removed but the rest of the shaping is completed.
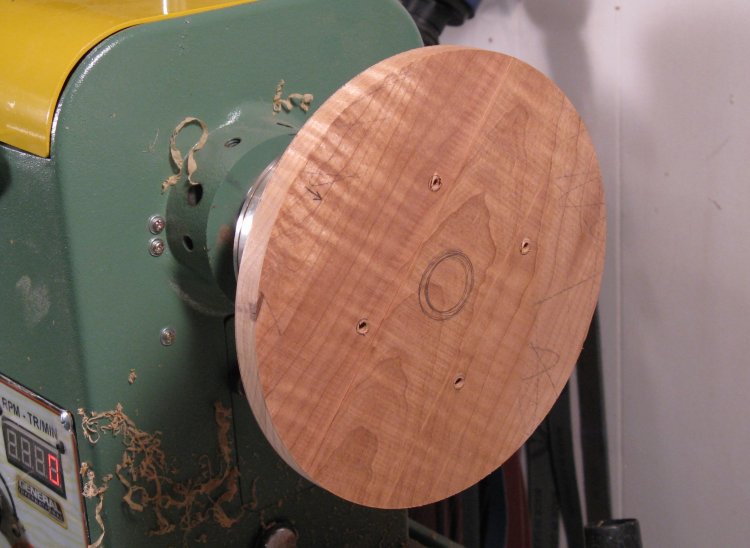
Plate flipped to start the top side
The plate has now been flipped and the top side is ready for turning.

Chuck holding bottom-side boss
A 4-jaw chuck is used to hold that boss that was formed on the bottom.
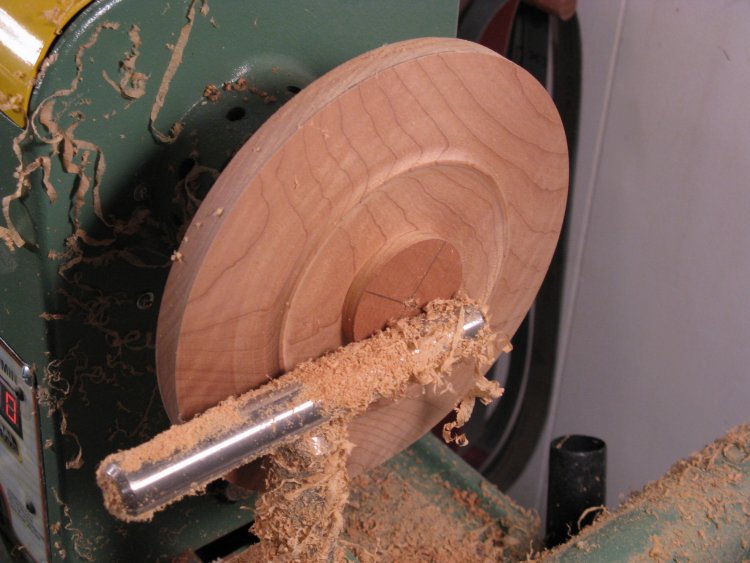
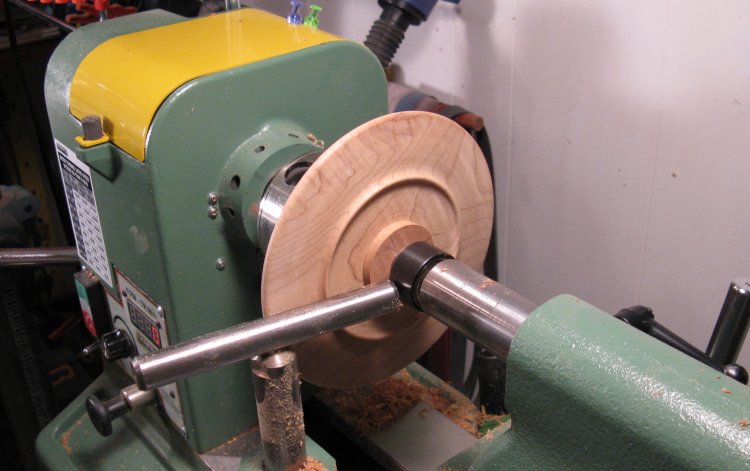
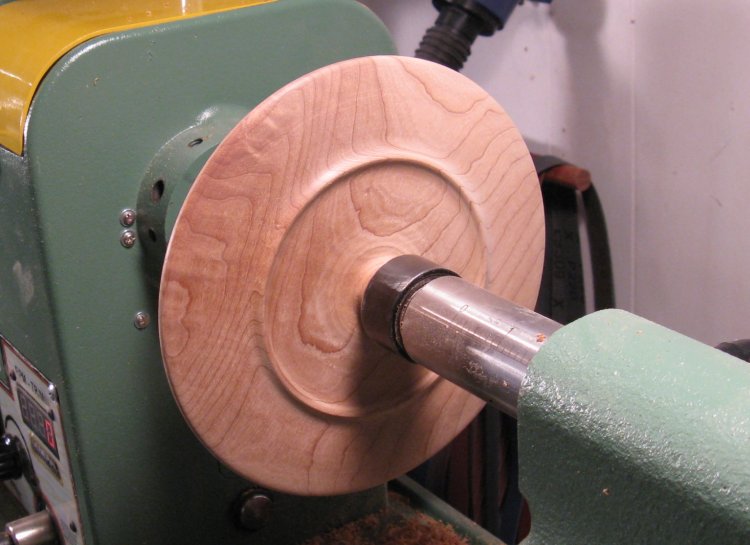
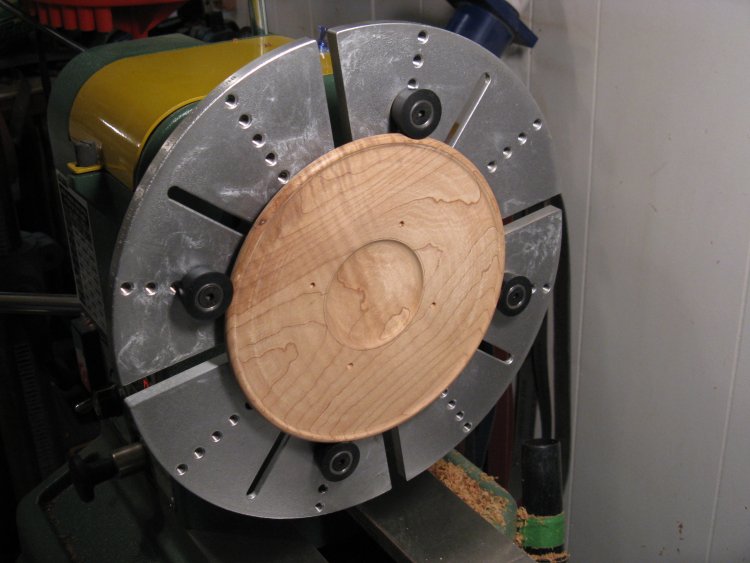
Top side turning complete
The top-side turning is complete. The center cavity has been formed, but the rest of it has been hollowed out only down to the tops of the dividers.
Those four mounting holes will be removed when the floor of the plate is formed.
Those four mounting holes will be removed when the floor of the plate is formed.

Edge view
This photo gives an idea of the overall thickness.
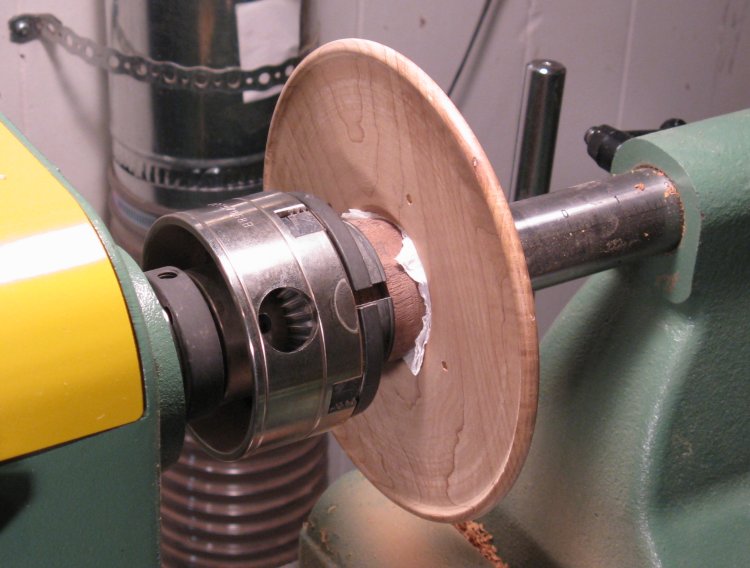
Plate flipped again and held with friction
To remove the bottom-side boss, the plate was flipped back over and squeezed between a large wood dowel and the live center.
Ready to remove boss
The boss is ready to be removed.
Boss reduced in diameter
The boss is reduced in diameter to about as small as it can be under the live center.
Starting to cut off the remainder of the boss
I've started to cut off the remainder of the boss. This was just done by hand using chisels.
Bottom done
With some sanding the boss removal is complete and the bottom side is essentially done.
Back on lathe to increase center depth
When I originally cut the center cavity, it wasn't practical to directly measure the plate thickness, so I erred on the shallow side. With the boss off, it looked like it should be a bit deeper, so I put it back on the lathe.
There are a few different ways to hold something with no spare material on the lathe, and one way is with a large chuck. Large jaws were available for the chuck I use, so this gave me an excuse to pick up a set. This model uses large rubber buttons that can be positioned as desired to hold the workpiece.
With the piece remounted, I just used a small scraper to deepen the cavity by 0.03" or so.
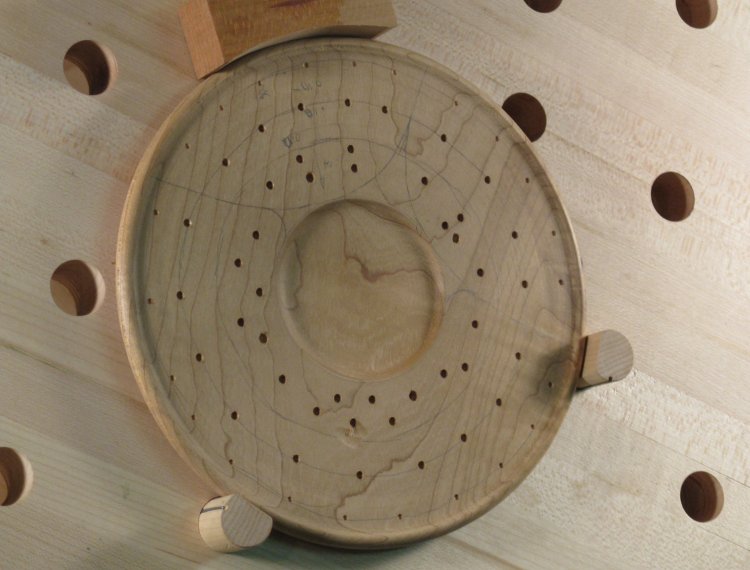
Depth guide holes drilled
I had made the bottom side of the plate with the desired contour, so making the plate a consistent thickness from the bottom side would shape the top correctly too. The contour is flat for the center two-thirds and then curves up towards the edges.
To help determine carving depth, I drilled flat-bottomed holes to the appropriate depth which can be seen in this shot.
To help determine carving depth, I drilled flat-bottomed holes to the appropriate depth which can be seen in this shot.
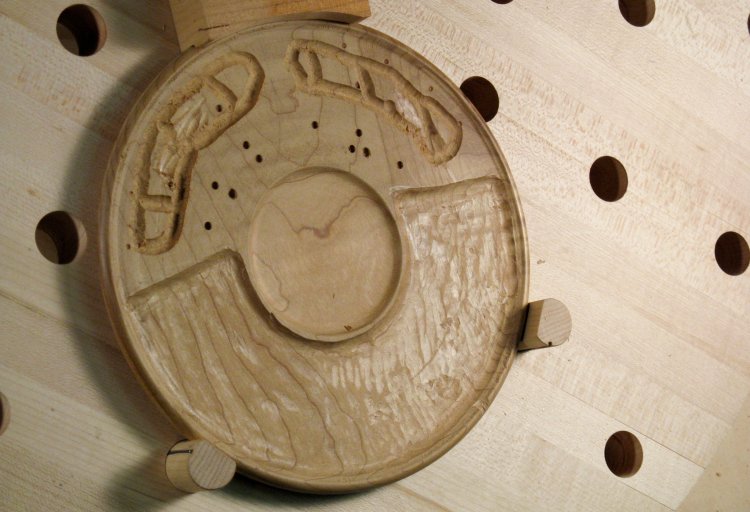
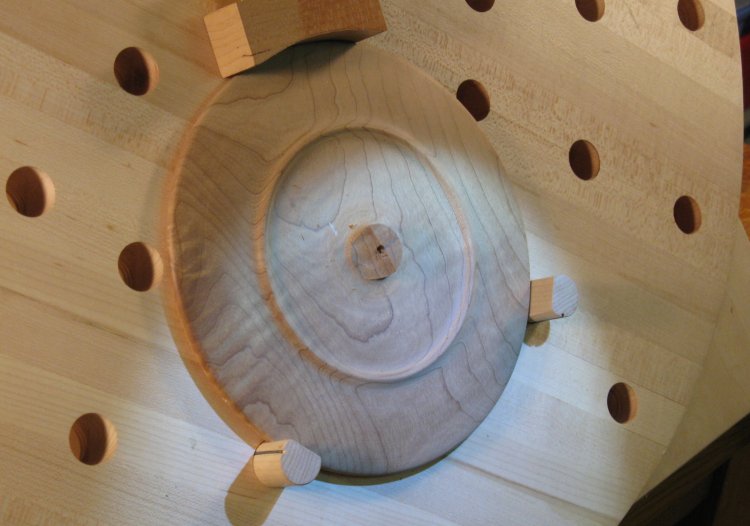
Large section roughed out
The bulk of the material from the large section has been carved out here. This was mostly done with a large-diameter curved chisel and the corresponding tool marks are visible.
A flat chisel seems like a more logical choice to use, but in practise any imperfection in holding the chisel horizontal results in a deeper gouge along one edge, which is difficult to remove.
Also visible in the two smaller sections are routed-out areas, which provides a depth guide and saves some chisel work.
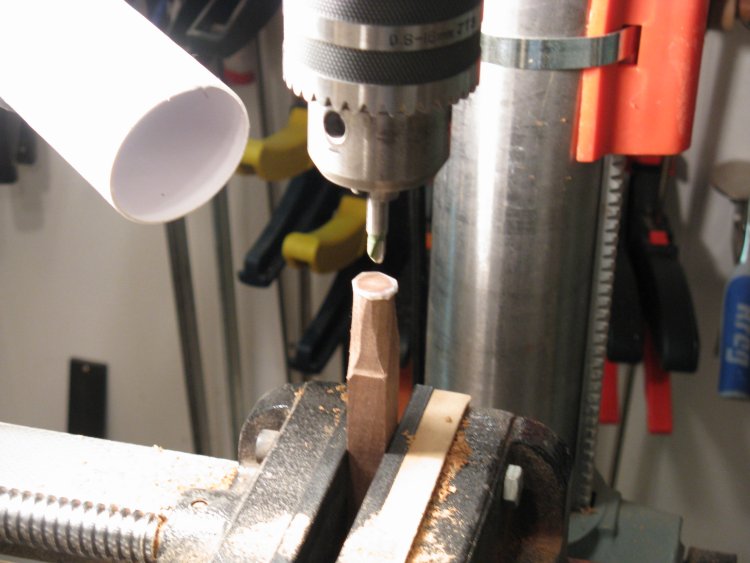
Thickness routing setup
This setup was used to "route" the smaller sections to the appropriate thickness. A round-end router bit was held in the drill press and a small support surface was set the desired thickness below the bit. Then the plate was just guided by hand to cut out the desired area. The horizontal angle of the plate was maintained to keep the cutter vertical to the surface.
The material on the top of the wood post is a low-friction plastic tape so the bottom of the plate could slide across it easily without being marked.
The material on the top of the wood post is a low-friction plastic tape so the bottom of the plate could slide across it easily without being marked.
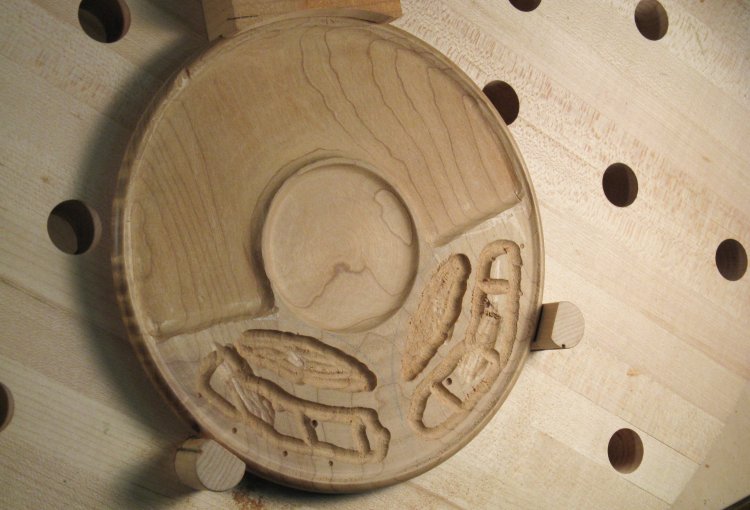
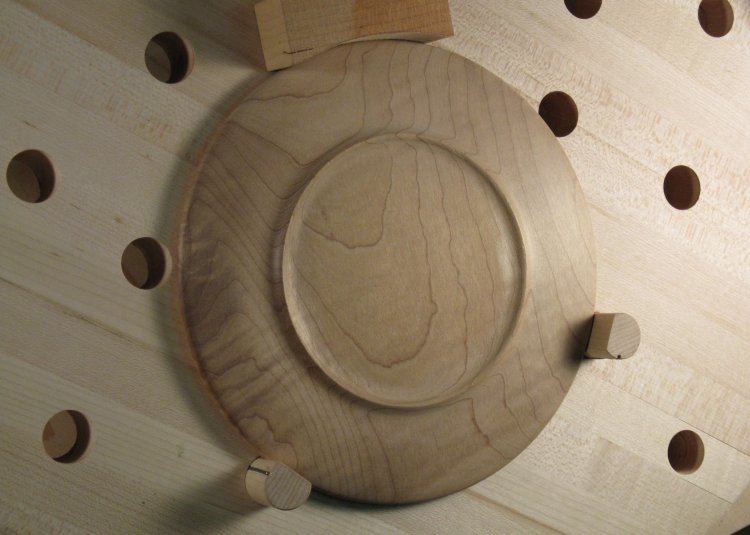
Smaller sections roughed in
The floor of the large section has been sanded flat here and the routing of the smaller sections is complete. These will be carved out and sanded in a similar manner, with some Dremel work to help round the edges of the dividing fences. The sanding of the piece took considerably longer than any other operation.
Also visible in this shot is some damage to the edge (at about 11:00) caused by a chisel slip. This was patched with a small piece of wood with matching grain and when sanded to match almost disappears in the finished plate.
Also visible in this shot is some damage to the edge (at about 11:00) caused by a chisel slip. This was patched with a small piece of wood with matching grain and when sanded to match almost disappears in the finished plate.
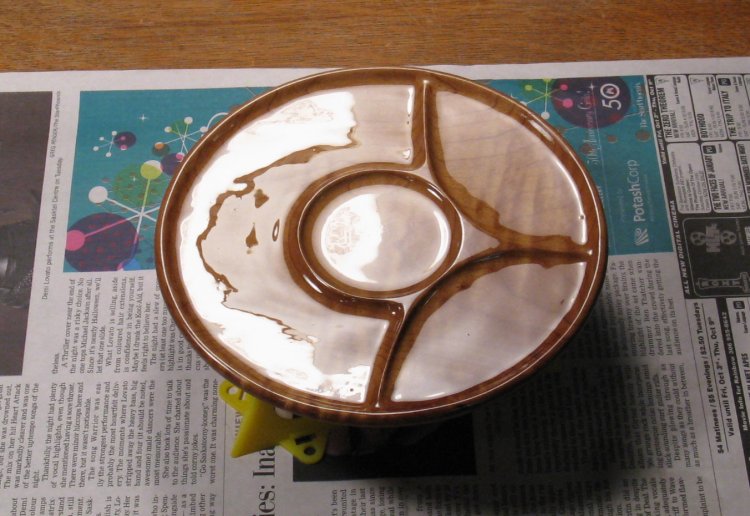
Completed and varnish applied
Using a foam brush, a coat of varnish has been applied and is still wet in this shot.
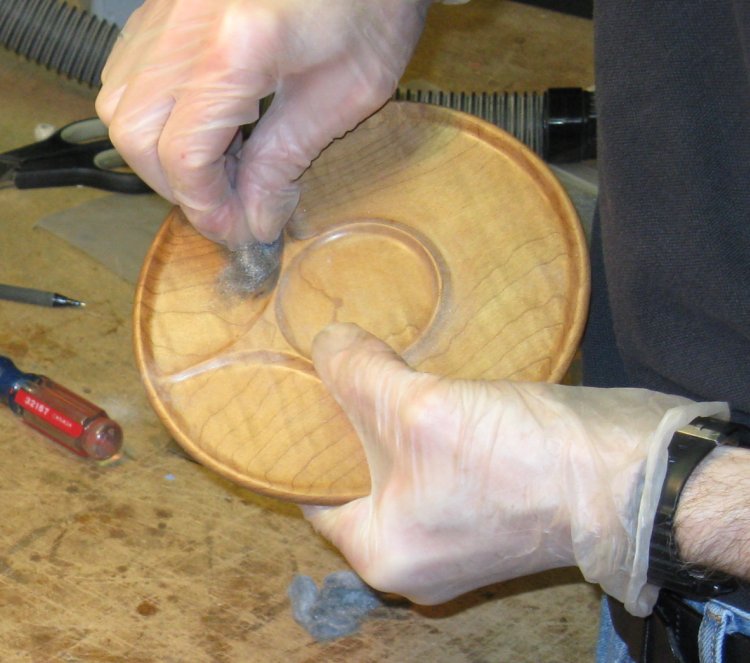
Roughing up with steel wool for the next coat
Between each coat of varnish, I roughened up the surface using #0000 steel wool. Also any imperfections like drips, dust particles, bubbles etc. can be smoothed at this point.
I coated both sides and used pyramidal-shaped plastic supports to hold up the plate when varnishing. These work pretty well, but if they are supporting a wet surface they leave a pock mark in the varnish. So I coated only one side at at time for the final coat so the supports were on a dry surface.
I coated both sides and used pyramidal-shaped plastic supports to hold up the plate when varnishing. These work pretty well, but if they are supporting a wet surface they leave a pock mark in the varnish. So I coated only one side at at time for the final coat so the supports were on a dry surface.
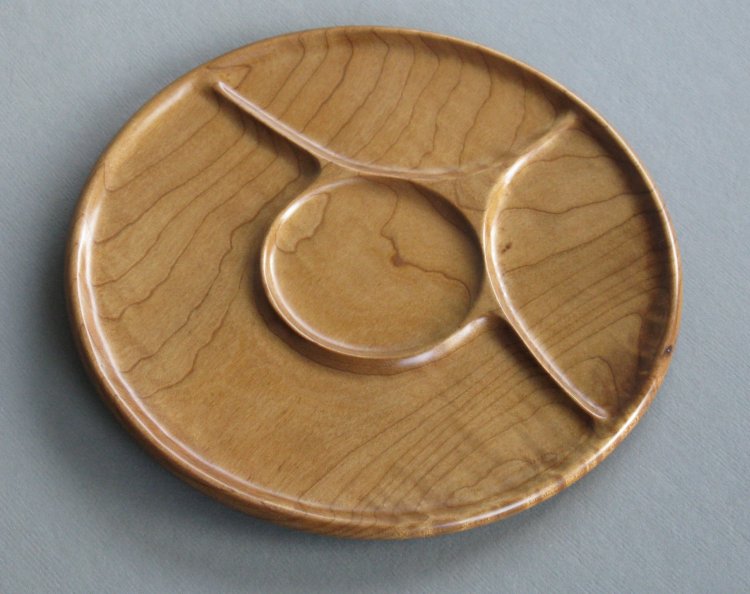
Completed
Complete


